14 Gorgeous Outdoor Backyard Ideas to Transform Any Outdoor Space
My backyard used to be a place I walked through on the way to the trash cans. A patio slab, a grill, a single plastic chair nobody ever sat in.
I kept assuming a genuinely beautiful backyard required a huge budget and a full landscaping crew. Then I started paying attention to what actually made other people’s yards feel like destinations rather than afterthoughts: layered seating, real lighting, a defined dining spot, a few plants with actual presence.
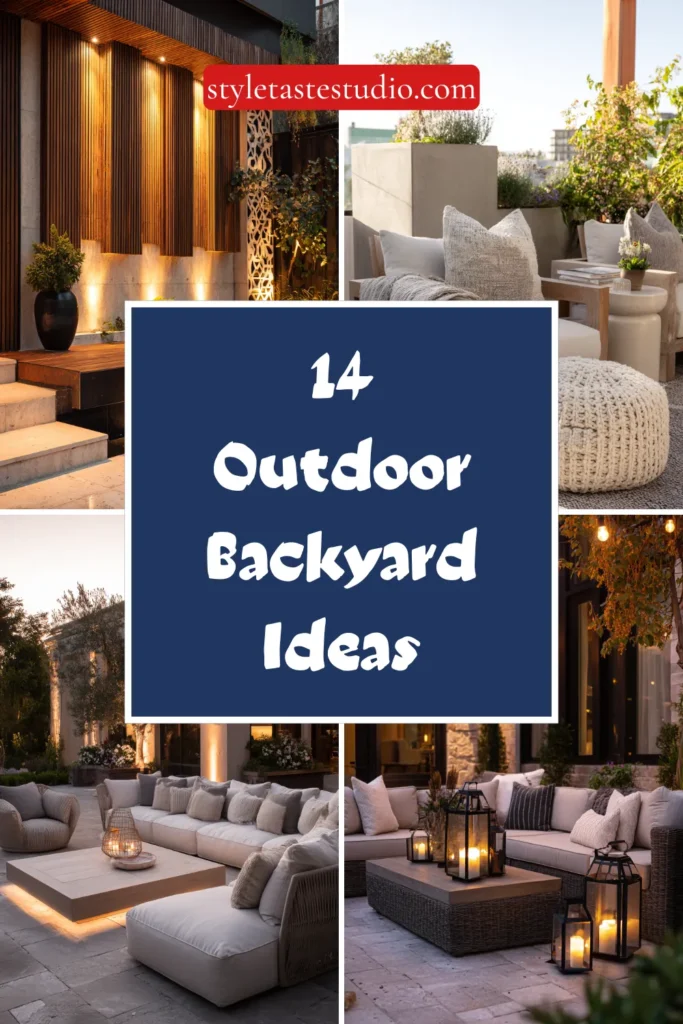
I started small. A proper outdoor rug under the existing patio furniture. String lights strung between two posts. A single large planter by the door.
Within a season, that same backyard became the place we ate dinner four nights a week instead of the place we hurried through to take out the trash.
Here are 14 ideas that turn any outdoor space, big or small, into somewhere people actually want to spend time.
Why Most Backyards Never Become Destinations
The common mistakes:
The furniture-only approach:
- A table and a few chairs placed on a bare patio slab
- Nothing addressing shade, lighting, or atmosphere beyond basic seating
- A functional space that never becomes an inviting one
- Furniture alone is rarely enough to make a yard feel finished
The daytime-only design:
- Every decision made based on how the yard looks at noon
- No lighting plan for the hours the yard is actually most pleasant to use
- A beautiful space that disappears completely after sunset
- Missing the reality that evenings are often when a backyard gets used most
The single-zone yard:
- One undefined open area trying to serve every possible function
- No distinct dining, lounging, or gathering spots
- A yard that feels smaller than its actual footprint because nothing within it is defined
- Function scattered rather than organized into purposeful areas
What a successful backyard transformation does:
Creates genuine destinations within the space:
- Defined zones for dining, lounging, and gathering
- Layered lighting extending usable hours well past sunset
- Plants and texture giving the space real depth and softness
- A yard designed to be experienced, not just maintained
My revelation: A backyard becomes a destination the moment it stops being organized around maintenance and starts being organized around how people actually want to spend time in it.
1. The Outdoor Rug Foundation
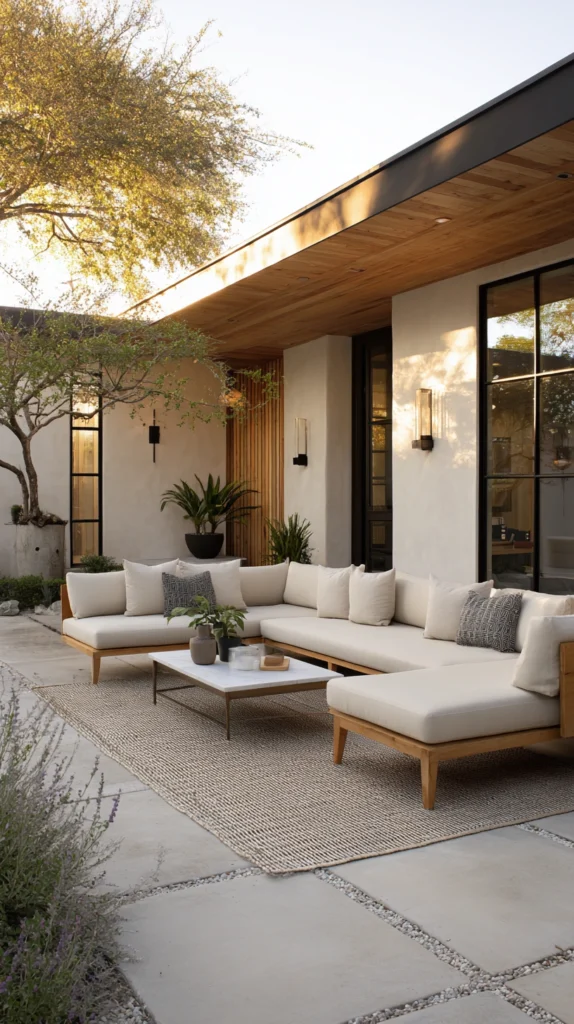
A weather-resistant outdoor rug placed beneath patio furniture — the single fastest way to make an outdoor seating area feel like a real room.
My bare concrete patio:
What I had:
- A patio slab with furniture simply placed directly on the concrete
- No sense of a defined room, just furniture scattered on a hard surface
- A space that felt more like a parking area than a place to relax
The outdoor rug discovery:
Why this single addition changes everything:
- Defines the seating area’s boundaries the way a rug does indoors
- Softens the hard visual edge of bare concrete or pavers
- Adds color, pattern, and texture at a relatively low cost
- Modern outdoor rug materials handle sun, rain, and spills without significant maintenance
Choosing the right rug:
Material and style considerations:
- Polypropylene outdoor rugs for durability and easy cleaning
- A pattern or color coordinating with existing cushions and outdoor decor
- Sizing generous enough that all furniture legs sit at least partially on the rug
- Darker colors or busier patterns hide dirt and wear better than solid light colors
Where this works best:
Ideal applications:
- Underneath a patio dining set
- Anchoring a lounge seating arrangement
- Defining a conversation area within a larger, open patio space
Cost:
- Outdoor rug (6×9 to 8×10 size): $80-250
My outdoor rug: Adding a simple striped outdoor rug beneath the existing patio furniture, at a cost of $140, did more to make that space feel like an intentional room than anything else added that entire season.
Outdoor Rug Tips
Size the rug so all furniture pieces sit at least partially on it:
Proportion rule:
- A rug too small leaves furniture floating awkwardly around its edges
- Measure the full furniture arrangement before selecting the rug’s dimensions
- This sizing detail affects how grounded and intentional the whole seating area feels
- When in doubt, choose the larger of two rug size options
Hose down and air dry the rug periodically to prevent mildew:
Maintenance requirement:
- Outdoor rugs can trap moisture underneath if never lifted and cleaned
- A periodic hose-down, followed by air drying propped against a rail or fence, prevents mildew buildup
- This simple maintenance extends the rug’s usable lifespan significantly
- Particularly important in humid climates or shaded patio areas with less natural airflow
2. The Layered String and Lantern Lighting
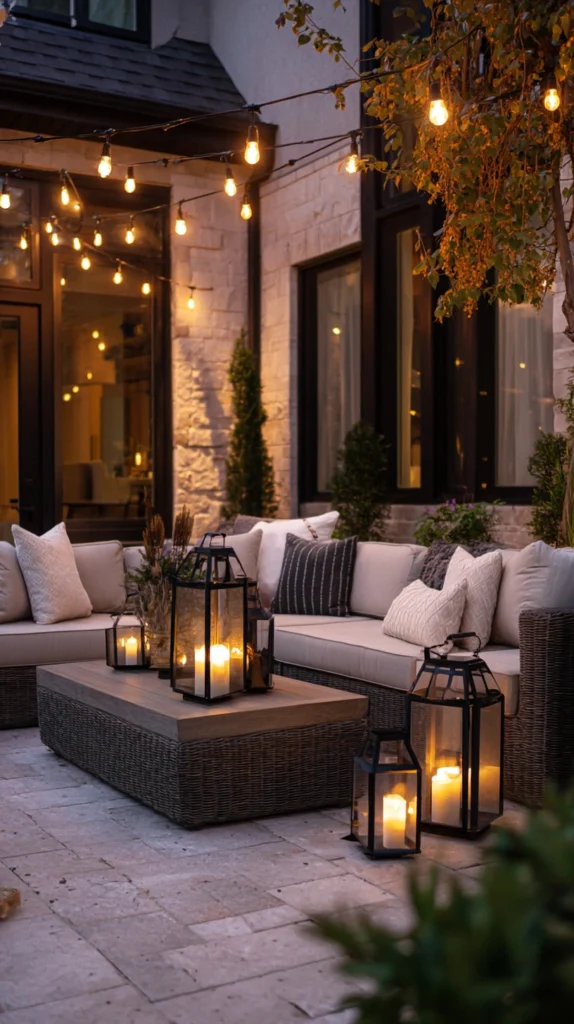
Warm string lights combined with tabletop lanterns and candles — extending the backyard’s usable hours well into the evening.
My backyard that disappeared after dark:
What was limiting evening use:
- A single porch light providing the only illumination after sunset
- A beautiful daytime space that became unusable once it got dark
- No sense of atmosphere or warmth once natural light faded
The layered lighting solution:
Why multiple light sources matter more than one bright fixture:
- String lights overhead create ambient, even illumination without harsh shadows
- Tabletop lanterns and candles add warmth at a lower, more intimate height
- Layering different light sources mimics how a well-designed indoor room is lit
- Significantly extends the hours the backyard genuinely gets used
Building the lighting layers:
Combining sources effectively:
- String lights strung between two posts, a pergola, or along a fence line
- Battery-powered or candle lanterns placed on the dining table or side tables
- Solar path lights along any walkways connecting different zones
- All fixtures in a consistent warm white tone, avoiding cool or blue-toned bulbs
Installation basics:
Getting the string lights right:
- Use outdoor-rated string lights specifically designed for exterior use
- Hang with a slight, natural sag rather than pulled perfectly taut
- Secure firmly at both ends to withstand wind and weather
Cost:
- Outdoor string lights (48 feet): $25-60
- Lanterns and candles: $30-80
- Solar path lights: $40-100
- Total: $95-240
My layered lighting: String lights over the dining area combined with a few simple lanterns on the table meant dinner outside no longer ended the moment the sun went down, and the whole yard developed a completely different personality after dark.
Layered Lighting Tips
Choose warm white bulbs consistently across every fixture:
Color temperature consistency:
- Mixing warm and cool-toned lights throughout the yard looks disjointed
- Warm white (2700K-3000K) consistently creates the cozy, inviting atmosphere most backyards want
- This consistency across string lights, lanterns, and any path lighting ties the whole space together
- Check the color temperature rating before purchasing any new lighting fixture
Install string lights on a timer or smart plug:
Convenience detail:
- Manually turning string lights on each evening is easy to forget or skip
- A simple outdoor-rated timer or smart plug automates this, ensuring the lights are on when needed
- This small addition meaningfully increases how consistently the lighting actually gets used
- A worthwhile investment given how much atmosphere the string lights alone provide
3. The Defined Outdoor Dining Zone
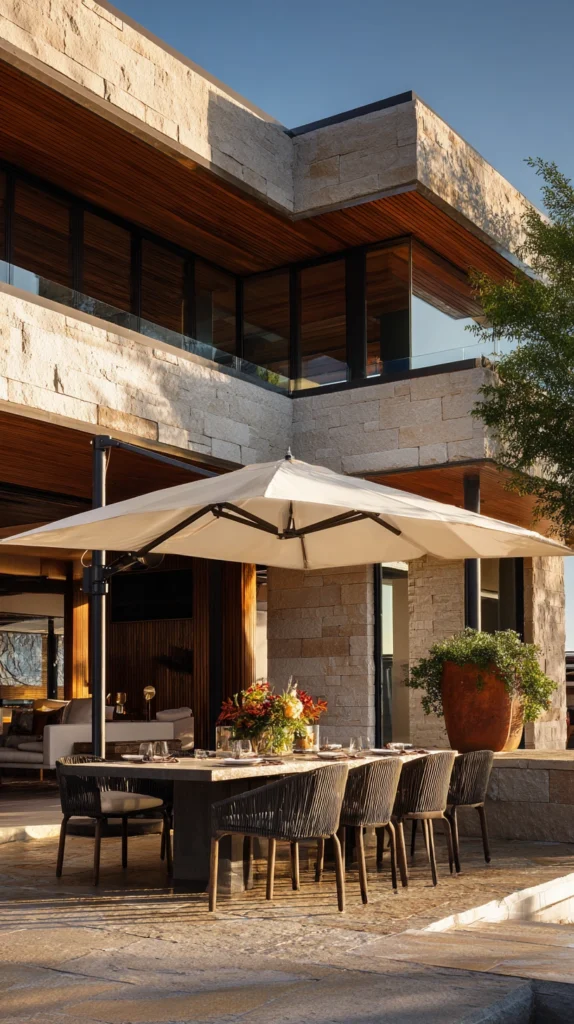
A dedicated dining table and chair set, positioned and styled as its own distinct area separate from lounge seating.
My single undefined patio space:
What was limiting the yard’s function:
- One patio area trying to serve both dining and casual lounging simultaneously
- Furniture arrangement that never quite worked well for either function
- No clear destination for an actual meal outside
The defined dining zone solution:
Why a dedicated dining area changes how the yard gets used:
- A specific zone for meals encourages actually eating outside more regularly
- Separates the more formal dining function from casual lounging seating
- Creates a natural gathering point for both everyday meals and entertaining
- Makes the yard feel like it has distinct destinations rather than one undefined space
Building the dining zone:
Key components:
- A table sized appropriately for typical household use, with room to expand for guests
- Weather-resistant chairs, cushioned for genuine comfort during longer meals
- Overhead shade, whether a market umbrella, pergola, or shade sail
- Lighting specifically over the table for evening use
Styling the space:
Completing the zone:
- A simple centerpiece, such as a potted plant or lantern, left on the table between meals
- Cloth napkins or placemats for a more finished, ready-to-use feel
- Positioned near, but visually distinct from, any separate lounge seating area
Cost:
- Outdoor dining table and chairs (four to six seats): $300-1,200
- Market umbrella or shade sail: $80-250
- Total: $380-1,450
My dining zone: Positioning the dining table under its own market umbrella, separate from the lounge seating on the other side of the patio, meant we started eating outside almost every night the weather allowed, something the previous shared, undefined space never encouraged.
Dining Zone Tips
Position the dining area with easy access to the kitchen:
Practical placement:
- A dining zone requiring a long walk from the kitchen door discourages regular everyday use
- The closer and more convenient the path, the more likely the space gets used for daily meals
- This consideration matters as much as the styling and furniture choices themselves
- Walk the actual path from kitchen to table before finalizing the zone’s exact placement
Choose a table shape and size matching typical household use, not just entertaining:
Right-sizing the table:
- A table sized only for large gatherings can feel oversized and impersonal for everyday meals
- A table that expands, via a leaf or extension, accommodates both daily use and occasional guests
- This flexibility ensures the dining zone gets used regularly, not just for special occasions
- Measure the space and consider actual daily household size before selecting the table
4. The Cozy Lounge Seating Nook
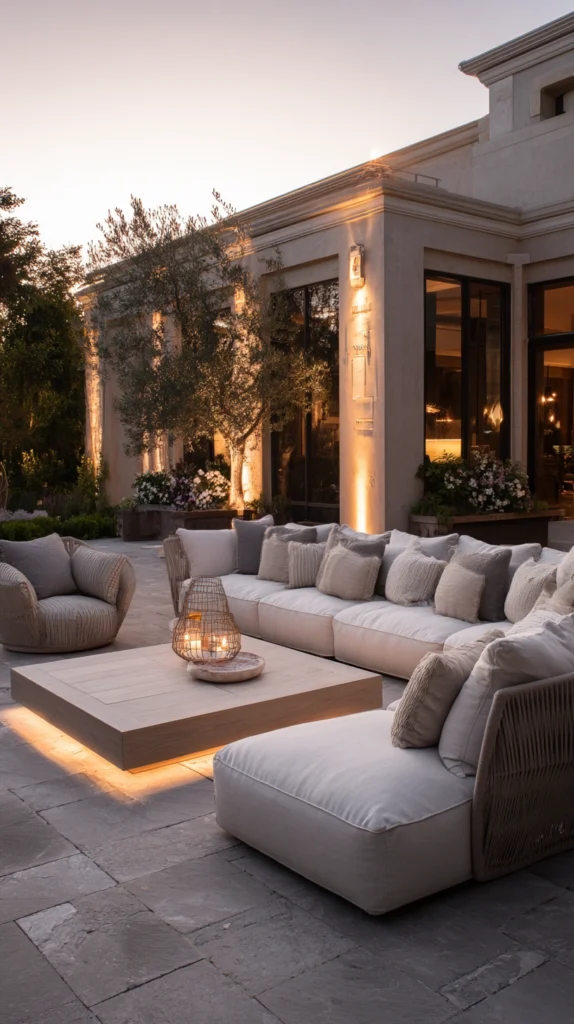
A grouped arrangement of comfortable lounge seating, positioned around a low table, creating an inviting conversation area.
My scattered patio furniture:
What was undermining the space:
- Chairs positioned around the patio’s perimeter rather than grouped together
- No natural conversation arrangement encouraging people to actually sit and talk
- A yard with seating but no genuine sense of an inviting gathering spot
The lounge nook solution:
Why grouped seating creates a genuine destination:
- A cluster of seating around a central low table naturally encourages conversation
- Mimics how comfortable indoor living rooms are arranged, rather than scattered patio chairs
- Creates a clear, inviting focal point distinct from the dining area
- One of the most effective layout changes for making a backyard feel genuinely welcoming
Building the seating nook:
Key components:
- A sofa or loveseat as the anchor piece, paired with two or more chairs
- A low coffee table or ottoman at the center of the grouping
- Cushions and throw pillows in coordinating, weather-resistant fabric
- Positioned to take advantage of any shade, view, or proximity to a fire feature
Layout considerations:
Arranging for comfort and conversation:
- Angle chairs slightly toward each other rather than in a rigid straight line
- Leave adequate walking space around the grouping, without spreading pieces too far apart
- Position the grouping away from direct pathways to keep it feeling like a distinct destination
Cost:
- Outdoor sofa and chair set: $600-2,000
- Low coffee table: $100-300
- Outdoor cushions and pillows: $80-200
- Total: $780-2,500
My lounge nook: Grouping a small outdoor sofa with two chairs around a low table in the corner of the patio created the exact cozy gathering spot the yard had been missing, and it has become where every guest naturally settles first.
Lounge Nook Tips
Choose cushions with removable, washable covers:
Practical material choice:
- Outdoor cushions inevitably collect dust, pollen, and occasional spills
- Removable, machine-washable covers make ongoing maintenance significantly easier
- This detail matters more for lounge seating than almost any other outdoor furniture category
- A worthwhile consideration even if it means a slightly higher initial furniture cost
Angle seating toward a focal point, whether a view, fire feature, or each other:
Layout intentionality:
- Seating arranged purely in a straight row rarely encourages genuine conversation
- A slight inward angle, or positioning around a central feature, creates a more natural gathering feel
- This small adjustment significantly affects how inviting and usable the seating area actually feels
- Test the arrangement by sitting in each piece before finalizing the final layout
5. The Statement Potted Plant Collection
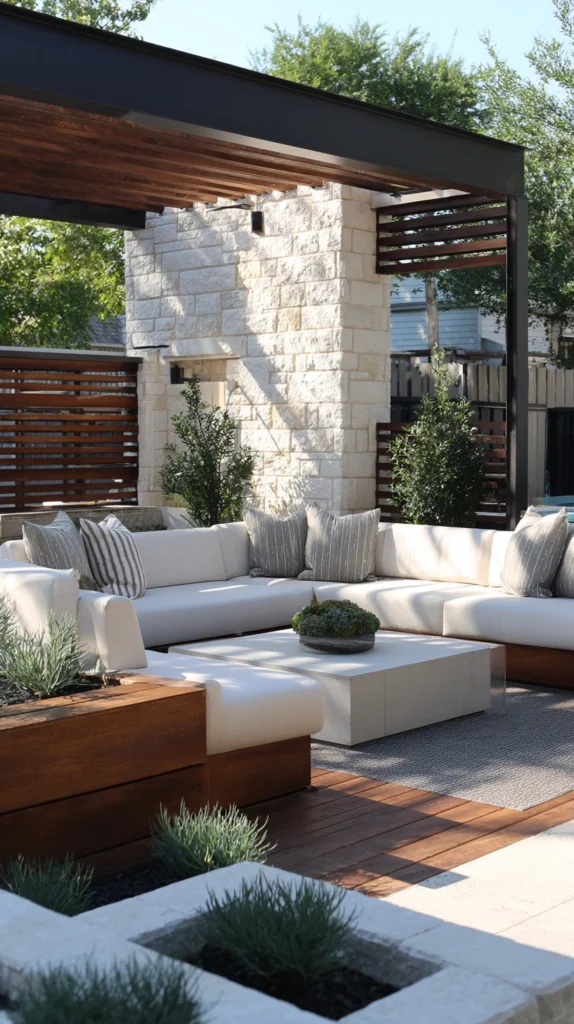
A curated grouping of large potted plants, varied in height and texture, anchoring key areas of the yard with greenery and structure.
My missing sense of lushness:
What was making the yard feel sparse:
- A patio with furniture and hardscape but very little actual plant life nearby
- Existing landscaping confined to distant beds, disconnected from the seating areas
- A missed opportunity to bring genuine greenery directly into the spaces people actually use
The statement potted plant solution:
Why large potted plants deliver outsized impact:
- Brings genuine greenery directly adjacent to seating and dining areas
- Large containers create immediate visual maturity, even with a relatively young plant
- Portable and flexible, allowing rearrangement as the space’s needs change
- Works on a patio, deck, or any hardscaped area where in-ground planting is not possible
Building the collection:
Selection approach:
- Choose two or three large “specimen” plants as anchors, such as a small tree or large tropical plant
- Add several medium containers with flowering or textural plants around the anchors
- Vary pot material and finish while keeping a cohesive color palette
- Group in odd numbers, clustered rather than evenly spaced
Plant choices by climate and light:
Selecting the right plants:
- Full sun patios: agave, ornamental grasses, flowering hibiscus
- Partial shade areas: hosta, ferns, hydrangea in large containers
- Year-round structure: boxwood or other evergreen shrubs in large pots
Cost:
- Large statement planters and specimen plants: $150-500 total
- Medium supporting containers and plants: $100-300 total
My potted plant collection: Clustering three large planters, one with a small potted olive tree, near the lounge seating area brought genuine lushness directly into the space we actually spend time in, rather than leaving all the greenery confined to distant garden beds.
Statement Plant Tips
Choose pot sizes generously larger than the plant’s current root ball:
Sizing for growth:
- A pot too small restricts root growth and requires more frequent repotting
- Sizing up generously accommodates a season or two of growth before repotting becomes necessary
- This choice also creates a more substantial, established visual presence immediately
- Balance pot size against the practical weight and portability needs of the specific location
Group plants by similar water needs within each container cluster:
Care simplification:
- Mixing plants with very different watering requirements in nearby containers complicates maintenance
- Grouping plants with similar needs, whether drought-tolerant or regularly watered, simplifies the routine
- This consideration matters as much as the visual arrangement when planning the collection
- Research each plant’s specific water needs before finalizing which pots sit near each other
6. The Pergola or Shade Structure Addition
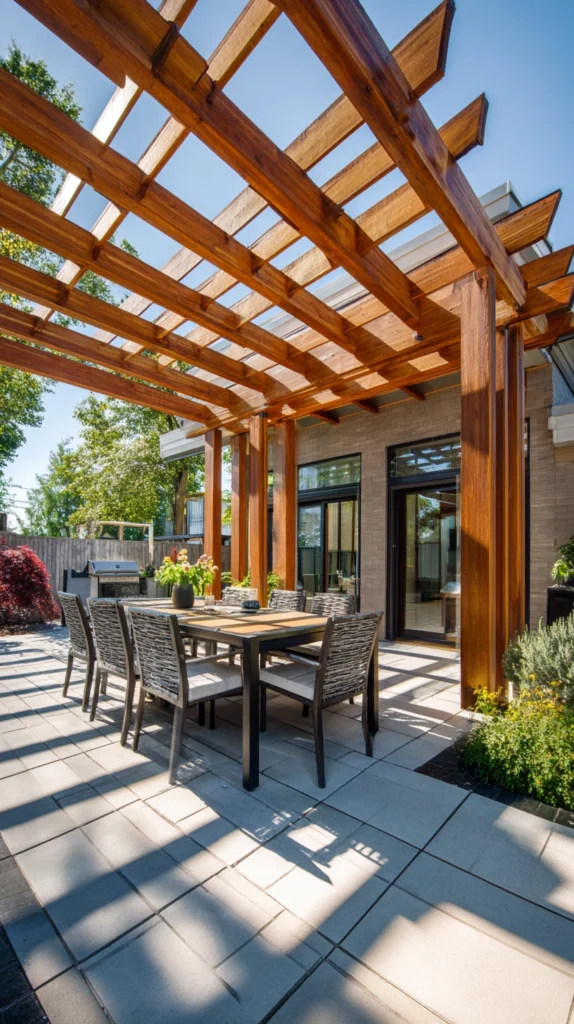
A wood or metal pergola providing structured, partial shade over a key seating or dining area.
My sun-exposed seating area:
What was limiting comfort:
- Patio furniture positioned in full, unrelenting sun for most of the day
- Guests and family avoiding the outdoor space during peak sun hours
- A missed opportunity to make the yard usable across more hours of the day
The pergola solution:
Why structured shade transforms the space’s usability:
- Filters direct sun without eliminating natural light entirely
- Creates a defined architectural presence, giving the seating area a genuine sense of enclosure
- Supports additional elements like string lights, climbing vines, or a retractable shade panel
- Extends comfortable outdoor use across significantly more hours of the day
Choosing the right pergola:
Material and style options:
- Wood pergola for a classic, warm architectural look
- Metal or aluminum pergola for lower maintenance and longer durability
- Adjustable louvered roof pergolas for on-demand shade control
- Sizing proportional to the seating or dining area it will cover
Enhancing the structure:
Adding function and beauty:
- Climbing vines trained across the top for natural, evolving shade over time
- String lights woven through the structure for evening ambiance
- A retractable canvas shade panel for additional coverage during peak sun
Cost:
- Basic wood pergola kit: $800-2,500
- Metal or aluminum pergola: $1,200-4,000
- Adjustable louvered pergola: $3,000-8,000
My pergola addition: Installing a simple wood pergola over the dining table made that area usable for lunch even in the middle of summer, something that had been completely impractical under direct sun before.
Pergola Tips
Position the pergola to block the harshest hours of direct sun specifically:
Orientation planning:
- Track the sun’s path across the intended location for a full day before finalizing placement
- The structure should specifically address the hours the space is used most, often midday through early evening
- A beautifully built pergola in the wrong orientation still leaves the space uncomfortable at peak times
- This planning step determines whether the investment delivers its full intended benefit
Add a retractable shade element for additional coverage during the hottest months:
Seasonal flexibility:
- Open lattice or beam pergola roofs alone may not block enough sun during peak summer heat
- A retractable canvas or shade cloth panel adds coverage exactly when most needed
- This addition allows the same structure to remain more open and light-filled during cooler months
- A relatively modest additional cost that significantly extends the pergola’s year-round usefulness
7. The Fire Feature Focal Point
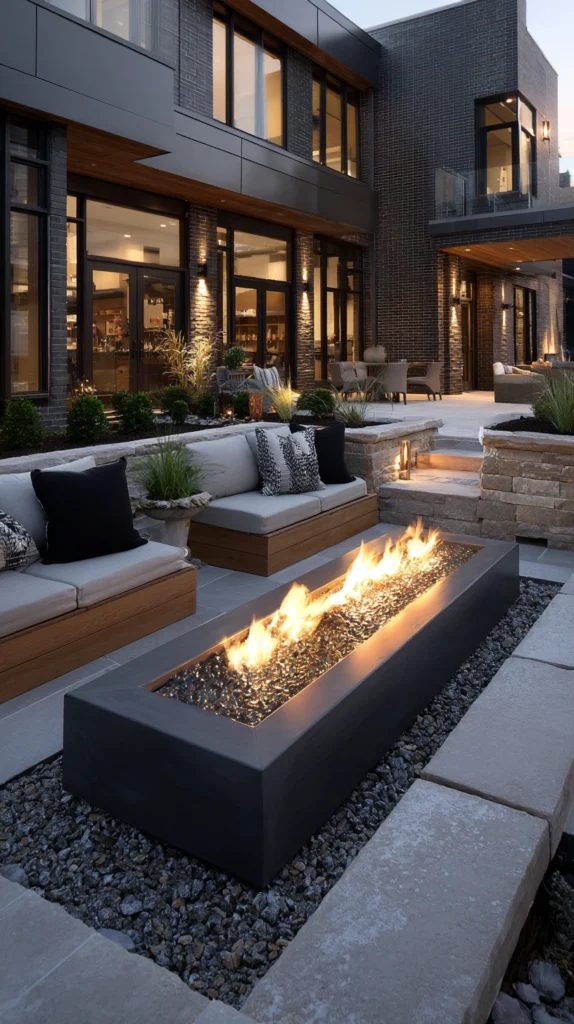
A fire pit or fire table positioned as the yard’s central evening gathering spot, surrounded by comfortable seating.
My yard that emptied out after sunset:
What was missing:
- A backyard that felt lively during the day but had no draw once evening arrived
- No natural gathering point for extending time outside after dark
- Missing the genuine warmth and atmosphere fire brings to an outdoor space
The fire feature solution:
Why fire consistently draws people outside longer:
- Creates a natural, magnetic gathering point unlike almost any other backyard feature
- Extends comfortable outdoor use into cooler evening hours, even outside of summer
- Provides both function, warmth and light, and pure atmospheric appeal
- One of the most consistently requested features in outdoor entertaining spaces for good reason
Choosing the right fire feature:
Style options:
- A built-in stone or block fire pit for a permanent, custom feature
- A portable metal fire pit for flexibility and lower upfront cost
- A gas fire table doubling as both a fire feature and a functional side table
- Wood-burning for the most traditional, authentic campfire experience
Building the gathering area:
Completing the space:
- A ring of comfortable chairs or a built-in bench surrounding the fire feature
- A defined ground surface, such as pavers or gravel, beneath and around the fire area
- Adequate distance from overhanging trees, structures, and other furniture for safety
Cost:
- Portable metal fire pit: $80-300
- Built-in stone fire pit: $800-3,000
- Gas fire table: $300-1,200
- Surrounding seating: $300-1,500
My fire feature: A simple gas fire table surrounded by four outdoor chairs became the spot where evenings in the yard now consistently end, drawing people outside long after dinner has finished and the sun has fully set.
Fire Feature Tips
Check local regulations before choosing a wood-burning option:
Regulation check:
- Many municipalities have specific rules or seasonal restrictions around open burning
- Gas fire features often face fewer restrictions and offer more consistent year-round use
- Confirm local requirements before finalizing the fire feature type
- This check prevents an expensive installation from becoming unusable due to local ordinances
Maintain appropriate clearance between the fire feature and all seating:
Safety and comfort spacing:
- Seating positioned too close becomes uncomfortably hot, even in cooler weather
- A distance of roughly three to four feet from the fire’s edge is typically comfortable
- This spacing also generally aligns with standard safety clearance recommendations
- Test the actual comfortable distance with a lit fire before finalizing permanent seating placement
8. The Softscape Pathway Journey
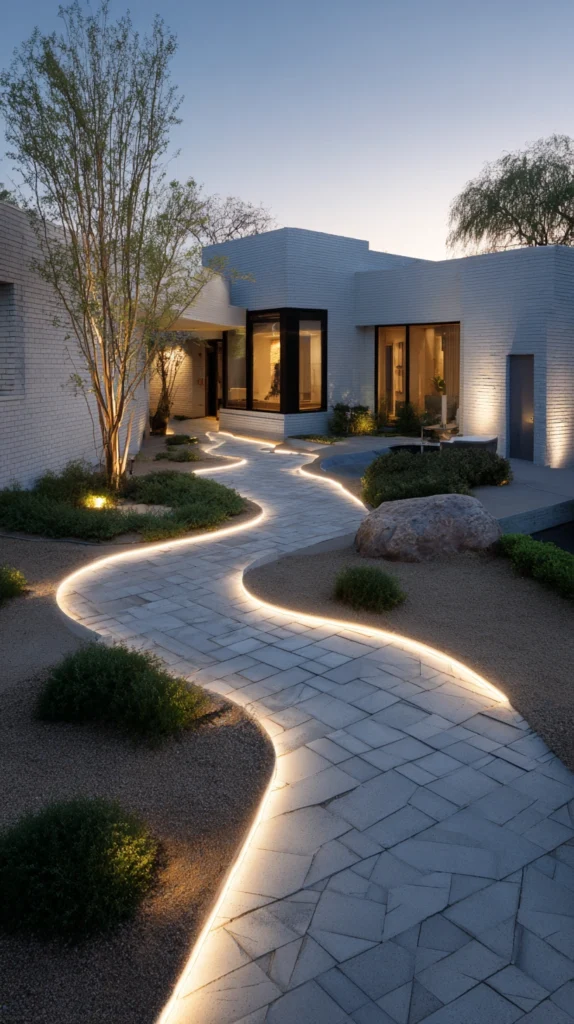
A defined pathway, using gravel, stepping stones, or pavers, connecting different zones of the backyard and encouraging exploration.
My yard with no sense of movement:
What was missing:
- Every area of the yard accessible only by walking directly across open grass
- No sense of a defined route connecting the patio, garden, and any secondary seating areas
- A yard that felt smaller because nothing within it suggested a journey or destination
The pathway solution:
Why a defined path changes how a yard is experienced:
- Creates a sense of discovery and intentional movement through the space
- Connects distinct zones, like dining, lounging, and garden areas, into one cohesive experience
- A yard with defined pathways consistently reads as larger and more considered than one without
- Encourages actually walking through and exploring the yard, rather than viewing it from one spot
Building the pathway:
Material and layout options:
- Decomposed granite or gravel for an affordable, natural-looking surface
- Flagstone or paver stepping stones set with gaps for a more casual, garden feel
- A curved rather than straight route for a more natural, unhurried journey through the space
- Connecting the patio to any secondary seating area, fire feature, or garden shed
Lighting the pathway:
Extending use after dark:
- Solar or low-voltage path lights spaced evenly along the route
- Warm-toned lighting for safety and ambiance during evening use
Cost:
- Gravel or decomposed granite pathway (per 100 sq ft): $150-400
- Stepping stone pathway: $200-600
- Path lighting: $60-200
My garden pathway: A curved decomposed granite path connecting the main patio to a small fire pit area tucked in the back corner turned a yard that had felt like one flat space into somewhere that genuinely invited exploration.
Pathway Tips
Curve the path route rather than running it in a straight line:
Design consideration:
- A straight, direct path can feel utilitarian rather than intentionally garden-like
- A gentle curve, even a subtle one, reads as more considered and encourages a slower, more enjoyable walk
- Use a garden hose laid on the ground to test and adjust the curve before installation
- This small design choice significantly affects the pathway’s overall character
Light the path for safe, attractive evening navigation:
Evening usability:
- An unlit path becomes difficult and potentially unsafe to navigate after dark
- Simple solar path lights, spaced consistently, address both safety and atmosphere
- This addition also extends the yard’s overall usable hours by making every zone accessible after sunset
- A relatively low-cost addition given how much it improves the pathway’s actual usability
9. The Vertical Greenery Wall
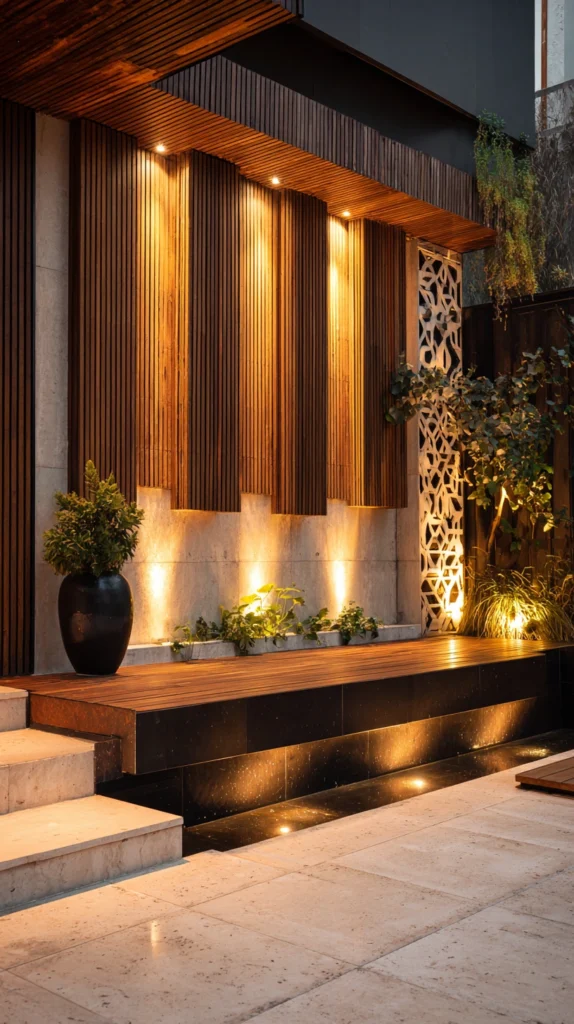
A living wall, trellis system, or tiered planter arrangement mounted against a fence or blank wall — adding lush greenery without consuming ground space.
My wasted vertical space:
What I had not considered:
- A tall, blank fence or wall running along one side of the yard
- Limited ground-level planting space, especially in a smaller backyard
- Never considering the wall itself as an opportunity for genuine greenery
The vertical greenery solution:
Why going vertical delivers such strong visual return:
- Uses otherwise wasted wall or fence space rather than competing for limited ground area
- Creates a genuine lush, layered backdrop for any seating or dining area positioned nearby
- Works in even the smallest backyard, since it requires minimal ground footprint
- Transforms a plain, blank surface into the yard’s most photographed feature
Vertical greenery structure options:
Choosing the right system:
- A modular living wall system with integrated planting pockets
- A trellis with climbing vines for the most low-maintenance, long-term option
- Tiered wall-mounted planter shelves for a mix of trailing and upright plants
- A simple grid of individual wall-mounted planters arranged in a deliberate pattern
Plant choices for vertical growing:
Selecting the right plants:
- Trailing plants like ivy or creeping fig for a cascading, established look
- Flowering climbing vines for seasonal color and fragrance
- Compact herbs in lower tiers for a functional, edible element
- Ferns or shade-tolerant foliage plants for a wall receiving limited direct sun
Cost:
- Modular living wall system: $150-500
- Trellis with climbing vines: $60-200
- Tiered wall planters: $80-250
My vertical greenery wall: Installing tiered planters against a previously bare fence, filled with a mix of trailing and flowering plants, turned the least interesting part of the yard into its most consistently complimented feature, using almost no ground space to do it.
Vertical Greenery Tips
Install a simple drip irrigation line for consistent watering:
Watering efficiency:
- Hand-watering a vertical planting system is time-consuming and often produces uneven results
- A small drip line connected to each tier or planting pocket keeps watering consistent across the entire wall
- This is especially important since vertical systems often dry out faster than ground-level beds
- A basic timer on the drip line automates the process entirely
Assess the wall’s actual sun exposure before choosing plants:
Placement consideration:
- Full, intense afternoon sun limits which plants will genuinely thrive in a vertical system
- A wall receiving morning sun and afternoon shade supports a wider variety of plant choices
- Observe the wall’s light pattern across a full day before finalizing plant selections
- This assessment prevents choosing beautiful plants that ultimately struggle in the specific location
10. The Hammock or Swing Relaxation Spot
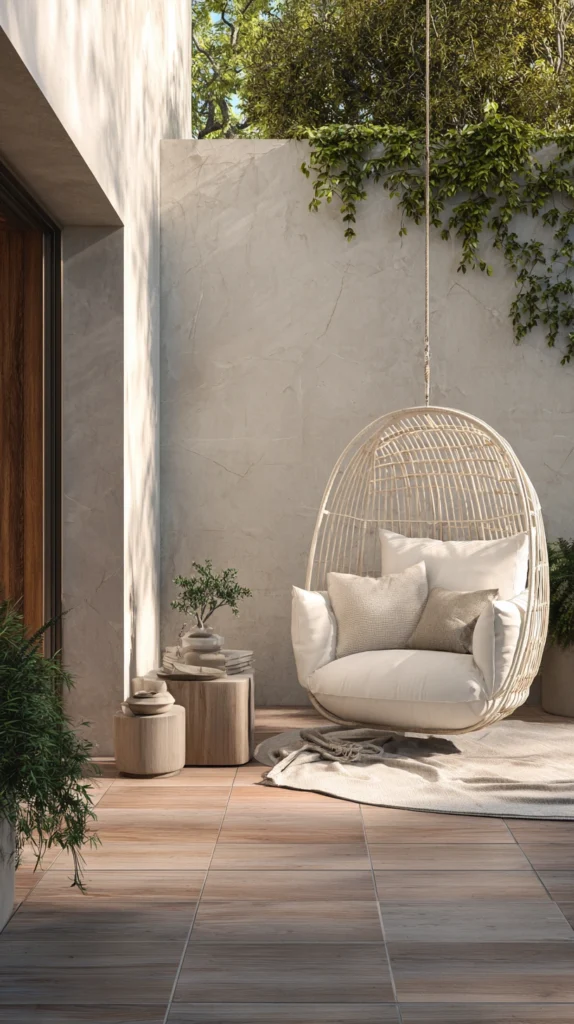
A hammock, hanging chair, or porch swing positioned in a quiet corner of the yard — a dedicated spot for genuine relaxation.
My yard with nowhere to truly unwind:
What was missing:
- Plenty of functional seating for dining and socializing, but nowhere designed purely for relaxation
- Every spot in the yard oriented toward activity or conversation
- Missing a genuinely restful destination within the larger space
The hammock or swing solution:
Why a dedicated relaxation spot matters:
- Creates a genuinely different kind of destination than dining or social seating
- The gentle motion of a hammock or swing has a naturally calming, restorative quality
- Works well tucked into an otherwise underused corner of the yard
- Signals that the space is designed for genuine rest, not only entertaining
Choosing the right option:
Style considerations:
- A classic rope or fabric hammock, strung between two trees or a dedicated stand
- A hanging egg or basket chair, suspended from a sturdy beam or pergola
- A traditional porch swing, if a covered structure is available to hang it from
- Sizing and weight capacity appropriate to intended use
Placement strategy:
Finding the right spot:
- A shaded corner, ideally beneath existing trees or a structure
- Positioned with some visual privacy or separation from the main social areas
- Close enough to be convenient, but distinct enough to feel like a genuine retreat
Cost:
- Rope or fabric hammock with stand: $80-300
- Hanging chair with stand: $100-350
- Porch swing: $150-500
My hammock corner: Tucking a simple hanging chair into the shaded corner of the yard, away from the main dining and lounge areas, gave the whole space a genuine spot for reading and unwinding that nothing else in the yard had offered.
Hammock Tips
Confirm adequate weight capacity and secure anchoring points:
Safety requirement:
- Both trees and dedicated stands need to genuinely support the intended weight capacity
- Check the specific hammock or chair’s weight rating against anticipated use
- For tree-hung hammocks, use proper tree-friendly straps rather than rope that can damage bark
- This verification prevents both structural failure and unintended tree damage
Choose UV-resistant, quick-drying fabric for a hammock or hanging chair:
Material durability:
- Standard fabric left outdoors continuously fades and can develop mildew
- UV-resistant, quick-drying materials specifically designed for outdoor use hold up significantly better
- This consideration extends the piece’s usable lifespan meaningfully compared to indoor-rated fabric
- A worthwhile detail to confirm before purchasing, given how much direct sun and weather exposure the piece will experience
11. The Outdoor Kitchen or Grilling Station
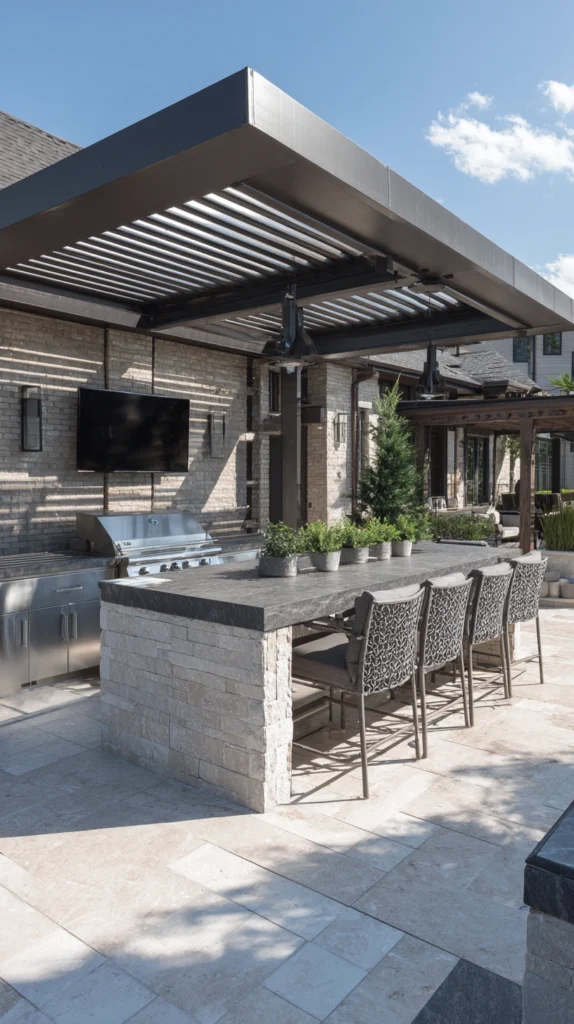
A dedicated grilling and prep area, ideally with some counter space and storage, moving cooking fully outside.
My back-and-forth grilling frustration:
What was inconvenient:
- Constantly walking back inside for prep tools, seasonings, and serving dishes while grilling
- No real counter space or storage set up specifically for outdoor cooking
- Guests naturally gathering near the indoor kitchen instead of outside where the grill actually was
The outdoor kitchen solution:
Why this addition changes how entertaining happens:
- Keeps the cook and the gathering happening in the same outdoor space
- Genuinely extends entertaining capability without requiring an indoor kitchen renovation
- Works especially well combined with a pergola or other shade structure overhead
- Becomes a natural social gathering point the way an indoor kitchen island typically does
Building the outdoor kitchen:
Core components by budget level:
- Basic setup: a quality grill on a cart with a small adjacent prep table
- Mid-range setup: a built-in grill island with some counter space and storage
- Full setup: built-in grill, counter space, a small refrigerator, and bar seating
Material choices for durability:
Selecting weather-appropriate materials:
- Stainless steel appliances rated specifically for outdoor use
- Stone, concrete, or tile countertops that withstand direct sun and weather exposure
- Weather-resistant cabinetry if incorporating any built-in storage
Cost:
- Quality grill with a rolling cart: $300-800
- Basic built-in grill island: $2,500-6,000
- Full outdoor kitchen with refrigerator and seating: $8,000-20,000
My outdoor grilling station: Adding a simple prep cart beside the grill, holding tools, seasonings, and serving dishes, eliminated the constant back-and-forth trips inside and meant guests started gathering right around the grill instead of clustering in the kitchen.
Outdoor Kitchen Tips
Start with a smaller, modular setup if budget is a concern:
Scaling the project:
- A quality grill paired with a simple rolling prep cart delivers much of the core convenience benefit
- Additional elements, counter space, refrigeration, and seating, can be added incrementally over time
- This staged approach avoids a large upfront cost while still meaningfully improving the outdoor cooking experience
- Most outdoor kitchen components are designed to be added modularly rather than all at once
Cover the cooking area to protect both the cook and the equipment:
Protection priority:
- Direct sun and rain exposure degrades outdoor cooking equipment faster than covered equipment
- Shade also makes the actual experience of cooking outside significantly more comfortable
- Pairing this addition with a pergola or simple shade sail extends both the equipment’s lifespan and its usability
- An uncovered setup still functions but wears down and gets used less consistently over time
12. The Privacy Screen or Living Fence
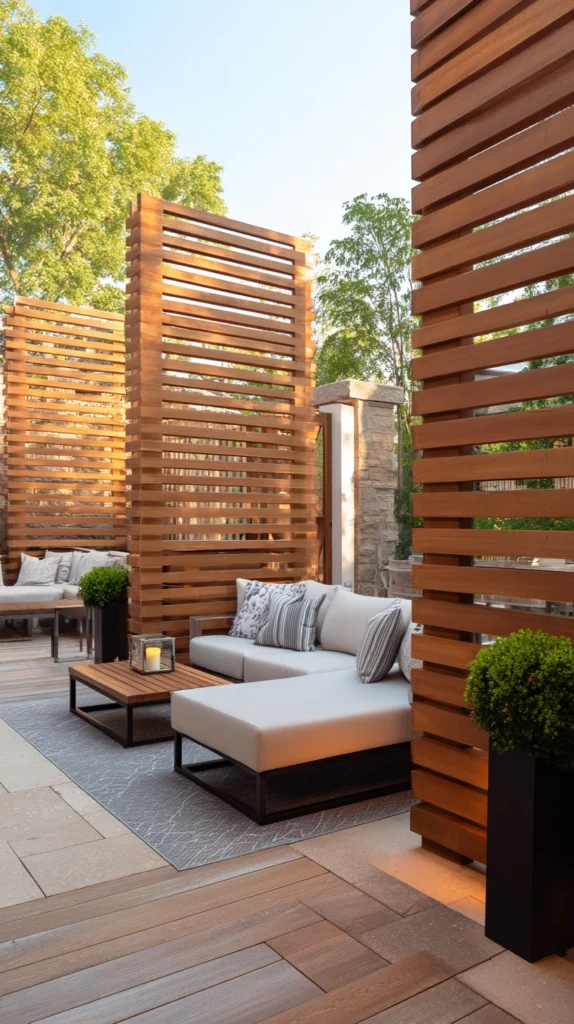
A trellis, tall planting, or slatted screen creating a sense of enclosure and privacy within an otherwise exposed backyard.
My overly exposed yard:
What was limiting how the space felt:
- A backyard clearly visible from neighboring properties or the street
- A sense of being on display rather than genuinely relaxing outside
- Missing the enclosed, retreat-like feeling a truly comfortable outdoor space needs
The privacy screen solution:
Why enclosure changes how a yard feels to use:
- Creates a genuine sense of retreat, distinct from a fully exposed, on-display space
- Allows more comfortable, relaxed use of the yard without feeling watched
- Can be achieved through built structures, dense planting, or a combination of both
- One of the most significant factors in whether a backyard actually gets used regularly for relaxation
Screening options:
Choosing the right approach:
- A tall slatted wood or composite screen along a specific problem sightline
- Dense evergreen planting, such as arborvitae or bamboo, for a living, growing privacy barrier
- A trellis with climbing vines, combining structure and greenery for a softer screening effect
- Strategic placement addressing the specific sightlines that feel most exposed, rather than screening the entire perimeter
Balancing privacy with light and airflow:
Getting the balance right:
- Slatted or semi-open screens maintain airflow and some light while still providing visual privacy
- Solid screens block sightlines completely but can also feel more closed-in
- Living screens take time to establish but ultimately blend more naturally into the landscape
Cost:
- Slatted wood privacy screen (per linear foot): $15-40
- Fast-growing privacy shrubs or bamboo: $100-400 for a meaningful planted screen
- Trellis with climbing vines: $60-200
My privacy screen: A slatted wood screen positioned specifically to block the sightline from a neighboring second-story window meant the lounge seating area finally felt like a genuine retreat rather than a space on constant display.
Privacy Screen Tips
Identify the specific problem sightlines rather than screening the entire yard:
Targeted approach:
- Screening an entire yard perimeter is often more costly and unnecessary than addressing specific exposure points
- Sit in the main seating areas and note exactly which angles feel the most exposed
- Targeted screening at those specific points delivers meaningful privacy improvement at a fraction of full-perimeter cost
- This assessment should happen before any screening material or plants are purchased
Choose fast-growing but well-behaved plant species for living screens:
Plant selection caution:
- Some fast-growing privacy plants, like certain bamboo varieties, can spread aggressively beyond the intended area
- Research the specific growth habit of any plant being considered for a living privacy screen
- Clumping bamboo varieties or well-behaved evergreen shrubs avoid this common landscaping regret
- This research prevents a privacy solution from becoming an unwanted maintenance burden later
13. The Weatherproof Outdoor Textiles Layer
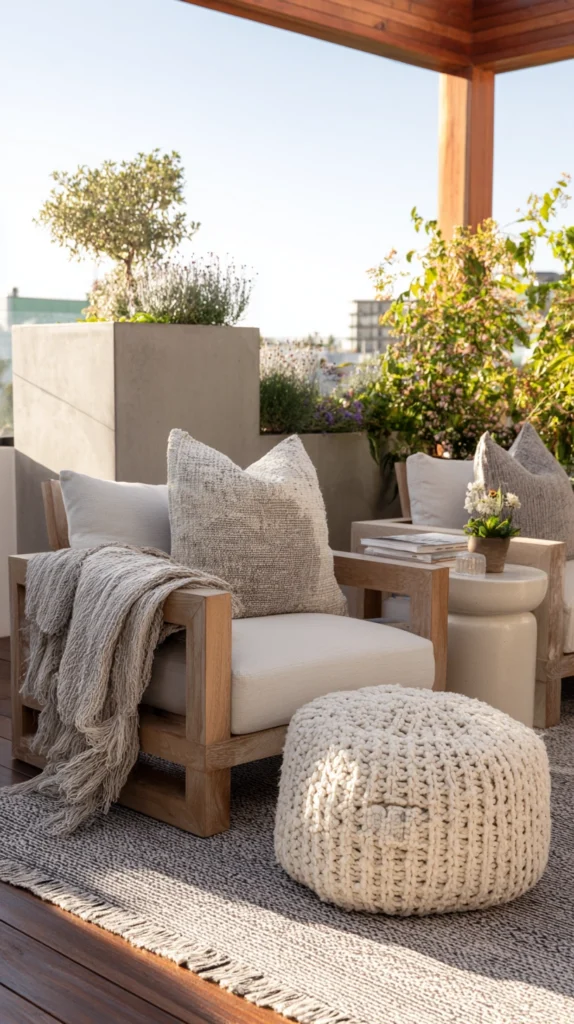
Weather-resistant throw pillows, blankets, and cushion covers used generously throughout the outdoor space to add color, comfort, and a finished feel.
My under-styled outdoor furniture:
What felt incomplete:
- Outdoor furniture with only the furniture itself, no additional textile layering
- A space that felt functional but not genuinely styled or inviting
- Missing the layer of comfort and personality that textiles add to any indoor room
The outdoor textiles solution:
Why fabric layering matters just as much outdoors as indoors:
- Adds genuine comfort, softness, and color beyond what furniture alone provides
- Relatively affordable compared to major furniture or hardscape investments
- Easy to update seasonally, refreshing the space without a full furniture change
- Signals the same level of styling attention typically reserved for indoor rooms
Building the textile layer:
What to include:
- Weather-resistant throw pillows in a coordinated color palette across all seating
- A woven or performance-fabric throw blanket for cooler evenings
- Coordinating cushion covers replacing any faded or mismatched originals
- A consistent color or pattern thread tying the dining and lounge areas together visually
Material considerations:
Choosing genuinely outdoor-appropriate fabric:
- Solution-dyed acrylic fabric for the best fade and moisture resistance
- Removable, washable covers for the easiest ongoing maintenance
- Avoid indoor-only fabrics, which will fade and deteriorate quickly outside
Cost:
- Outdoor throw pillows (set of four to six): $60-150
- Outdoor throw blanket: $30-70
- Coordinating cushion covers: $40-100
My outdoor textile layer: Adding a coordinated set of weather-resistant pillows and a woven throw blanket to the existing lounge furniture, at a total cost under $150, gave the space the same finished, styled feeling as an indoor living room.
Outdoor Textile Tips
Choose solution-dyed fabric specifically rated for outdoor use:
Material quality:
- Standard indoor fabric fades and deteriorates quickly when exposed to sun and moisture
- Solution-dyed acrylic fabric is specifically engineered to resist fading and mildew outdoors
- This distinction matters significantly given how much direct sun exposure outdoor textiles typically receive
- Confirm the specific fabric rating before purchasing, since not all “outdoor” labeled products offer the same durability
Store cushions and throws during extended periods of rain when possible:
Longevity practice:
- Even weather-resistant fabric benefits from being kept dry during prolonged wet weather
- A simple deck box or covered storage bin extends the textiles’ overall lifespan
- This habit is a relatively small effort that meaningfully protects the investment over time
- Particularly worthwhile in climates with frequent or prolonged rainy periods
14. The Seasonal Styling Refresh
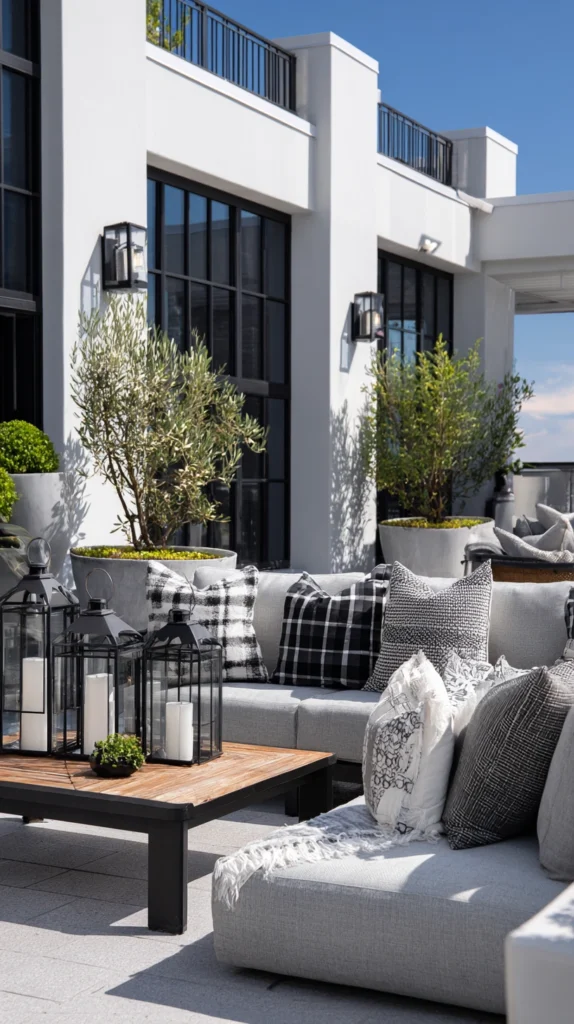
A rotating set of seasonal decor elements, swapped throughout the year, keeping the backyard feeling current and considered.
My static, unchanging yard:
What was making the space feel stale:
- The same outdoor decor left in place year-round, regardless of season
- A yard that looked identical in July as it did in October
- Missing the sense of a space that evolves and responds to the actual time of year
The seasonal refresh solution:
Why rotating seasonal elements keeps the yard feeling alive:
- Small seasonal changes signal ongoing care and attention to the space
- Allows the yard to feel current and considered throughout the entire year, not just during peak summer
- Relatively low-cost compared to major furniture or hardscape changes
- Creates anticipation and renewed interest in the space as each season shifts
Building a seasonal rotation:
Elements to swap by season:
- Spring: fresh flowering annuals in containers, lighter-colored cushion covers
- Summer: bold, saturated color accents, citronella candles, and lightweight textiles
- Fall: warm-toned pillows, seasonal gourds or pumpkins, deeper color palettes
- Winter: evergreen greenery, warm lighting emphasis, cozy blanket layering
Keeping the rotation manageable:
Practical approach:
- Store off-season items in labeled bins for easy retrieval the following year
- Focus seasonal changes on a few key elements (cushions, planters, a wreath or accent piece) rather than a full redecoration
- Set calendar reminders for each seasonal transition to keep the habit consistent
Cost:
- Seasonal cushion covers or accents (per season): $40-100
- Seasonal container plantings: $30-80
- Total annual seasonal investment: $150-400
My seasonal styling refresh: Swapping cushion covers and container plantings four times a year, stored in labeled bins between seasons, keeps the backyard feeling genuinely current, and guests consistently comment on how different the space looks each time they visit.
Seasonal Refresh Tips
Focus seasonal changes on a small number of impactful elements:
Efficiency principle:
- Attempting a full seasonal redecoration each time quickly becomes unsustainable
- Choosing three or four key elements, cushions, a planter, a wreath, delivers meaningful visual change with manageable effort
- This focused approach is what makes the seasonal habit actually persist year after year
- Identify the highest-impact, lowest-effort changes specific to the yard’s layout
Store off-season items properly to preserve their condition:
Storage practice:
- Items stored improperly between seasons can fade, mildew, or degrade before their next use
- Clean and fully dry items before storing them in sealed, labeled bins
- A dedicated storage location, whether a shed, garage corner, or deck box, keeps the rotation organized and efficient
- This small investment in proper storage protects the value of each seasonal purchase over multiple years
Choosing Your Backyard Transformation Projects
By Priority
Foundational comfort first:
- Outdoor rug foundation (idea 1)
- Cozy lounge seating nook (idea 4)
- Weatherproof outdoor textiles layer (idea 13)
Extending usable hours:
- Layered string and lantern lighting (idea 2)
- Fire feature focal point (idea 7)
- Pergola or shade structure addition (idea 6)
Greenery and atmosphere:
- Statement potted plant collection (idea 5)
- Vertical greenery wall (idea 9)
- Privacy screen or living fence (idea 12)
By Effort Level
Lowest effort:
- Outdoor rug foundation (idea 1)
- Weatherproof outdoor textiles layer (idea 13)
- Layered string and lantern lighting (idea 2)
Medium effort:
- Statement potted plant collection (idea 5)
- Hammock or swing relaxation spot (idea 10)
- Fire feature focal point, portable option (idea 7)
- Seasonal styling refresh (idea 14)
Higher commitment:
- Pergola or shade structure addition (idea 6)
- Outdoor kitchen or grilling station (idea 11)
- Softscape pathway journey (idea 8)
- Privacy screen or living fence (idea 12)
By Budget
Under $200:
- Outdoor rug foundation (idea 1)
- Layered string and lantern lighting (idea 2)
- Weatherproof outdoor textiles layer (idea 13)
$200-800:
- Statement potted plant collection (idea 5)
- Hammock or swing relaxation spot (idea 10)
- Vertical greenery wall (idea 9)
- Softscape pathway journey (idea 8)
$800-2,500:
- Cozy lounge seating nook (idea 4)
- Fire feature focal point (idea 7)
- Defined outdoor dining zone (idea 3)
- Privacy screen or living fence (idea 12)
$2,500+:
- Pergola or shade structure addition (idea 6)
- Outdoor kitchen or grilling station (idea 11)
Maintenance Through the Seasons
Spring:
- Clean and inspect outdoor rugs and textiles after winter storage
- Refresh container plantings and begin the seasonal styling rotation
Summer:
- Check string lights and solar fixtures for consistent function
- Monitor potted plants for increased watering needs during peak heat
Fall:
- Store or protect delicate textiles ahead of colder, wetter weather
- Clean and prepare the fire feature for increased cool-weather use
Winter:
- Store off-season cushions and decor in labeled, protected bins
- Plan the following year’s additions during the slower winter months
My Complete Backyard Transformation Journey
What I built across three years:
Year one ($540):
- Outdoor rug and layered string lighting over the existing patio furniture
- Weatherproof textile layer added to update tired cushions
- Learned that the cheapest, fastest changes delivered the most immediate transformation
Year two ($1,850):
- Defined dining zone with a market umbrella
- Statement potted plant collection near the lounge seating
- Learned that separating zones changed how consistently the whole yard actually got used
Year three ($2,100):
- Pergola over the dining area
- Fire feature and surrounding seating in the back corner
- Learned that structured shade and fire together extended the yard’s usable season more than any single addition alone
Total investment: $4,490 across three years Most important lesson: Layering, lighting, and defined zones mattered more than any single expensive purchase Single highest-impact change across all three years: The outdoor rug and string lights from year one, for the lowest cost and most immediate transformation
Getting Started This Weekend
Start with layering, not a full renovation.
This weekend:
Step 1 — Add an outdoor rug beneath existing furniture:
- The fastest, most affordable way to make a patio feel like a defined room
- Works with whatever furniture is already in place
Step 2 — String warm white lights over the main seating area:
- Extends usable hours immediately, without any major installation
- Pairs well with whatever lighting already exists
Step 3 — Choose one zone to define more clearly:
- Dining, lounging, or a quiet relaxation spot
- Rearrange existing furniture into a more intentional grouping before purchasing anything new
Step 4 — Add one statement plant or container grouping:
- Positioned directly adjacent to the main seating area
- Brings genuine greenery into the space people actually use daily
My recommendation:
Start with an outdoor rug and string lighting:
- Both are affordable, fast to implement, and deliver immediate visual transformation
- Both work with existing furniture, requiring no larger purchase to see the benefit
- This foundation makes every future addition to the yard build on an already-improved base
Sit outside after dark once both changes are in place and notice how differently the space feels before planning anything else.
Now go build the backyard that finally feels like a destination instead of a space you just walk through.
Quick Summary
The 14 gorgeous backyard transformation ideas:
Foundation and comfort:
- Outdoor rug foundation (idea 1): the fastest way to define a room outdoors
- Cozy lounge seating nook (idea 4): a genuine gathering and conversation spot
- Weatherproof outdoor textiles layer (idea 13): color and comfort at low cost
Extending usable hours:
- Layered string and lantern lighting (idea 2): evening atmosphere and function
- Fire feature focal point (idea 7): the most magnetic evening gathering point
- Pergola or shade structure addition (idea 6): comfort across more hours of the day
Greenery and atmosphere:
- Statement potted plant collection (idea 5): instant lushness near seating areas
- Vertical greenery wall (idea 9): maximum greenery, minimal footprint
- Privacy screen or living fence (idea 12): genuine retreat and enclosure
Defined zones and function:
- Defined outdoor dining zone (idea 3): a real destination for meals outside
- Softscape pathway journey (idea 8): connection and a sense of exploration
- Outdoor kitchen or grilling station (idea 11): cooking and gathering combined
- Hammock or swing relaxation spot (idea 10): a dedicated spot for genuine rest
Ongoing freshness:
- Seasonal styling refresh (idea 14): a yard that evolves with the year
The universal backyard transformation rules:
Always:
- Layer lighting rather than relying on a single fixture
- Define distinct zones for dining, lounging, and relaxation
- Add genuine greenery directly adjacent to the spaces people actually use
- Choose materials genuinely rated for outdoor sun and moisture exposure
Never:
- Design the space based only on how it looks during the day
- Leave furniture scattered without any intentional grouping or zoning
- Use indoor-only fabric or materials that will quickly fade and degrade outside
- Assume a large budget is required before beginning any meaningful improvement
Common mistakes:
- Treating furniture placement alone as a finished design
- Skipping evening lighting until the space has already proven hard to use after dark
- Leaving the yard as one undefined open area instead of distinct destinations
- Underestimating how much a rug, pillows, and lighting can transform an existing setup
- Waiting for a large budget instead of starting with the highest-impact, lowest-cost changes first
Remember: layering, lighting, and defined zones consistently outperform any single expensive purchase, an outdoor rug and string lights deliver some of the fastest, most affordable transformation available, greenery brought directly into seating areas matters more than distant landscaping alone, a yard designed for both day and evening use gets used far more consistently, and the best backyard transformation is the one that turns a space you walk through into a space you actually want to stay in.