14 Playground for Kids Backyard Ideas That Kids Will Never Want to Leave
My kids’ idea of the backyard used to be a place they walked through to get to the trampoline and nowhere else. One structure, one activity, and the rest of the yard sitting completely unused.
I kept assuming a real backyard playground meant buying one large, expensive combination play set and calling it finished. That single structure got used constantly for about two months, then became background scenery the kids barely noticed anymore.
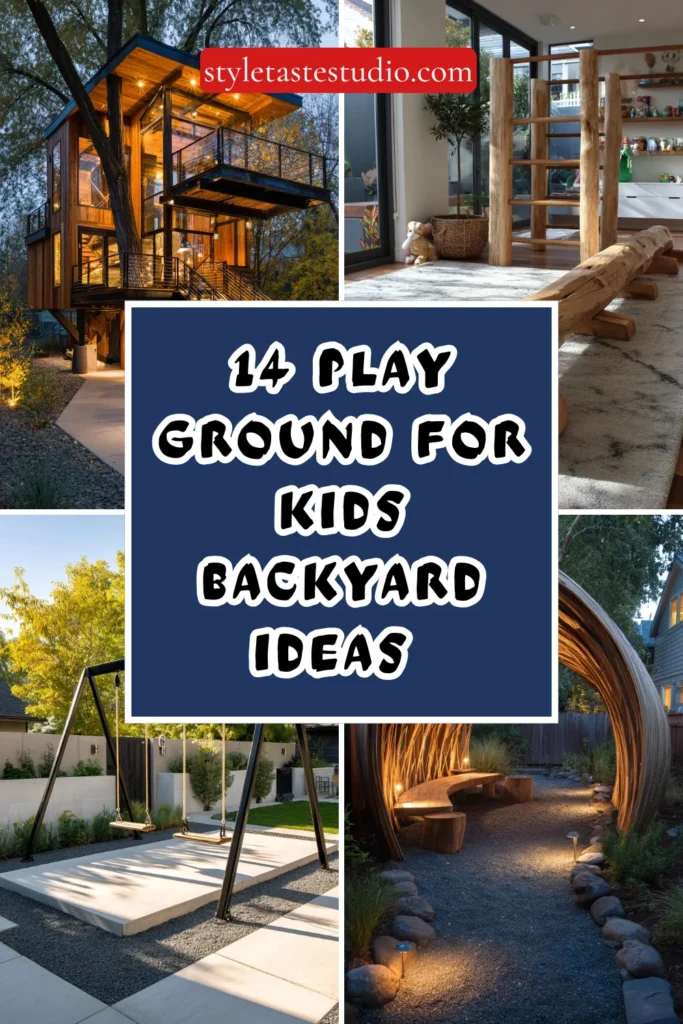
The actual shift happened when I stopped thinking about one big purchase and started thinking about a playground the way an actual playground designer would: multiple distinct activities, spread across the yard, each offering something genuinely different from the others.
Once there were five or six different things to do instead of one, the kids stopped asking to go to the park and started asking friends to come over instead.
Here are 14 ideas that turn a backyard into the kind of playground kids genuinely do not want to leave.
Why Most Backyard Playgrounds Get Boring Fast
The common mistakes:
The single mega-structure approach:
- One large combination play set purchased as the entire playground plan
- A significant portion of the budget concentrated into one item
- Novelty wearing off within a season, with nothing else to fall back on
- A missed opportunity for the variety that actually sustains long-term interest
The same-activity-type trap:
- Multiple pieces of equipment, but all offering essentially the same type of physical challenge
- No variety between climbing, swinging, balancing, and imaginative play
- A yard that looks well-equipped but plays repetitively
- Missing the range that keeps kids genuinely engaged over years, not weeks
The equipment-only mindset:
- Every addition being a purchased structure or piece of equipment
- No open, flexible space left for kids to invent their own games
- A yard fully programmed, leaving no room for spontaneous, self-directed play
- Missing the value unstructured space genuinely adds alongside structured equipment
What a successful kids’ backyard playground does:
Offers genuine variety across different play types:
- Climbing, swinging, balancing, imaginative, and open-ended play all represented
- A range of physical challenge levels, growing with the kids over time
- A mix of structured equipment and flexible, unprogrammed space
- Enough distinct activities that boredom rarely sets in for long
My revelation: A backyard playground that lasts is built from variety, not from one impressive purchase. Kids stay engaged longer with five modest additions offering different experiences than with one expensive structure offering only one.
1. The Classic Swing Set with Multiple Attachments
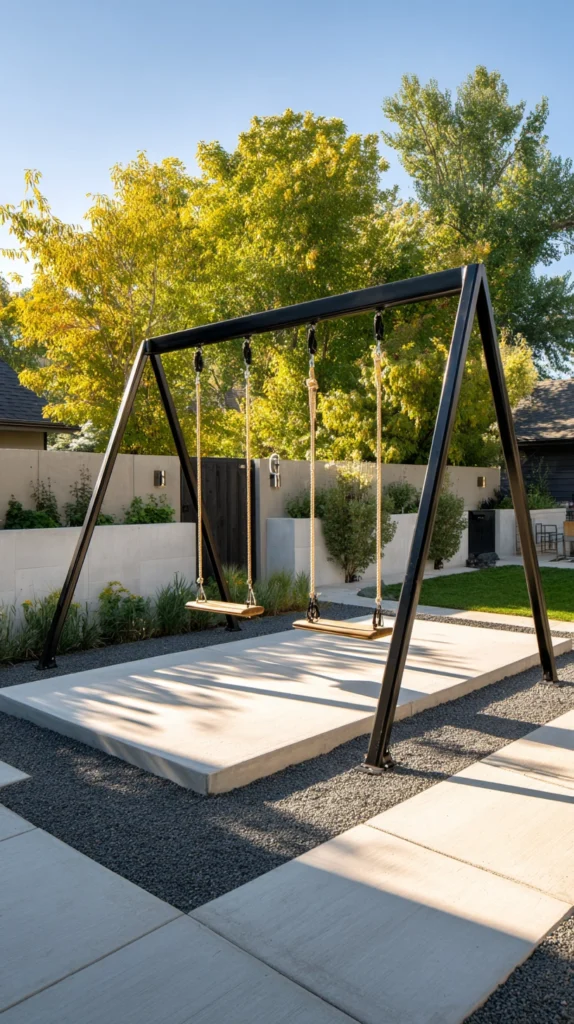
A sturdy metal or wood swing set frame, fitted with multiple swing types, a trapeze bar, and a climbing rope — one frame delivering several distinct activities.
My single-swing limitation:
What I had:
- A basic two-seat swing frame offering exactly one type of activity
- Kids competing constantly for the same two swing seats
- A missed opportunity to get significantly more play value from one central structure
The multi-attachment discovery:
Why fitting one frame with several attachments works so well:
- A single sturdy frame can support swings, a trapeze bar, and a climbing rope simultaneously
- Multiple kids can use the structure at once without waiting or competing for the same swing
- Different attachments challenge different skills, from basic swinging to upper body strength on a trapeze
- Significantly more play value extracted from a single structural investment
Choosing the right frame and attachments:
What to look for:
- A heavy-duty metal or pressure-treated wood frame rated for the combined weight of multiple attachments
- A standard belt swing, a toddler bucket swing if younger kids are involved, and a trapeze bar or rings
- A climbing rope or knotted rope ladder as an additional attachment option
- Confirm the frame’s overall width and height accommodate the specific combination chosen
Installation basics:
Getting it right:
- Anchor the frame securely into the ground, following manufacturer specifications precisely
- Install over a soft ground surface, such as mulch, sand, or rubber matting
- Space attachments with adequate clearance to prevent kids colliding during simultaneous use
Cost:
- Basic swing frame: $150-400
- Additional attachments (trapeze bar, climbing rope): $30-80 each
- Total: $210-560
My multi-attachment swing set: Adding a trapeze bar and climbing rope to the existing basic swing frame meant three kids could use the structure simultaneously instead of constantly negotiating over two swing seats, and it remains the most consistently used piece of equipment in the yard.
Multi-Attachment Swing Tips
Confirm the frame’s weight rating accounts for all attachments used simultaneously:
Safety verification:
- A frame rated for one swing may not adequately support the combined stress of multiple simultaneous attachments
- Check the manufacturer’s specific rating for combined, simultaneous use before adding multiple attachments
- This verification is essential before regular multi-child, multi-attachment use begins
- When uncertain, choose a frame specifically marketed and rated for multi-attachment configurations
Install adequate soft ground surfacing beneath the full swing arc of every attachment:
Comprehensive safety surfacing:
- Different attachments have different swing arcs and fall patterns
- Extend soft surfacing to cover the full potential fall zone of every individual attachment, not just the frame’s footprint
- This comprehensive coverage matters more here than for a single-swing setup, given the variety of motion involved
- A relatively modest additional surfacing investment for meaningfully improved safety across the whole structure
2. The Freestanding Rock Climbing Wall
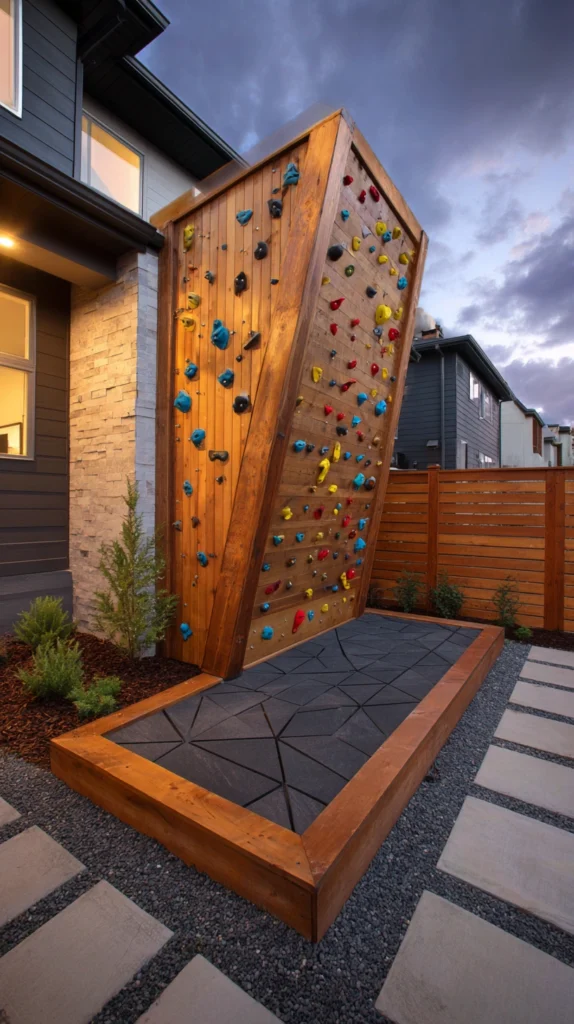
A vertical climbing wall, fitted with textured climbing holds, attached to an existing fence or a dedicated freestanding frame.
My missing vertical challenge:
What was absent:
- Plenty of horizontal running space, but nothing offering genuine vertical climbing challenge
- Kids naturally drawn to climbing on furniture, trees, and fences, with no appropriate dedicated outlet
- A missed opportunity to support a specific, well-loved physical skill
The climbing wall solution:
Why a dedicated climbing wall adds genuine long-term value:
- Offers a distinct physical challenge unlike swinging, sliding, or running
- Climbing holds can be rearranged over time, keeping the same wall interesting as skills develop
- Builds genuine upper body strength, problem-solving, and confidence
- Works well attached to an existing fence, requiring minimal additional structural footprint
Building the climbing wall:
Construction approach:
- Attach a sheet of plywood to the fence or a dedicated frame, reinforced adequately for climbing stress
- Install commercially available climbing holds in a varied, staggered pattern
- Confirm the wall height is appropriate for the intended age range, with a lower height for younger climbers
- Install adequate soft ground surfacing directly beneath the full climbing area
Difficulty progression:
Keeping the wall engaging over time:
- Start with holds spaced closer together and at easier angles for beginners
- Gradually rearrange or add holds spaced further apart as climbing skill improves
- Consider a designated “easy route” and “hard route” marked with different colored holds
Cost:
- Plywood and mounting hardware: $60-150
- Climbing holds (set of 20-30): $40-100
- Safety surfacing beneath: $80-250
- Total: $180-500
My climbing wall: Attaching a simple plywood climbing wall to the existing side fence, fitted with colorful climbing holds, gave my son the specific vertical challenge he had been seeking out on furniture and trees, immediately redirecting that energy somewhere genuinely appropriate.
Climbing Wall Tips
Rearrange climbing holds periodically to maintain challenge and interest:
Ongoing engagement:
- A static hold arrangement becomes memorized and less challenging relatively quickly
- Periodically rearranging holds, or adding new ones, keeps the same wall genuinely engaging over months and years
- This relatively low-effort maintenance significantly extends the climbing wall’s useful lifespan
- Involve kids in choosing new hold arrangements to maintain their sense of ownership over the structure
Install soft surfacing extending beyond the wall’s immediate footprint:
Fall protection coverage:
- Falls from a climbing wall can land at some distance from the wall’s base, not directly beneath it
- Extend safety surfacing generously beyond the wall’s footprint in the direction of typical climbing and falling
- This buffer zone reflects standard safety practice used in professional climbing wall installations
- A relatively modest additional material cost for significantly improved fall protection
3. The Backyard Zip Line
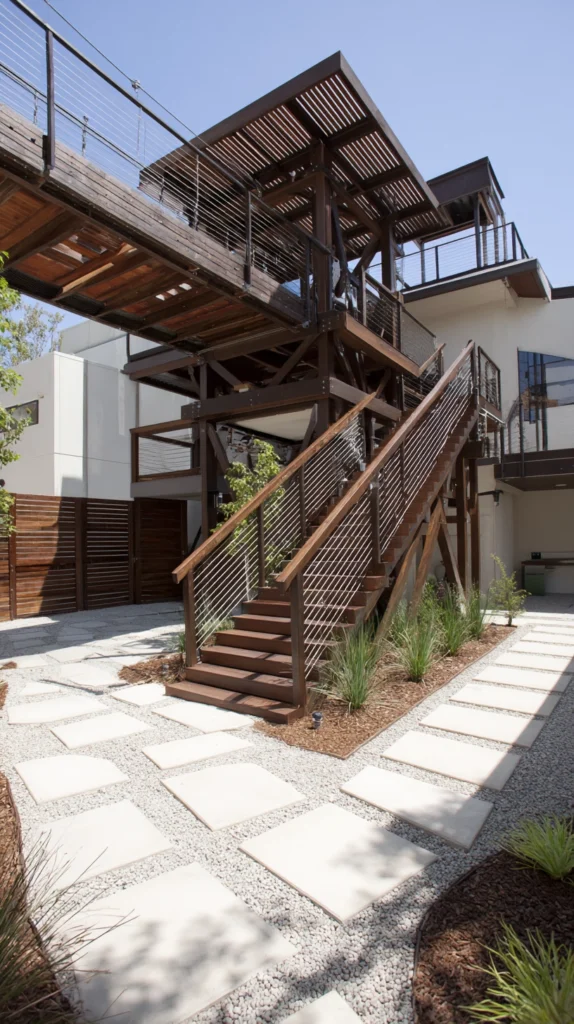
A cable zip line strung between two sturdy anchor points, with a seat or handle attachment — one of the most consistently thrilling additions available for a kids’ backyard.
My missing high-excitement activity:
What felt lacking:
- A yard well-equipped with climbing and swinging options, but nothing delivering genuine high-excitement thrill
- Kids specifically requesting a zip line after experiencing one elsewhere
- A missed opportunity for what is consistently one of the most requested backyard additions among kids
The zip line solution:
Why this addition consistently delivers such strong appeal:
- The combination of speed, height, and a sense of genuine adventure is difficult to replicate with other equipment
- A relatively contained installation footprint compared to some other large play structures
- Works across a range of ages once basic safety requirements are met
- Often becomes the single most requested and most talked-about backyard feature among a child’s friends
Installation basics:
Building the zip line safely:
- Two sturdy anchor points, typically mature trees or dedicated posts, rated for the cable’s tension and rider weight
- A cable specifically rated for zip line use, with a properly rated trolley and seat or handle attachment
- A gentle downward slope from start to finish, calibrated for a safe, controlled speed
- A soft landing zone with adequate surfacing at the finish point
Safety considerations:
Non-negotiable precautions:
- Direct adult supervision for every use, particularly with younger or less experienced riders
- A weight limit clearly established and enforced based on the specific cable and hardware rating
- Adequate clearance from any obstacles along the entire cable’s path
- A proper braking mechanism or soft stop at the line’s end to prevent hard impact
Cost:
- Zip line kit (cable, trolley, seat): $100-300
- Additional anchoring hardware, if needed: $30-80
My backyard zip line: Installed between two mature trees with a proper braking system at the end, the zip line has become the single most requested activity whenever friends come over, consistently outperforming every other piece of equipment in the yard for sheer excitement.
Zip Line Tips
Have anchor trees or posts assessed for genuine structural adequacy before installation:
Safety verification priority:
- A zip line places significant, repeated dynamic stress on both anchor points
- Confirm trees are healthy, mature, and appropriately sized, or that posts are properly rated for this specific use
- This assessment is essential and should not be skipped regardless of how sturdy the anchor points appear
- When uncertain about a tree’s adequacy, a dedicated, purpose-built post provides a more predictable, verified alternative
Install and maintain a genuine braking or soft-stop system at the line’s end:
Impact prevention:
- Riders reaching full speed at the line’s end without a proper stopping mechanism risk a hard, potentially injurious impact
- A commercial braking system, or a properly designed soft stop, is essential, not optional
- Regularly inspect this component specifically, given how critical it is to safe operation
- This detail is one of the most important safety considerations for the entire zip line installation
4. The Elevated Treehouse or Play Platform
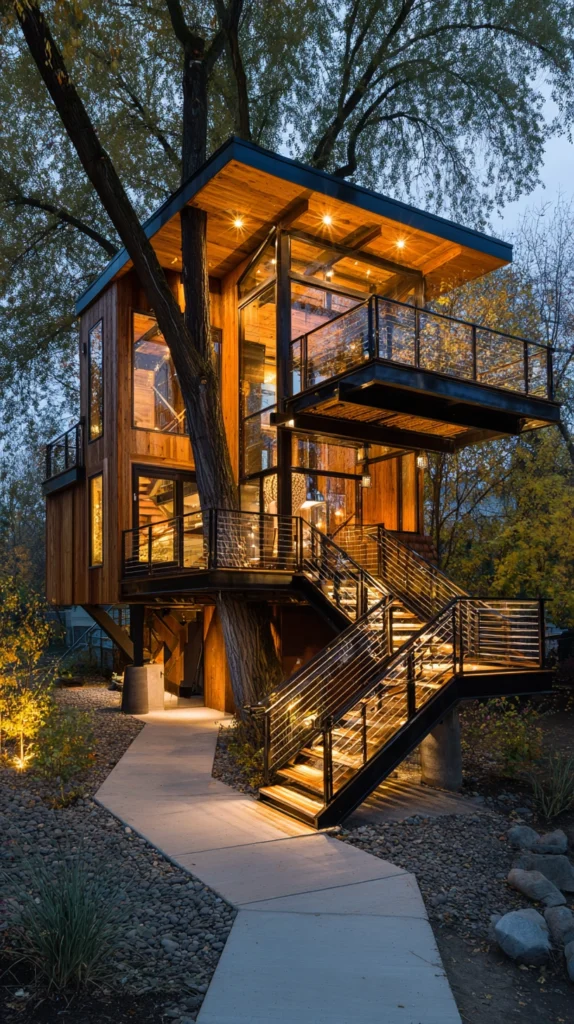
A raised platform structure, built into or beside a tree, offering an elevated space for imaginative play and a genuine sense of adventure.
My missing elevated retreat:
What felt absent:
- Ground-level play equipment covering most physical activity types, but nothing offering an elevated, private retreat
- Kids consistently drawn to any elevated space, whether furniture or low tree branches
- A missed opportunity for the specific appeal an elevated platform genuinely offers
The treehouse solution:
Why an elevated structure adds a distinct kind of play value:
- Offers a genuine sense of height, adventure, and ownership distinct from ground-level equipment
- Supports imaginative and pretend play in a way that feels genuinely special and set apart
- A structure that can evolve over years, from a simple platform to a more elaborate build as skills and interests grow
- Consistently cited as one of the most cherished childhood backyard memories across generations
Building the treehouse or platform:
Construction approach:
- A simple raised platform, built low to the ground initially for younger children, addressing safety concerns
- Support beams properly attached to a healthy, mature tree, or a freestanding post structure if no suitable tree exists
- A secure railing around the platform’s perimeter, appropriately sized for the intended age range
- A ladder or simple staircase providing secure, controlled access
Safety and construction considerations:
Building it right:
- Consult tree-specific construction guidance to avoid damaging the tree’s health during installation
- Keep platform height modest, particularly for younger children, with height increasing only as appropriate
- Use pressure-treated lumber and weatherproof hardware throughout
- Install soft ground surfacing beneath the platform and around the access point
Cost:
- Basic raised platform materials: $300-800
- More elaborate treehouse with walls and roof: $1,000-4,000+
My backyard treehouse: A simple, low platform built into the sturdiest tree in the yard, with a basic railing and ladder access, has become the specific spot my kids retreat to for both quiet reading and elaborate pretend play, a kind of space nothing else in the yard quite replicates.
Treehouse Tips
Consult tree-specific building guidance before attaching any structure:
Tree health protection:
- Improper attachment methods can genuinely damage a tree’s health over time
- Research or consult a professional on tree-friendly construction techniques specific to the tree species involved
- This consideration protects both the structure’s safety and the tree’s long-term wellbeing
- A tree damaged during construction can eventually become unable to safely support the platform at all
Start with a modest platform height and expand as children grow older:
Age-appropriate scaling:
- A very elevated structure may be inappropriate for younger children’s current developmental stage
- A lower initial platform height allows safe use immediately, with potential future expansion as kids grow
- This progressive approach also spreads the construction investment across multiple years if desired
- Revisit the structure’s design and height as children’s needs and skills genuinely change over time
5. The In-Ground or Above-Ground Trampoline
A trampoline, either recessed into the ground or set on legs above it, providing high-energy bouncing play.
My missing high-energy outlet:
What was limiting the yard’s function:
- Plenty of climbing and imaginative play options, but nothing offering pure, high-energy physical release
- Kids with genuine excess energy needing an outlet beyond running around the open lawn
- A missed opportunity for one of the most consistently popular backyard additions among kids of nearly every age
The trampoline solution:
Why a trampoline delivers such reliable, sustained engagement:
- Provides genuine, vigorous physical activity and energy release
- Works across a wide age range, from young children with supervision to older kids and even adults
- One of the most consistently used pieces of backyard equipment across many households, often for years
- Supports both solo bouncing and social, multi-child play simultaneously
In-ground versus above-ground:
Comparing the two main approaches:
- In-ground trampolines sit flush with the surrounding ground, offering a lower profile and often perceived improved safety
- Above-ground trampolines are significantly easier and less costly to install, requiring no excavation
- In-ground installations typically cost more due to the excavation and drainage work involved
- Both styles require a proper safety net enclosure, particularly for younger children
Safety essentials:
Non-negotiable considerations:
- A safety enclosure net for above-ground models, covering the full trampoline perimeter
- Adequate clearance from any nearby structures, trees, or fences
- Regular inspection of the jumping mat, springs, and padding for wear
- Clear rules around one jumper at a time for younger or less experienced users
Cost:
- Above-ground trampoline with safety net (12-14 foot): $200-600
- In-ground trampoline installation: $1,500-4,000
My trampoline: An above-ground trampoline with a full safety net enclosure has remained one of the most consistently used pieces of equipment in the yard for going on four years now, used by kids of significantly different ages and still just as popular as the day it arrived.
Trampoline Tips
Install a complete safety net enclosure regardless of trampoline style:
Essential safety measure:
- A trampoline without a safety net significantly increases the risk of falls off the jumping surface
- A full enclosure net, properly installed and maintained, addresses this risk directly
- This addition should be considered essential, not optional, particularly for households with younger children
- Confirm the net is compatible with and properly rated for the specific trampoline size purchased
Inspect springs, padding, and the jumping mat regularly for wear:
Ongoing safety maintenance:
- Trampoline components experience significant repeated stress and gradually wear over time
- A regular inspection routine, checking for torn padding, rusted springs, or a stretched or torn mat, catches issues before they become hazards
- This maintenance habit matters especially for equipment used as frequently and vigorously as a trampoline typically is
- Replace any worn components promptly rather than continuing use with compromised safety features
6. The Sandbox and Building Zone
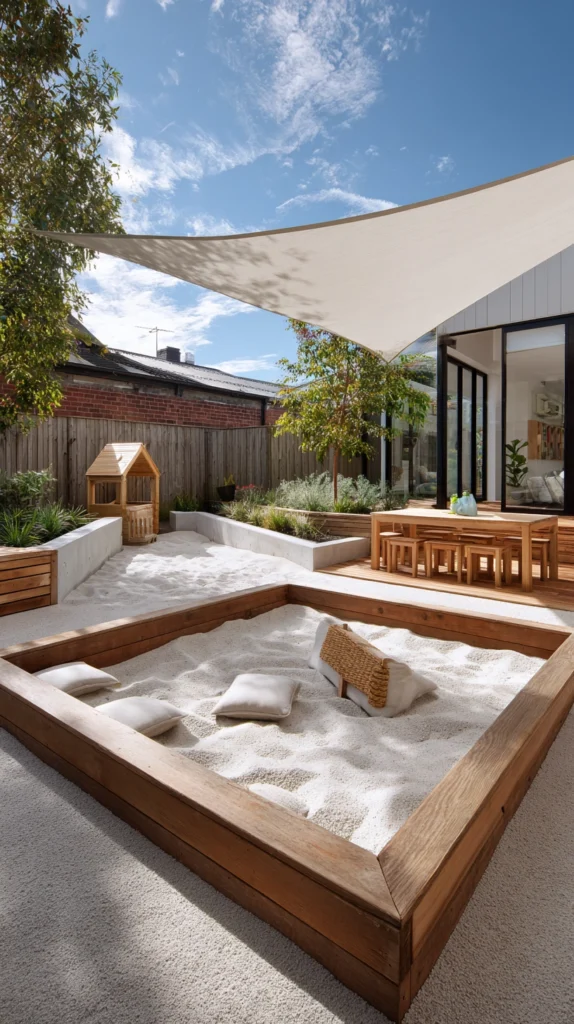
A generously sized sandbox, equipped with construction toys, trucks, and building tools — supporting extended, imaginative building play.
My undersized, under-equipped sand area:
What felt limiting:
- A small sandbox, sized more for a toddler than for the actual age range of kids using the yard
- Limited tools and toys, insufficient for the kind of elaborate building projects older kids genuinely want to attempt
- A missed opportunity to scale this classic play type up for a wider range of ages
The building zone solution:
Why a properly scaled sand and building area sustains longer engagement:
- A larger sandbox supports more elaborate, extended building projects than a small toddler-scaled version
- Construction toys and tools extend the play possibilities significantly beyond basic digging
- Open-ended building play supports creativity, planning, and cooperative play among multiple kids
- A play type that genuinely scales in complexity as kids get older, rather than being outgrown
Building the zone:
Construction and equipping:
- A generously sized sandbox, using a raised wood frame or an in-ground pit lined with landscape fabric
- Play sand specifically, in a quantity adequate for genuine building and digging projects
- Construction vehicles, buckets, shovels, and tools sized appropriately for the age range involved
- A cover for protecting the sand from rain and debris between uses
Expanding the play possibilities:
Additional elements to include:
- Small wood planks or building blocks for constructing more elaborate structures
- A water source nearby for building sandcastles or testing structural stability
- A designated storage bin or shed section for organizing the growing tool collection
Cost:
- Larger raised sandbox frame: $100-250
- Play sand (multiple bags): $40-80
- Construction toys and tools: $30-80
- Cover: $20-50
My sandbox building zone: Scaling up from a small toddler sandbox to a genuinely large building area, equipped with real building tools and construction vehicles, transformed sand play from a quick activity into something my older kids now spend genuine extended time on with friends.
Sandbox Tips
Size the sandbox generously relative to the actual number and age of children using it:
Proportion consideration:
- A sandbox sized for one small child quickly becomes inadequate for multiple older kids working on a shared project
- Consider both current and near-future needs when sizing the sandbox and its tool collection
- A generously sized sandbox supports more elaborate, collaborative building projects
- This upfront sizing decision affects how long the sandbox remains genuinely engaging as kids grow
Provide genuinely functional building tools rather than purely toy versions:
Tool quality consideration:
- Flimsy, purely decorative toy tools can limit the actual complexity of building projects attempted
- Sturdier, more functional tools support more ambitious and satisfying building outcomes
- This quality consideration matters more as children get older and attempt more elaborate constructions
- A modest additional investment in tool quality meaningfully extends the sandbox’s play value over time
7. The Balance Beam and Obstacle Course
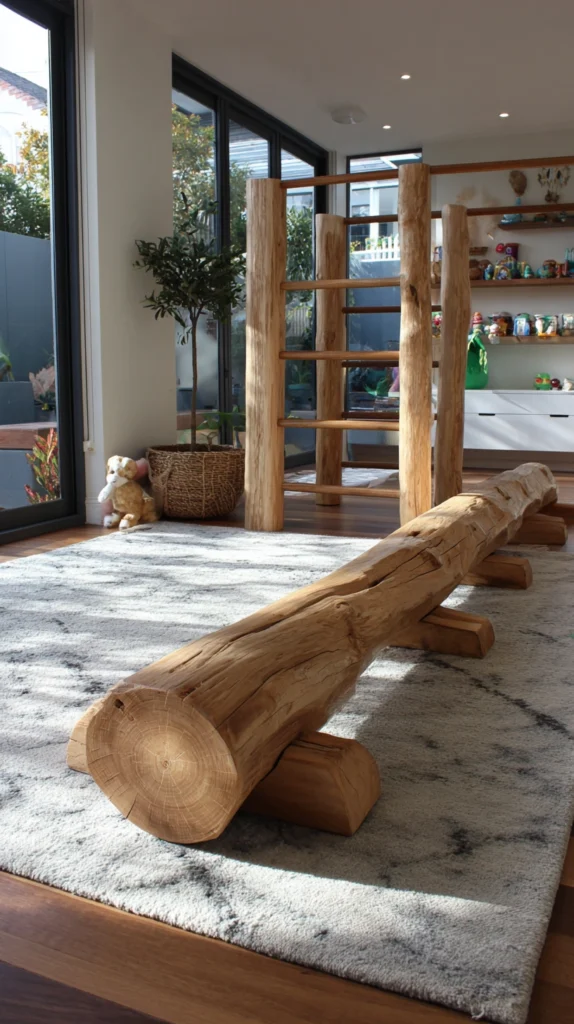
A configurable series of balance beams, stepping posts, and low hurdles, creating a repeatable obstacle course for physical challenge and skill-building.
My missing structured physical challenge:
What felt underdeveloped:
- Open running space and basic climbing equipment, but nothing offering a specifically structured, sequential physical challenge
- A missed opportunity for the kind of skill-building an obstacle course specifically supports
- No sense of a course kids could learn, master, and race against a personal best time
The obstacle course solution:
Why a structured course adds genuine ongoing value:
- Supports balance, coordination, and sequential problem-solving in a focused way
- A repeatable course kids can master and improve upon over time, building genuine confidence
- Naturally lends itself to friendly competition, racing against siblings, friends, or personal best times
- Relatively affordable and adaptable, allowing the course’s difficulty to evolve with growing skill
Building the obstacle course:
Simple construction elements:
- Wood balance beams at varying heights for basic balance practice
- Wooden stepping posts, spaced at a stride distance appropriate for the intended age range
- Low hurdles for jumping or stepping over
- A crawling tunnel section, using a simple fabric or PVC tunnel
Designing the course layout:
Creating an engaging sequence:
- Arrange elements in a winding or looping path rather than a straight, predictable line
- Vary the type of challenge at each station, alternating balance, jumping, and crawling elements
- Consider adding a simple stopwatch or timing element for kids interested in tracking improvement
Cost:
- Wood balance beams and posts: $40-100
- Low hurdles: $20-50
- Crawling tunnel: $20-50
- Total: $80-200
My backyard obstacle course: A simple sequence of balance beams, stepping posts, and a crawling tunnel became a course my kids run repeatedly, timing themselves and racing friends, and watching their coordination and confidence improve over just a few months made this one of the most rewarding low-cost additions to the yard.
Obstacle Course Tips
Vary the course layout periodically to maintain genuine challenge and interest:
Ongoing engagement:
- A static course layout eventually becomes fully memorized and less genuinely challenging
- Periodically rearranging the sequence or adding new elements keeps the same basic equipment feeling fresh
- This relatively low-effort adjustment significantly extends the course’s long-term engagement value
- Involve kids in redesigning the course occasionally to maintain their sense of ownership over it
Install soft ground surfacing along the full course length, not just at individual stations:
Comprehensive safety consideration:
- Falls during obstacle course activities can occur at any point along the sequence, not only at specific high-risk stations
- Grass, mulch, or foam matting along the entire course provides more consistent protection
- This comprehensive approach matters more here than surfacing limited only to the most obviously challenging elements
- A relatively straightforward safety consideration that meaningfully reduces injury risk from typical course-related falls
8. The Chalk Art and Hopscotch Court
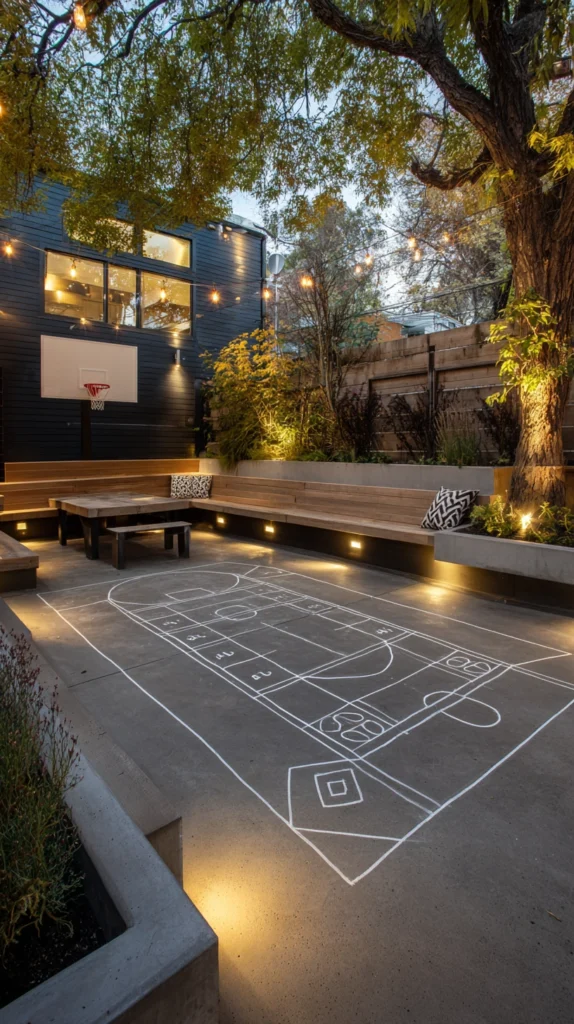
A designated patio or driveway section painted or marked for hopscotch, four square, or other classic chalk-based games.
My missing classic outdoor game space:
What felt overlooked:
- Existing concrete or paved surfaces going completely unused for classic outdoor games
- Kids drawing hopscotch courts freehand with chalk, only to have them wash away after the next rain
- A missed opportunity for a more permanent, always-ready version of these enduring classic games
The chalk art and game court solution:
Why a semi-permanent game court adds lasting value:
- Removes the need to redraw game courts with chalk every single time they are wanted
- Supports classic, enduringly popular games like hopscotch, four square, and tic-tac-toe
- Encourages social, multi-child play and can be used spontaneously by visiting friends
- A relatively low-cost addition, particularly when using existing patio or driveway surfaces
Creating the game court:
Marking approaches:
- Outdoor-rated paint, applied directly to existing concrete or pavement for a permanent court
- Painter’s tape as a guide for achieving straight, clean lines during the painting process
- Multiple game options marked in adjacent sections, such as hopscotch alongside a four square grid
- Sidewalk chalk kept readily available nearby for additional freeform art and games
Game options to include:
Popular choices for a marked court:
- A traditional hopscotch numbered grid
- A four square court, appropriately sized for the specific ball being used
- A simple tic-tac-toe grid for quick, casual games
- A painted target or aiming game for bean bag toss or similar activities
Cost:
- Outdoor-rated paint: $20-40
- Painter’s tape and supplies: $10-20
- Total: $30-60
My chalk art and game court: Painting a permanent hopscotch and four square court on the existing driveway cost under $50 total and turned an unused stretch of concrete into a spot that gets used almost daily, without ever needing to be redrawn.
Game Court Tips
Use outdoor-rated paint specifically formulated for the concrete or pavement surface:
Product selection:
- Standard craft or interior paint will not hold up to outdoor weather exposure and foot traffic
- Look specifically for exterior, floor-rated paint designed for concrete or asphalt surfaces
- This distinction significantly affects how long the game court markings remain visible and usable
- A slightly higher-quality exterior product typically extends the time before repainting becomes necessary
Use painter’s tape to achieve clean, straight lines during marking:
Application technique:
- Freehand painted lines often look uneven and less genuinely game-functional
- Painter’s tape, applied before painting and removed once the paint has set, creates significantly cleaner results
- This technique matters especially for games like four square, where accurate court dimensions affect actual gameplay
- A relatively small amount of additional preparation time for a noticeably more polished, functional result
9. The Fort-Building Loose Parts Zone
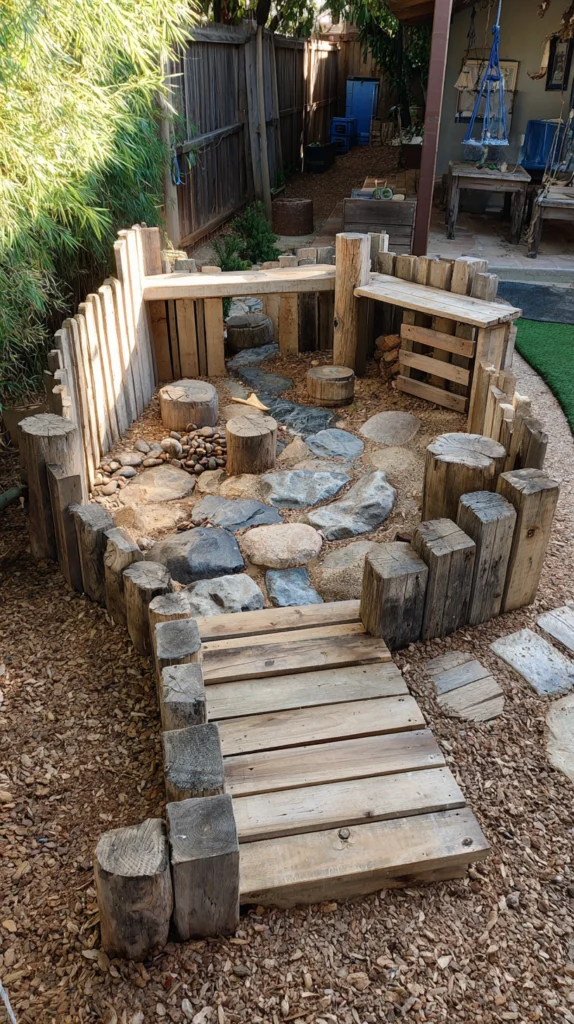
A designated area stocked with loose materials, such as wood planks, fabric, crates, and rope, encouraging kids to build their own forts and structures.
My missing open-ended construction option:
What was absent:
- Structured play equipment covering most conventional activities, but nothing genuinely open-ended and self-directed
- Kids naturally drawn to building forts from whatever materials happen to be available, without a dedicated space or supplies
- A missed opportunity for the kind of creative, self-directed play loose parts specifically support
The loose parts zone solution:
Why unstructured building materials offer unique play value:
- Supports genuinely open-ended, self-directed play with no fixed “correct” way to use the materials
- Encourages creativity, planning, and cooperative problem-solving among kids
- Increasingly recognized in play-based education as one of the most valuable, engaging play types available
- Relatively inexpensive to stock, often using materials otherwise destined for disposal
Stocking the loose parts zone:
What to include:
- Lightweight wood planks and boards, sanded to avoid splinters
- Large fabric pieces, old sheets, or tarps for creating fort walls and roofs
- Plastic crates or sturdy cardboard boxes for structural building
- Rope or bungee cords for securing structures together
- Clothespins or simple clamps for attaching fabric pieces
Organizing the zone:
Keeping materials accessible and manageable:
- A designated storage bin or shed section for organizing the loose parts collection
- A defined “building zone” area of the yard where fort construction is specifically encouraged
- Rotating in new materials periodically to keep the possibilities feeling fresh
Cost:
- Wood planks and boards: $20-60
- Fabric pieces or tarps: $15-40
- Crates, rope, and clamps: $20-50
- Total: $55-150
My loose parts fort zone: Stocking a corner of the yard with wood planks, old sheets, and a bin of crates gave my kids genuinely open-ended building materials, and the forts they construct now, entirely self-directed, show more creativity and problem-solving than any single purchased play structure has ever prompted.
Loose Parts Tips
Sand and smooth all wood pieces to prevent splinters before adding them to the zone:
Material preparation:
- Rough, unfinished wood pieces present a genuine splinter risk during hands-on building play
- A basic sanding pass on all edges and surfaces significantly reduces this risk
- This preparation step is simple but essential before any wood materials are made available for building
- Periodically inspect materials for developing rough edges or damage over continued use
Rotate and refresh the available materials periodically:
Sustained engagement:
- The same static collection of materials can eventually feel limited or repetitive
- Periodically adding new materials, or temporarily removing and reintroducing existing ones, maintains genuine novelty
- This rotation requires minimal ongoing cost while meaningfully extending the zone’s long-term creative potential
- Involve kids in identifying new materials they would find useful for future building projects
10. The Basketball Hoop and Sports Court Corner
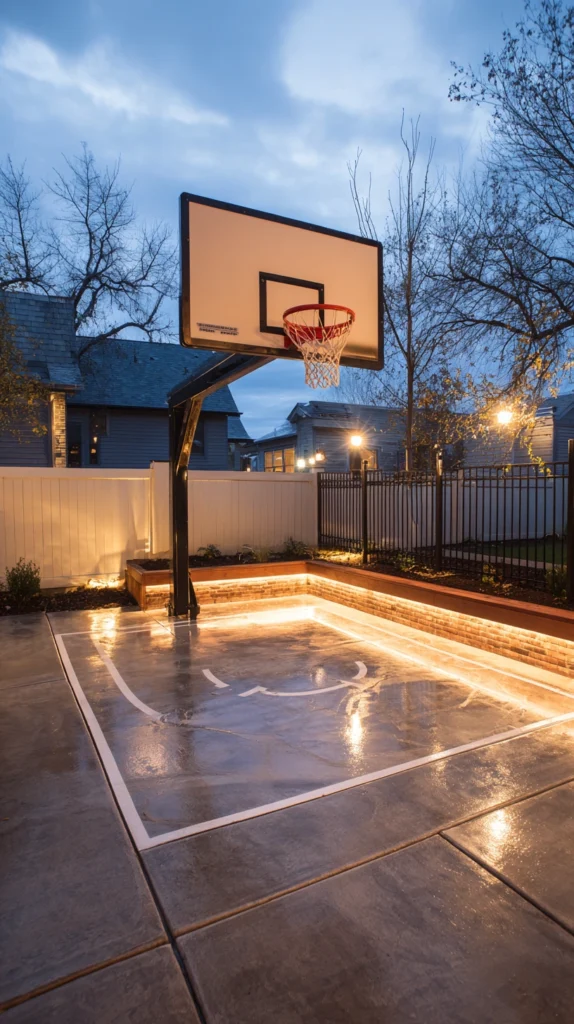
A basketball hoop paired with a small marked court area, supporting shooting practice and pickup games.
My missing organized sports option:
What felt limiting:
- Play equipment covering climbing, swinging, and imaginative play, but nothing supporting organized sports activity
- Kids interested in basketball with no dedicated space or hoop in the actual yard
- A missed opportunity for the specific social, skill-building value organized sports play offers
The basketball corner solution:
Why a dedicated sports zone adds distinct play value:
- Supports skill development, from basic shooting practice to more organized pickup games
- One of the most naturally social play types, easily including friends, siblings, or parents
- A relatively straightforward addition for any yard with an existing paved surface or willingness to pour one
- Builds physical skills distinct from the climbing, balancing, and swinging emphasized elsewhere in the yard
Choosing the right hoop setup:
Options by permanence and budget:
- An adjustable-height portable hoop, ideal for growing kids and flexible positioning
- A permanently mounted in-ground hoop system for a more substantial, stable setup
- A wall or garage-mounted hoop if a freestanding option is not practical for the space available
Building the court area:
Creating a functional space:
- An existing driveway or patio surface, if adequately sized and positioned
- A small dedicated concrete or asphalt pad, poured specifically for this purpose
- Painted court lines marking a simplified key or boundary, if desired
Cost:
- Portable adjustable basketball hoop: $80-250
- In-ground permanent hoop system: $300-800
- Small dedicated court pad, if pouring new concrete: $800-2,000
My basketball hoop corner: An adjustable-height portable hoop set up on the existing driveway gave my kids a genuine outlet for both solo shooting practice and pickup games with neighborhood friends, adjustable low enough for younger siblings to join in too.
Basketball Hoop Tips
Choose an adjustable-height hoop if children span a range of ages:
Flexibility for growing kids:
- A fixed-height hoop may be appropriately challenging for one child’s age but poorly suited to a younger sibling
- Adjustable-height systems accommodate a wider age range and can be lowered as skills develop
- This flexibility significantly extends how long the hoop remains genuinely usable and appropriately challenging
- Consider this feature specifically important for households with children of varying ages
Confirm adequate surrounding clearance before finalizing hoop placement:
Safety and functional spacing:
- A hoop positioned too close to walls, fences, or parked vehicles limits both safety and genuine playability
- Measure the available space and confirm adequate clearance for realistic shooting and movement
- This consideration prevents a hoop installation that technically fits but proves frustrating or unsafe to actually use
- Walk through typical game scenarios in the intended space before finalizing the exact placement
11. The Musical and Sensory Play Wall
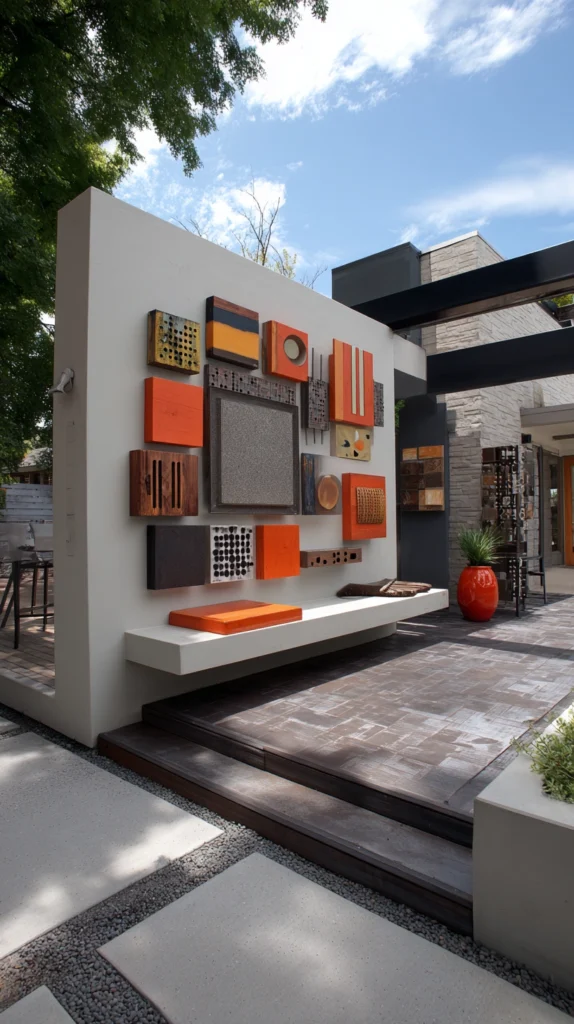
An outdoor wall or fence section fitted with musical instruments, tactile panels, and interactive sensory elements.
My missing sensory-focused activity:
What felt absent:
- Play equipment focused heavily on physical, gross motor activity, but nothing engaging sound and sensory exploration specifically
- A missed opportunity for the kind of engaged, exploratory play a musical or sensory wall specifically supports
- A blank fence or wall section going unused for this distinct play purpose
The sensory wall solution:
Why a dedicated musical and sensory zone adds unique value:
- Engages sound and tactile exploration in a way distinct from most conventional play equipment
- Supports younger children’s sensory development while remaining genuinely engaging for older kids as well
- Often becomes a favorite spontaneous activity, requiring no specific game or goal to enjoy
- A relatively affordable addition, particularly when incorporating repurposed household items
Building the sensory wall:
Elements to include:
- Mounted metal pots, pans, and wooden spoons for a simple percussion section
- A xylophone or chime set specifically designed for outdoor use
- Tactile panels featuring different textures, such as rough wood, smooth metal, and soft rope
- A simple echo tube or speaking tube connecting two points along the wall
Installation approach:
Getting the setup right:
- Mount all elements securely at a height appropriate for the intended age range
- Use weather-resistant materials and hardware throughout
- Group elements loosely by type, sound-based items together, tactile items together, for a more organized experience
Cost:
- Repurposed household items (pots, pans, spoons): $0-20
- Outdoor xylophone or chime set: $40-100
- Tactile panel materials: $20-50
- Total: $60-170
My sensory play wall: Mounting a simple collection of pots, pans, and a wooden spoon to the fence, alongside a small outdoor xylophone, created a spontaneous musical play spot that gets used constantly, often as the very first thing kids gravitate toward when they come outside.
Sensory Wall Tips
Use securely mounted, weather-resistant hardware throughout the installation:
Durability and safety:
- Items mounted with inadequate hardware can loosen or fall with repeated, vigorous use
- Weather-resistant screws and secure mounting brackets ensure the wall holds up to enthusiastic play over time
- This attention to secure mounting matters especially given how much direct physical interaction this zone receives
- Periodically check all mounted elements for looseness as part of routine yard maintenance
Incorporate genuinely different sound types across the wall’s elements:
Variety for sustained interest:
- A wall using only similar-sounding items offers less genuine sensory variety
- Combining metal percussion, wood-based sounds, and a proper chime or xylophone creates a richer range of tones
- This variety keeps the sensory exploration genuinely interesting across repeated use
- Consider the different pitches and textures available when initially selecting and arranging the wall’s elements
12. The Bike and Scooter Track
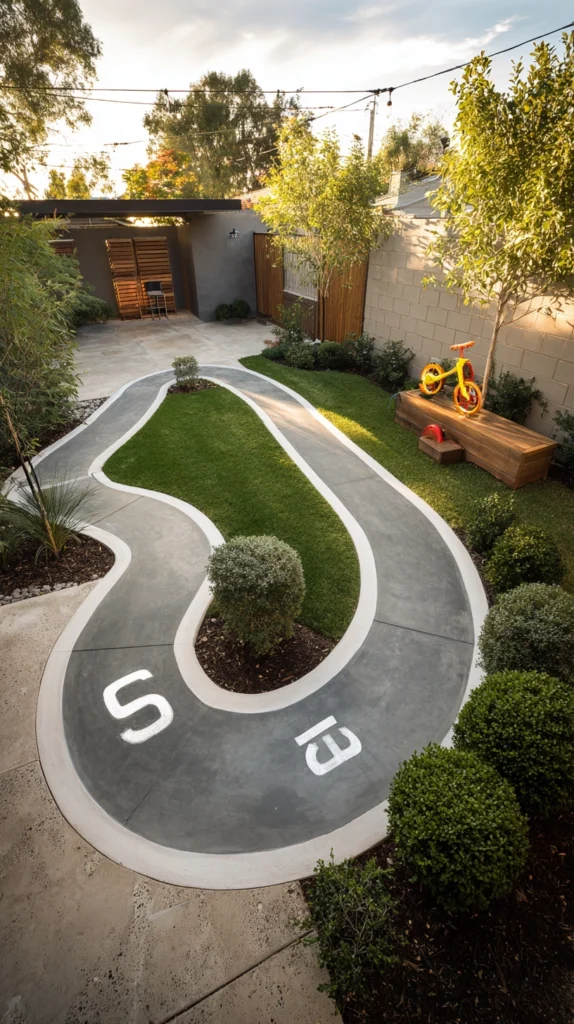
A defined looped path, using pavers, asphalt, or packed gravel, designed specifically for biking, scootering, and other wheeled play.
My missing riding surface:
What was limiting active riding play:
- Bikes and scooters used only occasionally on the street, given a lack of dedicated yard space
- A missed opportunity to support one of the most popular active play categories for a wide range of ages
- No sense of a genuine course kids could ride repeatedly and improve upon over time
The bike and scooter track solution:
Why a dedicated riding surface matters:
- Provides a genuinely safe, off-street space for biking and scootering
- A defined loop or course adds structure and repeatable challenge to riding play
- Supports significant gross motor development, balance, and coordination
- One of the most consistently popular active play categories once a proper surface and course exist
Building the track:
Surface and layout options:
- A paver or poured concrete loop, sized to accommodate typical bike and scooter widths
- Packed gravel or decomposed granite for a lower-cost, though less smooth, alternative surface
- Utilizing existing driveway space, extended with an additional loop section if the yard allows
- Simple painted lane markings or small cones for an informal, low-cost course layout
Adding challenge elements:
Enhancing the basic track:
- Small ramps or gentle inclines for more advanced riders
- Painted directional arrows or simple obstacle markers for structured practice
- A designated “pit stop” area for parking bikes and taking breaks
Cost:
- Paver loop track (per linear foot): $8-20
- Packed gravel track: $3-8 per linear foot
- Using existing driveway with added markings: $10-30
My bike track: A simple gravel loop around the perimeter of the backyard gave riding play an actual purpose and course, and my kids now ride that loop repeatedly, timing laps and inventing their own increasingly elaborate racing games.
Bike Track Tips
Design the track as a continuous loop rather than a dead-end path:
Layout for sustained play:
- A dead-end path requires constant stopping and turning around, interrupting riding momentum
- A looped track supports continuous, uninterrupted riding, which kids consistently find more engaging
- Even a modest, simple loop significantly outperforms a straight path in terms of actual play value
- Consider available yard space carefully to fit at least a small loop rather than defaulting to a straight run
Choose a track width accommodating the widest wheeled vehicle currently used:
Sizing for function:
- A track too narrow limits which bikes, scooters, or other wheeled toys can comfortably use it
- Measure the widest current vehicle, or anticipate near-future growth, before finalizing track width
- This sizing consideration prevents building a track that quickly becomes functionally too narrow
- A few extra inches of width during construction is a relatively small additional cost for meaningfully better long-term function
13. The Garden Fort or Willow Tunnel
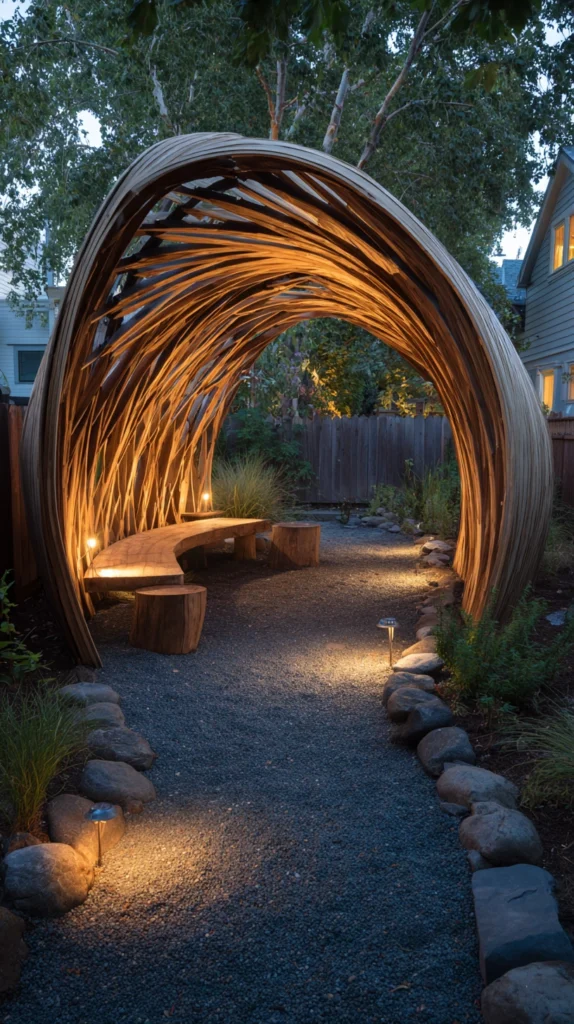
Living plants, such as willow branches or dense shrubs, trained and grown into a natural fort, tunnel, or hideaway structure.
My missing living play structure:
What felt like an untapped opportunity:
- Every play structure in the yard purchased or built from non-living materials
- A missed opportunity for the specific, evolving charm a genuinely living structure offers
- Kids consistently drawn to any dense, enclosed natural space, whether shrubs or overgrown garden corners
The living structure solution:
Why a grown, living play space offers something distinct:
- Creates a genuinely unique, evolving structure that changes and matures over years
- Willow and similar fast-growing materials can be trained into tunnels, domes, or small fort-like enclosures
- Offers natural shade and a sense of genuine enclosure unlike any built structure
- A relatively low-cost, patience-based project delivering a truly one-of-a-kind result
Building a willow tunnel or fort:
Construction approach:
- Plant living willow whips in the desired tunnel or dome shape, following a pre-marked pattern
- Weave and secure branches together as they grow, training the structure’s form over the first one to two seasons
- Water and maintain young willow consistently during establishment, since the plants need to root and grow into the structure
- Trim and shape the structure seasonally once established, maintaining both its form and health
Alternative living structure options:
Other approaches to consider:
- Dense flowering or evergreen shrubs, planted and pruned into a natural, enclosed fort shape
- Sunflower houses, using fast-growing annual sunflowers planted in a defined perimeter for a temporary, seasonal version
- Bean or pea tunnels, using a simple frame and climbing vegetable vines for an edible, temporary living structure
Cost:
- Living willow whips: $30-80 for a modest tunnel or dome
- Alternative shrub planting: $80-250 depending on size and plant maturity
My willow tunnel: Planting and training living willow branches into a small tunnel shape took about two growing seasons to fully establish, but it has become a genuinely magical, ever-changing play space that no purchased structure could replicate.
Living Structure Tips
Water and maintain young willow consistently during the establishment period:
Early care priority:
- Newly planted willow whips require more consistent watering than established plants while their root systems develop
- Inconsistent early watering significantly reduces the success rate of the entire living structure project
- This attention during the first season is critical to the structure’s eventual health and form
- Set a consistent watering schedule specifically for this planting during its establishment period
Weave and train branches gradually rather than forcing the shape too quickly:
Patient construction technique:
- Attempting to force young, still-establishing branches into a tight shape too early can damage or kill them
- Gradual, patient weaving and training over one to two growing seasons produces a stronger, more successful final structure
- This patience is essential to the project’s ultimate success, even though it delays the finished result
- Revisit and adjust the training approach as the plants show their actual growth response over time
14. The Flexible Open Field Zone
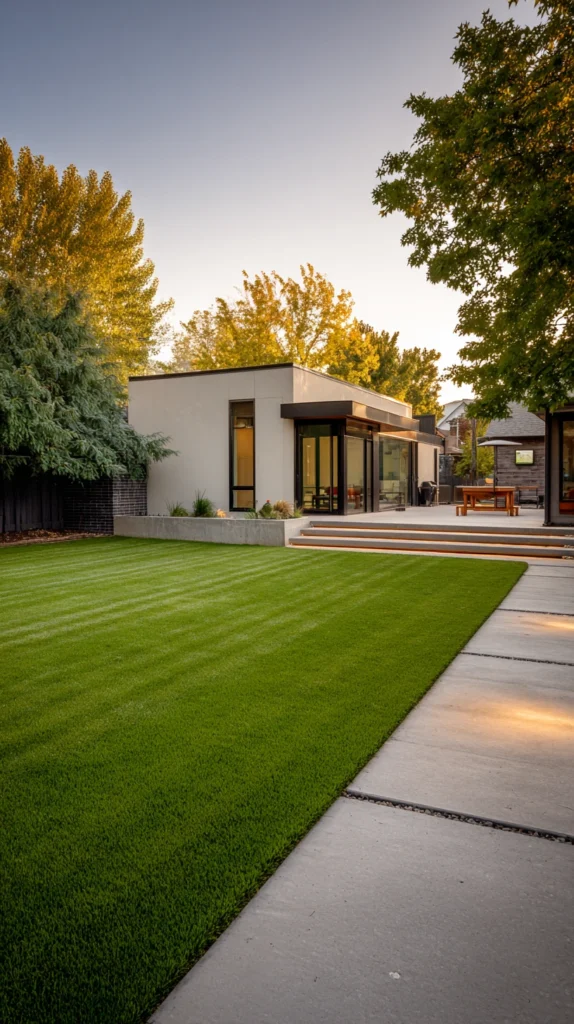
A section of open lawn intentionally kept free of structured equipment — space reserved for running, ball games, and whatever spontaneous activity the day calls for.
My over-equipped yard problem:
What felt missing:
- Every section of the yard assigned to a specific structured piece of equipment or activity zone
- No genuinely open, flexible space remaining for spontaneous games and activities
- Missing the simple, essential value of open running room that no single structured element can replicate
The open field solution:
Why preserving open space matters even in a well-equipped playground yard:
- Supports spontaneous games like tag, catch, and any activity kids invent on their own
- Provides essential running and general physical activity room that structured equipment alone cannot offer
- Balances out an otherwise fully programmed yard with something genuinely flexible and adaptable
- Often becomes the space where group games and the most creative, self-directed play actually happen
Preserving the open zone:
Keeping the space genuinely open:
- Resist the temptation to fill every remaining section of the yard with additional structured equipment
- Maintain the lawn in good condition, since this space typically receives heavy, repeated use
- Keep the area clear of stored equipment, hoses, or other tripping hazards
- Allow the space to remain genuinely flexible, ready for whatever activity a given day or group of kids wants
What naturally happens in this space:
Common spontaneous uses:
- Tag, catch, and other classic running games
- Impromptu soccer or kickball games with friends
- Bringing portable equipment, like a ball or frisbee, into the open space for combined use
- Simple cartwheels, tumbling, and general active movement
Cost:
- No direct cost; achieved by intentionally not filling the space with additional equipment
My open field zone: Deliberately preserving one section of the yard as completely open lawn, rather than adding yet another structured piece of equipment, has repeatedly proven to be where the most spontaneous, genuinely joyful play happens, precisely because nothing about it dictates a specific use.
Open Field Tips
Resist the temptation to eventually fill every open space with more equipment:
Ongoing restraint:
- As new equipment and structures are considered over time, there can be real pressure to use every remaining open area
- Deliberately preserving at least one genuinely open zone provides ongoing value that structured additions cannot replace
- This restraint requires conscious, ongoing effort, especially as a playground area gradually accumulates more elements over the years
- Revisit this priority periodically as the temptation to add “just one more thing” naturally arises
Maintain the open lawn to handle heavy, concentrated foot traffic:
Practical upkeep:
- An open play zone often receives more concentrated, repeated use than any single structured element in the yard
- Basic lawn care, addressing worn patches and drainage issues, keeps the space genuinely usable over time
- This maintenance consideration matters as much for this zone as for any of the more structured additions
- A well-maintained open lawn remains one of the most versatile and consistently used spaces in the entire playground area
Choosing Your Backyard Playground Elements
By Play Type
Physical and gross motor:
- Classic swing set with multiple attachments (idea 1)
- Freestanding rock climbing wall (idea 2)
- Balance beam and obstacle course (idea 7)
- In-ground or above-ground trampoline (idea 5)
High-thrill and adventure:
- Backyard zip line (idea 3)
- Elevated treehouse or play platform (idea 4)
Building and imaginative:
- Sandbox and building zone (idea 6)
- Fort-building loose parts zone (idea 9)
- Garden fort or willow tunnel (idea 13)
Social and skill-based:
- Chalk art and hopscotch court (idea 8)
- Basketball hoop and sports court corner (idea 10)
- Bike and scooter track (idea 12)
Sensory and flexible:
- Musical and sensory play wall (idea 11)
- Flexible open field zone (idea 14)
By Effort Level
Lowest effort:
- Chalk art and hopscotch court (idea 8)
- Musical and sensory play wall (idea 11)
- Flexible open field zone (idea 14)
Medium effort:
- Balance beam and obstacle course (idea 7)
- Fort-building loose parts zone (idea 9)
- Backyard zip line (idea 3)
- Basketball hoop and sports court corner (idea 10)
Higher commitment:
- Classic swing set with multiple attachments (idea 1)
- Freestanding rock climbing wall (idea 2)
- Elevated treehouse or play platform (idea 4)
- In-ground or above-ground trampoline (idea 5)
- Bike and scooter track (idea 12)
- Garden fort or willow tunnel (idea 13)
By Budget
Under $150:
- Chalk art and hopscotch court (idea 8)
- Musical and sensory play wall (idea 11)
- Fort-building loose parts zone (idea 9)
- Balance beam and obstacle course (idea 7)
$150-400:
- Backyard zip line (idea 3)
- Sandbox and building zone (idea 6)
- Freestanding rock climbing wall (idea 2)
- Garden fort or willow tunnel (idea 13)
$400-800:
- Classic swing set with multiple attachments (idea 1)
- Above-ground trampoline (idea 5)
- Basketball hoop and sports court corner, portable (idea 10)
$800+:
- Elevated treehouse or play platform (idea 4)
- In-ground trampoline (idea 5)
- Bike and scooter track, full paver loop (idea 12)
Maintenance Through the Seasons
Spring:
- Inspect all rope, chain, and hardware connections after winter exposure
- Restock and refresh sandbox and loose parts materials
Summer:
- Check trampoline nets, springs, and padding for wear given peak-season heavy use
- Water and maintain any living structures, like a willow tunnel, consistently
Fall:
- Prune and shape living structures following their peak growing season
- Store more delicate loose parts materials ahead of wetter weather
Winter:
- Cover or store equipment vulnerable to freezing or heavy moisture damage
- Plan the following year’s additions during the slower winter months
My Complete Backyard Playground Journey
What we built across three years:
Year one ($540):
- Swing set with a trapeze bar attachment
- Chalk art and hopscotch court on the existing patio
- Learned that variety, even at a modest scale, outperformed one larger single purchase
Year two ($920):
- Freestanding climbing wall on the side fence
- Above-ground trampoline with a full safety net
- Learned that different physical challenge types kept kids engaged far longer than more of the same activity type
Year three ($410):
- Backyard zip line between two mature trees
- Fort-building loose parts zone in the back corner
- Learned that the combination of high-thrill equipment and completely open-ended materials covered the widest possible range of play interests
Total investment: $1,870 across three years Most important lesson: A genuinely varied playground, built gradually, sustained far more long-term engagement than one large upfront purchase ever could Single highest-impact addition across all three years: The zip line, for consistently generating the most excitement and the most requests for friends to come over
Getting Started This Weekend
Start with variety, not scale.
This weekend:
Step 1 — Assess what play types are currently missing from the yard:
- Note whether climbing, high-thrill adventure, building, or open-ended play is underrepresented
- Let this gap analysis guide which addition to prioritize first, rather than defaulting to the most obvious option
Step 2 — Choose one relatively low-cost, high-variety addition:
- A chalk game court, a loose parts building zone, or a simple obstacle course
- Low-cost starting points allow testing genuine interest before a larger investment
Step 3 — Preserve at least one section of the yard as genuinely open space:
- Resist filling the entire yard with structured equipment immediately
- This open zone provides ongoing value regardless of which other additions come later
Step 4 — Plan the next addition around a genuinely different play type than what already exists:
- If the yard already has climbing equipment, consider an addition offering imaginative or building play instead
- This variety-focused planning approach sustains engagement significantly longer than repeating the same activity type
My recommendation:
Start with a low-cost obstacle course or chalk game court, then add one high-excitement piece like a zip line:
- Both starting points are affordable and quickly reveal genuine interest levels
- The combination covers both structured skill-building and pure excitement-driven play
- This foundation naturally informs which additional play types make sense to add next
Watch which addition gets requested most by visiting friends over the following month before planning what comes next.
Now go build the backyard playground that finally gives kids somewhere they genuinely never want to leave.
Quick Summary
The 14 playground for kids backyard ideas:
Physical and gross motor:
- Classic swing set with multiple attachments (idea 1): maximum play value from one central structure
- Freestanding rock climbing wall (idea 2): a distinct, evolving vertical challenge
- Balance beam and obstacle course (idea 7): sequential skill-building and friendly competition
- In-ground or above-ground trampoline (idea 5): reliable, sustained high-energy play
High-thrill and adventure:
- Backyard zip line (idea 3): consistently the most requested, most exciting addition
- Elevated treehouse or play platform (idea 4): a genuine sense of height and ownership
Building and imaginative:
- Sandbox and building zone (idea 6): scaled-up, extended construction play
- Fort-building loose parts zone (idea 9): genuinely open-ended, self-directed creativity
- Garden fort or willow tunnel (idea 13): a one-of-a-kind, ever-evolving living structure
Social and skill-based:
- Chalk art and hopscotch court (idea 8): classic games, always ready to play
- Basketball hoop and sports court corner (idea 10): skill-building and social pickup games
- Bike and scooter track (idea 12): a genuine purpose-built riding course
Sensory and flexible:
- Musical and sensory play wall (idea 11): spontaneous sound and tactile exploration
- Flexible open field zone (idea 14): space for whatever unplanned play a day calls for
The universal backyard playground rules:
Always:
- Prioritize variety across different play types over concentrating budget in one large structure
- Preserve at least one genuinely open, unstructured section of the yard
- Verify structural capacity and install adequate soft surfacing before any climbing, swinging, or zip line equipment
- Supervise trampolines, zip lines, and climbing equipment directly, especially with younger or less experienced kids
Never:
- Assume one impressive purchase constitutes a complete playground plan
- Skip safety net enclosures on trampolines or braking systems on zip lines
- Fill every available section of the yard, leaving no genuinely open space remaining
- Attach heavy equipment to unverified trees or structures without confirming adequate strength
Common mistakes:
- Concentrating the entire play budget into a single large combination structure
- Adding multiple pieces of equipment that all offer the same basic type of physical challenge
- Ignoring the value of open-ended, unstructured play space in favor of only purchased equipment
- Skipping structural or safety verification for higher-risk additions like zip lines and climbing walls
- Failing to periodically refresh or rearrange existing equipment to sustain long-term interest
Remember: variety across different play types sustains engagement far longer than any single expensive structure, preserving open space is as important as adding equipment, structural safety verification is never optional for climbing, swinging, or zip line installations, periodically refreshing existing equipment extends its useful life significantly, and the best backyard playground is the one offering enough genuine variety that kids never run out of new ways to use it.