14 Japanese Backyard Ideas for a Peaceful Outdoor Retreat
My backyard used to be busy in the way most American yards end up busy. A little of everything, scattered around without much relationship to anything else nearby, all of it competing for attention at once.
I kept adding things to make the yard feel more finished, and every addition somehow made it feel less restful instead. More furniture, more plants, more decoration, none of it adding up to the calm I actually wanted from the space.
Then I started reading about the principles behind traditional Japanese garden design, and the core idea reframed everything: restraint itself is the design. What you leave out matters as much as what you include. Asymmetry, not perfect balance. Suggestion, not literal representation.
I removed more than I added. A gravel area raked into simple lines. One carefully placed stone. A single maple instead of a mixed border. The yard got quieter, and it also, somehow, felt larger and more finished than it ever had with more in it.
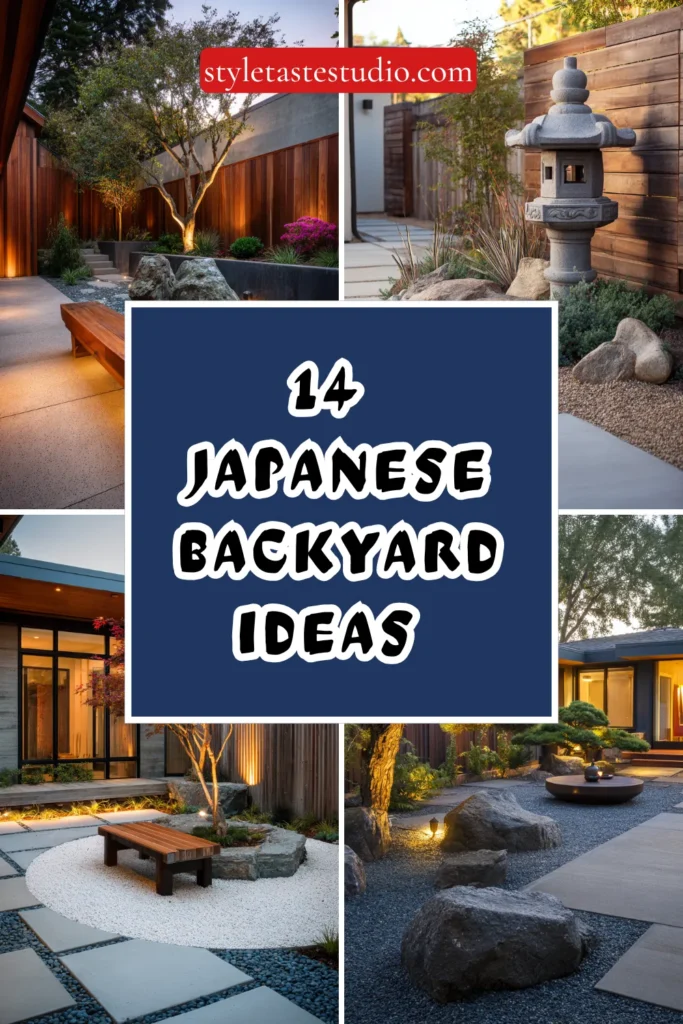
Here are 14 ideas that bring genuine Japanese garden principles into a backyard, creating the kind of peaceful retreat this design tradition has refined over centuries.
Why Most Attempts at This Style Miss the Point
The common mistakes:
The literal decoration approach:
- A red bridge, a pagoda lantern, and a few bamboo pieces added to an otherwise unchanged yard
- Individual “Japanese” objects purchased without any understanding of the underlying design principles
- A yard that looks like it borrowed props rather than genuinely embracing the aesthetic
- Missing the restraint and intentionality that actually define this design tradition
The overplanted, cluttered garden:
- Too many different plant varieties, competing rather than harmonizing
- No negative space or breathing room anywhere in the design
- A garden working against the very stillness this style is meant to evoke
- Abundance mistaken for the goal, when restraint is actually the point
The perfectly symmetrical layout:
- Plants and stones arranged in matched pairs and even numbers
- A formal, mirror-image layout borrowed from Western garden traditions
- Missing the deliberate asymmetry that is actually central to traditional Japanese garden composition
- Symmetry read as order, when true balance in this tradition comes from asymmetrical harmony
What a successful Japanese-inspired backyard does:
Embraces restraint as the core design principle:
- Fewer, more carefully chosen elements rather than abundance
- Deliberate asymmetry and negative space throughout
- Materials and plants chosen for their natural, unforced character
- A design that quiets the mind rather than demanding its attention
My revelation: This style is not about adding Japanese-looking objects to a yard. It is about subtracting until only the essential, carefully considered elements remain.
1. The Raked Gravel Zen Garden
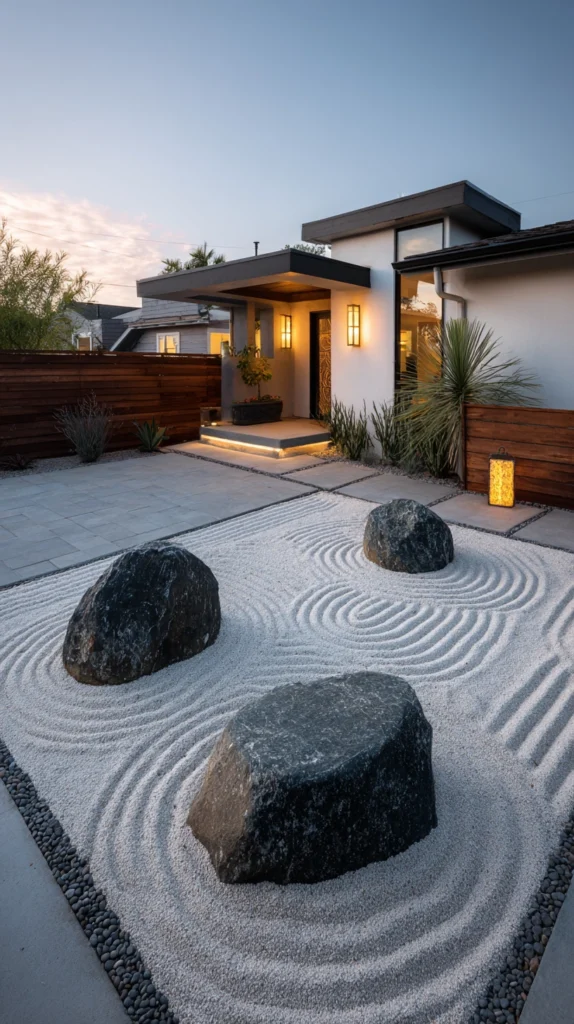
A defined area of fine gravel or sand, raked into simple linear or wave patterns around a small arrangement of stones — the most recognizable element of this design tradition.
My missing sense of stillness:
What I had:
- A yard full of plants and furniture but nowhere genuinely quiet or contemplative
- No single spot specifically designed to encourage stillness rather than activity
- A missed opportunity to include the one element most associated with this entire tradition
The raked gravel discovery:
Why this element carries such significance:
- Represents water and movement through pure suggestion, using texture rather than literal representation
- The act of raking itself is traditionally meditative, not just the finished result
- Creates a genuine focal point of stillness within an otherwise more active yard
- Works at nearly any scale, from a small defined corner to a more substantial area
Building the gravel garden:
Construction basics:
- A contained area, edged with wood, stone, or metal to keep the gravel defined
- Fine, light-colored gravel or coarse sand, raked with a simple wood or metal rake
- A small arrangement of larger stones, placed with deliberate asymmetry within the gravel
- Patterns typically representing water: straight lines for calm water, curved lines around stones for ripples
Choosing and placing stones:
Getting the arrangement right:
- Odd numbers of stones, typically three or five, in varied sizes
- Positioned off-center, never in the exact middle of the gravel area
- Partially buried, as though they emerged naturally from the ground rather than being placed on top
Cost:
- Fine gravel or sand (per 50 sq ft): $40-80
- Edging material: $30-80
- Stones, sourced or purchased: $0-100
- Rake: $15-30
My raked gravel garden: A small defined corner, edged in simple wood and raked into concentric circles around three stones, became the specific spot I return to for a few minutes of genuine stillness most mornings.
Raked Gravel Tips
Choose gravel or sand fine enough to hold a raked pattern clearly:
Material selection:
- Coarse gravel does not hold defined rake lines well and can look messy rather than intentional
- Finer decomposed granite or specifically designed raking sand maintains crisp, visible patterns
- This material choice significantly affects whether the finished result reads as deliberate or accidental
- Test a small sample area before committing to a full gravel order
Rake the pattern regularly as part of an ongoing ritual, not a one-time task:
Maintenance as practice:
- Wind, rain, and foot traffic will disturb the pattern over time
- Regular re-raking, ideally as a calm, unhurried routine, is part of the tradition’s intended practice
- This ongoing maintenance is not a chore to minimize but a genuine component of the garden’s purpose
- Approaching this task without rushing reinforces the same stillness the garden itself is meant to evoke
2. The Single Specimen Japanese Maple
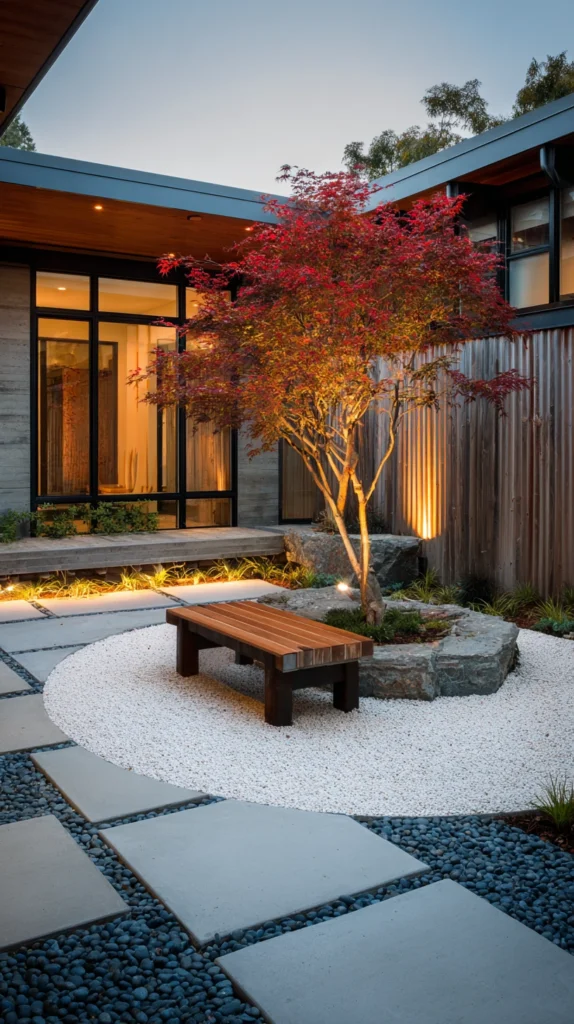
One carefully chosen Japanese maple, given significant space and attention, serving as the garden’s primary focal point.
My scattered, busy planting:
What was working against the calm I wanted:
- Numerous different trees and shrubs, none given enough space to become a genuine focal point
- A garden that felt visually busy rather than restful
- Missing the tradition of centering a single, exceptional specimen rather than spreading attention across many plants
The specimen maple solution:
Why one tree, given genuine space, outperforms many:
- A Japanese maple’s naturally sculptural branching structure rewards being seen in isolation
- Traditional Japanese garden design consistently centers a small number of specimen plants rather than dense, varied planting
- Delivers dramatic seasonal color, from spring red-tinged leaves to brilliant fall foliage, as the garden’s clear seasonal marker
- The single most iconic plant choice associated with this design tradition, for genuinely good reason
Choosing the right maple:
Selection considerations:
- Dwarf or weeping varieties for smaller yards, where a full-sized maple would overwhelm the space
- Red or burgundy-leafed varieties for the most dramatic, traditional color impact
- Confirm the specific variety’s mature size against the actual available space before planting
- Partial shade or filtered sun locations generally suit Japanese maples best, protecting delicate leaves from harsh afternoon sun
Placement and surrounding treatment:
Giving the tree its due prominence:
- Position with genuine open space around it, avoiding crowding from other plants
- A simple groundcover, moss, or gravel beneath, rather than competing plantings
- Positioned where it can be viewed from a primary seating area or window
Cost:
- Dwarf or specimen Japanese maple: $80-400 depending on size and variety
My specimen Japanese maple: Removing three smaller, competing shrubs to give one dwarf red maple genuine open space around it transformed that corner from visually busy into the garden’s clear, calm focal point.
Specimen Maple Tips
Choose a variety suited to the yard’s actual light conditions:
Site-appropriate selection:
- Japanese maples vary significantly in their sun and shade tolerance by variety
- Full, intense afternoon sun can scorch the delicate leaves of many popular varieties
- Research the specific variety’s light requirements against the yard’s actual conditions before planting
- This match between plant and site conditions significantly affects the tree’s long-term health and appearance
Resist the urge to surround the maple with additional competing plants:
Restraint in placement:
- The tree’s value as a focal point depends significantly on the open space surrounding it
- Adding numerous companion plants directly around the maple undermines its intended prominence
- A simple, quiet groundcover or bare raked area beneath allows the tree’s form to remain the clear focus
- This restraint is often the most difficult but most important discipline in successfully featuring a specimen tree
3. The Moss Garden Groundcover
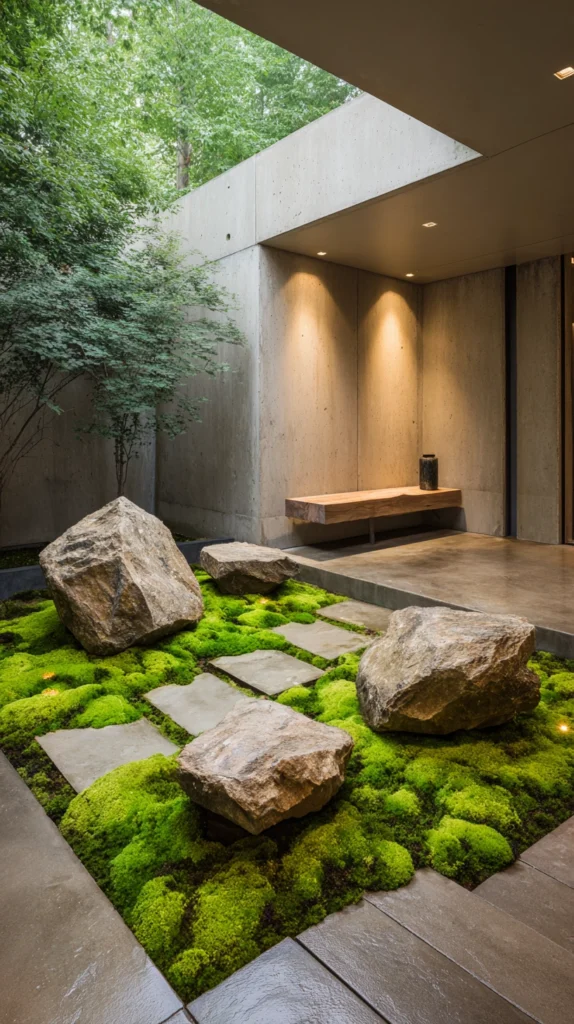
Moss used as a primary groundcover in shaded areas, replacing traditional lawn with a soft, textured, deep green surface.
My struggling shaded lawn:
What was not working:
- Grass consistently struggling and thinning in the yard’s shadier sections
- Constant reseeding and effort producing only patchy, unsatisfying results
- A missed opportunity to work with the shade rather than fighting it
The moss garden solution:
Why moss succeeds where grass struggles, and why that matters here:
- Thrives specifically in the shaded, moist conditions where grass typically fails
- A deeply traditional element in Japanese garden design, valued for its soft texture and quiet, deep green color
- Requires no mowing and significantly less water once established than a traditional lawn
- Creates a genuinely soft, velvet-like surface unlike any other groundcover option
Establishing a moss garden:
Getting moss to take hold:
- Choose a shaded area with consistent moisture, since moss requires humidity to establish and thrive
- Remove existing grass and weeds thoroughly, since moss cannot compete well with more aggressive plants
- Press moss fragments or moss “milkshake” (blended moss and buttermilk) directly onto prepared soil
- Keep consistently moist during the establishment period, typically several weeks to a few months
Maintaining an established moss area:
Ongoing care:
- Remove any fallen leaves or debris promptly, since buildup can smother the moss
- Occasional light watering during dry spells, particularly in climates with distinct dry seasons
- Avoid foot traffic across establishing moss areas, since it is more delicate than traditional lawn during this period
Cost:
- Moss starter patches or spores: $15-40
- Soil preparation supplies: $20-40
My moss garden: Converting the shadiest, most consistently struggling section of lawn into a moss groundcover eliminated years of frustrated reseeding, and the deep green, velvet-soft texture now reads as intentional rather than the problem area it used to be.
Moss Garden Tips
Choose a moss variety genuinely suited to the specific shade and moisture conditions available:
Species matching:
- Different moss varieties have different light and moisture tolerance ranges
- Research which specific variety matches the actual conditions of the intended area before sourcing moss
- This matching significantly affects the moss’s ability to establish and thrive long term
- Local nurseries or moss suppliers can often recommend varieties specifically suited to the regional climate
Keep the establishing area consistently moist, but not waterlogged:
Watering balance:
- Moss requires humidity and moisture to establish, but standing water can cause rot
- Light, frequent watering during the establishment period supports healthy root attachment without oversaturating
- This balance matters especially during the first several weeks after initial planting
- Adjust watering frequency based on the specific climate and the moss’s visible response
4. The Stone Lantern Focal Point
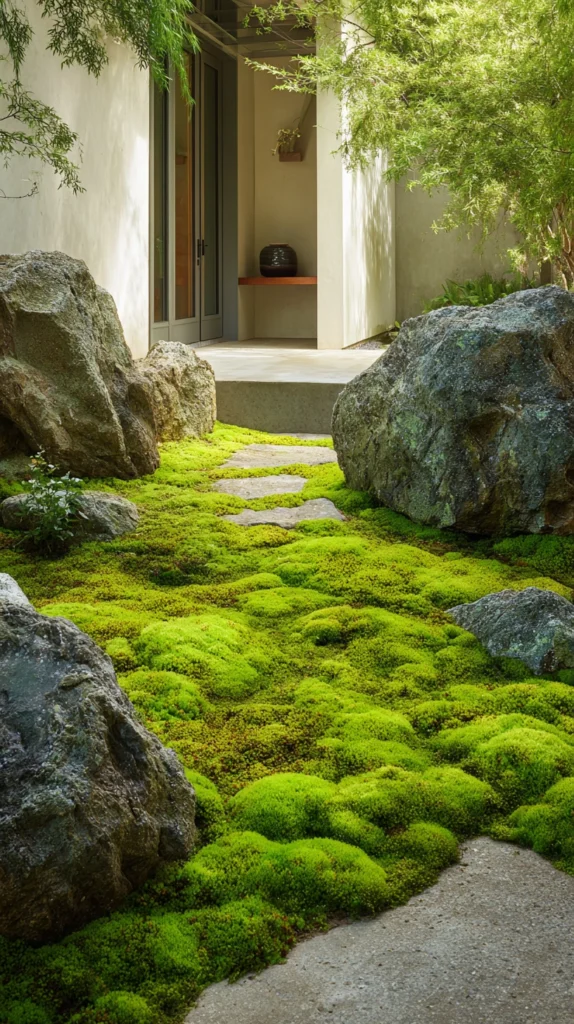
A traditional stone lantern, positioned as a quiet sculptural element within the garden, historically used to light pathways in classical Japanese gardens.
My missing sculptural anchor:
What felt absent:
- Plant-based elements throughout the garden, but no sculptural or architectural focal point
- A missed opportunity for the specific, quiet presence a traditional stone lantern brings
- Wanted an element carrying genuine historical weight within this design tradition
The stone lantern solution:
Why this specific object carries such traditional significance:
- Stone lanterns have served as both functional and symbolic elements in Japanese gardens for centuries
- Their weathered, mossy stone surface embodies the same appreciation for natural aging central to this aesthetic
- Functions as a genuine focal point without requiring bright color or ornate detail
- A relatively contained addition delivering significant traditional authenticity
Choosing the right lantern:
Style and material considerations:
- Genuine carved stone for the most authentic, substantial presence
- Cast concrete alternatives for a more budget-friendly option with a similar aesthetic
- Traditional forms include the tall, pedestal-style lantern and the shorter, ground-set snow-viewing lantern
- Choose a scale genuinely proportional to the garden’s actual size, avoiding an oversized lantern in a small space
Placement principles:
Positioning for authenticity:
- Near a path or the edge of a gravel garden, echoing its traditional pathway-lighting function
- Partially obscured by surrounding planting, rather than fully exposed as a standalone display piece
- Positioned off-center, following the same asymmetrical principle guiding stone placement throughout this tradition
Cost:
- Cast concrete lantern: $80-250
- Genuine carved stone lantern: $300-1,200+
My stone lantern: Positioned at the edge of the gravel garden, partially framed by a small planting of ferns, the lantern’s weathered stone surface has become one of the garden’s quietest but most meaningful details.
Stone Lantern Tips
Position the lantern partially obscured rather than fully exposed:
Placement authenticity:
- A lantern displayed as an isolated standalone object can read as a purchased ornament rather than an integrated garden element
- Partial screening by surrounding plants gives the lantern the quality of something discovered rather than displayed
- This detail significantly affects whether the lantern feels genuinely integrated into the garden’s design
- Position and adjust surrounding planting specifically to achieve this partially concealed effect
Choose a scale genuinely appropriate to the garden’s actual size:
Proportion consideration:
- An oversized lantern in a small garden can dominate rather than complement the space
- Measure the intended placement area and compare against the lantern’s actual dimensions before purchasing
- A more modest, appropriately scaled lantern typically integrates more successfully than an overly grand one
- This proportion consideration matters as much as the lantern’s style or authenticity
5. The Bamboo Fence and Screen
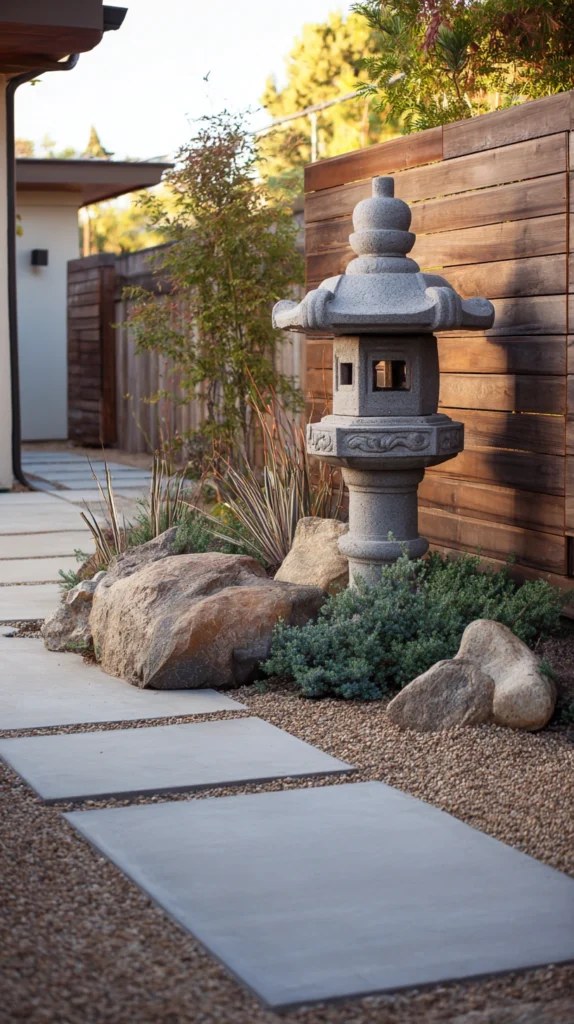
A traditional bamboo fence panel or screen, used either as a full boundary treatment or a partial accent screen within the garden.
My generic wood fence boundary:
What felt disconnected:
- A standard wood privacy fence, functional but carrying no relationship to the garden’s intended aesthetic
- A missed opportunity to use the boundary itself as a genuine design element within this tradition
- A fence that visually competed with, rather than supported, the overall Japanese-inspired design
The bamboo fence solution:
Why bamboo specifically suits this garden style:
- One of the most traditional and recognizable fencing materials in Japanese garden design
- The natural, warm texture of bamboo integrates far more cohesively than standard painted wood
- Available in several traditional styles, each carrying distinct historical and functional origins
- Works as both a full boundary treatment and a partial internal screen, dividing garden areas
Traditional bamboo fence styles:
Choosing the right pattern:
- Yotsume-gaki, an open, simple lattice style, ideal for a lighter, more see-through boundary
- Kenninji-gaki, a solid, tightly woven style providing genuine privacy
- Takesegakoi, a more rustic, natural-post style with woven bamboo infill
Installation approach:
Building or purchasing the fence:
- Pre-made bamboo fence panels, available through specialty garden suppliers
- DIY construction using bamboo poles and traditional black cord lashing techniques
- Applied as a full boundary replacement or as an internal screen dividing distinct garden zones
Cost:
- Pre-made bamboo fence panels (per panel): $40-120
- DIY bamboo pole and lashing materials: $80-300 for a modest screen section
My bamboo screen: Installing a simple yotsume-gaki style bamboo screen to divide the gravel garden area from the rest of the yard gave the space a genuine sense of traditional structure that the previous plain wood fence never provided.
Bamboo Fence Tips
Choose pressure-treated or specifically weather-sealed bamboo for genuine longevity:
Material durability:
- Untreated bamboo can deteriorate relatively quickly when exposed to consistent outdoor moisture
- Look specifically for bamboo products treated or sealed for extended outdoor use
- This detail significantly affects how long the fence maintains both its structural integrity and appearance
- A slightly higher upfront cost for properly treated material typically proves more cost-effective over time
Use bamboo as an accent screen if full boundary replacement is not practical:
Flexible application:
- A full bamboo fence replacement represents a significant project and cost for an existing yard
- A smaller accent screen, used to divide specific garden zones, delivers meaningful aesthetic benefit at lower cost and effort
- This scaled approach allows testing the material and style before a larger commitment
- Many successful Japanese-inspired yards use bamboo selectively rather than throughout the entire boundary
6. The Koi Pond or Simple Water Basin
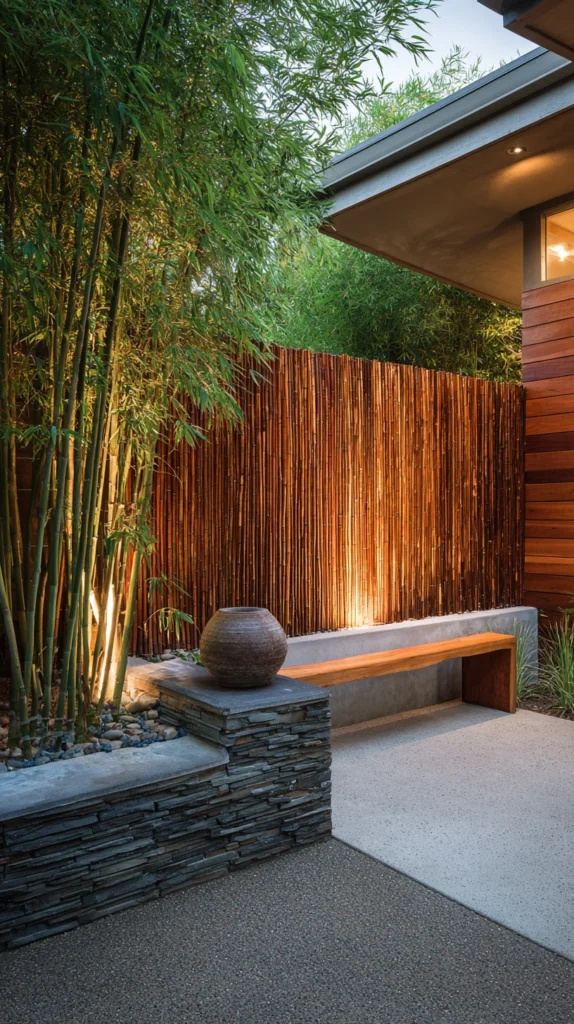
A water feature, ranging from a full koi pond to a simple stone basin, providing the sound and reflective quality central to this garden tradition.
My missing water element:
What was absent:
- A garden addressing stone, plants, and structure, but nothing incorporating water
- Water holds genuine symbolic and sensory importance within this design tradition, largely unaddressed in the current yard
- A missed opportunity for one of the most essential elements in classical Japanese garden design
The water feature solution:
Why water carries such significance in this tradition:
- Represents purification, tranquility, and the passage of time within traditional garden philosophy
- The sound of moving water provides genuine sensory calm, masking unwanted background noise
- Reflective water surfaces add depth and a sense of the sky brought down into the garden itself
- Scales from an elaborate koi pond to the simplest stone basin, accommodating nearly any yard size or budget
Choosing the right scale:
Options by space and investment:
- A full koi pond, for larger yards with a significant investment in this tradition
- A tsukubai, a simple stone water basin traditionally used for ritual hand-washing before tea ceremony, adapted as a garden feature
- A shishi-odoshi, a bamboo “deer scarer” that fills with water and taps rhythmically against a stone
- A simple recirculating basin fountain for the most contained, lowest-maintenance option
Building a simple stone basin:
Getting started at a manageable scale:
- A carved or naturally hollowed stone basin, filled and recirculated by a small pump
- Positioned near a seating area where the water’s sound and reflection can genuinely be appreciated
- Surrounded by simple plantings or moss, integrating the feature into the broader garden rather than isolating it
Cost:
- Simple stone basin with small pump: $150-400
- Shishi-odoshi bamboo deer scarer: $60-150
- Full koi pond: $800-3,500+
My stone water basin: A simple carved stone basin, positioned near the gravel garden with a small recirculating pump, brought the sound of gently moving water into a garden that had previously addressed every traditional element except this essential one.
Water Feature Tips
Choose a scale genuinely matched to the yard’s overall size and the rest of the garden’s proportions:
Proportion consideration:
- An oversized water feature in a small garden can dominate rather than complement the overall composition
- A simple stone basin often suits a smaller Japanese-inspired yard better than an ambitious koi pond
- This scale consideration should be weighed alongside the rest of the garden’s existing elements
- Choose the water feature type specifically appropriate to the garden’s actual size and existing level of development
Position the water feature where its sound can genuinely be appreciated from key seating areas:
Sensory placement priority:
- A water feature tucked in a rarely visited corner delivers less of its intended sensory benefit
- Position near a primary seating area, path, or window where the sound and reflection are regularly experienced
- This placement consideration matters as much as the feature’s style or material choice
- Walk through the garden’s typical use patterns before finalizing the water feature’s exact location
7. The Stepping Stone Path
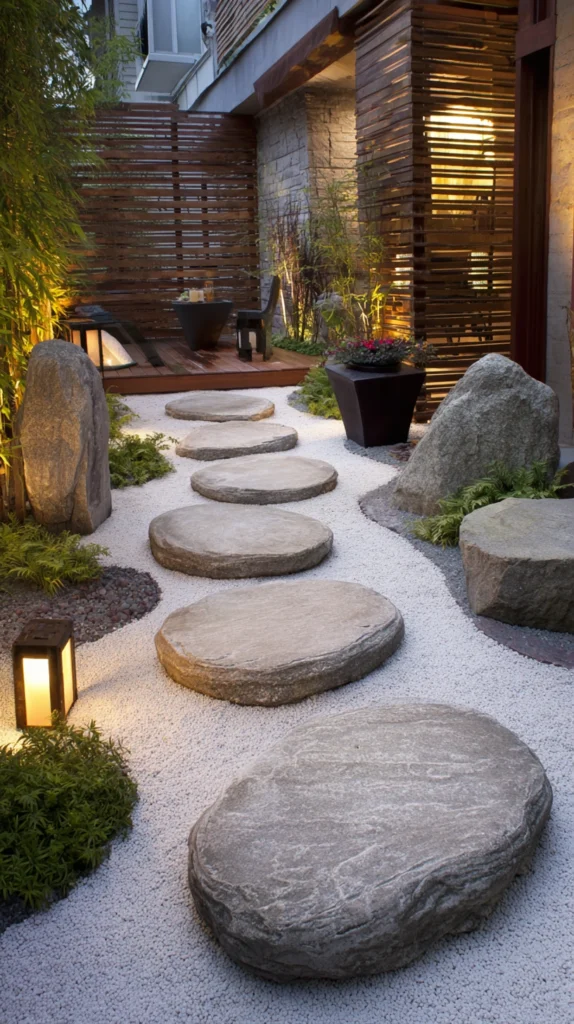
Individual flat stones, set with deliberate spacing through gravel or moss, guiding movement through the garden in a slow, considered manner.
My rushed, direct garden path:
What felt at odds with the garden’s intended pace:
- A straight, continuous paved path allowing quick, unconsidered movement through the space
- A missed opportunity to use the path itself as a tool for slowing visitors down
- Traditional Japanese garden design specifically uses path construction to control the pace of movement, something the existing path ignored entirely
The stepping stone solution:
Why individual stones change how a garden is actually experienced:
- The spacing between stones naturally slows walking pace, requiring genuine attention to each step
- This deliberate slowing is a core technique in traditional Japanese garden design, encouraging mindful movement
- Individual stones set within gravel or moss create a more natural, less formal path than continuous paving
- Forces visitors to look down periodically, then up again, creating a rhythm of discovery through the garden
Laying the stepping stone path:
Construction approach:
- Flat, naturally shaped stones, varied slightly in size for visual interest
- Set at a stride distance requiring a slight, deliberate pause between steps, rather than a comfortable continuous stride
- Embedded partially into the ground, as though naturally settled rather than placed on top
- Surrounded by gravel, moss, or low groundcover rather than bare soil
Path routing considerations:
Designing the journey:
- A gently curving rather than straight route, obscuring the full path from any single viewpoint
- Varying the path’s width slightly at different points, narrowing near features meant to be approached slowly
- Connecting key garden features, such as the water basin, lantern, and seating area, in a considered sequence
Cost:
- Natural flat stones (per stone): $8-25
- A path of 15-20 stones: $120-500
My stepping stone path: Replacing the previous straight paved walkway with individually set stones through a bed of gravel completely changed how visitors move through the garden, now unconsciously slowing down and paying attention to each step rather than walking through without noticing anything.
Stepping Stone Tips
Space stones to require deliberate attention, not comfortable, unconscious walking:
Pacing technique:
- Stones spaced at a completely natural, comfortable stride allow mindless walking straight through
- A slightly irregular or challenging spacing forces conscious attention to each step
- This deliberate friction is the entire point of the technique, not a design flaw to correct
- Test the spacing by walking the path yourself before finalizing the stone placement
Choose stones with a naturally flat, stable surface for genuine safety:
Practical safety consideration:
- Uneven or wobbly stones present a genuine tripping hazard, undermining the path’s actual function
- Select stones with adequately flat surfaces and set them firmly and securely into the ground
- This safety consideration should never be compromised for aesthetic preference alone
- Test each stone’s stability by stepping on it firmly before considering the installation complete
8. The Enclosed Tea Garden Corner
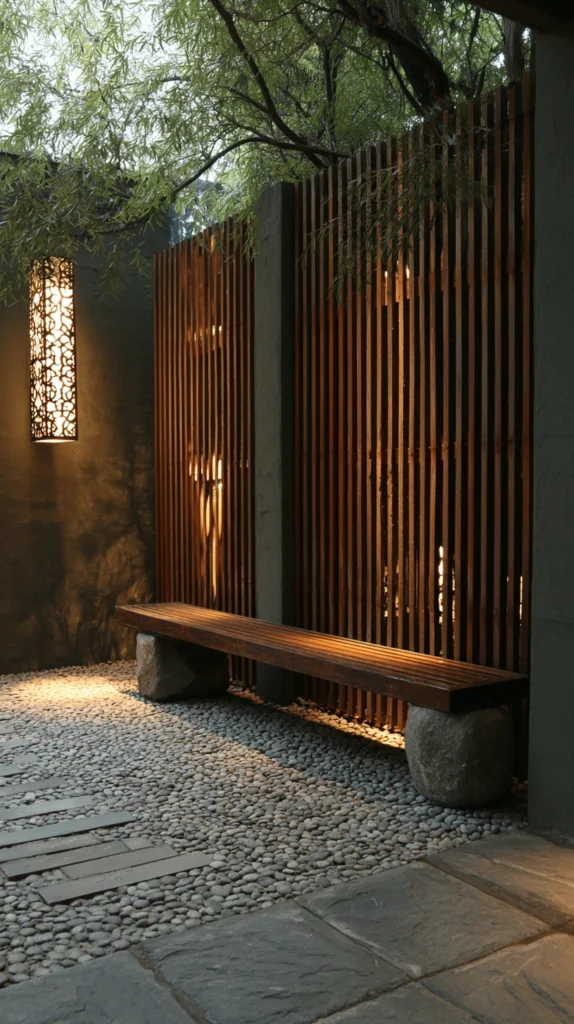
A small, deliberately separated section of the yard, designed specifically for quiet tea drinking or contemplation, echoing the traditional roji garden concept.
My missing dedicated contemplative space:
What was absent:
- A garden with various individual elements, but no single space specifically designed around the ritual of quiet tea and contemplation
- Missing the traditional roji concept, a garden path specifically leading to and preparing visitors for a tea ceremony space
- A missed opportunity to create one genuinely purposeful destination within the broader garden
The tea garden corner solution:
Why a dedicated contemplative corner matters within this tradition:
- The roji, or tea garden path, traditionally serves to mentally transition visitors from the outside world into a contemplative state
- A defined, somewhat enclosed corner recreates this sense of purposeful arrival and quiet purpose
- Provides one specific destination within the broader garden dedicated entirely to stillness
- Distinct from more general seating areas, this corner is designed around a specific, quiet ritual
Building the tea garden corner:
Design elements:
- A simple, low bench or flat stone seat, sized for one or two people
- Positioned with some sense of enclosure, whether through planting, a low fence, or the garden’s natural layout
- A stepping stone path specifically leading to this corner, reinforcing the sense of a deliberate journey
- Minimal, restrained planting immediately around the seating, avoiding any visual busyness
Completing the space:
Optional traditional elements:
- A tsukubai water basin nearby, echoing the traditional hand-washing ritual before tea
- A simple stone lantern positioned to provide gentle evening illumination
- A small, low table if intending genuine tea service in this space
Cost:
- Simple stone or wood bench seat: $80-250
- Supporting stepping stone path and minimal planting: $100-300
My tea garden corner: A simple stone bench, tucked into a partially enclosed corner and reached by its own small stepping stone path, has become the specific spot for morning tea, distinct in feeling from every other part of the yard.
Tea Garden Corner Tips
Create genuine physical or visual separation from the rest of the yard’s more active areas:
Enclosure consideration:
- A tea garden corner positioned directly beside high-traffic or active zones undermines its intended contemplative purpose
- Even modest separation, through planting, a low screen, or simply distance, reinforces the sense of a distinct destination
- This separation matters more here than for almost any other element in the garden
- Consider the yard’s overall layout and identify the most naturally separated or quiet available corner
Furnish minimally, resisting the urge to add decorative elements beyond the essential:
Restraint principle:
- Additional decor or seating beyond what is genuinely needed can undermine the corner’s intended simplicity
- A single seat, perhaps one supporting element like a lantern or basin, is typically sufficient
- This restraint reinforces the same minimalist philosophy central to the entire garden style
- When in doubt about adding something to this specific corner, the traditional answer is generally to leave it out
9. The Layered Evergreen Structure
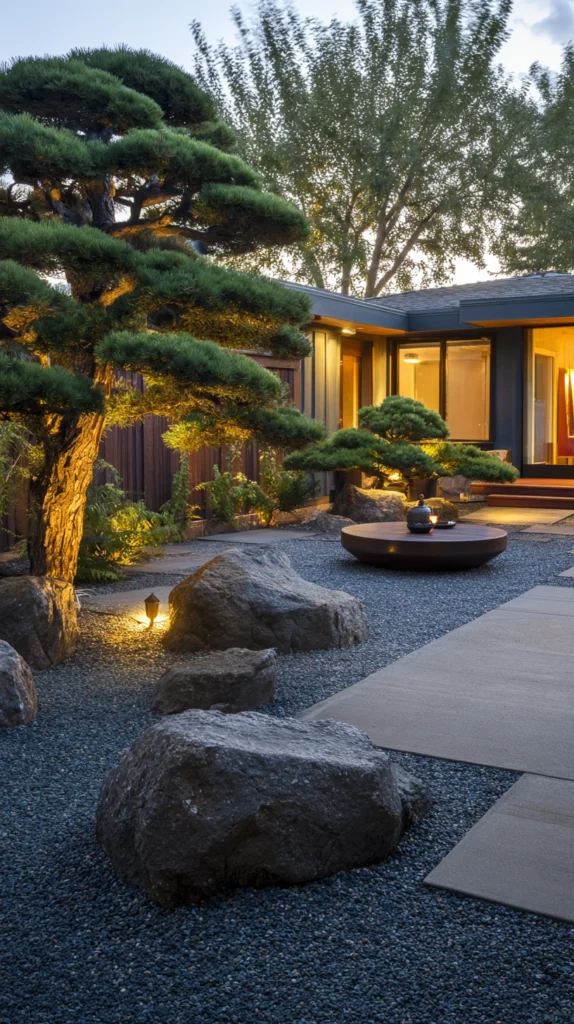
A backbone of pruned evergreen shrubs, providing year-round structure and form independent of seasonal bloom or foliage change.
My garden that disappeared in winter:
What was limiting the garden’s year-round presence:
- A planting scheme relying heavily on seasonal bloom and deciduous foliage
- A garden that looked considered in summer but bare and unstructured through winter months
- Missing the traditional emphasis on evergreen structure providing consistent form throughout the entire year
The evergreen structure solution:
Why evergreen backbone planting matters so much in this tradition:
- Traditional Japanese gardens prioritize structure and form over seasonal flower display
- Evergreen shrubs, carefully pruned into rounded or cloud-like forms, provide the garden’s consistent visual backbone
- This structure remains present and considered through every season, not just during peak bloom
- Represents a fundamentally different design priority than a Western garden built primarily around seasonal color
Choosing the right evergreen plants:
Traditional species and forms:
- Boxwood, pruned into rounded, cloud-pruned (niwaki-style) forms
- Japanese black pine, traditionally shaped through careful, ongoing pruning into sculptural forms
- Azalea, both for its evergreen structure and its traditional spring bloom
- Dwarf conifers, offering varied texture and form without requiring extensive pruning skill
Pruning for structure:
Building the traditional cloud-pruned look:
- Niwaki, the traditional Japanese pruning style, shapes shrubs into distinct rounded or layered “cloud” forms
- Requires regular, ongoing maintenance pruning to maintain the developed shape over time
- Can be approached gradually, starting with simple rounded forms and developing more elaborate shaping as skill and confidence grow
Cost:
- Evergreen shrubs suited to this pruning style: $30-150 each depending on size and maturity
- Basic pruning tools: $30-80
My layered evergreen structure: Adding three cloud-pruned boxwood shrubs as the garden’s structural backbone meant the space finally looked genuinely considered in the depths of winter, not just during the brief summer bloom window the previous planting scheme depended on entirely.
Evergreen Structure Tips
Start with simple rounded pruning forms before attempting more elaborate cloud shapes:
Skill progression:
- Advanced niwaki pruning takes years of practice to genuinely master
- Beginning with simple, rounded shapes builds foundational skill and confidence
- More elaborate, layered cloud forms can develop gradually as both the plant matures and pruning skill improves
- This patient, gradual approach prevents the discouragement of attempting overly ambitious shaping too early
Commit to a consistent, regular pruning schedule to maintain developed forms:
Ongoing maintenance requirement:
- Shaped evergreen structure requires regular maintenance pruning to hold its developed form
- Skipping pruning seasons allows the plant to revert toward its natural, unshaped growth habit
- This ongoing commitment is essential, not optional, for the structural backbone to remain effective over time
- Research the specific pruning calendar appropriate for each chosen evergreen variety
10. The Borrowed Scenery Technique
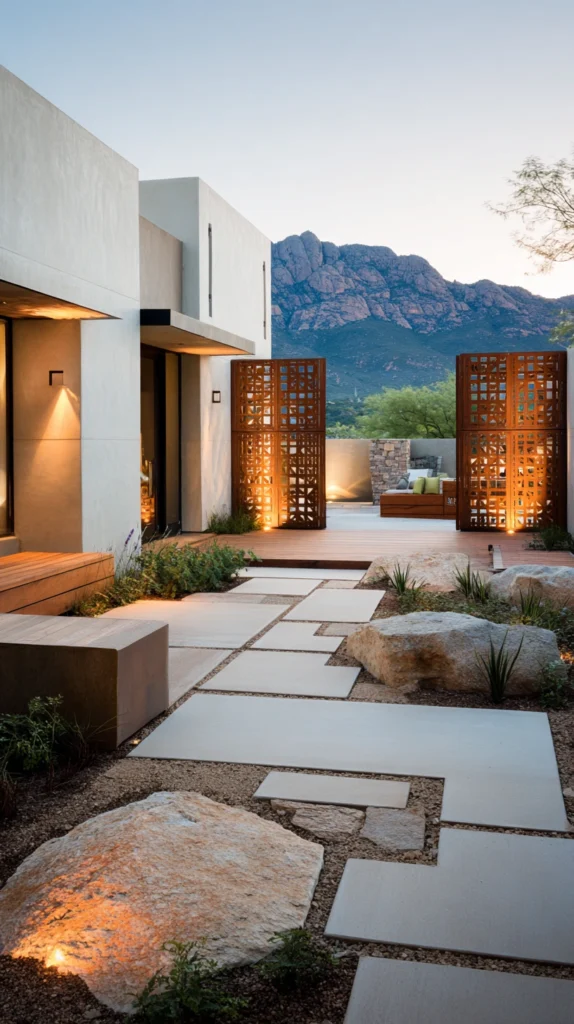
Deliberately framing views of trees, structures, or landscape beyond the garden’s actual boundary, incorporating them visually into the garden’s design.
My garden ignoring its surroundings:
What was being overlooked:
- Attractive trees or landscape features visible just beyond the property line, entirely unaddressed by the garden’s design
- A missed opportunity to use these external elements as part of the garden’s actual visual composition
- The traditional shakkei, or “borrowed scenery,” technique going completely unused
The borrowed scenery solution:
Why incorporating the surrounding landscape matters in this tradition:
- Shakkei is a foundational technique in classical Japanese garden design, deliberately incorporating distant scenery into the garden’s composition
- Makes a garden feel connected to, and often larger than, its actual physical boundary
- Uses framing and strategic sightlines to draw attention to genuinely attractive external elements
- One of the most sophisticated techniques in this tradition, requiring careful observation rather than significant expense
Applying the technique:
Identifying and using borrowed views:
- Walk the garden at different times of day, noting any attractive trees, rooflines, or landscape visible beyond the boundary
- Position seating or a garden opening specifically to frame this external view
- Use foreground planting to partially screen less attractive elements while leaving the desired view open
- Avoid any element within the garden itself that would compete with or obscure the borrowed scenery
Framing techniques:
Making the connection deliberate:
- A gap deliberately left in a hedge or screen, specifically positioned to reveal the external feature
- Seating oriented to face the borrowed view directly
- A garden opening or gate positioned to align with the distant feature
Cost:
- No direct cost; achieved through observation and strategic positioning of existing elements
My borrowed scenery: Noticing that a neighbor’s mature maple tree was visible just above the fence line from one specific spot in the garden, I positioned the tea garden bench to face that exact view, and the tree now reads as though it belongs to the garden itself.
Borrowed Scenery Tips
Walk the garden at different times of day and in different seasons to identify potential borrowed views:
Observation process:
- Attractive external elements may only be visible or appealing at certain times of day or times of year
- A thorough, patient observation process across varying conditions reveals opportunities easily missed in a single walkthrough
- This careful observation is the foundation of successfully applying this technique
- Take notes or photos of potential borrowed scenery opportunities as they are identified
Use foreground elements specifically to frame, not obscure, the desired distant view:
Framing precision:
- Randomly placed foreground planting can accidentally block the very view meant to be incorporated
- Position any framing elements deliberately, testing sightlines from the intended viewing point before finalizing placement
- This precision is what separates a genuinely successful borrowed scenery composition from an accidental, unconsidered one
- Adjust foreground plant height and placement gradually as they grow, maintaining the intended framed view over time
11. The Gate or Torii-Inspired Threshold
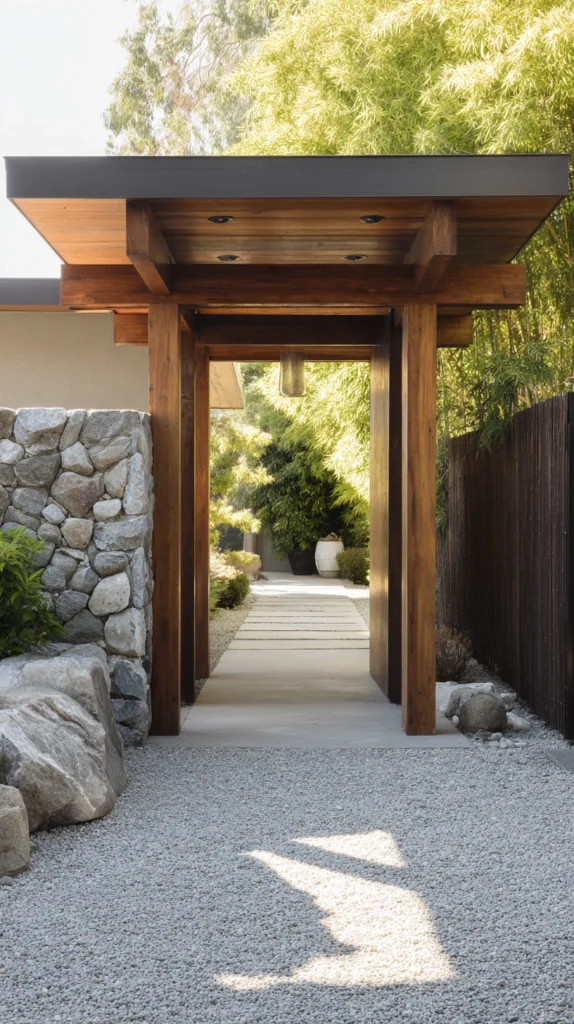
A simple gate or freestanding threshold structure marking the transition into a specific garden area, echoing the traditional torii gate concept.
My garden with no sense of arrival:
What was missing:
- A garden entered without any sense of transition or deliberate threshold
- Every area of the yard blending into the next with no marked distinction
- A missed opportunity for the psychological shift a defined threshold traditionally provides
The threshold gate solution:
Why a marked threshold matters within this tradition:
- Traditional torii gates mark the transition from ordinary space into sacred or contemplative space
- Applied to a garden context, a simple gate or threshold structure signals a deliberate shift in mindset when passing through
- Creates psychological separation between the garden’s more contemplative areas and the rest of the yard
- A relatively simple structural addition delivering significant symbolic and experiential value
Building the threshold:
Design and construction options:
- A simple wood torii-inspired gate, using two upright posts and a crossbeam
- A more minimal freestanding frame, without the traditional torii’s specific curved elements
- Positioned at the entrance to the tea garden corner, gravel garden, or another contemplative zone
- Painted in traditional vermillion for the most recognizable torii aesthetic, or left natural wood for a more understated approach
Placement considerations:
Where to position the threshold:
- At the entrance to the garden’s most contemplative or separated zone
- Aligned with the stepping stone path, reinforcing the sense of a deliberate journey
- Sized proportionally to the specific garden area it marks, avoiding an oversized structure in a small space
Cost:
- Simple wood threshold gate: $100-350
My threshold gate: A simple natural wood gate, positioned at the entrance to the tea garden corner, creates a genuine sense of arrival every time I walk through it, marking that specific space as distinct from the rest of the yard in a way nothing else in the garden achieves.
Threshold Gate Tips
Scale the gate proportionally to the specific area it marks:
Proportion consideration:
- An oversized gate in a small garden can dominate rather than gently mark a transition
- Measure the intended threshold location and choose gate dimensions genuinely proportional to that specific space
- A modest, appropriately scaled threshold typically integrates more successfully than an overly grand one
- This proportion consideration matters as much as the gate’s material or color choice
Consider natural wood over painted vermillion for a more subtle, integrated look:
Style and authenticity balance:
- Traditional vermillion torii gates carry strong religious and cultural associations specific to Shinto shrines
- A natural wood threshold achieves the same structural and symbolic transition function with a more understated, garden-appropriate aesthetic
- This choice avoids potentially appropriating specifically religious imagery while still honoring the underlying design concept
- Many successful Japanese-inspired residential gardens favor this more subtle approach specifically for this reason
12. The Asymmetrical Stone Arrangement
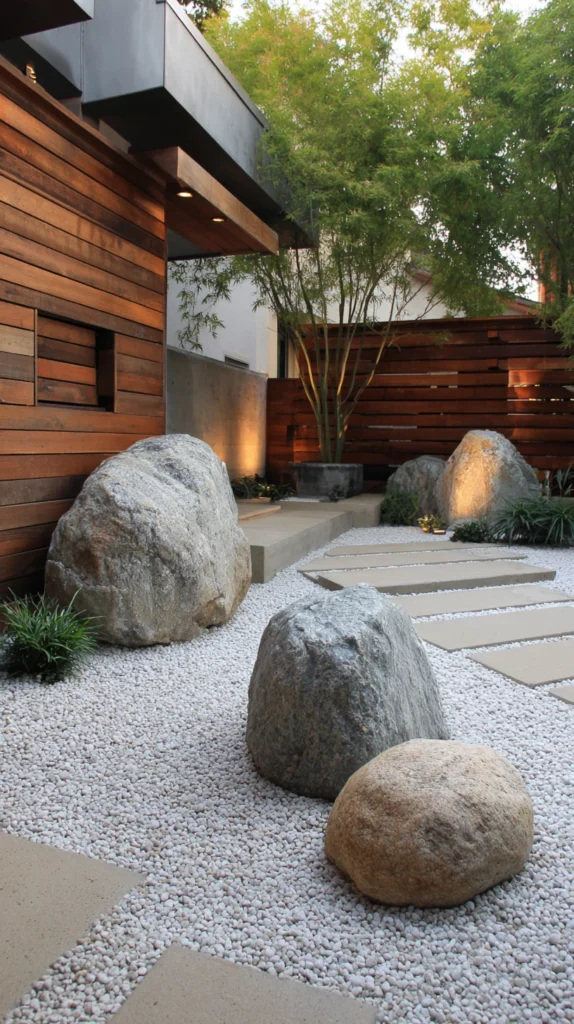
A deliberate, carefully considered grouping of stones, placed according to traditional principles of asymmetrical balance rather than formal symmetry.
My instinct toward symmetrical placement:
What felt at odds with the tradition:
- An instinct to place any garden stones or objects in matched, symmetrical pairs
- Missing the deliberate asymmetry that is actually fundamental to traditional Japanese garden composition
- A garden that, despite other traditional elements, still carried a fundamentally Western sense of formal balance
The asymmetrical arrangement solution:
Why asymmetry, not symmetry, defines authentic balance in this tradition:
- Traditional Japanese garden design deliberately avoids formal, mirror-image symmetry
- Balance is instead achieved through asymmetrical relationships between elements of varying size, form, and placement
- This principle extends beyond stone placement to nearly every aspect of the garden’s composition
- Understanding and applying this specific principle is often what most distinguishes an authentic-feeling garden from a merely decorated one
Applying asymmetrical principles:
Building the arrangement:
- Groups of stones in odd numbers, typically three, five, or seven
- Significant variation in size between stones within the same grouping, rather than uniform pieces
- Positioned off-center within their setting, never placed in the exact middle of a gravel bed or planting area
- One stone typically serving as the visual anchor, larger or more prominent than its companions
Extending the principle throughout the garden:
Applying asymmetry more broadly:
- Avoid planting matched pairs of the same plant on either side of a path or feature
- Vary the height and placement of garden elements rather than creating mirror-image arrangements
- Trust that visual weight can be balanced through variation and relationship, not just literal matching
Cost:
- Stones, sourced or purchased: $0-150 depending on source and quantity
My asymmetrical stone grouping: Rearranging what had been a symmetrical pair of matching stones flanking the path into a genuinely asymmetrical grouping of three varied stones, one large and two smaller, off to one side, finally gave that corner the authentic sense of considered balance the rest of the garden had been working toward.
Asymmetrical Stone Tips
Choose stones with genuinely varied size, shape, and character rather than a matched set:
Material selection principle:
- Purchasing a uniform set of matching stones works against the asymmetrical principle from the outset
- Sourcing stones individually, embracing natural variation in size and form, better supports authentic asymmetrical composition
- This variation is what allows the eventual arrangement to feel genuinely balanced rather than simply mismatched
- Take time sourcing stones specifically for their individual character, rather than convenience of a matched set
Step back and assess the arrangement’s balance from multiple viewing angles:
Composition evaluation:
- Asymmetrical balance is inherently more subjective and harder to judge than simple symmetry
- View the stone arrangement from several different points in the garden, not just one primary angle
- Adjust placement gradually, assessing how the grouping’s visual weight feels balanced from each vantage point
- This iterative process is a genuine part of traditional garden composition, not a sign of initial design failure
13. The Minimal Seating with a Single View
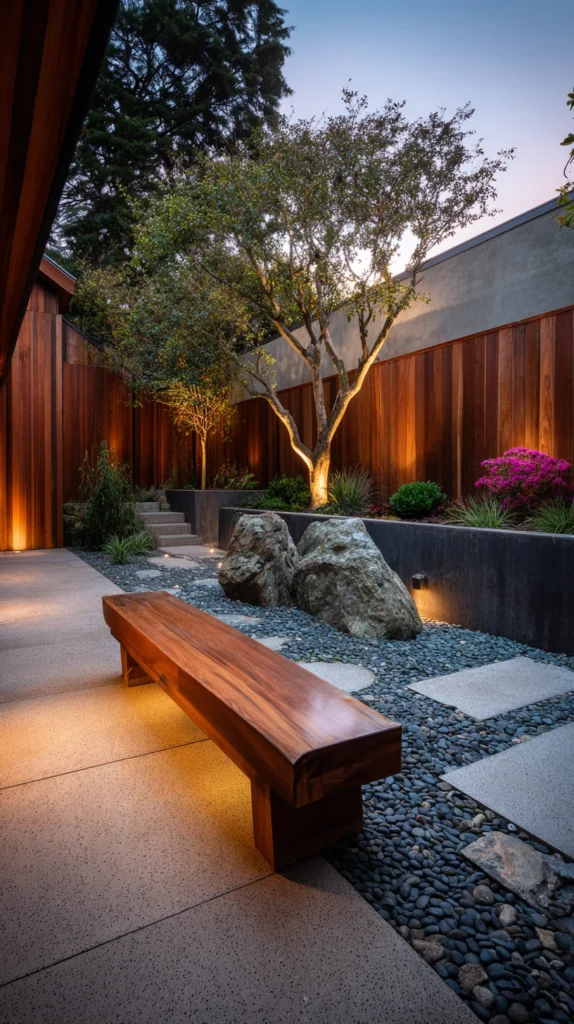
One simple, well-placed bench or seat, positioned to face a single considered view rather than a general seating arrangement.
My scattered, multi-directional seating:
What was diluting the garden’s focus:
- Multiple furniture pieces arranged for general social use, each facing different directions
- No single seat specifically positioned around one carefully considered view
- Missing the traditional emphasis on contemplative, singular viewing over general social gathering
The minimal seating solution:
Why one seat facing one view outperforms scattered social seating in this context:
- Traditional Japanese garden design frequently centers a single viewing point, deliberately positioned for contemplation
- This singular focus reinforces the garden’s overall purpose: quiet observation rather than active social gathering
- A single well-placed seat, facing a specifically composed view, delivers a different and complementary experience to more social areas elsewhere in the yard
- Simplicity in seating mirrors the same restraint principle guiding every other element in this tradition
Choosing and placing the seat:
Getting the placement right:
- A simple wood bench, low stone seat, or single chair, without excessive cushioning or ornamentation
- Positioned to face the garden’s most considered composition, whether the stone arrangement, the specimen tree, or the water feature
- Oriented for the golden hours, morning or evening light, when the garden’s textures and shadows are most striking
What makes the view worth sitting for:
Composing the seat’s specific outlook:
- Ensure the framed view includes at least one element from each major category: stone, water, and planting, if possible
- Avoid any visual clutter within the specific sightline from the seat
- Consider how the view changes across seasons, and confirm it remains worth sitting for even outside peak bloom
Cost:
- Simple wood or stone bench: $80-250
My single-view bench: Positioning one simple stone bench to face directly toward the water basin and specimen maple, with nothing else within that specific sightline, created the exact quiet, singular focus the rest of the garden’s more active seating never provided.
Minimal Seating Tips
Test the view from the seated position before finalizing placement:
Perspective verification:
- The intended view can look different from a seated height than it does while standing and observing
- Sit in the intended location, or a close approximation, before permanently placing the seat
- This verification ensures the final composition genuinely works from the actual viewing position
- Adjust the seat’s exact position and angle based on this direct testing rather than assumption alone
Resist adding a second seat or expanding this specific spot into a social gathering area:
Purpose protection:
- A single contemplative seat can gradually accumulate additional furniture over time, diluting its original purpose
- Maintaining this spot specifically as a single-seat, single-view space preserves its distinct function within the broader garden
- Reserve more social, multi-person seating for a separate area of the yard entirely
- This restraint protects what makes this particular spot valuable and distinct from the garden’s other areas
14. The Seasonal Awareness Planting Plan
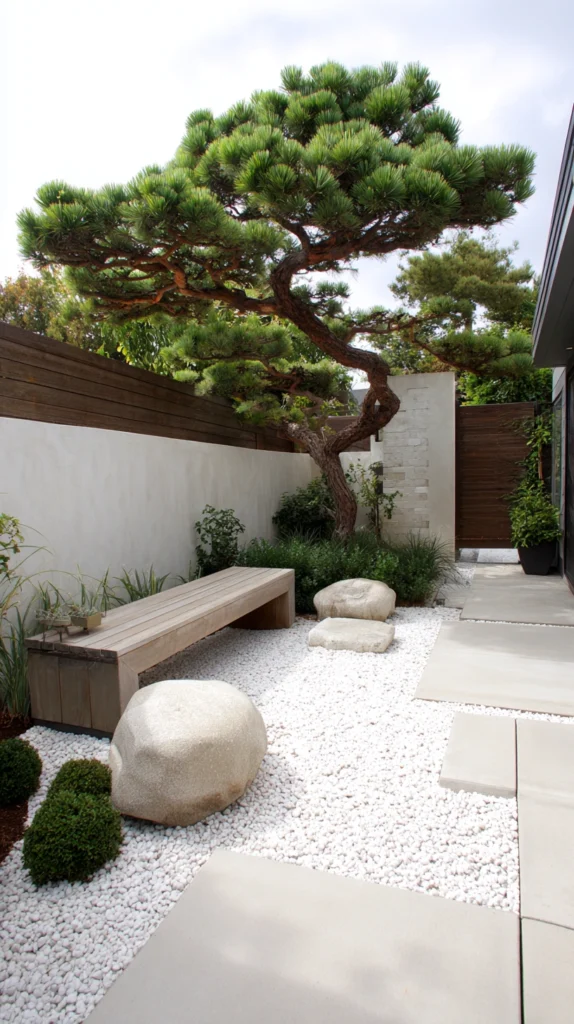
A planting scheme deliberately designed to mark and celebrate the changing seasons, rather than aiming for constant, uniform bloom.
My garden aiming for nonstop color:
What was working against the tradition:
- A planting plan focused on maximizing continuous bloom throughout the growing season
- Missing the traditional Japanese garden emphasis on marking and honoring each season’s distinct character
- A garden that, while colorful, lacked the specific seasonal awareness central to this design tradition
The seasonal awareness solution:
Why marking seasons matters more than constant bloom in this tradition:
- Traditional Japanese garden design deliberately celebrates each season’s distinct character rather than pursuing uniform year-round color
- Specific plants are chosen and positioned to be genuinely appreciated at their particular seasonal peak
- This approach creates anticipation and a sense of the garden’s ongoing relationship with time, rather than static, unchanging color
- A fundamentally different planting philosophy than the continuous-bloom approach common in many Western garden traditions
Building a seasonal awareness plan:
Assigning plants to seasonal moments:
- Spring: flowering cherry or plum for the traditional hanami, or blossom-viewing, moment
- Summer: lush green foliage and the specimen maple’s full canopy, emphasizing cool shade and texture
- Fall: the specimen maple’s dramatic color change as the garden’s clear seasonal highlight
- Winter: evergreen structure and the bare, sculptural branches of deciduous specimens, appreciated for their form alone
Designing for seasonal transition:
Creating genuine anticipation:
- Position seasonal specimens where their peak moment will be genuinely visible and celebrated
- Accept and embrace quieter periods between seasonal highlights, rather than trying to fill every month with equal color
- Consider adding a small ritual, like a specific viewing spot for the maple’s fall color, to mark these seasonal moments intentionally
Cost:
- Varies significantly based on specific plant choices; often achievable within a standard planting budget through selection rather than addition
My seasonal awareness garden: Deliberately positioning a flowering plum for a dramatic early spring moment, then allowing quieter summer green before the maple’s fall color takes over as the clear autumn highlight, gave the garden a sense of unfolding relationship with the calendar year that a more uniformly colorful planting plan never provided.
Seasonal Awareness Tips
Accept and embrace quieter periods rather than trying to fill every season with equal color:
Philosophical shift:
- The instinct toward constant bloom can work against this tradition’s actual intended experience
- A garden with genuine quiet periods between seasonal highlights creates more meaningful anticipation for each highlight’s arrival
- This acceptance of seasonal quiet is itself a component of the restraint central to the entire design philosophy
- Resist the urge to add filler plants purely to eliminate any bloomless period
Position each seasonal specimen where its peak moment will be genuinely visible from key vantage points:
Strategic placement for celebration:
- A specimen plant’s seasonal peak delivers less value if it occurs somewhere rarely observed
- Position spring, summer, and fall highlights specifically where they will be seen from primary seating or viewing areas
- This placement consideration ensures each seasonal moment is genuinely experienced, not merely present somewhere in the yard
- Walk through the garden at each season’s peak to confirm the specimen’s visibility from where it matters most
Choosing Your Japanese Garden Elements
By Priority
Foundational elements first:
- Raked gravel Zen garden (idea 1)
- Single specimen Japanese maple (idea 2)
- Asymmetrical stone arrangement (idea 12)
Structure and boundary:
- Bamboo fence and screen (idea 5)
- Layered evergreen structure (idea 9)
- Gate or torii-inspired threshold (idea 11)
Sensory and contemplative:
- Koi pond or simple water basin (idea 6)
- Moss garden groundcover (idea 3)
- Minimal seating with a single view (idea 13)
By Effort Level
Lowest effort:
- Borrowed scenery technique (idea 10)
- Asymmetrical stone arrangement (idea 12)
- Seasonal awareness planting plan (idea 14)
Medium effort:
- Single specimen Japanese maple (idea 2)
- Stone lantern focal point (idea 4)
- Stepping stone path (idea 7)
- Minimal seating with a single view (idea 13)
Higher commitment:
- Raked gravel Zen garden (idea 1)
- Moss garden groundcover (idea 3)
- Bamboo fence and screen (idea 5)
- Koi pond or simple water basin (idea 6)
- Enclosed tea garden corner (idea 8)
- Layered evergreen structure (idea 9)
By Budget
Under $150:
- Asymmetrical stone arrangement (idea 12)
- Borrowed scenery technique (idea 10)
- Seasonal awareness planting plan (idea 14)
- Shishi-odoshi bamboo deer scarer (idea 6)
$150-400:
- Raked gravel Zen garden (idea 1)
- Stepping stone path (idea 7)
- Stone lantern focal point, cast concrete (idea 4)
- Gate or torii-inspired threshold (idea 11)
- Minimal seating with a single view (idea 13)
$400-800:
- Single specimen Japanese maple (idea 2)
- Bamboo fence and screen, partial (idea 5)
- Enclosed tea garden corner (idea 8)
- Koi pond or simple water basin (idea 6)
$800+:
- Full koi pond installation (idea 6)
- Genuine carved stone lantern (idea 4)
Maintenance Through the Seasons
Spring:
- Prune evergreen structure and specimen trees as new growth begins
- Refresh raked gravel patterns after winter weather disturbance
Summer:
- Water moss gardens and newly established plantings consistently during peak heat
- Maintain regular raking as part of an ongoing meditative routine
Fall:
- Celebrate and maintain visibility of the specimen maple’s peak color moment
- Clear fallen leaves from moss areas and water features promptly
Winter:
- Appreciate the garden’s bare structural form and evergreen backbone
- Plan the following year’s seasonal planting adjustments during this quieter period
My Complete Japanese Garden Journey
What I built across three years:
Year one ($680):
- Raked gravel Zen garden and asymmetrical stone arrangement
- Single specimen Japanese maple
- Learned that restraint and careful placement mattered more than any individual object’s cost
Year two ($540):
- Stepping stone path and simple stone water basin
- Moss garden in the shadiest corner
- Learned that water and moss brought a sensory dimension no purely visual element had provided
Year three ($430):
- Enclosed tea garden corner with minimal seating
- Threshold gate marking its entrance
- Learned that a single, deliberately separated contemplative space delivered more value than scattered improvements throughout the yard
Total investment: $1,650 across three years Most important lesson: This tradition rewards subtraction and careful placement far more than addition and abundance Single highest-impact change across all three years: The raked gravel garden and stone arrangement in year one, for establishing the restraint principle that guided every subsequent decision
Getting Started This Weekend
Start by removing, then add with restraint.
This weekend:
Step 1 — Walk the yard and identify what feels visually busy or competing:
- Note where too many elements crowd a single view or area
- This assessment often reveals more opportunity than any new addition would
Step 2 — Choose one small area to simplify first:
- A single corner for a small raked gravel space, or one bed to reduce to a single specimen plant
- Starting small builds understanding of the underlying principles before a larger commitment
Step 3 — Practice asymmetrical placement with whatever stones or objects are already available:
- Rearrange any existing garden stones or pots into an intentionally asymmetrical, odd-numbered grouping
- This costs nothing and directly applies one of the tradition’s most fundamental principles
Step 4 — Identify one potential borrowed scenery view:
- Walk the yard at different times of day, noting any attractive external elements visible beyond the boundary
- This observation costs nothing and may reveal an opportunity to incorporate into future seating placement
My recommendation:
Start with a small raked gravel area and one specimen plant:
- Both are achievable in a single weekend and directly embody the tradition’s core restraint principle
- Both provide genuine hands-on understanding of asymmetry and simplicity before larger investments
- This foundation naturally informs which of the remaining ideas make sense to add next
Sit near the new gravel garden for a few quiet minutes before deciding what, if anything, comes next.
Now go build the backyard retreat that finally offers genuine stillness, not just more to look at.
Quick Summary
The 14 Japanese backyard ideas:
Foundational stillness:
- Raked gravel Zen garden (idea 1): the most recognizable meditative element
- Asymmetrical stone arrangement (idea 12): the core principle of authentic balance
- Minimal seating with a single view (idea 13): contemplation over social gathering
Structure and planting:
- Single specimen Japanese maple (idea 2): one focal tree over many competing plants
- Moss garden groundcover (idea 3): soft texture where grass struggles
- Layered evergreen structure (idea 9): year-round form and backbone
- Seasonal awareness planting plan (idea 14): celebrating each season distinctly
Architecture and boundary:
- Bamboo fence and screen (idea 5): traditional, natural boundary material
- Gate or torii-inspired threshold (idea 11): a marked transition into stillness
- Stone lantern focal point (idea 4): quiet sculptural presence
Water and sensory:
- Koi pond or simple water basin (idea 6): the tradition’s essential water element
- Stepping stone path (idea 7): pacing and mindful movement through the garden
Contemplative destinations:
- Enclosed tea garden corner (idea 8): a dedicated space for quiet ritual
- Borrowed scenery technique (idea 10): incorporating the world beyond the boundary
The universal Japanese garden rules:
Always:
- Choose asymmetrical arrangements over formal, matched symmetry
- Prioritize restraint, removing elements that do not genuinely earn their place
- Position stones and specimens with deliberate, considered placement rather than convenience
- Design for seasonal change and quiet periods, not constant, uniform color
Never:
- Add literal decorative objects without understanding the underlying design principles
- Arrange plants or stones in matched, symmetrical pairs
- Fill every available space, eliminating the negative space central to this tradition
- Pursue continuous bloom at the expense of genuine seasonal awareness and quiet transition periods
Common mistakes:
- Treating this style as a decoration theme rather than a design philosophy built on restraint
- Overplanting and overcrowding a space meant to prioritize negative space
- Defaulting to symmetrical placement out of habit rather than embracing asymmetrical balance
- Ignoring the potential of borrowed scenery beyond the garden’s actual boundary
- Skipping the ongoing, meditative maintenance, like raking and pruning, that is part of the tradition itself
Remember: this style is built on subtraction as much as addition, asymmetry and odd-numbered groupings define authentic balance in this tradition, a single well-placed specimen consistently outperforms many competing plants, ongoing maintenance like raking and pruning is part of the practice itself, not separate from it, and the best Japanese-inspired backyard is the one that finally gives the mind somewhere to rest.