13 Small Backyard Garden Ideas That Make Tiny Spaces Feel Bigger
My backyard was barely twelve feet deep. A narrow strip of grass between the patio and the fence, too small for most of the garden ideas I kept saving from other people’s much larger yards.
I spent an entire season trying to force a full-scale garden into that space, and every attempt just made the yard feel more cramped. More plants, more furniture, more stuff, all of it working against the one thing the space actually needed.
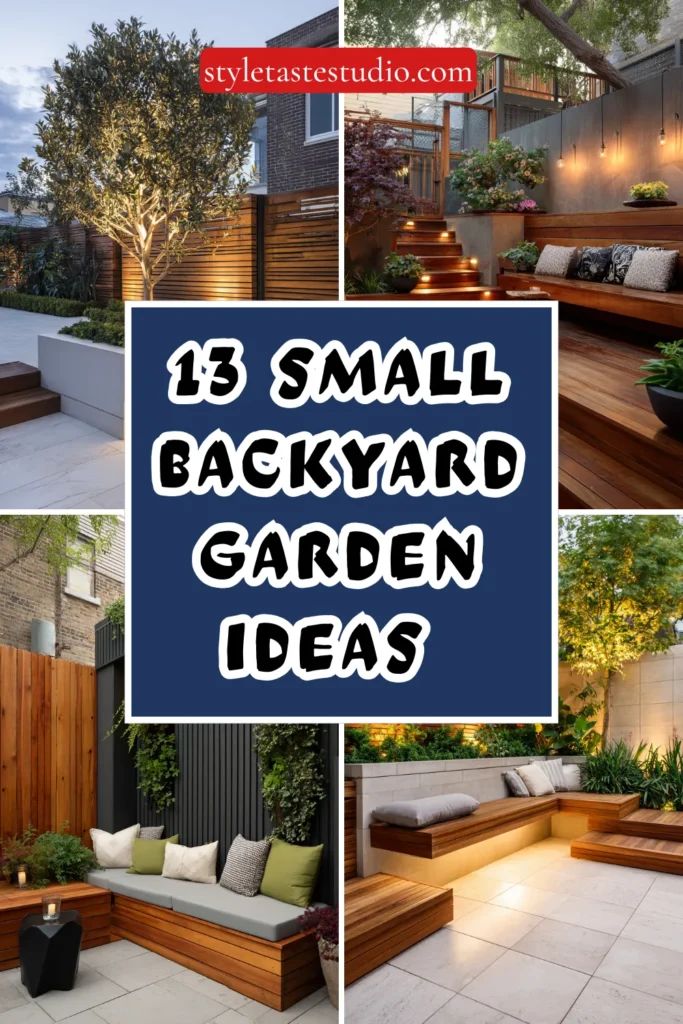
Then I stopped trying to fit more in and started thinking about how a small space could trick the eye into reading as larger than it actually was. Vertical growing instead of horizontal. One statement plant instead of a dozen small ones. A mirror positioned to reflect the greenery back at itself.
The yard did not get any bigger. It just stopped feeling like a space apologizing for its size.
Here are 13 ideas that make a small backyard garden feel genuinely expansive, using the same visual tricks professional designers rely on for tight urban lots.
Why Most Small Gardens Feel Even Smaller Than They Are
The common mistakes:
The scaled-down full garden approach:
- Attempting a miniature version of a large yard’s garden plan
- The same variety of features, just smaller versions of each
- A yard that ends up feeling crowded rather than intentionally designed
- Missing the reality that small spaces need a fundamentally different strategy, not a shrunken one
The single flat plane of planting:
- Every plant at roughly the same height, spread across the limited ground space
- No vertical layering or height variation anywhere in the design
- A garden that reads as flat and two-dimensional regardless of plant variety
- Missing the depth trick that makes small spaces feel larger
The visible boundary everywhere:
- Fences, walls, and property lines fully visible and unobscured from every angle
- No attempt to soften or disguise where the space actually ends
- A yard that constantly reminds the eye exactly how small it is
- Missing the strategic screening that makes boundaries disappear
What a successful small garden does:
Uses the space’s limits as design opportunities:
- Vertical growing multiplies planting space without expanding the footprint
- Height variation creates genuine depth within a shallow area
- Strategic screening obscures the actual boundary, making the space feel open-ended
- A few well-chosen elements outperform many crowded ones
My revelation: A small garden does not need less of everything. It needs a completely different strategy, one built around vertical space, obscured boundaries, and restraint, rather than simply scaling everything down.
1. The Vertical Growing Wall
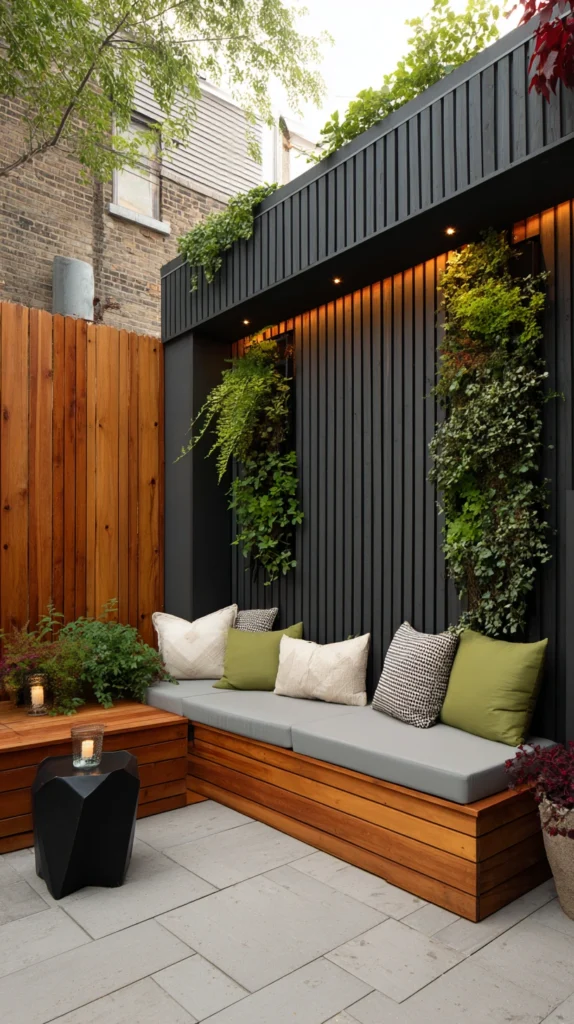
A wall-mounted planting system covering a fence or wall, multiplying growing space without expanding the garden’s actual footprint.
My limited ground space problem:
What I had:
- A narrow strip of usable ground, already fully accounted for by the patio and a small lawn
- No remaining floor space for the kind of layered garden bed a larger yard could support
- A tall, blank fence doing nothing while ground space remained the limiting factor
The vertical wall discovery:
Why going vertical solves the core small-garden problem:
- Uses wall and fence height, a dimension entirely untapped by traditional ground-level planting
- Multiplies genuine growing space without consuming any additional footprint
- Creates a lush, layered green backdrop that makes the whole yard feel more enclosed and garden-like
- The single most effective strategy for adding real plant volume to a space with no ground to spare
Building the vertical wall:
Structure options:
- A modular living wall system with integrated planting pockets
- A simple grid of individual wall-mounted planters
- A trellis system supporting climbing vines for a more gradual, natural vertical coverage
- Tiered wall-mounted shelving holding a mix of potted plants
Plant choices for vertical growing:
Selecting the right plants:
- Trailing plants like ivy or creeping fig for a cascading, established look
- Ferns or shade-tolerant foliage for a wall receiving limited direct sun
- Flowering vines for seasonal color climbing a trellis system
- Compact herbs in lower tiers for a functional, edible element
Cost:
- Modular living wall system: $150-500
- Simple wall-mounted planter grid: $80-250
- Trellis with climbing vines: $60-200
My vertical growing wall: Covering the entire back fence with a tiered planter system turned the yard’s least useful surface into its most significant source of greenery, without giving up a single square foot of the limited ground space.
Vertical Wall Tips
Install a simple drip irrigation line for consistent watering:
Watering efficiency:
- Hand-watering a full vertical wall is time-consuming and often produces uneven results
- A small drip line connected to each tier or planting pocket keeps watering consistent across the entire wall
- This is especially important since vertical systems often dry out faster than ground-level beds
- A basic timer on the drip line automates the process entirely
Mount into fence posts or wall studs, not thin surface material alone:
Structural safety:
- A fully planted vertical wall carries significant weight once watered
- Locate and mount into sturdier structural points, whether fence posts or wall studs
- This detail prevents the system from pulling loose or damaging the surface over time
- A stud finder designed for outdoor use helps locate these sturdier mounting points
2. The Reflective Mirror Trick
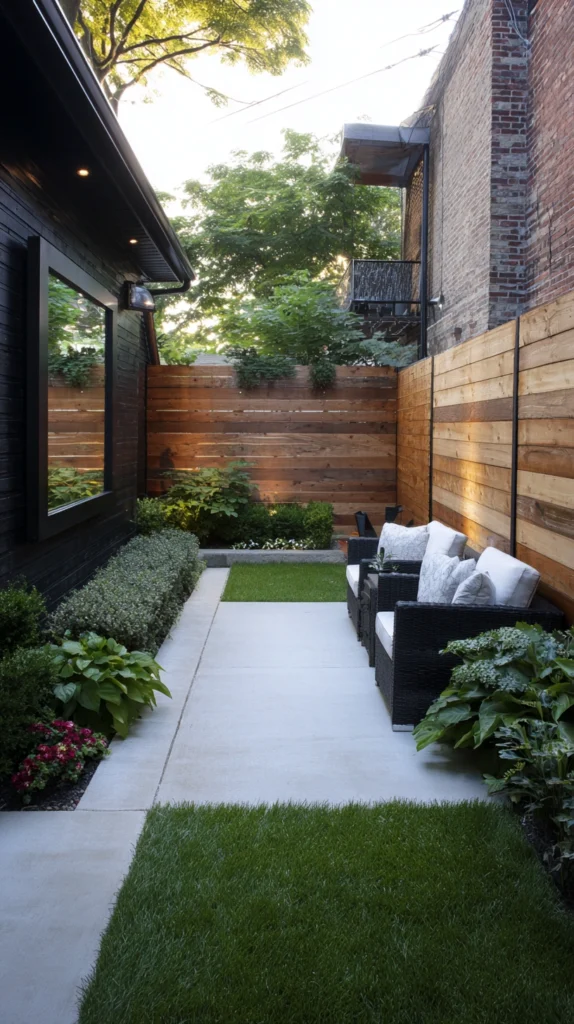
A large outdoor mirror positioned to reflect greenery and light, visually doubling the perceived depth of a small garden.
My shallow, closed-in garden:
What was working against me:
- A genuinely small footprint that felt even smaller without any visual depth trick
- No sense of expansion anywhere in the space, regardless of how the plants were arranged
- A garden that photographed exactly as small as it actually was
The mirror trick solution:
Why a well-placed mirror genuinely changes how a small garden reads:
- Reflects both natural light and existing greenery, doubling the perceived depth in whichever direction it faces
- One of the most effective, purely visual small-space tricks used by professional garden designers
- Creates the illusion of a garden continuing beyond the actual boundary
- Works especially well positioned to reflect the garden’s best existing feature back at itself
Mirror placement strategy:
Getting the positioning right:
- Mounted on the fence or wall at the garden’s far end, reflecting the planting back toward the viewer
- Positioned to catch and reflect natural light from a nearby window or open sky
- Behind a planting bed so foliage partially obscures the mirror’s edge, enhancing the illusion
- Angled slightly to avoid reflecting the viewer’s own direct image, which breaks the effect
Choosing the right mirror:
Style and material considerations:
- A large, simple-framed outdoor mirror for the cleanest visual expansion effect
- Weather-resistant framing material, such as powder-coated metal or treated wood
- An arched or window-pane style mirror for a more decorative garden focal point
- Antiqued or aged mirror glass for a softer, more romantic reflected quality
Cost:
- Large outdoor garden mirror: $80-300
My garden mirror: A large arched mirror mounted at the back of the narrow garden, partially framed by climbing vines, made the space read as nearly double its actual depth in every photo taken from the patio.
Mirror Trick Tips
Position the mirror to reflect something worth reflecting:
Placement consideration:
- A mirror facing a blank wall or clutter only reflects more of the same
- Position mirrors to reflect the garden’s best plants, a window, or open sky
- This detail determines whether the mirror enhances the space or just doubles a flaw
- Walk the garden and view potential mirror placements before finalizing installation
Secure large mirrors properly for safety and stability:
Installation safety:
- Large or heavy outdoor mirrors require appropriate wall anchors or fence post mounting
- Improperly secured mirrors present a genuine safety risk, especially in a smaller garden with less room to avoid them
- Follow the manufacturer’s specific mounting recommendations for the mirror’s weight
- This step is not optional regardless of how tempting a quick hanging solution seems
3. The Single Statement Tree in a Container
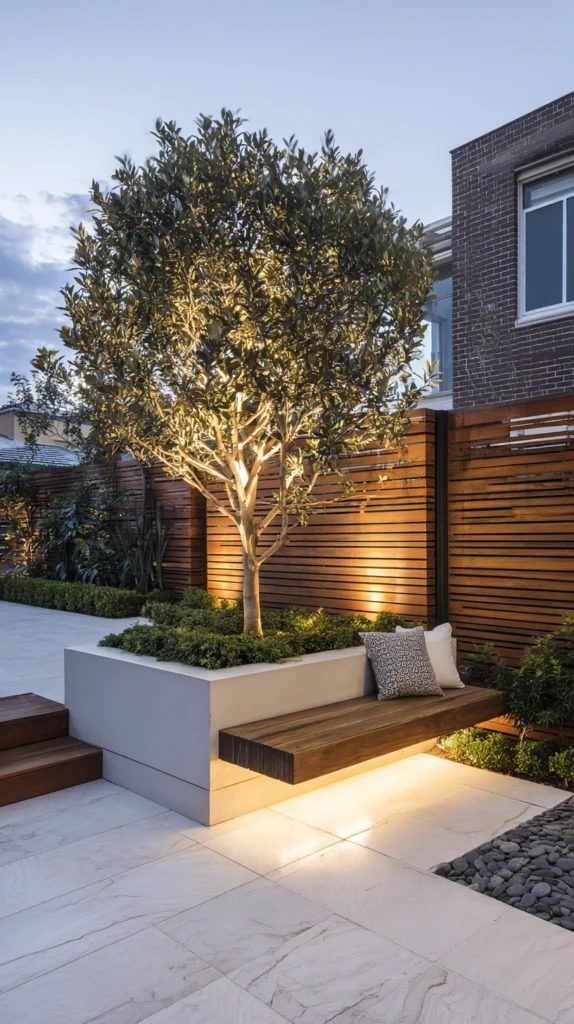
One well-chosen, appropriately scaled tree, grown in a large container as the garden’s clear vertical anchor.
My scattered small plant collection:
What felt underwhelming:
- Numerous small pots and plants, none large enough to serve as a genuine focal point
- A garden that felt busy at ground level but lacked any vertical anchor drawing the eye upward
- Budget spread thin across many small purchases rather than concentrated on one impactful choice
The statement tree solution:
Why one larger vertical element outperforms many small ones in a tight space:
- A single substantial tree creates genuine focal height a collection of small plants cannot replicate
- Establishes the garden’s overall scale and draws the eye upward, making the space feel taller and more established
- A container-grown tree avoids the root space concerns of planting directly in a small garden’s limited soil
- The single most effective way to make a young, small garden feel mature and considered
Choosing the right specimen:
Selection considerations for small spaces:
- A tree or large shrub genuinely suited to container growing and confirmed mature container size
- Species offering multi-season interest, such as spring bloom and attractive year-round structure
- Narrow, columnar growth habits that add height without consuming excessive width
- A container sized generously enough to support the tree’s root system for several years
Placement strategy:
Where to position the focal specimen:
- Anchoring one corner rather than the center, preserving open sightlines through the rest of the space
- Positioned where it will be visible from the home’s main interior window or seating area
- Near the garden’s boundary, helping to visually soften and obscure the fence line
Cost:
- Large container: $60-200
- Small to mid-sized tree suited to container growing: $80-300
My container tree: A single Japanese maple in a large ceramic pot, positioned in the corner of the narrow garden, gave the whole space a sense of vertical maturity that no collection of smaller plants had achieved.
Statement Tree Tips
Choose a container at least 18-24 inches in diameter for genuine long-term root support:
Sizing for health and longevity:
- A container too small restricts root growth and requires more frequent, disruptive repotting
- Sizing up generously accommodates several years of growth before repotting becomes necessary
- This choice also creates a more substantial, established visual presence immediately
- Balance container size against the practical weight and placement needs of the specific location
Research columnar or narrow-growth varieties specifically suited to small spaces:
Species selection:
- Standard tree varieties can quickly outgrow both their container and the available space
- Columnar or fastigiate growth habits add height without consuming the width a small garden cannot spare
- This research prevents a beautiful young specimen from eventually overwhelming the space it was meant to anchor
- Consult a local nursery specifically about varieties bred or selected for narrow, upright growth
4. The Curved Path Illusion
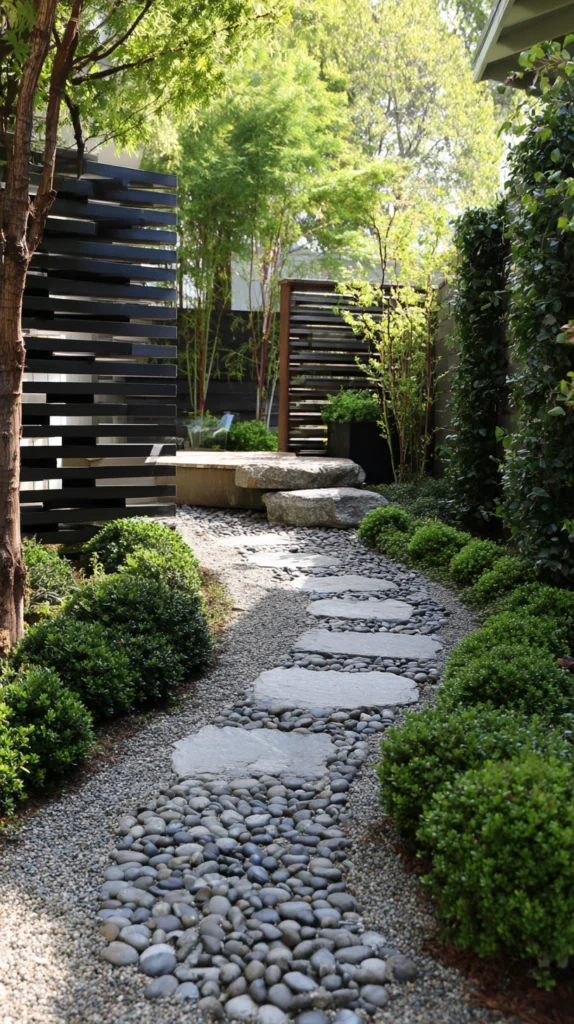
A gently curving path through the garden, rather than a straight line, creating the impression of a longer journey through the space.
My straight-line, instantly-visible garden:
What was making the space feel smaller:
- A straight path running directly from the patio to the back fence, visible in its entirety from a single glance
- The garden’s full depth revealed instantly, with nothing left to discover
- A missed opportunity to use path design as a genuine depth-creating tool
The curved path solution:
Why a curve creates the impression of more space than actually exists:
- Obscures the garden’s true endpoint from any single viewing angle
- Creates a sense of discovery and gradual reveal rather than an instantly visible, finite space
- A well-designed curved path can make a small garden feel like it continues beyond what is immediately visible
- One of the most effective layout techniques used specifically in small urban garden design
Designing the curved path:
Layout approach:
- Even a gentle, subtle curve delivers meaningful visual benefit in a small space
- Use a garden hose laid on the ground to test and adjust the curve before installing any hard material
- Position taller plants at the outer edge of the curve to further obscure the full sightline
- Avoid an overly dramatic curve that wastes precious space in a genuinely tiny garden
Material choices:
Selecting the right surface:
- Stepping stones for an informal, garden-appropriate curved path
- Decomposed granite or gravel for an affordable, easily curved material
- Brick or paver pathway for a more defined, formal curved route
Cost:
- Stepping stones: $5-15 per stone
- Decomposed granite (per 50 sq ft): $50-100
- Brick or paver curved path: $150-400
My curved garden path: Replacing the straight line from patio to fence with a gentle stepping-stone curve, screened partially by taller plants along the outer edge, made the twelve-foot garden feel like it genuinely continued beyond what could be seen from the patio.
Curved Path Tips
Keep the curve subtle in a genuinely small space:
Proportion consideration:
- An overly dramatic curve in a tiny garden wastes precious square footage on the curve itself
- A gentle, subtle deviation from a straight line delivers the visual benefit without excessive space cost
- Test the curve’s actual footprint against the garden’s total available space before finalizing
- A restrained curve consistently outperforms an ambitious one in a genuinely space-constrained garden
Plant taller elements along the outer edge of the curve to enhance the obscuring effect:
Layout reinforcement:
- The curve alone provides some benefit, but taller planting along its outer edge meaningfully increases the illusion
- This combination obscures the path’s full length from any single vantage point more effectively than either element alone
- Position the tallest plants specifically where they will block the most direct sightline to the garden’s end
- This detail is what elevates a simply curved path into a genuine depth-creating design technique
5. The Layered Height Planting Scheme
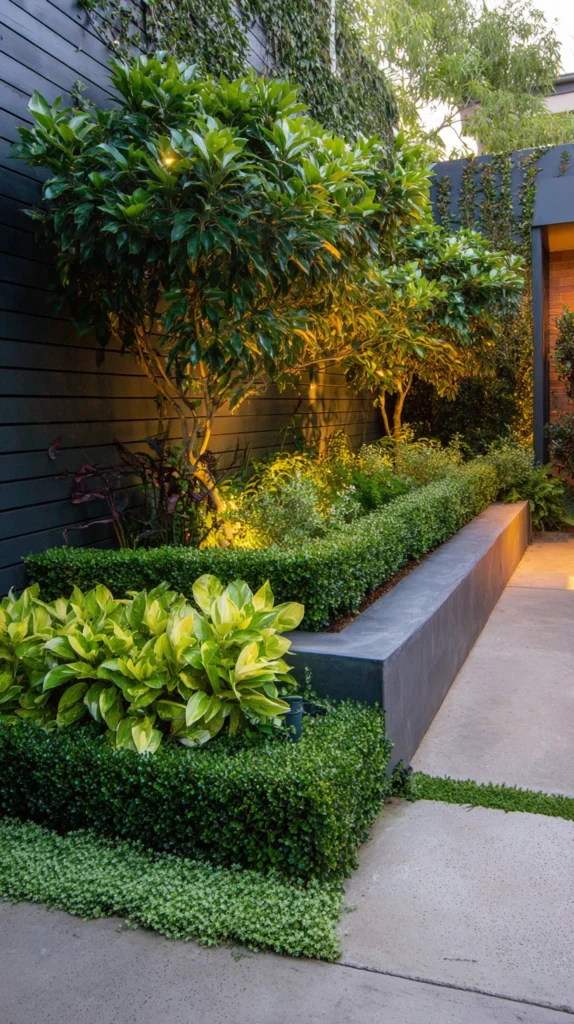
Arranging every plant by height, shortest at the front and tallest at the back, creating genuine depth within a shallow planting bed.
My flat, single-height garden bed:
What was creating a two-dimensional look:
- Plants of similar height scattered throughout the narrow bed with no intentional arrangement
- No sense of depth or dimension when viewing the garden from the patio
- A planting scheme that looked flat regardless of how many different plants were included
The layered height solution:
Why height arrangement matters more than plant variety in a small space:
- Creates genuine visual depth within even a very shallow bed, without requiring any additional square footage
- Allows every plant to remain visible, rather than shorter plants being hidden behind taller ones
- A technique used consistently in professional landscape design, requiring no additional plant purchases
- Transforms a flat, narrow strip of planting into a noticeably more dimensional, sophisticated arrangement
Applying the layering technique:
Building the arrangement:
- Position the tallest plants (the statement tree, tall grasses, or a trellis) at the very back of the bed
- Place medium-height perennials and shrubs in the middle layer
- Reserve the front edge for the shortest plants, groundcovers, or low borders
- Even a bed only a few feet deep benefits significantly from this three-tier approach
Working within limited depth:
Adapting the technique to a narrow space:
- Use narrower, more upright plant varieties for the back layer to avoid consuming excessive depth
- Choose trailing or spreading plants for the front layer to soften the bed’s edge without adding width
- Consider vertical elements, like a trellis, as the “tallest” layer when ground depth is especially limited
Cost:
- No cost if simply rearranging existing plants
- Minor cost if filling gaps created by the rearrangement: $30-100
My layered small garden bed: Rearranging the narrow planting strip by height, tallest at the fence and shortest at the path edge, made a bed only three feet deep read as significantly more dimensional than it had when every plant sat at roughly the same height.
Layered Height Tips
Choose narrow, upright varieties for the back layer in especially shallow beds:
Depth-conscious selection:
- Wide, sprawling tall plants can consume more depth than a narrow bed can spare
- Columnar or upright growth habits deliver height without excessive width
- This selection consideration matters more in a small garden than it would in a more spacious bed
- Research the mature width, not just the height, of any plant intended for the back layer
Leave room for mature growth even in a tightly planned small bed:
Growth accommodation:
- Plants positioned too closely together based on their current size can quickly become overcrowded
- Research each plant’s mature spread and space accordingly, even if the bed looks sparse initially
- This patience prevents the need to remove or relocate plants once they reach full size
- A properly spaced layered bed will fill in appropriately within one to two growing seasons, even in a small footprint
6. The Multi-Level Deck or Tiered Platform
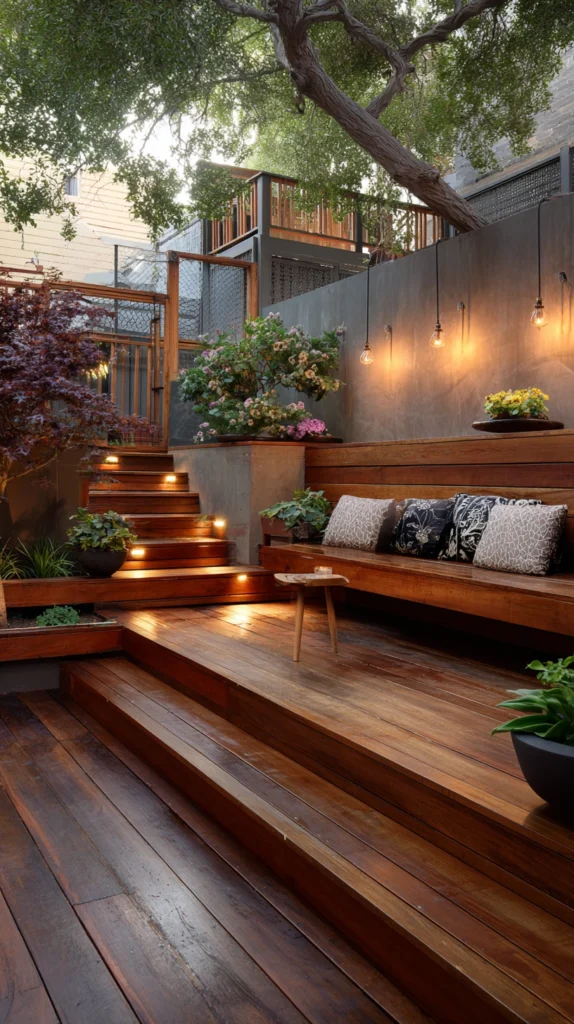
A raised deck or series of small tiered platforms, adding vertical level changes to an otherwise flat, single-plane small garden.
My single flat plane problem:
What felt one-dimensional:
- A garden existing entirely on one flat level, with the patio and planting bed at the same elevation throughout
- No sense of the dimensional interest a change in level naturally provides
- Missing an opportunity to use elevation change as a genuine space-expanding technique
The tiered platform solution:
Why level changes make a small garden feel larger:
- Creates distinct zones and a sense of transition, even within a genuinely small footprint
- Adds visual and physical dimension that a single flat plane cannot achieve
- A small raised platform or deck section can define a dedicated seating nook distinct from the planting area
- Professional small-garden design frequently relies on level changes specifically for this space-expanding effect
Building the tiered structure:
Construction approach:
- A modest raised deck section, just a few inches to a foot above the main garden level
- Simple built platforms using pressure-treated lumber, sized to fit the specific available space
- A tiered arrangement stepping down toward the garden, if the yard has any natural slope to work with
- Railings or simple edging to define each level’s boundary clearly
Using the levels effectively:
Assigning function to each tier:
- A raised platform for a small seating area, distinct from the lower planting zone
- Steps between levels doubling as additional planting shelves for trailing plants
- A lower tier dedicated entirely to planting, keeping the upper level clear for furniture
Cost:
- Small raised deck platform (basic materials): $300-800
- Simple tiered step construction: $150-400
My tiered garden platform: Adding one small raised deck section, just eight inches above the main garden level, created a distinct seating zone that made the whole space feel like it had multiple genuine areas rather than one single flat plane.
Tiered Platform Tips
Keep level changes modest in a genuinely small garden:
Proportion consideration:
- A dramatic elevation change can consume disproportionate space relative to a small garden’s total footprint
- A modest rise, even just several inches, delivers meaningful dimensional benefit without excessive space cost
- This restraint keeps the technique proportional to the garden’s actual scale
- Test the platform’s footprint against the garden’s total available space before finalizing construction
Use the vertical transition itself as additional planting or storage space:
Maximizing every surface:
- The steps or risers between levels represent additional surface area often left unused
- Small planting shelves or built-in storage along these transitions add function without consuming floor space
- This detail is particularly valuable in a small garden where every surface matters
- Consider this opportunity during the initial platform design rather than as an afterthought
7. The Concealed Boundary with Climbing Screens
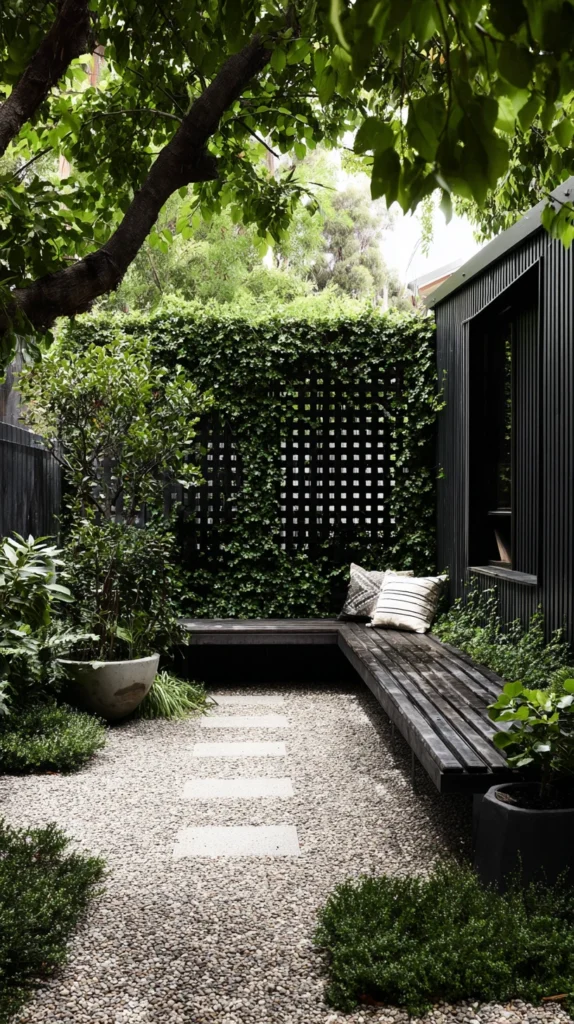
Dense climbing vines or a slatted screen specifically positioned to obscure the fence line, making the garden’s true boundary less visually apparent.
My too-visible fence line:
What was limiting the garden’s perceived size:
- A fence clearly visible in its entirety from every angle within the garden
- The eye constantly registering exactly where the space ends
- A missed opportunity to use screening specifically to blur that hard boundary line
The concealed boundary solution:
Why obscuring the fence line changes how large the garden feels:
- A visible, hard boundary constantly reminds the eye of the space’s actual limits
- Dense climbing growth or a slatted screen softens and partially obscures this hard edge
- Creates the impression that the garden continues beyond what can be clearly seen
- One of the most effective techniques specifically for making a small garden’s true size less immediately apparent
Building the concealment:
Approach options:
- Dense, fast-growing climbing vines trained across the full fence length
- A slatted wood or composite screen positioned in front of the fence, creating layered depth
- A combination of both, with vines growing through and softening the screen’s more structured lines
Choosing the right climbing plants:
Selection for dense, effective coverage:
- Star jasmine for fragrant, glossy, densely evergreen coverage
- Climbing hydrangea for lush foliage and significant seasonal bloom
- Clematis for a faster-establishing option with dramatic flower color
- Boston ivy for the most vigorous, complete coverage in a single growing season
Cost:
- Climbing vine plants: $15-40 each, for a full fence line
- Slatted screen material, if adding structure: $15-40 per linear foot
My concealed fence line: Training fast-growing star jasmine across the entire back fence over two growing seasons has completely softened what was once a hard, clearly visible boundary, and the garden now feels like it extends beyond wherever the eye can actually see.
Concealed Boundary Tips
Choose fast-establishing vine varieties for quicker visual impact in a small space:
Plant selection for immediate results:
- Slow-growing vines can take many years to achieve meaningful fence coverage
- Faster-establishing varieties deliver the concealing effect within one to two growing seasons rather than five or more
- This consideration matters especially in a small garden where the boundary’s visual impact is felt so immediately
- Balance growth speed against the specific variety’s mature size and maintenance requirements
Guide and prune vine growth to maintain even, complete coverage:
Ongoing maintenance:
- Unguided vine growth can develop patchy, uneven coverage across the fence
- Regular light guidance and pruning during the growing season maintains a consistent, complete screen
- This attention pays off significantly in how convincingly the boundary is ultimately obscured
- A relatively modest ongoing time investment for a technique with substantial visual payoff
8. The Monochromatic Color Palette
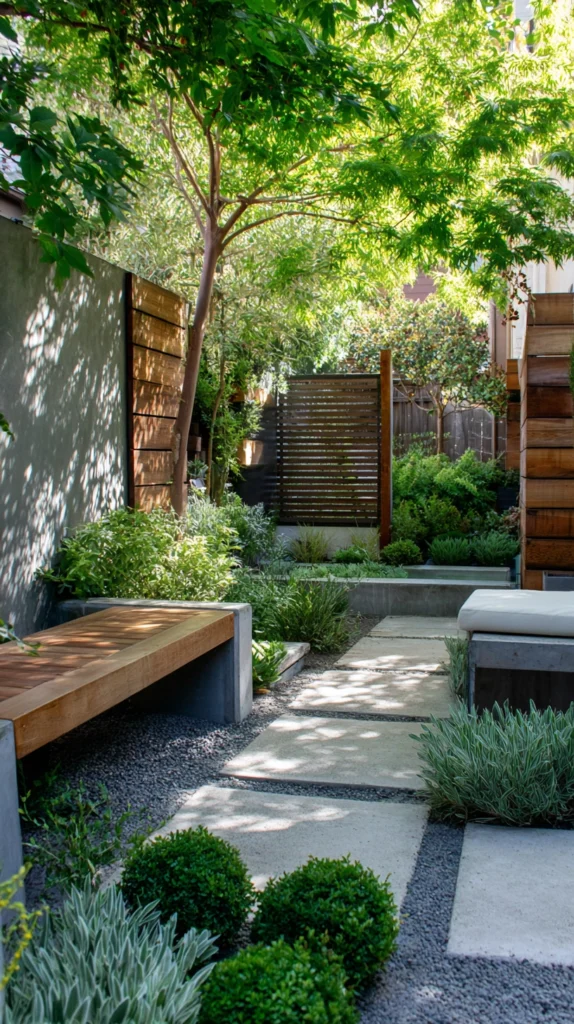
A garden planted almost entirely in variations of a single color family, using tonal depth rather than variety to create visual interest.
My too-busy, scattered color scheme:
What felt chaotic:
- Every available color represented somewhere in the small garden, competing for attention
- A visually busy space that felt even smaller because nothing allowed the eye to rest
- A missed opportunity to use color restraint specifically as a space-expanding technique
The monochromatic solution:
Why color restraint makes a small space feel larger:
- A busy, multi-color garden visually shrinks a small space by fragmenting the eye’s attention
- A single color family, in varying tones and shades, creates a calmer, more cohesive impression
- This cohesion allows the eye to take in the whole space as one unified area, rather than many competing parts
- A technique frequently used by professional designers specifically for small, tight garden spaces
Choosing a color direction:
Palette options:
- All-white and silver-toned foliage for a bright, luminous small garden feel
- Purple and burgundy tones for a rich, dramatic monochromatic scheme
- Green-on-green, using varied foliage textures and shades rather than flower color at all
- Soft pink and blush tones for a romantic, cohesive garden palette
Building the monochromatic scheme:
Selection approach:
- Choose plants primarily for their foliage and bloom color falling within the chosen family
- Vary texture significantly within the single color palette to maintain visual interest
- Allow occasional variation in tone, lighter and darker shades of the same color, rather than a single flat color throughout
Cost:
- No inherent additional cost; achieved through selective plant choice within a standard planting budget
My monochromatic white garden: Committing to an all-white and silver planting scheme in the small side garden made the space feel significantly calmer and larger than the previous scattered rainbow of colors ever had, precisely because the eye could finally take in the whole space at once.
Monochromatic Tips
Vary texture significantly to prevent the scheme from feeling flat:
Maintaining visual interest:
- A single color across plants with identical texture can start to feel monotonous rather than sophisticated
- Combining fine, feathery foliage with broad leaves and varied bloom shapes maintains genuine interest within the restrained palette
- This textural variety is what keeps a monochromatic garden feeling considered rather than simply limited
- Prioritize this textural diversity as much as the color selection itself when choosing plants
Allow foliage color to count as part of the palette, not just blooms:
Expanding the palette practically:
- Relying solely on flower color limits the scheme significantly, since most blooms are seasonal
- Silver, gray, or burgundy foliage extends the chosen color family’s presence across the entire year, not just bloom season
- This approach also reduces the garden’s dependence on peak flowering for its overall visual cohesion
- Research foliage color specifically, not just bloom color, when selecting plants for a monochromatic scheme
9. The Multi-Functional Furniture and Planter Combination
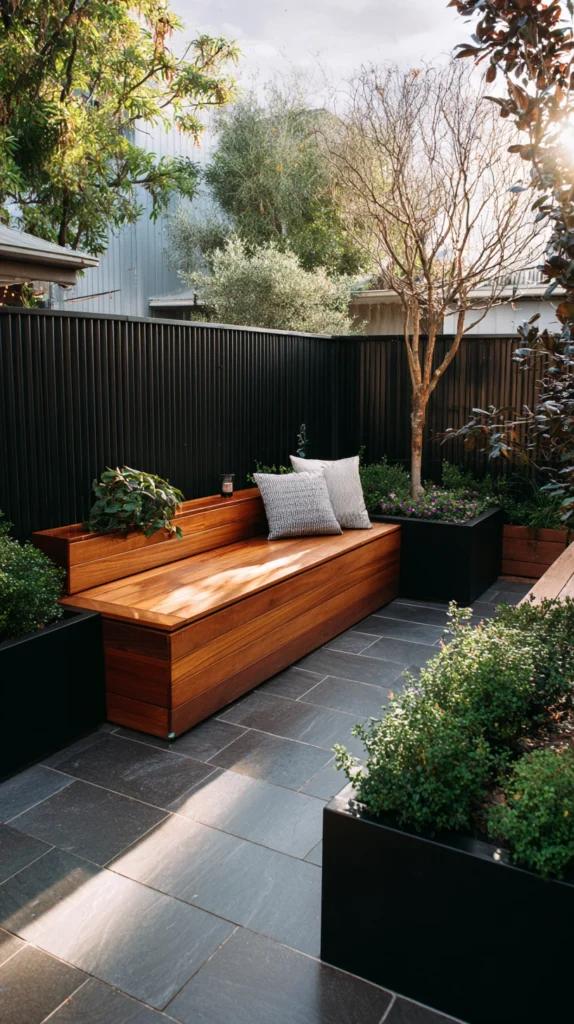
Furniture pieces that double as planters, such as a built-in bench with integrated planting boxes, maximizing every square foot’s function.
My separate furniture and planting zones:
What felt inefficient:
- Furniture and planting beds treated as entirely separate elements competing for the same limited square footage
- A missed opportunity to combine these two functions into single, space-efficient pieces
- A small garden where every separate element ate further into an already tight footprint
The multi-functional solution:
Why combining furniture and planting delivers genuine space efficiency:
- A single piece serving two functions consumes meaningfully less total footprint than two separate elements
- Built-in planting boxes integrated into seating add greenery directly at eye level for seated guests
- Particularly valuable in a small garden where every additional standalone piece meaningfully reduces open space
- One of the most practical, function-forward strategies available for maximizing a tight footprint
Building the combination:
Design and construction options:
- A built-in bench with an integrated planting box running along its back or one end
- A low garden wall doubling as both seating and a raised planting bed
- Storage ottomans topped with a small planter arrangement rather than purely decorative
- A dining table with a built-in centerpiece planting trough
Selecting appropriate plants for integrated planters:
Choosing what to grow:
- Trailing plants softening the seating’s hard edges
- Fragrant herbs or flowers positioned at a height easily enjoyed while seated
- Low-maintenance succulents for a planting box that will not require constant attention
Cost:
- Built-in bench with integrated planter: $200-600
- Low garden wall doubling as seating: $300-800
My bench and planter combination: A simple built-in bench along the fence, with a narrow integrated planting box running its full length, gave the small garden genuine seating and a defined planting bed without requiring two entirely separate pieces competing for the same footprint.
Multi-Functional Furniture Tips
Ensure integrated planting boxes have adequate drainage separate from the seating structure:
Construction detail:
- Poor drainage in an integrated planter can lead to water damage in the adjacent seating structure over time
- Design the planting box with its own proper drainage, isolated from the bench’s structural wood
- This detail protects the furniture’s longevity while still allowing genuine, healthy plant growth
- A liner or separate insert within the planting box can further isolate moisture from the surrounding structure
Choose plant varieties genuinely suited to a container’s more limited root space:
Plant selection for integrated planters:
- Built-in planting boxes typically offer less soil depth and volume than a standalone garden bed
- Choose plants with naturally more compact or shallow root systems, well suited to this constrained space
- This consideration prevents plants from quickly outgrowing the integrated planter’s inherent size limitations
- Research the specific rooting depth and spread needs of any plant before including it in this application
10. The Framed Garden View or Window
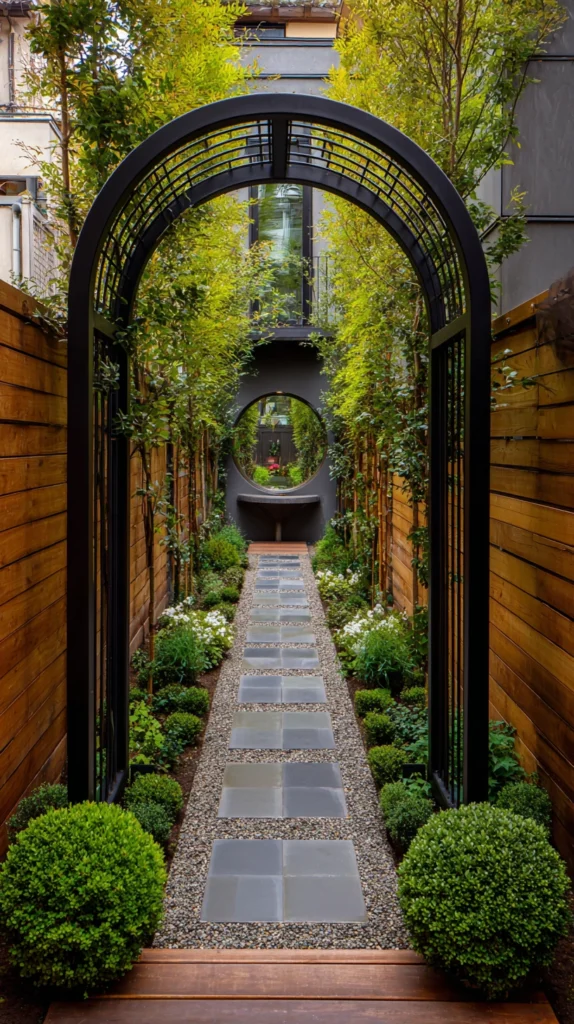
A cutout, arch, or simple frame positioned within the garden, creating a defined “view” through to a specific feature or beyond the boundary.
My unframed, all-at-once garden view:
What felt underwhelming:
- The entire small garden visible in a single glance, with nothing framed or specifically highlighted
- No sense of a curated view or a specific moment the eye is drawn toward
- A missed opportunity to use framing as a technique for adding perceived depth and intention
The framed view solution:
Why a framed element changes how the garden is perceived:
- Creates a specific, curated moment within the garden rather than one undifferentiated view
- A frame, arch, or cutout draws the eye through to what lies beyond it, implying additional space
- Mimics how a window frames and adds depth to an interior view, applied to an outdoor context
- One of the more architectural techniques available for adding perceived dimension to a small space
Building the framed view:
Approach options:
- A simple wood or metal arch positioned partway through the garden, framing the view toward the back
- A cutout or “window” built into a slatted screen or fence section
- A trellis structure with an open center, framing a specific plant or feature positioned beyond it
- Two matching tall planters flanking a narrow path, creating a natural framed threshold
What to frame:
Choosing the focal point:
- The garden’s statement tree or most significant planting
- A mirror, positioned to be viewed specifically through the frame
- A distant view beyond the garden’s actual boundary, if one exists
- A simple, well-styled bench or seating area as the framed destination
Cost:
- Simple garden arch: $60-200
- Framed cutout screen section: $80-250
My framed garden arch: A simple metal arch positioned partway along the narrow garden path, with climbing vines beginning to grow across it, creates a distinct threshold moment that makes the space beyond feel like a genuinely separate, additional area rather than more of the same visible strip.
Framed View Tips
Position the frame at a genuine transition point within the garden’s layout:
Placement logic:
- A frame placed arbitrarily, with no relationship to the garden’s actual layout, feels less intentional
- Position the frame where a natural transition already exists, such as between a patio and planting area
- This placement logic is what makes the framing feel like genuine architecture rather than a decorative afterthought
- Walk through the garden and identify where a natural pause or transition point could support a framed element
Choose a frame material and style coordinating with the garden’s overall aesthetic:
Design cohesion:
- A frame mismatched to the garden’s existing style can look like an unrelated addition
- Coordinate the frame’s material and finish with existing structures, furniture, or fencing
- This cohesion ensures the framed element feels integrated rather than randomly inserted
- Consider the frame as part of the garden’s overall design plan, not an isolated purchase
11. The Repeated Container Rhythm
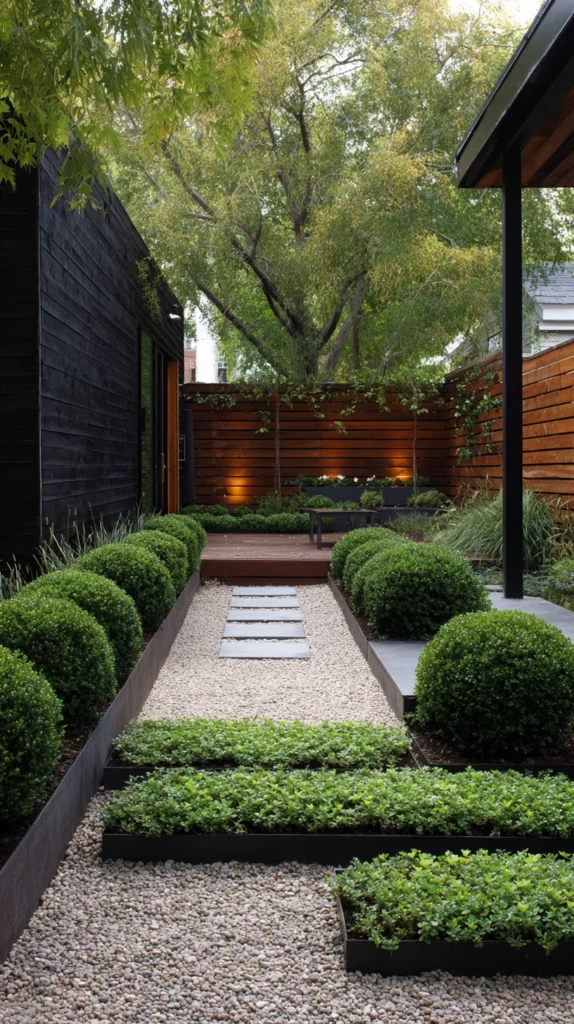
A consistent series of matching containers, planted identically and spaced evenly, creating a rhythmic visual pattern along a path or bed edge.
My mismatched container collection:
What felt disjointed:
- Several different containers, collected over time, each with a different plant and no coordinating thread
- A garden that felt scattered and busy rather than cohesive
- A missed opportunity for the specific calming, expansive effect visual repetition provides
The repeated container solution:
Why rhythm and repetition make a small garden feel more spacious:
- A repeated pattern, the same container and plant repeated at even intervals, creates genuine visual rhythm
- This consistency allows the eye to process the space as one cohesive design rather than a collection of separate decisions
- Repetition is a technique consistently used in professional garden design specifically for creating a sense of intentional scale
- One of the most achievable, low-cost small-garden techniques available
Building the repeated rhythm:
Application approach:
- Choose one container style and one plant variety, repeated consistently along a path or bed edge
- Space containers evenly, creating a clear, predictable pattern the eye can follow
- Vary container size slightly for subtle dynamic interest while maintaining overall consistency
- Extend the rhythm the full length of the available space for maximum cohesive effect
Where this technique works best:
Ideal applications:
- Lining a narrow path with matching containers on either side
- Along the base of a fence line, reinforcing the vertical screening technique
- Framing a seating area with a consistent container arrangement
Cost:
- Matching containers (per container): $15-40
- A repeated row of six to eight containers: $90-320
My repeated container path: Lining the narrow garden path with eight matching terracotta pots, each planted identically with the same variety of lavender, created a rhythmic, cohesive pattern that made the whole path feel more intentional and expansive than the previous mismatched collection ever did.
Repeated Container Tips
Choose a single plant variety across the entire repeated series:
Cohesion principle:
- Varying the plant within each container undercuts the unified rhythm the repetition is meant to create
- The same plant, repeated across every container, reinforces the sense of one coordinated, intentional design decision
- This approach is also often more cost-effective, since one plant variety can be purchased in bulk
- Reserve varied planting within a container series for more experienced gardeners confident in balancing the mix
Maintain consistent spacing throughout the repeated sequence:
Pattern integrity:
- Uneven spacing between containers disrupts the visual rhythm the technique depends on
- Measure and mark consistent intervals before placing any container permanently
- This precision is what separates a genuinely rhythmic pattern from a merely repeated but randomly placed collection
- A tape measure and a few minutes of planning prevent this common execution mistake
12. The Elevated Sightline Technique
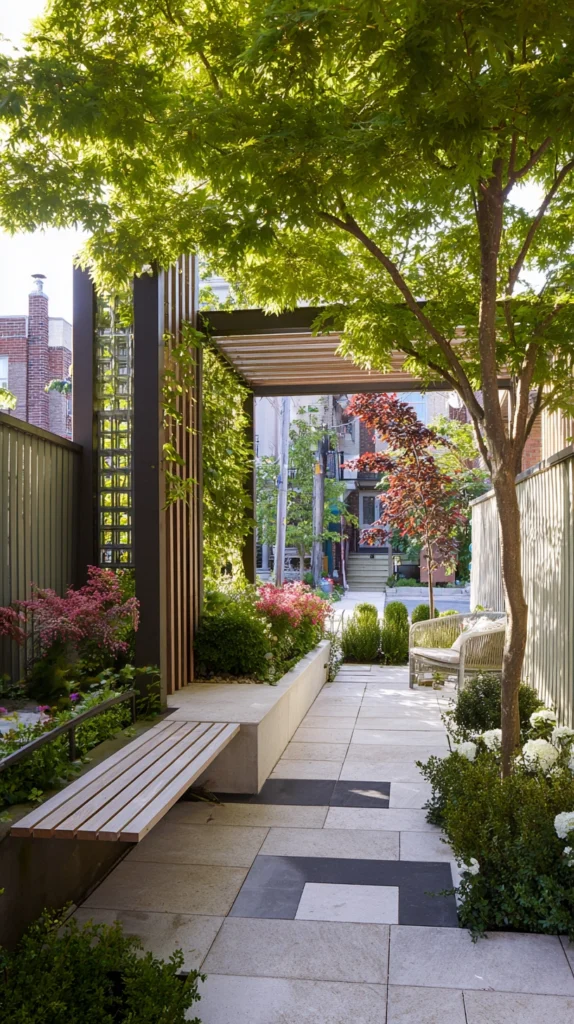
Positioning the tallest garden elements strategically to draw the eye upward and outward, beyond the garden’s actual physical boundary.
My downward-focused small garden:
What was limiting the perceived space:
- Every element in the garden positioned at eye level or below
- The eye naturally settling on the fence line and stopping there
- A missed opportunity to use height specifically to redirect the eye’s attention beyond the garden’s actual limits
The elevated sightline solution:
Why directing the eye upward expands perceived space:
- The eye naturally follows tall elements upward, past the point where a fence would otherwise stop it
- Elements extending above the fence line create the impression of a garden continuing skyward, if not outward
- This upward redirection is a genuine technique used by small-space designers to counteract a limited footprint
- Particularly effective when combined with other techniques on this list, like the statement tree or vertical wall
Applying the technique:
Building an elevated sightline:
- Position the garden’s tallest element, whether a tree, trellis, or arbor, near the boundary rather than the center
- Allow climbing plants to grow above the fence line itself where local regulations and practical concerns permit
- Use tall, narrow plantings specifically at the garden’s back edge to draw the eye upward at the point where the boundary would otherwise be most visible
- Consider an overhead element, like a pergola beam or hanging light, extending the sense of vertical space even further
Combining with other techniques:
Building a comprehensive strategy:
- Pair with the concealed boundary technique, using tall climbing growth that also obscures the fence
- Combine with the statement container tree, positioned specifically at the garden’s back edge
- Layer with the mirror trick, positioning height-drawing elements near the reflective surface for compounded effect
Cost:
- Tall trellis or arbor structure: $80-300
- Combined with existing tall plantings: minimal additional cost
My elevated sightline garden: Positioning the tallest trellis and climbing vine specifically at the back fence, rather than centering it, redirected attention upward at exactly the point where the boundary would otherwise be most obvious, and the combined effect with the vine growing above the fence line genuinely blurs where the garden actually ends.
Elevated Sightline Tips
Confirm any growth extending above the fence line complies with local regulations and neighbor considerations:
Practical and courteous planning:
- Some municipalities or homeowner associations have specific height restrictions for fence-adjacent plantings
- Confirm any planned growth above the fence line is genuinely permitted before investing in tall structures or plants
- Consider how growth extending toward a neighboring property might be perceived and address this proactively
- This verification prevents a otherwise effective technique from becoming a source of dispute or required removal
Position the tallest elements at the boundary rather than centrally within the garden:
Strategic placement:
- Central tall elements can make a small garden feel more crowded rather than more expansive
- Positioning height specifically at the garden’s edges redirects attention toward and beyond the boundary itself
- This placement decision is what distinguishes this technique from simply adding a tall plant somewhere convenient
- Consider this positioning logic specifically when applying any of the height-adding ideas throughout this list
13. The Minimalist Restraint Approach
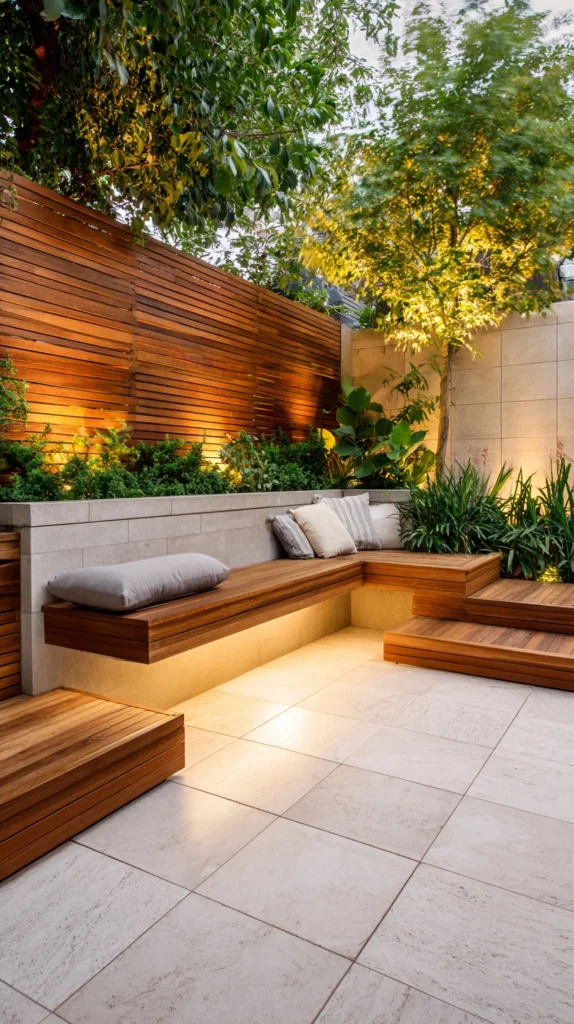
Deliberately limiting the total number of distinct elements in the garden, allowing negative space itself to make the design feel larger and more considered.
My overcrowded small garden:
What was working against the space:
- An accumulation of plants, decor, and furniture added gradually over time, with no overall editing
- A garden genuinely crowded with individually nice elements that collectively felt overwhelming
- A missed opportunity to recognize that a small garden might need fewer things, not cleverer arrangements of many things
The minimalist restraint solution:
Why doing less can genuinely make a small garden feel bigger:
- Negative space, areas deliberately left open and unplanted, allows the eye to rest and the overall space to feel less cramped
- A garden with fewer, more carefully chosen elements consistently reads as more sophisticated and spacious than a crowded one
- This restraint is often the single most effective technique on this entire list, despite requiring no purchase at all
- Professional small-space design frequently prioritizes editing and removal as much as thoughtful addition
Applying minimalist restraint:
Practical approach:
- Choose three to five genuinely excellent elements rather than a dozen adequate ones
- Deliberately preserve some visibly open, unplanted space rather than filling every available area
- Regularly assess the garden and remove or relocate anything that no longer earns its place
- Resist the impulse purchase at the garden center that does not fit the overall considered plan
What to prioritize keeping:
Editing decisions:
- The single statement tree or vertical element providing the garden’s main focal point
- One seating element, genuinely comfortable and well-placed
- A limited, cohesive plant palette rather than one of everything
- Whatever specific element has proven, through actual use, to be genuinely valued
Cost:
- No direct cost; achieved through removal and restraint rather than addition
My minimalist small garden: Removing nearly half of the accumulated plants and decor from the narrow garden, keeping only the statement tree, one seating piece, and a simplified planting scheme, made the space feel noticeably larger and calmer than it ever had at its most fully decorated.
Minimalist Restraint Tips
Regularly reassess the garden and remove elements that no longer earn their place:
Ongoing editing habit:
- Gardens accumulate additions gradually, and this accumulation can happen without much conscious decision-making
- A periodic, honest assessment identifies elements that have become clutter rather than genuine contributors
- This ongoing editing habit is what maintains a small garden’s sense of spaciousness over time, not just at initial design
- Set a seasonal reminder to walk through the garden specifically with an eye toward removal, not just addition
Resist impulse additions that do not fit the garden’s overall considered plan:
Discipline in acquisition:
- A single appealing plant or object at the garden center can seem harmless in isolation
- In a genuinely small garden, each individual addition carries more relative weight than it would in a larger space
- Pausing before any new addition, and confirming it genuinely fits the garden’s existing plan, prevents gradual overcrowding
- This discipline is often more difficult to maintain than any single design technique, but delivers the most consistent long-term benefit
Choosing Your Small Garden Techniques
By Space Constraint
Extremely narrow spaces (under 6 feet deep):
- Vertical growing wall (idea 1)
- Repeated container rhythm (idea 11)
- Minimalist restraint approach (idea 13)
Moderately small spaces (6-12 feet deep):
- Curved path illusion (idea 4)
- Layered height planting scheme (idea 5)
- Concealed boundary with climbing screens (idea 7)
Small but workable spaces (12+ feet, still limited):
- Multi-level deck or tiered platform (idea 6)
- Single statement tree in a container (idea 3)
- Framed garden view or window (idea 10)
By Effort Level
Lowest effort:
- Minimalist restraint approach (idea 13)
- Monochromatic color palette (idea 8)
- Reflective mirror trick (idea 2)
Medium effort:
- Vertical growing wall (idea 1)
- Layered height planting scheme (idea 5)
- Repeated container rhythm (idea 11)
- Framed garden view or window (idea 10)
Higher commitment:
- Multi-level deck or tiered platform (idea 6)
- Concealed boundary with climbing screens (idea 7)
- Multi-functional furniture and planter combination (idea 9)
- Elevated sightline technique (idea 12)
By Budget
Under $150:
- Minimalist restraint approach (idea 13)
- Monochromatic color palette (idea 8)
- Layered height planting scheme (idea 5)
$150-400:
- Reflective mirror trick (idea 2)
- Framed garden view or window (idea 10)
- Repeated container rhythm (idea 11)
- Vertical growing wall, simple version (idea 1)
$400-800:
- Single statement tree in a container (idea 3)
- Concealed boundary with climbing screens, full fence (idea 7)
- Multi-functional furniture and planter combination (idea 9)
$800+:
- Multi-level deck or tiered platform (idea 6)
Maintenance Through the Seasons
Spring:
- Refresh containers and begin the growing season’s watering routine
- Prune and guide climbing vines as new growth emerges
Summer:
- Water vertical walls and containers more frequently during peak heat
- Reassess the garden for overcrowding as summer growth fills in
Fall:
- Prune back climbing screens and vertical growth following peak season
- Conduct a seasonal editing pass, removing anything that no longer earns its place
Winter:
- Protect containers and vertical systems from freezing temperatures where relevant
- Plan the following year’s additions and edits during the slower winter months
My Complete Small Garden Journey
What I built across two years:
Year one ($420):
- Vertical growing wall along the back fence
- Single statement tree in a large container
- Learned that vertical space mattered more than any ground-level addition in a footprint this limited
Year two ($310):
- Reflective mirror and a curved stepping-stone path
- A significant editing pass, removing roughly a third of accumulated small plants and decor
- Learned that removing elements delivered as much visual improvement as any single addition had
Total investment: $730 across two years Most important lesson: A small garden needs a fundamentally different strategy than a scaled-down version of a large one Single highest-impact change across both years: The editing pass in year two, for proving that restraint could outperform addition
Getting Started This Weekend
Start by editing, not adding.
This weekend:
Step 1 — Walk the garden and identify what genuinely earns its place:
- Note which elements feel essential versus which have simply accumulated over time
- This honest assessment often reveals more opportunity than any new purchase would
Step 2 — Remove or relocate anything that does not clearly contribute:
- A cluttered small garden benefits enormously from subtraction
- This step costs nothing and often delivers immediate, noticeable improvement
Step 3 — Choose one vertical technique to test:
- A single trellis, a few wall-mounted planters, or one statement container tree
- Vertical additions consistently deliver the strongest space-expanding return in a small footprint
Step 4 — Consider one depth-creating trick:
- A mirror, a curved path, or a framed view element
- These techniques cost relatively little but meaningfully change how the space is perceived
My recommendation:
Start with an honest editing pass, then add one vertical element:
- Editing costs nothing and often reveals how much visual clutter was working against the space
- A single vertical addition, once the space is edited, delivers the clearest, most immediate transformation
- This combination addresses both what is holding the garden back and what could genuinely elevate it
Stand at the garden’s entrance after both steps and notice how differently the space reads before adding anything else.
Now go build the small garden that finally feels as expansive as it deserves to.
Quick Summary
The 13 small backyard garden ideas:
Vertical and height techniques:
- Vertical growing wall (idea 1): multiplies growing space without expanding the footprint
- Single statement tree in a container (idea 3): genuine vertical anchor and maturity
- Elevated sightline technique (idea 12): redirects the eye upward and beyond the boundary
Visual depth tricks:
- Reflective mirror trick (idea 2): doubles perceived depth through reflection
- Curved path illusion (idea 4): obscures the garden’s true endpoint
- Framed garden view or window (idea 10): creates a curated, dimensional moment
Layout and arrangement:
- Layered height planting scheme (idea 5): genuine depth within a shallow bed
- Multi-level deck or tiered platform (idea 6): dimension through elevation change
- Repeated container rhythm (idea 11): cohesion through visual repetition
Boundary and color strategy:
- Concealed boundary with climbing screens (idea 7): softens and obscures the hard fence line
- Monochromatic color palette (idea 8): calm cohesion over busy variety
Efficiency and restraint:
- Multi-functional furniture and planter combination (idea 9): maximizes every square foot’s function
- Minimalist restraint approach (idea 13): negative space as a genuine design tool
The universal small garden rules:
Always:
- Prioritize vertical growing space over additional ground-level planting
- Use height, curves, and framing specifically to create the impression of depth
- Obscure or soften the visible boundary rather than leaving it fully exposed
- Choose fewer, better elements over many crowded ones
Never:
- Attempt a scaled-down version of a large garden’s full feature list
- Leave every plant at the same height, creating a flat, two-dimensional look
- Fill every available inch of space, eliminating any sense of negative space
- Assume more plants and more decor automatically improve a small garden
Common mistakes:
- Treating a small garden as simply a miniature large garden rather than requiring its own distinct strategy
- Ignoring vertical space entirely in favor of an already-limited ground footprint
- Leaving the fence line fully visible and unobscured, constantly revealing the space’s actual limits
- Scattering many different colors and plant varieties rather than embracing cohesive restraint
- Never editing or removing accumulated elements, allowing gradual clutter to undermine the space
Remember: a small garden needs a fundamentally different strategy than a shrunken large one, vertical space consistently delivers the strongest return in a limited footprint, visual tricks like mirrors and curves genuinely change perceived depth, obscuring the boundary matters as much as anything planted within it, and the best small garden is often the one with less in it, not more.