13 Backyard Fence Decor Ideas That Instantly Boost Curb Appeal
My fence was the one surface in the entire backyard I never thought to decorate. Six feet of plain, weathered wood running the full length of the property, doing nothing but marking a boundary.
I kept focusing on furniture, plants in the ground, and the patio itself, walking right past the fence every single day without considering it a design opportunity at all.
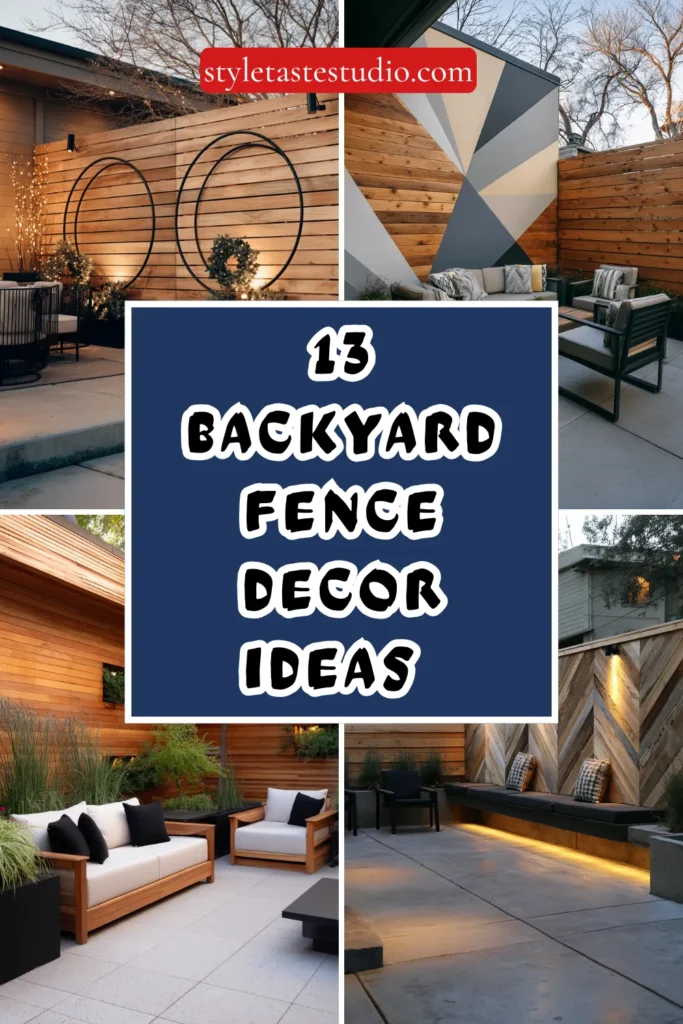
Then I hung a single vertical planter on one blank section, just to test the idea. That small addition made the rest of the bare fence suddenly obvious in a way it had not been before. Once I started decorating the fence itself, the whole yard felt more finished, almost immediately.
A fence is not just a boundary. It is the largest uninterrupted surface in most backyards, and largely untouched in most of them. Here are 13 ideas that turn that overlooked surface into one of the yard’s best features.
Why Most Fences Stay Undecorated
The common mistakes:
The boundary-only mindset:
- A fence treated purely as a property line, never considered part of the yard’s actual design
- Every design decision focused on furniture, plants, and hardscape instead
- A significant surface area left completely blank by default, not by choice
- Missing an opportunity hiding in plain sight in nearly every backyard
The single, isolated addition:
- One planter or piece of art added to the fence with no supporting elements
- No sense of a cohesive plan across the fence’s full length
- A single decoration looking more like an accident than an intentional design choice
- Isolated additions rarely delivering the same impact as a considered, repeated approach
The wrong scale for the surface:
- Small, delicate decor lost against a large expanse of fence
- Nothing substantial enough to actually register from a normal viewing distance
- A missed opportunity to use the fence’s genuine scale to real advantage
- Decor chosen without considering how it would actually read across such a large surface
What a successful fence decor plan does:
Treats the fence as genuine design real estate:
- Repeats elements across the fence’s length for a cohesive, considered look
- Chooses decor scaled appropriately to the fence’s actual size
- Layers plants, lighting, and objects rather than relying on one single addition
- Transforms a boundary into one of the yard’s most photographed features
My revelation: The fence is often the largest blank canvas in the entire backyard, and it is consistently the most overlooked. Decorating it delivers outsized visual return precisely because so few people think to do it at all.
1. The Vertical Planter Wall
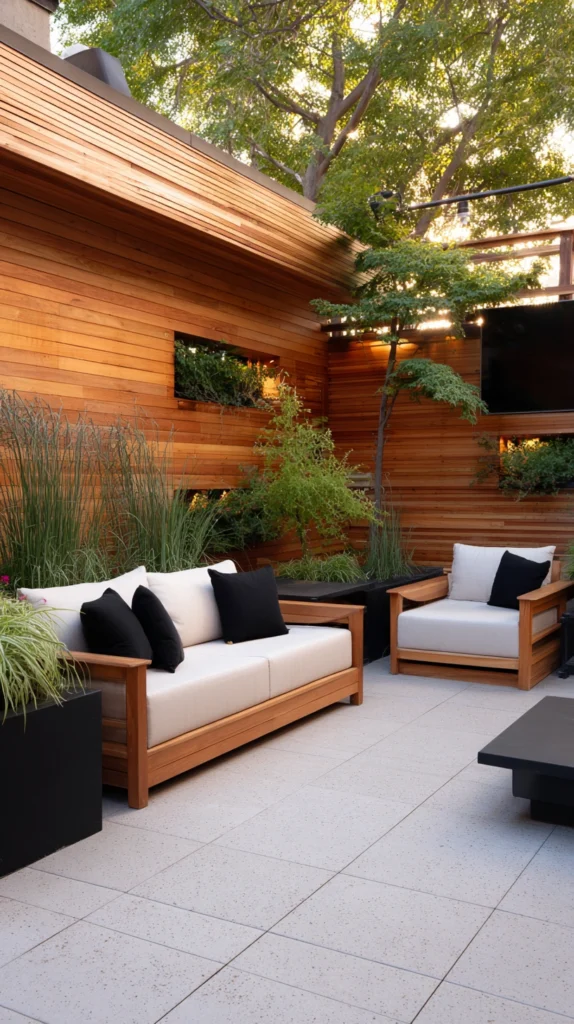
A series of wall-mounted planters, arranged in a grid or row along the fence — bringing genuine greenery to a vertical surface without any ground footprint.
My blank wood fence problem:
What I had:
- A long, plain wood fence with no visual interest anywhere along its length
- Ground-level garden beds elsewhere in the yard, but nothing addressing the fence itself
- A significant surface area doing absolutely nothing for the yard’s overall design
The vertical planter discovery:
Why this specific approach delivers such strong impact:
- Uses the fence’s vertical surface, a space entirely untapped by traditional in-ground planting
- Creates a genuine living wall effect without requiring any additional ground space
- Works on any fence style, wood, vinyl, or metal, with appropriate mounting hardware
- One of the most transformative single additions available for a plain fence
Building the planter wall:
Layout and installation approach:
- Choose matching planters, repeated in a grid or evenly spaced row for cohesion
- Mount securely into fence posts or rails, rather than thinner fence boards alone
- Space planters with enough gap to let each one register individually, not crowd together
- Mix planter heights slightly for a more dynamic, less rigidly uniform look
Plant choices for vertical mounting:
What thrives in this format:
- Trailing plants like ivy or sweet potato vine for a cascading, established look
- Compact flowering annuals for consistent seasonal color
- Herbs for a functional element if the fence is near a kitchen or patio
- Succulents for a lower-maintenance option in sunnier locations
Cost:
- Wall-mounted planters (per planter): $10-30
- A row of eight to ten planters: $100-280
- Mounting hardware: $15-30
My vertical planter wall: A row of matching black metal planters along the back fence, filled with trailing sweet potato vine, transformed the most overlooked section of the yard into one guests specifically comment on now.
Vertical Planter Tips
Mount into fence posts or rails, never into thin fence boards alone:
Structural safety:
- Thin fence boards alone often cannot support the weight of a filled, watered planter
- Locate and mount directly into sturdier posts or horizontal rails for genuine security
- This detail prevents planters from pulling loose or damaging the fence over time
- A stud finder designed for outdoor use can help locate these sturdier mounting points
Choose a consistent planter style and color for the strongest cohesive effect:
Design cohesion:
- Mismatched planter styles and colors along the same fence can look accidental rather than intentional
- A single repeated planter style, even in slightly varied sizes, reads as a considered design choice
- This consistency is what separates a genuine “living wall” effect from a scattered collection
- Order all planters from the same product line to ensure a true match
2. The String Light and Lantern Trim
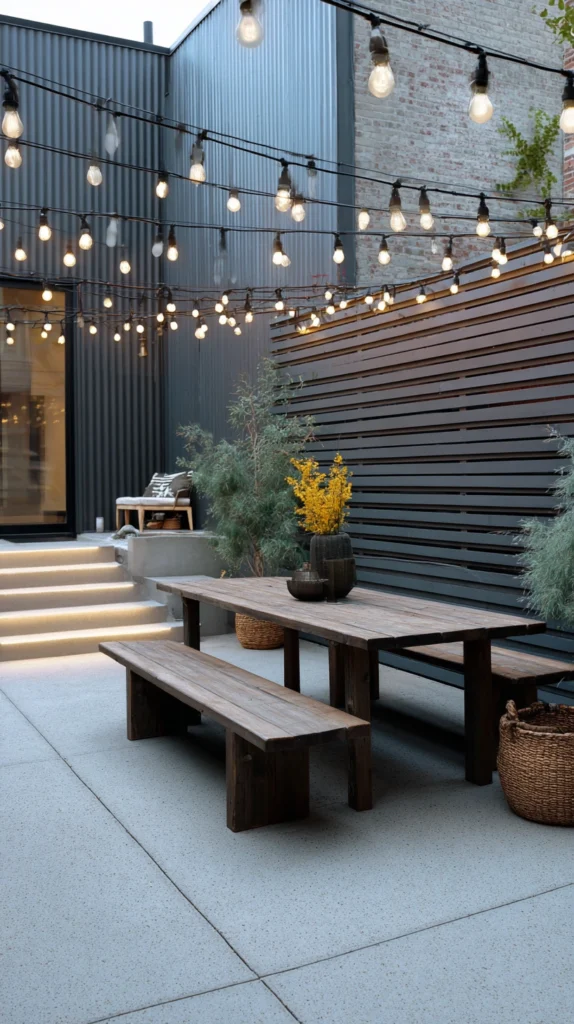
Warm string lights woven along the top of the fence, paired with hanging lanterns — extending the fence’s visual presence into the evening.
My fence that disappeared after dark:
What was limiting the yard’s evening character:
- A fence with daytime presence but nothing distinguishing it once the sun went down
- All existing lighting focused on the patio, leaving the fence line completely dark
- A missed opportunity to extend the yard’s boundary definition into the evening hours
The string light trim solution:
Why lighting the fence line matters so much after dark:
- Defines the yard’s full boundary even after natural light fades
- Creates a warm, enclosed, genuinely inviting atmosphere along the perimeter
- Extends visual interest to the fence exactly when other daytime decor becomes invisible
- One of the most cost-effective ways to add evening ambiance across a large area
Installing the light trim:
Approach and technique:
- Outdoor-rated string lights, run along the top edge of the fence using small hooks or clips
- A gentle, natural sag between mounting points rather than pulled perfectly taut
- Hanging lanterns, battery or solar powered, spaced at intervals along the fence face
- Warm white bulbs consistently, avoiding cool or mixed color temperatures
Extending the effect:
Additional layering options:
- Solar-powered fence post cap lights for a more architectural, built-in look
- A mix of string lights and lanterns at varied heights for more dimensional lighting
- Positioning lights to also illuminate any nearby plantings along the fence’s base
Cost:
- Outdoor string lights (per 48-foot strand): $25-60
- Hanging lanterns (per lantern): $10-30
- Solar fence post caps: $8-20 each
My string light fence trim: Running warm string lights along the top of the entire back fence, paired with a few simple lanterns hung at intervals, meant the yard’s full boundary stayed visually present well into the evening, rather than disappearing into darkness the moment the sun set.
String Light Trim Tips
Secure lights with fence-specific clips rather than nails or staples directly into the wood:
Installation method:
- Nails and staples can damage the fence material and make future adjustments difficult
- Purpose-made string light clips or hooks attach without permanent damage
- This approach also makes seasonal removal and reinstallation significantly easier
- A small additional cost for hardware that protects the fence’s long-term condition
Use a timer or smart plug to automate the lighting schedule:
Convenience automation:
- Manually turning fence lighting on each evening is easy to forget
- An outdoor-rated timer or smart plug ensures the lights consistently turn on at dusk
- This small addition significantly increases how reliably the lighting actually gets used and enjoyed
- A worthwhile investment given how much atmosphere this lighting layer provides
3. The Gallery Wall of Outdoor Art
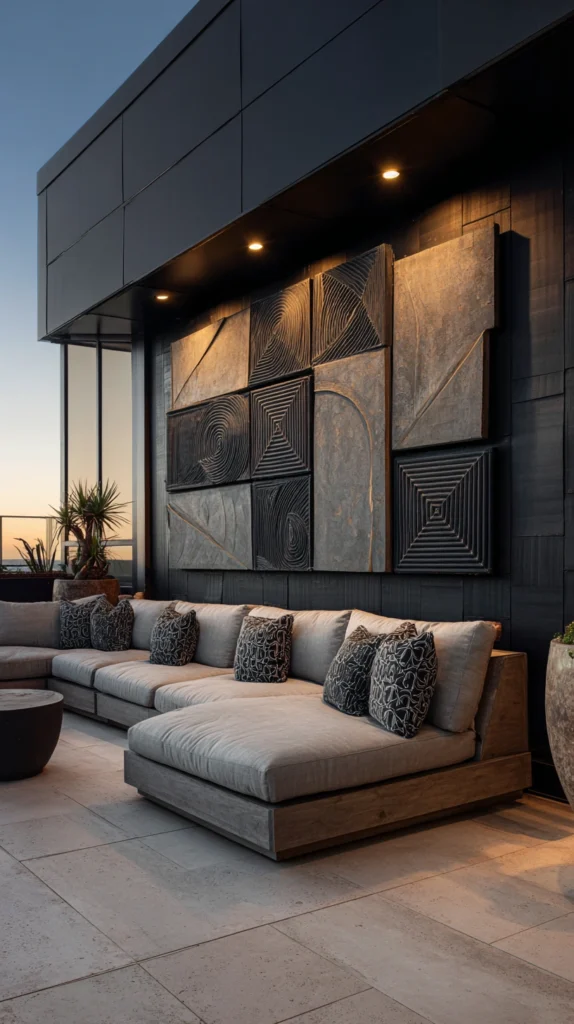
A curated collection of weather-resistant art pieces, mirrors, or metal wall decor arranged along the fence — bringing an indoor gallery wall concept outside.
My fence with no personality:
What felt generic:
- A fence that was structurally fine but visually said nothing about the household’s actual taste
- No sense of the personal, curated character an indoor gallery wall typically brings to a room
- A missed opportunity to extend that same design approach into the outdoor space
The outdoor gallery wall solution:
Why this concept translates so well to a fence:
- The fence’s flat, large surface functions almost identically to an interior gallery wall
- Weather-resistant art and decor pieces are increasingly widely available and durable
- Creates genuine personality and visual interest distinct from purely plant-based decor
- One of the most personalized approaches to fence decor available
Choosing the right pieces:
Material and style considerations:
- Metal wall art, specifically designed and coated for outdoor use
- Weather-resistant mirrors for adding light and a sense of depth
- Ceramic or ceramic-look decorative plates and medallions
- A mix of shapes and sizes, arranged with the same intentionality as an indoor gallery wall
Arranging the gallery:
Layout principles:
- Lay pieces out on the ground first to test the arrangement before mounting anything
- Vary size and shape while maintaining a cohesive color or material story
- Leave consistent spacing between pieces, typically two to four inches
- Anchor the arrangement with one larger, more substantial piece as the visual focal point
Cost:
- Individual outdoor art and decor pieces: $20-100 each
- A full gallery arrangement of six to eight pieces: $150-500
My outdoor gallery wall: A mix of metal sunburst art, a weather-resistant mirror, and a few ceramic medallions arranged along one section of fence gave that space genuine personality, and it has become the backdrop for nearly every photo taken in the yard since.
Outdoor Gallery Wall Tips
Test the full arrangement on the ground before mounting any piece:
Planning technique:
- Laying out the intended arrangement on the ground, or tracing it in paper templates on the fence, prevents costly mounting mistakes
- This step allows adjusting spacing and composition before any permanent holes are made
- A relatively small amount of upfront planning significantly improves the finished result
- Take a photo of the finalized ground layout to reference during actual mounting
Confirm every piece is genuinely rated for full outdoor exposure:
Material verification:
- Indoor-only art and mirrors will degrade quickly under direct sun and moisture exposure
- Look specifically for products labeled and warrantied for exterior use
- This verification matters significantly given the investment involved in a full gallery arrangement
- A slightly higher cost for genuinely outdoor-rated pieces prevents a disappointing, short-lived display
4. The Espalier or Trained Fruit Tree
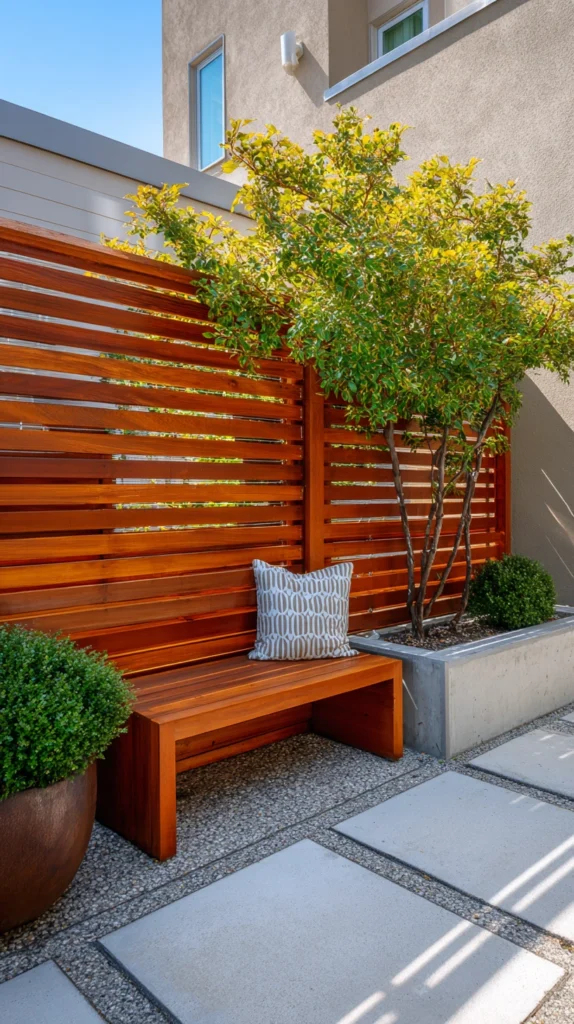
A fruit tree pruned and trained flat against the fence in a formal espalier pattern — combining ornamental structure with genuine edible harvest.
My missing productive greenery:
What was underutilized:
- A fence providing structure but no functional, edible contribution to the yard
- Interest in growing fruit, but no obvious space for a traditional freestanding tree
- Missing a technique that turns the fence itself into genuine growing support
The espalier solution:
Why this technique suits a fence specifically:
- Trains the tree to grow flat against the fence, requiring minimal depth or ground footprint
- Creates a genuinely striking, formal architectural pattern as the tree matures
- Delivers real fruit harvest in addition to significant ornamental value
- A traditional technique with centuries of use specifically for maximizing productivity against walls and fences
Choosing the right tree and pattern:
Selection considerations:
- Apple and pear trees are among the most commonly and successfully espaliered fruit varieties
- Choose a dwarf or semi-dwarf rootstock, better suited to the more controlled espalier form
- Common patterns include horizontal cordon (simple horizontal tiers) or a more elaborate fan shape
- Confirm the fence receives adequate sun exposure for the specific fruit variety chosen
Training and maintenance:
Building the espalier over time:
- Install a simple wire support system along the fence to guide the tree’s branches
- Prune and tie branches to the desired pattern gradually over several growing seasons
- Regular seasonal pruning maintains both the tree’s productivity and its formal shape
- Patience is essential, since a mature espalier pattern typically takes three to five years to fully establish
Cost:
- Young fruit tree suitable for espalier: $40-100
- Wire support system: $20-50
- Total: $60-150
My espalier apple tree: Training a dwarf apple tree flat against the sunniest section of fence has taken several years to reach its full pattern, but it now delivers both a genuinely striking formal look and a real annual harvest from a space that previously offered neither.
Espalier Tips
Start with a young, flexible tree rather than attempting to train a mature one:
Success factor:
- Young trees have more flexible, pliable branches genuinely suited to careful training
- Mature trees with established woody growth are significantly more difficult to reshape successfully
- This early start is essential for achieving a clean, well-formed espalier pattern over time
- Purchase specifically from nurseries offering young whip or one-year specimens appropriate for training
Commit to consistent seasonal pruning throughout the tree’s development:
Ongoing maintenance requirement:
- An espalier pattern requires regular, deliberate pruning to maintain its intended shape
- Skipping seasonal pruning allows the tree to revert toward a more natural, undesired growth habit
- This ongoing commitment is essential, not optional, for the technique to succeed long term
- Research the specific pruning calendar appropriate for the chosen fruit variety before beginning
5. The Painted Mural or Accent Panel
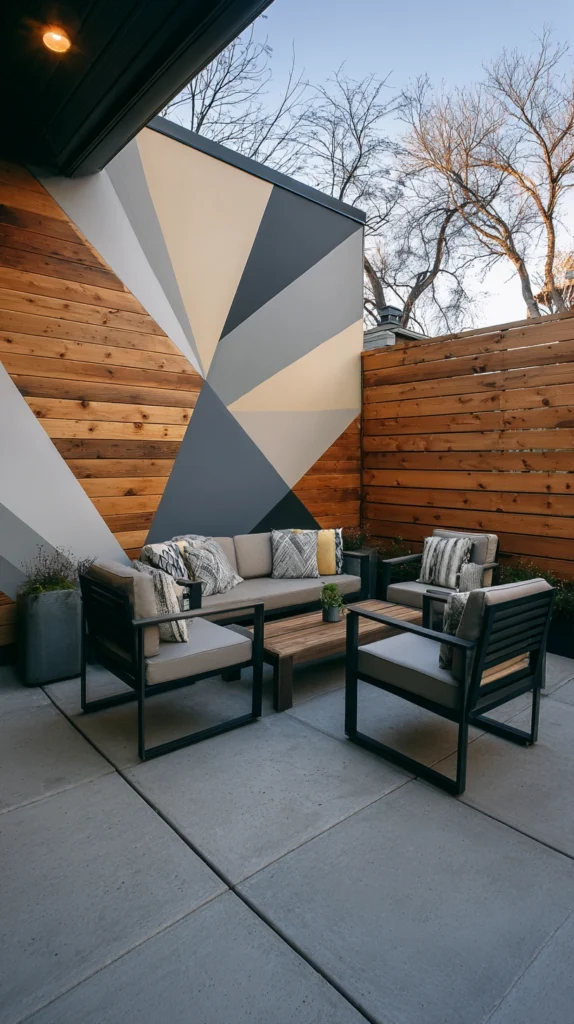
A hand-painted mural or a defined painted accent panel on a section of fence — turning the fence itself into a genuine art piece.
My fence with wasted flat surface:
What was overlooked:
- A large, flat wood surface treated purely as a functional boundary
- No consideration of the fence as a genuine canvas for artistic expression
- A missed opportunity distinct from anything achievable through plants or hung decor alone
The painted mural solution:
Why painting the fence itself delivers something unique:
- Creates a genuinely one-of-a-kind feature no purchased decor item could replicate
- Works at any scale, from a small defined accent panel to a full mural across the entire fence
- Allows complete creative control over color, pattern, and subject matter
- One of the most personalized, memorable approaches to fence decoration available
Choosing the right approach:
Scale and style options:
- A full mural, depicting a landscape, botanical scene, or abstract design
- A defined geometric accent panel, using painter’s tape for clean, graphic lines
- A simple ombre or gradient color wash across one fence section
- Stenciled patterns repeated across the fence for a more structured, replicable look
Preparing and painting the fence:
Getting a lasting result:
- Clean and lightly sand the fence surface before painting for better paint adhesion
- Use exterior-grade paint specifically rated for the fence material
- A primer coat, particularly on raw or previously unpainted wood, improves longevity significantly
- Seal the finished mural with a clear exterior topcoat for additional weather protection
Cost:
- Exterior paint (per gallon): $30-60
- Primer and sealant: $25-45
- Total: $55-105 for a defined accent panel or small mural
My painted fence accent: A simple geometric pattern painted in deep terracotta on one section of an otherwise plain fence, using painter’s tape for crisp lines, became a genuine focal point that cost less than most single decor purchases considered for the same spot.
Painted Mural Tips
Choose exterior paint genuinely rated for the specific fence material:
Product selection:
- Interior paint or an incorrectly rated exterior product will fail quickly outdoors
- Confirm the paint is specifically rated for wood, vinyl, or metal, matching the actual fence material
- This detail significantly affects how long the finished mural or panel maintains its appearance
- A slightly higher-quality exterior product typically extends the repainting interval considerably
Seal the finished paint with a clear exterior topcoat:
Longevity protection:
- Unsealed paint, even quality exterior paint, fades and wears faster under constant sun and rain exposure
- A clear protective topcoat, applied after the design is fully complete, adds meaningful additional durability
- This step is particularly important for more detailed or labor-intensive murals representing significant time investment
- A relatively small additional cost that protects a much larger investment of both material and effort
6. The Repurposed Window Shutter Display
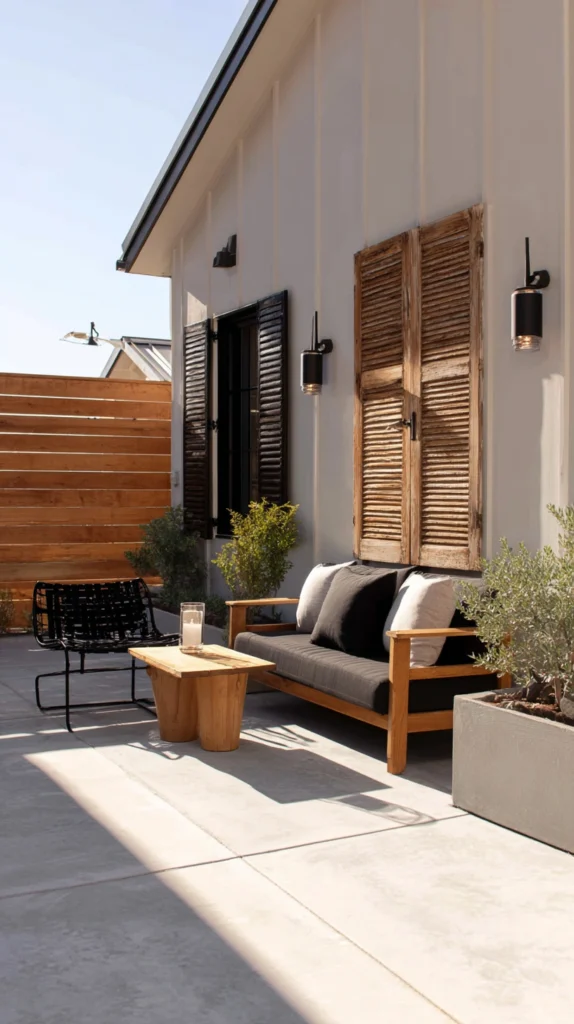
Vintage wood window shutters, mounted flat or opened slightly, attached to the fence as a decorative architectural accent.
My missing architectural character:
What felt flat:
- A fence with no architectural detail or dimension, purely a flat, functional surface
- Wanted to add genuine architectural character without a full structural addition
- A missed opportunity for a specifically charming, cottage-style decorative element
The repurposed shutter solution:
Why vintage shutters work so well on a fence:
- Adds genuine architectural dimension and character to an otherwise flat surface
- Vintage or reclaimed shutters carry authentic age and charm new products cannot replicate
- A relatively affordable way to introduce a cottage or farmhouse-style accent
- Often available secondhand at very low cost, given how frequently they are replaced during home renovations
Sourcing and preparing shutters:
Finding the right pieces:
- Architectural salvage yards, frequently carrying vintage window shutters
- Online marketplaces and estate sales, often a low-cost source
- Clean and lightly sand shutters before mounting, addressing any splinters or rough edges
- A fresh coat of paint or stain if the original finish does not suit the yard’s color palette
Mounting and styling:
Installation approach:
- Mount flat against the fence using appropriate outdoor screws into sturdy fence points
- Space multiple shutters evenly if using more than one, mimicking a window’s natural rhythm
- Pair with a small flower box beneath each shutter for an even more window-like effect
Cost:
- Vintage shutters (per pair): $15-50
- Paint or stain, if refinishing: $20-30
- Total: $35-80
My repurposed shutters: Two vintage shutters, sourced from a local salvage yard for $25 total, mounted with small flower boxes beneath them, gave one section of the fence the charming illusion of an actual cottage window.
Repurposed Shutter Tips
Inspect vintage shutters for rot or significant structural damage before purchasing:
Quality assessment:
- Some vintage shutters have deteriorated beyond the point of safe, lasting reuse
- Check for soft, spongy wood, which indicates rot, and confirm hinges and slats remain structurally sound
- This inspection prevents purchasing material that will fail shortly after installation
- A few minutes of assessment at the point of purchase saves significant future disappointment
Mount securely into fence posts or rails, accounting for the shutter’s weight:
Installation safety:
- Wood shutters carry genuine weight, particularly older, solid-construction pieces
- Mount into sturdier structural points on the fence, not thin boards alone
- This detail prevents the shutters from pulling loose or damaging the fence over time
- Use exterior-rated screws long enough to achieve a genuinely secure hold
7. The Vertical Herb and Kitchen Garden
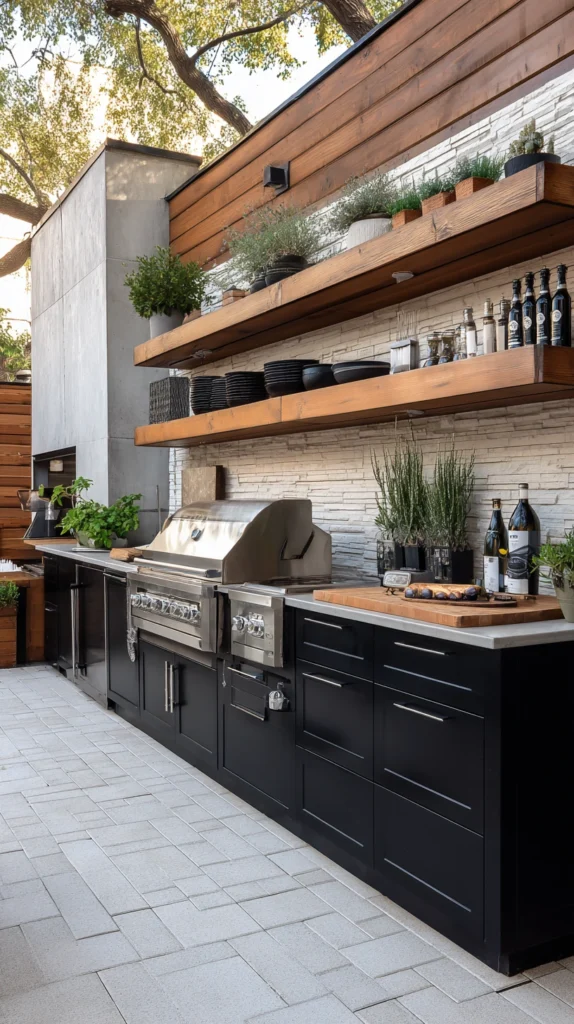
A dedicated section of fence fitted with planting pockets or shelving specifically for growing culinary herbs, positioned near the kitchen or grilling area.
My herbs scattered inconveniently:
What was frustrating:
- Culinary herbs planted in a distant garden bed, requiring a walk across the yard mid-cooking
- A missed opportunity to position genuinely useful plants somewhere actually convenient
- The fence near the kitchen door or grill left entirely undecorated and unused
The vertical herb garden solution:
Why this specific application delivers genuine daily value:
- Positions frequently used herbs exactly where they are most convenient, near cooking areas
- Combines functional, edible growing with genuine visual interest on the fence
- Vertical planting pockets or shelving maximize herb variety in a compact footprint
- A fence decor idea that earns its place through daily practical use, not just appearance
Building the herb wall:
Structure options:
- Fabric or felt vertical planting pockets, mounted directly to the fence
- Small wood shelving brackets holding individual pots at staggered heights
- A repurposed wood pallet, mounted flat against the fence, with pockets built into its slats
Choosing the right herbs:
Best options for this application:
- Basil, thyme, and oregano for classic, frequently used culinary staples
- Mint, contained in its own dedicated pocket given its aggressive spreading habit
- Rosemary for a more substantial, longer-lived anchor plant within the arrangement
- Chives for a compact, easy-care option well suited to smaller planting pockets
Cost:
- Fabric planting pocket system: $25-60
- Small herb starter plants: $3-6 each
- Total: $40-100
My vertical herb wall: Mounting a fabric planting pocket system to the fence directly beside the grill meant fresh herbs were finally within arm’s reach during actual cooking, rather than requiring a walk to a distant garden bed mid-recipe.
Vertical Herb Garden Tips
Position mint in its own separate, contained pocket:
Growth management:
- Mint spreads aggressively and can quickly overtake neighboring plants if not contained
- A dedicated, separate planting pocket keeps this specific herb’s growth genuinely manageable
- This precaution prevents one enthusiastic grower from crowding out the rest of the herb wall
- A small planning detail that meaningfully protects the overall arrangement’s long-term balance
Choose a location with adequate sun exposure for the specific herbs selected:
Growing condition matching:
- Most culinary herbs require significant direct sun to thrive and produce genuinely flavorful growth
- Confirm the fence section receives at least six hours of direct sun before finalizing herb selection
- Shade-tolerant options, like mint and some varieties of parsley, work better in a less sunny location
- This assessment prevents disappointment from herbs that struggle in an unsuitable light condition
8. The Decorative Fence Cap and Post Finials
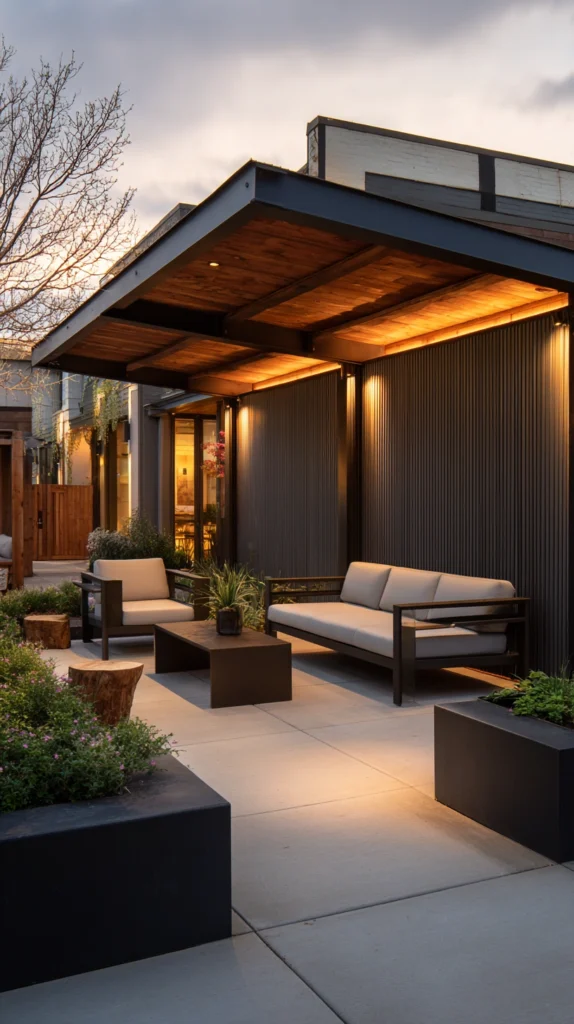
Ornamental post caps or finials added to the top of each fence post — a subtle but genuinely elevating architectural detail.
My plain, flat fence posts:
What felt unfinished:
- Every fence post topped with nothing more than the standard flat cut
- A small but consistently visible detail left entirely unaddressed across the fence’s full length
- A missed opportunity for a relatively simple, affordable architectural upgrade
The post cap solution:
Why this small detail delivers outsized visual return:
- Repeated consistently across every post, this detail affects the entire fence’s overall impression
- A relatively small individual cost, multiplied across the fence, delivering meaningful cumulative impact
- Adds genuine architectural polish, similar to how trim details elevate an entire room indoors
- One of the easiest fence upgrades to install without any specialized skill or tools
Choosing the right caps:
Style and material options:
- Simple pyramid or ball-shaped wood caps for a classic, traditional look
- Solar-powered post cap lights, combining decoration with functional evening lighting
- Copper or metal caps for a more substantial, higher-end architectural feel
- Decorative finials for a more ornate, formal fence style
Installation basics:
Getting it right:
- Confirm caps are sized correctly to the specific fence post dimensions before purchasing
- Secure with exterior-grade screws or an appropriate weatherproof adhesive
- Install consistently across every post for the strongest cohesive visual effect
Cost:
- Basic wood post caps (per cap): $5-15
- Solar-powered post cap lights (per cap): $10-25
- A full fence run of 15-20 posts: $75-500
My decorative post caps: Adding simple pyramid-style caps to every post along the fence, a project completed in a single afternoon, gave the entire boundary a noticeably more finished, architectural presence for a relatively modest total cost.
Post Cap Tips
Measure post dimensions precisely before ordering caps:
Fit verification:
- Fence post sizes vary, and a mismatched cap size will not sit securely or look correct
- Measure the actual post width and confirm against the specific cap product’s compatible sizing
- This verification prevents ordering an entire set of caps that ultimately do not fit properly
- A quick measurement at the start saves a frustrating return and reorder process later
Install every cap consistently, rather than only a few posts:
Completeness principle:
- Partial installation, with only some posts capped, looks unfinished rather than intentional
- Committing to capping every post along the fence delivers the strongest, most cohesive visual result
- This consistency is what elevates the detail from a minor addition to a genuine architectural upgrade
- Budget for the full run of posts from the outset rather than planning a partial installation
9. The Hanging Basket Row
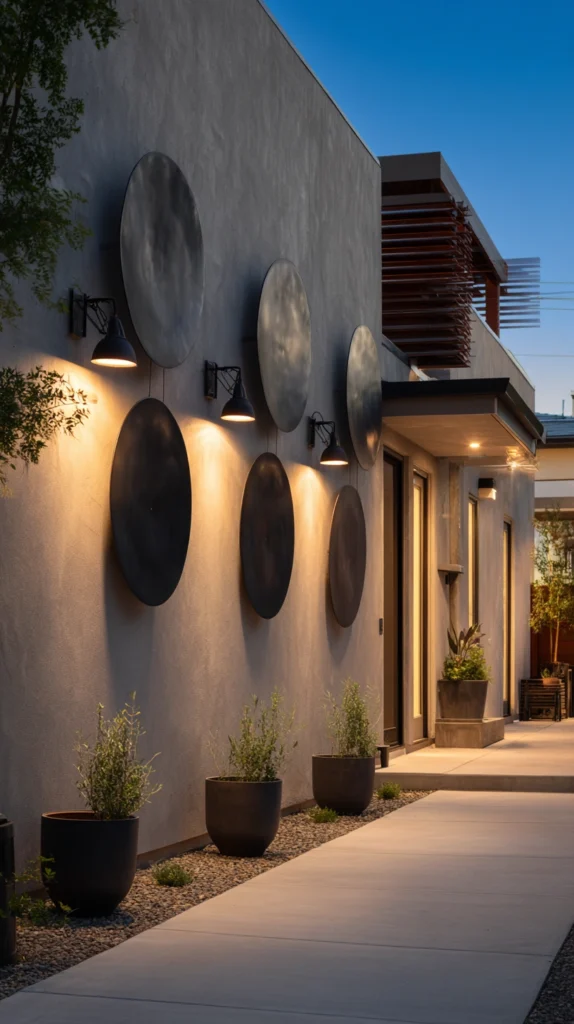
A consistent row of hanging flower baskets, mounted at even intervals along the fence — classic, reliable color and texture across the full length.
My fence lacking consistent color:
What was missing:
- Scattered, occasional plantings elsewhere in the yard, but nothing consistent along the fence itself
- A missed opportunity for the kind of reliable seasonal color hanging baskets consistently deliver
- A design approach so classic it was easy to overlook in favor of more elaborate options
The hanging basket solution:
Why this traditional approach remains genuinely effective:
- Hanging baskets deliver reliable, abundant seasonal color with relatively simple care
- A consistent row along the fence creates genuine visual rhythm and cohesion
- Works on nearly any fence style and requires minimal specialized installation skill
- One of the most classic, time-tested approaches to fence decoration for good reason
Installing the basket row:
Approach and technique:
- Mount sturdy hanging brackets at even, consistent intervals along the fence
- Choose baskets sized appropriately for the specific bracket and fence combination
- Space baskets close enough to read as a cohesive row, without crowding into each other
- Maintain a consistent basket size and style throughout for the most cohesive result
Plant choices for hanging baskets:
Best options for this application:
- Petunias and calibrachoa for abundant, reliable seasonal color
- Fuchsia for a more dramatic, cascading option in partially shaded locations
- Trailing lobelia for a softer, more delicate cascading texture
- Geraniums for a classic, low-maintenance option with strong color payoff
Cost:
- Hanging brackets (per bracket): $8-20
- Hanging baskets, pre-planted: $20-40 each
- A row of six to eight baskets: $170-480
My hanging basket row: A consistent row of petunia-filled baskets along the side fence delivers reliable color from late spring through fall, and the simple repetition across the fence’s length makes the whole side yard feel considered rather than incidental.
Hanging Basket Tips
Water hanging baskets more frequently than ground-level plantings:
Care consideration:
- Hanging baskets dry out significantly faster than in-ground beds due to increased air exposure
- Daily watering during hot weather is often necessary to keep baskets looking their best
- This increased maintenance requirement should factor into the decision before committing to a full row
- A simple drip irrigation line to each basket can reduce this manual watering burden considerably
Choose a consistent basket size and plant variety across the entire row:
Cohesion principle:
- Mismatched basket sizes or wildly different plant varieties can look scattered rather than intentional
- A single repeated basket style and plant type creates the strongest sense of a considered, cohesive design
- This consistency is part of what separates a genuine “row” effect from a random collection of individual baskets
- Purchase all baskets and plants at the same time to ensure a genuine match throughout
10. The Reclaimed Wood Accent Panel
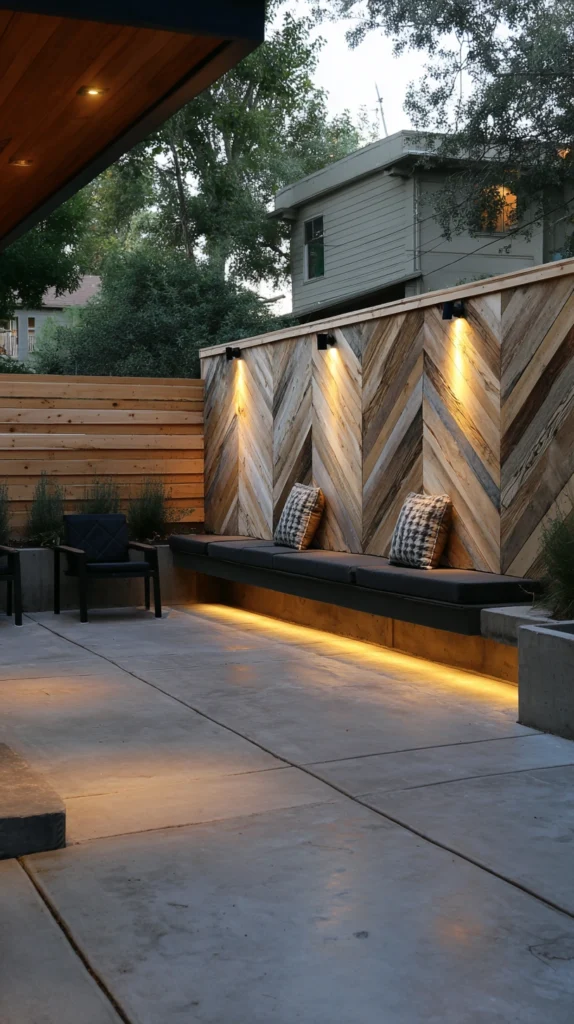
A section of the fence covered in reclaimed or contrasting wood, adding texture and material variation to an otherwise uniform surface.
My uniform, monotonous fence:
What felt repetitive:
- The entire fence constructed from identical boards, with no material variation anywhere
- A long, unbroken expanse with nothing to interrupt the visual monotony
- A missed opportunity to introduce genuine texture and material contrast
The reclaimed wood panel solution:
Why introducing a different wood texture matters:
- Breaks up an otherwise uniform, monotonous fence surface with genuine textural contrast
- Reclaimed wood specifically carries authentic character and history new lumber cannot replicate
- Creates a natural focal point without requiring any additional plants or hung decor
- A relatively contained project delivering significant visual variation for a modest scope
Building the accent panel:
Construction approach:
- Select a defined section of the fence, rather than attempting the full length
- Source reclaimed boards varying slightly in tone and texture from the main fence material
- Attach directly over or alongside the existing fence boards, depending on the specific design intent
- Arrange boards in a distinct pattern, such as a herringbone or varied-width layout, for added visual interest
Sourcing reclaimed material:
Finding the right wood:
- Architectural salvage yards specifically dealing in reclaimed lumber
- Online marketplaces, searching for free or low-cost reclaimed wood
- Old pallets, cleaned and disassembled, as a genuinely free source
- Local demolition sites, with appropriate permission from the site manager
Cost:
- Reclaimed wood, sourced free to low-cost: $0-80
- Fasteners and finishing supplies: $15-30
My reclaimed wood accent panel: A six-foot section of the fence covered in weathered pallet wood, arranged in a simple herringbone pattern, introduced genuine texture and visual interest to what had been the most monotonous stretch of the entire boundary.
Reclaimed Wood Panel Tips
Contain the accent panel to a defined section rather than the full fence length:
Scope management:
- A reclaimed wood treatment across the entire fence can become costly and visually overwhelming
- A contained panel, roughly a quarter to a third of the fence’s total length, reads as an intentional accent
- This scale also keeps both material sourcing and installation time reasonable
- A well-proportioned smaller panel typically outperforms an overly ambitious full-length attempt
Seal reclaimed wood before mounting to protect against further weathering:
Material preparation:
- Reclaimed wood has often already experienced significant weather exposure before being sourced
- A clear exterior sealant helps stabilize the wood and slow any further deterioration
- This preparation step protects the investment of time spent sourcing and installing the material
- Apply sealant to all sides of the boards, not just the visible face, for the most complete protection
11. The Fence-Mounted Water Feature
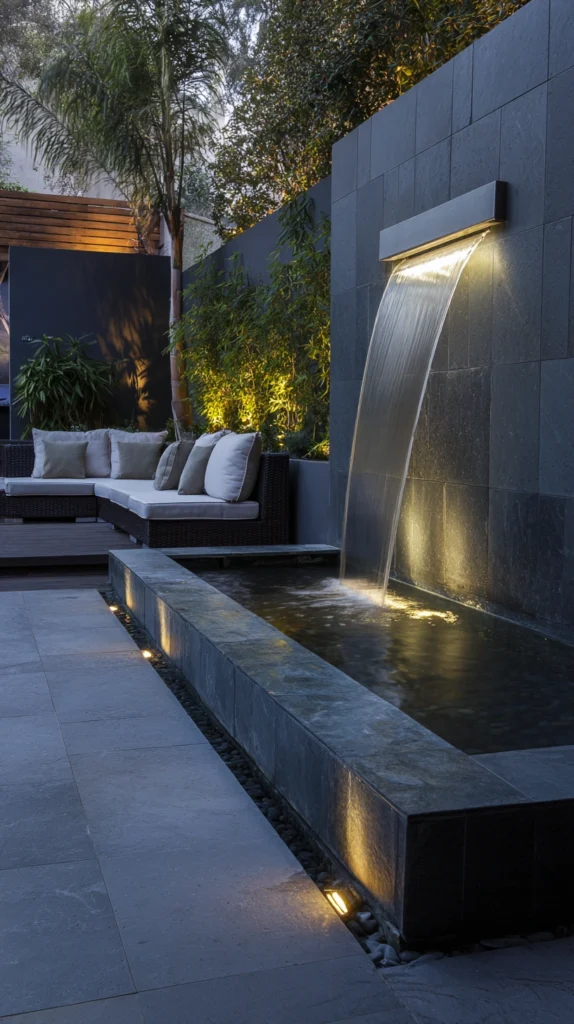
A small wall-mounted fountain or water feature attached directly to the fence — adding sound and movement to the boundary itself.
My silent, static fence line:
What was missing:
- A fence providing visual structure but no sound or movement along its length
- Existing water features elsewhere in the yard, disconnected from the fence area specifically
- A missed opportunity to bring the sensory benefit of water sound to an otherwise purely visual boundary
The fence water feature solution:
Why mounting a water feature to the fence works so well:
- Requires no additional ground footprint, unlike a traditional standalone water feature
- Adds genuine sound and movement precisely where the fence would otherwise remain static
- A recirculating system uses minimal water, making this a practical addition even in smaller yards
- Creates a natural focal point along an otherwise purely structural surface
Choosing the right feature:
Style and installation options:
- A wall-mounted fountain with a self-contained recirculating basin
- A simple spout or spillway feature, directing water into a small basin below
- Solar-powered pump options for locations without convenient electrical access
Installation considerations:
Getting it right:
- Confirm the fence structure can support the feature’s weight, particularly once filled with water
- Position near an accessible water source for easy filling and occasional cleaning
- Consider proximity to seating areas, since the sound carries best when heard from nearby
Cost:
- Small wall-mounted fountain: $80-250
- Solar pump option, if needed: $30-80
My fence-mounted fountain: A small wall-mounted fountain attached to the fence near the patio seating area brought genuine water sound to a boundary that had previously been purely visual, and it now masks neighborhood noise more effectively than anything else added to the yard.
Fence Water Feature Tips
Confirm the fence’s structural capacity before mounting a filled water feature:
Weight verification:
- A water feature, once filled, carries significantly more weight than most other fence decor
- Mount into sturdy posts or add additional structural support if the existing fence construction seems inadequate
- This verification is essential before installation, given the potential for a failure to cause real damage
- When uncertain, consult a professional or choose a lighter-weight feature specifically designed for fence mounting
Position the feature within reach of an accessible water source:
Practical maintenance consideration:
- Regular refilling and occasional cleaning are much easier with nearby water access
- A feature positioned far from any hose connection becomes a genuine maintenance burden
- This placement consideration matters as much as the feature’s aesthetic fit with the surrounding decor
- Plan the water feature’s location around practical access before finalizing based on appearance alone
12. The Layered Trellis and Climbing Vine System
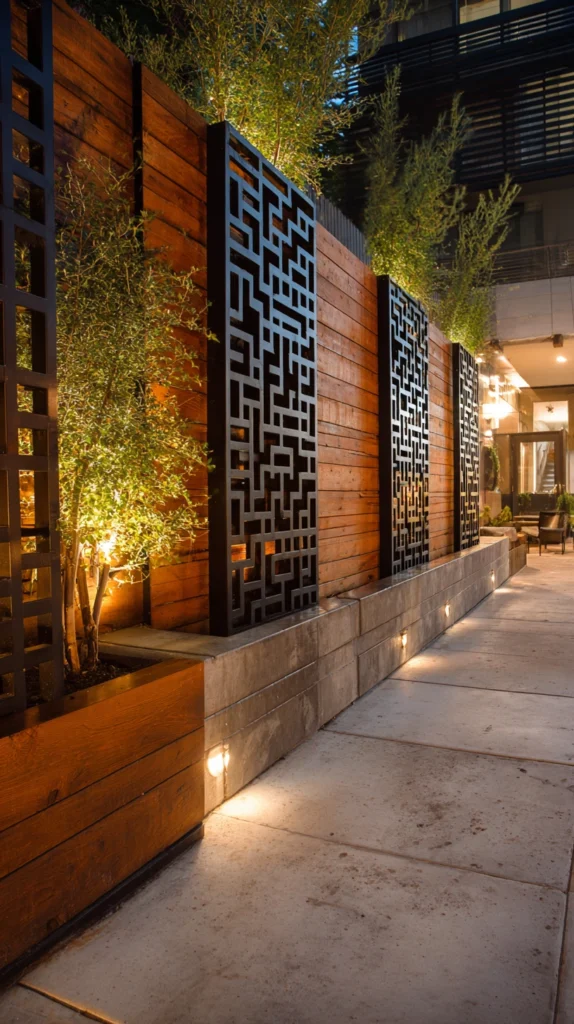
Multiple trellis panels attached along the fence, each supporting a different climbing vine variety, creating a layered, textural green wall.
My single, isolated trellis attempt:
What felt incomplete:
- One small trellis added to a single spot on the fence, with the rest left bare
- A missed opportunity to extend that same greenery concept across the fence’s full length
- Existing vine growth concentrated in one area rather than distributed for a more cohesive effect
The layered trellis system solution:
Why multiple trellis panels outperform a single isolated one:
- Creates a genuinely cohesive green wall effect across the fence’s entire length, rather than one isolated patch
- Different vine varieties at each panel add textural and seasonal variation throughout
- A more substantial, established garden feel develops as each panel matures over time
- Delivers significantly more overall greenery impact than concentrating effort in a single spot
Building the layered system:
Installation approach:
- Mount matching or coordinating trellis panels at even intervals along the fence
- Assign each panel a different but complementary climbing vine variety
- Stagger bloom times across the different vines for extended seasonal color
- Maintain consistent panel style and spacing for a cohesive overall look despite the plant variety
Choosing vine varieties for layering:
Building seasonal and textural variety:
- Clematis for spring and early summer bloom with dramatic flower color
- Climbing hydrangea for later summer white blooms and lush foliage
- Star jasmine for fragrant, glossy evergreen coverage
- Climbing roses for a classic, romantic cottage garden feel
Cost:
- Trellis panels (per panel): $25-60
- Climbing vine plants (per plant): $15-40
- A system of four to five panels: $175-500
My layered trellis system: Installing five matching trellis panels along the back fence, each with a different climbing vine, created a genuinely lush, textured green wall that develops new seasonal interest as each variety comes into bloom throughout the year.
Layered Trellis Tips
Stagger bloom times across the different vine varieties selected:
Seasonal planning:
- Choosing vines that all bloom simultaneously leaves the fence without color for the remainder of the year
- Researching each variety’s specific bloom season allows planning for extended, rotating seasonal interest
- This staggered approach keeps the fence visually engaging across a much longer portion of the year
- A relatively small amount of research upfront delivers meaningfully extended seasonal payoff
Guide and prune each vine regularly during the first growing season:
Establishment care:
- Unguided young vines can grow in unintended directions, missing their designated trellis panel
- Regular light guidance during the first season establishes the desired coverage pattern for each panel
- This early attention pays off significantly once the vines mature and require less ongoing management
- A relatively modest time investment that meaningfully improves the long-term cohesion of the full system
13. The Themed Seasonal Wreath Row
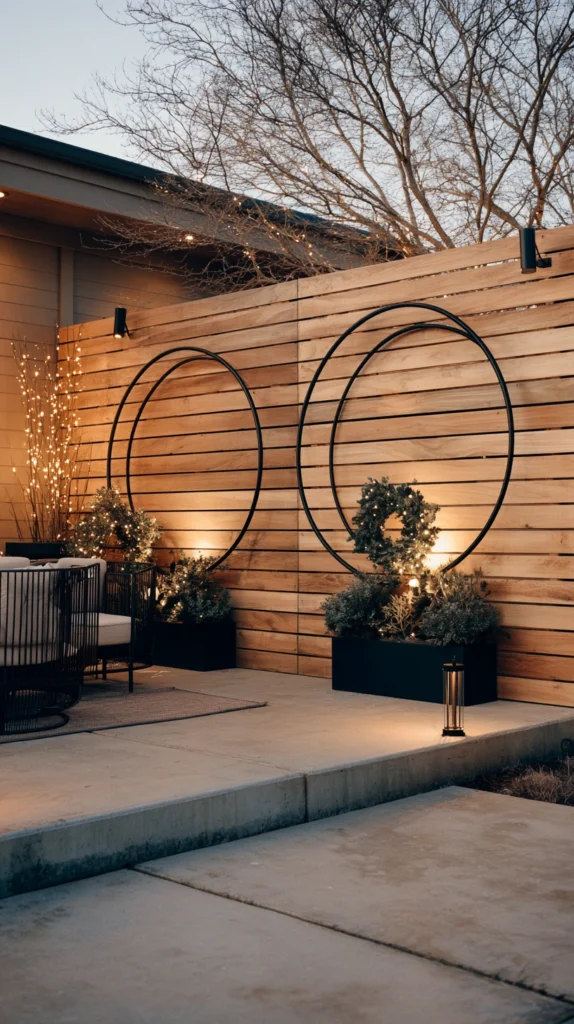
A row of wreaths, mounted along the fence and rotated seasonally, bringing consistently fresh, current decor to the boundary throughout the year.
My static, unchanging fence decor:
What was making the space feel stale:
- Any fence decor added once and left unchanged regardless of the season
- A boundary looking identical in July as it did in December
- Missing the sense of a space that evolves and responds to the actual time of year
The seasonal wreath row solution:
Why rotating wreaths keep the fence feeling genuinely current:
- A relatively low-cost way to refresh the fence’s appearance multiple times per year
- Wreaths are widely available in an enormous range of seasonal styles and materials
- Small, consistent seasonal changes signal ongoing care and attention to the space
- Creates renewed visual interest and anticipation as each season shifts
Building the wreath row:
Installation and rotation approach:
- Mount simple, weatherproof wreath hooks at even intervals along the fence
- Choose wreaths sized appropriately to read clearly from a normal viewing distance
- Rotate wreaths seasonally, storing off-season pieces in labeled, protected bins
- Maintain consistent spacing and hook placement, changing only the wreaths themselves between seasons
Seasonal wreath ideas:
Building the rotation:
- Spring: fresh floral or pastel-toned wreaths
- Summer: greenery-based or citrus-accented wreaths
- Fall: warm-toned dried botanical or harvest-themed wreaths
- Winter: evergreen, pinecone, or simple ribbon-accented wreaths
Cost:
- Weatherproof wreath hooks (per hook): $5-15
- Seasonal wreaths (per wreath, per season): $20-50
- A row of four to six positions, refreshed seasonally: $100-400 annually
My seasonal wreath row: A row of five wreath hooks along the front fence, rotated with the seasons and stored in labeled bins between changes, keeps that boundary looking consistently fresh and current throughout the entire year, at a relatively modest ongoing cost.
Seasonal Wreath Row Tips
Install permanent, weatherproof hooks even though the wreaths themselves rotate:
Infrastructure planning:
- Installing and removing hooks with every seasonal change adds unnecessary ongoing effort
- Permanent, weatherproof hooks allow quick, simple wreath swaps throughout the year
- This one-time installation investment makes the entire seasonal rotation habit significantly easier to maintain
- Choose hooks specifically rated for outdoor conditions and the expected wreath weight
Store off-season wreaths properly to preserve their condition for reuse:
Storage practice:
- Wreaths stored improperly between seasons can fade, mildew, or lose their shape before their next use
- Clean and fully dry wreaths before storing them in sealed, labeled bins
- A dedicated storage location keeps the rotation organized and protects the value of each seasonal purchase
- This small investment in proper storage allows wreaths to be reused across multiple years rather than repurchased annually
Choosing Your Fence Decor Projects
By Fence Style
Traditional wood fences:
- Repurposed window shutter display (idea 6)
- Espalier or trained fruit tree (idea 4)
- Hanging basket row (idea 9)
Modern or minimalist fences:
- Gallery wall of outdoor art (idea 3)
- Decorative fence cap and post finials (idea 8)
- Painted mural or accent panel (idea 5)
Cottage or garden-style fences:
- Vertical planter wall (idea 1)
- Layered trellis and climbing vine system (idea 12)
- Seasonal wreath row (idea 13)
By Effort Level
Lowest effort:
- Decorative fence cap and post finials (idea 8)
- Seasonal wreath row (idea 13)
- String light and lantern trim (idea 2)
Medium effort:
- Vertical planter wall (idea 1)
- Vertical herb and kitchen garden (idea 7)
- Gallery wall of outdoor art (idea 3)
- Repurposed window shutter display (idea 6)
Higher commitment:
- Espalier or trained fruit tree (idea 4)
- Painted mural or accent panel (idea 5)
- Reclaimed wood accent panel (idea 10)
- Layered trellis and climbing vine system (idea 12)
- Fence-mounted water feature (idea 11)
By Budget
Under $100:
- Painted mural or accent panel, small panel (idea 5)
- Repurposed window shutter display (idea 6)
- Reclaimed wood accent panel (idea 10)
- Decorative fence cap and post finials (idea 8)
$100-300:
- Vertical planter wall (idea 1)
- String light and lantern trim (idea 2)
- Vertical herb and kitchen garden (idea 7)
- Fence-mounted water feature (idea 11)
$300-500:
- Gallery wall of outdoor art (idea 3)
- Hanging basket row (idea 9)
- Layered trellis and climbing vine system (idea 12)
$500+:
- Espalier or trained fruit tree, established specimen (idea 4)
- Full hanging basket row, larger fence (idea 9)
Maintenance Through the Seasons
Spring:
- Refresh seasonal wreaths and rotate in spring-appropriate decor
- Begin regular watering routines for hanging baskets and vertical planters
Summer:
- Water vertical plantings and hanging baskets more frequently during peak heat
- Guide and prune climbing vines actively during their peak growing season
Fall:
- Rotate wreaths and seasonal decor to fall-appropriate styles
- Prune espalier fruit trees following harvest, according to their specific care schedule
Winter:
- Store more delicate decor items, protecting them from freezing or excessive moisture
- Inspect all mounting hardware for looseness or wear before the following season begins
My Complete Fence Decor Journey
What I added across two years:
Year one ($380):
- Vertical planter wall along the main patio-facing fence section
- String light trim along the entire fence’s top edge
- Learned that the fence had been the single most overlooked design opportunity in the whole yard
Year two ($510):
- Gallery wall of outdoor art on one dedicated fence section
- Vertical herb garden positioned near the grill
- Learned that combining decorative and functional elements delivered the most consistently used, appreciated results
Total investment: $890 across two years Most important lesson: The fence deserved the same design attention as any other surface in the yard Single highest-impact addition across both years: The vertical planter wall, for transforming the most visually neglected section of the entire property
Getting Started This Weekend
Start with one section, not the whole fence.
This weekend:
Step 1 — Choose the most visible or most neglected section of fence:
- The section most visible from the main patio or seating area
- Or the section that has felt most obviously bare and unaddressed
- This choice determines where the first project will deliver the most immediate visible impact
Step 2 — Select one low-cost, low-commitment project for that section:
- A row of post caps, a small painted accent panel, or a simple string light trim
- Starting affordably allows testing the concept before a larger investment
- Low-risk projects also build confidence and skill for more ambitious additions later
Step 3 — Confirm the fence’s structural capacity before mounting anything substantial:
- Locate sturdy posts and rails for any project involving real weight
- This check prevents damage to the fence and ensures long-term safety for whatever gets added
Step 4 — Plan for consistency across the fence’s full length, even if implemented gradually:
- Even a project completed one section at a time benefits from an overall plan
- This planning ensures the finished result reads as cohesive, not accidental
My recommendation:
Start with string lights and one small vertical planter:
- Both are affordable, quick to implement, and deliver immediate visual transformation
- Both provide genuine information about how much the fence’s appearance affects the whole yard’s feel
- This starting point often reveals which further additions would deliver the most value next
Step back and look at the fence from across the yard after both changes before deciding what comes next.
Now go build the fence line that finally gets the same design attention as every other part of the yard.
Quick Summary
The 13 backyard fence decor ideas:
Greenery and planting:
- Vertical planter wall (idea 1): genuine living wall effect, no ground footprint
- Espalier or trained fruit tree (idea 4): ornamental structure with real harvest
- Vertical herb and kitchen garden (idea 7): function and decor combined
- Hanging basket row (idea 9): classic, reliable seasonal color
- Layered trellis and climbing vine system (idea 12): a fully developed green wall
Lighting and atmosphere:
- String light and lantern trim (idea 2): extends the fence’s presence into evening
- Fence-mounted water feature (idea 11): sound and movement along the boundary
Art and personality:
- Gallery wall of outdoor art (idea 3): a genuinely personalized fence feature
- Painted mural or accent panel (idea 5): a one-of-a-kind artistic statement
- Repurposed window shutter display (idea 6): charming, salvaged architectural character
Architectural and material detail:
- Decorative fence cap and post finials (idea 8): small detail, outsized cumulative impact
- Reclaimed wood accent panel (idea 10): genuine texture and material contrast
Seasonal freshness:
- Themed seasonal wreath row (idea 13): a fence that evolves with the calendar year
The universal fence decor rules:
Always:
- Mount anything substantial into sturdy fence posts or rails, never thin boards alone
- Repeat elements consistently across the fence’s length for a cohesive, intentional look
- Choose decor scaled appropriately to the fence’s actual, often significant, size
- Confirm materials are genuinely rated for full outdoor exposure before purchasing
Never:
- Treat the fence as purely a boundary, separate from the yard’s overall design
- Add a single isolated decoration with no supporting plan for the rest of the fence
- Mount water features, planters, or heavy decor without verifying structural capacity first
- Assume indoor-rated materials will hold up under genuine outdoor sun and moisture exposure
Common mistakes:
- Overlooking the fence entirely as a design opportunity in favor of furniture and ground-level plantings
- Adding decor without a cohesive plan, resulting in a scattered rather than intentional look
- Choosing decor too small or delicate to actually register against the fence’s genuine scale
- Skipping structural verification before mounting anything with real weight
- Leaving fence decor completely static year-round, missing the value of seasonal refreshes
Remember: the fence is often the largest blank canvas in the entire backyard, and it is consistently the most overlooked, repetition and consistency across the fence’s length deliver more impact than any single isolated addition, structural verification matters before mounting anything with genuine weight, combining decorative and functional elements creates the most consistently valued results, and the best fence decor is the kind that makes people realize the fence was there to be designed all along.