14 Creative Backyard Garden Landscape Ideas on a Budget That Look Expensive
My backyard looked exactly like what it was: a builder-grade lot with sod, one struggling shrub, and a fence nobody had ever bothered to notice. Every landscaping quote I gathered started at five figures.
I could not afford a landscape architect. What I could afford was patience, a shovel, and a willingness to learn which techniques actually mattered and which were just expensive labor.
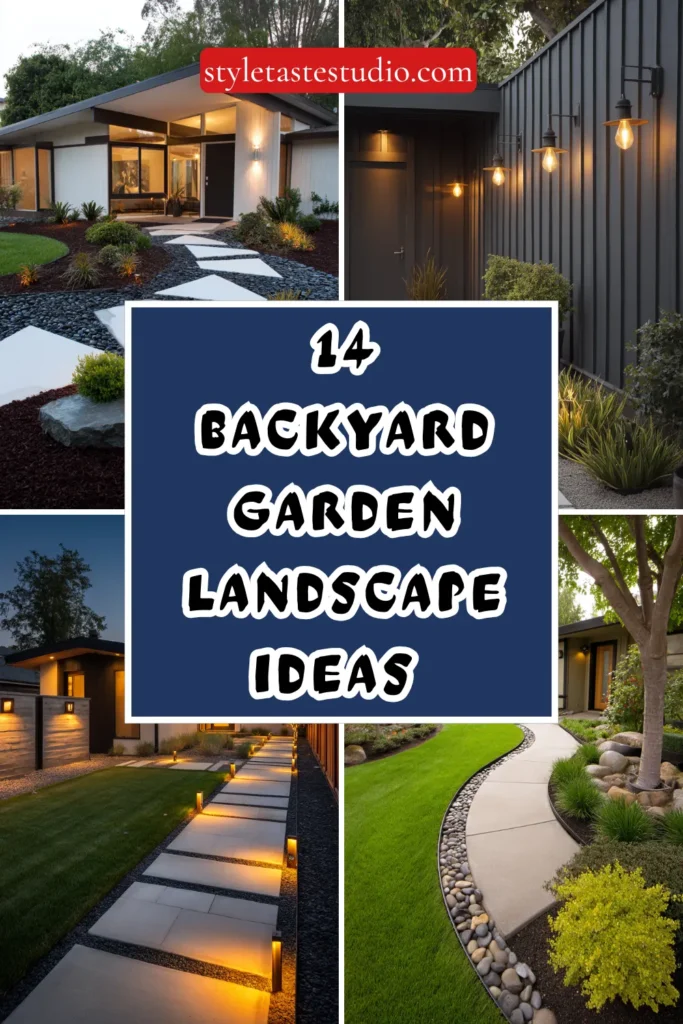
Turns out the difference between a yard that looks professionally designed and one that looks like a rental property has very little to do with budget. It has to do with edging, repetition, and a handful of techniques real landscapers use that cost almost nothing to copy.
I started with clean bed edges and three matching pots by the front door. Cost under forty dollars combined. A neighbor asked who did my landscaping.
Here are 14 ideas that make a backyard look genuinely designed, without the genuine designer price tag attached to it.
Why Most Budget Landscaping Still Looks Cheap
The common mistakes:
The scattered plant purchase approach:
- One of everything, bought on impulse at the garden center
- No repetition or grouping anywhere in the yard
- Every bed looking like a different, unrelated decision
- More money spent than a cohesive plan would have required, with a worse result
The undefined bed edges:
- Mulch or gravel spreading gradually into the lawn over time
- No crisp line separating planted areas from grass
- The single detail that most immediately signals “unfinished” regardless of what is planted
- A free fix in labor terms, constantly skipped anyway
The single-size, single-height planting:
- Every plant chosen at the same mature height and spread
- No layering, no vertical interest, no sense of depth
- A flat, uniform look regardless of how much was actually spent
- Professional-looking gardens depend on height variation more than plant cost
What a successful budget landscape does:
Uses design principles that cost nothing to apply:
- Repetition of a few plant varieties instead of one of everything
- Crisp, defined edges between beds and lawn
- Height variation layered front to back
- Odd-numbered groupings instead of scattered singles
My revelation: The techniques that make a yard look expensive are almost entirely free. Money buys plants faster; it does not buy the eye for repetition and edges that actually creates the expensive look.
1. The Crisp Bed Edging Trick
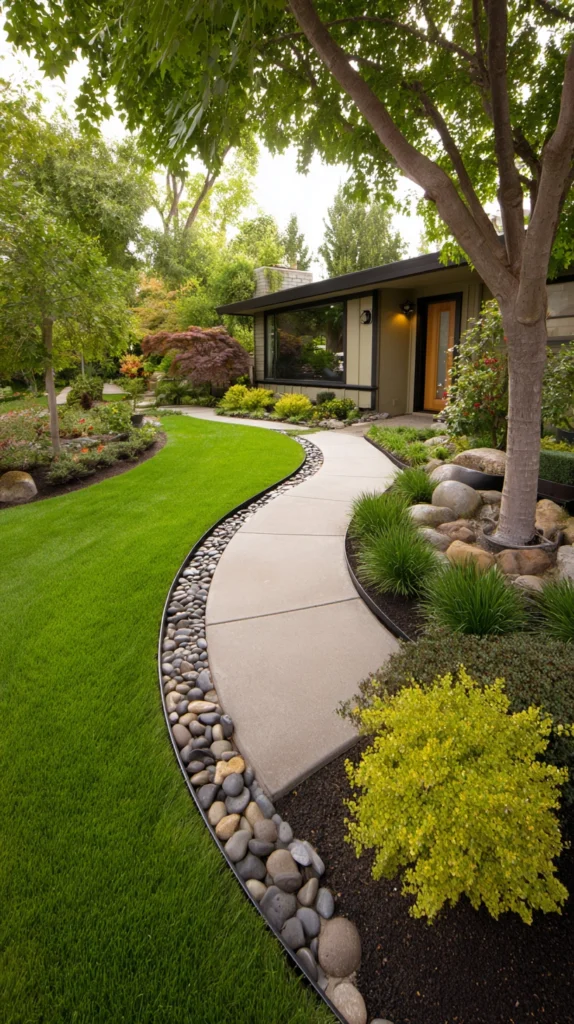
A clean, defined line between lawn and planting bed, cut with a simple edging tool — the single highest-impact, lowest-cost landscaping change available.
My blurry bed lines:
What I had:
- Mulch beds fading gradually into the surrounding grass
- No clear boundary anywhere between lawn and planted areas
- A yard that looked unfinished no matter what was planted within the beds
The edging discovery:
Why this detail matters more than almost anything else:
- A crisp edge signals intentional design more than any single plant purchase could
- Professional landscapers consistently cite clean edges as the detail clients notice most
- Costs nothing beyond a few hours of labor with a simple hand tool
- Immediately elevates even a modest, inexpensive planting scheme
Achieving a clean edge:
Method options:
- A half-moon edging tool, cut by hand along the bed’s perimeter
- A rented power edger for larger properties with extensive bed lines
- Physical edging material (metal, plastic, or stone) for a more permanent defined line
- Re-cutting the edge every few weeks during the growing season to maintain crispness
Where this works best:
Ideal applications:
- Every planting bed in the yard, regardless of size or plant selection
- Especially valuable around front walkway beds and high-visibility areas
- Works with existing plantings; no new plants required to see the benefit
Cost:
- Half-moon edging tool: $15-30
- Physical edging material, if desired (per linear foot): $1-4
- Total: $15-30 for tool-only approach, $50-200 for physical edging material
My crisp bed edges: Re-cutting every bed edge in the yard with a $20 tool took one afternoon and did more for the yard’s overall polish than any plant purchase from that entire season.
Bed Edging Tips
Maintain the edge regularly, not just once:
Ongoing commitment:
- A crisp edge cut once and never touched again gradually blurs back within a season
- A quick re-cutting every few weeks during active growing season keeps the line sharp
- This maintenance takes only minutes once the initial edge is established
- Consistency here matters more than the initial cutting technique used
Curve bed edges gently rather than using harsh angles:
Shape consideration:
- Sharp, angular bed edges can look stiff and amateur
- Gentle, sweeping curves read as more intentional and professionally designed
- Use a garden hose laid on the ground to test curve shapes before cutting
- This small adjustment in shape meaningfully affects how polished the final result appears
2. The Repetition Planting Strategy
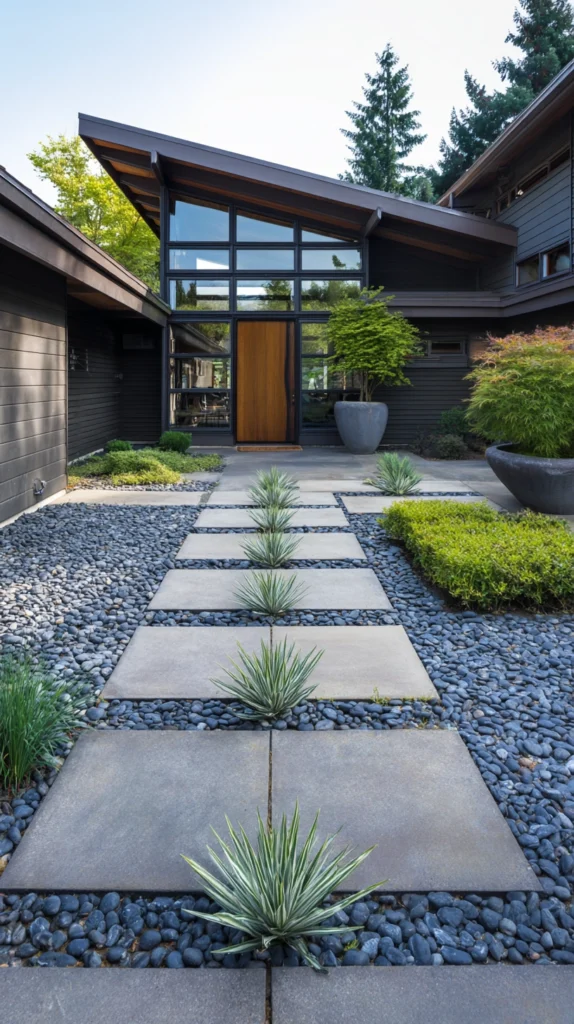
Using the same three to five plant varieties repeated throughout the yard, rather than one of many different species.
My one-of-everything garden center trip:
What was creating visual chaos:
- A different plant purchased on impulse for nearly every empty spot
- No cohesive thread tying any of the beds together
- A yard that looked more expensive to have purchased than it actually looked once planted
The repetition discovery:
Why repeating a limited plant palette looks more expensive:
- Professional landscape designs consistently rely on repetition rather than variety
- A cohesive, repeated palette reads as intentional in a way that a mixed collection cannot
- Buying more of fewer varieties is often cheaper than buying one of many different plants
- Creates visual rhythm as the eye moves through the yard, recognizing the same forms repeating
Building a repetition planting plan:
Selection approach:
- Choose one structural plant (a shrub or ornamental grass) as the backbone, repeated throughout
- Add one or two flowering perennials repeated in clusters at different points
- Include one groundcover or low border plant used consistently along bed edges
- Resist the urge to add a different, unrelated plant to fill each remaining gap
Where this works best:
Ideal applications:
- Foundation beds along the house
- Border plantings along a fence line
- Any yard with several disconnected beds needing a unifying visual thread
Cost:
- Plants purchased in larger quantities of fewer varieties (per plant): $8-25
- Average yard requiring 15-20 plants across three to five varieties: $150-400
My repetition planting: Replacing a scattered collection of a dozen different plants with clusters of just four repeated varieties cost less overall and made the yard look like it had been professionally designed from the very beginning.
Repetition Planting Tips
Choose plants with a long season of interest for the repeated backbone:
Selection priority:
- The plant repeated most throughout the yard should look good across multiple seasons
- Evergreen shrubs or ornamental grasses with structure through fall and winter work particularly well
- This choice ensures the yard’s unifying thread remains visible even outside peak bloom season
- A repeated plant with only a brief flowering window provides less consistent cohesion
Buy plants in odd-numbered groupings within each repetition:
Grouping principle:
- Clusters of three or five read as more natural and intentional than clusters of two or four
- This detail applies within each repeated grouping throughout the yard
- Odd numbers create a more organic, less rigidly symmetrical appearance
- A small detail that meaningfully affects how professional the overall planting feels
3. The Matching Container Trio
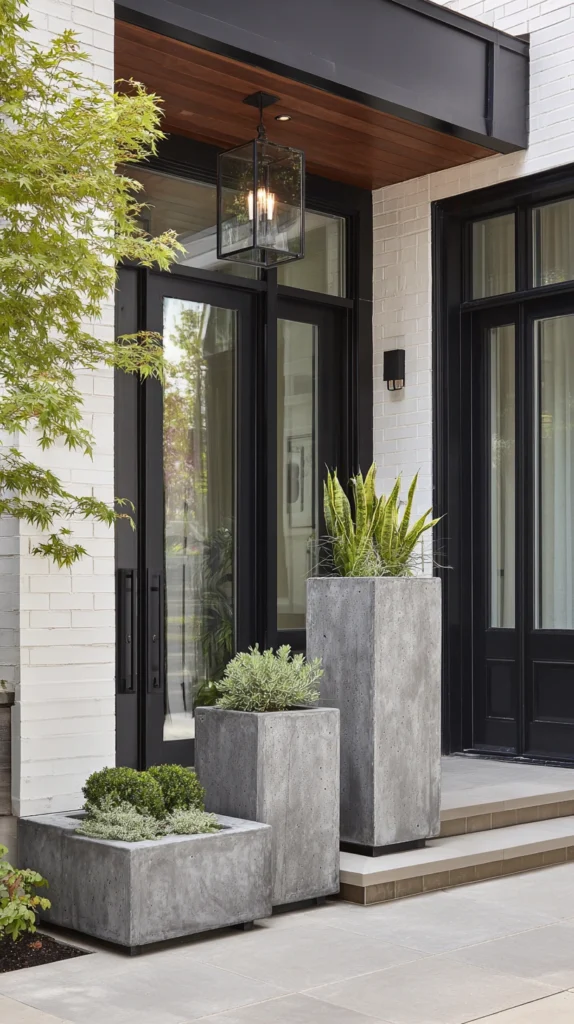
Three matching planters, varied in size, grouped at an entry point or focal area — a low-cost way to add instant polish.
My mismatched pot collection:
What felt disjointed:
- Several different pots, collected over time, none coordinating with each other
- An entry area with no cohesive visual moment
- A missed opportunity for one of the cheapest high-impact additions available
The matching trio solution:
Why three coordinated containers deliver outsized impact:
- A matched set signals intention in a way mismatched pots never can
- Varying heights within the matched set creates visual interest without sacrificing cohesion
- Works at nearly any budget level, from basic plastic to more substantial ceramic
- One of the most affordable, immediately visible upgrades available for an entry area
Building the trio:
Selection approach:
- Choose one container style and finish, purchased in three different sizes
- Group at varying heights: tall, medium, and short, clustered together
- Fill with either matching plants across all three or a coordinated, varied planting
Placement strategy:
Where to position the trio:
- Flanking a front door or entry walkway
- Anchoring a patio corner or outdoor seating area
- Marking the transition point between a driveway and front walkway
Cost:
- Matching planter set (three sizes, budget material): $40-90
- Matching planter set (higher-quality ceramic or concrete): $100-250
- Plants for filling: $30-80
My matching container trio: Three simple charcoal planters, all from the same product line but different heights, grouped by the front door for under $70 total, remains the single best return on investment of anything I have added to the yard.
Matching Container Tips
Choose one plant variety across all three pots for the strongest cohesive statement:
Simplicity principle:
- Different plants in each pot can undercut the unified look the matching containers create
- The same plant, repeated across all three, reinforces the sense of one coordinated design decision
- This approach is also often cheaper, since one plant variety can be purchased in bulk
- Reserve varied planting within a matched set for more experienced gardeners confident in balancing the mix
Elevate budget plastic containers with a faux-stone or concrete finish paint:
Material upgrade on a budget:
- Inexpensive plastic planters can be painted with specialty finishes mimicking concrete or stone
- This technique achieves a significantly more expensive appearance for a fraction of the material cost
- Test the finish on a small, hidden area of the pot before committing to full coverage
- A worthwhile technique specifically when budget constraints rule out genuine stone or concrete containers
4. The Gravel Pathway with Steel Edging
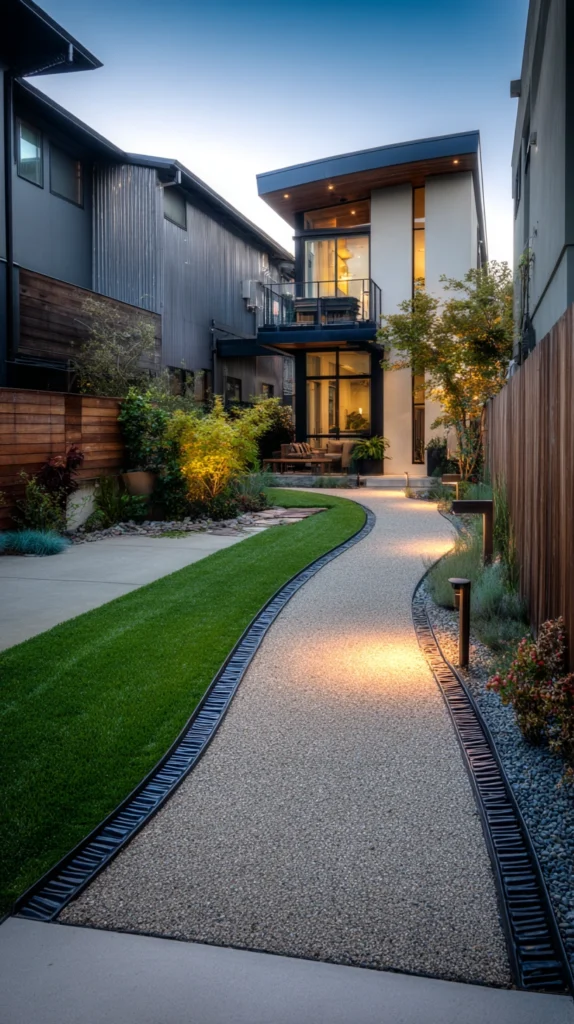
A simple decomposed granite or gravel path, contained by steel or aluminum landscape edging, connecting two points in the yard.
My missing sense of journey:
What was absent:
- A yard with no defined path guiding movement from one area to another
- Visitors cutting directly across the lawn rather than following any intended route
- No sense of destination or intentional flow anywhere in the design
The gravel pathway solution:
Why a defined path elevates the entire yard’s perceived design:
- Creates a genuine sense of destination and intentional movement through the space
- Decomposed granite and gravel are among the most affordable path materials available
- Steel edging contains the material cleanly, preventing the scattered look loose gravel can develop
- A relatively simple weekend project delivering a significant visual and functional upgrade
Building the pathway:
Construction basics:
- Excavate a shallow trench along the planned path route, typically three to four inches deep
- Install steel or aluminum edging along both sides to contain the gravel material
- Add a layer of landscape fabric beneath the gravel to reduce weed growth
- Fill with decomposed granite or gravel, compacting and leveling as you go
Material and style choices:
Selecting the right look:
- Decomposed granite for a fine, walkable, natural-looking surface
- Larger gravel or pea stone for a more textured, rustic path
- A curved rather than straight path for a more natural, garden-like feel
Where this works best:
Ideal placements:
- Connecting a back door to a garden shed or seating area
- Winding through a garden bed as a maintenance and viewing path
- Along the side yard as a functional connector between front and back
Cost:
- Decomposed granite or gravel (per ton, covers roughly 100 sq ft at 3 inches deep): $40-80
- Steel edging (per linear foot): $2-5
- Landscape fabric: $15-30
- Total: $100-350 for an average pathway
My gravel garden path: A curved decomposed granite path connecting the patio to the garden shed, contained by simple steel edging, cost under $180 total and immediately gave the yard a sense of intentional flow it had never had before.
Gravel Pathway Tips
Compact the gravel thoroughly during installation:
Installation technique:
- Loosely poured gravel shifts and scatters underfoot, quickly looking messy
- Compacting each layer as it is added creates a firmer, more stable, better-looking surface
- A hand tamper or rented plate compactor both work well depending on the path’s size
- This step is what separates a professional-looking path from one that looks thrown down
Choose a curved path route over a straight line when space allows:
Design consideration:
- A straight path can feel utilitarian rather than intentionally designed
- A gentle curve, even a subtle one, reads as more considered and garden-like
- Use a garden hose to test and adjust the path’s curve before excavating
- This small design choice significantly affects the path’s overall aesthetic impact
5. The Vertical Trellis and Climbing Vine
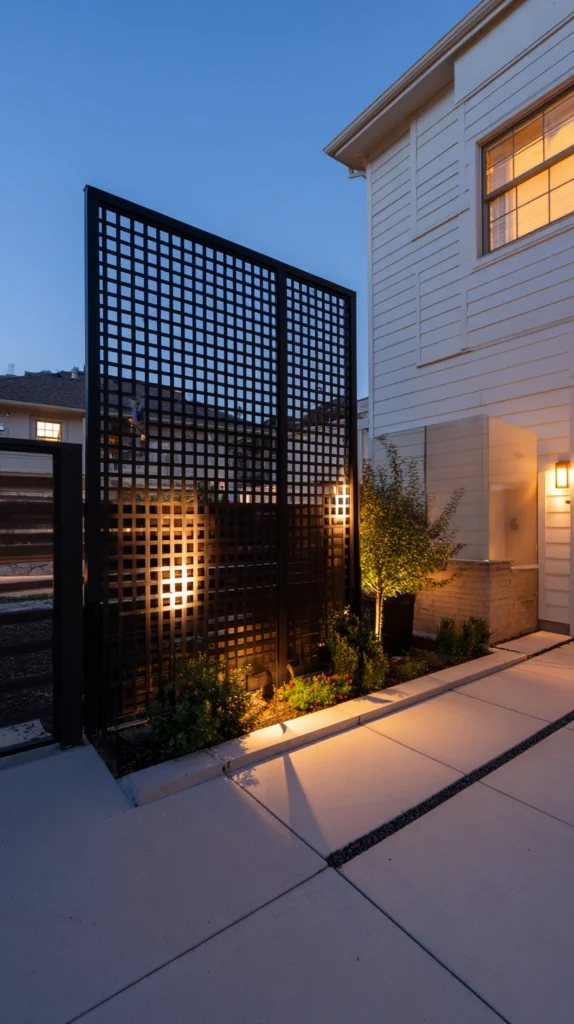
A simple wood or metal trellis paired with a fast-growing climbing vine, adding height and greenery to a blank wall or fence.
My flat, two-dimensional yard:
What was missing:
- A yard with plenty of ground-level plantings but nothing rising vertically
- A blank fence or wall doing nothing for the overall design
- Missing the sense of layered depth taller elements provide
The vertical trellis solution:
Why going vertical adds outsized visual value:
- Uses wall or fence space that would otherwise remain entirely unused
- A single trellis and vine combination adds significant green coverage relative to its cost
- Creates genuine height variation, a hallmark of professionally designed gardens
- Fast-growing vines deliver a mature, established look within a single growing season
Choosing the right trellis and vine combination:
Selection approach:
- A simple wood lattice or metal grid trellis, sized to the available wall space
- Fast-growing annual vines (morning glory, black-eyed Susan vine) for quick, budget-friendly coverage
- Perennial climbing vines (clematis, climbing hydrangea) for a longer-term, more permanent investment
- Match the vine’s growth habit to the trellis structure’s ability to support it
Installation basics:
Getting it right:
- Mount the trellis a few inches away from the wall or fence to allow airflow
- Secure firmly, since a mature vine adds significant weight over time
- Guide young vine growth onto the trellis initially, until the plant begins climbing independently
Where this works best:
Ideal placements:
- A blank fence section visible from the main patio or seating area
- Flanking a garage or shed wall
- Framing an entry gate or side yard access point
Cost:
- Wood or metal trellis: $30-100
- Climbing vine plants: $10-30 each
- Total: $40-160
My trellis and vine: A simple metal trellis with a fast-growing clematis against the previously blank fence added the vertical dimension the whole yard had been missing, and within one season it looked like an established garden feature.
Trellis and Vine Tips
Choose a vine species suited to the specific trellis material and structure:
Compatibility consideration:
- Some vines twine directly around supports, while others need horizontal wires or a mesh grid to climb
- Confirm the trellis structure matches the specific climbing mechanism of the chosen vine
- A mismatch between vine type and support structure can result in poor coverage despite healthy growth
- Research the specific vine’s climbing habit before finalizing trellis selection
Prune and guide the vine regularly during its first growing season:
Establishment care:
- Unguided young vines can grow in unintended directions, missing the trellis structure entirely
- Regular light guidance and pruning during the first season establishes the desired coverage pattern
- This early attention pays off significantly once the vine matures and requires less ongoing management
- A relatively small time investment that meaningfully improves the long-term result
6. The Mulch Color and Texture Upgrade
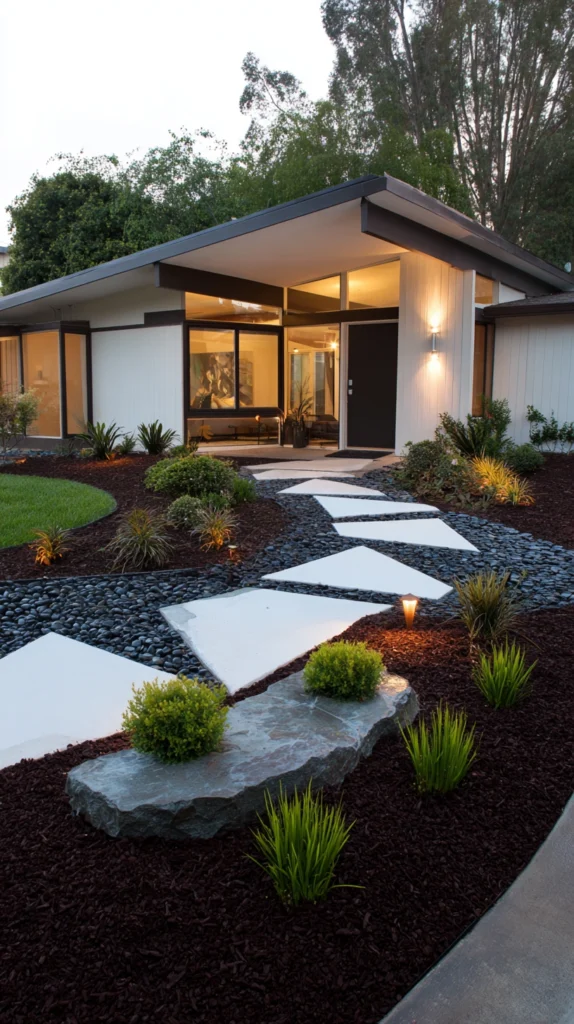
Switching to a richer, darker mulch color and applying it at a consistent, generous depth — a simple material swap with significant visual impact.
My inconsistent, faded mulch:
What was undermining the yard’s look:
- Mulch applied inconsistently, thin in some areas and absent in others
- A faded, sun-bleached color throughout most of the beds
- A detail so basic it was easy to overlook, yet visible throughout the entire yard
The mulch upgrade solution:
Why this simple material swap matters so much:
- Mulch color and consistency affects the visual read of every single bed in the yard simultaneously
- A rich, dark mulch color makes green foliage appear more vibrant by contrast
- Consistent depth throughout signals genuine care and maintenance
- One of the most cost-effective yard-wide upgrades available, given how much surface area it covers
Choosing the right mulch:
Selection considerations:
- Dark brown or black-dyed mulch for the strongest contrast with plant foliage
- Natural hardwood mulch for a slightly less dramatic but longer-lasting, more natural option
- Avoid brightly colored dyed mulches (red, orange) that can look artificial rather than expensive
- Consistency in mulch type across the entire yard, rather than mixing different products bed to bed
Application technique:
Getting the depth right:
- Apply at a consistent two to three inch depth throughout all beds
- Keep mulch pulled back several inches from plant stems and trunks to prevent rot
- Refresh the top layer annually rather than letting the existing mulch fully break down and fade
Cost:
- Bulk mulch (per cubic yard, covers roughly 100 sq ft at 3 inches deep): $25-45
- Average yard requiring 3-4 cubic yards: $75-180
My mulch upgrade: Switching every bed in the yard to the same dark, natural hardwood mulch at a consistent depth cost under $150 total and made every single planting throughout the property look more established and cared for immediately.
Mulch Upgrade Tips
Apply mulch at a consistent depth throughout every bed, not just the visible ones:
Consistency principle:
- Uneven mulch depth between visible and less-visible beds creates a disjointed overall impression
- Treat every bed in the yard with the same care and consistent application
- This uniformity is part of what signals genuine, comprehensive maintenance rather than selective effort
- A relatively small additional time investment for meaningfully improved overall cohesion
Avoid piling mulch directly against plant stems or tree trunks:
Plant health consideration:
- Mulch mounded against stems and trunks traps moisture and can lead to rot or disease
- Maintain a small clear gap, often called a mulch volcano avoidance technique, around each plant’s base
- This detail protects plant health while also looking more intentional and well-maintained
- A common mistake that undermines both the yard’s appearance and its plants’ long-term health
7. The Salvaged and Repurposed Hardscape Materials
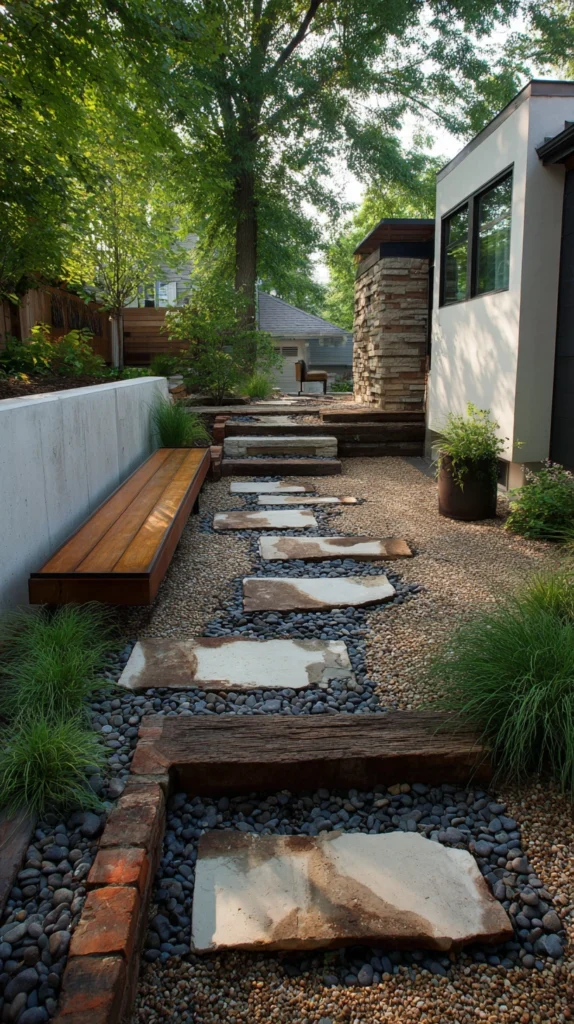
Reclaimed brick, broken concrete, or salvaged pavers used for pathways, edging, or small patios — genuine material character at little to no cost.
My hardscape budget gap:
What was out of reach:
- New pavers or stone priced well beyond the available landscaping budget
- Wanted genuine hardscape material rather than another mulch or gravel-only solution
- Assumed quality hardscaping required buying new material at full retail price
The salvaged material solution:
Why reclaimed materials often outperform new ones in this application:
- Frequently available free or at very low cost from demolition sites or online marketplaces
- Existing weathering and character look more established than brand-new material
- Broken concrete, sometimes called urbanite, functions genuinely well as irregular flagstone
- Diverts usable material from landfills while delivering real hardscape function
Sourcing salvaged materials:
Finding what is available:
- Online marketplaces, searching for “free concrete,” “free brick,” or “free pavers”
- Local demolition or construction sites, with permission from the site manager
- Salvage yards specifically dealing in reclaimed building materials
- Neighbors renovating patios or driveways, often eager to have the old material hauled away
Using salvaged materials effectively:
Application ideas:
- Broken concrete pieces laid as an irregular stepping stone path
- Reclaimed brick used for clean, defined bed edging
- Salvaged pavers reset as a small patio or seating pad
Cost:
- Salvaged material itself: often free to $50 for a full pickup truck load
- Sand base and leveling materials: $30-80
- Total: $30-130 for a substantial hardscape project
My salvaged concrete path: A stepping stone path built entirely from a neighbor’s discarded driveway concrete cost nothing for the material itself, and the irregular, weathered pieces look more intentional than new pavers would have.
Salvaged Material Tips
Inspect materials carefully for structural soundness before transporting:
Quality check:
- Not all salvaged material is suitable; some concrete may be too degraded or reinforced with exposed rebar
- Check for cracks that indicate the material may continue breaking apart after installation
- Avoid material with significant embedded metal that could pose a safety hazard
- A few minutes of inspection at the source prevents wasted effort transporting unusable material
Clean and sort salvaged pieces before beginning installation:
Preparation step:
- Remove any attached soil, old mortar, or debris before laying material
- Sort pieces by size and shape to plan the layout more efficiently
- This preparation makes the actual installation process significantly smoother and faster
- A clean, well-sorted pile of material also makes final placement decisions easier to visualize
8. The Ornamental Grass Border
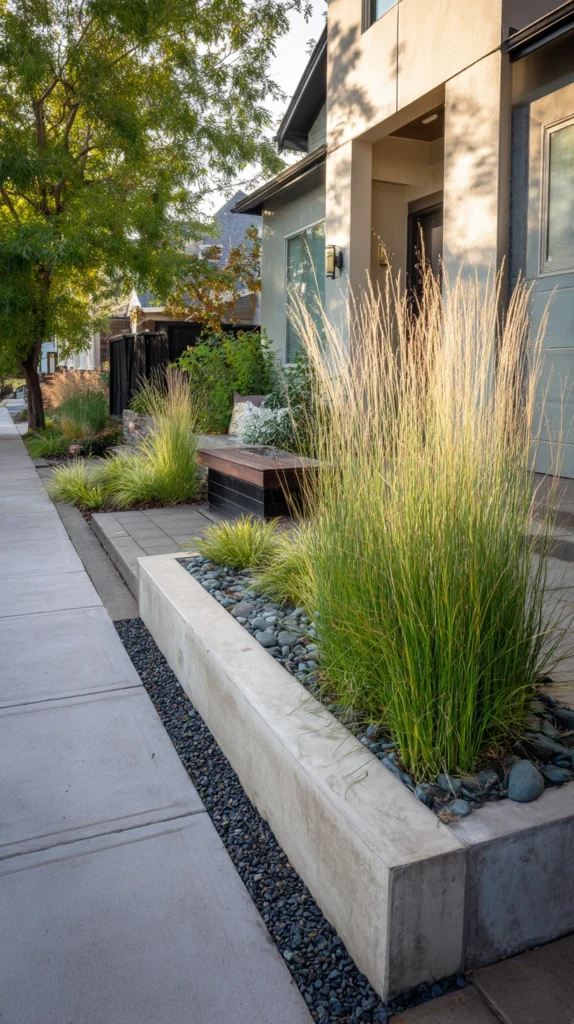
A row or cluster of ornamental grasses planted along a fence line or bed edge — low-maintenance, high-impact texture at a relatively low plant cost.
My missing textural layer:
What was flat about the existing planting:
- Beds filled primarily with flowering perennials and shrubs, but no textural grass element
- No movement in the garden when the wind passed through
- A missed opportunity for one of the most cost-effective plant categories available
The ornamental grass solution:
Why grasses deliver such strong value for the cost:
- Many ornamental grass varieties are relatively inexpensive per plant compared to flowering perennials
- Grow quickly to a mature, established size within one to two seasons
- Add movement and sound to the garden, engaging more than just sight
- Provide four-season interest, including attractive seed heads through fall and winter
Choosing the right grasses:
Selection by size and effect:
- Taller varieties (miscanthus, feather reed grass) for a privacy screen or dramatic backdrop
- Medium varieties (fountain grass) for mid-border texture and movement
- Low-growing varieties (blue fescue) for edging and foreground texture
Planting for maximum impact:
Layout strategy:
- Plant in a repeated row along a fence line for a cohesive screening effect
- Cluster in groups of three or five within a mixed border for textural contrast
- Space according to the specific variety’s mature spread to avoid future overcrowding
Cost:
- Ornamental grass plants (per plant, small starter size): $8-20
- A border of 10-15 plants: $80-300
My ornamental grass border: A row of feather reed grass along the back fence, purchased as small starter plants for under $150 total, filled in within two seasons to create genuine privacy screening with constant movement and texture.
Ornamental Grass Tips
Cut back grasses in late winter before new growth emerges:
Maintenance timing:
- Ornamental grasses benefit from being cut back to a few inches above ground each year
- Late winter, just before new growth begins, is the ideal timing for this maintenance
- This annual cutback keeps the grasses looking fresh and prevents a buildup of dead material
- A simple, once-yearly task that maintains the border’s appearance with minimal effort
Purchase smaller starter plants rather than larger, more expensive specimens:
Cost efficiency:
- Most ornamental grasses grow quickly enough that smaller, cheaper starter plants catch up within one to two seasons
- The price difference between small and large specimens is often significant relative to the growth time saved
- This approach allows a larger overall border for the same budget
- Patience with smaller plants is one of the most effective cost-saving strategies in garden design generally
9. The DIY Raised Garden Bed from Basic Lumber
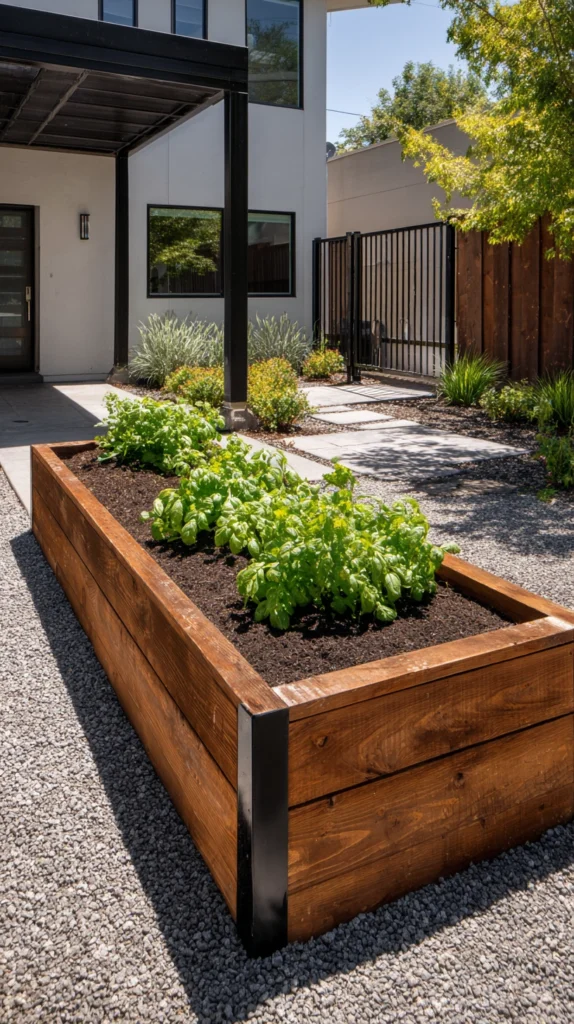
Simple raised beds built from inexpensive cedar or pine lumber — defined, elevated planting areas at a fraction of purchased kit prices.
My unstructured ground-level planting:
What felt unfinished:
- Vegetable and flower plantings directly in ground-level soil with no defined structure
- Purchased raised bed kits priced significantly higher than the material cost alone
- A missed opportunity for the clean, structured look raised beds provide
The DIY raised bed solution:
Why building from basic lumber beats purchased kits:
- Raw lumber costs a fraction of assembled or kit-based raised bed products
- A basic rectangular design requires minimal carpentry skill or specialized tools
- Customizable to the exact size and location needed, rather than a fixed kit dimension
- Delivers the same clean, structured look as expensive kits at meaningfully lower cost
Building basic raised beds:
Construction approach:
- Cedar or untreated pine boards, cut to the desired bed dimensions
- Simple corner joints, secured with exterior-grade screws
- A typical bed height of 12-18 inches, providing adequate soil depth for most plants
- Line the bottom with cardboard or landscape fabric to suppress weeds before filling with soil
Material choices:
Selecting the right lumber:
- Cedar for natural rot resistance and a more attractive finished appearance
- Untreated pine as the most affordable option, requiring more frequent eventual replacement
- Avoid chemically treated lumber for food-growing beds specifically
Cost:
- Cedar boards for one 4×8 foot bed: $60-120
- Pine boards for the same size: $30-60
- Screws and basic hardware: $10-20
- Total: $40-140 per bed
My DIY raised beds: Building three cedar raised beds from lumber yard boards cost roughly a third of what comparable purchased kits quoted, and the slightly imperfect corners have weathered in a way that looks entirely intentional.
DIY Raised Bed Tips
Choose cedar over pine if the beds will remain in place for several years:
Material longevity:
- Cedar’s natural rot resistance significantly extends a raised bed’s usable lifespan
- Pine, while cheaper initially, typically requires replacement within a shorter timeframe
- Calculate the cost difference against the expected replacement timeline before choosing
- For a longer-term investment, cedar’s higher upfront cost is often the better value overall
Fill beds with a proper soil blend rather than only garden soil:
Growing medium consideration:
- Plain garden soil alone often compacts and drains poorly within a raised bed structure
- A blend of quality topsoil, compost, and a drainage material like perlite improves plant performance significantly
- This soil investment matters as much as the bed construction itself for successful growing
- Research an appropriate blend ratio specific to what will be planted in each bed
10. The Solar Path Light Row
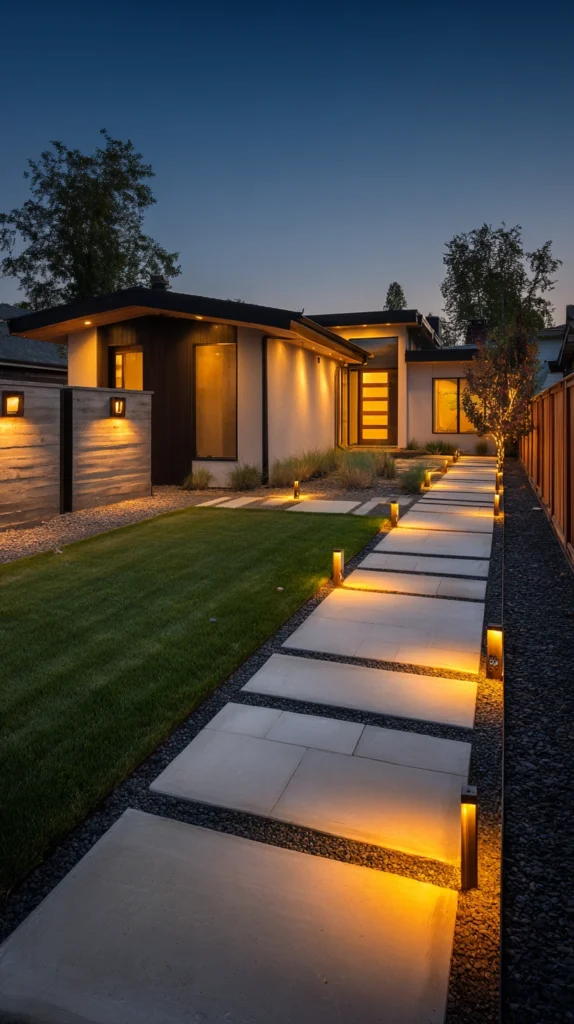
A consistent row of matching solar path lights lining a walkway or bed edge — affordable lighting that adds evening drama without any electrical work.
My dark, unlit evening yard:
What was limiting the yard’s use:
- A yard that essentially disappeared after sunset with no lighting plan
- Electrical wiring for landscape lighting priced well beyond the available budget
- Missing the sense of a finished, considered design that evening lighting provides
The solar path light solution:
Why this lighting approach delivers real impact at low cost:
- Requires zero electrical wiring or professional installation
- A consistent row of matching fixtures creates a cohesive, intentional look
- Extends the yard’s usable and visible hours significantly after dark
- One of the most affordable landscape lighting solutions available, with meaningful visual return
Choosing the right fixtures:
Selection considerations:
- Simple, classic fixture designs over overly ornate or novelty styles
- Matching fixtures throughout, rather than a mismatched collection
- Warm-toned LED bulbs rather than cool, blue-white light
- Higher-quality solar panels within the fixture for more reliable, consistent charging
Installation and placement:
Getting the layout right:
- Space fixtures evenly along the path or bed edge, typically four to six feet apart
- Position for direct sun exposure during the day to ensure adequate charging
- Avoid overcrowding the light spacing, which can look busy rather than elegant
Cost:
- Solar path lights (per fixture): $8-25
- A row of 8-10 fixtures: $65-250
My solar path light row: A consistent row of ten matching solar lights along the front walkway cost under $150 total and transformed how the entire front yard looks and functions after dark.
Solar Path Light Tips
Invest in slightly higher-quality fixtures over the cheapest available option:
Value consideration:
- The lowest-cost solar lights often have weak solar panels and dim, short-lived illumination
- A moderate step up in price frequently delivers significantly better light output and reliability
- This is one landscaping category where the cheapest option often needs replacement within a single season
- A slightly higher initial investment typically proves more cost-effective over time
Clean solar panels periodically to maintain charging efficiency:
Maintenance requirement:
- Dust, pollen, and grime accumulating on solar panels reduce their charging capacity over time
- A quick wipe with a damp cloth every few weeks maintains consistent performance
- This simple maintenance task is easy to overlook but meaningfully affects the lights’ nightly output
- A small effort that keeps the entire row performing consistently throughout the season
11. The Single Statement Tree or Large Shrub
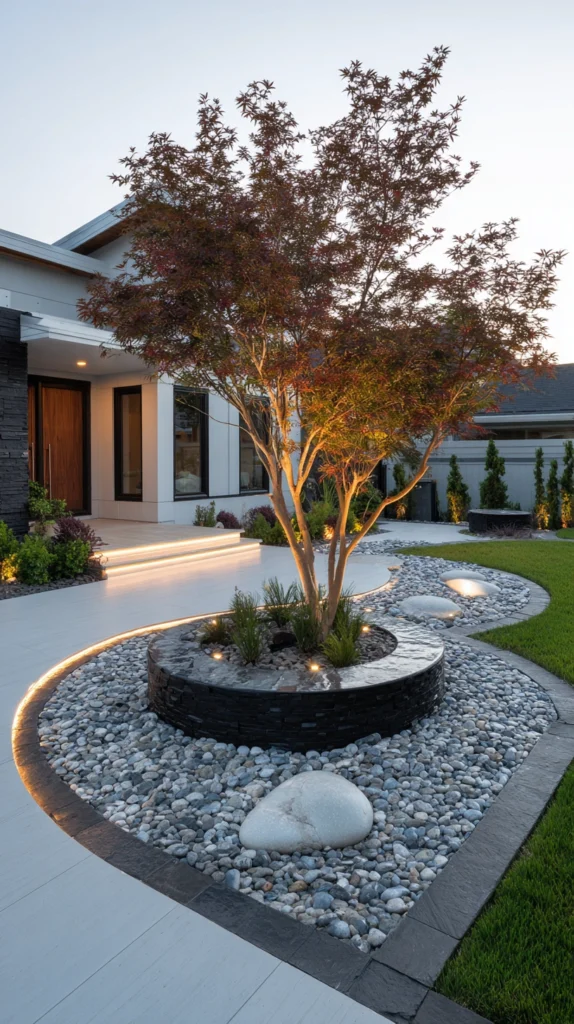
One well-chosen, appropriately sized tree or large shrub planted as a genuine focal point — a single confident purchase outperforming many smaller ones.
My collection of small, disconnected plants:
What felt underwhelming:
- Numerous small perennials and shrubs, none large enough to serve as a genuine focal point
- A yard that felt busy at ground level but lacked any vertical anchor
- Budget spread thin across many small purchases rather than concentrated on one impactful choice
The statement tree solution:
Why one larger investment often outperforms many smaller ones:
- A single substantial tree or shrub creates genuine focal weight the way many small plants cannot
- Establishes the yard’s overall scale and proportion immediately
- Often costs less in total than the equivalent amount spent across numerous smaller plants
- The single most effective way to make a young landscape feel established
Choosing the right specimen:
Selection considerations:
- A tree or shrub genuinely suited to the yard’s mature size constraints
- Species offering multi-season interest, such as spring bloom, summer shade, and fall color
- A reasonably sized specimen at purchase, balancing cost against the desire for immediate impact
- Positioned where it will be visible from key vantage points, like a patio or main window
Placement strategy:
Where to position the focal specimen:
- Anchoring one corner of the yard rather than dead center
- Positioned to eventually provide shade for a patio or seating area
- Visible from the home’s main interior gathering spaces
Cost:
- Mid-sized specimen tree: $80-300
- Large flowering shrub: $50-150
My statement tree: A single Japanese maple, planted as the yard’s clear focal point, cost more than any other individual plant purchase but immediately gave the entire landscape a sense of maturity and intention that a dozen smaller plants never achieved collectively.
Statement Tree Tips
Research the mature size thoroughly before planting:
Long-term planning:
- A tree or shrub planted without consideration for its full mature size can quickly outgrow its space
- Confirm both height and spread at maturity against the actual available planting area
- This research prevents a costly future removal or an awkwardly cramped specimen
- Patience with a smaller specimen size at planting is preferable to overcrowding with an oversized one
Stake and water consistently during the first full growing season:
Establishment care:
- A newly planted specimen tree or shrub requires more consistent watering than established plantings
- Staking may be necessary for taller trees until the root system is fully established
- This first-season attention significantly affects the long-term health and appearance of the investment
- Reducing watering too early is one of the most common causes of a young specimen failing to thrive
12. The Layered Height Planting Technique
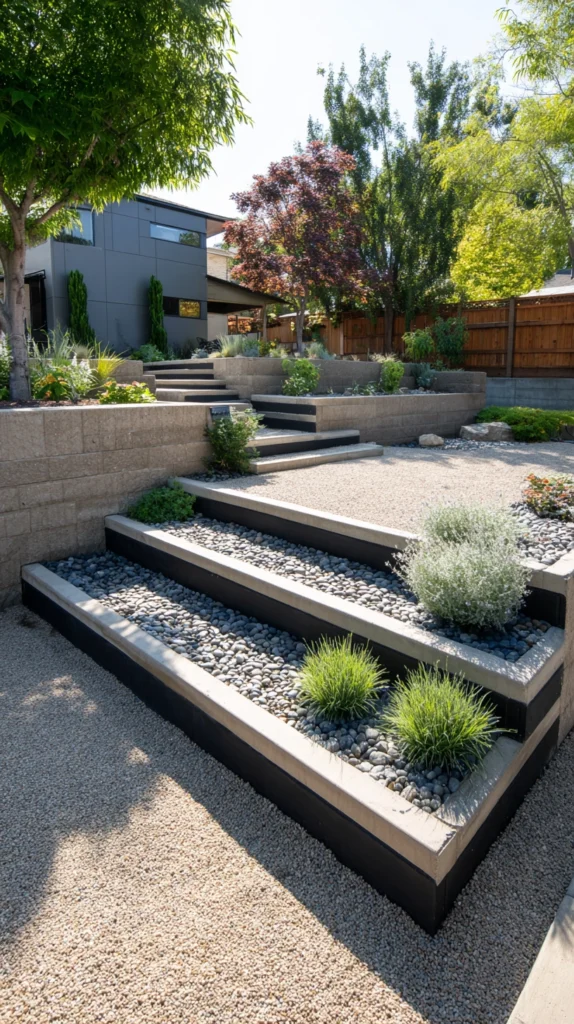
Arranging plants specifically by height, tallest at the back and shortest at the front, within every bed throughout the yard.
My flat, single-height beds:
What was creating a two-dimensional look:
- Plants of similar height scattered throughout each bed with no intentional arrangement
- No sense of depth or dimension when viewing the beds from a typical vantage point
- A planting scheme that looked flat regardless of how many different plants were included
The layered height solution:
Why height arrangement matters more than plant variety:
- Creates genuine visual depth and dimension within even a modest planting budget
- Allows every plant in the bed to remain visible, rather than shorter plants being hidden behind taller ones
- A technique used consistently in professional landscape design, requiring no additional plant purchases
- Transforms an identical plant selection into a noticeably more sophisticated arrangement
Applying the layering technique:
Building the arrangement:
- Position the tallest plants (shrubs, ornamental grasses) at the back of the bed
- Place medium-height perennials in the middle layer
- Reserve the front edge for the shortest plants, groundcovers, or low borders
- Consider the bed’s viewing angle, adjusting the layering if the bed is viewed from multiple sides
Working with existing plants:
Retrofitting without new purchases:
- Assess current plantings for height and consider transplanting to achieve better layering
- Fall or early spring, when plants are dormant, is the ideal time for this kind of rearrangement
- This technique can dramatically improve an existing bed’s appearance without any new plant cost
Cost:
- No cost if simply rearranging existing plants
- Minor cost if filling gaps created by the rearrangement: $30-100
My layered height beds: Simply rearranging existing plants by height, moving nothing but transplanting a few pieces during a weekend, made every bed in the yard look noticeably more considered without spending a single additional dollar on new plants.
Layered Height Tips
Consider the bed’s primary viewing angle before finalizing the layout:
Perspective planning:
- A bed viewed only from one side should layer tallest-to-shortest from back to front
- A bed viewed from multiple angles, such as an island bed, may need tallest plants centered instead
- This consideration prevents shorter plants from being unintentionally hidden from the primary viewing point
- Walk around the bed from every typical vantage point before finalizing plant positions
Leave room for mature growth when spacing the layered arrangement:
Growth accommodation:
- Plants positioned too closely together based on their current size can quickly become overcrowded
- Research each plant’s mature spread and space accordingly, even if the bed looks sparse initially
- This patience prevents the need to remove or relocate plants once they reach full size
- A properly spaced layered bed will fill in in appropriately within one to two growing seasons
13. The Painted Fence or Wall Backdrop
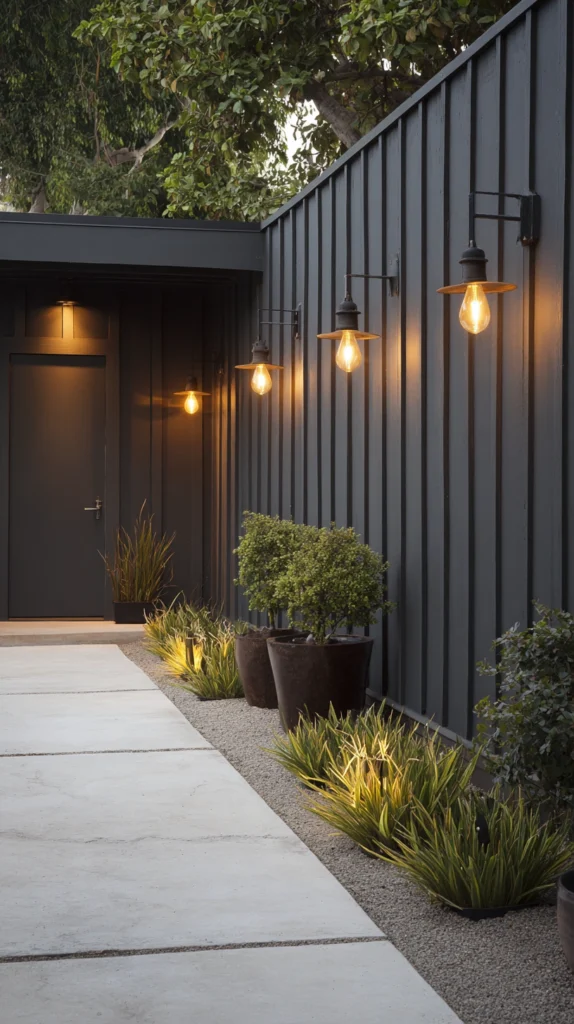
A fresh coat of paint on an existing fence or wall, in a deep, coordinating color, providing a polished backdrop for the plantings in front of it.
My weathered, forgettable fence:
What was undermining the yard:
- A faded, gray-toned wood fence serving as the backdrop for every bed along that side of the yard
- Plants and flowers looking less vibrant against the tired, neutral background
- A missed opportunity to use paint, one of the cheapest materials available, for significant visual impact
The painted fence solution:
Why a painted backdrop elevates everything planted in front of it:
- A deep, coordinating fence color makes foliage and flowers appear more vibrant by contrast
- Transforms a purely functional structure into a genuine design element
- Paint is among the least expensive materials relative to the square footage it covers
- Immediately modernizes and refreshes the yard’s overall appearance
Choosing the right color:
Color selection:
- Deep charcoal or black for the most dramatic contrast with greenery
- Deep forest green for a more natural, blending backdrop
- Navy or deep plum for a bolder, more unexpected choice
- Avoid bright or light colors that can compete with, rather than support, the plantings
Painting the fence:
Practical execution:
- Clean and lightly sand the fence surface before painting for better paint adhesion
- Use an exterior-grade paint or stain rated for the fence material
- A sprayer significantly speeds application for a long fence line compared to brushing
Cost:
- Exterior fence paint or stain (per gallon, covers roughly 300-400 sq ft): $30-50
- Average fence line (2-3 gallons needed): $60-150
My painted charcoal fence: Repainting the existing wood fence a deep charcoal color for under $100 in materials made every single plant in front of it look noticeably more vibrant and intentional, all without purchasing a single new plant.
Painted Fence Tips
Choose exterior paint or stain specifically rated for the fence material:
Product selection:
- Interior paint or an incorrect product type will fail quickly under outdoor conditions
- Confirm the product is rated for exterior wood, metal, or the specific fence material present
- This detail affects how long the finished result lasts before requiring repainting
- A slightly higher-quality exterior product typically extends the repainting interval significantly
Test the color on a small section before committing to the full fence:
Color verification:
- Paint colors can appear different once applied at full scale compared to a small sample chip
- Paint a small, inconspicuous section and view it at different times of day before finalizing
- This test prevents committing significant time and material to a color that does not achieve the intended effect
- A relatively small additional step that prevents a potentially costly full repainting redo
14. The Free Plant Propagation and Division Strategy
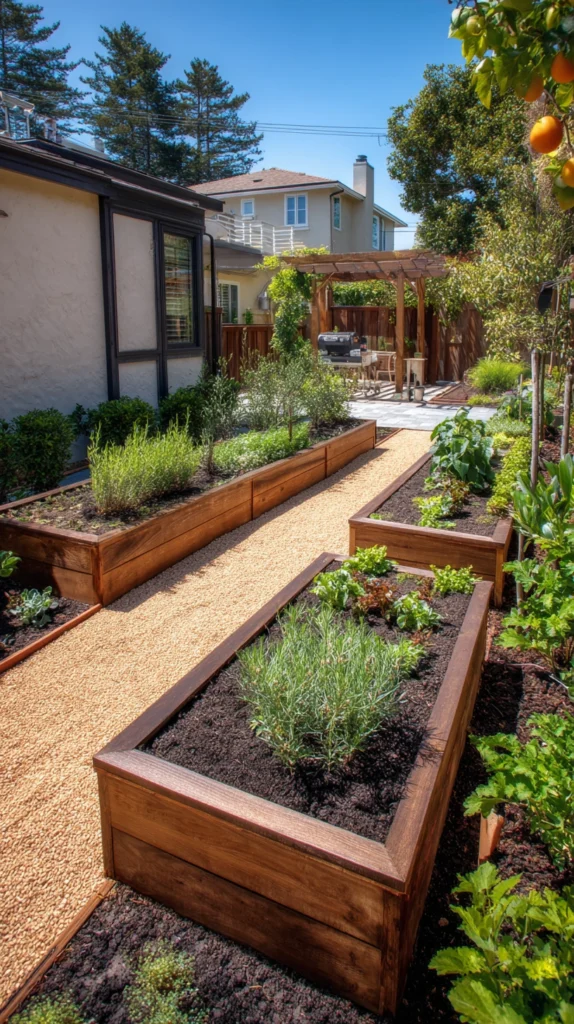
Growing the garden through plant division, cuttings, and seed starting rather than purchasing every new plant at full retail price.
My expensive plant-by-plant budget drain:
What was adding up quickly:
- Every new plant for the yard purchased individually at full garden center price
- A landscaping vision requiring significantly more plants than the available budget could support
- Missing the reality that many gardens are built primarily through propagation, not pure purchasing
The propagation strategy:
Why growing plants for free changes the entire budget equation:
- Dividing existing perennials multiplies the plant count without any additional cost
- Cuttings from many shrubs and perennials root readily with minimal equipment
- Seed starting allows filling large areas with annuals for a fraction of purchased plant prices
- Experienced gardeners consistently build extensive landscapes primarily through free propagation methods
Propagation methods to use:
Approaches by plant type:
- Division: digging up and splitting mature perennials like hostas, daylilies, and ornamental grasses
- Stem cuttings: rooting cut sections of many shrubs, including hydrangea and boxwood, in water or soil
- Seed starting: growing annuals and some perennials from seed, indoors or direct-sown
- Trading with neighbors and local gardening groups for divisions and cuttings of plants not yet owned
Building a propagation habit:
Making this an ongoing practice:
- Divide overcrowded perennials every few years, using the divisions to expand other beds
- Take cuttings from friends’ or neighbors’ established shrubs with their permission
- Start a small seed-starting setup for expanding annual plantings each season
- Join local gardening groups or plant swaps, a genuinely free source of new plant material
Cost:
- Basic propagation supplies (rooting hormone, small pots, seed starting trays): $20-50
- Ongoing plant acquisition cost: near zero once the propagation habit is established
My propagation strategy: Dividing three overgrown hostas from one corner of the yard filled an entirely new bed for free, and joining a local plant swap group has brought in more variety than any single garden center trip ever could have, at no cost beyond the time invested.
Propagation Tips
Learn which specific plants divide or root most easily as a starting point:
Building confidence:
- Some plants, like hostas and daylilies, divide with near-guaranteed success even for beginners
- Others require more specific technique or timing to root successfully from cuttings
- Starting with the easiest, most forgiving plants builds skill and confidence before attempting more difficult propagation
- This gradual approach prevents early discouragement from a few failed attempts with more challenging species
Time divisions and cuttings to the appropriate season for each plant type:
Timing consideration:
- Most perennial division succeeds best in early spring or fall, during dormant or low-stress periods
- Softwood cuttings from shrubs typically root most successfully in late spring or early summer
- Attempting propagation at the wrong time of year significantly reduces success rates
- Research the specific timing recommendation for each plant before beginning the propagation process
Choosing Your Budget Landscaping Projects
By Immediate Impact
Highest impact for lowest cost:
- Crisp bed edging trick (idea 1)
- Mulch color and texture upgrade (idea 6)
- Layered height planting technique (idea 12)
Highest impact requiring modest investment:
- Matching container trio (idea 3)
- Painted fence or wall backdrop (idea 13)
- Solar path light row (idea 10)
By Effort Level
Lowest effort:
- Crisp bed edging trick (idea 1)
- Mulch color and texture upgrade (idea 6)
- Layered height planting technique (idea 12)
- Solar path light row (idea 10)
Medium effort:
- Matching container trio (idea 3)
- Repetition planting strategy (idea 2)
- Painted fence or wall backdrop (idea 13)
- Ornamental grass border (idea 8)
Higher commitment:
- Gravel pathway with steel edging (idea 4)
- DIY raised garden bed from basic lumber (idea 9)
- Salvaged and repurposed hardscape materials (idea 7)
- Free plant propagation and division strategy (idea 14)
By Budget
Under $100:
- Crisp bed edging trick (idea 1)
- Layered height planting technique (idea 12)
- Free plant propagation and division strategy (idea 14)
- Salvaged and repurposed hardscape materials (idea 7)
$100-250:
- Matching container trio (idea 3)
- Mulch color and texture upgrade (idea 6)
- Solar path light row (idea 10)
- Painted fence or wall backdrop (idea 13)
- Vertical trellis and climbing vine (idea 5)
$250-500:
- Ornamental grass border (idea 8)
- Gravel pathway with steel edging (idea 4)
- Repetition planting strategy (idea 2)
$500+:
- DIY raised garden bed from basic lumber, multiple beds (idea 9)
- Single statement tree or large shrub (idea 11)
Maintenance Through the Seasons
Spring:
- Re-cut bed edges as the growing season begins
- Divide overcrowded perennials for propagation and expansion
Summer:
- Refresh mulch in any areas that have thinned or faded
- Monitor climbing vines and guide new growth onto trellises
Fall:
- Take cuttings from shrubs for winter rooting and spring planting
- Clean and store solar lights if experiencing significant leaf litter coverage
Winter:
- Plan the following season’s propagation and layout adjustments
- Cut back ornamental grasses in late winter before new growth begins
My Complete Budget Landscape Journey
What I built across three years:
Year one ($310):
- Crisp bed edging throughout the entire yard
- Matching container trio at the front entry
- Learned that the cheapest techniques delivered the most noticeable transformation
Year two ($480):
- Ornamental grass border along the back fence
- Painted the fence a deep charcoal
- Learned that a coordinated backdrop made every existing plant look more intentional
Year three ($210):
- Propagated divisions from established perennials to fill two new beds
- Added a gravel pathway connecting the patio to the garden shed
- Learned that propagation alone could expand the garden significantly without matching the previous years’ cash investment
Total investment: $1,000 across three years Most important lesson: The free and low-cost techniques (edging, repetition, layering) consistently outperformed expensive individual purchases Single highest-impact change across all three years: The crisp bed edging in year one, for the lowest cost and most immediately noticeable transformation
Getting Started This Weekend
Start with technique, not purchases.
This weekend:
Step 1 — Re-cut every bed edge in the yard:
- A simple half-moon tool and an afternoon of labor
- The single highest-impact, lowest-cost change available
- Do this before considering any new plant purchases
Step 2 — Assess existing plants for layering opportunities:
- Identify which plants could be rearranged by height within their current beds
- Plan any transplanting for the appropriate dormant season if not immediately possible
Step 3 — Choose one low-cost focal addition:
- A matching container trio, a mulch refresh, or a coordinating paint color for a fence
- Pick whichever addresses the yard’s most noticeable current weak point
Step 4 — Research propagation opportunities before buying new plants:
- Identify any existing perennials in the yard, or a neighbor’s yard, suitable for division
- This step can meaningfully reduce the plant budget for whatever project comes next
My recommendation:
Start with bed edging and a mulch refresh:
- Both are inexpensive, achievable in a single weekend, and immediately visible
- Both improve the appearance of every existing plant without requiring a single new purchase
- This foundation makes every future addition to the yard look more polished by comparison
Stand at the street and look back at the yard after both changes before deciding what comes next.
Now go build the yard that looks like it cost far more than it actually did.
Quick Summary
The 14 budget landscaping ideas:
Technique-based, nearly free:
- Crisp bed edging trick (idea 1): the single highest-impact free change
- Layered height planting technique (idea 12): depth and dimension at no cost
- Free plant propagation and division strategy (idea 14): expanding the garden without buying plants
Low-cost material upgrades:
- Mulch color and texture upgrade (idea 6): richer color across every bed
- Painted fence or wall backdrop (idea 13): a polished backdrop for existing plants
- Solar path light row (idea 10): evening drama without electrical work
Plant strategy:
- Repetition planting strategy (idea 2): cohesion through a limited, repeated palette
- Ornamental grass border (idea 8): texture and movement at low plant cost
- Single statement tree or large shrub (idea 11): one confident purchase over many small ones
Hardscape on a budget:
- Gravel pathway with steel edging (idea 4): a defined sense of journey and destination
- Salvaged and repurposed hardscape materials (idea 7): genuine character at minimal cost
- DIY raised garden bed from basic lumber (idea 9): structured beds for a fraction of kit prices
Focal details:
- Matching container trio (idea 3): instant polish at an entry point
- Vertical trellis and climbing vine (idea 5): height and greenery on unused wall space
The universal budget landscaping rules:
Always:
- Cut and maintain crisp bed edges before considering any new plant purchase
- Repeat a limited plant palette rather than buying one of many different varieties
- Layer plants by height within every bed for genuine depth
- Propagate and divide existing plants before purchasing new ones at full price
Never:
- Let mulch or gravel spread unchecked into the surrounding lawn
- Purchase a different plant for every empty spot without a cohesive plan
- Skip researching a plant’s mature size before choosing its planting location
- Assume expensive materials are required to achieve a polished, professional look
Common mistakes:
- Treating bed edges as optional rather than the highest-impact detail available
- Scattering budget across many small, unrelated plant purchases
- Ignoring free propagation and division opportunities already available in the yard
- Choosing bright or light fence and wall colors that compete with plantings instead of supporting them
- Underestimating how much repetition and consistency affect the overall perceived cost of a landscape
Remember: crisp bed edges deliver more visual impact than any single plant purchase, repetition of a limited palette looks more expensive than variety ever will, propagation and division can expand a garden significantly without expanding the budget, technique consistently outperforms spending in landscape design, and the best budget backyard is the one where nobody can tell what it actually cost.