15 Backyard Pond Ideas That Turn Any Yard Into a Backyard Oasis
My backyard had a dead patch of grass where nothing ever grew right. Too much shade from the fence, too much foot traffic from the dog, never worth fighting for.
I dug a hole there instead. Not a big one, just large enough for a preformed liner and a small pump. Lined it, filled it, dropped in a few plants and three goldfish.
Within a month that dead patch of grass had become the one spot in the yard everyone gravitated toward. The sound of moving water changed how the whole yard felt, even from the far side of the patio.
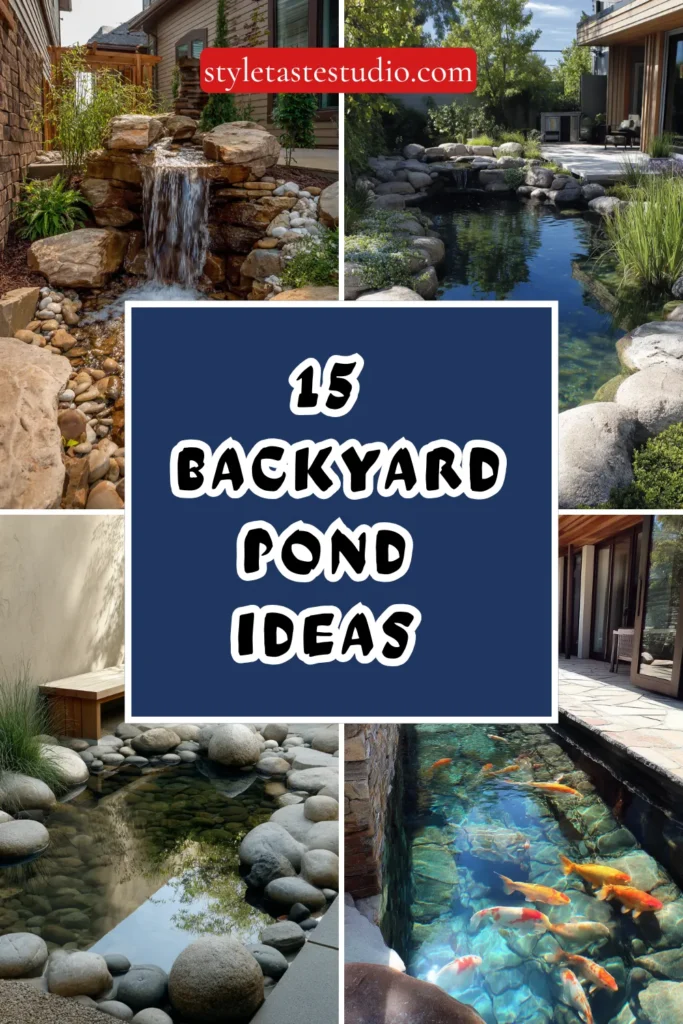
A pond does not need to be large, expensive, or complicated to change a backyard completely. Here are 15 ideas that turn any yard, big or small, into a genuine outdoor oasis.
Why Most Backyard Pond Attempts Fail
The common mistakes:
The oversized first project:
- Attempting a large, complex pond as a first water feature
- Underestimating the ongoing maintenance a bigger pond requires
- Abandoning the project halfway through once the scope became overwhelming
- A smaller, well-executed pond outperforms a large, half-finished one every time
The algae-green afterthought:
- No plan for filtration or water circulation from the start
- A pond that looks great for two weeks, then turns murky and green
- Missing the balance of plants, fish, and mechanical filtration that keeps water clear
- Water clarity treated as an afterthought instead of a core design requirement
The exposed liner and hardware:
- Pond liner visible at the edges, undermining the natural look
- Pump equipment and tubing left in plain view
- No edging or plant cover to soften the transition between pond and yard
- The mechanics of the pond competing with its intended beauty
What a successful backyard pond does:
Balances beauty with function from day one:
- Sized appropriately for the yard and the owner’s maintenance appetite
- Proper filtration and circulation planned before a single shovel goes into the ground
- Liner and equipment fully concealed by edging, rock, and plants
- A feature that gets easier to enjoy over time, not harder to maintain
My revelation: A pond’s long-term success depends far more on filtration and sizing decisions made before digging than on any decorative choice made afterward.
1. The Preformed Liner Starter Pond
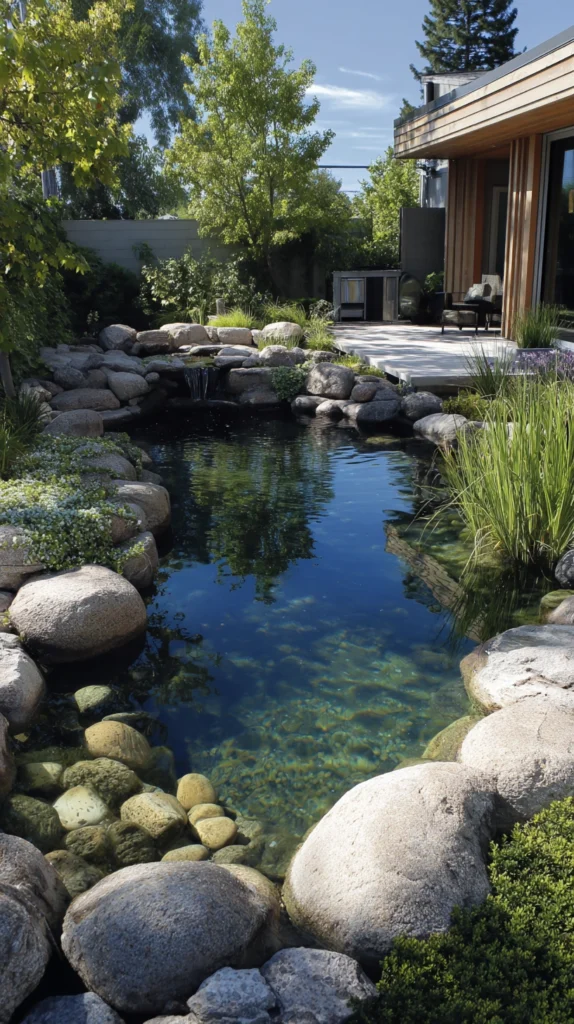
A rigid preformed pond shell installed in the ground — the fastest, most beginner-friendly way to add a genuine water feature.
My first-timer hesitation:
What I was worried about:
- No experience with pond construction of any kind
- Concerned about getting the shape, depth, and liner installation wrong
- Wanted a genuine water feature without a steep first-attempt learning curve
The preformed liner discovery:
Why this is the most forgiving starting point:
- A rigid shell arrives with the shape, depth, and shelving already determined
- Removes the guesswork of freehand digging and flexible liner fitting
- Installs in a single weekend for most standard shell sizes
- A widely available, well-documented method with abundant guidance for first-timers
Installation basics:
Getting it right:
- Dig the hole slightly larger than the shell to allow for a sand base layer
- Use a level across multiple points to confirm the shell sits perfectly even
- Backfill around the edges with sand or soil, tamping firmly as you go
- Fill slowly, checking the level again once water begins adding weight to the shell
Where this works best:
Ideal situations:
- First-time pond builders wanting a manageable starting project
- Small to medium backyard spaces
- Yards with relatively level, easy-to-dig soil
Cost:
- Preformed pond shell (small to medium): $80-300
- Pump and basic filtration: $60-200
- Underlayment sand and edging materials: $40-100
- Total: $180-600
My preformed liner pond: A medium-sized shell installed over a single Saturday became a fully functional pond by Sunday evening, and the entire project cost less than I had budgeted for research alone on a custom-dug alternative.
Preformed Liner Tips
Level the shell before backfilling, not after:
Critical sequencing:
- An unlevel shell becomes extremely difficult to correct once backfilled and filled with water
- Check level from multiple angles and points around the shell’s rim before adding any water
- A few extra minutes at this stage prevents a much larger correction project later
- This single step is the most common source of preformed pond installation problems
Choose a shell size slightly larger than initially planned:
Sizing consideration:
- Small preformed shells fill with debris and temperature-swing faster than larger ones
- A modest size increase improves both water stability and stocking flexibility
- This adjustment costs relatively little at purchase but improves long-term pond health significantly
- Consider the largest shell the budget and space can reasonably accommodate
2. The Flexible Liner Custom-Shaped Pond
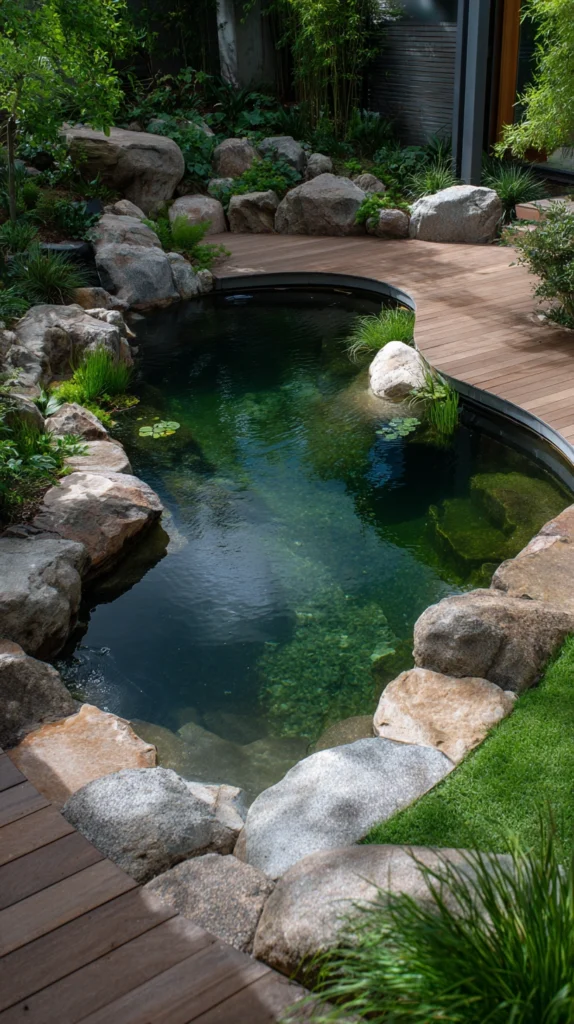
A flexible rubber liner shaped freehand to any desired pond outline — offering full creative control over size and shape.
My limited shape options:
What preformed shells could not offer:
- A specific, irregular shape envisioned for the yard’s particular layout
- A pond size falling between standard preformed shell dimensions
- Wanted genuine creative control over the pond’s final outline
The flexible liner solution:
Why this method offers unmatched design flexibility:
- Any shape, size, or depth combination is achievable with a flexible liner
- Allows the pond to follow the yard’s natural contours rather than a manufactured shape
- Scales easily from a small accent pond to a significant water feature
- The preferred method for anyone with a specific vision beyond standard shell options
Installation basics:
Building the custom shape:
- Mark the desired outline directly on the ground before digging
- Dig with varied depths, including shallow marginal shelves for plants
- Install an underlayment layer to protect the liner from sharp rocks or roots
- Drape the liner loosely into the hole, allowing it to settle naturally as water is added
Liner material considerations:
Choosing the right liner:
- EPDM rubber liner for the best combination of durability and flexibility
- PVC liner as a more affordable but shorter-lifespan alternative
- Liner thickness of at least 45 mils for genuine long-term durability
Where this works best:
Ideal situations:
- Yards with an irregular shape or specific design vision
- Larger pond projects benefiting from custom depth zones
- Anyone comfortable with a more involved, hands-on installation process
Cost:
- EPDM rubber liner (per square foot): $0.50-1.50
- Underlayment material: $0.20-0.50 per square foot
- Average medium pond (100 sq ft liner area): $70-200 for liner and underlayment
My custom liner pond: Shaping the liner to follow the yard’s existing curve around an established tree meant the pond looked like it had always belonged there, something no preformed shell could have achieved.
Flexible Liner Tips
Remove every sharp object from the excavated hole before laying underlayment:
Protection priority:
- Roots, rocks, and construction debris can puncture even a quality liner over time
- A thorough inspection and cleanup of the hole before installation prevents future leaks
- Underlayment adds a layer of protection but does not replace this initial cleanup step
- A few extra minutes of inspection here prevents a much more difficult repair later
Allow extra liner material around all edges before trimming:
Sizing buffer:
- Trimming liner too close to the final edge leaves no room for adjustment
- Leave several extra inches of liner beyond the pond’s edge until the pond is fully filled and settled
- Final trimming should happen only after the liner has settled under the water’s weight
- This buffer prevents the common mistake of an edge coming up short after settling
3. The Small Container Water Garden
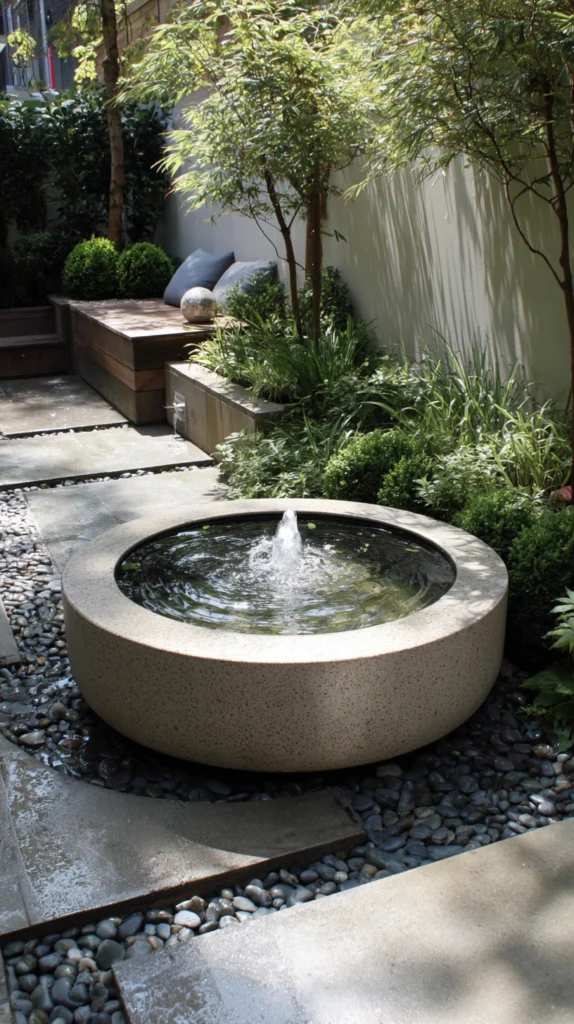
A large ceramic pot, whiskey barrel, or stock tank converted into a self-contained miniature pond — pond benefits without any digging required.
My renter’s dilemma:
What was limiting my options:
- No permission to dig a permanent in-ground feature
- A small patio space rather than a full yard
- Wanted the sound and life of water without a major installation commitment
The container pond solution:
Why a contained vessel delivers real pond benefits:
- Requires zero digging, making it appropriate for renters or patio-only spaces
- Fully portable if a move or rearrangement becomes necessary
- Scaled appropriately for a small space without overwhelming it
- A genuine functioning ecosystem is achievable even at this small scale
Container options:
Choosing the right vessel:
- A large glazed ceramic pot with the drainage hole sealed
- A half whiskey barrel, lined if not already watertight
- A galvanized stock tank for a more contemporary look
- Any vessel holding at least 15-20 gallons for basic ecosystem stability
Building the mini ecosystem:
What to include:
- A small submersible pump for basic water movement
- One or two dwarf aquatic plants suited to a contained space
- A few small fish, such as mosquito fish, if the container size supports them
- A layer of gravel or stone at the base for visual finish and beneficial bacteria
Where this works best:
Ideal situations:
- Apartment patios and balconies
- Small urban backyards
- Rental properties where digging is not permitted
Cost:
- Large ceramic pot or whiskey barrel: $40-150
- Small submersible pump: $25-60
- Plants and finishing materials: $20-50
- Total: $85-260
My whiskey barrel pond: A half barrel on the patio, lined and fitted with a small pump and two water lilies, brought the sound and movement of water to a space with no yard to dig into at all.
Container Pond Tips
Seal any drainage holes thoroughly before adding water:
Waterproofing step:
- Most containers not specifically designed for water retention have a drainage hole
- A quality pond-safe sealant or a rubber liner insert addresses this reliably
- Test the seal with a small amount of water before fully filling and stocking the container
- This test prevents discovering a leak after plants and fish have already been added
Choose dwarf or miniature plant varieties specifically:
Plant sizing:
- Standard pond plants can quickly overwhelm a small container’s limited volume
- Dwarf water lilies and miniature marginal plants are specifically bred for smaller vessels
- Check the mature size of any plant before adding it to a contained pond
- This consideration prevents the container from becoming overcrowded within a single season
4. The Waterfall and Stream Combination
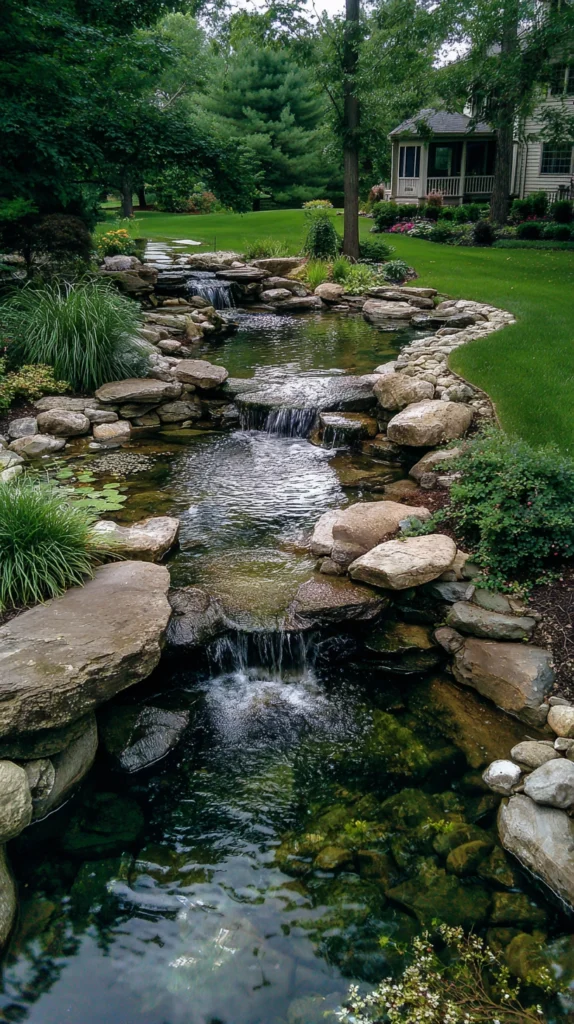
A pond paired with a cascading waterfall and connecting stream — adding movement, sound, and additional filtration surface area.
My silent, still water problem:
What was missing:
- A pond with genuinely still, quiet water
- No sense of movement or sound beyond the pump’s basic circulation
- Missing the more dramatic sensory experience a waterfall provides
The waterfall and stream solution:
Why moving water elevates the entire feature:
- The sound of falling water masks unwanted background noise more effectively than still water alone
- Additional surface area from a stream and waterfall increases natural oxygenation
- Creates genuine visual movement and a more dynamic focal point
- Increases beneficial bacteria surface area, supporting better overall water clarity
Building the waterfall and stream:
Construction approach:
- Position the waterfall source at a higher elevation than the main pond
- Build the stream bed with liner, following a natural, gently winding path
- Use varied rock sizes along the stream edges to create natural-looking cascades
- Ensure the pump is sized appropriately for the total water volume being moved
Rock and stone selection:
Choosing the right materials:
- Flat, layered stones for creating distinct waterfall drop points
- A mix of boulder sizes along the stream bed for natural variation
- Smaller river rock lining the stream bottom itself
Where this works best:
Ideal situations:
- Yards with some natural elevation change to work with
- Larger pond installations with room for an extended stream
- Anyone prioritizing sound and movement as much as visual stillness
Cost:
- Additional liner and underlayment for the stream: $100-300
- Rock and stone materials: $150-500
- Upgraded pump for the additional volume: $100-300
- Total: $350-1,100
My waterfall and stream: Adding a short stream and small waterfall to the existing pond transformed the space from a quiet water feature into the genuine focal point of the entire backyard, audible from the moment you step outside.
Waterfall Tips
Size the pump to the total water volume being moved, not just the pond:
Equipment sizing:
- A pump adequate for a still pond may be underpowered once a waterfall and stream are added
- Calculate the pump requirements based on the full water volume and desired flow rate
- An undersized pump results in a disappointing trickle rather than a genuine cascade
- Consult flow rate charts specific to the waterfall height and stream length being built
Position rocks to direct water intentionally, not randomly:
Water flow design:
- Randomly placed rocks can create unwanted splashing or water escaping the liner
- Each rock along the waterfall edge should have a specific purpose in directing the water’s path
- Test the water flow before final rock placement, adjusting as needed
- This intentional placement is what separates a natural-looking waterfall from an obviously constructed one
5. The Koi Pond with Deep Water Zones
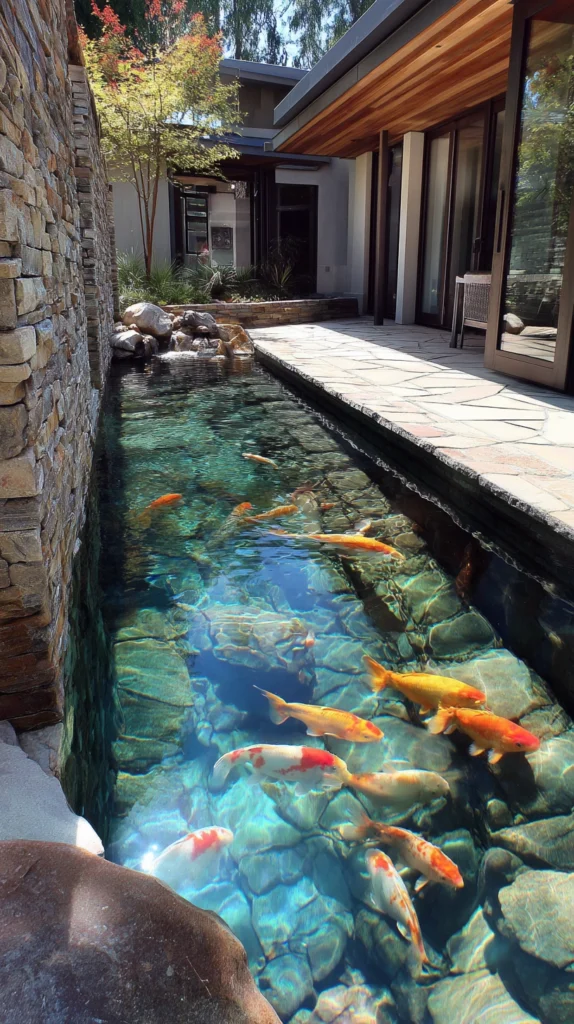
A larger, deeper pond specifically designed to support koi fish — combining a serious aquatic hobby with a significant landscape feature.
My shallow pond’s fish limitations:
What was holding me back:
- A shallow pond unable to support anything beyond basic goldfish
- Interest in koi specifically, but uncertainty about the requirements involved
- Assumed koi ponds required a scale beyond what the yard could reasonably support
The koi pond solution:
Why koi require a specifically designed approach:
- Koi need significantly greater depth than goldfish to thrive and survive winter
- A dedicated deep zone protects fish during temperature extremes
- Koi grow substantially larger than goldfish, requiring proportional water volume
- A genuinely rewarding long-term hobby once the pond is properly designed for their needs
Design requirements for koi:
Building the right environment:
- A minimum depth of three feet, with four feet or more preferred in colder climates
- Adequate surface area relative to the number of fish planned
- Strong filtration, since koi produce significantly more waste than smaller fish
- Some shaded areas or floating plants to protect fish from excessive sun exposure
Filtration for koi specifically:
What differs from a standard pond:
- A biological filter sized generously for the fish load
- A mechanical pre-filter to capture debris before it reaches the biological system
- UV clarifiers to help manage algae given the higher nutrient load koi produce
Where this works best:
Ideal situations:
- Yards with adequate space for a genuinely large pond
- Owners specifically interested in koi as an ongoing hobby
- Climates where winter depth requirements can be reasonably achieved
Cost:
- Larger liner and excavation for adequate depth: $500-2,000
- Koi-appropriate filtration system: $300-1,200
- Initial koi fish (per fish, varies significantly by size and quality): $20-200+
- Total: $800-3,500+
My koi pond: Committing to the full three-foot depth requirement from the start meant the fish survived their first winter without issue, something a shallower, improvised pond would likely not have supported.
Koi Pond Tips
Never underestimate the minimum depth requirement for winter survival:
Non-negotiable specification:
- A pond too shallow can freeze solid or allow lethal temperature swings for koi
- Research the specific depth requirement for the local climate before finalizing pond dimensions
- This requirement should be treated as a fixed constraint, not a flexible target
- Retrofitting additional depth into an already-built pond is far more difficult than planning for it initially
Introduce fish gradually rather than fully stocking at once:
Stocking strategy:
- Adding all planned fish simultaneously can overwhelm a newly established biological filter
- Introduce a small number of fish initially, allowing beneficial bacteria to establish
- Gradually add additional fish over several weeks or months as the ecosystem stabilizes
- This patience significantly reduces the risk of water quality problems and fish loss
6. The Naturalistic Wildlife Pond
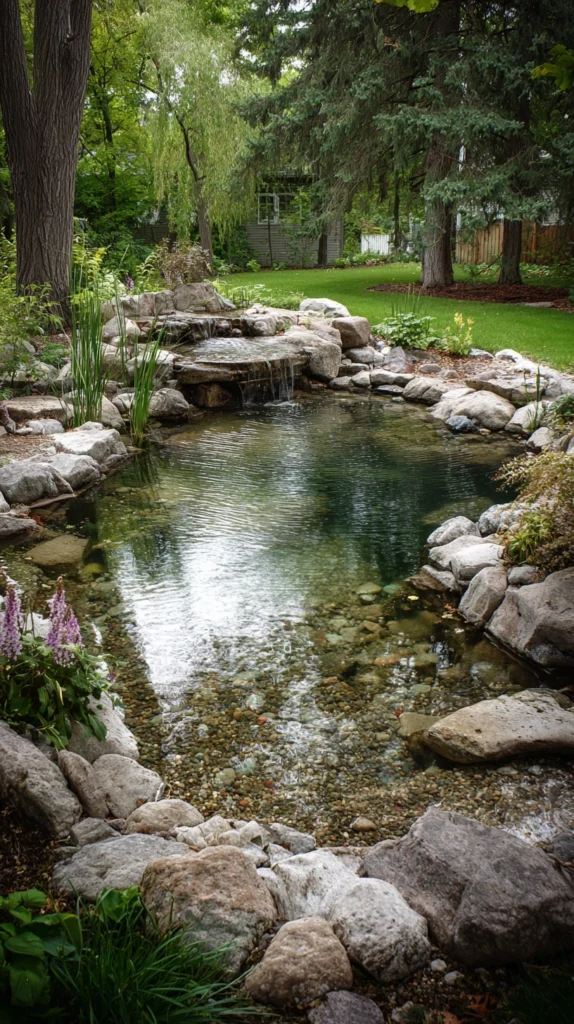
A pond designed specifically to attract and support local wildlife, prioritizing gently sloped edges and native plants over ornamental fish.
My fish-focused pond missing wildlife:
What I had not considered:
- A pond built specifically around ornamental fish, with steep, hard edges
- No natural access points for birds, frogs, or beneficial insects
- A missed opportunity to support the broader backyard ecosystem
The wildlife pond solution:
Why this approach differs from a typical ornamental pond:
- Gently sloped edges allow birds and small animals safe access to drink and bathe
- Native plants specifically support local pollinators and amphibians
- Fewer or no fish means more resources available for frog and insect populations
- Creates a genuine ecological feature rather than purely an ornamental one
Design elements specific to wildlife:
Building for genuine ecosystem support:
- At least one gently sloped “beach” entry point, rather than uniformly steep sides
- Native aquatic and marginal plants suited to the local region
- A shallow area specifically for birds, separate from any deeper fish zones
- Avoiding chemical treatments that could harm amphibians or beneficial insects
Plant choices for wildlife ponds:
Best options by function:
- Native water lilies or lotus for shelter and shade
- Marginal grasses and rushes for frog and insect habitat
- Flowering native plants along the edges to attract pollinators
- Avoid aggressive non-native species that could spread beyond the pond
Where this works best:
Ideal situations:
- Yards prioritizing ecology and wildlife over ornamental display
- Larger properties with room for a more naturalistic, less manicured design
- Anyone interested in supporting local frog, bird, and pollinator populations
Cost:
- Native plants: $150-400
- Liner and excavation for a naturalistic shape: $200-600
- Minimal or no filtration equipment, depending on fish stocking: $0-200
- Total: $350-1,200
My wildlife pond: Building a gently sloped entry point specifically for birds meant the pond now draws regular visitors beyond just the fish, and the frog chorus on summer evenings has become one of the yard’s genuine pleasures.
Wildlife Pond Tips
Skip or minimize fish stocking to prioritize amphibian populations:
Ecological trade-off:
- Fish, particularly larger ornamental varieties, often eat frog eggs and tadpoles
- A pond with minimal or no fish provides significantly better conditions for amphibian populations
- This trade-off is worth considering specifically if wildlife support is the primary goal
- A separate ornamental fish pond, if desired, can be built elsewhere in the yard
Avoid pesticides and chemical treatments anywhere near the pond:
Non-negotiable practice:
- Chemical lawn treatments and pesticides can wash into the pond and harm sensitive wildlife
- Establish a buffer zone around the pond where chemical treatments are never used
- This commitment is essential for the pond to genuinely function as intended wildlife habitat
- Natural pest management methods protect both the pond and the surrounding yard’s ecosystem
7. The Formal Reflecting Pool
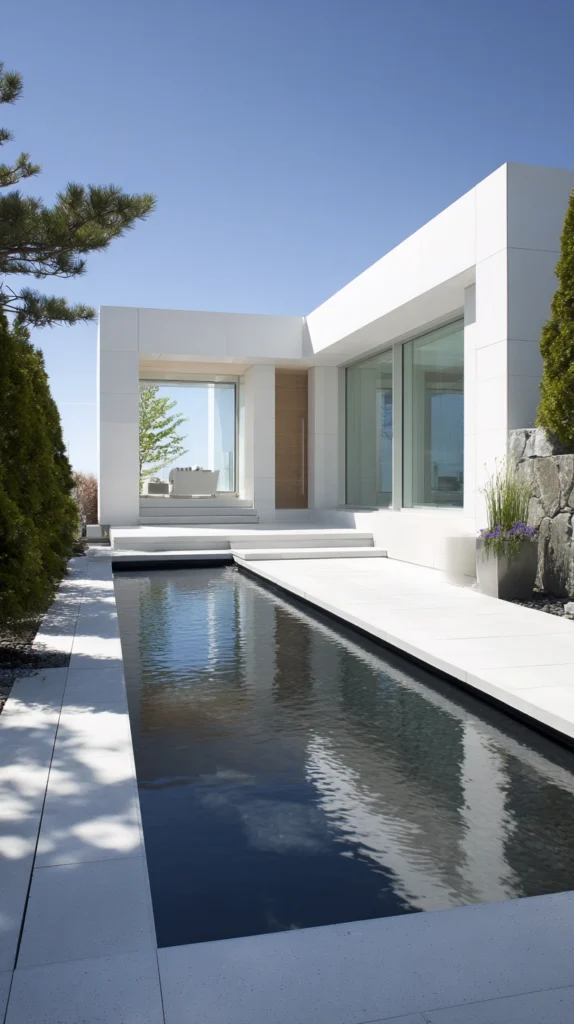
A simple, geometric pond with minimal planting, designed primarily to reflect the sky and surrounding architecture.
My overly busy backyard:
What felt cluttered:
- Every existing feature competing for attention with dense planting and varied materials
- Wanted one calm, restrained element rather than another busy focal point
- Missing a moment of genuine visual quiet in an otherwise active yard
The reflecting pool solution:
Why simplicity is the entire point of this style:
- A minimal, geometric pond creates a genuine moment of calm within a busier landscape
- Reflects sky, surrounding trees, and architecture, adding depth without additional clutter
- Works especially well as a formal counterpoint to a naturalistic garden elsewhere in the yard
- The restraint itself is the design choice, rather than an absence of effort
Design principles for a reflecting pool:
Keeping it intentionally minimal:
- A clean geometric shape, rectangular or square, rather than an organic curve
- Very still water, since movement disrupts the reflective quality
- Minimal or no plants breaking the water’s surface
- Dark-colored liner or pond bottom to enhance the mirror-like reflective effect
Placement for maximum reflective impact:
Positioning strategy:
- Aligned with an architectural feature of the house for a direct reflection
- Positioned to reflect a specific tree or garden feature
- Visible from a primary vantage point, such as a patio or a window
Where this works best:
Ideal situations:
- Modern or minimalist backyard designs
- Yards wanting a formal, restrained counterpoint to more naturalistic elements
- Spaces with strong architectural lines worth reflecting
Cost:
- Liner and excavation for a simple geometric shape: $150-500
- Dark pond liner or bottom treatment: $50-150
- Minimal pump for very gentle circulation: $40-100
- Total: $240-750
My reflecting pool: A simple black-lined rectangular pool near the patio reflects the sky and the branches of an overhead tree, and it remains the calmest, most restful spot in a yard otherwise full of activity.
Reflecting Pool Tips
Keep water movement to an absolute minimum:
Stillness requirement:
- Even gentle circulation can disrupt the mirror-like surface this design depends on
- Use the smallest pump necessary purely for basic water health, not visible movement
- Some reflecting pools function with no mechanical circulation at all, relying instead on regular manual cleaning
- This restraint in mechanics is essential to achieving the intended calm, reflective effect
Choose a dark liner or bottom treatment specifically:
Material selection for reflection:
- A light-colored pond bottom reduces the water’s reflective quality significantly
- Black or very dark liner material maximizes the mirror-like effect
- This choice matters more here than in almost any other pond style on this list
- Confirm the liner’s specific color before installation, since options vary between suppliers
8. The Raised Pond with Seating Wall
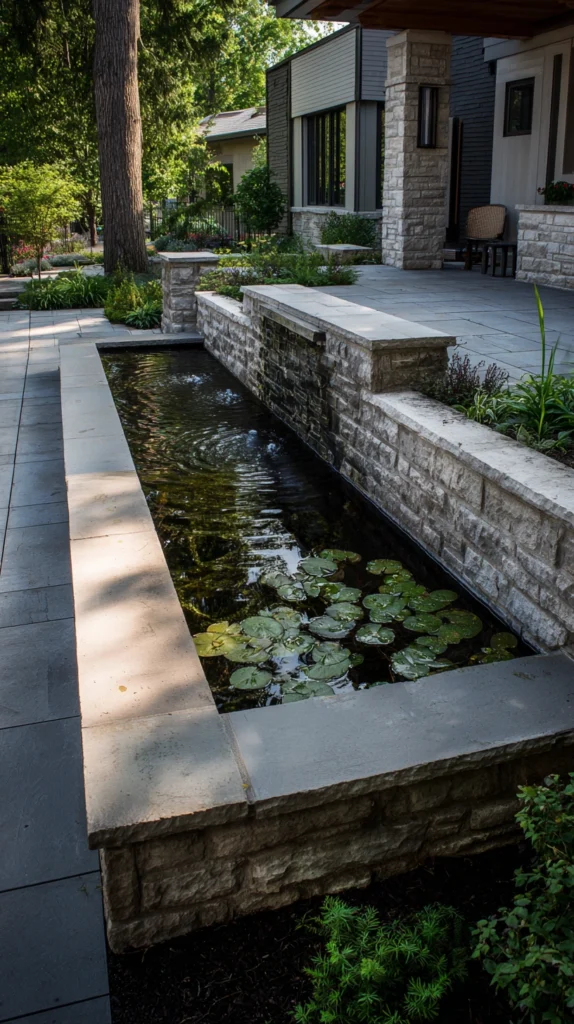
A pond built above ground level, surrounded by a stone or brick wall wide enough to sit on — combining water feature and seating.
My missing seating near the water:
What was limiting the pond’s use:
- An in-ground pond with no comfortable spot to sit and actually enjoy it
- Guests standing awkwardly at the edge rather than lingering nearby
- A missed opportunity to make the pond a genuine gathering spot
The raised pond solution:
Why building the pond above ground changes how it gets used:
- A wide seating wall around the pond’s perimeter invites people to actually sit and linger
- Elevates the water closer to eye level, making it more visually present from seated positions
- Often easier to construct than deep excavation, particularly in yards with difficult digging conditions
- Creates a genuine architectural feature rather than a purely landscape element
Building the raised structure:
Construction basics:
- A block or brick retaining wall forming the pond’s perimeter, lined on the interior
- Wall width of at least 12-16 inches to function comfortably as seating
- A capstone or flat top surface for comfortable, stable sitting
- Proper drainage and structural support given the significant weight of water involved
Material and style choices:
Selecting the right look:
- Natural stone for a more organic, established appearance
- Brick for a classic, traditional garden wall look
- Poured concrete with a stone veneer for a more contemporary style
Where this works best:
Ideal situations:
- Yards wanting the pond to double as a social gathering spot
- Difficult digging conditions where raised construction is more practical
- Patios and entertaining areas wanting water incorporated directly into the seating plan
Cost:
- Block or stone for the retaining wall: $400-1,500
- Liner and pump: $150-400
- Capstone material: $150-500
- Total: $700-2,400
My raised seating pond: A stone wall pond beside the patio, wide enough to sit on comfortably, turned the water feature into an actual gathering spot where guests linger with drinks rather than just glancing at it from a distance.
Raised Pond Tips
Build the wall wide enough for genuine comfortable seating:
Sizing for function:
- A wall too narrow looks like seating but proves uncomfortable in practice
- At least 14-16 inches of flat seating surface provides genuine comfort for most adults
- Test the planned width with an actual mockup before finalizing construction
- This detail determines whether the wall functions as intended seating or purely decoration
Confirm the wall’s structural integrity before filling with water:
Engineering consideration:
- Water is significantly heavier than most people initially estimate
- A retaining wall not built to appropriate structural standards risks failure once filled
- Consult a professional for larger raised pond projects, particularly those exceeding a modest size
- This verification step is essential given the potential consequences of a structural failure
9. The Container Bog Garden Companion
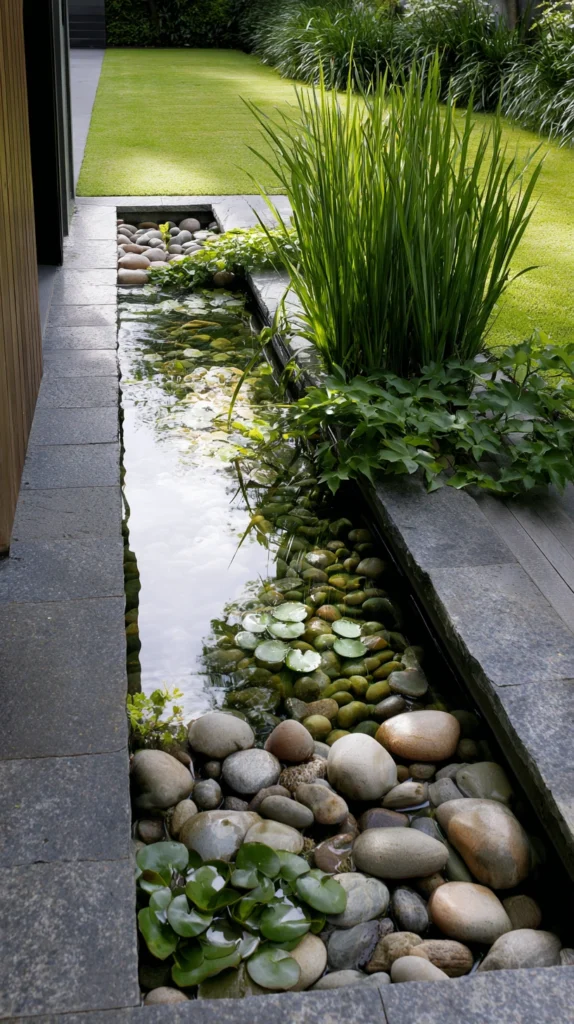
A shallow bog garden built adjacent to or connected with the main pond, supporting moisture-loving plants that cannot tolerate standing water.
My missing plant variety:
What was limiting my planting options:
- A pond supporting only true aquatic plants, submerged or floating
- Many desired moisture-loving plants unable to tolerate the pond’s standing water depth
- A missed opportunity for a wider range of textures and plant varieties near the water
The bog garden solution:
Why a bog garden expands the pond’s overall planting possibilities:
- Supports plants that want consistently moist soil without full submersion
- Creates a natural, gradual transition zone between the pond and the surrounding yard
- Significantly increases the variety of textures, heights, and colors available near the water
- Often built using pond overflow or a shared liner, requiring minimal additional plumbing
Building the bog garden:
Construction approach:
- A shallow liner-lined area, typically six to twelve inches deep, filled with a soil and gravel mix
- Connected to the pond’s overflow or filled with the pond’s own circulated water
- Positioned adjacent to the pond for a seamless visual transition
- Drainage holes or a slight slope to prevent the bog from becoming fully waterlogged and stagnant
Plant choices for a bog garden:
Best options for this zone:
- Cardinal flower for vivid color and hummingbird appeal
- Japanese iris for structural height and early-season bloom
- Marsh marigold for a naturalized, informal look
- Ornamental sedges and rushes for textural variety
Cost:
- Liner for the bog area: $30-100
- Soil and gravel mix: $30-80
- Plants: $80-200
- Total: $140-380
My bog garden addition: Building a small bog area along one edge of the pond expanded the plant palette significantly, and the transition between pond, bog, and lawn now feels genuinely natural rather than abrupt.
Bog Garden Tips
Use a soil and gravel mix specifically suited to consistently moist conditions:
Growing medium selection:
- Standard garden soil alone can become overly compacted or waterlogged in a bog setting
- A mix incorporating coarse sand or fine gravel improves drainage while retaining moisture
- This specific soil composition supports healthier root systems for bog-appropriate plants
- Research the specific mix ratio recommended for the plant varieties being included
Position the bog garden downhill from or level with the pond’s overflow point:
Water management:
- A bog garden positioned uphill from the pond’s water source will not receive adequate moisture
- Planning the bog’s elevation relative to the pond ensures consistent, passive moisture delivery
- This planning reduces or eliminates the need for separate manual watering of the bog area
- A well-planned elevation relationship is what makes this addition largely self-sustaining
10. The Solar-Powered Fountain Pond
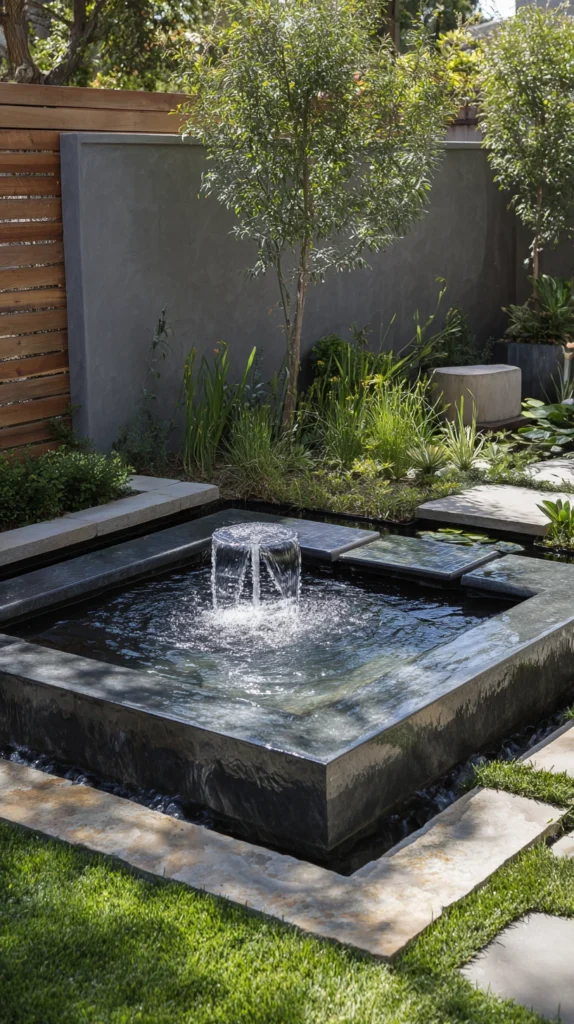
A pond feature powered entirely by a solar pump, eliminating the need for electrical wiring to the water feature.
My wiring limitation:
What was holding the project back:
- A desired pond location far from any existing outdoor electrical outlet
- The cost and disruption of running new electrical wiring across the yard
- Wanted a functioning water feature without this significant added expense
The solar-powered solution:
Why solar power removes a major installation barrier:
- Eliminates the need for any electrical wiring runs to the pond’s location
- Significantly reduces both installation cost and complexity
- Allows pond placement based purely on the yard’s aesthetic and functional needs, not proximity to power
- An increasingly reliable technology, no longer the underpowered novelty it once was
Choosing the right solar system:
What to look for:
- A solar panel sized appropriately for the desired pump flow rate
- Battery backup systems for continued operation during cloudy periods or after sunset
- Panels positioned for maximum sun exposure, potentially separate from the pond itself
- Pump wattage matched specifically to the pond’s size and any waterfall or fountain height
Placement considerations:
Getting the setup right:
- The solar panel does not need to be directly at the pond, allowing flexible positioning for sun exposure
- A cable connects the remote panel to the pump, offering placement flexibility
- South-facing panel orientation, in most regions, maximizes daily sun exposure
Where this works best:
Ideal situations:
- Pond locations far from existing electrical access
- Yards prioritizing lower installation cost and complexity
- Anyone wanting a more environmentally sustainable pond operation
Cost:
- Solar pump kit with panel: $60-200
- Battery backup system (if included): $30-100
- Total: $60-300
My solar-powered pond fountain: Positioning the pond in the sunniest, most visually ideal corner of the yard was only possible once electrical wiring was no longer a limiting factor, and the solar system has run reliably through two full seasons.
Solar Pond Tips
Size the solar panel generously relative to the pump’s actual power draw:
Power sizing:
- An undersized panel struggles to keep the pump running consistently, particularly on cloudy days
- Choosing a panel with some power buffer beyond the pump’s minimum requirement improves reliability
- This slight oversizing costs relatively little additional expense for meaningfully better performance
- Check the manufacturer’s specific wattage recommendations before finalizing the panel size
Position the panel separately from the pond if needed for better sun exposure:
Placement flexibility:
- The ideal pond location and the ideal sun exposure location are not always the same spot
- Most solar pump kits include cable length sufficient to separate the panel from the pump
- Prioritize sun exposure for the panel even if that means it sits some distance from the pond itself
- This flexibility is one of the solar system’s genuine practical advantages over a fixed-position assumption
11. The Fire and Water Feature Combination
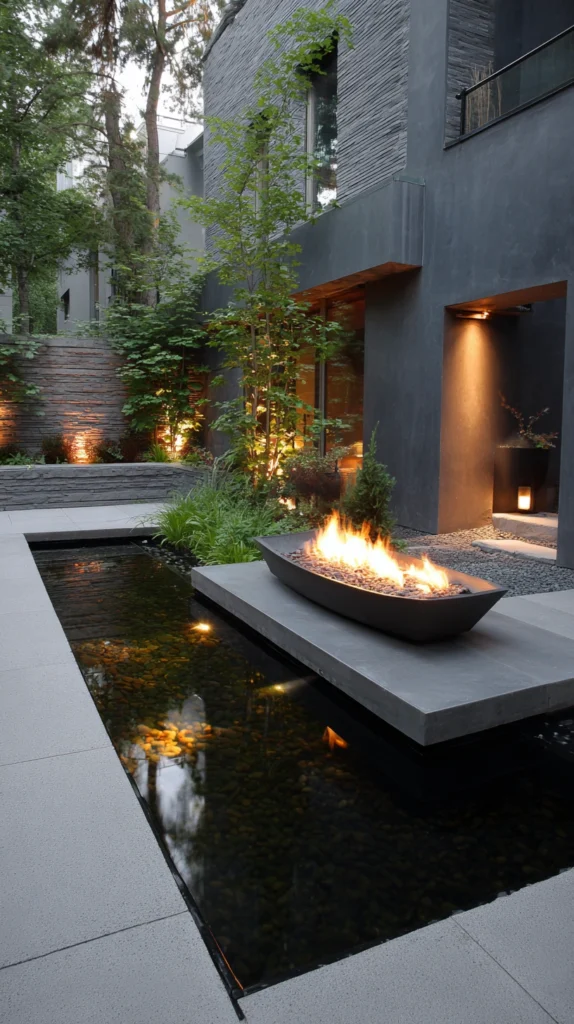
A pond paired with a fire bowl or fire pit positioned nearby, combining two contrasting elemental features in one gathering area.
My missing evening drama:
What was underwhelming:
- A beautiful pond during the day that lost most of its visual interest after dark
- No complementary feature to extend the water feature’s evening appeal
- A missed opportunity to create genuine drama through elemental contrast
The fire and water combination:
Why pairing these two elements works so well:
- The contrast between flickering fire and reflective water creates genuine visual drama
- Extends the outdoor space’s usability into cooler evening hours
- Fire’s warm light beautifully illuminates and reflects across the pond’s surface
- A combination consistently associated with high-end, resort-style backyard design
Building the combination:
Placement and construction approach:
- A fire bowl or small fire pit positioned near, but not directly adjacent to, the pond’s edge
- Adequate clearance maintained between the fire feature and any pond plantings or overhanging materials
- Seating arranged to take advantage of both features simultaneously
- Consider a floating or fountain-adjacent fire bowl for the most dramatic direct pairing
Safety considerations:
Non-negotiable precautions:
- Maintain manufacturer-recommended clearance between fire and any flammable pond materials
- Position seating at a safe, comfortable distance from the fire element
- Choose a fire feature appropriate for the specific local climate and any burn restrictions
Where this works best:
Ideal situations:
- Yards with adequate space to properly separate the two features
- Evening-focused entertaining areas
- Anyone wanting to extend the pond’s appeal beyond daylight hours
Cost:
- Fire bowl or small fire pit: $150-600
- Additional seating near the combined feature: $200-800
- Total: $350-1,400
My fire and water combination: Adding a simple fire bowl a safe distance from the pond’s edge meant evenings outside finally had real visual drama, the reflection of the flame across the water surface is something photographs never quite capture.
Fire and Water Tips
Maintain generous clearance between the fire feature and pond plantings:
Safety spacing:
- Overhanging plants or dry pond-edge materials near an open flame present a genuine fire risk
- Keep a clear buffer zone, free of flammable materials, around any fire feature
- This spacing consideration should be part of the initial layout planning, not an afterthought
- Local fire safety guidelines may specify minimum clearance requirements worth researching beforehand
Choose a fire feature with wind protection if the yard is exposed:
Practical consideration:
- An exposed, unprotected flame can struggle to stay lit or pose additional risk in a windy yard
- A fire bowl with a wind guard or a more sheltered placement addresses this issue directly
- This consideration is particularly relevant near open water, where wind exposure is often greater
- Test the fire feature’s performance in the actual location before finalizing seating around it
12. The Pondless Water Feature
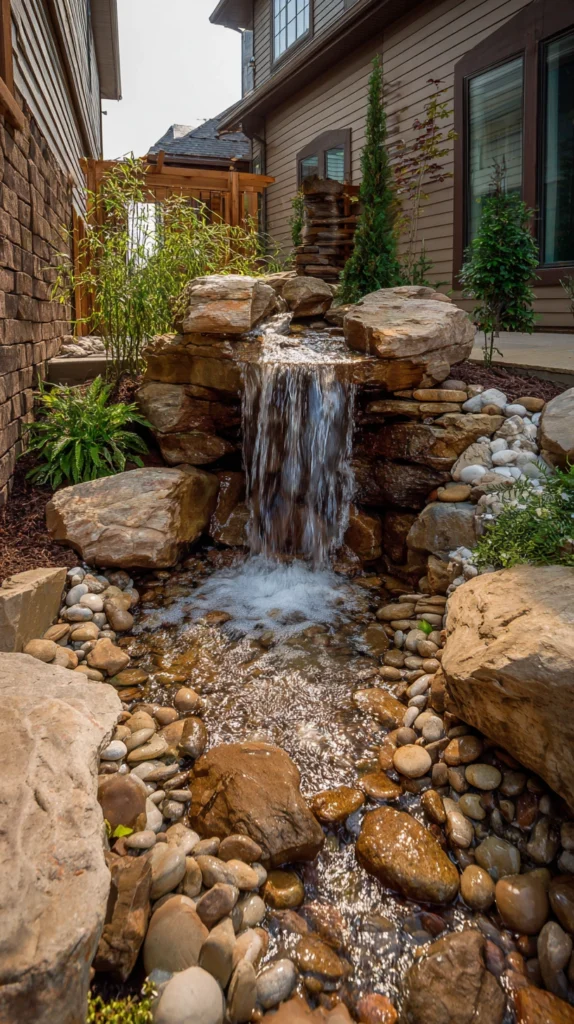
A recirculating water feature with no standing open pond, water disappearing into a hidden reservoir beneath decorative rock.
My safety and maintenance concerns:
What was holding me back:
- Concerns about standing water safety with young children in the household
- Wanted the sound and movement of water without the ongoing maintenance of a full pond
- Uncertain whether a traditional pond fit the household’s current stage of life
The pondless water feature solution:
Why this option delivers water’s benefits without open water:
- No standing open water, significantly reducing safety concerns around children or pets
- Genuinely lower maintenance than a full pond, since there is no large open water surface for algae or debris
- Still delivers the sound and visual movement that make water features so appealing
- A hidden reservoir recirculates the same water continuously, similar to a fountain
Building a pondless feature:
Construction approach:
- A buried reservoir, often a large basin or a gravel-filled pit, holds the recirculating water
- A pump moves water up through rock or a small waterfall structure, then back down into the hidden reservoir
- Decorative rock and gravel cover the reservoir completely, leaving no visible open water
- The water appears to disappear into the rock, creating a clean, safe, and visually striking effect
Where this works best:
Ideal situations:
- Households with young children or pets where open water is a genuine concern
- Anyone wanting water feature sound and movement with meaningfully lower maintenance
- Smaller yards where a full pond’s footprint is not practical
Cost:
- Reservoir basin and pump: $150-500
- Decorative rock and gravel: $100-400
- Total: $250-900
My pondless water feature: Choosing this option specifically because of young children in the house meant getting the sound and movement of water without ever worrying about open standing water in the yard.
Pondless Water Feature Tips
Size the reservoir generously to accommodate water loss from evaporation and splash:
Reservoir sizing:
- A reservoir too small requires frequent manual refilling, undermining the low-maintenance appeal
- A generously sized hidden reservoir reduces how often water needs to be topped off
- This sizing consideration is worth prioritizing during the initial construction phase
- Check the reservoir’s water level periodically, particularly during hot, dry weather
Choose rock sizes that fully conceal the reservoir without restricting water flow:
Material selection:
- Rocks too small can fall into and clog the reservoir or pump intake
- Rocks too large can leave visible gaps revealing the hidden reservoir beneath
- A mixed range of rock sizes, layered thoughtfully, achieves both full concealment and reliable function
- Test the water flow and appearance before finalizing the exact rock placement
13. The Container Aquatic Plant Focal Point
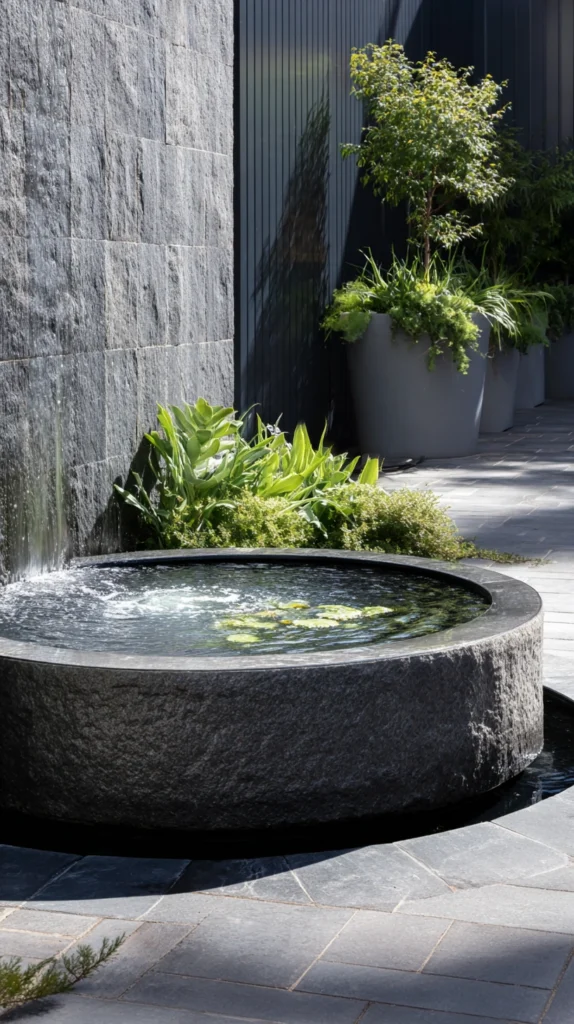
A single, striking aquatic plant, such as a lotus or oversized water lily, grown as the pond’s clear visual centerpiece.
My unfocused pond planting:
What felt scattered:
- Several small, similar plants added without any clear visual hierarchy
- No single element drawing the eye to a specific focal point within the pond
- A planting scheme that felt busy rather than intentional
The single focal plant solution:
Why one dramatic plant outperforms several modest ones:
- A single striking specimen creates genuine visual hierarchy within the pond
- Lotus and larger water lily varieties offer dramatic bloom and leaf scale
- Simplifies the overall planting scheme while increasing its visual impact
- Mirrors the principle that one confident choice often outperforms several tentative ones
Choosing the right focal plant:
Best options for dramatic impact:
- Lotus for its dramatic large leaves and striking seasonal blooms
- Oversized water lily varieties for a more classic pond centerpiece
- A single dwarf papyrus for vertical drama in a smaller pond
- Match the plant’s mature size carefully to the pond’s actual dimensions
Supporting the focal plant:
Completing the composition:
- A few smaller, complementary plants around the pond’s edges, kept visually subordinate
- Adequate depth and container sizing specific to the chosen focal plant’s needs
- Sufficient sun exposure, since most dramatic bloomers require significant direct light
Cost:
- Lotus or large water lily specimen: $30-150
- Appropriate planting container for the pond: $20-60
- Total: $50-210
My lotus focal point: Committing to a single dramatic lotus rather than scattering several smaller plants throughout the pond gave the whole feature a clear visual centerpiece, and the summer blooms remain the single most photographed detail in the yard.
Focal Plant Tips
Confirm the pond’s sun exposure meets the plant’s specific requirements:
Light requirement check:
- Lotus and most dramatic-blooming water lilies require significant direct sun to bloom reliably
- A pond in significant shade will struggle to support these specific focal plant choices
- Assess the pond’s actual daily sun exposure honestly before selecting a focal plant
- Choosing a plant genuinely suited to the available light prevents disappointment later in the season
Contain the focal plant’s roots to manage its spread:
Growth management:
- Many dramatic aquatic plants spread aggressively if planted directly in open pond soil
- A dedicated planting container or basket keeps the plant’s growth contained and manageable
- This containment also simplifies eventual division or relocation of the plant
- Check the container size against the specific plant’s mature root system requirements
14. The Multi-Level Terraced Pond System
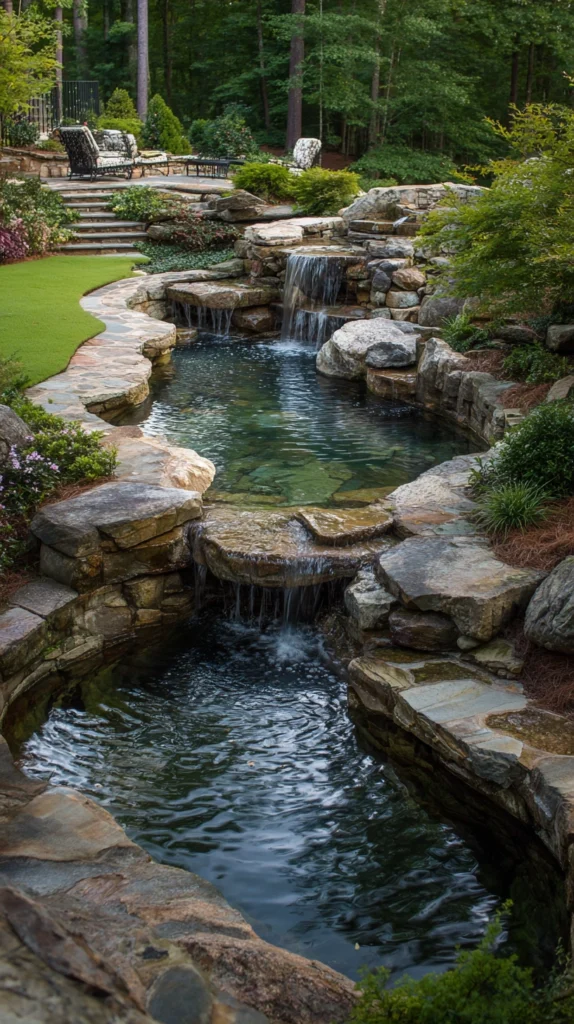
A series of connected ponds at different elevations, water cascading from the highest level down to the lowest through small waterfalls.
My single flat pond limitation:
What felt one-dimensional:
- A single pond at one consistent level, regardless of the yard’s actual terrain
- A sloped yard section left undeveloped rather than incorporated into the design
- Missing the opportunity for a more dynamic, multi-dimensional water feature
The terraced pond solution:
Why multiple connected levels create a more dynamic feature:
- Works with a naturally sloped yard rather than requiring extensive leveling
- Each individual pool can be sized and planted differently, adding variety throughout the system
- The cascading connection between levels creates continuous sound and movement
- A significantly more dramatic, resort-style feature than any single flat pond alone
Designing the terraced system:
Construction approach:
- Identify the yard’s natural elevation change and plan pond levels accordingly
- Connect each level with a small waterfall or cascade, sized proportionally to the elevation drop
- A single pump, typically positioned at the lowest level, circulates water back to the top
- Vary each pool’s depth and planting scheme for genuine visual distinction between levels
Where this works best:
Ideal situations:
- Yards with significant natural slope or elevation change
- Larger properties with room for a multi-level system
- Anyone wanting the most dramatic, dynamic water feature achievable in a residential yard
Cost:
- Liner and excavation for multiple connected levels: $600-2,000
- Larger pump sized for the full system: $150-400
- Rock and stone for waterfall connections: $200-700
- Total: $950-3,100
My terraced pond system: Working with the yard’s existing slope rather than fighting it meant building three connected pools felt like a natural extension of the landscape, and the sound of water cascading through all three levels carries throughout the entire backyard.
Terraced Pond Tips
Work with the yard’s existing slope rather than creating an artificial one:
Design efficiency:
- Excavating a naturally sloped yard for a terraced system requires far less earth-moving than creating elevation change from scratch
- Survey the yard’s existing high and low points before finalizing the terraced design
- This approach also tends to look more natural, since the ponds follow the land’s genuine contours
- Significant cost and labor savings result from working with, rather than against, the existing terrain
Vary the planting and depth between each level intentionally:
Design distinction:
- Identical planting and depth at every level can make the system feel repetitive rather than dynamic
- Assign each pool a distinct character, one deeper with fish, one shallow with marginal plants, one a small reflecting pool
- This intentional variation is what makes a multi-level system feel genuinely dynamic rather than simply repeated
- Plan this distinction during the design phase, before construction begins
15. The Zen Meditation Pond
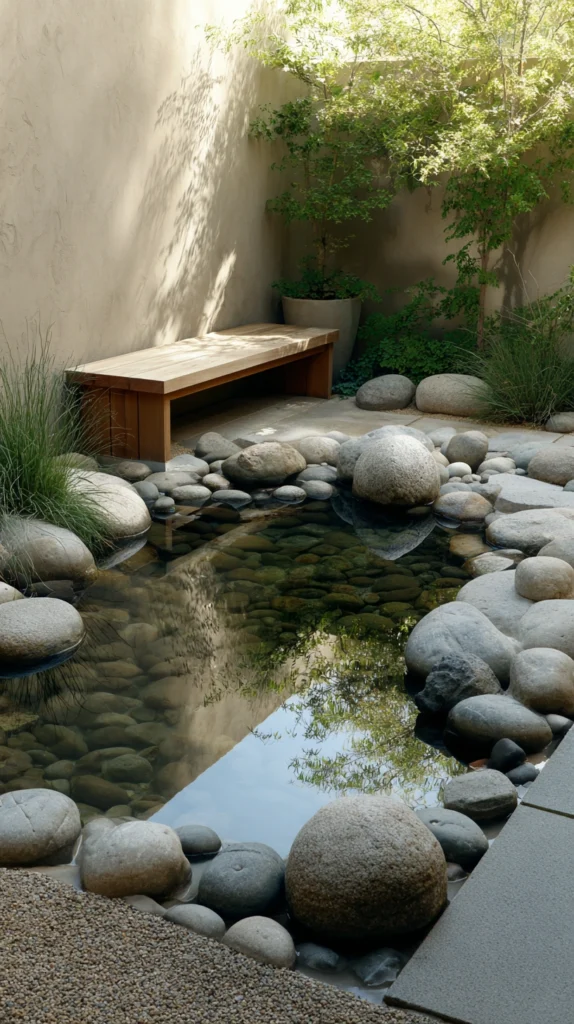
A small, quiet pond designed specifically as a contemplative focal point, often paired with simple seating and minimal, deliberate plantings.
My missing quiet retreat:
What the yard was lacking:
- Plenty of active, social outdoor space but nowhere genuinely quiet and contemplative
- A pond built primarily for visual display rather than a personal, restorative experience
- Wanted one corner of the yard dedicated specifically to quiet and reflection
The meditation pond solution:
Why this approach differs from an ornamental or social pond:
- Designed specifically around stillness, simplicity, and personal restoration rather than display
- Minimal, deliberate plantings rather than a dense or varied planting scheme
- Often incorporates a single seating spot rather than group gathering space
- The pond becomes a destination for quiet time rather than primarily a backdrop for entertaining
Design principles for a meditation pond:
Building the contemplative space:
- A small, intimate scale rather than a large, dramatic feature
- Very gentle water movement, enough for soft sound without overwhelming quiet
- A single simple seating element, such as one bench or a flat sitting stone
- Minimal, carefully chosen plants rather than a full, varied planting scheme
Incorporating traditional elements:
Optional additions for atmosphere:
- A simple stone lantern or single sculptural element
- A small deer scarer or bamboo water spout for gentle, rhythmic sound
- Smooth river stones lining the pond’s edge rather than more varied, busy rock
Where this works best:
Ideal situations:
- A private, somewhat secluded corner of the yard
- Anyone specifically prioritizing a restorative, personal retreat space
- Yards with an existing quiet or shaded area suited to this purpose
Cost:
- Small pond liner and pump: $150-400
- Simple stone seating or a bench: $50-300
- Minimal plantings and finishing stone: $80-250
- Total: $280-950
My meditation pond: Tucked into the quietest corner of the yard, with just one small bench and a gentle bamboo spout, this pond has become the specific spot I go to when the rest of the day needs a genuine pause.
Meditation Pond Tips
Choose the most secluded, quiet corner of the yard available:
Placement priority:
- A meditation pond positioned near high-traffic areas undermines its intended contemplative purpose
- Look for the yard’s naturally quietest, most private corner, even if it requires some plant screening
- This placement decision matters more here than for any other pond style on this list
- A slightly less visually prominent location often serves this specific pond’s purpose better than a highly visible one
Resist the urge to add features beyond the essential minimum:
Restraint principle:
- Additional plants, ornaments, or fish can gradually shift this pond away from its intended simplicity
- Regularly assess whether each element still serves the space’s quiet, contemplative purpose
- This ongoing restraint is what keeps a meditation pond distinct from a standard ornamental one
- When in doubt, remove rather than add to maintain the intended sense of calm
Choosing Your Backyard Pond
By Yard Size
Small yards or patios:
- Small container water garden (idea 3)
- Pondless water feature (idea 12)
- Zen meditation pond (idea 15)
Medium yards:
- Preformed liner starter pond (idea 1)
- Flexible liner custom-shaped pond (idea 2)
- Waterfall and stream combination (idea 4)
Large yards or sloped properties:
- Koi pond with deep water zones (idea 5)
- Multi-level terraced pond system (idea 14)
- Naturalistic wildlife pond (idea 6)
By Priority
Lowest maintenance:
- Pondless water feature (idea 12)
- Solar-powered fountain pond (idea 10)
- Small container water garden (idea 3)
Wildlife and ecology focused:
- Naturalistic wildlife pond (idea 6)
- Container bog garden companion (idea 9)
Entertaining and gathering:
- Raised pond with seating wall (idea 8)
- Fire and water feature combination (idea 11)
- Waterfall and stream combination (idea 4)
By Budget
Under $300:
- Small container water garden (idea 3)
- Solar-powered fountain pond (idea 10)
- Container aquatic plant focal point (idea 13)
$300-800:
- Preformed liner starter pond (idea 1)
- Flexible liner custom-shaped pond (idea 2)
- Pondless water feature (idea 12)
- Zen meditation pond (idea 15)
$800-1,500:
- Waterfall and stream combination (idea 4)
- Raised pond with seating wall (idea 8)
- Fire and water feature combination (idea 11)
$1,500+:
- Koi pond with deep water zones (idea 5)
- Multi-level terraced pond system (idea 14)
Maintenance Through the Seasons
Spring:
- Remove winter debris and inspect the liner for any damage
- Restart pumps and filtration systems, checking all components before full operation
Summer:
- Monitor water levels closely as evaporation increases
- Watch for algae growth and adjust plant coverage or filtration as needed
Fall:
- Remove fallen leaves regularly to prevent decomposition affecting water quality
- Prepare fish and plants for the transition into colder weather
Winter:
- Use a pond heater or aerator in climates where the surface may freeze
- Reduce or pause feeding for fish during colder months when their metabolism slows
My Complete Backyard Pond Journey
What I built across four years:
Year one ($480):
- Preformed liner starter pond in a previously dead patch of lawn
- Learned that a manageable first project mattered more than an ambitious one
Year two ($720):
- Small waterfall and stream addition
- Container bog garden along one edge
- Learned that moving water changed the whole feature’s presence in the yard
Year three ($1,350):
- Expanded depth and filtration to support a small koi collection
- Learned that proper planning for fish requirements from the start prevents costly retrofitting later
Year four ($310):
- Solar-powered fountain feature added to a previously unpowered corner
- Learned that solar technology had become genuinely reliable, not just a compromise option
Total investment: $2,860 across four years Most important lesson: Starting small and expanding gradually produces a better result than attempting the full vision immediately Single highest-impact change across all four years: The waterfall and stream addition in year two, for transforming the pond from a quiet feature into the yard’s clear focal point
Getting Started This Weekend
Start smaller than the full vision.
This weekend:
Step 1 — Choose the pond’s location based on sun and visibility:
- At least four to six hours of sun for most aquatic plants to thrive
- Visible from a frequently used vantage point, like a patio or window
- Away from major tree root systems that could complicate digging or damage a liner
Step 2 — Decide on preformed shell versus flexible liner:
- A preformed shell for the most beginner-friendly first project
- A flexible liner if a specific custom shape is genuinely important
- Both are valid starting points; choose based on comfort level with the installation process
Step 3 — Plan filtration before finalizing the pond’s size:
- Undersized filtration is the most common source of ongoing pond frustration
- Research pump and filter requirements specific to the planned pond volume
- This planning step matters more than almost any decorative decision
Step 4 — Start with a smaller pond than initially imagined:
- A modest, well-executed first pond can always be expanded later
- A smaller project also keeps the initial investment and maintenance learning curve manageable
My recommendation:
Start with a preformed liner pond and basic filtration:
- The most forgiving, well-documented approach for a first pond project
- Provides real information about maintenance commitment before a larger investment
- Nearly every idea on this list can be added onto this kind of pond later
Sit beside the finished pond in the evening and listen to the water before planning what comes next.
Now go build the pond that finally gives the backyard its own quiet, moving focal point.
Quick Summary
The 15 backyard pond ideas:
Beginner-friendly starting points:
- Preformed liner starter pond (idea 1): the most forgiving first project
- Small container water garden (idea 3): pond benefits with zero digging
- Solar-powered fountain pond (idea 10): no electrical wiring required
Custom and dramatic builds:
- Flexible liner custom-shaped pond (idea 2): full creative control over shape
- Waterfall and stream combination (idea 4): sound and movement added
- Multi-level terraced pond system (idea 14): the most dynamic, resort-style feature
Fish and ecology focused:
- Koi pond with deep water zones (idea 5): a serious, rewarding aquatic hobby
- Naturalistic wildlife pond (idea 6): built to support frogs, birds, and pollinators
- Container bog garden companion (idea 9): expanded plant variety near the water
Restrained and formal:
- Formal reflecting pool (idea 7): calm, minimal, architectural
- Zen meditation pond (idea 15): a personal, contemplative retreat
- Container aquatic plant focal point (idea 13): one dramatic specimen as the centerpiece
Function and safety focused:
- Pondless water feature (idea 12): water sound without open standing water
- Raised pond with seating wall (idea 8): the pond as a genuine gathering spot
- Fire and water feature combination (idea 11): elemental contrast for evening drama
The universal backyard pond rules:
Always:
- Plan filtration and pump sizing before finalizing the pond’s dimensions
- Level preformed shells and settle flexible liners fully before final trimming
- Choose a pond size matching realistic long-term maintenance capacity
- Research fish-specific depth and filtration needs before stocking any fish
Never:
- Start with an oversized, overly ambitious first pond project
- Skip a thorough inspection of the excavated hole for sharp debris before laying liner
- Add all planned fish to a new pond simultaneously
- Use pesticides or chemical treatments near a pond intended to support wildlife
Common mistakes:
- Treating filtration as an afterthought rather than a core design requirement
- Underestimating the depth koi and other larger fish genuinely require
- Leaving liner edges and pump equipment visible rather than concealed
- Choosing a pond style without first considering the yard’s actual sun exposure and slope
- Overcrowding a small container pond with plants sized for a much larger feature
Remember: a smaller, well-executed pond consistently outperforms a larger, half-finished one, filtration decisions made before digging matter more than any decorative choice made afterward, working with the yard’s existing slope and sun exposure saves significant cost and effort, gradual expansion produces better long-term results than attempting the full vision immediately, and the best backyard pond is the one that gets easier to enjoy over time, not harder to maintain.