14 Vintage Craft Room Ideas
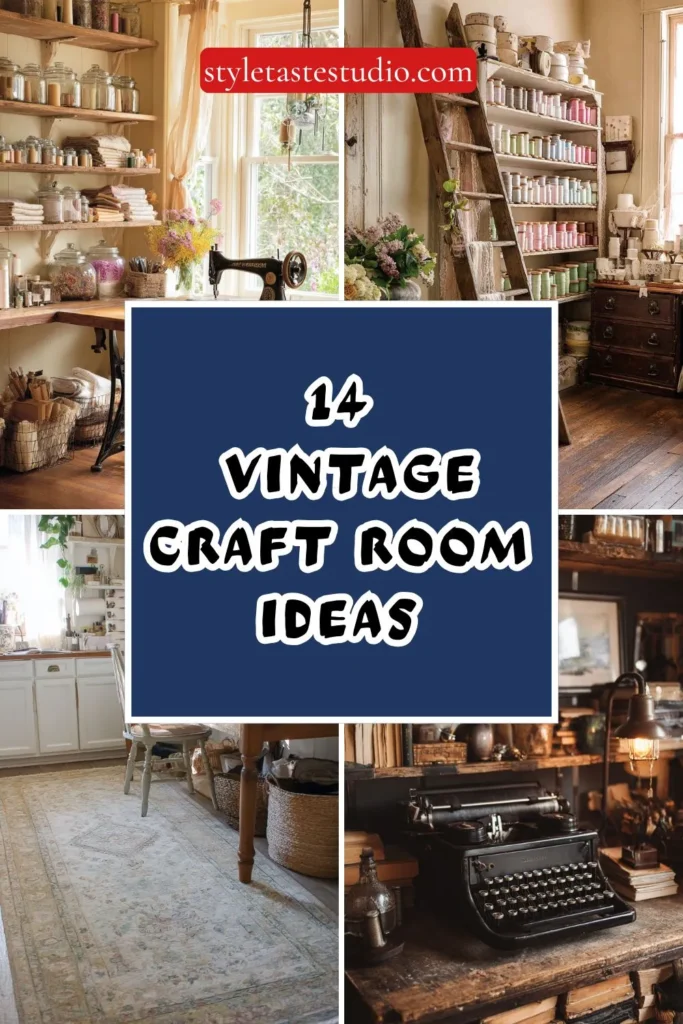
A vintage craft room leans into worn textures, collected tools, and warm color palettes rather than the sleek, matched-storage look of a modern craft space. It’s a style built on genuine character, which makes it especially forgiving for anyone building the room gradually rather than all at once.
Below are 14 ways to bring vintage character into a craft room, from full furniture pieces to smaller styling details, with real numbers on dimensions, material cost, and budget so the room comes together on a realistic timeline and budget.
Vintage Style Considerations
Farmhouse vintage (worn wood, gingham):
- Pairs with painted furniture, exposed shelving
- Reads warm and lived-in
- Best with mismatched, collected storage
- Works well with natural light and open layouts
Industrial vintage (metal, factory-inspired):
- Pairs with metal shelving, exposed hardware
- Reads utilitarian and structured
- Best with rolling carts and metal bins
- Works well in a converted garage or basement
Cottage vintage (florals, pastels, lace):
- Most delicate and decorative of the three
- Pairs with soft colors and vintage textiles
- Best with glass-front cabinets for display
- Works well in a smaller, more intimate room
1. Use a Vintage Sewing Table as the Main Work Surface
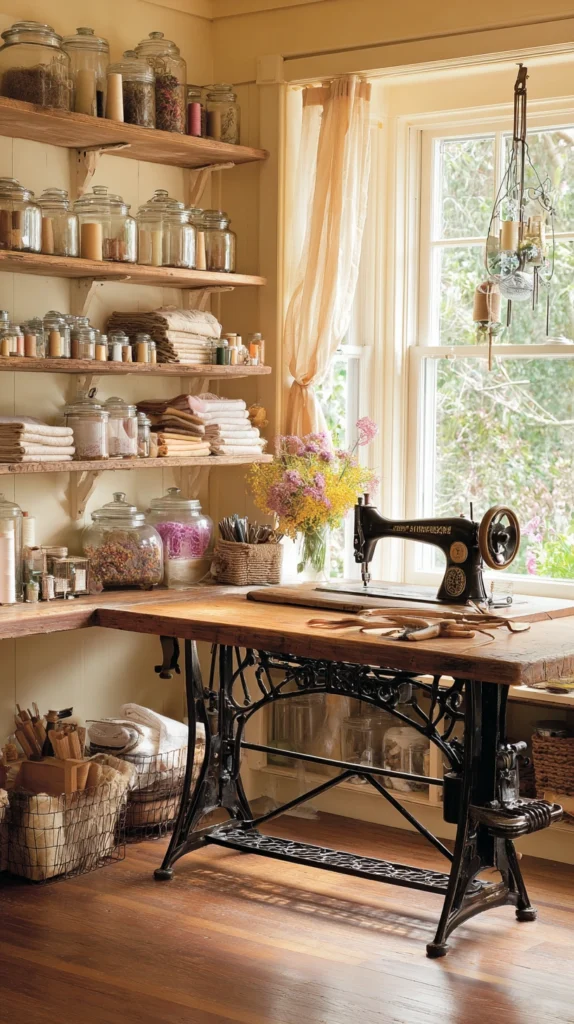
An old treadle sewing machine table or cabinet, whether still fitted with its original machine or repurposed as a plain work surface, brings genuine vintage character and function to the center of a craft room. Standard vintage sewing tables run 30-36 inches wide and 28-30 inches tall, similar to a standard desk.
Budget: $80-300 depending on condition and whether the original machine is included, typically sourced from antique shops or estate sales. Tables with the original cast iron treadle base tend to cost more than simpler wood cabinet versions without the mechanism.
If the original machine still works, it can be kept as a functional piece for actual sewing projects, adding both nostalgia and practicality to the room. If the machine is missing or non-functional, the flat cabinet top still makes an excellent work surface, and the underneath storage compartments are ideal for organizing thread, patterns, or small tools.
Refinishing the wood top with a matte sealant protects the surface from craft supplies like paint and glue while preserving the table’s original character and patina.
Many treadle sewing tables also fold or have a hinged leaf that lowers the machine below the tabletop surface, which is a useful feature to look for if you want the option of a completely flat work surface when the machine itself isn’t in use.
2. Add a Glass-Front Cabinet for Supply Display
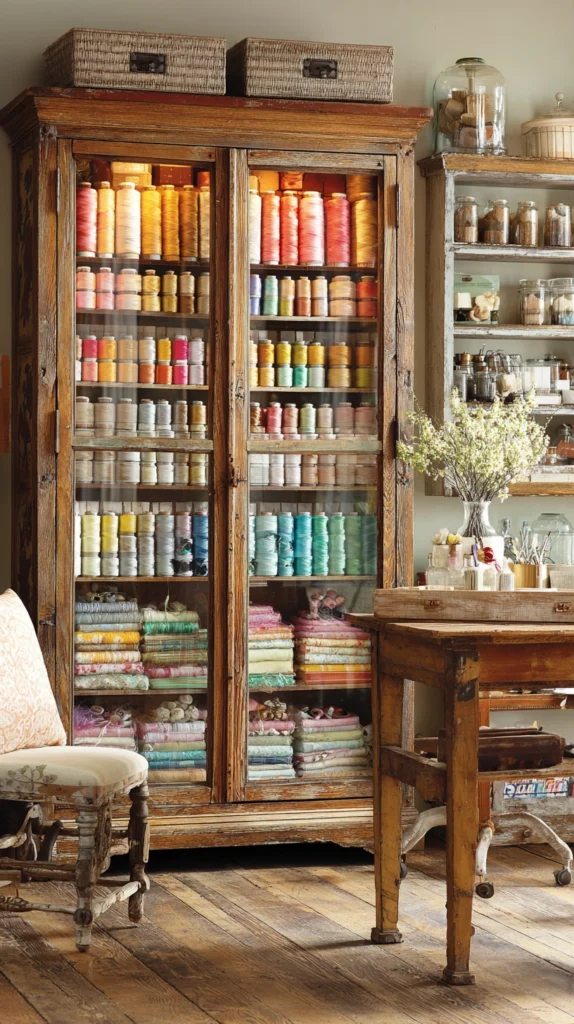
A vintage glass-front cabinet, whether a china cabinet, medicine cabinet, or bookcase repurposed for craft storage, turns supplies into a visual display rather than hiding them behind solid doors. Standard glass-front cabinets run 30-40 inches wide and 60-72 inches tall.
Budget: $150-500 depending on size and condition, often available secondhand through antique stores, estate sales, or online marketplaces. Solid wood cabinets with original glass panes tend to cost more than simpler versions with newer glass replacements.
Organizing supplies by color inside a glass-front cabinet — spools of thread, jars of buttons, or paint bottles arranged in a gradient — turns the storage itself into a piece of decor rather than just a functional necessity. This works especially well for supplies that are naturally colorful or visually interesting, like ribbon, yarn, or paper.
Adding a simple LED strip light inside the cabinet, if it doesn’t already have interior lighting, makes the display pop even more and helps with visibility when selecting supplies.
If the original glass panes are cracked or missing, many local glass shops can cut simple replacement panes affordably, which is often a better option than passing over an otherwise structurally sound cabinet just because of minor glass damage.
3. Use Mason Jars for Small Supply Storage
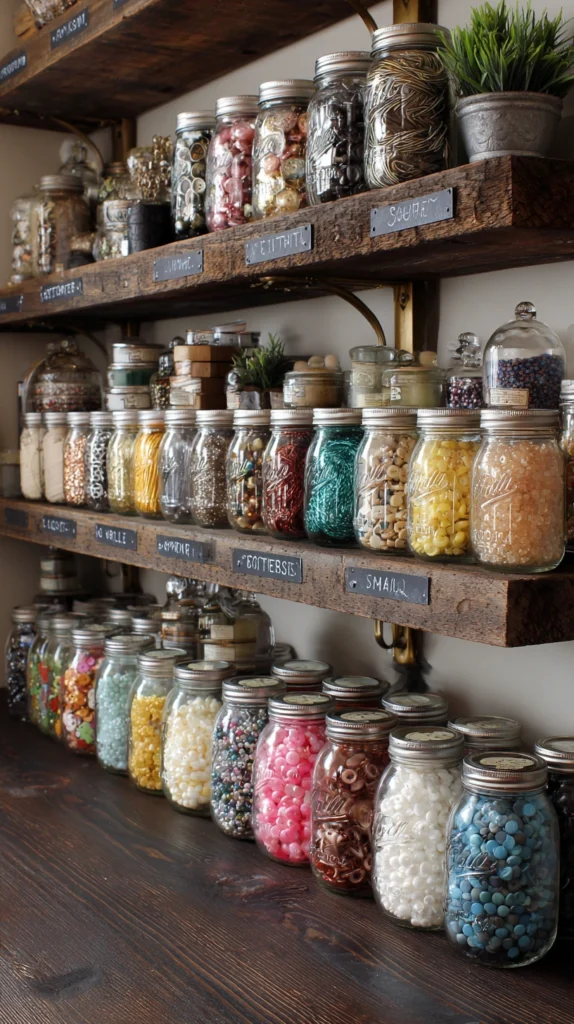
Mason jars are one of the most affordable and recognizable vintage-style storage solutions, ideal for organizing small items like buttons, beads, pins, and embroidery floss. Standard mason jars run from 4 oz for very small items up to a quart size for bulkier supplies.
Budget: $15-30 for a starter set of a dozen assorted jars, or less if sourcing secondhand jars from thrift stores. This is one of the cheapest storage upgrades on this list relative to how much organizational value it adds.
Mounting jar lids to the underside of a shelf, then screwing the filled jars up into the lids, creates a space-saving hanging storage system that keeps supplies visible and accessible without taking up counter or shelf space. This technique works especially well along the underside of upper cabinets or open shelving in a craft room.
Adding simple hand-written or vintage-style labels to each jar completes the look and makes locating specific supplies faster during a project.
4. Add a Vintage Ladder for Ribbon or Fabric Storage
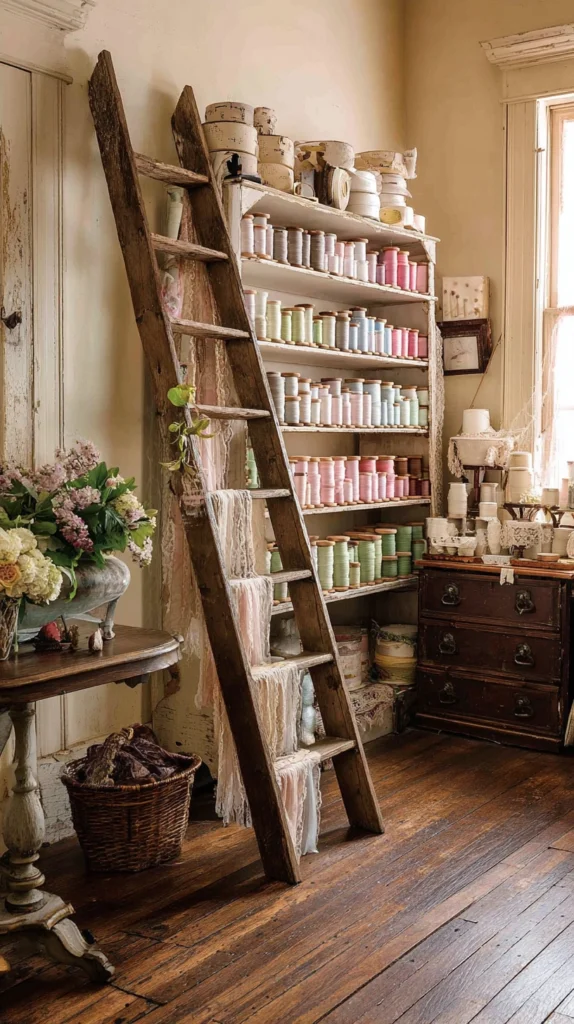
An old wood ladder, whether a genuine antique or a new reproduction styled to look aged, makes distinctive storage for ribbon spools, fabric bolts, or hanging supplies. Standard decorative ladders run 5-6 feet tall, leaned against a wall rather than freestanding.
Budget: $40-150 depending on size and whether it’s a genuine vintage find or a new reproduction piece. Genuine vintage ladders often cost less than new “farmhouse style” reproductions, provided you can find one in decent structural condition.
Hanging ribbon spools on wooden dowels threaded horizontally across the ladder rungs, or draping fabric bolts directly over each rung, both make efficient use of the ladder’s natural shape for organized, visible storage. This is also one of the more space-efficient options on this list, since it uses vertical wall space rather than floor or counter area.
Sanding any rough or splintered areas and applying a light sealant protects both the ladder and anything stored on it from snags or splinters.
5. Use an Old Dresser as a Craft Supply Station
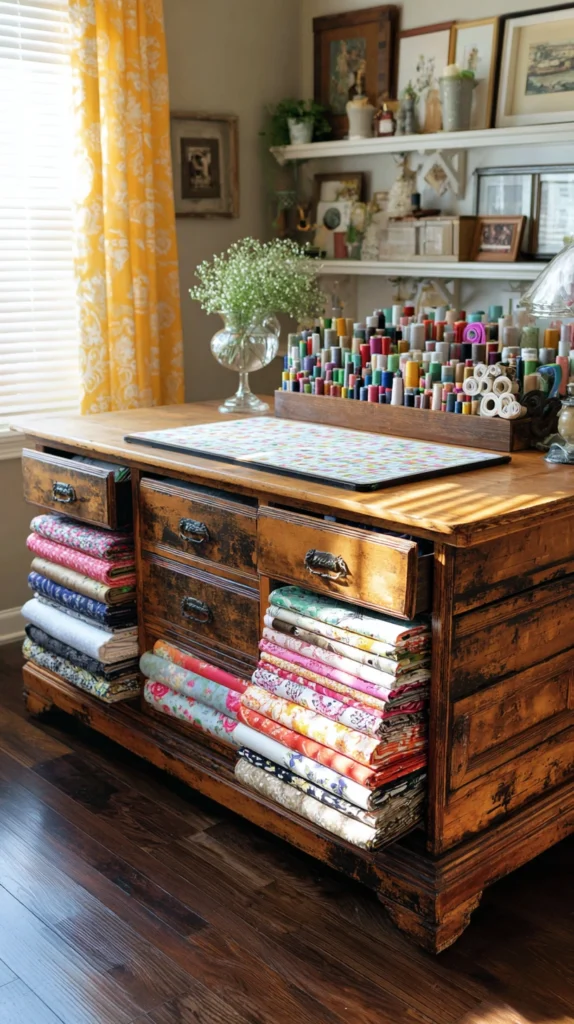
A vintage dresser, whether refinished or left with its original worn patina, provides deep drawer storage well suited to larger craft supplies like fabric, paper, or bulkier tools. Standard vintage dressers run 30-60 inches wide with 4-6 drawers.
Budget: $50-250 depending on size and condition, commonly available through thrift stores, estate sales, or secondhand marketplaces. This is one of the more functional and affordable large storage pieces on this list.
Lining the drawers with fabric or shelf paper before filling them protects both the drawer interior and the supplies stored inside, while also adding a decorative touch when a drawer is opened. Using drawer dividers or small bins within each drawer keeps smaller supplies from sliding around and becoming disorganized over time.
Topping the dresser with a cutting mat or protective surface turns it into a dual-purpose piece, offering both storage and an additional work surface in a smaller craft room.
Checking that drawers slide smoothly before purchasing a secondhand dresser is worth doing in person if possible, since swollen wood or warped drawer runners are common in older furniture and can sometimes require sanding or waxing to fix.
6. Add Vintage Tins and Biscuit Boxes for Storage
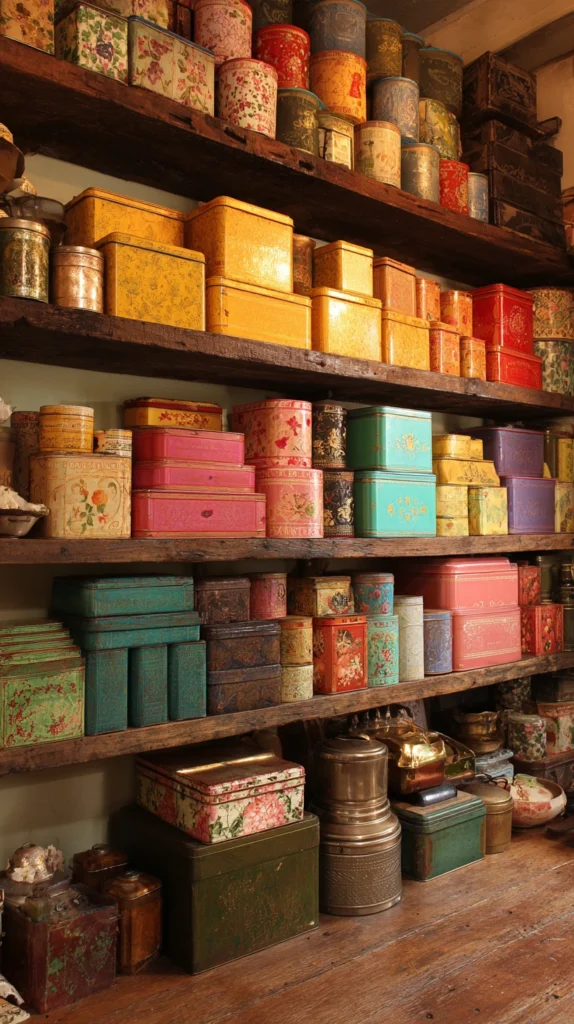
Vintage tins, from old biscuit boxes to tobacco or tea tins, bring color and pattern to open shelving while offering practical storage for craft supplies. Standard vintage tins vary widely in size, from small 3-4 inch containers up to larger 10-12 inch boxes.
Budget: $5-25 per tin depending on rarity and condition, typically sourced gradually from thrift stores, flea markets, or antique shops. Building a collection over time, rather than buying a full matching set at once, keeps the look authentically collected rather than curated all in one trip.
Grouping tins by similar color palettes on a shelf, even when the patterns and origins differ, helps the collection read as cohesive despite being made up of mismatched pieces. Tins with hinged or removable lids work well for supplies you access frequently, while nested or stacked tins are better suited to less frequently used items.
This is one of the easiest ways to add vintage character gradually, since new tins can be added to the collection as they’re found without disrupting the overall room design.
Checking the interior of any vintage tin for rust or old residue before using it for craft storage is worth doing, and a thorough wash followed by a full dry prevents any moisture from transferring to fabric, paper, or other supplies stored inside later.
7. Use a Vintage Typewriter or Sewing Machine as a Display Piece
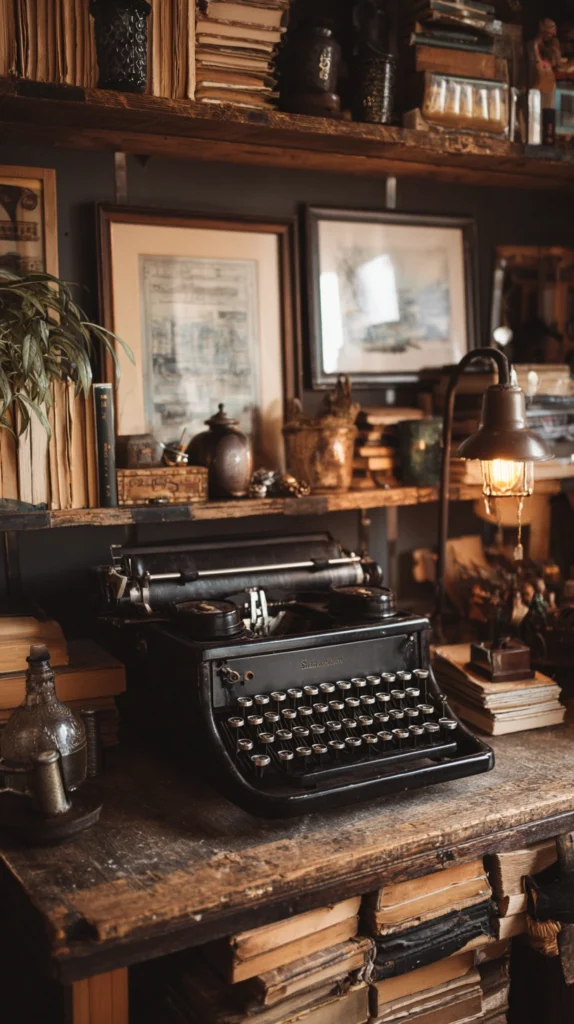
Even a non-functional vintage typewriter or sewing machine adds a strong decorative focal point to a craft room, evoking a sense of creative history even without being used for its original purpose. Standard vintage typewriters run about 12-14 inches wide and make an ideal shelf or desk display piece.
Budget: $40-150 for a decorative, non-functional vintage typewriter, or more if seeking a fully restored working model. Purely decorative condition units, which don’t need to actually type, are generally the most affordable option.
Positioning the piece on a shelf, desk corner, or windowsill where natural light highlights its texture and detail makes the most of its visual impact without taking up valuable work surface space. If the piece does still function, it can double as an actual tool for label-making or vintage-style project components.
This is a strong example of a purely decorative addition that reinforces the vintage theme throughout the room without requiring any functional storage planning.
8. Add a Pegboard With Vintage-Style Hooks and Bins
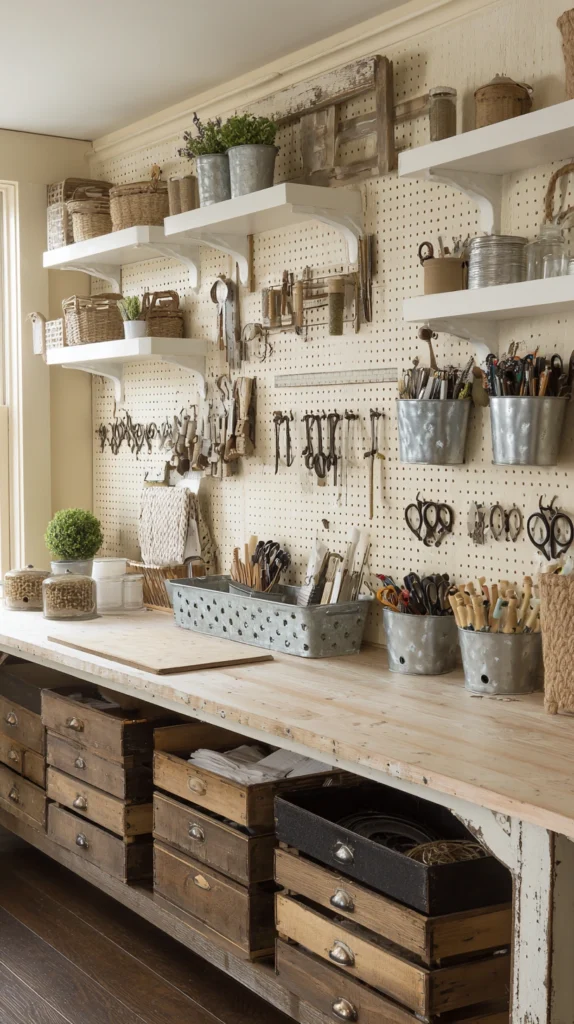
A pegboard wall, outfitted with metal hooks and small galvanized bins rather than modern plastic organizers, brings an industrial-vintage look to tool and supply storage. Standard pegboard sheets run 4×8 feet and can be cut down to fit smaller wall sections.
Budget: $30-60 for a pegboard sheet and frame, plus $40-100 for a set of metal hooks and small galvanized storage bins. This is one of the more affordable full-wall storage systems on this list.
Painting the pegboard a soft cream, sage, or muted color rather than leaving it in the standard hardware-store finish helps it blend into a more considered, styled room rather than reading as a garage workshop wall. Arranging tools and supplies by project type, rather than randomly, keeps the wall functional as well as visually appealing.
Metal hooks and galvanized bins hold up to daily use far better than plastic alternatives while also reinforcing the vintage-industrial aesthetic more convincingly.
9. Use Vintage Suitcases for Stackable Storage
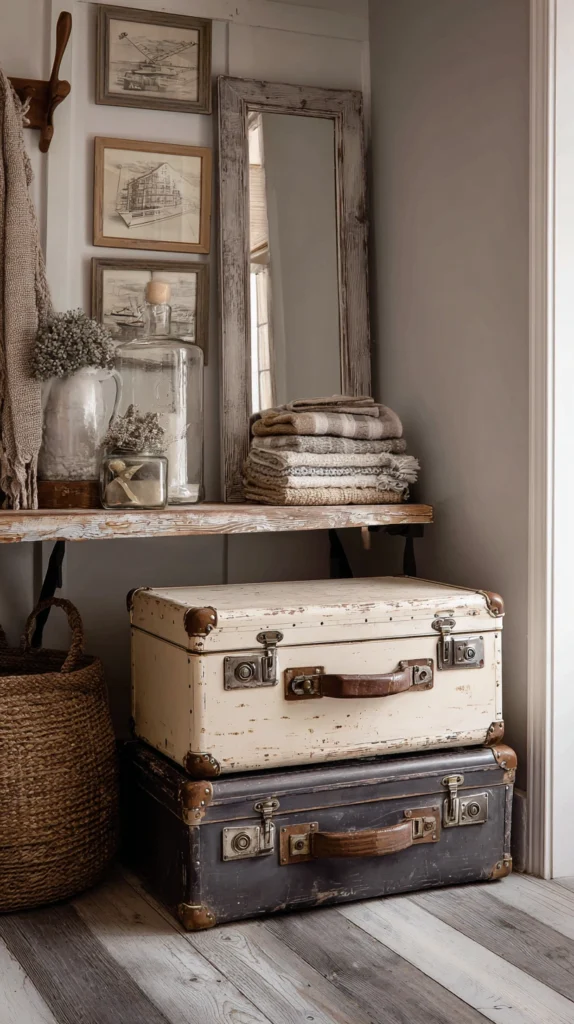
Vintage hard-shell suitcases, whether functional or purely decorative, stack easily to create both storage and a design feature in a corner or beneath a window. Standard vintage suitcases range from small 12-16 inch cases up to larger 24-30 inch trunk-style pieces.
Budget: $20-80 per suitcase depending on size, brand, and condition, typically found at thrift stores, estate sales, or antique shops. Building a small collection of 2-4 stacked suitcases, rather than buying a large matched set, is both more affordable and more visually interesting.
Using the largest suitcase on the bottom of the stack and progressively smaller cases toward the top creates a stable, visually balanced tower that also functions as a small side table or display surface. The interior of each case can hold fabric, patterns, or seasonal craft supplies not needed on a daily basis.
This is a particularly good option for a smaller craft room where floor space is limited, since stacked suitcases take up a compact footprint while adding meaningful storage capacity.
Adding a thin layer of felt or fabric lining inside each suitcase protects delicate supplies like vintage fabric scraps or paper ephemera from any lingering musty odor or dust that older cases sometimes carry.
10. Add a Vintage-Style Cutting Table With Turned Legs
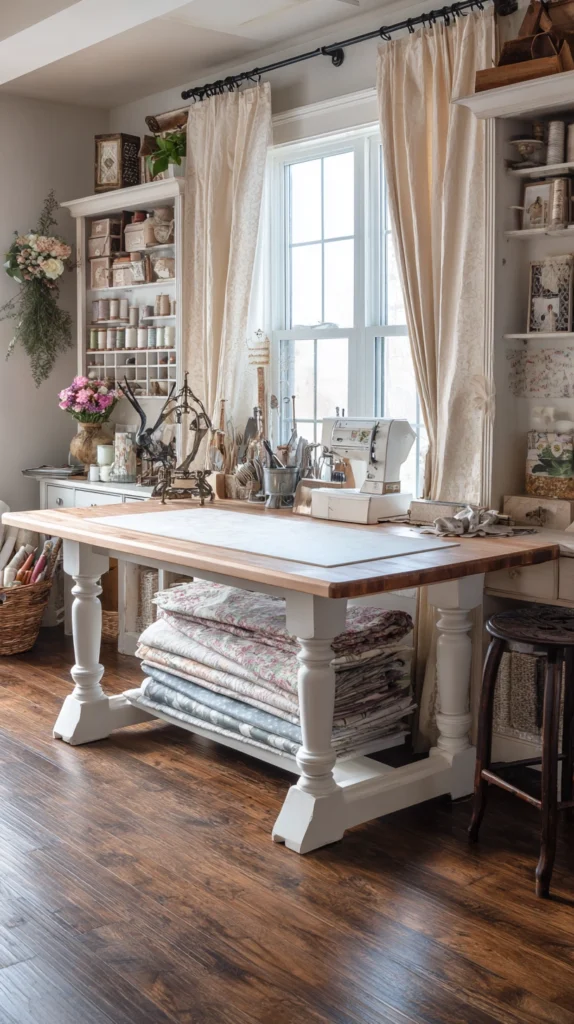
A large work table with turned wood legs, reminiscent of an antique farm table or cutting table used in old tailor shops, anchors a craft room with both function and visual character. Standard cutting tables run 60-72 inches long and 30-36 inches wide, sized for spreading out fabric or larger paper crafts.
Budget: $200-500 for a genuine vintage farm table repurposed as a cutting surface, or $150-350 for a new table built in a vintage turned-leg style. Secondhand farm tables are often more affordable than new furniture styled to look vintage.
Adding a self-healing cutting mat on top of the table protects the wood surface from repeated cuts while still allowing the table’s character to show around the edges. If the table’s original surface has visible wear or stains, embracing that patina rather than trying to fully refinish it keeps the vintage character intact.
This is one of the larger investments on this list, but it also serves as the room’s primary functional workspace, making it worth prioritizing early in the room’s overall planning.
If a full farm table isn’t practical for the room’s size, the same turned-leg aesthetic can be recreated more affordably by attaching a set of secondhand or reproduction turned legs to a simple new plywood or MDF tabletop cut to size.
11. Use Vintage Fabric or Wallpaper for an Accent Wall
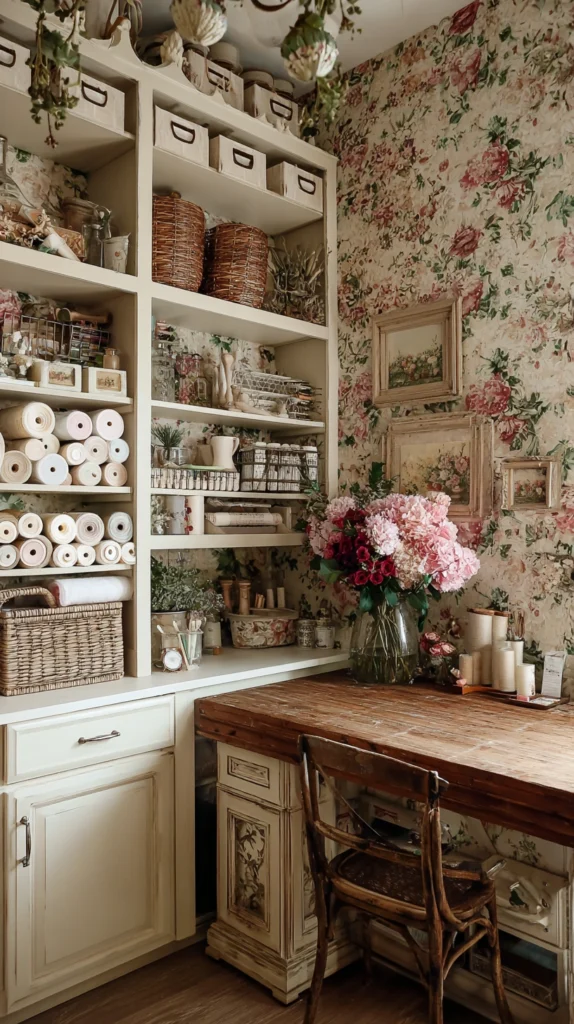
A small-scale vintage floral or botanical print, whether original vintage wallpaper stock or a modern reproduction, brings pattern and warmth to one wall of a craft room without overwhelming the whole space. A standard 9-foot accent wall needs about 2-3 rolls of wallpaper.
Budget: $60-150 for reproduction vintage-style wallpaper covering one wall, or significantly more if sourcing genuine vintage rolls, which can be rare and pricier collector’s items. Reproduction prints offer a similar look at a much more practical cost and availability.
Choosing a smaller-scale, more subdued print keeps the wall from competing visually with the room’s other collected vintage items, many of which already carry their own pattern and color. This treatment works particularly well behind open shelving or a glass-front cabinet, since the wallpaper shows through and adds depth to the display.
If wallpaper feels like too large a commitment, framing a large piece of vintage-style fabric as wall art achieves a similar decorative effect on a smaller scale and lower budget.
12. Add a Vintage Rug for Warmth and Softness
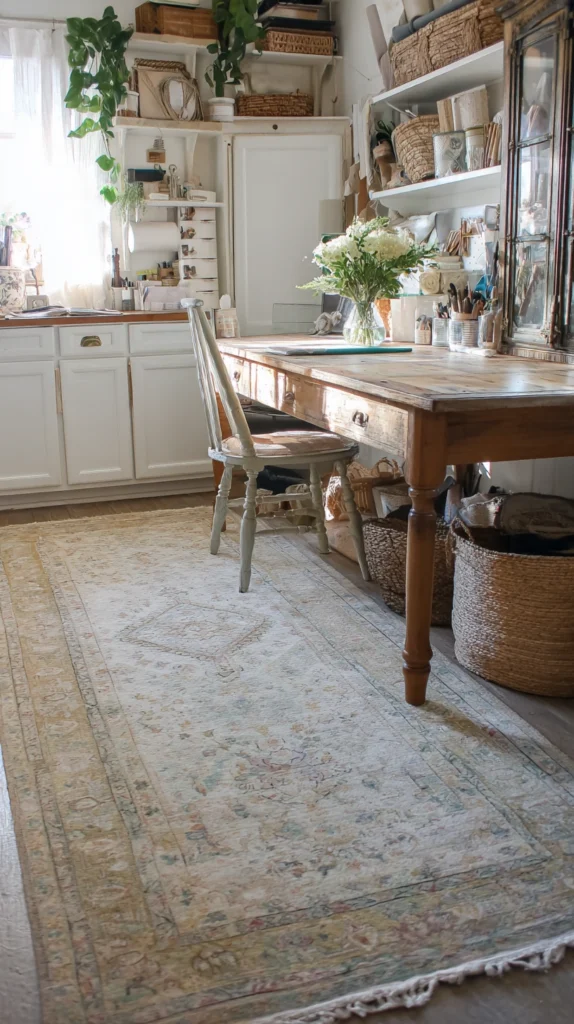
A worn-in looking Persian, floral, or braided rug adds softness underfoot and ties the room’s color palette together, especially in a craft room with hard flooring like wood or tile. Standard area rugs for a craft room run 5×7 or 6×9 feet depending on room size.
Budget: $80-250 for a quality vintage-style printed or braided rug, less if sourcing an actual secondhand vintage rug through an estate sale or antique shop. A genuinely aged, secondhand rug often costs less than a new “vintage-look” reproduction of similar size.
Choosing a patterned or lower-pile rug is a practical choice for a craft room specifically, since these spaces are prone to spills, dropped pins, and fabric or paper scraps that are easier to spot and clean on a textured, patterned surface than a plush, solid-colored one. A rug pad underneath adds both comfort and slip resistance, especially important if the craft room includes a rolling chair or cart.
This is one of the easiest elements on this list to swap out later if your color palette or style preferences shift, since it doesn’t involve any permanent installation.
13. Use Vintage Doorknobs or Drawer Pulls as Hardware
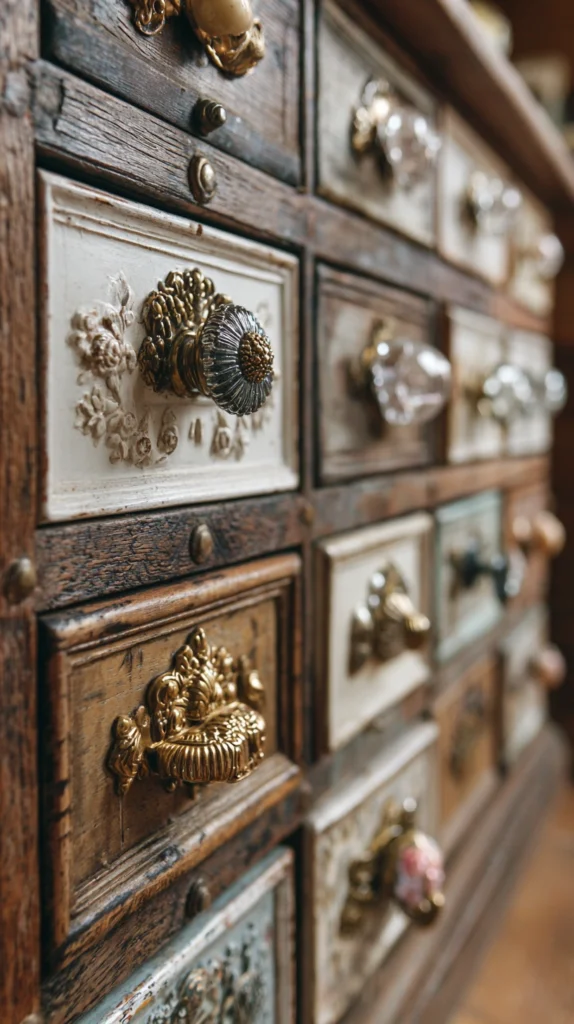
Swapping standard modern hardware for mismatched vintage glass, brass, or ceramic doorknobs and drawer pulls adds small, tactile detail throughout a craft room’s furniture. Standard drawer pulls and knobs are sized to fit most existing furniture hole spacing, though some vintage pieces may require slight adjustment.
Budget: $3-15 per knob or pull, depending on material and rarity, typically collected gradually from flea markets, hardware salvage shops, or online vintage sellers. Building a full mismatched set over time, rather than all at once, keeps costs manageable and the look feeling genuinely collected.
Glass knobs in particular catch and reflect light beautifully, adding a subtle sparkle to drawer fronts that plain modern hardware doesn’t offer. Mixing a few different styles and materials — some brass, some glass, some ceramic — across different pieces of furniture creates a more eclectic, collected look than a single matched hardware set throughout the room.
This is one of the lowest-cost ways to meaningfully change the character of existing furniture, whether it’s a repurposed dresser, a cabinet, or a craft cart.
Keeping the original screw or bolt size in mind while shopping for replacement hardware saves a return trip, since vintage knobs and pulls don’t always follow the same standardized spacing used in modern furniture.
14. Add a Vintage-Style Pendant or Task Lamp
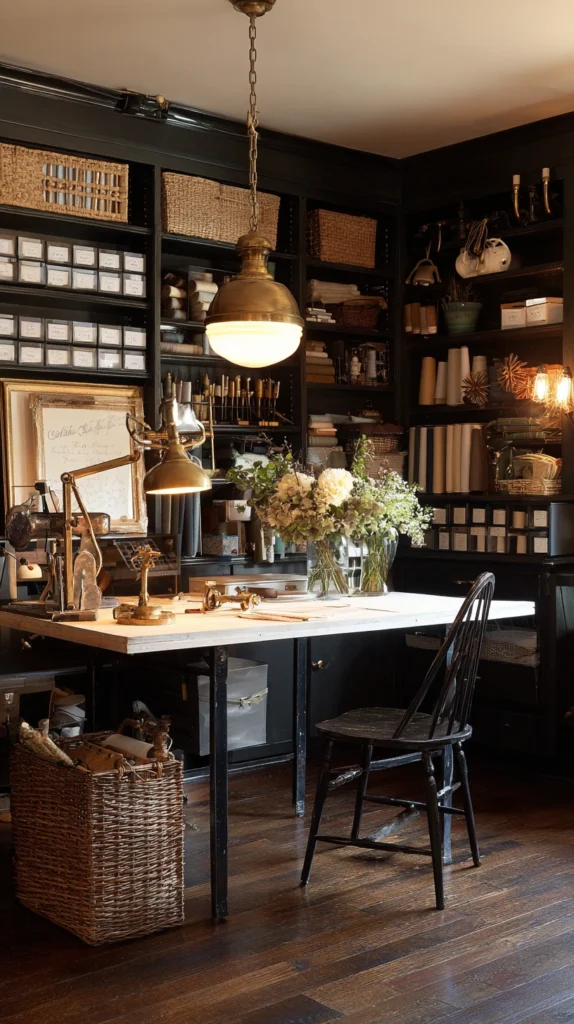
A milk-glass pendant light or an articulated brass task lamp brings warm, focused lighting to a craft room’s main work area while reinforcing the room’s overall vintage theme. Standard task lamps position the light source 15-20 inches above the work surface for adequate task lighting.
Budget: $40-120 for a quality vintage-style task lamp, or $80-200 for a pendant light if replacing an overhead fixture entirely. Good task lighting matters more in a craft room than in almost any other room in the house, given how much detail-oriented work happens at close range.
An adjustable-arm task lamp allows the light to be repositioned directly over detailed work like sewing, painting, or small assembly projects, which is more useful in a craft space than a fixed overhead light alone. Warm white bulbs, rather than cool or daylight-toned ones, support the room’s vintage feel, though a secondary daylight-balanced lamp is worth adding as well for color-accurate work like fabric matching or painting.
Positioning at least one light source close to the primary work surface, rather than relying solely on a distant overhead fixture, meaningfully reduces eye strain during longer crafting sessions.
A dimmer switch on the main overhead fixture, if wiring allows, gives the room flexibility to shift between bright, functional task lighting during active project work and a softer, cozier glow during downtime.
Quick Start Shopping List
This weekend, under $150:
- A dozen assorted mason jars: $20
- Vintage-style drawer pulls (set of 6): $40
- A small vintage tin or two for storage: $20
- A vintage-style task lamp: $70
Budget-Friendly Version
Lowest-cost ways to start:
- Mason jar storage instead of purchased organizers
- Secondhand furniture instead of new “vintage-style” pieces
- A gradually built tin or jar collection rather than a matched set
- Vintage hardware swaps on existing furniture
Choosing a Vintage Color Palette
Muted, slightly faded colors read as more authentically vintage than bright, saturated modern tones, since original vintage pieces have naturally softened with decades of light exposure and wear.
Sage green, dusty rose, buttercream, and soft denim blue are among the most common colors found in genuine vintage furniture and textiles, making them a reliable starting point if you’re choosing paint colors or fabric for the room.
Limiting the overall palette to 3-4 core colors, even while mixing many different patterns and textures within those colors, keeps a room full of collected, mismatched pieces feeling cohesive rather than chaotic.
Testing paint or fabric choices against a few of your actual vintage pieces before committing to a full room scheme helps confirm the colors genuinely complement the items you already have or plan to collect.
Sampling a color on a small painted board first, and viewing it at different times of day, is a worthwhile extra step before committing to a full wall or piece of furniture.
Where to Find Vintage Pieces
Estate sales are one of the best sources for genuinely aged furniture and smaller items like tins, jars, and sewing tools, often priced lower than antique stores carrying similar pieces.
Thrift stores and consignment shops are worth checking regularly rather than once, since inventory turns over quickly and the right dresser, table, or cabinet may show up unexpectedly on any given visit.
Online marketplaces and local classifieds often have larger furniture pieces listed by people clearing out a relative’s home, frequently priced to sell quickly rather than for maximum value.
Flea markets and antique malls are the best sources for smaller decorative items — knobs, tins, typewriters — since vendors specialize in exactly this kind of collected, smaller-scale inventory.
Success Indicators
- Room feels collected and personal, not like a matched furniture set
- Storage is both functional and visually interesting to look at
- Lighting supports actual detailed craft work, not just ambiance
- Furniture pieces show some age and character rather than looking brand new
- The room continues to evolve as new vintage finds are added over time
Remember
Build the room gradually from secondhand and vintage finds rather than trying to complete it in one shopping trip, prioritize a solid work surface and good task lighting early since those support the room’s actual function, mix hardware and storage pieces from different sources rather than buying a matched set for a more authentically collected look, embrace visible wear and patina on furniture rather than fully refinishing every piece, and treat this as a room that keeps growing and changing as you continue to find new pieces over months and years.