13 Xeriscape Front Yard Ideas for Low-Water Landscaping
A traditional lawn in a dry climate is essentially a plant that wants to be somewhere else, kept alive through sheer force of sprinkler timers and water bills.
Xeriscaping flips that entire equation. Instead of fighting your climate every summer, you’re working with plants and materials that were built for exactly the conditions you’ve got.
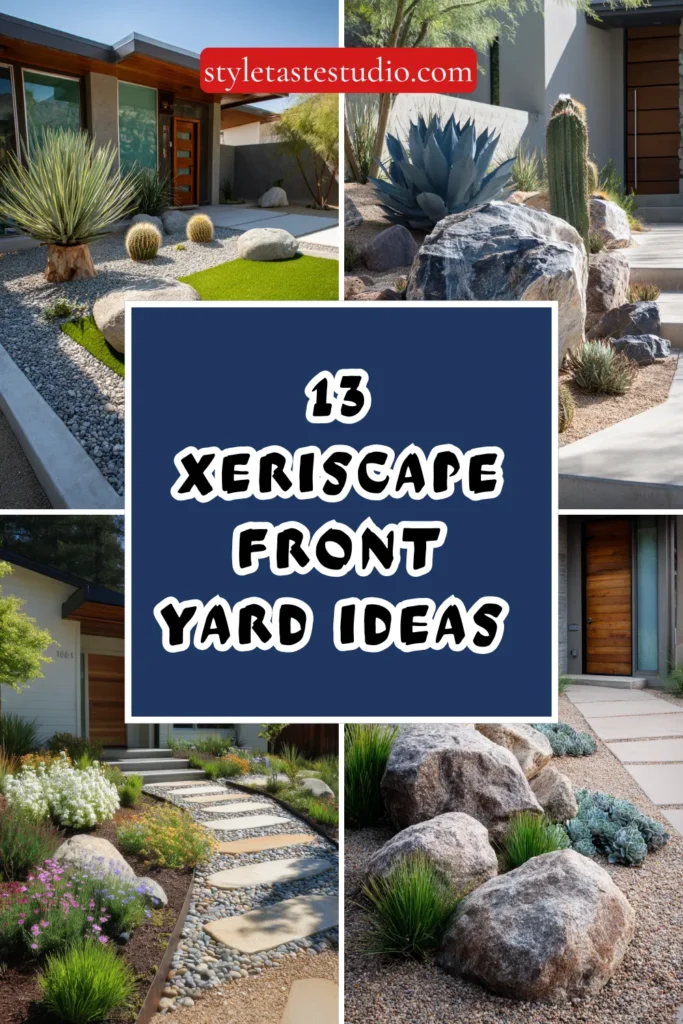
The results don’t have to look like gravel and a single sad cactus, which is the image a lot of people still picture when they hear the word. Done well, a xeriscaped front yard can be more textured, more colorful, and more interesting to look at than the lawn it replaced.
Here are 13 xeriscape front yard ideas that cut water use dramatically without giving up curb appeal.
Every one of these scales up or down depending on how much of your front yard you’re ready to convert.
1. Gravel Mulch Beds With Drought-Tolerant Perennials
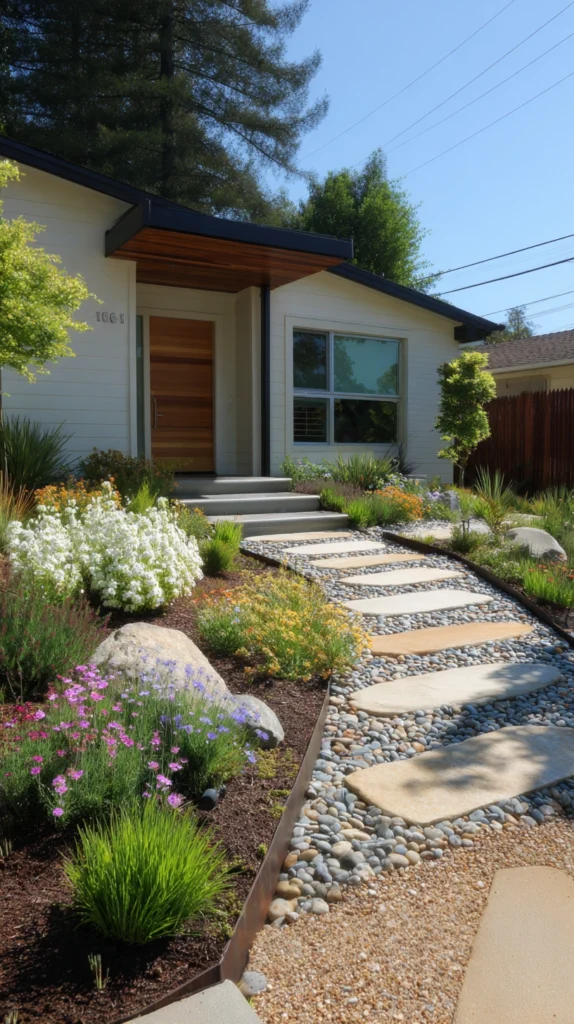
Planting beds topped with a layer of decorative gravel instead of organic mulch, filled with perennials chosen specifically for low water needs.
Gravel does something organic mulch can’t in a dry climate, it reflects heat away from plant roots rather than absorbing and holding it, and it never breaks down or needs replacing the way bark mulch does every couple of years.
I converted my entire front bed to a 2-inch layer of quarter-inch gravel, planting through it with a mix of Russian sage, yarrow, and blanket flower spaced generously to allow for their mature spread.
Budget tip: Buying gravel in bulk by the ton from a landscape supply yard costs a fraction of the same material sold in bags at a garden center, especially once you’re covering more than a couple hundred square feet.
A few things worth getting right:
- Lay landscape fabric beneath the gravel first, or weeds will eventually punch straight through
- Choose a gravel size that won’t scatter into the lawn or walkway with regular foot traffic or wind
- Leave adequate space around each plant’s base rather than packing gravel too tightly against the stem, which can trap excess moisture against the crown
This combination handles a genuinely hot, dry front yard with almost no supplemental watering once plants are established.
I made the mistake of laying gravel directly over bare soil on one small test section, and weeds had pushed through within a single month, which made the case for fabric underlayment better than any product description ever could.
2. A Dry Riverbed as the Yard’s Central Feature
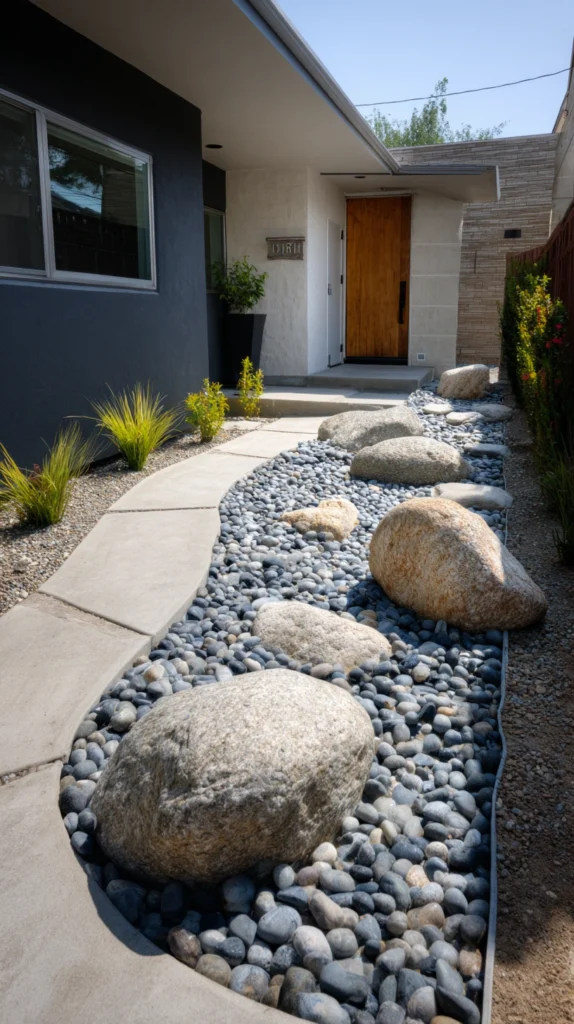
A rock-lined channel running through the front yard, mimicking a natural streambed, that manages rainwater runoff while serving as the yard’s primary visual anchor.
Dry climates still get rain occasionally, often in sudden, heavy bursts rather than the steady drizzle wetter regions see, and a dry riverbed gives that water somewhere intentional to go instead of pooling against your foundation or eroding bare soil.
I built a curving dry riverbed running from my downspout out toward the street, lining it with a mix of river rock and a few larger boulders positioned at the bends where water moves fastest.
Style tip: Follow the yard’s actual natural drainage path rather than forcing a new route, since a dry riverbed that fights the grade looks obviously artificial the first time it actually rains.
A few design considerations:
- Vary rock sizes throughout the channel, with larger stones at curves and smaller rock filling the straighter sections
- Dig the channel wider and deeper than seems necessary, since undersized channels overflow during genuinely heavy storms
- Plant drought-tolerant grasses or low shrubs along the edges to soften the hardscape and help stabilize the banks
Even in years with almost no rain to actually channel, a well-built dry riverbed reads as a deliberate design choice rather than an empty ditch.
A neighbor’s version, built without any real attention to the yard’s actual grade, ended up funneling water directly toward their garage during one bad storm, which is exactly the outcome careful grading beforehand is meant to prevent.
3. Native Grass Meadow in Place of Turf Lawn
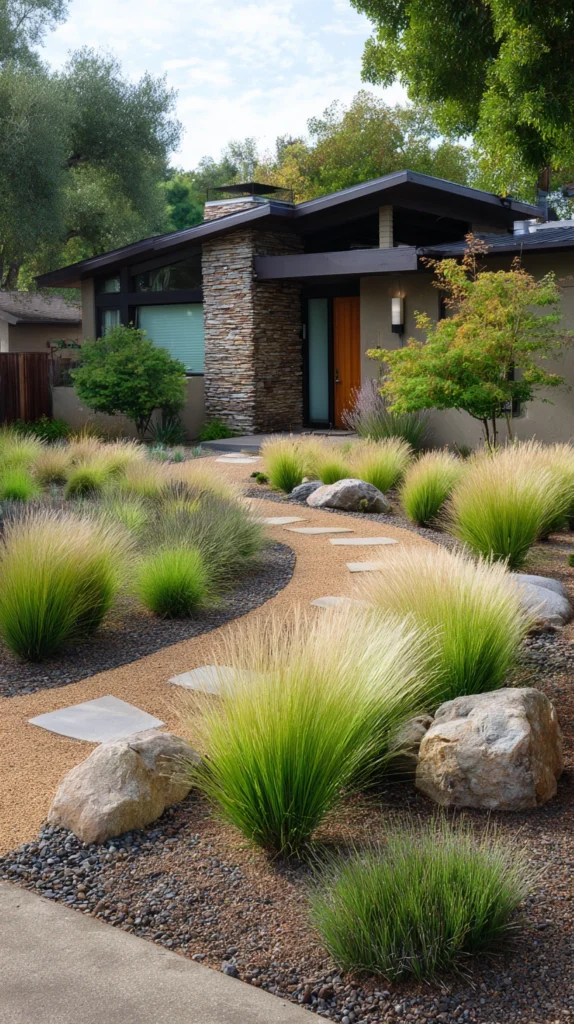
Replacing a traditional turf lawn entirely with a planting of native, drought-adapted grasses left to grow in loose, natural clumps rather than mowed short.
Turf grass is almost never native to a genuinely dry climate, which is exactly why it demands so much irrigation to survive there. Native grasses evolved for your actual rainfall pattern, and they hold up without the weekly watering schedule turf requires.
I removed my entire front lawn and replaced it with a mix of blue grama and buffalo grass, both native to my region, mowed only once or twice a season rather than weekly.
Budget tip: Native grass seed costs considerably less per square foot than sod, and while it takes a season longer to fill in, the long-term water savings make up the difference within a couple of years.
A few things worth knowing before converting:
- Kill existing turf thoroughly first, either by smothering with cardboard and mulch or through targeted herbicide application, since new seed struggles against established grass competition
- Water consistently through the first season while roots establish, even though the meadow will need very little supplemental water afterward
- Check local ordinances or HOA rules before converting, since some areas have specific height or appearance requirements for front yard plantings
This is one of the most dramatic water-saving conversions on this list, since lawn irrigation is typically the single largest water draw in most dry-climate landscapes.
Patience was the hardest part of this project honestly, since the yard looked genuinely patchy and unconvincing for most of the first season before the grass finally knit together into something that actually looked intentional.
4. Succulent and Cactus Rock Garden
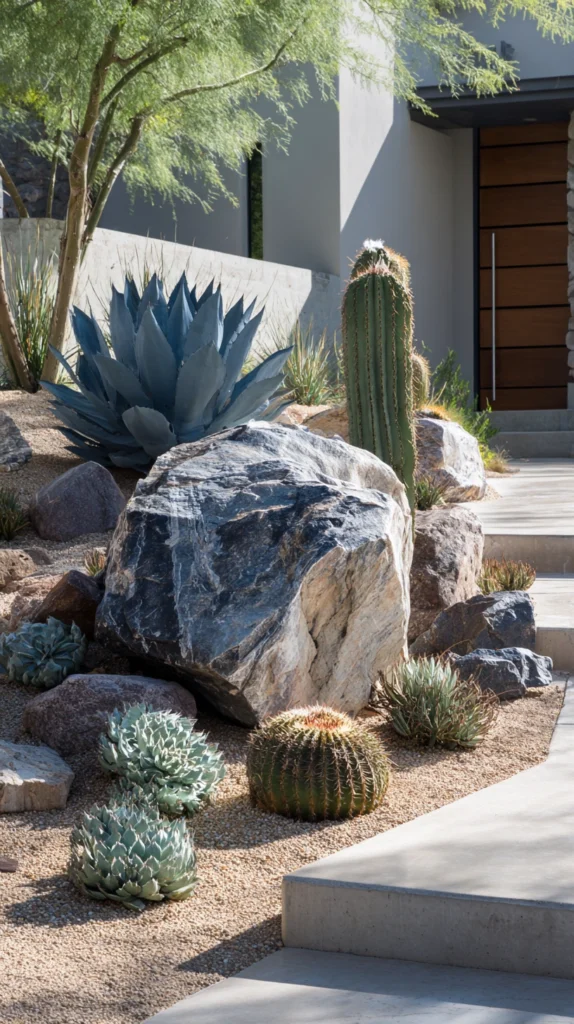
A dedicated bed combining architectural cacti, agave, and other succulents with boulders and gravel, designed around sculptural plant forms rather than dense, leafy planting.
This is the look most people already picture when they hear xeriscaping, and there’s a reason it’s become a classic. Few planting styles handle extreme heat and drought as reliably as a well-chosen succulent collection.
I built a rock garden along my front walkway using several large boulders as anchors, filling the gaps between them with a mix of golden barrel cactus, agave, and low-growing sedum.
Style tip: Bury boulders at least a third of their height rather than setting them fully on the surface, since a partially buried rock reads as naturally occurring while one sitting on top looks placed.
A few installation notes:
- Use heavy equipment or professional help for any boulder over a couple hundred pounds, since these aren’t safely moved by hand
- Choose plants with varied heights and forms, mixing tall architectural cacti with lower, spreading succulents for visual layering
- Plant with well-draining soil specifically, since succulents and cacti are far more likely to fail from overwatering or poor drainage than from drought
A rock garden like this genuinely thrives on neglect in a way few other planting styles can claim, which makes it one of the lowest-maintenance options here.
I lost a beautiful agave the first year to root rot after an unusually wet spring, which taught me more about drainage than any planting guide had managed to, and the replacement soil mix has held up through every soggy season since.
5. Permeable Paver Walkway With Planted Joints
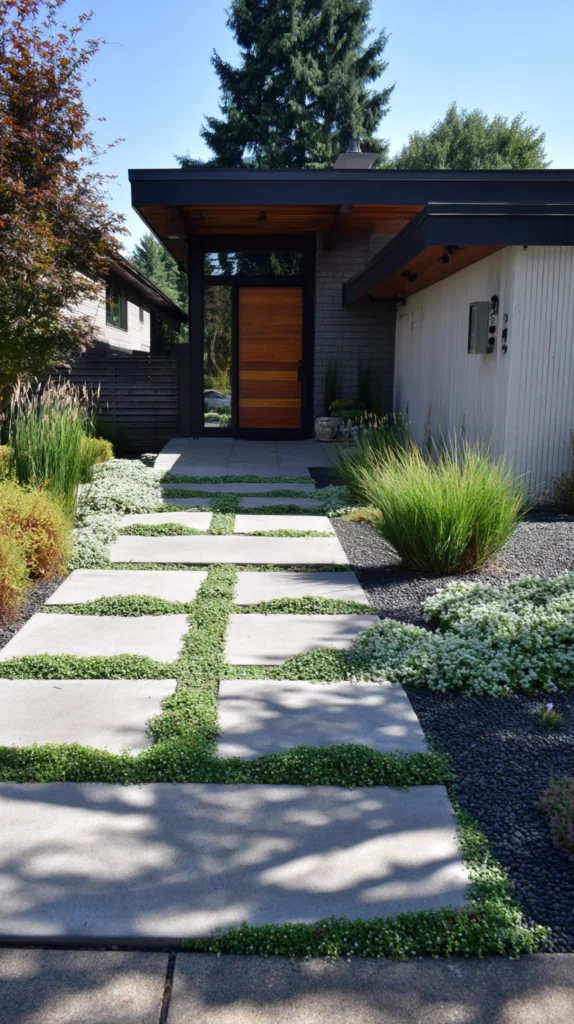
A front walkway built from permeable pavers with wide joints filled with soil and drought-tolerant groundcover rather than mortared, sealed joints.
Traditional concrete walkways shed every drop of rain straight into the storm drain, while a permeable paver path lets water soak directly into the ground beneath it, reducing runoff and helping keep nearby plantings hydrated without extra irrigation.
I replaced my old concrete front walk with large flagstone pavers set with 2-inch gaps, filling those gaps with a mix of soil and creeping thyme that’s slowly spread to soften every edge of the path.
Budget tip: Reclaimed or salvaged pavers cost considerably less than new stone and work just as well for this application, since irregular shapes and slight wear actually suit a permeable, planted joint design better than perfectly uniform new material.
A few practical notes:
- Set pavers on a compacted gravel base rather than a solid concrete slab, which is what allows water to actually drain through rather than around the installation
- Choose a groundcover that tolerates occasional foot traffic, since not every low-growing plant holds up to regular stepping
- Keep the gaps wide enough for meaningful drainage, generally at least an inch and a half, rather than a tight, decorative-only joint
This is a strong choice if you want to reduce water runoff from hardscape as well as from planting beds, since the walkway itself becomes part of the yard’s overall water management.
The thyme took longer to fill in than I expected, nearly a full season of looking sparse before it finally knitted the joints together, which is worth knowing going in so you don’t assume something’s gone wrong partway through.
6. Drought-Tolerant Flowering Shrub Border
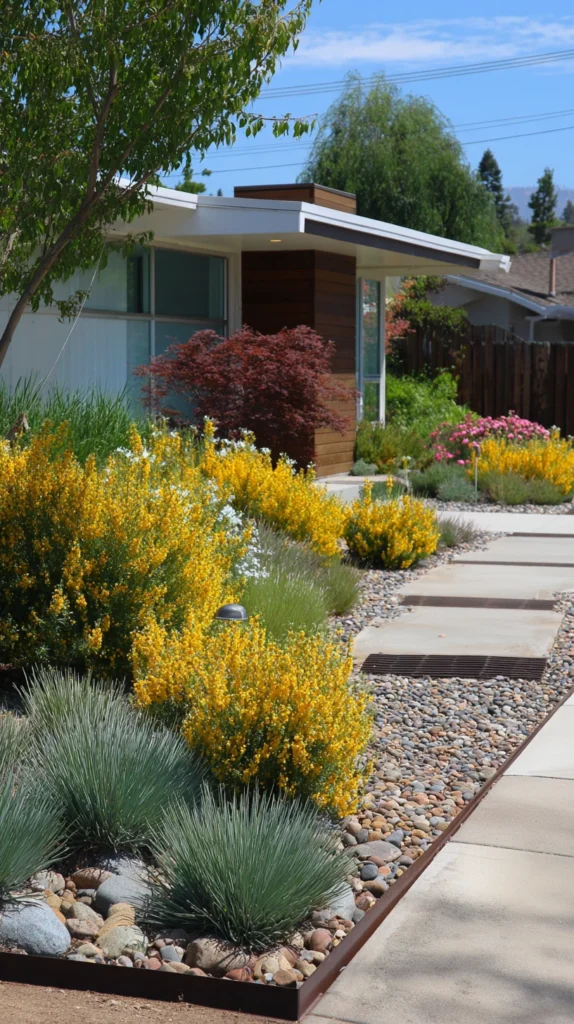
A foundation planting or property line border built entirely from shrubs specifically chosen for their ability to bloom reliably with minimal supplemental water.
A lot of dry-climate landscaping skips flowers altogether, assuming color and low water use can’t coexist, but a well-chosen shrub border proves otherwise, delivering real seasonal bloom without a sprinkler system running daily.
I planted a mixed border of Texas sage, rockrose, and lavender along my front foundation, choosing species that bloom at slightly different points through the season to keep some color present for most of the year.
Budget tip: Buy smaller, younger shrubs rather than mature specimens, since the price difference per plant is substantial and most drought-tolerant shrubs establish and fill in within just a couple of growing seasons.
A few things worth knowing:
- Space shrubs according to their mature width rather than how they look freshly planted, since overcrowding leads to competition for the limited water they actually need
- Water deeply but infrequently during establishment, which encourages deeper root growth than frequent shallow watering does
- Choose a mix of bloom times across different species so the border doesn’t peak all at once and then sit dormant for months
This border delivers genuine seasonal color while using a fraction of the water a comparable bed of traditional annuals would require.
Overcrowding was my early mistake here too, since young shrubs look deceptively small at planting time, and thinning out a couple of Texas sage plants two years later, once they’d filled in more than expected, was a task I could have avoided with better initial spacing.
7. Decomposed Granite as a Lawn Alternative
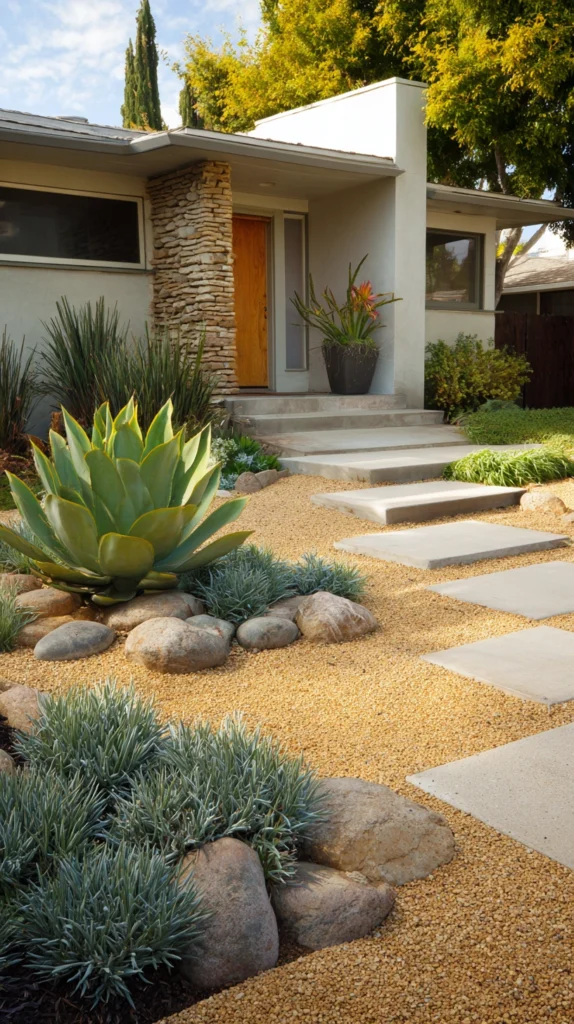
Fine, compacted decomposed granite used as the primary ground cover across most of the front yard, in place of either turf grass or a heavier gravel.
Decomposed granite has a softer, more finished look than coarse gravel, and it compacts into a firm, walkable surface that reads more like a natural extension of the soil than an obviously hardscaped material.
I replaced my front lawn with a 3-inch layer of compacted decomposed granite, leaving cut-out planting pockets throughout for a scattered arrangement of agave, yucca, and ornamental grasses.
Budget tip: Decomposed granite typically costs less per square foot than most paver or flagstone options, making it one of the more affordable ways to cover a large front yard area while still looking considerably more finished than plain gravel.
A few installation notes:
- Compact the material in layers rather than all at once, using a plate compactor for a genuinely firm, stable surface
- Choose a stabilized decomposed granite product if the area sees regular foot traffic, since standard DG can shift and rut over time without a binding agent
- Plan planting pockets before compaction begins, since cutting through an already-compacted surface later is considerably more work
This material handles both foot traffic and occasional vehicle weight, like a delivery cart rolled up the front walk, better than loose gravel ever does.
Skipping the plate compactor rental to save a bit of money turned out to be a false economy on my first attempt, since the surface rutted within weeks under regular foot traffic until I went back and compacted it properly in layers.
8. Vertical Interest With a Living Succulent Wall
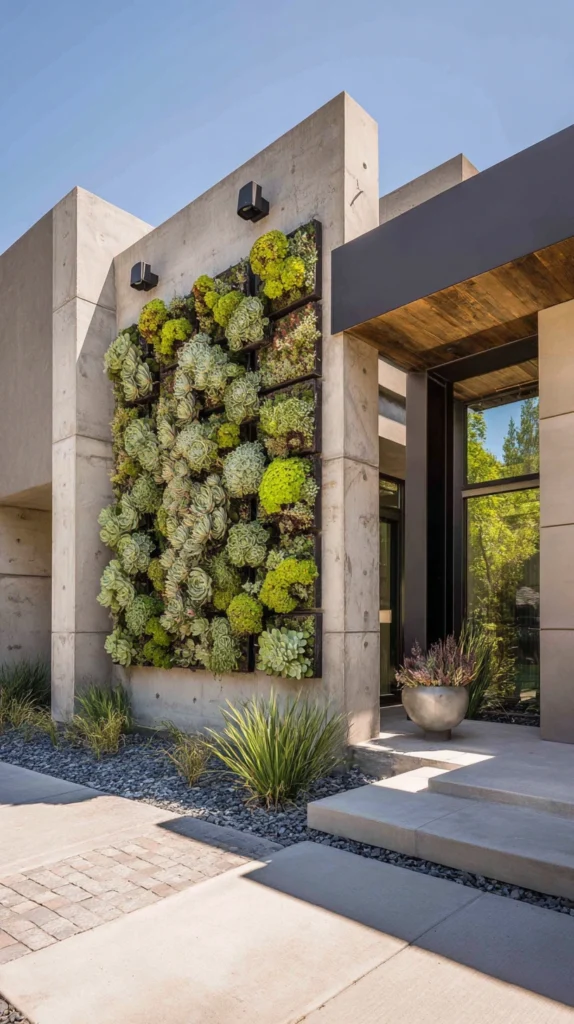
A wall-mounted planter system filled with a mosaic of succulents, positioned near the front entry as a striking, low-water focal point that doesn’t compete for ground space.
When front yard space is limited, going vertical solves a real problem, delivering serious visual impact without taking up any additional planting bed footprint at all.
I mounted a modular succulent wall planter beside my front door, filling it with a mix of echeveria, sedum, and sempervivum arranged in a loose color gradient from blue-green to deep burgundy.
Style tip: Arrange succulents by color rather than species alone, since a deliberate gradient or color blocking pattern reads as considerably more intentional than a random mix, even when using the exact same plants.
A few practical notes:
- Choose a planter system with excellent drainage specifically, since trapped moisture against a wall-mounted system causes rot far more often than drought ever does
- Water succulent walls less frequently than you’d expect, generally every week or two depending on climate, since overwatering is the more common failure point
- Position the wall where it gets appropriate sun exposure for the specific succulents chosen, since some varieties need more shade than a full southern exposure provides
A living wall like this becomes the genuine focal point of a front entry, doing more visual work in a few square feet than an entire traditional planting bed often manages.
I watered mine on the same schedule as my in-ground beds at first, and root rot took out nearly a third of the arrangement before I realized a wall-mounted system dries out and needs attention on an entirely different timeline than anything planted in open ground.
9. Boulder Groupings as Structural Anchors
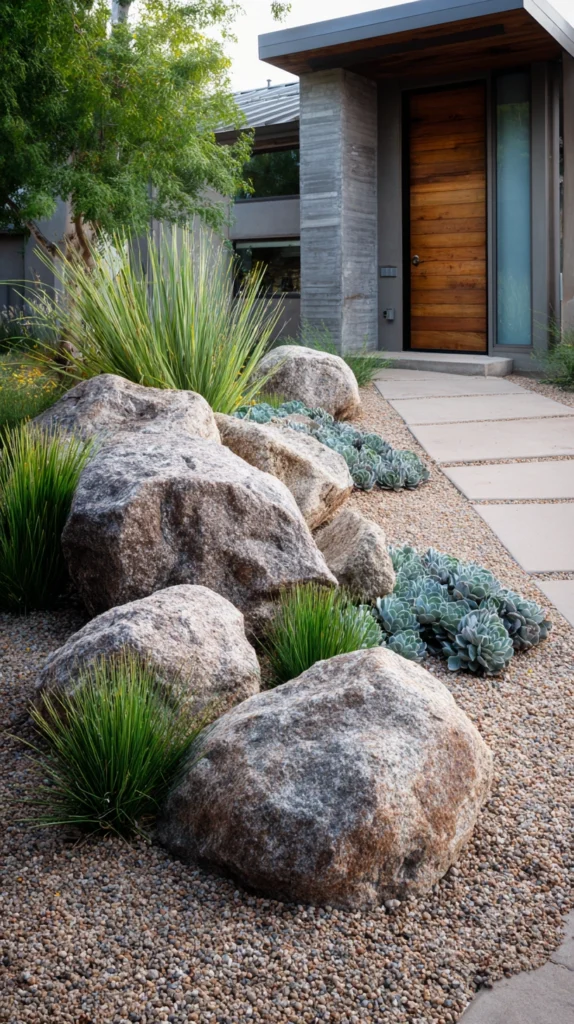
Large individual boulders or small boulder clusters placed strategically throughout an otherwise minimally planted front yard, providing structure and visual weight without relying on plants at all.
Not every element in a xeriscape needs to be a plant. Boulders provide genuine year-round structure that never needs watering, pruning, or replacing, and they photograph just as well in the dead of summer as any other season.
I placed three boulder groupings of varying size throughout my front yard, positioning the largest near the entry walk and two smaller companion groupings further out, connected visually by a shared gravel ground plane.
Budget tip: Source boulders directly from a stone yard rather than a garden center, since you’ll pay considerably less for the same material once you’re buying by weight rather than as individually packaged decorative pieces.
A few things that make this work:
- Use odd numbers within each grouping, generally three stones, and vary their size significantly rather than choosing matching pieces
- Partially bury each boulder rather than setting it fully on the surface, for a more naturally occurring look
- Position groupings to create clear sightlines and a sense of intentional flow through the yard, rather than scattering them randomly
Boulders essentially function as the yard’s permanent bones, giving the space real structure that survives drought, heat, and neglect without a second thought.
Delivery access is worth mapping out before ordering anything sizable, since my first boulder delivery couldn’t reach the intended spot and required a second, more expensive trip with a smaller machine that could actually navigate around the side of the house.
10. Xeriscape Beds With Seasonal Bulb Pockets
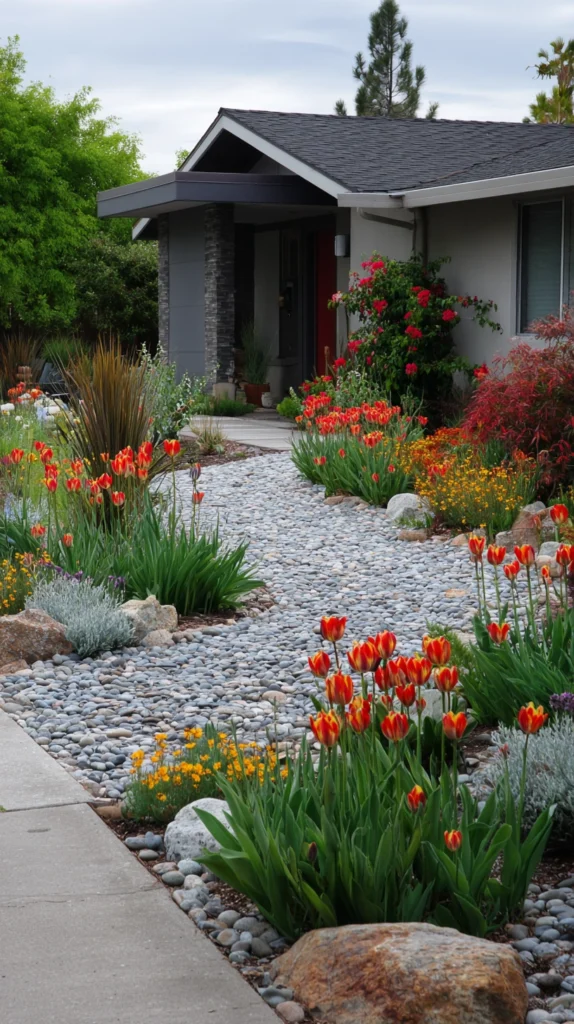
Drought-tolerant perennial beds that also include small pockets of low-water bulbs, chosen specifically to bloom in early spring before the hottest, driest part of the year sets in.
Most xeriscape planting focuses on summer survival, but adding a handful of appropriate spring bulbs gives the yard an early burst of color during the one season when water is often more naturally available anyway.
I tucked small clusters of species tulips and grape hyacinth throughout my drought-tolerant perennial bed, positioned to bloom and fade back before my summer perennials fully take over the same space.
Budget tip: A modest quantity of bulbs planted in small clusters rather than large drifts costs relatively little, while still delivering a real burst of early color before the rest of the bed comes into its own.
A few things worth knowing:
- Choose bulb varieties specifically adapted to dry summer dormancy, since not all bulbs handle a hot, dry off-season the way species tulips and similar Mediterranean-climate bulbs do
- Plant bulbs in small pockets between established perennials rather than dedicating separate bulb-only beds
- Allow bulb foliage to die back naturally before cutting it, since cutting too early weakens the bulb’s ability to store energy for next year’s bloom
This approach gives a xeriscape bed a genuine seasonal rhythm rather than a single flat look that barely changes from spring through fall.
I cut back the bulb foliage too early the first spring, eager to tidy up the bed before summer planting, and noticeably fewer blooms came back the following year as a direct result of not letting the leaves finish storing energy first.
11. A Gravel Courtyard Entry With Container Plantings
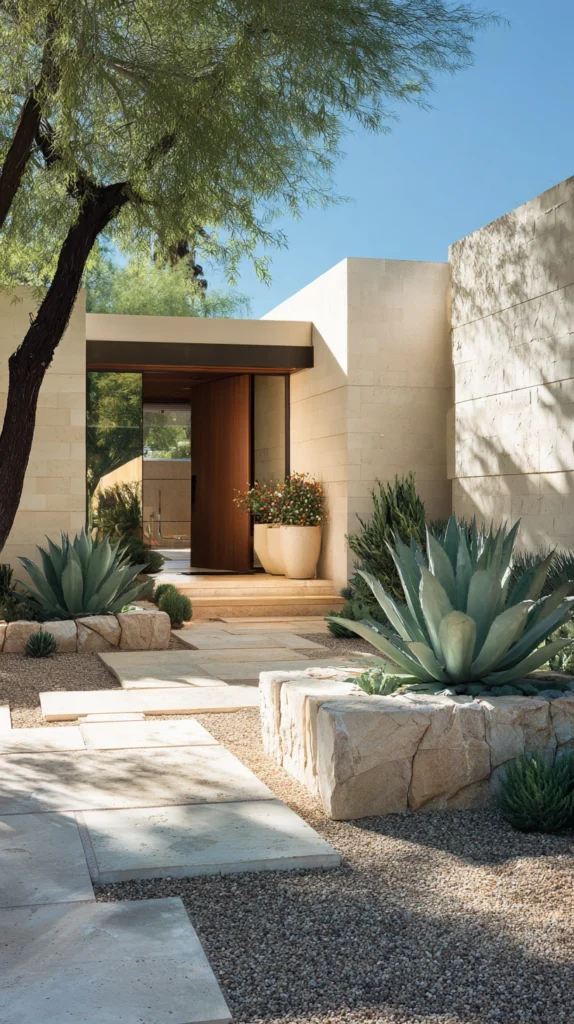
A small, defined gravel courtyard near the front door, furnished with large glazed ceramic containers holding a rotating mix of drought-tolerant plants rather than in-ground beds.
Containers offer flexibility that in-ground xeriscape beds don’t, letting you rotate plants seasonally, protect more delicate specimens during extreme weather, and rearrange the whole arrangement without touching a single permanent planting.
I built a small gravel courtyard just off my front walk, furnished with three large glazed pots in varying heights, planted with a mix of dwarf agave, trailing rosemary, and a small olive tree in the largest container.
Style tip: Group containers in odd numbers and varying heights rather than a uniform matching set, since this creates more visual interest and reads as more intentional than identical pots lined up in a row.
A few practical notes:
- Choose containers with adequate drainage holes specifically, since trapped water in a container kills drought-tolerant plants faster than almost any other single mistake
- Use a well-draining cactus or succulent-specific soil mix rather than standard potting soil, which retains far more moisture than these plants actually want
- Move containers into partial shade during the most extreme heat if a particular plant shows signs of stress, taking advantage of the mobility a container arrangement offers
This setup gives you a defined, welcoming entry space that still uses dramatically less water than a comparable in-ground planting bed of similar visual impact.
My first container arrangement used a single uniform pot size across all three, and it looked flatter than I expected once photographed, while swapping to varied heights on the second attempt gave the whole grouping noticeably more visual movement.
12. Mulched Pathways Connecting Distinct Planting Zones
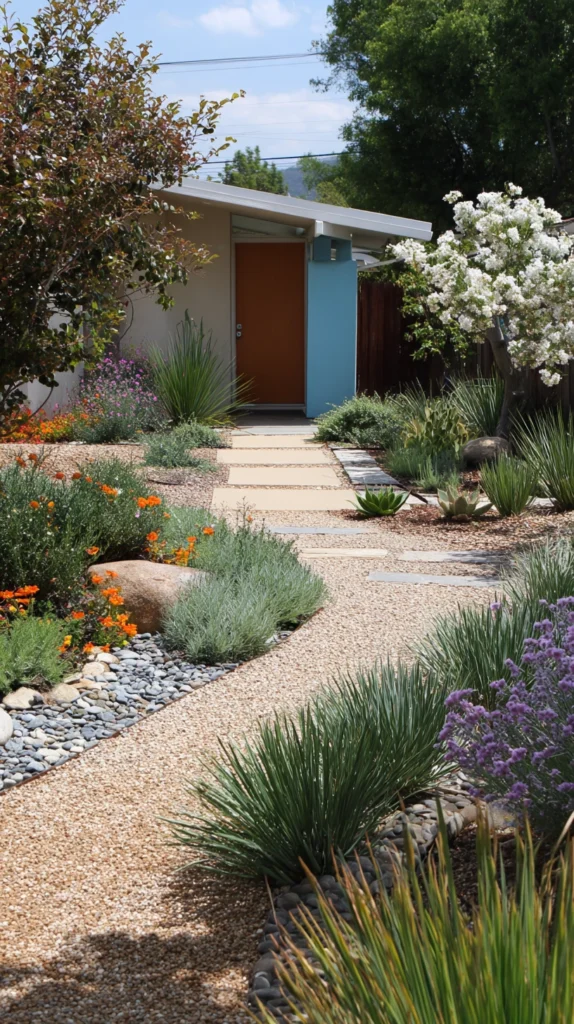
A front yard organized into several smaller, distinct planting zones, connected by simple mulched or gravel pathways rather than one large, undifferentiated bed.
Breaking a front yard into smaller zones, rather than one sprawling xeriscape bed, gives the space a sense of intentional design and makes maintenance considerably more manageable, since each zone can be tended and watered somewhat independently.
I divided my front yard into three distinct zones, a succulent rock garden near the entry, a native grass meadow along one side, and a flowering shrub border along the property line, connecting all three with a simple decomposed granite path.
Budget tip: Organizing a large yard into zones lets you tackle one section at a time as budget allows, rather than needing to fund an entire yard conversion all at once.
A few things worth planning:
- Choose a consistent pathway material throughout, even as the planting style shifts between zones, to keep the overall yard feeling cohesive
- Vary each zone’s water needs only slightly rather than dramatically, since zones positioned close together are difficult to irrigate at genuinely different rates
- Use the pathway itself as a visual transition device, letting one planting style gradually give way to the next along its length
This zoned approach turns what could be an overwhelming full-yard project into a series of smaller, more manageable installations that still add up to a cohesive whole.
Tackling the whole yard in one season would have stretched both my budget and my patience considerably thinner, so spreading the three zones across three separate years turned out to be the more sustainable way to actually finish the project without burning out halfway through.
13. Artificial Turf Panel as a Controlled Green Accent
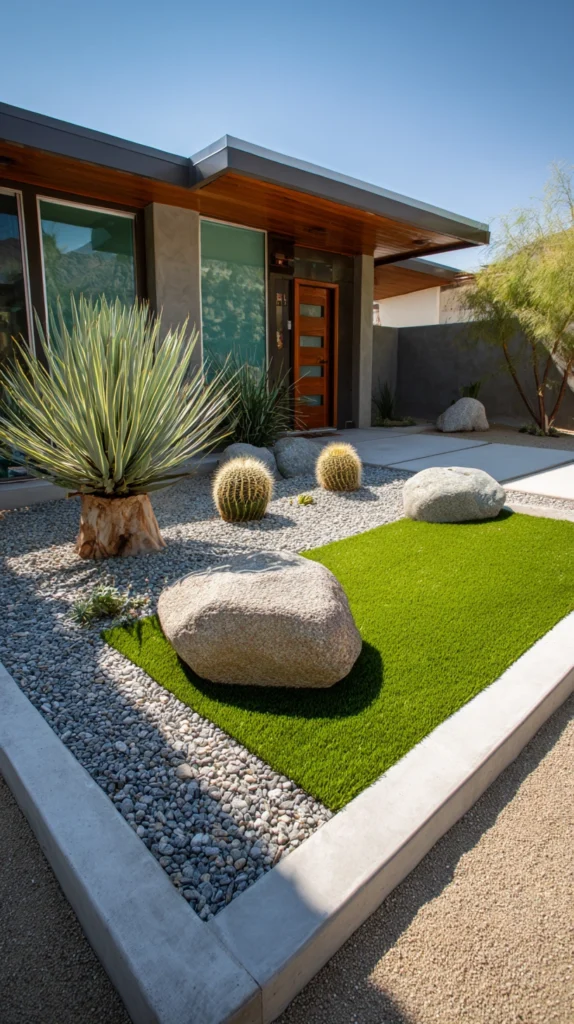
A small, defined section of high-quality artificial turf used specifically as a play area or visual green accent, paired with xeriscape planting throughout the rest of the yard.
For households with young kids or pets who genuinely want a small patch of soft, green, walkable surface, a contained artificial turf panel solves that specific need without requiring irrigation across an entire front yard to support it.
I installed a modest artificial turf panel near my front porch specifically as a play space for my kids, surrounding the rest of the yard with xeriscape beds and gravel that require no water at all.
Budget tip: A smaller, well-defined turf panel costs considerably less than covering an entire yard, and confining it to just the area that genuinely needs a soft, green surface keeps the overall water savings largely intact.
A few practical notes:
- Choose a quality artificial turf product with adequate drainage backing, since a genuinely dry climate still occasionally sees heavy rain that needs somewhere to go
- Keep the turf panel’s edges clean and well-defined with proper edging material, since a poorly bordered panel can look like an odd patch rather than an intentional feature
- Rinse artificial turf periodically to clear dust and debris, since dry climates tend to accumulate more airborne dust than turf specifically designed for wetter regions typically encounters
This approach acknowledges that a fully water-free yard isn’t always realistic for every household, while still keeping the vast majority of the property genuinely low-water.
I skimped on the drainage backing for my first panel to save a bit of money, and standing water after a single heavy storm made clear why that particular corner cut wasn’t actually worth it in a yard that still occasionally sees real rain.
The Fastest Way to See Real Water Savings
Removing turf grass entirely, whether you replace it with native grass, gravel, or a mixed planting bed, delivers the single largest water reduction of anything on this list, since lawn irrigation typically accounts for more outdoor water use than every other landscaping element combined.
Materials Worth Comparing Before You Buy
- Bulk gravel and decomposed granite priced by the ton from a landscape supply yard, not by the bag from a retail garden center
- Drip irrigation components if any plantings still need occasional supplemental water, since drip systems waste far less water than spray irrigation
- Landscape fabric rated for long-term outdoor use rather than a thinner, short-lived version meant for temporary garden projects
The Mistake That Undermines Most Xeriscape Conversions
The most common failure in a new xeriscape yard isn’t choosing the wrong plants, it’s overwatering them out of habit during the first season, treating drought-tolerant plants the way you’d treat a traditional lawn or garden bed. Most xeriscape plants actually die from too much water and poor drainage far more often than from genuine drought, so resist the urge to water on the same old schedule once the new landscaping is in the ground.