14 Raised Planter Box Ideas for Patios and Decks
A deck or patio without a single planter always looks slightly unfinished, like a room with furniture but no rug.
Raised boxes solve a problem ground-level beds can’t touch on hard surfaces, since there’s no soil to plant into at all once you’re standing on wood decking or poured concrete. They also solve a second problem most people don’t think about until later, keeping soil and water off a surface that wasn’t built to handle either one directly.
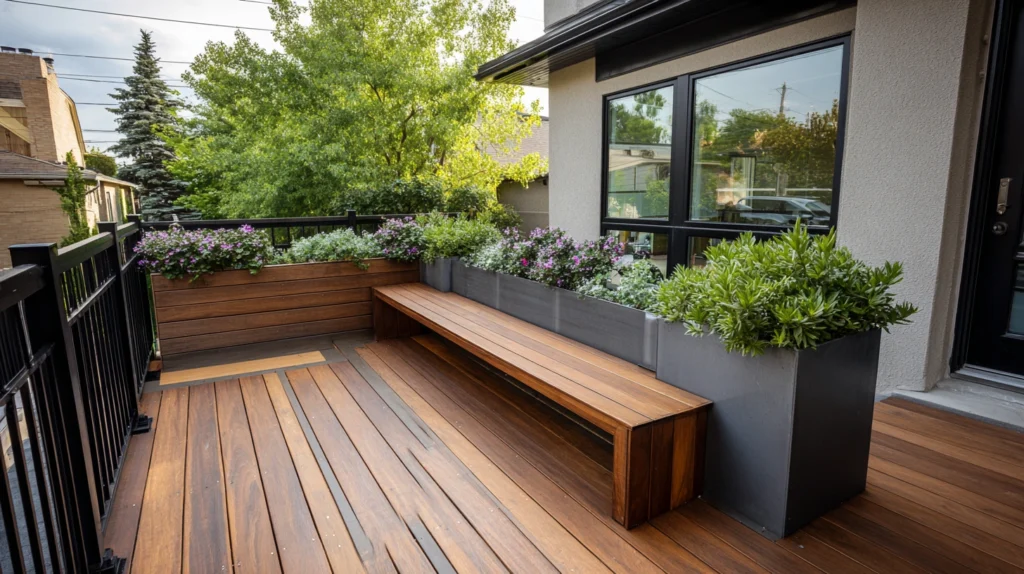
The right box does more than hold dirt, though. Height, material, and placement all change how a planter reads against the rest of the space, from a low, understated border to a genuine architectural feature that anchors the whole patio.
Here are 14 raised planter box ideas built specifically for decks and patios rather than in-ground yards.
Every one of these accounts for drainage and weight, the two things that trip up more deck planters than any design choice ever does.
1. Cedar Slat Boxes With a Modern Gap Pattern
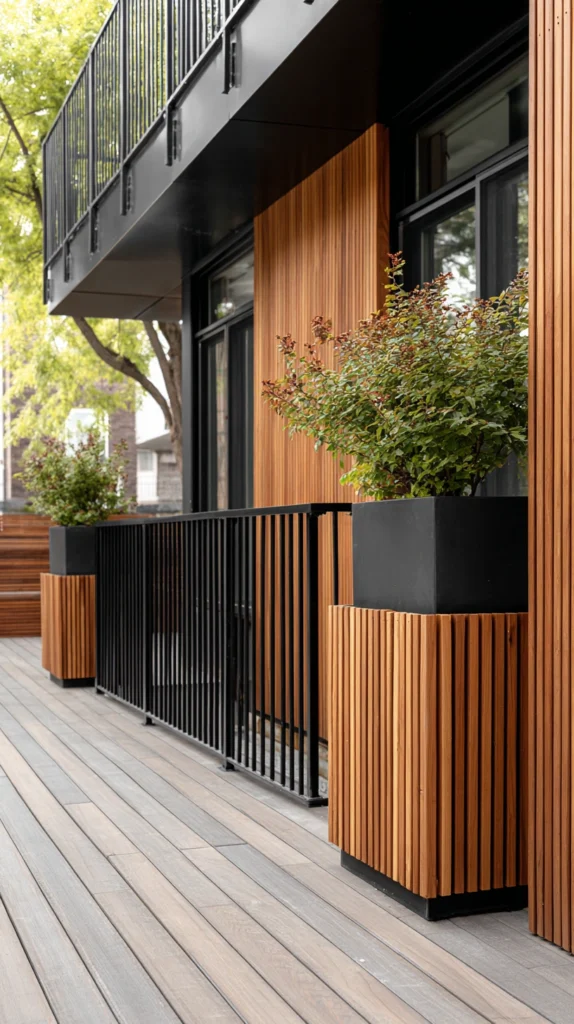
Simple rectangular boxes built from cedar boards spaced with a small visible gap between each slat, rather than solid, tightly joined panels.
The gap pattern does two things at once, it lightens the box’s visual weight compared to a solid panel, and it allows a bit of airflow around the interior liner, which helps prevent trapped moisture from sitting against the wood longer than it needs to.
I built a run of three matching cedar slat boxes along my deck railing, spacing the boards a quarter inch apart and lining the interior with a heavy-duty plastic liner before adding soil.
Budget tip: Standard cedar fence boards, cut down to size, cost considerably less than pre-milled planter box lumber sold specifically for this purpose, and the finished result looks nearly identical once assembled.
A few build details worth getting right:
- Line the interior with a perforated liner rather than lining it completely solid, since the box still needs drainage even with a plastic barrier in place
- Seal cut edges with an exterior wood sealer before installation, since raw cut ends absorb moisture fastest
- Elevate the box slightly on small feet or blocks, keeping the bottom off the deck surface for airflow and drainage clearance
This style reads as clean and current without looking like it belongs in a showroom, which makes it one of the more versatile designs on this list.
I skipped elevating the first box I built and noticed water pooling beneath it after just a few weeks, a problem the small feet on the later boxes solved completely once I went back and added them.
2. Galvanized Metal Stock Tanks Repurposed as Planters
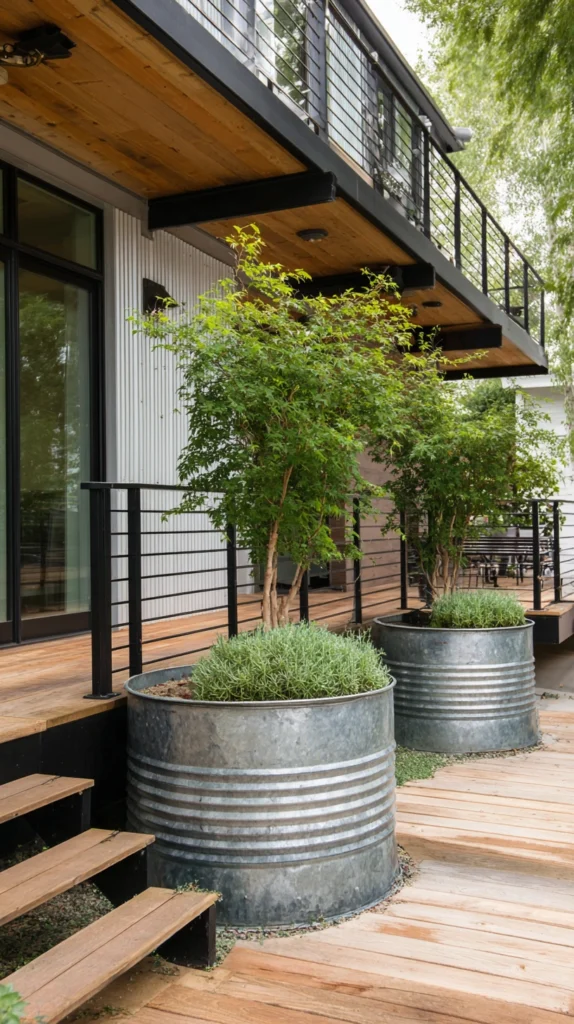
Livestock watering troughs, drilled with drainage holes and filled with soil, used as oversized raised planters with a distinctly industrial-farmhouse look.
Stock tanks bring genuine scale to a patio that smaller wooden boxes can’t match, and their metal construction handles direct sun and weather considerably longer than most wood options without any real maintenance at all.
I drilled a dozen half-inch drainage holes into the bottom of a round galvanized stock tank, elevated it slightly on paver blocks, and planted it with a mix of tomatoes and trailing nasturtium.
Budget tip: Stock tanks are often cheaper per gallon of planting capacity than an equivalent volume of built wooden boxes, especially once you factor in the labor a custom build would otherwise require.
A few practical notes:
- Drill drainage holes before adding any soil, since retrofitting holes into a tank already full of dirt is considerably harder
- Elevate the tank on blocks or feet, both for drainage and to prevent the metal bottom from staying in constant contact with a wet deck surface
- Choose a tank size proportional to your available space, since these read as substantial and can visually overwhelm a smaller patio if sized too large
A single well-placed stock tank often does more to define a patio’s overall style than several smaller, scattered planters ever manage together.
The tank’s metal walls heat up considerably more than a wooden box would in full afternoon sun, which I learned the first summer when several plants near the tank’s edges showed clear heat stress until I shifted them slightly toward the cooler center of the soil.
3. Built-In Bench Planter Combination
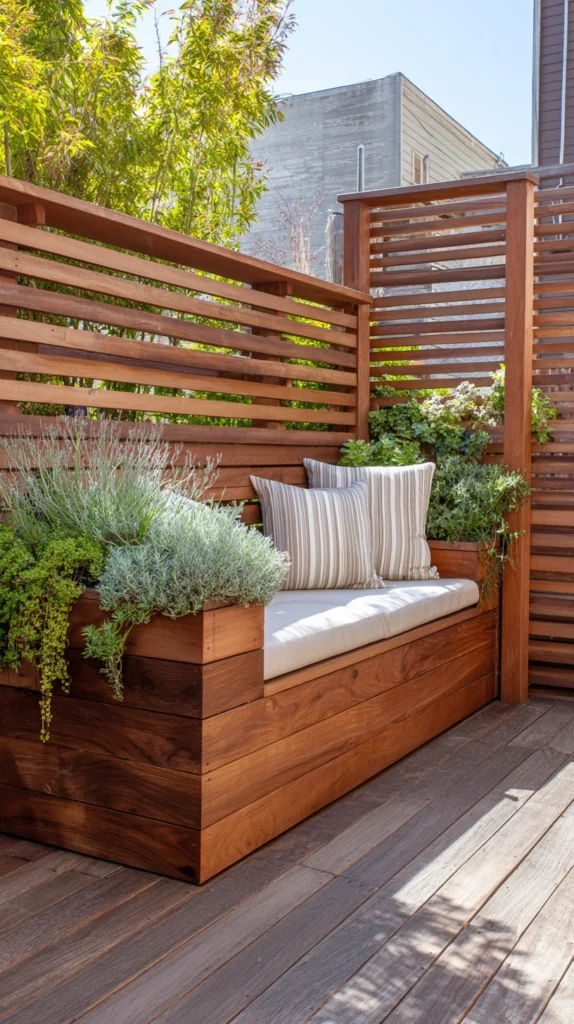
A raised planter box built directly into the structure of a deck bench, combining seating and planting into a single continuous feature along the deck’s edge.
Combining these two elements saves real space on a smaller deck, and the planter’s greenery softens what would otherwise be a fairly utilitarian bench running along a railing or perimeter.
I built a bench along one side of my deck with a planter box integrated directly into the backrest, filling it with ornamental grasses tall enough to provide a bit of privacy screening for anyone sitting below.
Budget tip: Building the planter as part of the bench’s existing structural frame uses less total lumber than constructing two entirely separate pieces, since the bench’s support posts do double duty as the planter’s frame as well.
A few build considerations:
- Waterproof the section of bench frame directly behind the planter thoroughly, since this is the area most exposed to soil moisture over time
- Choose plants that won’t obstruct anyone sitting on the bench, keeping taller varieties toward the back or ends rather than directly behind where someone’s head would be
- Include a removable liner or drainage tray specifically at this junction, making it easier to service or replace without disassembling the entire bench
This combination works especially well along a deck railing that needs both a design feature and functional seating in the same footprint.
I underestimated how much moisture would eventually work its way into the bench frame despite the liner, and adding a second layer of waterproofing membrane during a repair two years in has held up considerably better than the original single-layer approach.
4. Tiered Corner Planter for Vertical Layering
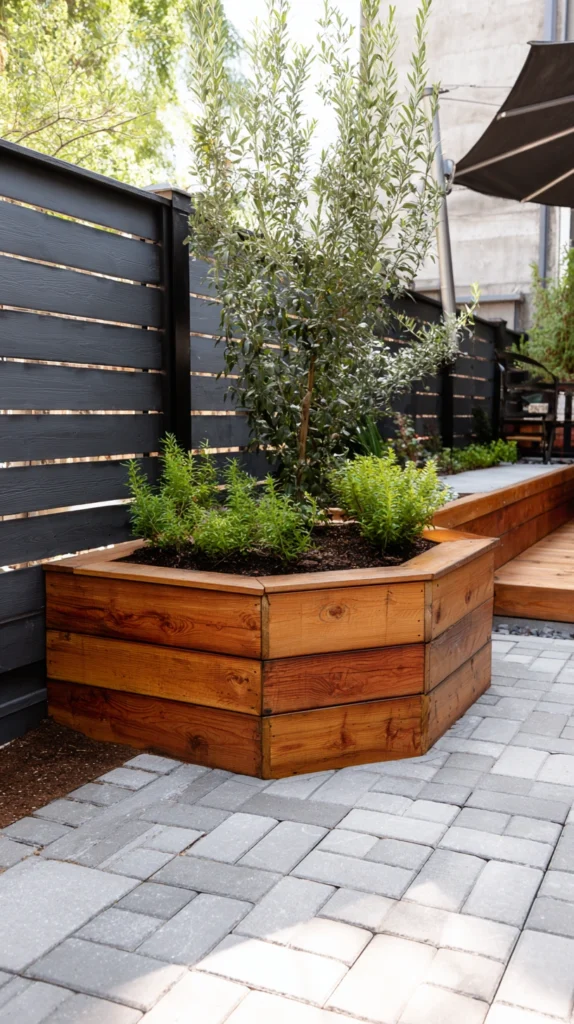
A stepped, multi-level planter box built specifically to fit into a patio corner, with each tier set back slightly from the one below for a layered, cascading planting effect.
Corners are some of the most commonly wasted space on a patio, and a tiered box makes efficient use of that spot while creating natural visual layering that a single flat box in the same footprint couldn’t achieve.
I built a three-tier corner planter from cedar, with each step roughly 8 inches deep, planting trailing plants at the top to cascade down over the lower tiers and more upright plants in the bottom level.
Style tip: Choose plants with a genuinely trailing growth habit for the upper tiers specifically, since the entire visual effect depends on growth actually spilling down and softening the hard edges between levels.
A few build considerations:
- Size each tier’s depth for the specific plants you’re growing, since shallow-rooted trailing plants need less soil depth than anything with a more substantial root system
- Waterproof between tiers carefully, since water draining from an upper level will pass directly over the tier below it
- Anchor the entire structure securely into the corner, since a tall, tiered planter carries real weight once fully planted and watered
This design turns an awkward, often-ignored corner into one of the more visually rich spots on the entire patio.
My first attempt used identical soil depth across all three tiers, and the trailing plants on top struggled next to the more substantial upright varieties below, so adjusting each tier’s depth to actually match its intended plant type made a noticeable difference in how evenly everything grew in.
5. Long Narrow Trough Along a Railing Edge
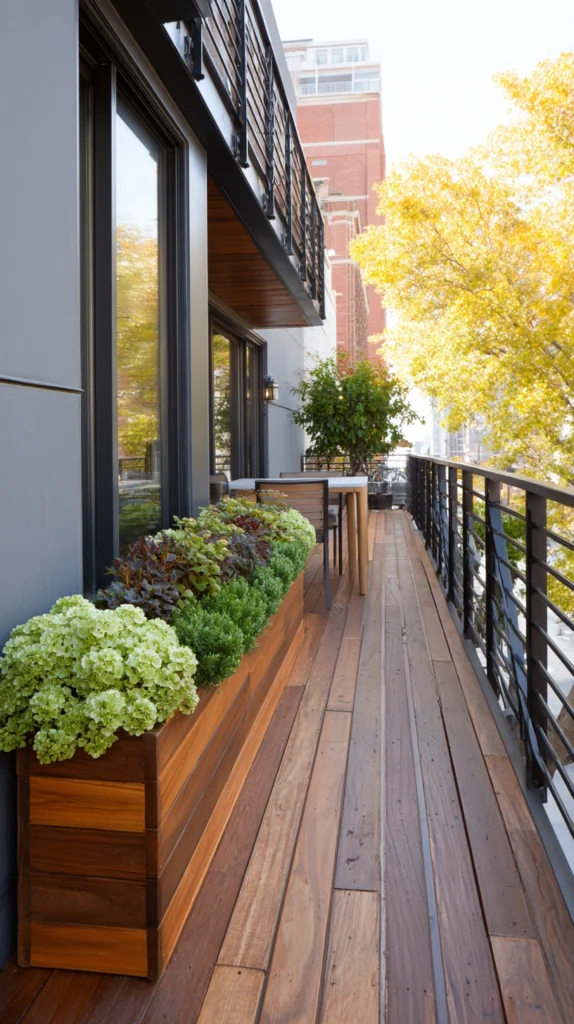
A slim, elongated planter box mounted or set along the full length of a deck railing, sized specifically for a continuous row of smaller plants rather than a few larger specimens.
A narrow trough style keeps the planting low and continuous, softening a railing’s hard horizontal line without blocking any view beyond the deck the way a taller, bulkier planter might.
I built a single continuous trough running the full 16-foot length of my deck railing, planting it with a mix of trailing sweet potato vine and low-growing marigolds for consistent color along the entire run.
Budget tip: Building one continuous long box uses less total lumber than several separate smaller boxes covering the same length, since you’re not duplicating end panels and corner joints multiple times over.
A few practical notes:
- Add support brackets at regular intervals along the railing, generally every 3 to 4 feet, since a long trough carries substantial weight once filled with wet soil
- Include drainage holes spaced evenly along the entire length rather than concentrating them at just the ends
- Choose lower-growing plants specifically if the railing planter sits at a height where taller plants would block a view you want to keep
This style works particularly well on a deck where the view beyond the railing matters, since it adds color and life without creating a visual wall.
I initially spaced my support brackets too far apart, and the trough visibly sagged in the middle within the first season once soil and water added real weight, which is the kind of mistake that’s easy to prevent up front but considerably more annoying to fix after the fact.
6. Concrete Block Planter With a Modern Industrial Look
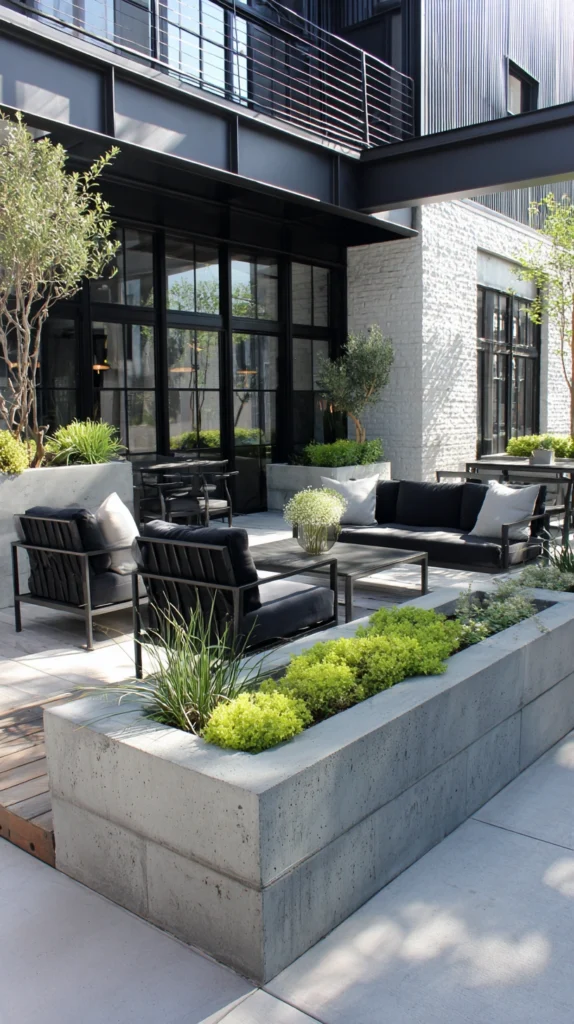
Simple concrete or cinder block modules, stacked and mortared into a rectangular planter box, left in their raw gray finish for an intentionally industrial aesthetic.
Concrete block delivers genuine permanence and weight that wood simply doesn’t, and the raw, unfinished material pairs particularly well with a modern patio design built around clean lines and minimal ornamentation.
I stacked standard concrete blocks three courses high, mortared them together into a simple rectangular shape, and lined the interior with a heavy-duty plastic liner before filling it with soil for a mix of ornamental grasses and succulents.
Budget tip: Standard concrete block is one of the least expensive building materials available by volume, making this one of the more affordable ways to build a genuinely substantial, permanent planter.
A few build considerations:
- Confirm your patio surface can support the block’s considerable weight before building, especially on an elevated deck rather than a ground-level patio
- Use a proper mortar mix and technique if stacking more than two courses, since a taller unmortared stack risks shifting or collapsing over time
- Seal the interior surface of the block before adding a liner, since raw concrete can leach lime into soil and affect pH over time without a barrier in place
This design holds up to genuinely harsh weather better than almost any wood option on this list, without ever needing to be stained, sealed, or repainted.
7. Vertical Pallet Planter for a Narrow Patio Edge
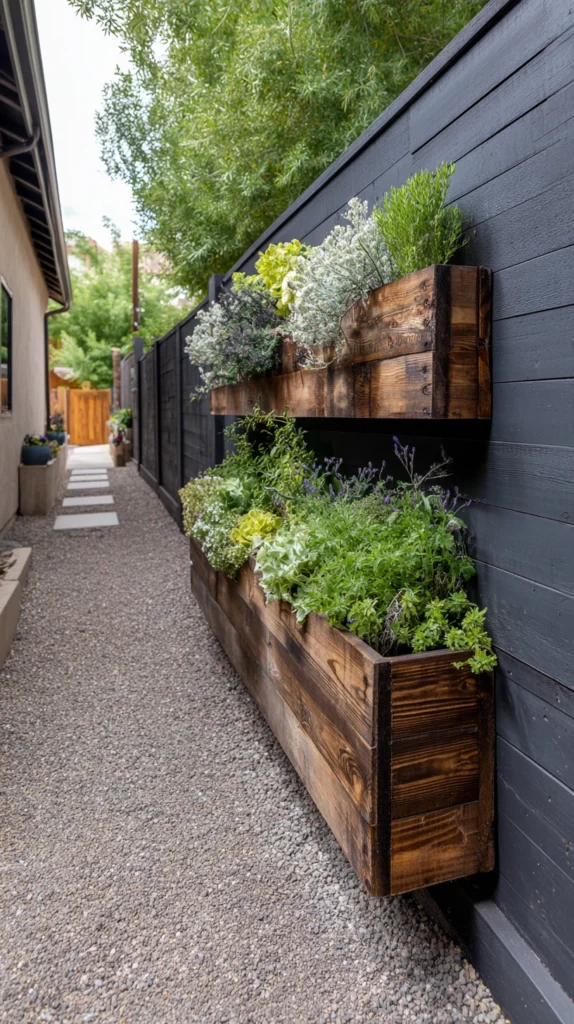
A single wooden pallet, stood upright and modified with a backing and liner, functioning as a slim planter box that takes up almost no floor footprint.
For a narrow patio or a tight side deck, floor space is often the scarcest resource, and a vertical pallet planter delivers real growing capacity while occupying barely more than a few inches of depth against a wall or railing.
I lined the back and bottom of a reclaimed pallet with landscape fabric and plywood backing, then filled the resulting slat pockets with a mix of trailing herbs and small flowering annuals, leaning it against my patio’s exterior wall.
Budget tip: A free or low-cost reclaimed pallet, combined with basic landscape fabric, delivers real planting capacity for a fraction of what a comparable built vertical planter would cost.
A few practical notes:
- Let the filled pallet lie flat for a couple of weeks before standing it upright, giving roots time to establish and hold soil in place
- Secure the pallet to the wall with brackets rather than relying on it leaning freely, especially once fully planted and watered
- Choose shallow-rooted plants specifically, since the pallet’s slat gaps don’t offer much soil depth compared to a standard box
This is one of the most space-efficient designs on this entire list, delivering meaningful planting capacity in a footprint that barely registers on a crowded patio.
8. Self-Watering Planter Box With a Built-In Reservoir
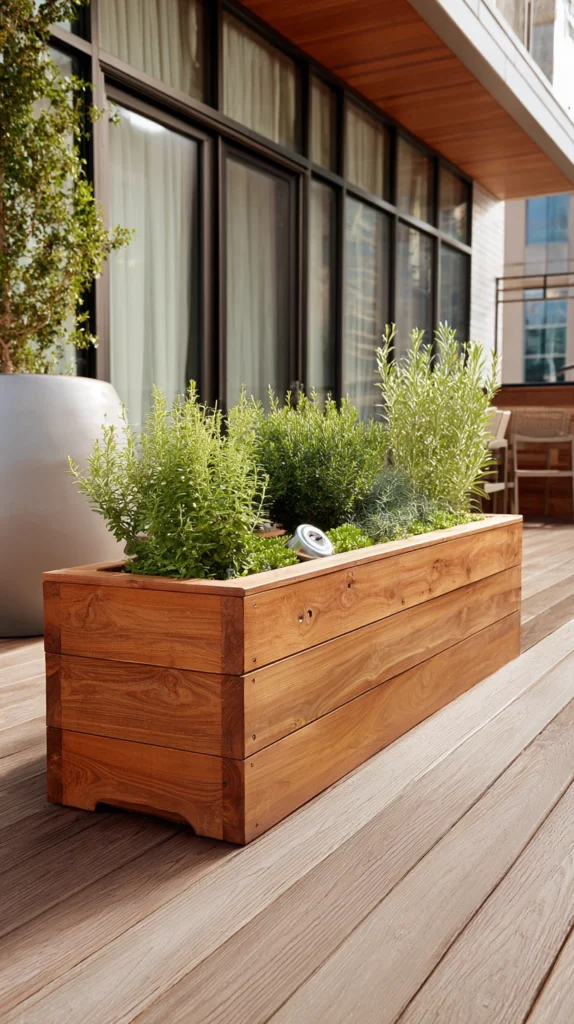
A raised box built with a water reservoir in its base, wicking moisture up to plant roots as needed rather than relying entirely on manual watering.
For anyone who travels regularly or simply struggles to keep up with a consistent watering schedule, a self-watering design solves the single most common reason deck and patio planters fail, inconsistent moisture.
I built a cedar box with a false bottom creating a water reservoir below, using a simple wicking fabric to draw moisture up into the soil above, with a fill tube running to the surface for easy refilling.
Budget tip: A DIY self-watering insert, built from basic materials like landscape fabric and a perforated pipe, costs considerably less than a purpose-built self-watering planter sold at full retail price.
A few build considerations:
- Include an overflow hole at the reservoir’s maximum fill level, preventing water from backing up into the soil above and waterlogging plant roots
- Choose a wicking material that reliably draws moisture upward without breaking down quickly in constant contact with water
- Size the reservoir appropriately for your climate, since a hot, dry region needs more water capacity between refills than a cooler, more humid one
This design demands more upfront building effort than a standard box, but it pays that effort back considerably in reduced watering frequency throughout the growing season.
9. Copper-Clad Planter for an Aged Patina Over Time
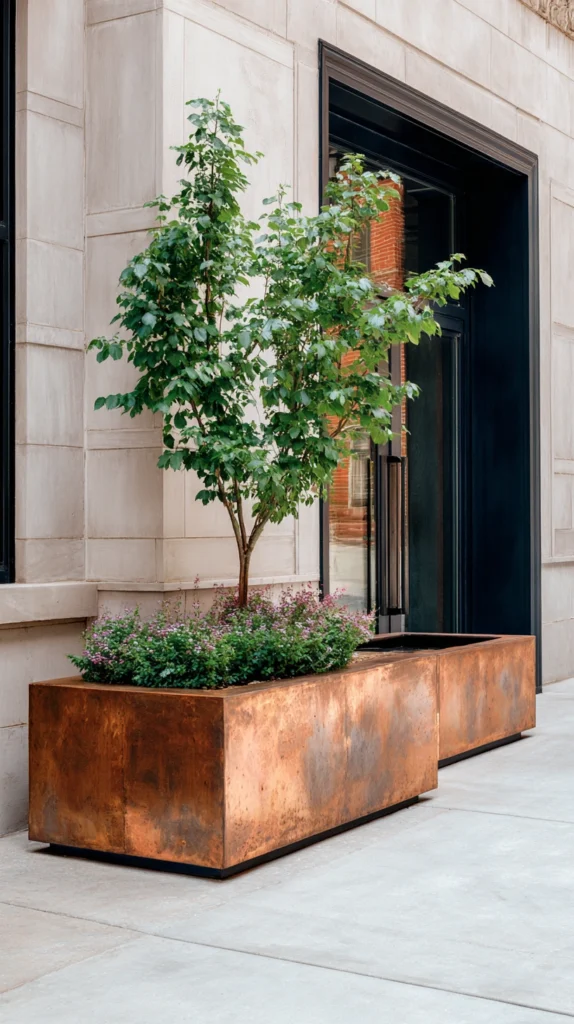
A wooden or composite box frame clad in copper sheeting, left unsealed so it develops a natural greenish patina as it weathers over several years.
Copper cladding brings a genuinely different material quality to a patio than wood, stone, or painted metal, and watching its color shift gradually from bright new copper to a soft verdigris green over time gives the planter an evolving character most static materials don’t offer.
I clad a simple wood-framed box in sheet copper, securing it with copper nails specifically to avoid any reaction between mismatched metals, and left the surface completely untreated to weather naturally in the elements.
Budget tip: Copper flashing sold for roofing applications costs considerably less per square foot than copper sheet marketed specifically for decorative planter use, and it works just as well for this application.
A few things worth knowing:
- Use copper-specific fasteners throughout, since mixing copper with certain other metals can cause a reaction that accelerates corrosion
- Expect the patina process to take a few years to develop fully, with the color shifting gradually rather than all at once
- Position the planter somewhere it will actually see rain and sun exposure, since a fully covered, sheltered spot slows the natural patina process considerably
This is one of the more unusual materials on this entire list, and it rewards patience with a genuinely unique, evolving finish that most other planter materials can’t replicate.
10. Raised Herb Box Positioned Near the Grill or Kitchen Door
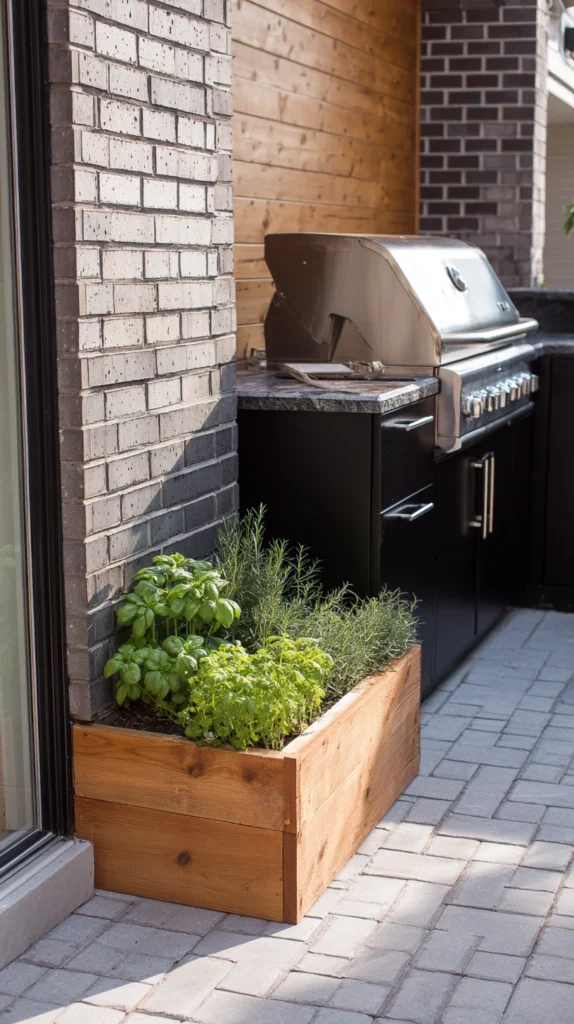
A modestly sized raised box, positioned specifically within easy reach of an outdoor kitchen or the door leading to the indoor kitchen, planted exclusively with culinary herbs.
Placement does as much work here as the box itself, since an herb garden positioned even a short walk away from where you’re actually cooking gets used far less often than one within arm’s reach of the grill or back door.
I built a compact cedar box directly beside my outdoor grill station, planting it with a tight rotation of basil, thyme, rosemary, and chives that get used in nearly every meal cooked at that station.
Budget tip: A smaller box sized specifically for herbs costs considerably less to build and fill than a larger, more general planting box, since herbs generally need less soil volume than vegetables or larger ornamentals.
A few practical notes:
- Position the box for at least six hours of direct sun daily, since most culinary herbs need considerably more light than typical ornamental shade plants
- Choose a soil mix with excellent drainage specifically, since most herbs, particularly Mediterranean varieties like rosemary and thyme, resist consistently damp roots
- Keep the box height comfortable for regular harvesting, generally around counter height, so snipping herbs mid-cooking doesn’t require bending down repeatedly
Proximity alone tends to determine whether an herb planter actually gets used regularly or eventually gets neglected, more than any other single design decision.
11. Board-Formed Concrete Planter With Visible Wood Grain Texture
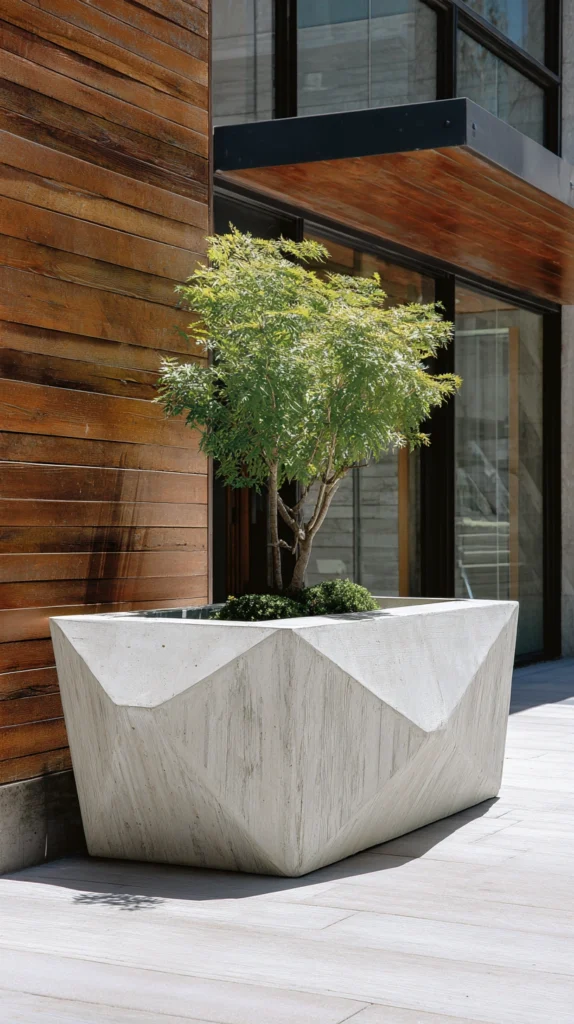
A poured concrete planter cast in wooden forms specifically chosen to leave the wood grain pattern visible in the finished concrete surface.
This technique delivers concrete’s genuine permanence and weight while adding a textural detail that raw, smooth concrete doesn’t offer, bridging the gap between an industrial material and something with real organic character.
I built simple rough-sawn lumber forms, poured a basic concrete mix into them, and let the concrete cure fully before removing the forms, revealing a subtle wood grain texture pressed into the finished surface.
Budget tip: Basic concrete mix and rough lumber for forms cost considerably less than a comparable finished stone or specialty concrete planter purchased ready-made.
A few build considerations:
- Use rough-sawn rather than smooth-planed lumber for the forms specifically, since a more pronounced wood grain transfers a more visible texture into the cured concrete
- Seal the interior of wooden forms lightly with a release agent, making it easier to remove them cleanly once the concrete has cured
- Allow the concrete to cure fully, generally at least a week, before moving or planting in the finished piece, since handling it too early risks cracking or chipping
This technique takes real patience and a bit of trial and error, but it produces a planter with a genuinely distinctive, handmade quality that a purchased piece rarely matches.
12. Modular Interlocking Boxes for a Reconfigurable Layout
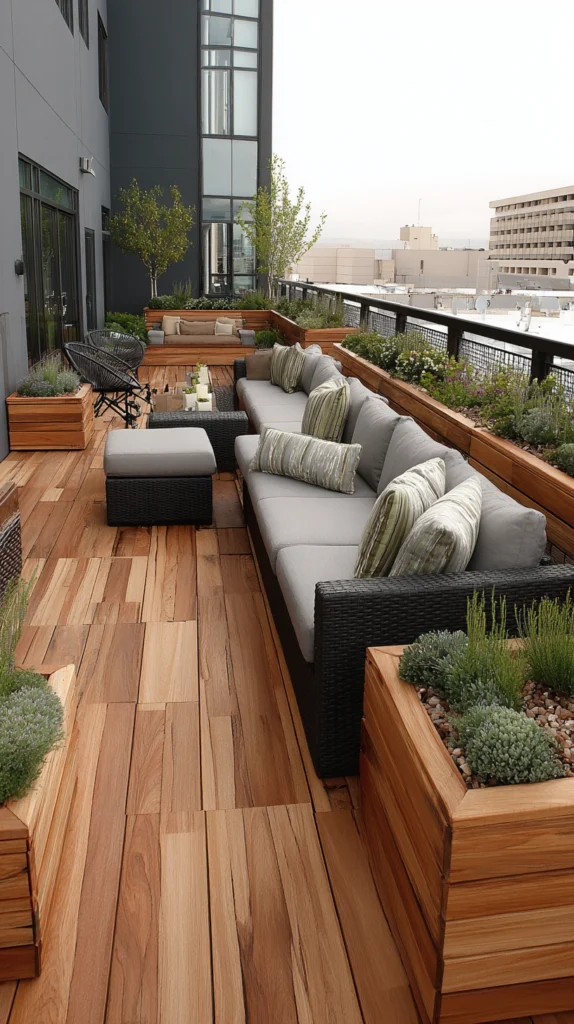
A set of matching smaller planter boxes, built or purchased with interlocking or stackable features, allowing the overall arrangement to be reconfigured seasonally or as needs change.
Committing to one fixed, permanent planter layout doesn’t suit everyone, and a modular system lets you rearrange the entire planting scheme without rebuilding anything from scratch each time your patio’s use or furniture layout shifts.
I built four matching cedar boxes with simple interlocking cleats on their sides, letting me arrange them as a single long row for summer entertaining or split them into separate clusters for a quieter, more intimate fall layout.
Budget tip: Building several smaller, identical boxes from the same cut list costs about the same as one larger custom piece, while delivering considerably more long-term flexibility in how you arrange them.
A few build considerations:
- Keep individual box dimensions manageable for one person to lift and move, even when partially filled, rather than building anything too large or heavy to reposition easily
- Standardize the interlocking mechanism across every box, ensuring any box can connect to any other regardless of the specific arrangement you’re building that season
- Choose a consistent finish and material across the full set, so the modular system reads as one cohesive collection rather than mismatched individual pieces
This approach suits anyone who genuinely likes to rearrange their outdoor space through the year rather than settling on one permanent configuration.
13. Rustic Reclaimed Barnwood Planter Boxes
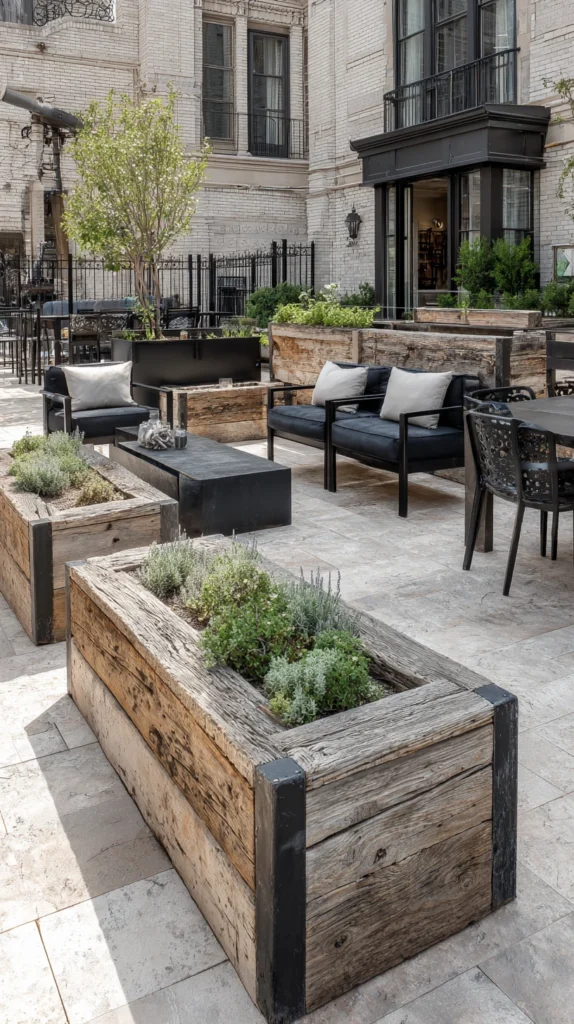
Planter boxes built from genuinely weathered, reclaimed barnwood, preserving visible nail holes, worn edges, and natural color variation rather than using new lumber finished to look aged.
Reclaimed wood carries a level of authentic character that no amount of distressing or staining fully replicates on new material, and building planters from it brings that same weathered charm to an otherwise plain deck or patio.
I built a set of simple rectangular boxes from reclaimed barnwood sourced from an old collapsed structure, preserving the wood’s natural gray patina and existing nail holes rather than sanding or refinishing the surface.
Budget tip: Reclaimed lumber yards and architectural salvage shops often price weathered barnwood lower than new lumber finished to mimic the same aged look, since you’re paying for genuinely used material rather than a manufactured effect.
A few things worth knowing:
- Have reclaimed wood checked and treated for pests before building anything from it, since old barnwood occasionally harbors insects that shouldn’t be introduced to a new setting
- Line the interior thoroughly with a proper liner, since older wood is generally more porous and prone to faster moisture damage than new, properly treated lumber
- Reinforce joints more generously than you would with new lumber, since aged wood can be more brittle at the edges where screws or nails need to hold
The resulting planter looks like it’s been part of the patio for decades from the very first day it’s installed, which is difficult to achieve with any new material alone.
14. Low, Wide Succulent Trough for a Minimalist Layout
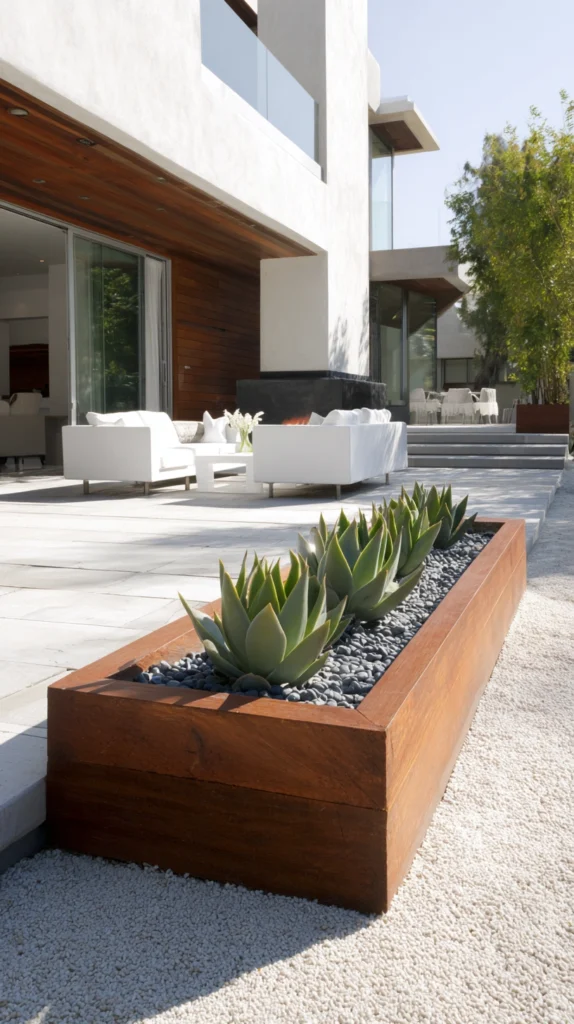
A shallow, wide planter box, sized specifically for a dense mosaic planting of low-growing succulents rather than taller ornamentals or vegetables.
A low, horizontal profile suits a minimalist patio far better than a tall, bulky box, and succulents specifically thrive in the shallower soil depth this style provides, unlike many other plants that need more root room.
I built a wide, shallow cedar trough, only about 6 inches deep, densely planting it with a mosaic of echeveria, sedum, and sempervivum arranged in a deliberate color gradient across the surface.
Style tip: Plant in a clear color or texture gradient rather than scattering varieties randomly, since a mosaic arrangement reads as considerably more intentional once the succulents fill in and the pattern becomes visible from above.
A few practical notes:
- Use a well-draining, succulent-specific soil mix rather than standard potting soil, which retains far more moisture than these plants actually need
- Keep the box genuinely shallow rather than building it to a standard planter depth, since excess unused soil depth simply invites overwatering and rot
- Position the trough somewhere it gets consistent sun exposure, since most popular succulent varieties need considerably more light than typical shade-tolerant patio plants
This style delivers serious textural interest at a low, unobtrusive height, making it a strong fit for a patio that already has plenty of taller furniture or structures competing for visual attention.
The Box Design With the Fewest Ways to Go Wrong
The cedar slat box with a basic plastic liner remains the most forgiving starting point on this list, since the materials are widely available, the build requires no specialized skills, and it accommodates nearly any plant selection without the specific soil depth or drainage constraints some of the more particular designs demand.
Weight and Drainage Details Worth Confirming Before You Build
- Confirm your deck’s load rating before installing anything genuinely heavy, like a filled stock tank or a multi-course concrete block planter
- Include drainage holes and a gap beneath the box regardless of material, since standing water against a deck surface causes damage whether the planter itself is wood, metal, or concrete
- Use a saucer or drainage tray beneath any planter positioned directly on finished decking, protecting the surface underneath from staining or rot over time
The Assumption That Causes the Most Planter Failures
Most struggling deck and patio planters aren’t failing because of a bad plant choice, they’re failing because the box was built without genuinely accounting for drainage, treating a raised planter as though it behaves the same way an in-ground garden bed does. A box with nowhere for excess water to go turns into a container of standing, stagnant soil the first time it rains hard, regardless of how well-chosen the plants inside it actually are.