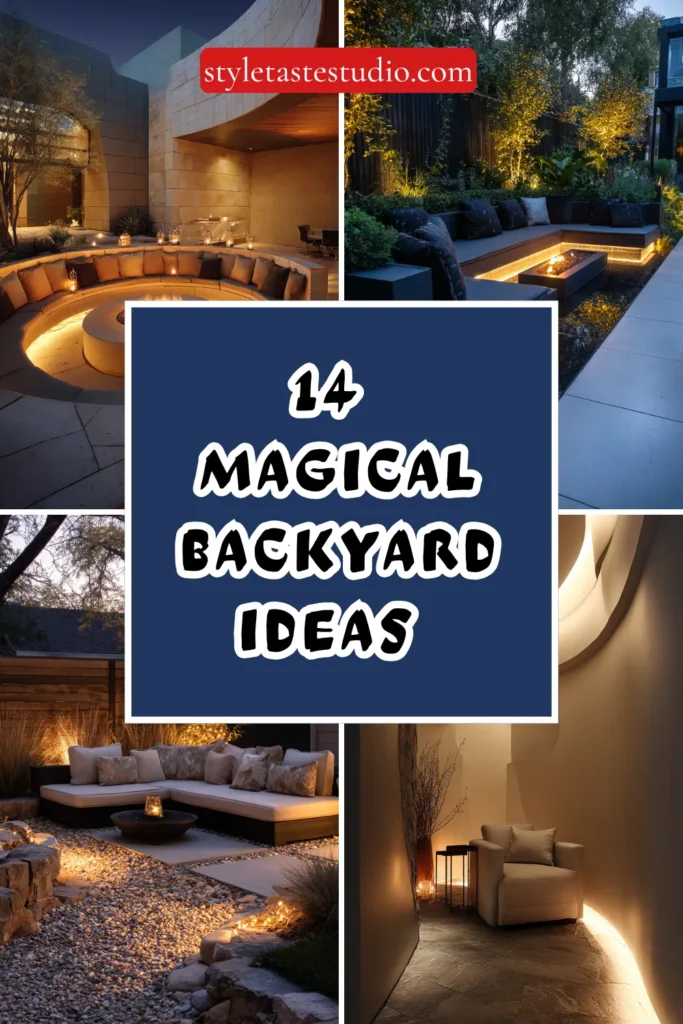
14 Magical Backyard Ideas That’ll Wow Your Guests
My backyard was pleasant. Tidy furniture, healthy plants, nothing wrong with it, and nothing that made anyone stop mid-conversation either. Pleasant was the ceiling, not the goal.
I wanted the specific feeling of walking into a yard at dusk and having it feel like something out of a storybook, the kind of space that makes a first-time guest go quiet for a second before saying anything. That feeling has very little to do with budget and almost everything to do with a handful of specific techniques: warm hidden light, an element of surprise, a sense that the yard extends further than it actually does.
I started with fairy lights tucked low into a planting bed instead of strung overhead where everyone expected them. That one change, light coming from somewhere unexpected, did more for the “magical” feeling than anything else added that year.
Here are 14 ideas that bring genuine enchantment to a backyard, built around the specific techniques that make a space feel like it belongs in a different, more wonderful world than the one right outside the fence.
Why Most Backyards Never Feel Magical
The common mistakes:
The obvious, expected lighting placement:
- String lights strung in the same predictable overhead pattern everyone already expects
- Every light source visible and unremarkable, nothing hidden or surprising
- A yard that is lit, but not enchanted
- Missing the specific placement tricks that make light itself feel like magic rather than just illumination
The literal, costume-like theming:
- Plastic fairy figurines and obviously artificial “magical” props scattered around
- Decor that looks purchased from a party store rather than genuinely atmospheric
- A yard trying too hard to announce its theme rather than simply creating a feeling
- Missing the restraint that makes genuine enchantment read as authentic rather than performed
The single-sense approach:
- A yard designed purely for how it looks, with no attention to sound, scent, or texture
- Missing the layered sensory experience that genuinely transports someone
- A space that photographs well but does not actually feel different to stand in
- Missing the multisensory quality that separates a genuinely magical space from a merely pretty one
What a successful magical backyard does:
Creates a sense of discovery and layered sensory experience:
- Light sources placed to surprise rather than simply illuminate
- Sound, scent, and texture considered alongside visual design
- Moments of genuine mystery, a hidden nook, an obscured path, a glimpse of something not fully visible
- A restrained, authentic aesthetic rather than literal costume-store theming
My revelation: Magic in a backyard comes from suggestion and surprise, not from more decoration. The most enchanted-feeling spaces are often the ones doing the least obvious, most carefully placed things.
1. The Hidden Ground-Level Fairy Lights
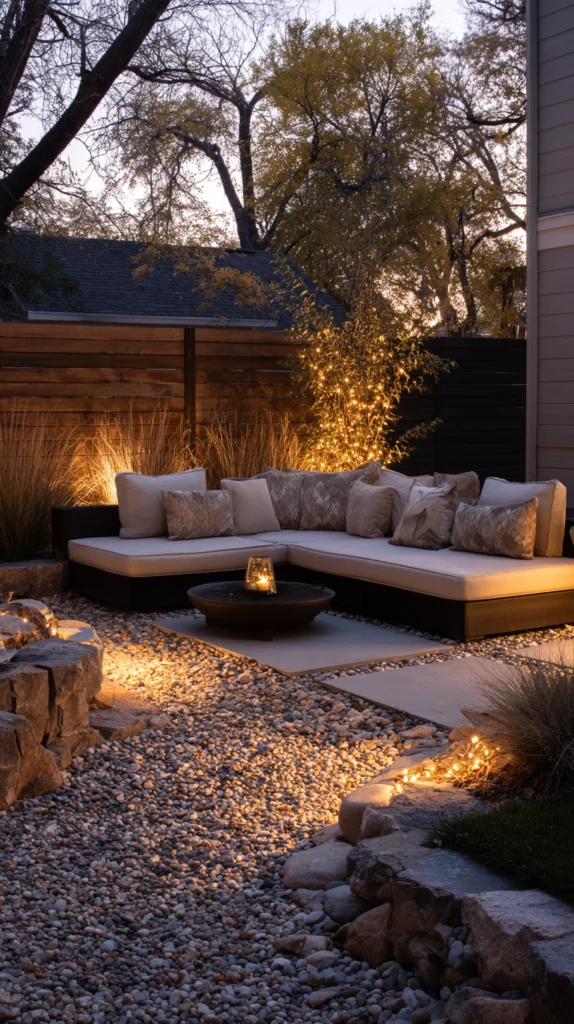
String lights or fairy lights tucked low into planting beds and along path edges, rather than strung overhead, creating light that seems to glow up from the garden itself.
My predictable overhead lighting:
What I had:
- String lights strung in the expected overhead pattern between the patio and fence
- A yard that was pleasantly lit but entirely unsurprising
- No sense of light coming from anywhere other than exactly where anyone would expect it
The ground-level discovery:
Why low, hidden light creates genuine enchantment:
- Light glowing up from within a planting bed reads as mysterious rather than merely functional
- Mimics the quality of light in a genuinely magical forest scene, illumination with no obvious visible source
- Creates depth and shadow play across foliage that overhead lighting alone cannot achieve
- A relatively simple placement shift delivering significantly more atmospheric impact than the same lights hung overhead
Installing ground-level lights:
Placement technique:
- Weave outdoor-rated fairy lights directly through planting beds, letting foliage partially obscure the light source itself
- Line path edges with lights nestled just behind low plants rather than fully exposed
- Tuck small solar lanterns among taller plants so the light appears to emanate from within the greenery
Choosing the right lights:
Getting the effect right:
- Warm white micro fairy lights, thin enough to disappear into foliage during the day
- Battery or solar-powered strands, avoiding visible cords running across open ground
- Waterproof-rated products specifically suited to direct contact with soil and moisture
Cost:
- Micro fairy lights (per 33-foot strand): $10-25
- Solar lantern accents: $8-20 each
My hidden ground-level lights: Weaving warm fairy lights through the low planting bed along the main path meant guests walked toward a soft, glowing garden with no visible light source, and it remains the single detail people ask about most.
Ground-Level Lighting Tips
Let foliage partially obscure the light source rather than fully exposing it:
Concealment technique:
- Fully visible fairy lights, even at ground level, read as decoration rather than magic
- Position lights so leaves and stems partially cover the actual bulbs, letting the glow show through rather than the wire itself
- This partial concealment is the specific detail that creates the sense of light emerging from the garden rather than being added to it
- Adjust placement after dark, since the effect is only fully visible once lit
Choose battery or solar power to avoid visible cords across open ground:
Practical concealment:
- A visible extension cord running across a path or bed breaks the illusion immediately
- Battery-operated or solar-powered lights eliminate this issue entirely
- This choice matters more for ground-level lighting than for any overhead application, given how exposed ground-level cords would be
- Confirm battery life and solar charging adequacy for the specific intended use duration before committing to a full installation
2. The Moon Gate or Circular Threshold
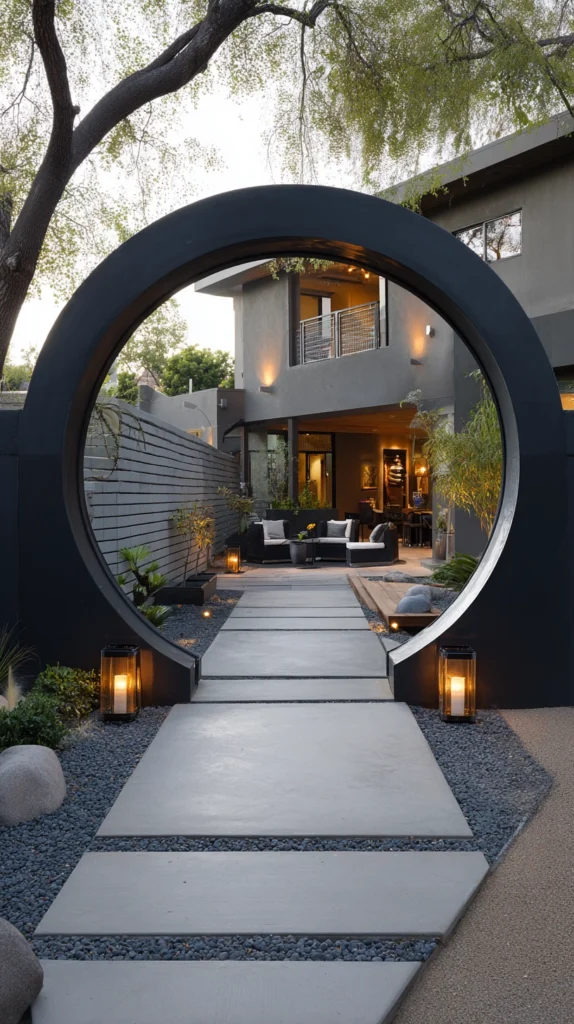
A circular gate or archway, inspired by traditional moon gate design, marking a deliberate transition point into a specific garden area.
My missing sense of arrival:
What felt absent:
- Every area of the yard blending into the next with no marked threshold
- A missed opportunity for the specific sense of crossing into “somewhere else” a defined gate provides
- No moment of anticipation before entering the garden’s more considered areas
The moon gate solution:
Why a circular threshold creates genuine enchantment:
- The circular form itself is visually striking and immediately distinct from ordinary rectangular garden structures
- Creates a clear, deliberate “before and after” moment, reinforcing the sense of entering a different space
- A traditional design element with genuine history, carrying more authentic weight than a purely decorative arch
- One of the most photographed, most immediately captivating additions available for a backyard specifically aiming for enchantment
Building the moon gate:
Construction approach:
- A circular frame, built from wood, metal, or a simple painted plywood cutout
- Positioned at the entrance to a specific garden zone, framing the view beyond
- Painted in a deep, saturated color for maximum visual impact, or left natural for a softer, more integrated look
- Sized generously enough for comfortable walk-through passage
Placement and framing:
Getting the positioning right:
- Position where it frames something genuinely worth seeing on the other side, a planting bed, a water feature, or a lit path
- Train climbing vines around the frame’s edge over time for an increasingly organic, established look
- Align with the garden’s main path for a natural, deliberate walk-through experience
Cost:
- DIY circular frame materials: $80-250
- Pre-made moon gate structure: $300-900
My moon gate threshold: A simple painted circular gate marking the entrance to the back garden area creates a genuine moment of anticipation every time someone walks through it, and the framed view of the lit path beyond makes that transition feel like stepping into an entirely different space.
Moon Gate Tips
Position the gate to frame a genuinely considered view on the other side:
Framing intentionality:
- A moon gate opening onto an unremarkable or cluttered view undermines its own dramatic effect
- Confirm what will actually be visible through the gate before finalizing its placement
- This consideration is what separates a genuinely magical threshold from simply an interesting-shaped structure
- Walk through the intended gate location and view what lies beyond before committing to the final position
Train climbing vines around the frame for an increasingly established, organic look over time:
Long-term development:
- A bare wood or metal circular frame reads as more structural than enchanted initially
- Climbing vines, trained gradually around the frame’s edge, soften the structure and deepen its magical quality over successive seasons
- This natural development is part of what makes the gate feel genuinely established rather than recently installed
- Choose a vigorous but well-behaved climbing variety suited to the frame’s specific material and the local climate
3. The Canopy of Hanging Glass Orbs or Lanterns
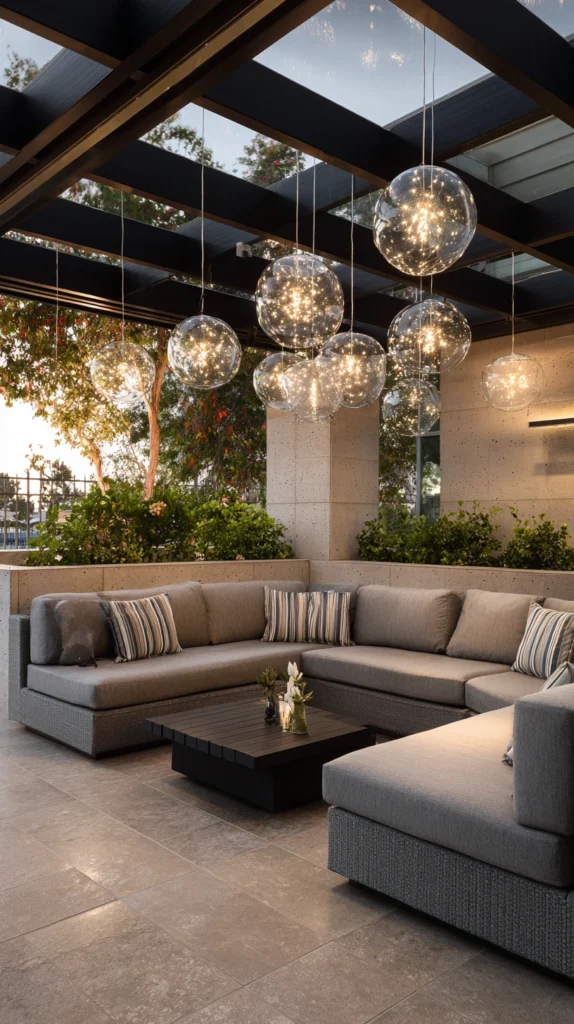
Suspended glass orbs, mercury glass ornaments, or small lanterns hung at varied heights throughout tree branches or an overhead structure.
My flat, single-plane overhead decor:
What felt underwhelming:
- String lights alone providing overhead illumination but no genuine dimensional or sculptural interest
- A missed opportunity for the specific enchantment suspended glass and reflective surfaces provide
- No sense of layered objects catching and scattering light throughout the space above
The hanging orb canopy solution:
Why suspended glass and lanterns add a distinct magical quality:
- Reflective and glass surfaces catch both natural and artificial light, scattering it throughout the space in a way flat lighting cannot
- Varied heights and sizes create genuine dimensional interest overhead, distinct from a single flat plane of string lights
- Mercury glass and colored glass orbs specifically evoke a fairy tale, otherworldly quality
- Works beautifully layered with string lights rather than replacing them entirely
Building the canopy:
Installation approach:
- Hang glass orbs, mercury glass ornaments, or small lanterns from tree branches at varied heights using clear fishing line
- Cluster several pieces together at different points rather than spacing them in a uniform grid
- Combine with string lights woven through the same branches for layered illumination and reflection
Choosing the right pieces:
Material and style options:
- Mercury glass ornaments for an antique, otherworldly shimmer
- Colored glass orbs for a more whimsical, storybook quality
- Small battery-operated lanterns for pieces that provide their own gentle internal light
- Weather-resistant outdoor-rated glass specifically, avoiding decorations meant only for indoor use
Cost:
- Mercury glass or colored glass ornaments (per set of 10-15): $20-50
- Small battery lanterns (per lantern): $10-25
- Fishing line and hanging hardware: $10-20
My hanging glass orb canopy: Suspending mercury glass ornaments at varied heights among the branches of the largest tree, layered with warm string lights, created a scattered, shimmering effect overhead that no flat string light installation alone had ever achieved.
Hanging Orb Tips
Cluster pieces together rather than spacing them in a uniform, predictable grid:
Organic arrangement technique:
- Evenly spaced ornaments read as a decorated grid rather than something naturally discovered
- Clustering several pieces together at varied points, with open space between clusters, creates a more organic, enchanted feel
- This irregular grouping mirrors the same technique used effectively in the balloon garland and lantern cluster approaches elsewhere in backyard decor
- Step back and assess the overall pattern from a normal viewing distance before finalizing the full installation
Use clear fishing line for hanging to keep the suspension itself invisible:
Illusion maintenance:
- Visible string or wire immediately breaks the sense of objects mysteriously suspended in space
- Clear fishing line, rated for outdoor use and the specific weight of each piece, keeps the hanging mechanism essentially invisible
- This detail matters significantly for maintaining the magical, floating quality the installation is meant to achieve
- Confirm the fishing line’s weight rating matches the actual weight of the glass pieces being hung
4. The Secret Reading Nook Behind Greenery
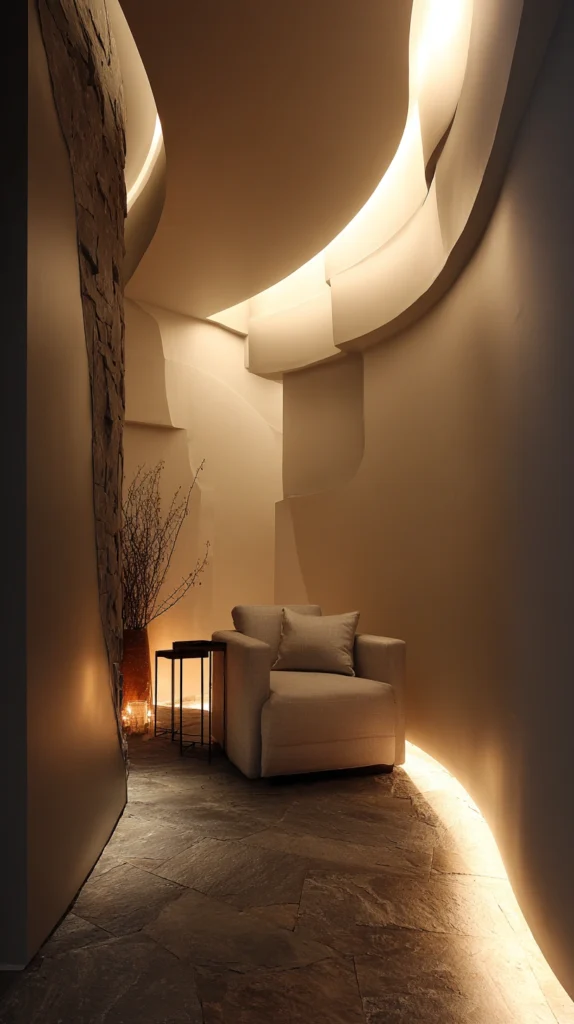
A small, partially concealed seating spot, tucked behind dense planting or a living screen, discovered rather than immediately visible.
My fully visible, unmysterious yard:
What was limiting the sense of discovery:
- Every seating area immediately visible from the patio, with nothing left to find
- A yard that revealed its entire layout in a single glance
- A missed opportunity for the specific enchantment a partially hidden, discovered space provides
The secret nook solution:
Why partial concealment creates genuine magic:
- A space that must be discovered, rather than immediately visible, carries inherent enchantment
- Mirrors the storybook quality of a secret garden, something children’s literature has leaned on for exactly this emotional effect
- Creates a sense of the yard containing more than what is visible at first glance, implying additional depth and space
- One of the most emotionally resonant techniques available, particularly appealing to both children and adults
Building the secret nook:
Construction approach:
- Position a small bench or chair behind a dense planting screen, a trellis with climbing vines, or a small stand of tall grasses
- Create a narrow, slightly obscured path leading to the spot, reinforcing the sense of discovery
- Keep the seating itself simple, letting the surrounding concealment do most of the enchanting work
Choosing the concealing plants:
Selecting the right screen:
- Dense, evergreen shrubs for year-round concealment
- Tall ornamental grasses for a softer, more seasonal screening effect
- A flowering vine-covered trellis for concealment that also provides seasonal color and fragrance
Cost:
- Small bench or chair: $60-200
- Concealing plants: $80-250
My secret reading nook: A single chair tucked behind a dense stand of ornamental grasses, reached by a narrow gap in the planting, has become the specific spot my daughter shows every single friend who visits, genuinely delighted every time by the fact that most first-time guests do not notice it exists until she leads them there.
Secret Nook Tips
Position the nook so it is genuinely not visible from the main patio or entry point:
Concealment verification:
- A “hidden” nook still fully visible from the main gathering area does not deliver the intended sense of discovery
- Walk the yard from typical entry and seating points, confirming the nook is genuinely out of immediate sightline
- This verification is essential to the technique actually working as intended
- Adjust planting density or the nook’s exact position if initial testing reveals it is more visible than intended
Keep the path to the nook narrow and slightly winding rather than a direct, obvious route:
Reinforcing the discovery experience:
- A wide, direct path to the “hidden” spot undermines the sense of secrecy the technique is meant to create
- A narrower, slightly curving approach, requiring a small gap through planting, reinforces the feeling of discovering something not meant to be immediately obvious
- This detail matters as much as the seating area’s actual concealment for the overall emotional effect
- Test the path’s genuine sense of discovery with a first-time visitor before considering the installation complete
5. The Glowing Pathway Stones
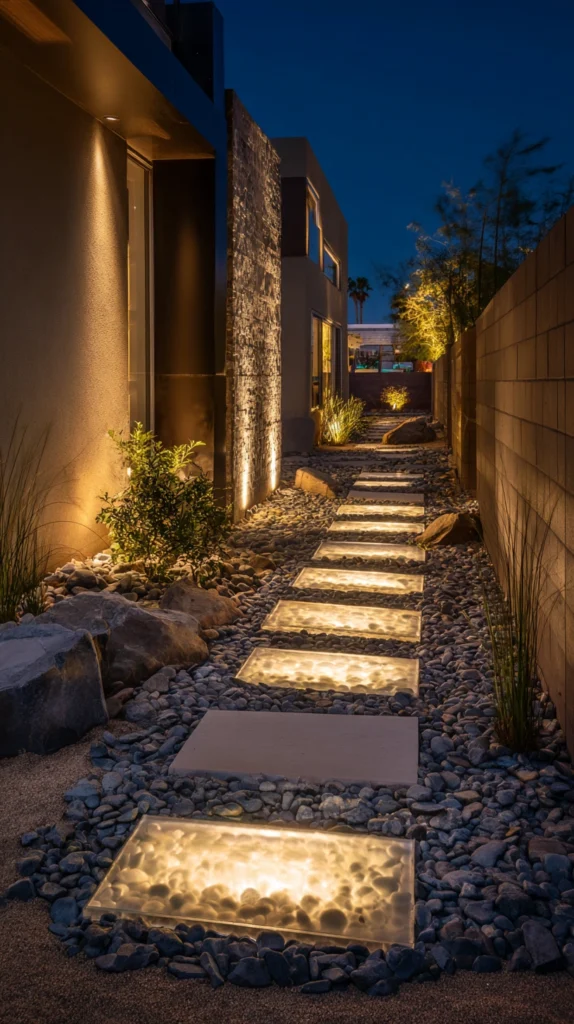
Solar-powered or embedded LED stepping stones, creating a softly illuminated path that seems to glow from within the ground itself.
My dark, unmarked evening path:
What was limiting evening enchantment:
- A garden path relying entirely on ambient lighting from elsewhere in the yard
- No specific illumination marking the path itself, distinct from general area lighting
- A missed opportunity for the specific magic of a path that appears to glow with its own internal light
The glowing pathway solution:
Why illuminated stones create a distinctly magical quality:
- Light appearing to emanate from within the stones themselves reads as genuinely otherworldly
- Guides movement through the garden after dark while adding significant atmospheric value beyond pure function
- Creates a literal glowing trail, evoking fairy tale and fantasy garden imagery directly
- A relatively contained, achievable project delivering outsized enchantment for its actual scope
Choosing the right glowing stones:
Product and installation options:
- Solar-powered LED stepping stones, available as a complete pre-made product
- DIY glowing stones, using resin and embedded LED lights poured into stone-shaped molds
- Glow-in-the-dark aggregate, mixed into stepping stone material for a softer, more subtle luminous effect
Installing the pathway:
Getting the placement right:
- Space stones at a natural walking stride, consistent with standard stepping stone installation
- Position for maximum solar charging exposure during the day, if using solar-powered products
- Combine with the ground-level fairy lights technique for a fully immersive glowing path effect
Cost:
- Solar LED stepping stones (per stone): $10-25
- DIY resin and LED materials for custom stones: $15-30 per stone
My glowing pathway: Solar LED stepping stones leading from the patio to the secret reading nook create a genuinely magical glowing trail every evening, and it remains the detail most responsible for guests describing the yard as feeling like something from a storybook.
Glowing Pathway Tips
Confirm adequate daily sun exposure for solar-powered stepping stones:
Charging requirement:
- Solar stones positioned in significant shade will not charge adequately for reliable evening illumination
- Assess the intended path’s actual sun exposure across a full day before committing to solar-powered products
- Battery-powered or hardwired alternatives may be necessary for a heavily shaded path
- This assessment prevents disappointment from stones that fail to glow reliably once installed
Test the glow effect after dark before finalizing the full pathway installation:
Verification before commitment:
- Purchase and test a small number of stones before committing to the full path’s material cost
- Some products glow more subtly than marketing images suggest, and testing confirms the actual effect meets expectations
- This small-scale test also allows assessing spacing and brightness before finalizing the complete installation
- Adjust stone spacing or brightness level based on this initial test before purchasing the remaining materials
6. The Whimsical Fairy Garden Miniature Scene
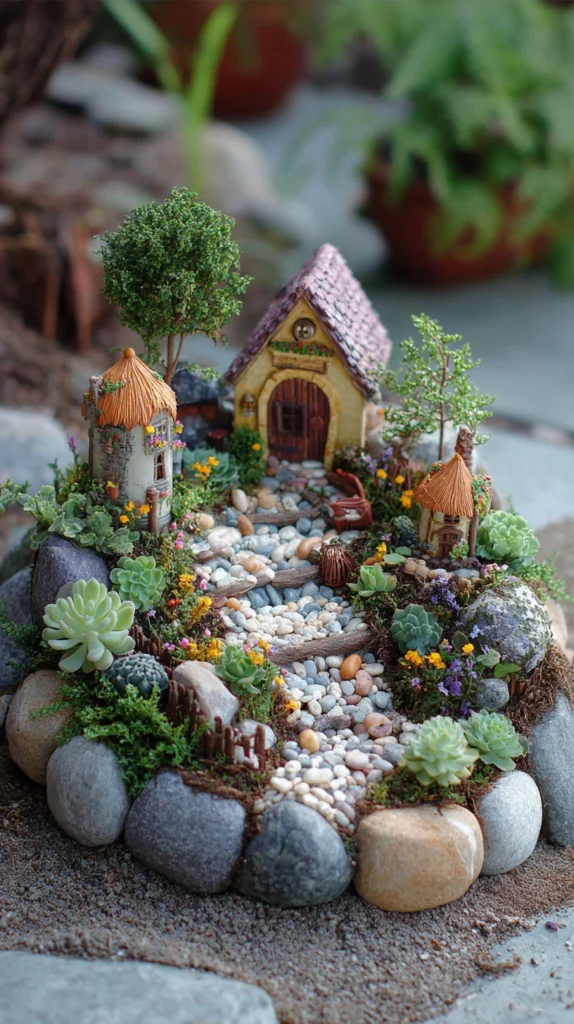
A small-scale miniature garden, complete with tiny structures, paths, and plants, tucked into a corner of a larger bed — a detailed, discoverable scene at a completely different scale.
My missing sense of scale surprise:
What felt like an opportunity:
- A garden entirely at human scale, with nothing offering the specific delight of a miniature, detailed world
- A missed opportunity for the genuine wonder a tiny, carefully detailed scene provides, especially for children but genuinely appealing to adults as well
- No moment of close, careful looking anywhere in the yard’s overall design
The fairy garden miniature solution:
Why a small-scale scene adds a distinct kind of magic:
- Creates genuine delight through scale contrast, a tiny, detailed world nestled within the larger garden
- Rewards close, careful looking, offering a different kind of engagement than the yard’s larger-scale features
- A classic technique specifically associated with whimsical, storybook garden design
- Relatively affordable and achievable, using widely available miniature garden accessories
Building the miniature scene:
Construction approach:
- Choose a defined corner of an existing bed, sized appropriately for a contained miniature scene
- Layer miniature structures (a tiny house, bridge, or gate) with small-scale plants suited to the miniature proportions
- Use moss, small pebbles, and fine gravel to create miniature “paths” and “lawns” within the scene
- Add tiny lights, if desired, for the scene to remain visible and magical after dark as well
Choosing appropriate miniature plants:
Selecting the right scale:
- Miniature hostas, dwarf mondo grass, or Irish moss for miniature “lawn” and groundcover effects
- Small succulents for structural, tree-like elements within the tiny scene
- Thyme or other low, spreading herbs for miniature pathway edging
Cost:
- Miniature garden accessories and structures: $20-60
- Miniature-scale plants: $15-40
My fairy garden miniature scene: A small corner of the front bed, complete with a tiny painted house, a pebble path, and dwarf mondo grass “lawn,” has become the specific spot every child who visits crouches down to examine closely, and more than a few adults do exactly the same thing.
Fairy Garden Tips
Choose a contained, defined area rather than letting the miniature scene sprawl:
Scale discipline:
- A miniature scene spreading across too large an area loses the specific charm of its contrained, discoverable scale
- Define clear boundaries, whether a small raised section or a defined edge within a larger bed, keeping the scene genuinely miniature in feeling
- This containment is what makes the scene feel like a discovered detail rather than simply another garden bed
- Resist the urge to continually expand the miniature scene once it exists; its charm depends partly on its contained scale
Select plants genuinely suited to the miniature scale, not simply small varieties of larger plants:
Proportion accuracy:
- Plants that will eventually grow to a more substantial size undermine the miniature illusion over time
- Research specifically dwarf or naturally tiny plant varieties suited to true miniature garden proportions
- This research prevents the scene from gradually losing its intended scale as plants mature beyond their initial appearance
- Local nurseries specializing in miniature or fairy garden plants can provide reliable guidance on appropriately scaled options
7. The Mystical Fog or Mist Water Feature
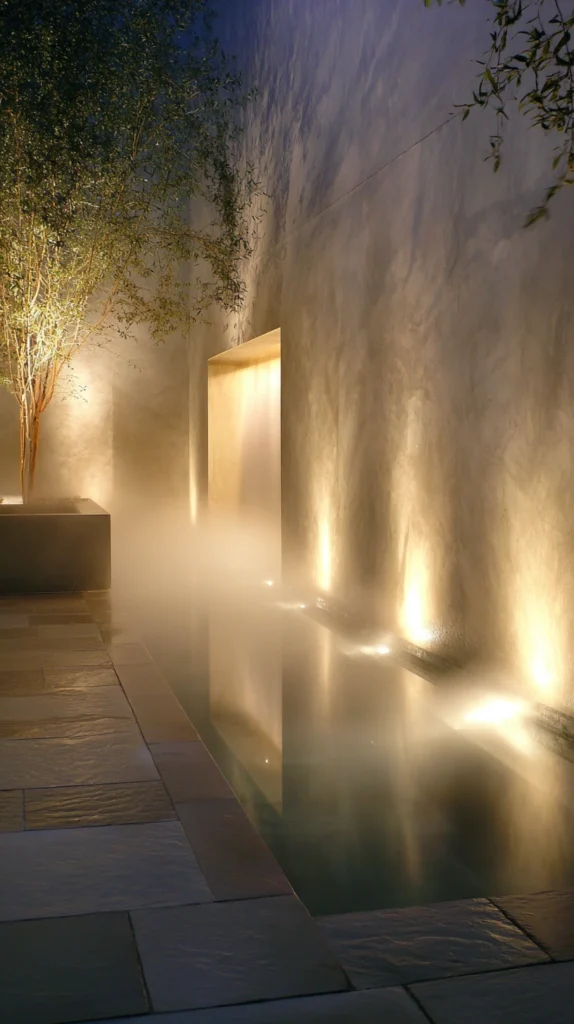
A water feature incorporating a fogger or misting element, creating a soft, ethereal mist effect around the water’s surface.
My ordinary, unremarkable water feature:
What felt like a missed opportunity:
- A standard fountain or basin, pleasant but lacking any specifically otherworldly quality
- No sense of the mysterious, atmospheric effect mist and fog specifically provide
- A missed opportunity for one of the most immediately striking additions available for enchanted garden design
The mist water feature solution:
Why fog and mist create such an immediately magical effect:
- Soft mist rising from water genuinely evokes a fantasy or fairy tale atmosphere unlike almost any other single addition
- Particularly striking when combined with uplighting, since the mist itself catches and scatters light dramatically
- A relatively contained, achievable addition to an existing or new water feature
- One of the most immediately “wow” additions available, consistently generating strong guest reaction
Adding mist to a water feature:
Installation approach:
- A small ultrasonic fogger, submerged within an existing basin or pond, creating a continuous soft mist
- Positioned within a shallow water feature specifically designed to showcase the misting effect
- Combined with uplighting directed through the mist for maximum dramatic visual impact after dark
Choosing the right fogger:
Product considerations:
- Ultrasonic foggers rated specifically for the water feature’s size and depth
- Confirm the specific product is safe for use with any fish or plants present in the water feature
- Battery or plug-in powered options, depending on the feature’s proximity to an outdoor outlet
Cost:
- Ultrasonic fogger unit: $20-60
- Uplighting for the mist effect: $30-80
My mystical mist water feature: Adding a small ultrasonic fogger to the existing stone basin, combined with a single warm uplight directed through the resulting mist, transformed a pleasant but unremarkable water feature into the single most commented-on detail in the entire yard after dark.
Mist Feature Tips
Confirm the fogger is genuinely safe for any fish or aquatic plants present:
Compatibility verification:
- Not all fogger products are safe for use in water containing live fish or certain aquatic plants
- Research the specific product’s compatibility before adding it to any water feature with existing aquatic life
- This verification prevents accidental harm to fish or plants from an otherwise purely atmospheric addition
- Choose products specifically marketed as fish-safe if the water feature includes any aquatic life
Pair the mist with uplighting for the most dramatic visual effect:
Combined technique:
- Mist alone, without supplemental lighting, is far less visually striking after dark
- A single warm-toned uplight, positioned to shine directly through the rising mist, dramatically amplifies the visual effect
- This combination is what creates the most consistently praised, photograph-worthy version of this technique
- Test the uplight’s exact positioning after dark, adjusting until the mist catches the light most effectively
8. The Storybook Cottage-Style Garden Shed
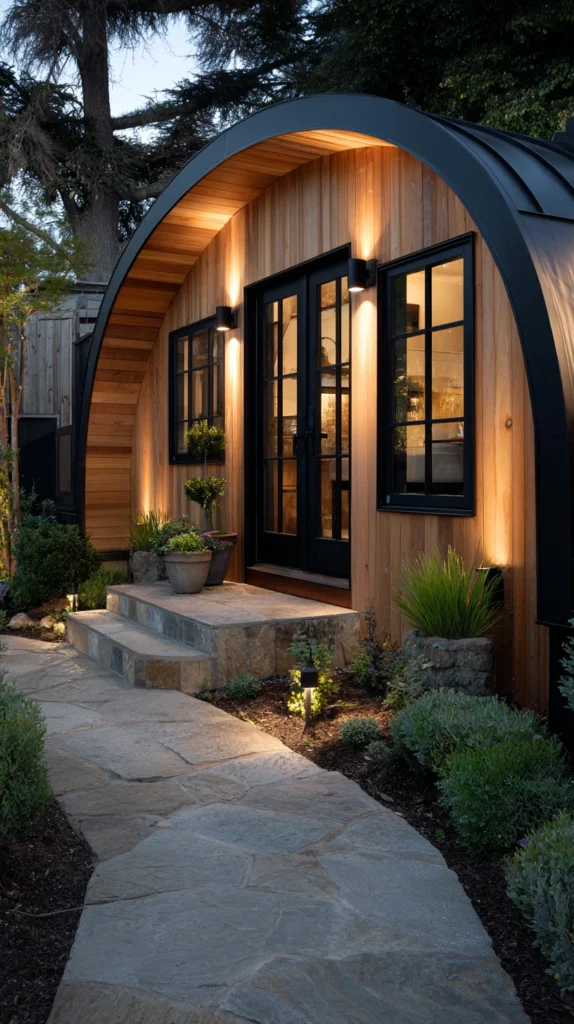
A garden shed or small structure, styled with cottage-inspired details, a round door, climbing roses, or a thatched-look roof, becoming a genuine architectural focal point.
My purely functional, forgettable shed:
What was undermining the yard’s overall magic:
- A plain, purely utilitarian storage shed, visually disconnected from the rest of the garden’s more considered design
- A missed opportunity to transform an already-present structure into a genuine storybook focal point
- A structure that undermined, rather than contributed to, the yard’s overall enchanted quality
The storybook shed solution:
Why transforming an existing structure delivers such strong value:
- Uses a structure already present in the yard, requiring styling and detail rather than entirely new construction
- A charmingly detailed shed becomes a genuine architectural anchor for the whole garden’s storybook quality
- Particularly effective specifically because sheds are so commonly left plain and purely functional, making a styled version stand out significantly
- Delivers outsized enchantment relative to the actual scope of the project
Styling the shed:
Detail approaches:
- A round or arched door, replacing or overlaying the standard rectangular door
- Climbing roses or other flowering vines trained up and around the structure
- A soft, weathered paint color, such as sage green or dusty blue, rather than standard utilitarian brown or gray
- Small window boxes, if the shed has windows, filled with cascading flowers
Additional cottage details:
Completing the storybook effect:
- A small stone or gravel path leading specifically to the shed’s door
- A simple bench or small seating area positioned near the entrance
- Weathered, aged-looking hardware, such as an iron door handle or hinges, for authentic charm
Cost:
- Paint and exterior finishing: $40-100
- Climbing roses or vines: $30-80
- Round door detail or window boxes: $60-200
My storybook garden shed: Repainting the previously plain gray shed a soft sage green, adding a simple arched door detail, and training climbing roses up one side transformed what had been the yard’s most overlooked structure into its clear architectural centerpiece.
Storybook Shed Tips
Choose a soft, weathered paint color rather than bright or stark white:
Color for authentic charm:
- Bright, high-contrast colors can read as costume-like rather than genuinely storybook
- Soft, slightly muted tones, sage green, dusty blue, warm cream, evoke a more authentic, aged cottage quality
- This color restraint matters significantly for achieving genuine charm rather than an overly theatrical effect
- Test paint samples against the shed’s actual material and the surrounding garden’s existing colors before committing
Train climbing plants gradually rather than attempting an instant, fully covered look:
Patient development:
- A shed instantly covered in artificial or overly dense vine coverage can look staged rather than genuinely established
- Allowing climbing roses or vines to develop gradually over one to two seasons creates a more authentic, naturally aged appearance
- This patience is part of what separates a genuinely charming, lived-in structure from an obviously recent renovation
- Guide and prune the climbing growth periodically to encourage even, attractive coverage as it develops
9. The Twinkling Firefly-Effect Lighting
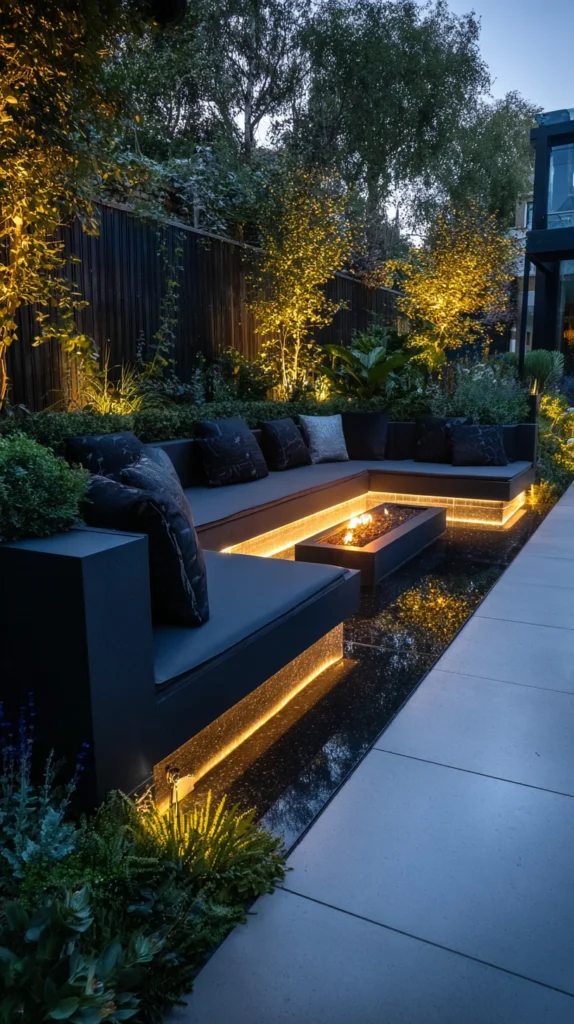
Small, randomly blinking LED lights, scattered through low planting to mimic the appearance of genuine fireflies at dusk.
My missing sense of living light:
What felt static:
- Fixed, steady lighting throughout the garden, beautiful but entirely static and unchanging
- A missed opportunity for the specific enchantment of light that seems to move and flicker on its own
- No sense of the living, organic quality genuine fireflies bring to a summer evening
The firefly-effect solution:
Why blinking, randomized lights create such a specifically magical quality:
- Mimics one of nature’s most universally beloved, genuinely magical evening phenomena
- The randomized, non-uniform blinking pattern reads as alive in a way steady lighting cannot replicate
- Particularly effective in regions where genuine fireflies are rare or absent, bringing that specific evening magic regardless of local ecology
- A relatively simple, affordable addition delivering significant atmospheric and emotional impact
Installing firefly-effect lights:
Placement approach:
- Small randomized-blink LED lights, scattered individually through low planting beds and grasses
- Positioned at varied heights within the foliage, mimicking how genuine fireflies appear at different levels
- Concentrated more densely in one or two specific areas rather than spread thin across the entire yard
Choosing the right product:
Getting an authentic effect:
- Products specifically marketed with a randomized or firefly-mimicking blink pattern, rather than simple uniform twinkle lights
- Warm, yellow-toned light for the most authentic firefly color
- Battery or solar-powered options, avoiding visible cords through the planting
Cost:
- Firefly-effect LED lights (per set of 20-40): $15-35
My firefly-effect lighting: Scattering randomized-blink LED lights through the ornamental grass border creates a genuinely convincing firefly effect every evening, and guests unfamiliar with the specific product consistently ask, delighted, whether we actually have real fireflies in the yard.
Firefly Light Tips
Concentrate lights more densely in one or two areas rather than spreading them thin across the whole yard:
Density consideration:
- Lights spread too thinly across a large area can look sparse and less convincing than a denser, more concentrated cluster
- A more concentrated placement in a specific bed or border creates a more genuinely convincing, magical density
- This concentration mirrors how real fireflies often appear in denser clusters within specific favorable habitat areas
- Reserve the full yard for other lighting techniques, using the firefly effect specifically within one or two focal planting areas
Choose products with genuinely randomized blinking rather than simple uniform twinkle patterns:
Authenticity in product selection:
- A uniform, synchronized twinkle pattern reads as decorative lighting rather than a convincing firefly mimicry
- Look specifically for products marketed with randomized or asynchronous blinking, closely mimicking actual firefly behavior
- This distinction significantly affects how convincing and genuinely magical the final effect actually appears
- Watch product demonstration videos before purchasing, since the specific blink pattern varies meaningfully between different products
10. The Scented Garden Pathway
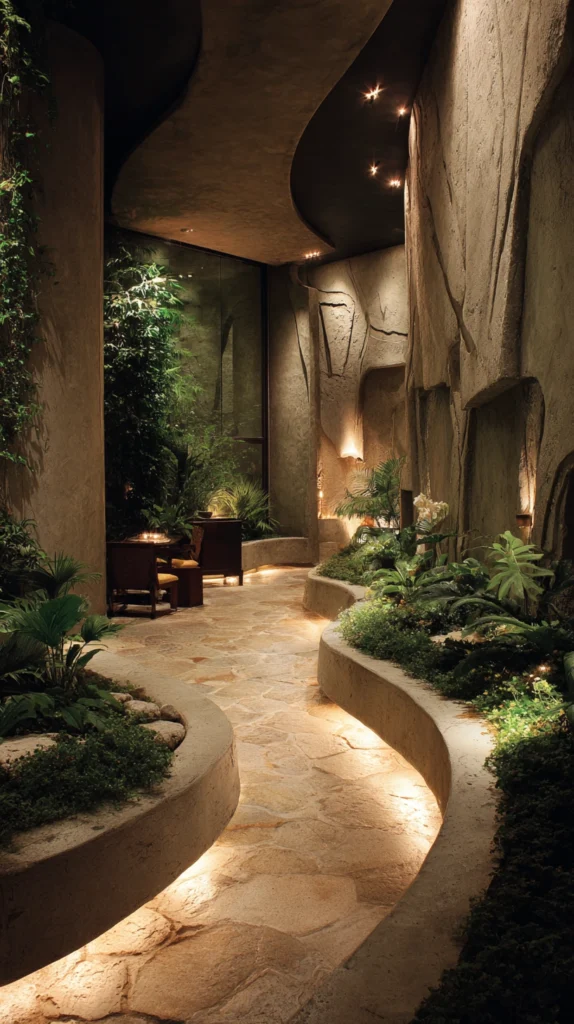
A path lined specifically with fragrant plants, chosen so that brushing past or walking through releases their scent, adding an olfactory layer to the garden’s magic.
My purely visual garden experience:
What was missing:
- A path designed entirely around visual appeal, with no consideration of scent
- A missed opportunity for the specific enchantment fragrance adds to an evening garden experience
- A garden that looked magical but did not fully engage the senses beyond sight
The scented pathway solution:
Why fragrance adds a distinct, powerful layer of enchantment:
- Scent carries uniquely strong emotional and memory associations, often more evocative than visual elements alone
- A pathway releasing fragrance as guests walk through creates an active, participatory sensory experience
- Evening-blooming fragrant plants specifically intensify their scent after dark, aligning perfectly with a garden’s evening magical hours
- One of the most memorable, distinctive details separating a genuinely multisensory magical garden from a purely visual one
Choosing fragrant plants for the pathway:
Selection by fragrance type and timing:
- Lavender, planted along path edges where brushing past releases its scent
- Night-blooming jasmine or moonflower, specifically intensifying fragrance in the evening hours
- Rosemary or thyme, planted between stepping stones where foot pressure releases their scent
- Roses, positioned where their fragrance can be enjoyed without their thorns catching on passing guests
Planting for the pathway experience:
Getting the placement right:
- Position fragrant plants close enough to the path’s edge that brushing contact is genuinely likely
- Layer different fragrant plants along the path’s length for a changing scent experience while walking
- Consider evening bloom timing specifically for any garden primarily enjoyed after dark
Cost:
- Fragrant plants (per plant): $8-25
- A full pathway planting (10-15 plants): $100-350
My scented garden pathway: Lining the main path with lavender and creeping thyme between the stepping stones means every walk through the garden releases fragrance underfoot, adding a sensory dimension that the visual lighting and structural elements alone had never fully provided.
Scented Pathway Tips
Choose night-blooming or fragrance-intensifying plants specifically if the garden is primarily used in the evening:
Timing-appropriate selection:
- Many popular fragrant plants release their strongest scent during daytime hours, less useful for a garden enjoyed primarily after dark
- Research specifically evening or night-blooming fragrant varieties, such as moonflower or night-blooming jasmine, for gardens used mainly in the evening
- This timing consideration significantly affects whether the fragrance is genuinely experienced during the garden’s actual peak use hours
- Confirm the specific bloom and fragrance timing of any plant before finalizing its inclusion in the pathway planting
Position low, textural herbs like thyme directly between stepping stones for a scent released underfoot:
Interactive fragrance technique:
- Fragrant plants positioned only along path edges require brushing contact to release scent
- Low, spreading herbs planted directly in the gaps between stepping stones release fragrance simply through foot pressure while walking
- This technique creates a genuinely interactive, surprising sensory experience distinct from edge-planted fragrant borders
- Choose specifically low-growing, foot-traffic-tolerant varieties suited to this between-stone application
11. The Illuminated Tree Canopy Uplighting
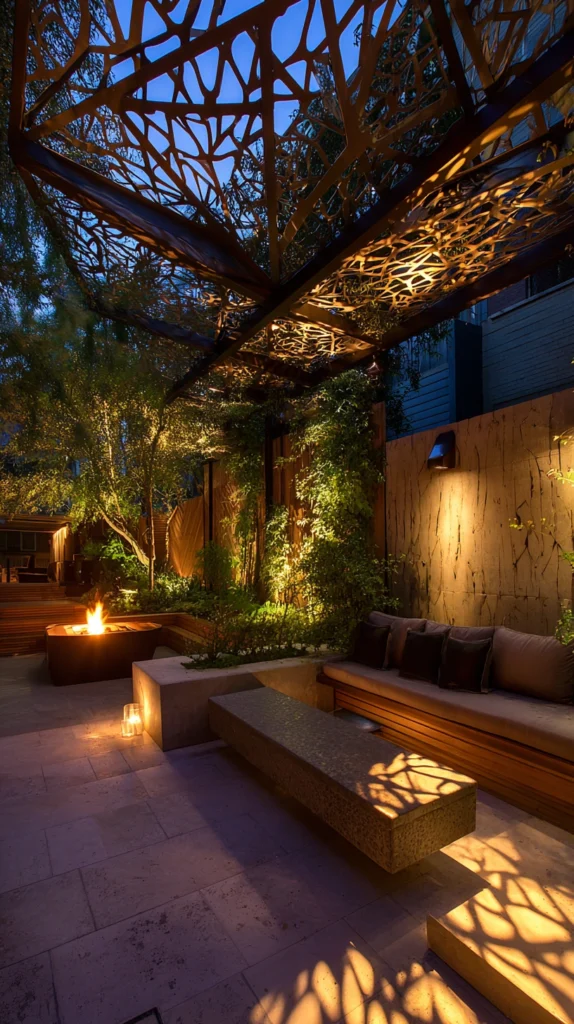
Ground-mounted uplights positioned beneath mature trees, casting dramatic light and shadow patterns up through the branches and leaves.
My unlit, invisible tree canopy after dark:
What was going unaddressed:
- Mature, beautiful trees completely invisible once natural light faded
- A significant portion of the yard’s actual visual asset, the tree canopy itself, contributing nothing to the evening atmosphere
- A missed opportunity for one of the most dramatic lighting techniques available in outdoor design
The tree uplighting solution:
Why uplighting trees creates such a dramatically magical effect:
- Casts genuinely striking light and shadow patterns up through branches and leaves, an effect impossible to achieve any other way
- Transforms a tree that disappears after dark into one of the garden’s most dramatic evening features
- Creates a sense of scale and drama, particularly effective with mature trees offering substantial canopy structure
- One of the most professional-looking lighting techniques achievable in a residential backyard setting
Installing tree uplighting:
Placement and technique:
- Ground-mounted spotlights, positioned close to the trunk and angled upward through the canopy
- Warm white light for the most natural, flattering illumination of bark and foliage
- Multiple lights per tree, positioned at different angles, for the most dramatic, dimensional shadow effect
Choosing the right fixtures:
Product considerations:
- Low-voltage landscape uplights, specifically rated for outdoor ground-mounted use
- Adjustable angle fixtures, allowing fine-tuning of exactly where the light falls within the canopy
- Solar-powered options for trees positioned away from convenient electrical access
Cost:
- Low-voltage uplight fixtures (per fixture): $20-60
- A full installation for one mature tree (2-3 fixtures): $60-180
My illuminated tree canopy: Adding three ground-mounted uplights beneath the yard’s largest oak transformed that tree from an invisible daytime feature into the garden’s most dramatic evening element, with light and shadow patterns dancing through the branches that genuinely stop guests mid-conversation.
Tree Uplighting Tips
Position multiple fixtures at different angles around the trunk for the most dimensional effect:
Multi-angle technique:
- A single uplight creates a flatter, less dramatic effect than multiple lights positioned at different points
- Two to three fixtures, positioned at different angles around the trunk’s base, create genuine dimensional shadow play throughout the canopy
- This multi-point approach is what separates a professionally dramatic result from a single, more basic spotlight effect
- Test different fixture positions after dark, adjusting angles until the shadow pattern achieves the desired dramatic effect
Choose warm white light specifically, avoiding cool or blue-toned fixtures:
Color temperature for natural effect:
- Cool or blue-toned uplighting can make foliage and bark appear artificial or clinical rather than naturally dramatic
- Warm white light (2700K-3000K) renders natural materials, bark, leaves, more flatteringly and authentically
- This color choice matters significantly for achieving a genuinely magical rather than merely illuminated effect
- Confirm the specific fixture’s color temperature rating before purchasing, since not all outdoor lighting products default to warm tones
12. The Enchanted Reading or Storytelling Circle
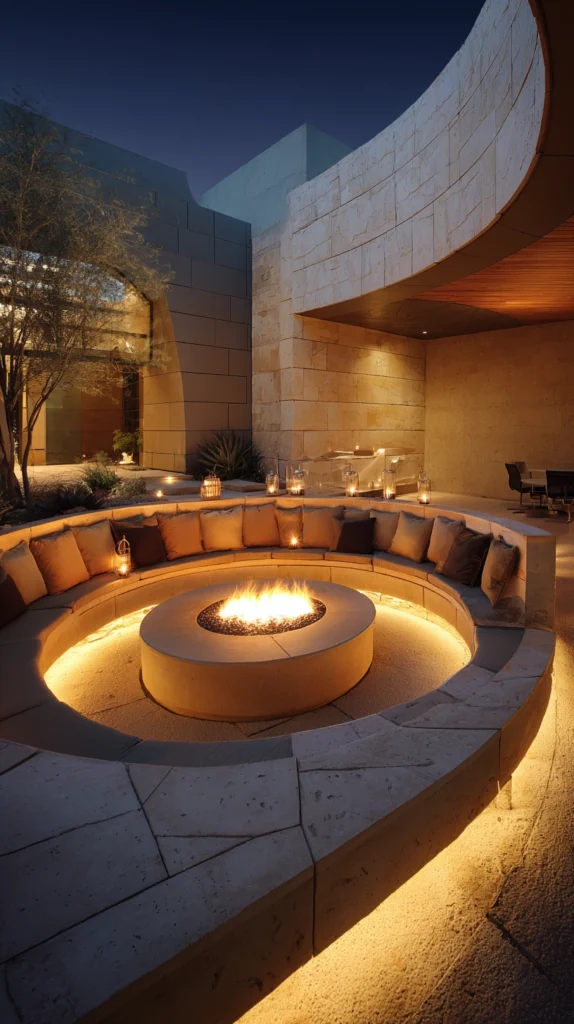
A small circle of seating, positioned around a central low light source, specifically designed for evening storytelling or quiet gathering.
My missing communal magical gathering spot:
What felt absent:
- Individual seating scattered throughout the yard, but no specific spot designed for a shared, communal magical experience
- A missed opportunity for the specific enchantment a dedicated storytelling or gathering circle provides
- No genuine destination specifically supporting the kind of shared evening experience that creates lasting memories
The storytelling circle solution:
Why a dedicated circle adds a distinct communal magic:
- Creates a genuine destination specifically designed for shared evening experience, storytelling, quiet conversation, or simply watching the sky
- The circular arrangement itself carries inherent symbolic and practical value, supporting genuine group connection
- A central low light source, rather than overhead illumination, creates an intimate, campfire-like quality
- Particularly resonant for families with children, though genuinely appealing to gatherings of any age
Building the storytelling circle:
Construction approach:
- A circle of simple seating, whether cushions, low stools, or a built-in circular bench
- A central low light source, such as a lantern, small fire bowl, or battery-powered candle cluster
- Positioned somewhat separated from the yard’s more active areas, reinforcing its distinct, contemplative purpose
Completing the circle:
Additional atmospheric details:
- Soft blankets or cushions, stored nearby and ready for use
- Surrounding planting or a slight enclosure, reinforcing the sense of a distinct, intimate space
- A small storage box nearby for books, if storytelling is a specific intended use
Cost:
- Simple seating (cushions, low stools): $60-200
- Central light source: $20-80
My storytelling circle: A small circle of floor cushions around a central lantern, tucked into a slightly separated corner of the yard, has become the specific spot for evening stories with the kids, and the low, warm light combined with the circular arrangement creates an intimacy no other seating area in the yard quite matches.
Storytelling Circle Tips
Position the circle with some separation from the yard’s more active gathering areas:
Purposeful placement:
- A storytelling circle positioned directly beside louder, more active zones undermines its intended intimate, contemplative quality
- Even modest separation, through distance, planting, or the yard’s natural layout, reinforces the circle’s distinct purpose
- This separation matters as much for this feature as it does for the secret reading nook idea, both benefiting from genuine distinction from active areas
- Consider the yard’s overall layout and identify the most naturally quiet, appropriately separated spot
Choose a central light source low enough to create genuine intimacy, not general illumination:
Lighting quality for atmosphere:
- A bright, elevated light source creates general illumination rather than the intimate, gathered-around-a-glow quality the circle is meant to evoke
- A low lantern, small fire bowl, or ground-level candle cluster creates the specific intimate atmosphere central to this feature’s magic
- This lighting choice matters significantly more here than simply having adequate light to see by
- Test the light source’s height and warmth specifically for the intimate quality it creates, not just its practical illumination level
13. The Wind Chime and Sound Garden
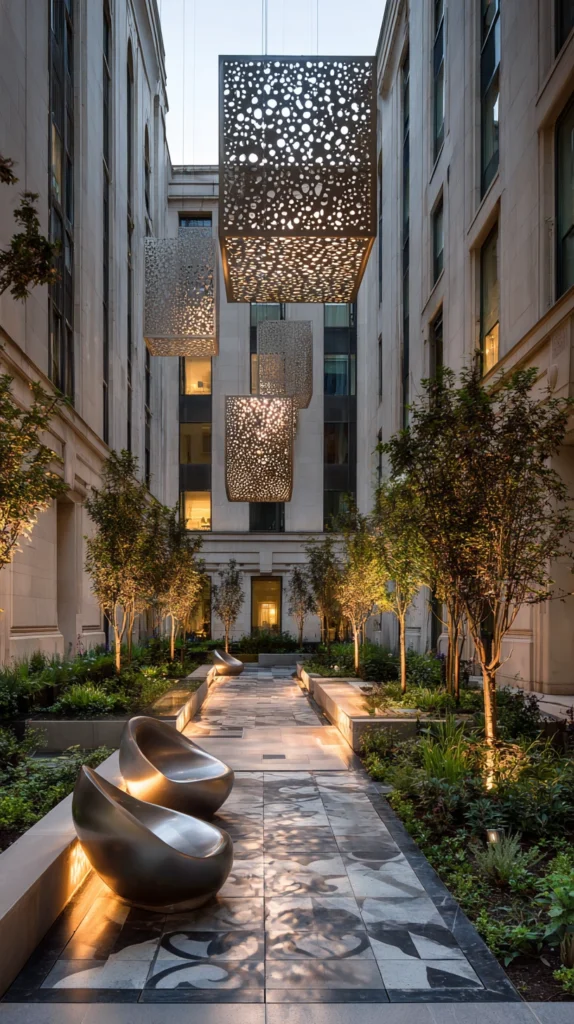
Wind chimes, bells, or other gentle sound-producing elements, positioned throughout the garden to add an ambient, ever-changing auditory layer.
My silent, visually-only garden:
What was missing:
- A garden designed entirely around visual and even olfactory experience, but with no consideration of sound
- A missed opportunity for the specific magic gentle, natural sound adds to an outdoor space
- A garden that looked enchanted but remained silent, missing an entire sensory dimension
The sound garden solution:
Why gentle ambient sound adds a distinct magical quality:
- Wind chimes and bells create an ever-changing, naturally random auditory layer, different every time the wind shifts
- This unpredictability mirrors the same organic, alive quality the firefly lighting technique achieves visually
- Sound specifically associated with wind chimes carries strong cultural association with peaceful, magical, contemplative spaces
- A relatively affordable addition delivering a genuinely distinct sensory dimension the rest of the garden’s visual techniques cannot provide
Placing wind chimes and sound elements:
Positioning approach:
- Hang chimes at varied heights and in different areas rather than clustering them all in one spot
- Choose different chime materials, bamboo, metal, glass, for genuinely varied tonal qualities across the garden
- Position near seating areas specifically, where the sound will be most consistently appreciated
Choosing the right chimes:
Material and tone considerations:
- Metal chimes for the clearest, most resonant, bell-like tones
- Bamboo chimes for a softer, more woody, natural sound
- Glass chimes for a delicate, higher-pitched tinkling quality
Cost:
- Quality wind chimes (per chime): $20-80
My sound garden: Hanging three different wind chimes, metal near the patio, bamboo near the secret nook, and glass near the moon gate, added a genuinely varied, ever-changing auditory layer that guests consistently notice and comment on, especially during quieter, less crowded moments in the garden.
Wind Chime Tips
Choose different chime materials for genuinely varied tonal quality across different areas:
Auditory variety:
- Identical chimes throughout the garden create a more uniform, less dimensional sound experience
- Varying material, metal, bamboo, glass, across different garden zones creates a richer, more varied auditory landscape
- This variety mirrors the same principle of layered, varied experience used throughout the other magical garden techniques
- Position each chime type in a zone where its specific tonal quality feels most fitting to that area’s overall character
Position chimes where wind naturally moves through the space, not in fully sheltered corners:
Functional placement:
- Chimes positioned in a fully wind-sheltered corner will rarely actually sound, undermining their entire purpose
- Observe the yard’s natural wind patterns and position chimes specifically where genuine airflow regularly occurs
- This practical consideration matters as much as the chime’s aesthetic placement for the feature to actually function as intended
- Test chime placement over a few days, noting whether they produce sound with the yard’s typical wind conditions
14. The Layered Reflective Surface Placement

Strategic placement of mirrors, reflective glass, or polished metal accents throughout the garden, catching and multiplying both natural and artificial light.
My missing sense of depth and light multiplication:
What was limiting the garden’s overall shimmer:
- Light sources scattered throughout the garden, but nothing specifically designed to catch, reflect, and multiply that light further
- A missed opportunity for the specific magic reflective surfaces add when strategically placed among other lit and lush elements
- A garden that was well lit but not genuinely shimmering or multidimensional in its light quality
The reflective surface solution:
Why strategic reflection adds a distinct, final layer of enchantment:
- Mirrors and reflective surfaces catch and multiply existing light sources, amplifying the effect of every other lighting technique already in place
- Creates genuine depth and a sense of the garden extending beyond its actual physical boundary
- Small reflective accents, placed among foliage, catch dappled light throughout the day and scattered artificial light after dark
- The final, unifying technique that ties together and amplifies every other magical element already established throughout the garden
Placing reflective elements:
Strategic positioning approach:
- Small mirrors, tucked among foliage at varied heights, catching and reflecting nearby light sources
- Polished metal garden accents, positioned where they will catch both sunlight and evening lighting
- A larger mirror, positioned specifically to reflect the moon gate, the illuminated tree canopy, or another significant feature
Choosing the right reflective materials:
Material and placement considerations:
- Weather-resistant outdoor mirrors, specifically rated for direct exposure to the elements
- Antiqued or slightly distressed mirror glass for a softer, more magical quality than a stark, modern reflection
- Polished copper or brass accents for warm-toned reflection, complementing the garden’s warm lighting choices
Cost:
- Small decorative mirrors: $15-40 each
- Larger strategic mirror placement: $80-300
- Polished metal garden accents: $20-60
My layered reflective placement: Tucking several small antiqued mirrors among the ferns near the secret reading nook, positioned to catch the nearby fairy lights, added a final shimmer and depth to that corner that made the whole area feel like it extended further and glowed more richly than any single lighting technique alone had achieved.
Reflective Surface Tips
Position mirrors specifically to reflect existing lit or lush features, not empty space:
Strategic reflection targeting:
- A mirror reflecting an unremarkable blank area delivers little genuine benefit
- Position mirrors deliberately to catch and amplify a specific existing lit feature, whether string lights, a lantern, or lush foliage
- This targeted placement is what separates a genuinely effective reflective accent from a randomly placed decorative object
- Test mirror placement after dark specifically, since the reflective effect on artificial lighting is often the primary intended benefit
Choose weather-resistant, outdoor-rated mirrors specifically, avoiding indoor products:
Material durability:
- Standard indoor mirrors degrade quickly when exposed to outdoor moisture and temperature fluctuation
- Confirm any mirror or reflective accent is specifically rated and sealed for outdoor use before installation
- This distinction matters significantly for the longevity and continued effectiveness of the reflective placement technique
- A slightly higher cost for genuinely outdoor-rated products prevents a disappointing, short-lived installation
Choosing Your Magical Backyard Elements
By Priority
Lighting foundation first:
- Hidden ground-level fairy lights (idea 1)
- Illuminated tree canopy uplighting (idea 11)
- Twinkling firefly-effect lighting (idea 9)
Discovery and structure:
- Moon gate or circular threshold (idea 2)
- Secret reading nook behind greenery (idea 4)
- Storybook cottage-style garden shed (idea 8)
Full sensory layering:
- Scented garden pathway (idea 10)
- Wind chime and sound garden (idea 13)
- Mystical fog or mist water feature (idea 7)
By Effort Level
Lowest effort:
- Wind chime and sound garden (idea 13)
- Twinkling firefly-effect lighting (idea 9)
- Fairy garden miniature scene (idea 6)
Medium effort:
- Hidden ground-level fairy lights (idea 1)
- Glowing pathway stones (idea 5)
- Layered reflective surface placement (idea 14)
- Scented garden pathway (idea 10)
Higher commitment:
- Moon gate or circular threshold (idea 2)
- Canopy of hanging glass orbs or lanterns (idea 3)
- Secret reading nook behind greenery (idea 4)
- Storybook cottage-style garden shed (idea 8)
- Mystical fog or mist water feature (idea 7)
- Illuminated tree canopy uplighting (idea 11)
By Budget
Under $100:
- Wind chime and sound garden (idea 13)
- Twinkling firefly-effect lighting (idea 9)
- Fairy garden miniature scene (idea 6)
- Hidden ground-level fairy lights (idea 1)
$100-300:
- Glowing pathway stones (idea 5)
- Scented garden pathway (idea 10)
- Mystical fog or mist water feature (idea 7)
- Layered reflective surface placement (idea 14)
$300-600:
- Canopy of hanging glass orbs or lanterns (idea 3)
- Secret reading nook behind greenery (idea 4)
- Illuminated tree canopy uplighting (idea 11)
- Enchanted reading or storytelling circle (idea 12)
$600+:
- Moon gate or circular threshold (idea 2)
- Storybook cottage-style garden shed (idea 8)
Maintenance Through the Seasons
Spring:
- Inspect and test all lighting systems after winter storage or exposure
- Refresh mulch and plantings around the fairy garden miniature scene
Summer:
- Monitor solar charging adequacy for pathway and ground-level lights during peak use season
- Maintain fragrant pathway plants with regular pruning to encourage continued scent release
Fall:
- Clean and store more delicate glass ornaments and lanterns ahead of harsher weather
- Prune climbing vines on the moon gate and storybook shed to maintain their developing shape
Winter:
- Protect mist and water features from freezing where relevant
- Plan the following year’s additions during the slower winter months
My Complete Magical Backyard Journey
What I built across three years:
Year one ($380):
- Hidden ground-level fairy lights and glowing pathway stones
- Fairy garden miniature scene in the front bed
- Learned that light placement mattered more than light quantity for genuine enchantment
Year two ($720):
- Moon gate threshold and secret reading nook
- Illuminated tree canopy uplighting
- Learned that structure and concealment added a dimension of discovery no amount of lighting alone could achieve
Year three ($410):
- Mystical mist water feature and hanging glass orb canopy
- Wind chime sound garden and scented pathway plantings
- Learned that layering the remaining senses, sound and scent, completed an experience that had been purely visual until that point
Total investment: $1,510 across three years Most important lesson: Genuine enchantment comes from suggestion, discovery, and layered senses, not from more decoration Single highest-impact addition across all three years: The hidden ground-level fairy lights from year one, for the lowest cost and most immediate, consistent guest reaction
Getting Started This Weekend
Start with light placement, not light quantity.
This weekend:
Step 1 — Move existing string lights to an unexpected, lower placement:
- Weave them through a planting bed instead of stringing them overhead
- This single relocation often delivers more magic than adding entirely new lights in the expected spot
Step 2 — Identify one spot in the yard that could become a discovered, partially hidden nook:
- A corner behind existing dense planting, or a spot that could be screened with an added shrub or trellis
- This identification costs nothing and reveals genuine opportunity within the yard’s existing layout
Step 3 — Add one sensory layer beyond lighting:
- A wind chime, a fragrant plant near a path, or a small water feature
- This addition begins building the multisensory quality central to genuine enchantment
Step 4 — Test everything after dark before considering the space finished:
- Many of these techniques only reveal their full effect once the sun sets
- Walk the yard at dusk and adjust placement based on what genuinely reads as magical versus merely decorative
My recommendation:
Start with hidden ground-level lighting and one discovered nook:
- Both are achievable at relatively low cost and deliver immediate, noticeable transformation
- Both directly apply the core principle of suggestion and discovery over simple addition
- This foundation naturally reveals which of the remaining ideas would add the most value next
Walk through the yard after dark once both changes are complete, and notice how differently the space feels before adding anything else.
Now go build the backyard that finally makes guests go quiet for a moment before they can find the words for it.
Quick Summary
The 14 magical backyard ideas:
Light and illumination:
- Hidden ground-level fairy lights (idea 1): light that appears to glow from the garden itself
- Canopy of hanging glass orbs or lanterns (idea 3): dimensional, reflective overhead shimmer
- Glowing pathway stones (idea 5): a literal glowing trail through the garden
- Twinkling firefly-effect lighting (idea 9): the living, randomized quality of real fireflies
- Illuminated tree canopy uplighting (idea 11): dramatic light and shadow through the branches
Structure and discovery:
- Moon gate or circular threshold (idea 2): a deliberate transition into enchantment
- Secret reading nook behind greenery (idea 4): a spot that must be discovered, not simply seen
- Storybook cottage-style garden shed (idea 8): an existing structure transformed into a focal point
- Fairy garden miniature scene (idea 6): a tiny, detailed world at a completely different scale
Water and atmosphere:
- Mystical fog or mist water feature (idea 7): an immediately striking, otherworldly effect
- Layered reflective surface placement (idea 14): amplifying and multiplying existing light
Full sensory layering:
- Scented garden pathway (idea 10): fragrance released by walking through the space
- Wind chime and sound garden (idea 13): an ever-changing, ambient auditory layer
- Enchanted reading or storytelling circle (idea 12): a communal, intimate gathering destination
The universal magical backyard rules:
Always:
- Place light sources to surprise rather than simply illuminate
- Layer multiple senses, sound, scent, and texture, alongside visual design
- Create at least one genuine moment of discovery or partial concealment
- Test every lighting technique after dark before considering the installation finished
Never:
- Rely on the same predictable overhead string light placement everyone already expects
- Choose obviously artificial, costume-like decor over genuinely atmospheric materials
- Design purely for visual appeal while ignoring sound and fragrance entirely
- Make every element of the yard immediately visible, eliminating any sense of discovery
Common mistakes:
- Adding more decoration rather than reconsidering placement and technique
- Choosing literal, costume-store “magical” props over authentic, restrained atmospheric details
- Designing exclusively for daytime appearance without testing the space after dark
- Leaving the entire yard visible at first glance, with nothing left to discover
- Treating sound and scent as unnecessary extras rather than essential layers of genuine enchantment
Remember: magic comes from suggestion and surprise, not from more decoration, light placed to appear hidden or ground-level consistently outperforms the same light strung overhead, genuine discovery matters as much as visual beauty, layering sound and scent alongside sight creates a fuller sensory experience, and the best magical backyard is the one that makes a guest stop mid-sentence, without being able to immediately explain why.