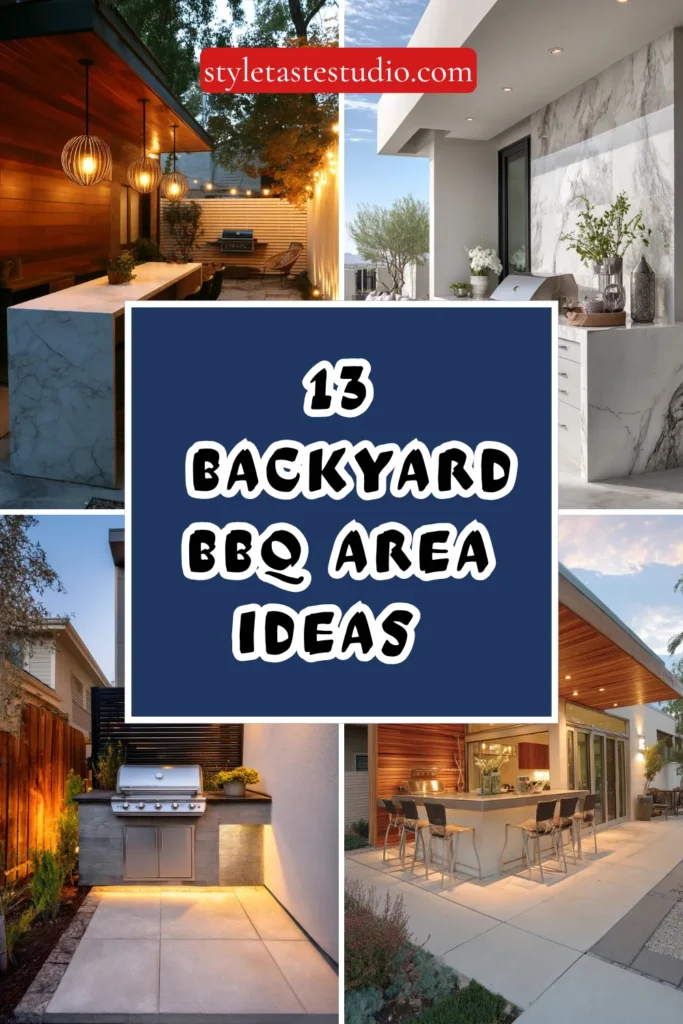
13 Backyard BBQ Area Ideas We’re Obsessed With
We built our first backyard BBQ setup with a single freestanding grill parked on the grass near the back door. It worked, technically, but it never felt like a real part of the yard. Just an appliance sitting out in the open.
Three years and one full redo later, we have an actual dedicated BBQ area now, and the difference in how often we use it is honestly kind of embarrassing to admit. We grill probably four times as often as we used to, purely because the space finally makes it easy and enjoyable instead of a minor hassle.
Along the way I’ve picked up a lot of ideas, some from our own trial and error and some borrowed shamelessly from friends who did this better than us the first time around. A few of these were expensive structural changes. A few cost almost nothing and made a surprising difference anyway.
I’ve tried to organize this list roughly from smaller, easier upgrades toward bigger commitments, so you can find something that fits your situation whether you’re working with an entire backyard renovation budget or just want to improve what you already have this weekend.
Not every idea here needs to happen at once, either. We spread these changes across three separate summers, adding one or two things each year as budget and time allowed. Looking back, that gradual approach probably worked out better than trying to do everything in a single overwhelming project.
Here are the 13 BBQ area ideas that actually changed how we use our backyard.
1. A Dedicated Grilling Zone with Heat-Resistant Flooring
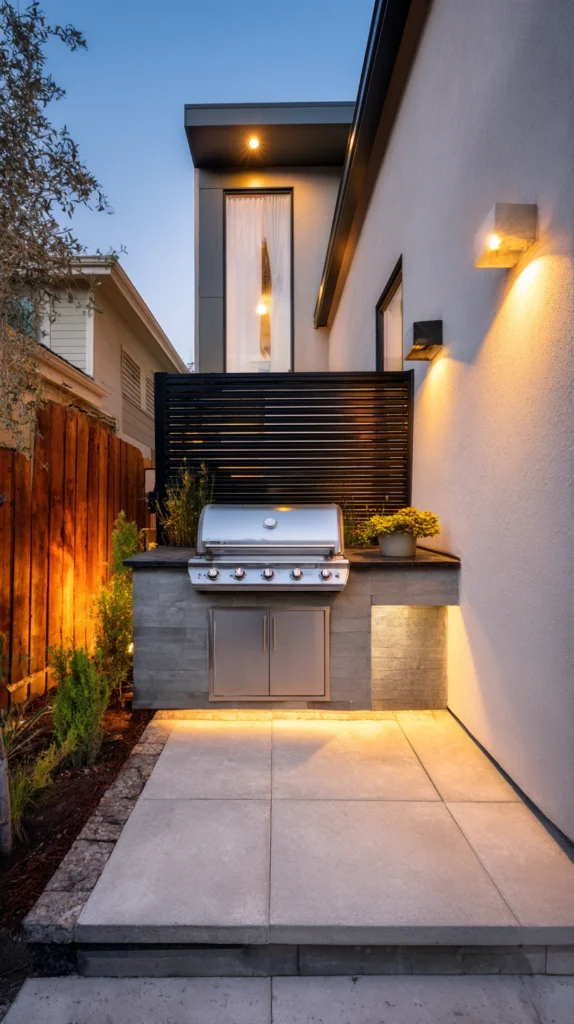
Our original grill sat directly on grass, which turned into a scorched, patchy mess within a single summer. That alone was reason enough to finally carve out a proper dedicated spot.
- Pavers or concrete pads handle direct heat and grease spills far better than grass or mulch
- Leave at least a few feet of clearance around the grill on all sides for safety and comfortable movement
- Slightly sloped or permeable surfaces help grease and rainwater drain away instead of pooling
- Keep the zone close enough to the kitchen door to minimize trips back and forth for supplies
We poured a simple paver pad specifically sized for the grill and a small side table, and it immediately felt like a real station instead of an appliance randomly placed in the yard.
That small, defined footprint ended up mattering more than I expected. It gave the whole area a sense of purpose, and it made cleanup dramatically easier since grease and ash now stay contained to a surface built to handle it.
We also learned to size the pad slightly larger than we initially thought necessary. Our first attempt left barely enough room to maneuver around the grill with a plate in hand, and we ended up expanding it by another few feet within the first year.
2. A Built-In Grill Island
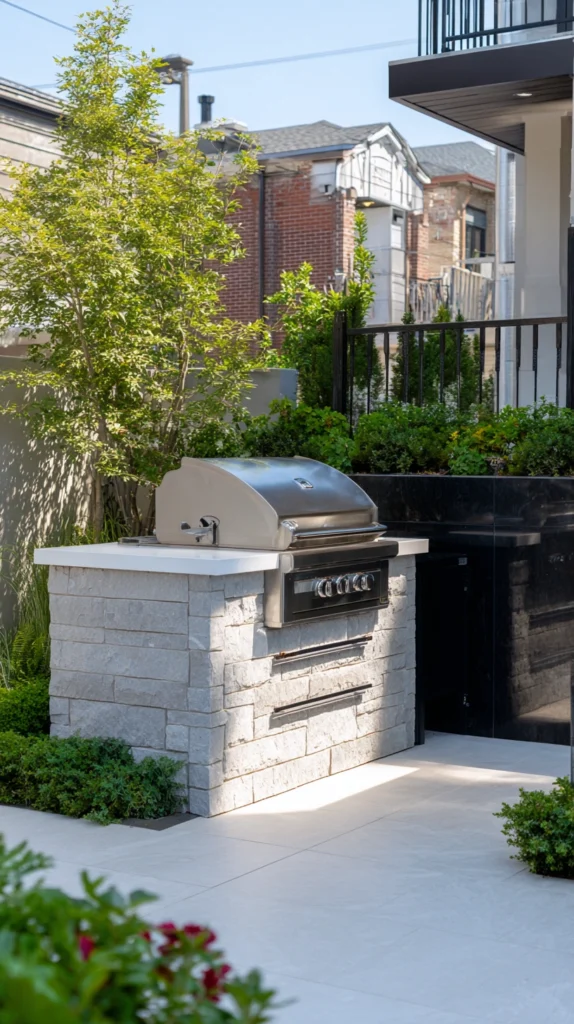
Once we outgrew the standalone grill entirely, we moved to a built-in grill island, which turned out to be the single biggest upgrade on this entire list in terms of how it changed our actual cooking process.
- Built-in islands provide dedicated counter space for prep, plating, and setting down hot items
- Stone or stainless steel surfaces hold up to heat and weather better than wood countertops
- Built-in storage underneath keeps tools, charcoal, or propane tanks organized and out of sight
- Plan for a natural gas line during construction if you want to avoid swapping propane tanks mid-cook
The counter space alone changed everything about how we grill. No more balancing plates on the porch railing or making repeated trips back to the kitchen for something we forgot.
It’s a bigger investment than most items on this list, but it’s the one upgrade that turned grilling from a slightly chaotic process into something that actually feels organized and enjoyable, even when cooking for a crowd.
We went with a natural gas line during our build, and I’d genuinely recommend the same if it’s feasible for your property. Never running out of fuel mid-cook, or realizing the backup tank is also empty right as guests arrive, has been a small but consistent relief ever since we made the switch.
3. Overhead Shade Specifically for the Grill Station
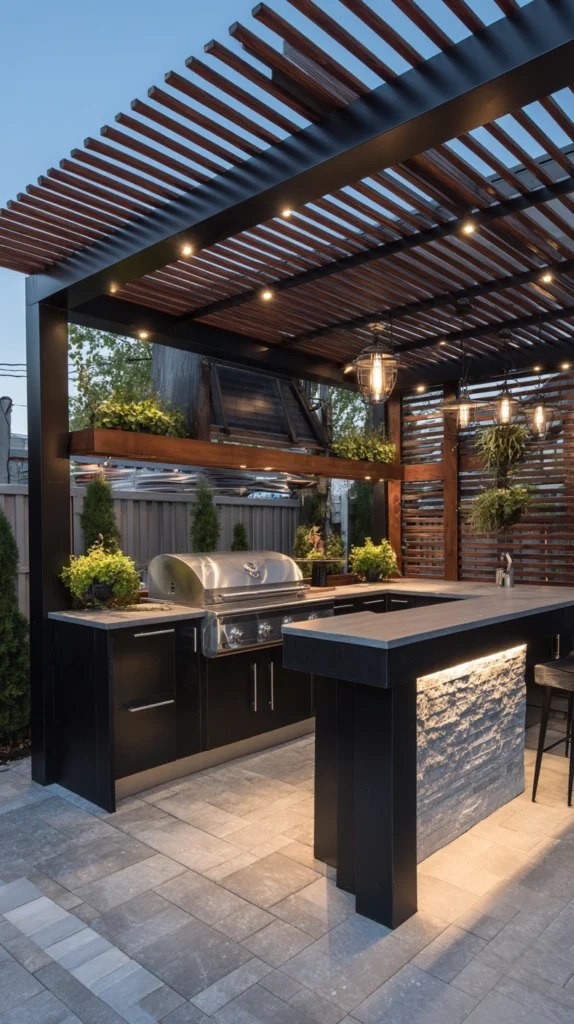
Standing over a hot grill in direct summer sun is miserable, and it’s a detail that’s easy to overlook until you’ve actually experienced it during a July cookout.
- A simple pergola over the grilling zone makes a bigger comfort difference than most people expect
- Retractable shade sails offer flexibility if you want sun during cooler months and shade in summer
- Keep shade structures a safe distance from grill smoke and open flame, per your grill’s clearance guidelines
- Attached awnings off the house work well if a freestanding structure isn’t in the budget
We added a simple metal-framed shade sail directly over our grill island, angled to block the worst of the afternoon sun without trapping smoke underneath it.
It sounds like a minor addition, but whoever’s manning the grill genuinely thanks us for it every single time now, especially during the hottest stretch of summer when standing in direct sun for twenty minutes used to feel like a genuine chore.
We angled our shade sail specifically based on where the sun sits during our typical dinner-hour cooking window, rather than just centering it over the grill by default. That extra bit of planning made a noticeable difference, since a shade structure aimed at the wrong time of day barely helps at all.
4. A Nearby Prep Station Separate from the Grill
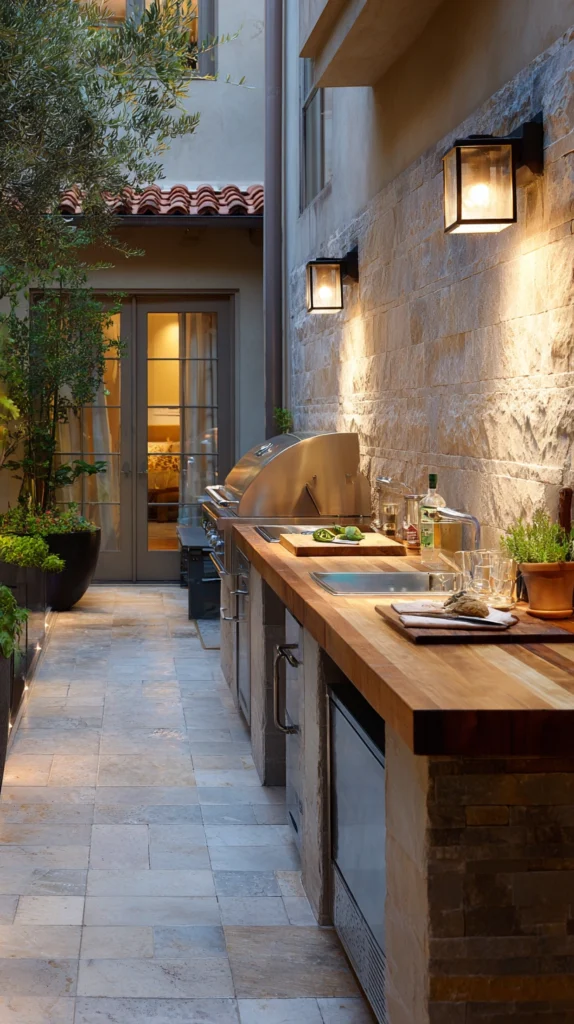
We used to do all our food prep inside, then carry everything out in stages. It worked, but it meant a lot of back-and-forth trips during what should have been a relaxed part of hosting.
- A small outdoor counter or cart near the grill keeps prep, seasoning, and plating all in one place
- Include a cutting surface that’s easy to wipe down and store when not in use
- A shallow sink, if plumbing allows, cuts down dramatically on trips inside for washing hands or tools
- Keep frequently used seasonings and tools stored in a weatherproof container right at the station
We added a simple rolling cart with a butcher block top next to our grill island, and it’s become the default spot for everything from seasoning meat to setting out finished plates.
It’s a low-cost addition compared to a full built-in kitchen, but it solved the exact same back-and-forth problem for a fraction of the price and effort.
The rolling aspect turned out to be more useful than we expected too. We can push it out of the way entirely when it’s not in use, which matters in a yard where the grilling zone occasionally needs to double as open space for other activities.
5. Smoker and Grill Combo Setup
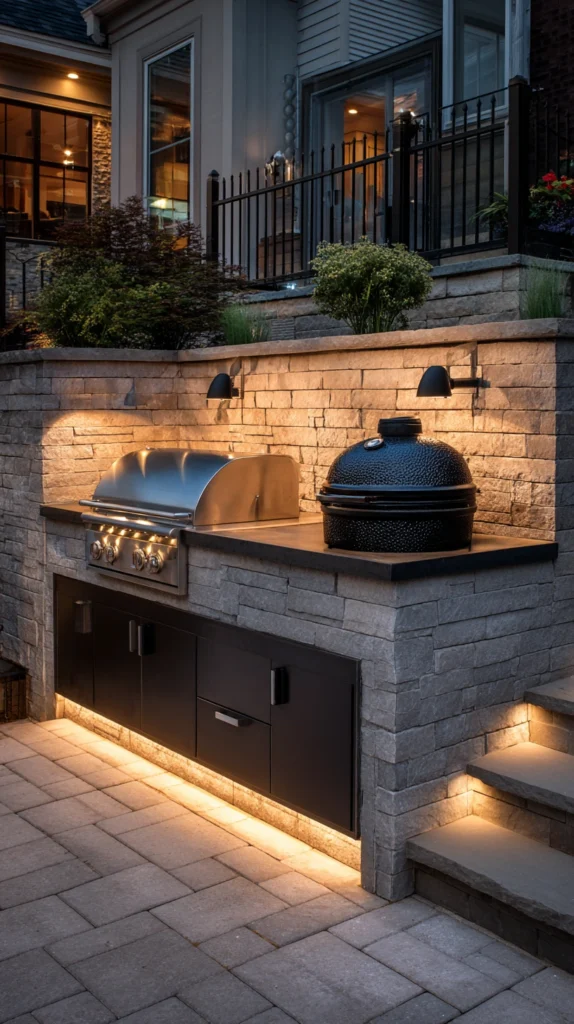
Once we got serious about backyard cooking, a single grill started to feel limiting. Adding a dedicated smoker alongside it opened up a completely different category of cooking we hadn’t been able to do before.
- Position the smoker a comfortable distance from the main grill to manage heat and smoke separately
- Covered storage nearby protects wood chips or pellets from moisture between uses
- A shared prep and serving area keeps both stations functioning as one cohesive setup rather than two separate zones
- Consider ventilation and wind direction when placing a smoker relative to seating areas
We positioned ours just off to the side of the grill island, close enough to feel like part of the same station but far enough that the smoke doesn’t drift directly into the seating area during long cook sessions.
It’s turned weekend cooking into a genuinely different experience, since low and slow smoked dishes have become their own occasion separate from a quick weeknight grill session.
We started with a smaller, more affordable smoker before eventually upgrading once we confirmed how often we’d actually use it. That trial period saved us from overspending on a larger unit before we knew smoking would become a regular part of our routine rather than a passing interest.
6. Bar Seating Facing the Grill
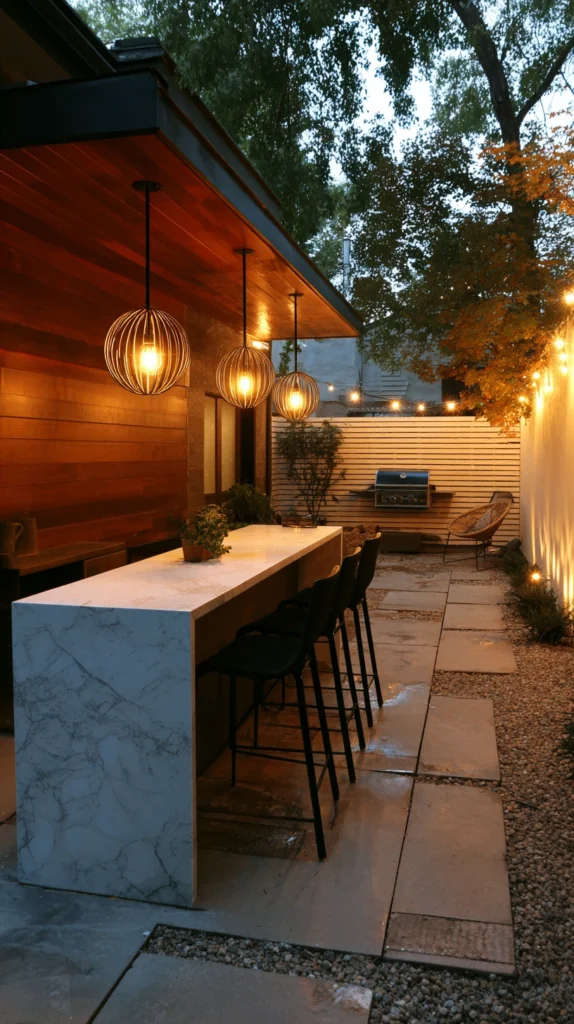
One of the best changes we made was adding a small bar-height counter with stools facing the grill station directly. It sounds minor, but it fundamentally changed how people gather during a cookout.
- Bar seating keeps guests engaged with whoever’s cooking instead of scattered elsewhere in the yard
- Weather-resistant stools hold up better than indoor furniture pulled outside temporarily
- Position seating close enough for conversation but outside the direct heat radius of the grill
- A shaded overhang above the seating keeps guests comfortable during longer cooking sessions
Before adding this, whoever was grilling ended up isolated while everyone else socialized somewhere else in the yard. Now the grill area is genuinely the social hub instead of a solitary cooking task.
It’s become the spot people naturally gravitate toward during any gathering, drinks in hand, chatting with whoever’s working the grill instead of leaving them out of the conversation entirely.
We went with simple, stackable stools specifically so we could easily add or remove seating depending on the size of the group. That flexibility has mattered more than I expected, since our gatherings range anywhere from just the two of us to a dozen or more people on a given weekend.
7. String Lights and Task Lighting Combined
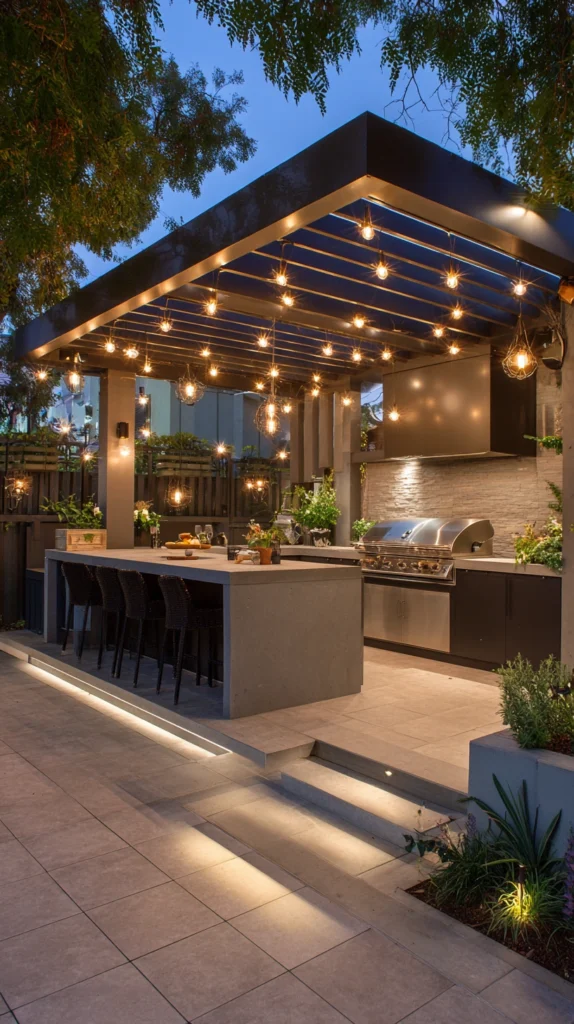
Grilling doesn’t stop when the sun goes down, but our original setup basically became unusable after dark without proper lighting. That was an easy fix once we actually addressed it directly.
- Task lighting directly over the grill matters more than ambient lighting for actual cooking safety
- String lights across the broader seating area add atmosphere without overwhelming brightness
- Motion-sensor lights near storage or prep areas add convenience for quick nighttime tasks
- Dimmable options let you shift from bright, functional cooking light to a softer evening mood afterward
We added a small weatherproof task light directly above the grill, plus string lights strung across the pergola over the seating area. The combination solved both the practical and the atmospheric sides of the problem at once.
Evening cookouts went from something we avoided to something we actively plan for now, mostly because the space finally feels usable and pleasant once the sun goes down.
We also learned to keep the task lighting a slightly warmer color temperature rather than a stark white, since it made the whole area feel more inviting instead of like a job site under a work light. Small color choices like that ended up mattering more to the overall mood than the actual brightness itself.
8. A Dedicated Beverage and Cooler Station
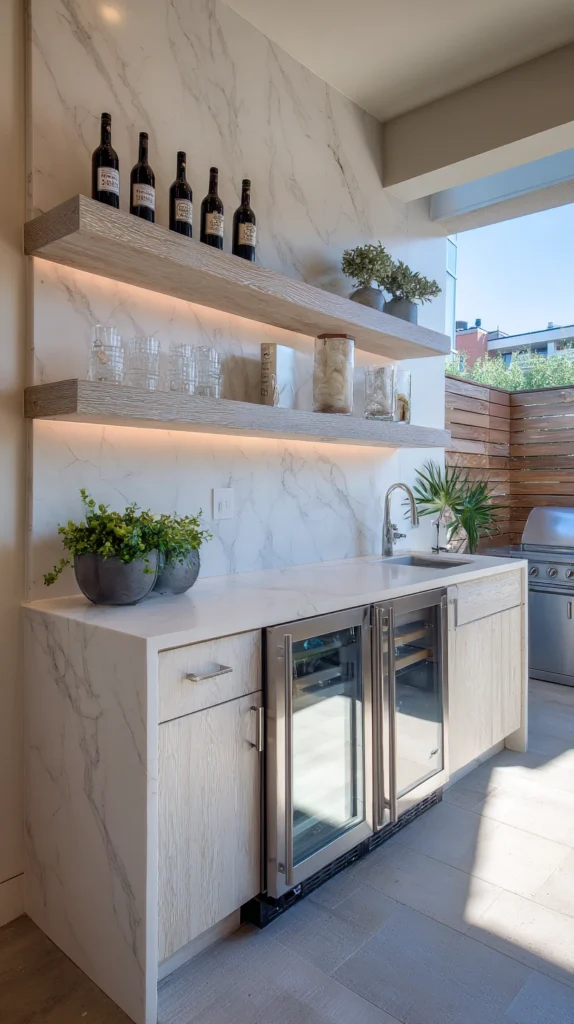
Guests constantly wandering back inside for drinks used to break up the flow of every single gathering we hosted. Adding a dedicated beverage spot near the grill area fixed that almost immediately.
- A built-in beverage fridge keeps drinks cold without anyone needing to manage a cooler full of melting ice
- Simple cooler carts work nearly as well if a built-in fridge isn’t in the budget
- Position the station close to seating but out of the main grill’s direct heat and smoke path
- Stock it with cups, openers, and napkins so guests can serve themselves without interrupting the host
We added a small outdoor-rated beverage fridge tucked under the counter near our grill island, and it’s genuinely eliminated the constant trips inside that used to interrupt every gathering.
Guests now serve themselves without needing to ask, which sounds like a small thing but has made hosting noticeably less exhausting for whoever’s actually running the cookout.
We stock it with a rotating mix of drinks depending on the season, and keeping it visible right next to the seating area seems to encourage guests to actually use it instead of defaulting to whatever they brought with them. It’s a small psychological nudge, but it’s worked consistently well for us.
9. Weatherproof Storage for Grilling Tools
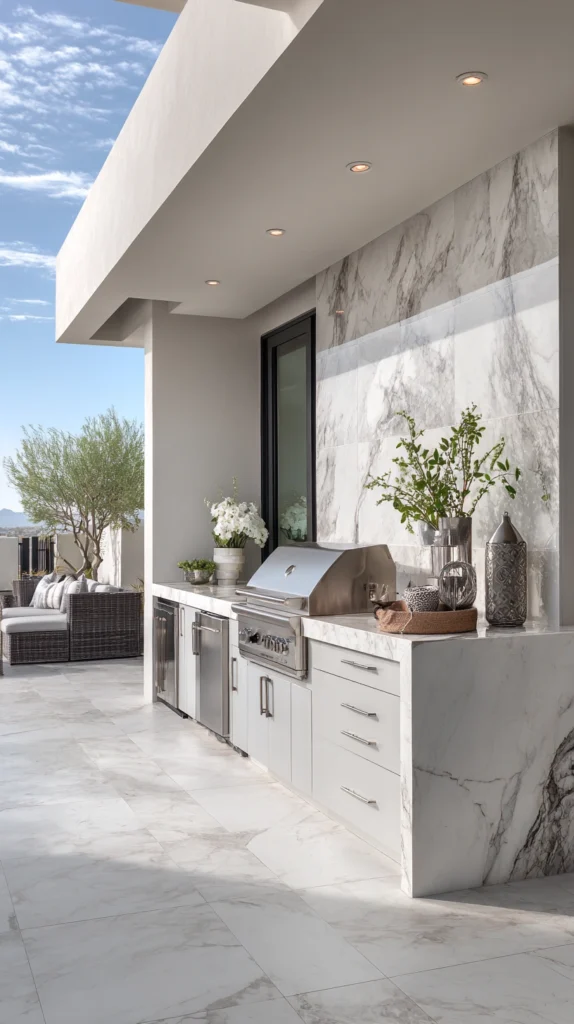
We used to keep our grilling tools inside, which meant an annoying pre-cookout scramble every single time to gather everything before starting. A dedicated storage solution outside solved that completely.
- A weatherproof cabinet or drawer built into the grill island keeps tools protected and accessible
- Magnetic strips or hooks on a nearby wall work well for frequently used utensils
- Store extra propane tanks or charcoal in a ventilated, covered space away from direct grill heat
- Label or organize storage so multiple people in the household know exactly where things belong
We built simple drawers into our grill island specifically for tongs, spatulas, thermometers, and extra skewers, and it’s removed an entire layer of pre-cookout hassle that used to exist before every single grilling session.
Nobody has to ask where anything is anymore, which has made even spontaneous weeknight grilling feel far more manageable than it used to.
We also added a small hook just inside the drawer specifically for oven mitts and towels, since those always seemed to go missing before we gave them a dedicated spot. It’s a tiny detail, but it’s the kind of thing that quietly removes friction from a routine you’re hopefully repeating several times a week.
10. A Pizza Oven as a Secondary Cooking Feature
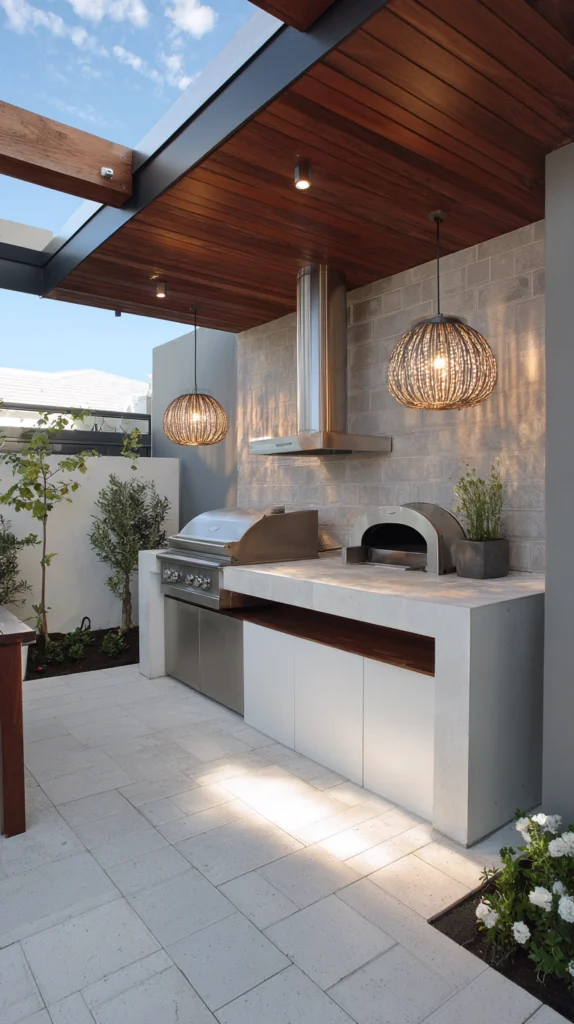
This one started as a slightly indulgent addition and turned into one of the most-used features in our entire backyard setup, genuinely rivaling the grill itself in terms of frequency of use.
- Wood-fired or gas pizza ovens both work well, with gas offering more convenience for regular use
- Position the oven close enough to the main grill area to function as part of the same overall station
- Built-in ovens integrate into a grill island, while freestanding models offer more placement flexibility
- Factor in a longer preheat time when planning cook schedules around a wood-fired option specifically
We added a compact gas pizza oven next to our grill island, and it’s become the centerpiece of nearly every gathering since, with guests taking turns building their own pizzas throughout the evening.
It’s turned a simple backyard cookout into something closer to an actual event, mostly because the interactive nature of everyone building their own pizza keeps people engaged in a way passive grilling alone never quite achieved.
Kids especially love this addition, since it gives them something active to do during a gathering instead of just waiting around for food to be ready. We’ve had entire evenings built almost entirely around a rotating pizza-making session instead of a traditional sit-down meal.
11. Fencing or Screening Around the BBQ Zone
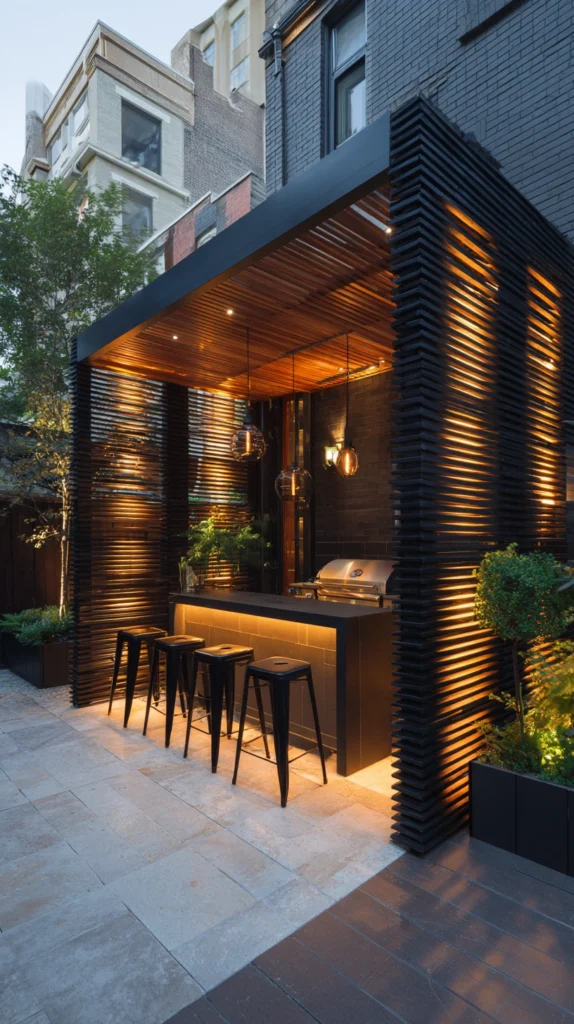
Our grill area originally sat fully exposed to both the neighbor’s yard and the wind coming across our open lot, which made both privacy and consistent cooking temperatures harder to manage.
- Simple lattice or slatted fencing adds privacy without fully enclosing the space
- Windbreaks near the grill help maintain more consistent cooking temperatures on breezy days
- Tall potted plants offer a softer, more natural screening option than solid fencing
- Leave enough open airflow around the grill itself to avoid trapping smoke against a solid barrier
We added a simple horizontal slat fence along one side of our grill area, which solved both the privacy issue and noticeably reduced how much the wind affected our grill’s temperature during cooking.
It also gave the whole zone a more defined, intentional feel, turning what used to be an exposed corner of the yard into something that reads as its own dedicated outdoor room.
We chose a horizontal slat style specifically because it let some airflow through while still blocking direct sightlines from the neighbor’s side. A fully solid fence would have solved the privacy issue too, but at the cost of trapping smoke and heat in a way that made the grilling area noticeably less comfortable during longer cook sessions.
12. A Covered Roof Structure for Year-Round Use
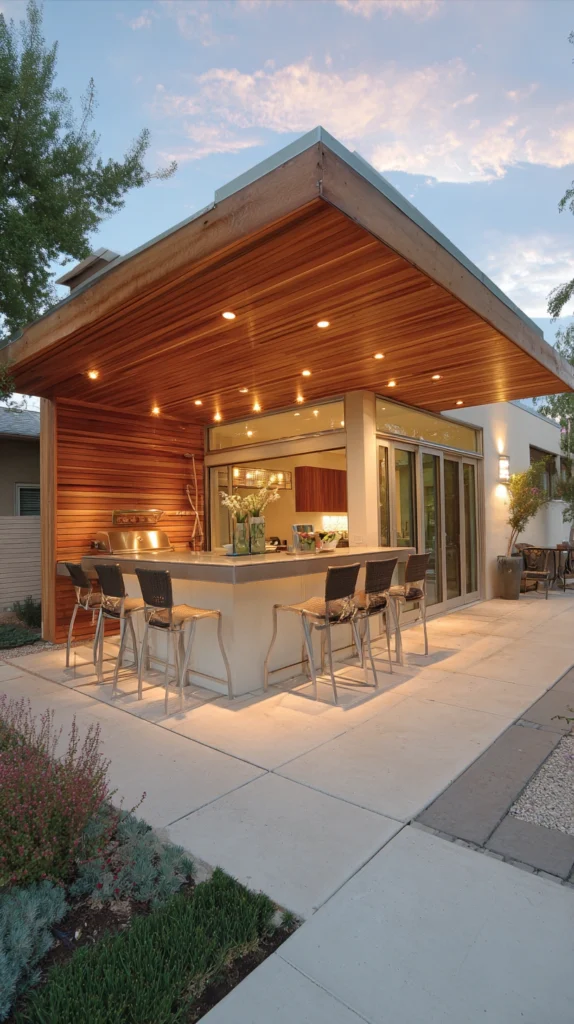
Shade sails and pergolas help, but a fully covered roof structure extended our BBQ season in a way nothing else on this list quite managed, letting us grill comfortably through light rain and even into cooler months.
- A solid roof, whether attached to the house or freestanding, protects both the grill and gathered guests from weather
- Proper ventilation remains critical even under a solid roof, to safely manage smoke and heat
- Combine a covered structure with partial walls or screening for additional protection from wind and rain
- Consider your local climate and how much of the year you’d realistically use a fully covered space
We eventually added a simple gable roof extending off the back of the house, covering the entire grill island and seating area beneath it. It’s turned grilling into a genuinely year-round activity for us instead of a purely summer one.
Even during a light rain, we can still gather under the roof and grill without anyone getting wet, which has meaningfully increased how often we actually use the space across the full calendar year.
It was also the most expensive single addition on this entire list, so I’d genuinely recommend it only once you’re confident the rest of your BBQ area layout is settled. Building a permanent roof over a space you’re still planning to rearrange later is a good way to end up boxed in by your own construction.
13. Personal Touches That Make It Feel Like Your Own
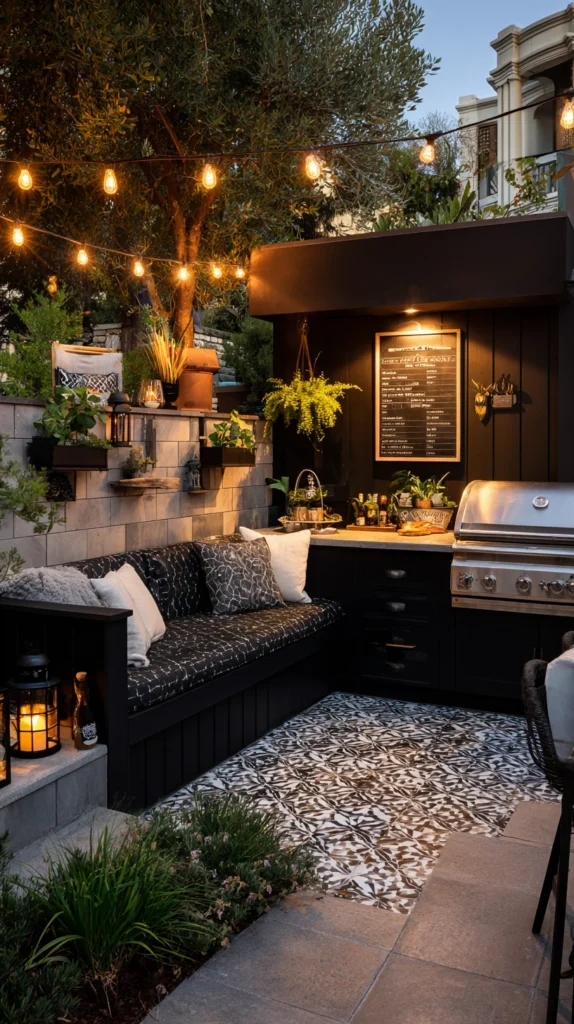
Beyond the functional upgrades, the small personal details ended up mattering more to how the space actually feels than I expected going into this whole project.
- A chalkboard or small sign listing the day’s menu adds a nice personal touch for gatherings
- Family recipes or favorite rubs displayed nearby give the space some genuine character
- Simple decor like string lights, planters, or a favorite piece of art personalize an otherwise functional area
- Comfortable, well-worn seating often gets more actual use than a pristine matching furniture set
We added a small chalkboard near our prep station where we jot down whatever’s on the menu for the day, and it’s become a genuinely fun little ritual that guests look forward to seeing updated each time.
None of these final touches cost much or required any real construction, but they’re the details that made our BBQ area feel like a genuine extension of our home rather than just a functional cooking station bolted onto the yard.
We’ve also started keeping a small binder near the prep station with our favorite rubs and marinade recipes written out, mostly so guests who ask can actually take a copy home with them. It’s turned into an unexpectedly nice way to share something personal from an otherwise purely functional part of the yard.
Looking back across three years of gradually building this space out, the biggest lesson has been that a great backyard BBQ area is built in layers. Function first, then comfort, then the personal details that actually make people want to linger.
If you’re just getting started, don’t feel like you need to tackle everything on this list at once. We certainly didn’t, and honestly, some of our favorite additions were the smallest, cheapest ones we almost skipped entirely.
A few closing thoughts on actually planning your own version of this, based on mistakes we made along the way that are easy enough to avoid once you know to watch for them.
- Start with the functional basics, like a defined grilling surface and adequate lighting, before investing in bigger features like a pizza oven or a full roof structure
- Measure your available space carefully before committing to a built-in island, since these are expensive and difficult to resize later
- Talk to a contractor early about gas lines and plumbing if you’re considering a built-in fridge, sink, or natural gas grill, since retrofitting these later costs significantly more
- Think through your actual climate and how many months a year you’d realistically use a fully covered structure before committing to that level of investment
- Prioritize whichever upgrade solves your current biggest frustration first, rather than whatever looks most impressive in photos
For us, that meant starting with a defined grilling surface and basic shade before anything else, since those were the two changes that made the space usable at all during our first full summer of hosting.
Three years in, we’re still adding small things here and there. A new set of tools, a slightly better light fixture, a rearranged storage drawer. The space keeps evolving, and honestly, that ongoing process has become part of what makes it feel genuinely ours rather than a finished project we’re done thinking about.
If there’s one thing I’d tell anyone starting from scratch, it’s this. Don’t wait until you can afford the full vision before starting. Build the version you can manage now, use it constantly, and let each year’s additions come from what you actually notice missing rather than what looks good in someone else’s finished backyard.