13 Stunning Aesthetic Backyard Ideas You’ll Love
My backyard used to be a rectangle of grass with a grill parked on the patio and not much else.
It was fine. It was also completely forgettable, the kind of space you walk through instead of sitting in.
Then I started designing it on purpose instead of just maintaining it. Same square footage, a completely different feeling every time I step outside.
Here are 13 backyard ideas that turn an ordinary yard into a space that actually looks and feels intentional.
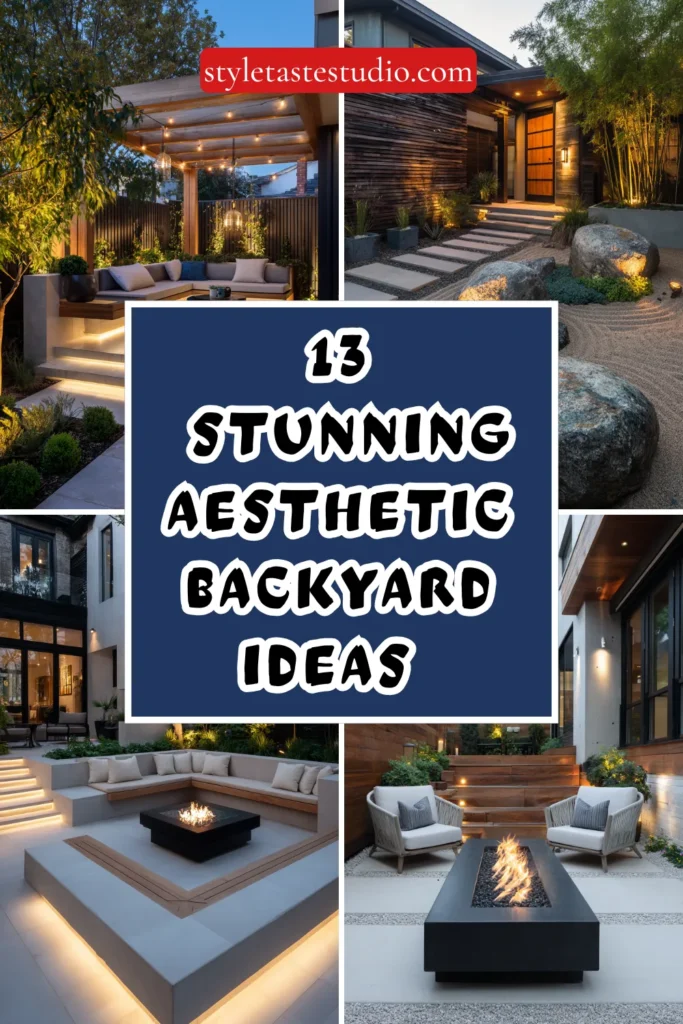
Every one of these can be built in stages, so you don’t need to overhaul the whole yard at once. Pick one feature that solves an actual gap in how you currently use the space, get it right, then move on to the next.
I’ve included a mix of quick weekend projects and bigger structural builds below, so whether you’ve got an afternoon or a full season to invest, there’s something here that fits.
1. Sunken Conversation Pit
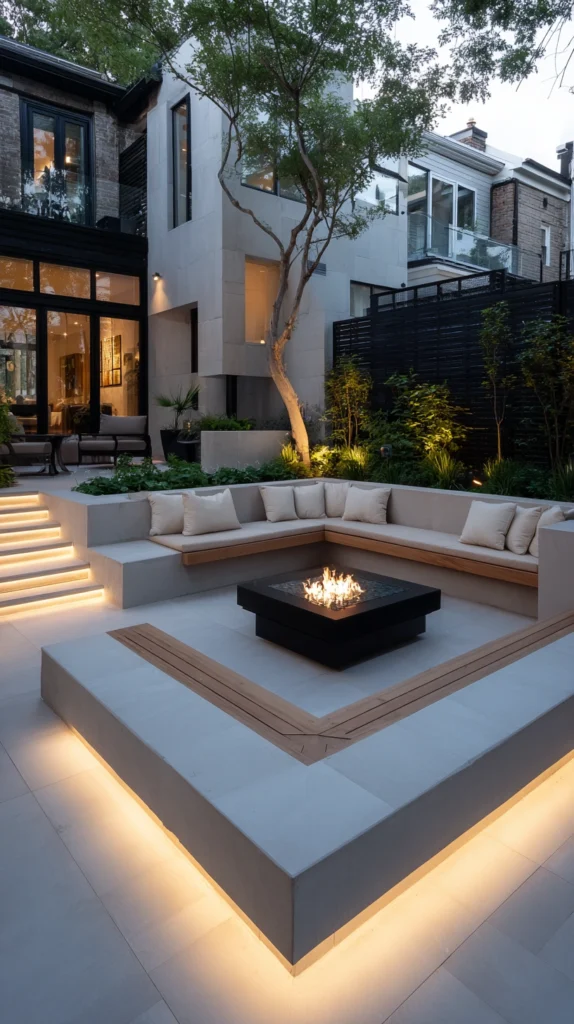
A partially recessed seating area, dug a couple feet below grade, wrapped in built-in bench seating.
A sunken pit does something flat patio furniture never can, it creates an actual sense of enclosure without a single wall. Stepping down into the space feels like entering a distinct room, even though there’s nothing overhead.
Mine is dug about 20 inches below the surrounding patio, framed in concrete block and finished with cedar bench seating around three sides, with a small fire table anchoring the center.
Budget tip: Skip poured concrete walls and use retaining wall block instead, which stacks dry without mortar and cuts both material and labor cost significantly.
A few things worth planning for:
- Grade the pit floor slightly toward a drain or gravel base so it doesn’t collect standing water
- Build seating at a comfortable depth, around 16 to 18 inches, so it doubles as extra step access
- Add a rope or low-voltage lighting along the seat edge so the drop-off is visible after dark
The depth of the pit does mean drainage has to be planned carefully from the start, but once it’s built, it becomes the single most-used spot in the yard, hands down.
I’d also suggest oversizing the pit slightly beyond what feels necessary. I built mine to fit six comfortably, and it fills to capacity almost every time we host, whereas a tighter build would have meant constantly dragging in extra chairs.
2. Layered Perennial Border
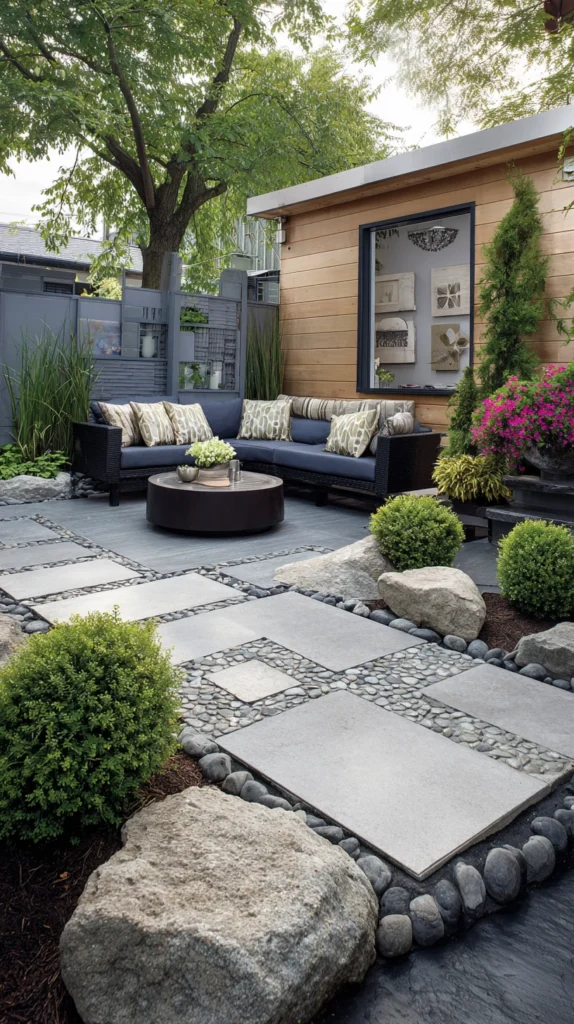
A deep planting bed along a fence or property line, layered by height with perennials chosen for a rolling bloom sequence.
This is the design that makes a yard look professionally landscaped without hiring anyone. Instead of one flat row of the same plant, you’re building height, texture, and color that changes as the season moves.
My border runs the full length of the back fence, about 40 feet, with tall plants like Russian sage and ornamental grasses at the back, mid-height coneflowers and salvia in the middle, and low creeping phlox spilling over the front edge.
Style tip: Plant in odd-numbered clusters of three or five rather than single specimens scattered evenly, since grouped plantings read as an intentional drift instead of a random assortment.
A few planning notes that made a real difference for me:
- Stagger bloom times so something is flowering from spring through fall instead of one big burst in June
- Repeat two or three key plants throughout the border to create visual rhythm
- Leave gaps for spring bulbs, which fill in early color before perennials wake up
This border does take a season or two to fill in completely, but by year three it looks like it’s always been there.
Mature plant spacing is the mistake I made the first time around. Everything looked sparse and underplanted in year one, so I crowded new plants into the gaps, only to spend year three ripping half of them back out once the originals filled in as intended.
3. Outdoor Dining Pergola
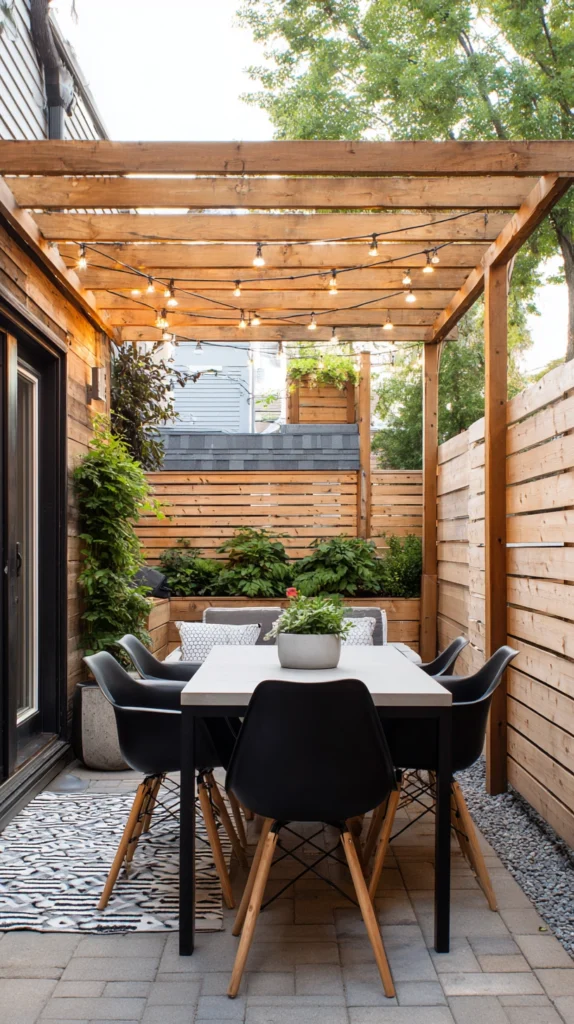
A wooden or metal pergola structure built directly over a dining table, softened with climbing vines or string lights.
A dining table sitting alone on an open patio always feels a little exposed. Adding a pergola overhead instantly gives the space a sense of scale and shelter, even without solid walls or a roof.
Mine is a simple cedar post-and-beam structure, 10×12 feet, built over a table that seats eight, with climbing wisteria trained up two of the posts and market lights strung across the top beams.
Budget tip: Pre-cut lumber packages sold specifically for pergola kits are often cheaper than sourcing and cutting individual boards yourself, especially if you don’t already own a miter saw.
A few build details worth getting right:
- Set posts in concrete footings below the frost line for long-term stability
- Space rafters close enough, about 12 to 16 inches apart, to cast meaningful shade
- Choose a climbing vine suited to your climate, since aggressive growers like wisteria need regular pruning to stay in bounds
Once the vines fill in, the dappled shade underneath makes the whole dining area usable for hours longer during peak summer heat than an open table ever was.
Orientation matters more than most people expect before building. I positioned mine with the long axis running east to west, which blocks the harshest midday sun while still letting in soft morning and evening light across the table.
4. Reflective Water Feature
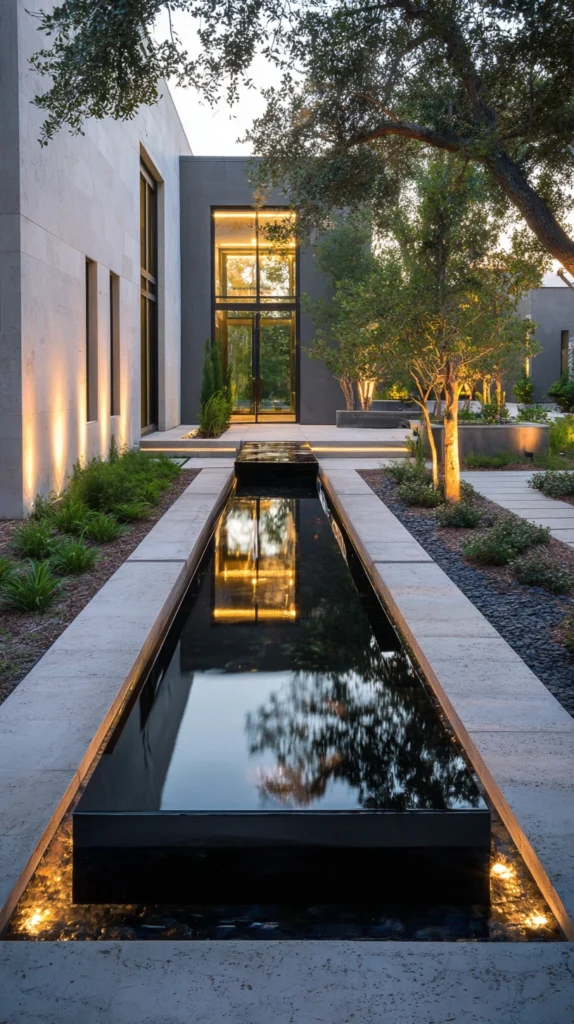
A still, shallow water feature, like a raised reflecting pool or a simple basin, designed to mirror the sky and surrounding plants.
Moving water gets most of the attention in backyard design, but still water does something completely different. A flat, reflective surface doubles your garden visually and adds a genuinely calming quality that a bubbling fountain doesn’t.
I built mine as a simple raised steel basin, about 4 feet across and 12 inches deep, set at the end of a sightline from the patio so it catches the reflection of a nearby Japanese maple.
Style tip: Keep the water perfectly still, since even a small recirculating pump breaks the mirror effect that makes this feature work in the first place.
A few practical considerations:
- Choose a dark-lined or dark-painted basin interior, since dark surfaces reflect far better than light ones
- Position it where it catches something worth reflecting, like a tree, sculpture, or the sky itself
- Add a small aeration tablet or a few fish if mosquitoes become an issue in standing water
Because there’s no pump running constantly, this is also one of the lowest-maintenance water features you can add to a yard.
Falling leaves and debris are the real upkeep issue with still water, not algae or mosquitoes as most people assume. A simple mesh cover kept nearby lets me skim the basin in under a minute whenever autumn leaves start dropping into it.
5. Sculptural Gravel Garden
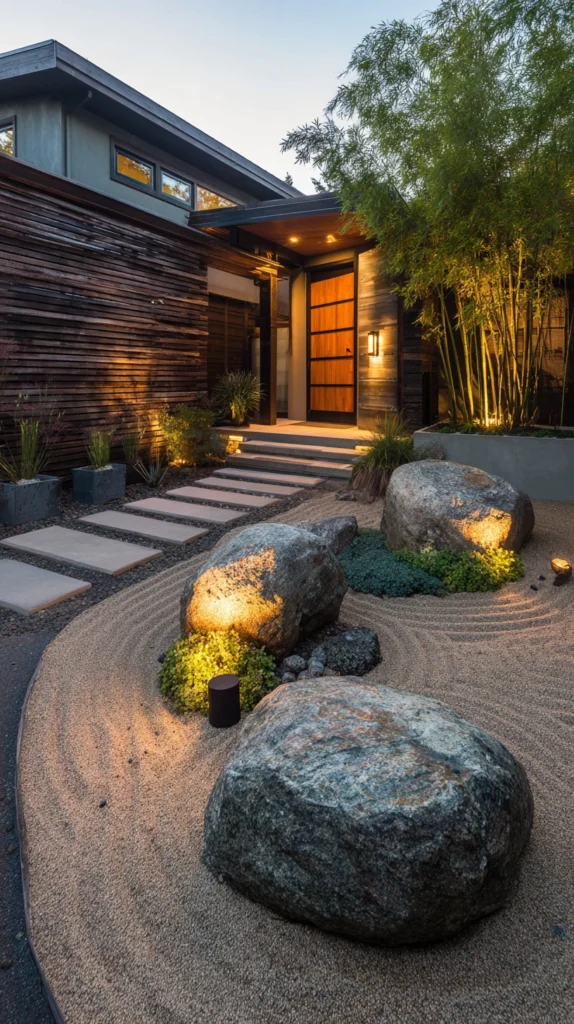
A dry, minimalist bed of raked gravel accented with a few carefully placed boulders, sculptural plants, or driftwood.
This style borrows from Japanese dry gardens, stripping everything down to essential shapes and textures instead of dense planting. It works especially well in hot, dry climates where a lush lawn is a losing battle anyway.
My gravel garden replaced a struggling patch of lawn near the side fence, using large granite boulders, a single sculptural agave, and raked pea gravel in a simple wave pattern radiating from the largest stone.
Budget tip: Source boulders directly from a stone yard rather than a garden center, since you’ll pay a fraction of the price for the same material minus the retail markup.
A few things that make this design succeed:
- Use an odd number of boulders, and vary their size significantly rather than choosing matching stones
- Rake the gravel occasionally to keep the pattern crisp, since foot traffic and wind will disturb it over time
- Choose drought-tolerant, architectural plants like agave or yucca instead of soft, leafy varieties that clash with the minimalist feel
This is genuinely one of the lowest-water, lowest-maintenance styles on this entire list once it’s established.
Placement of the largest boulder essentially sets the whole composition, so I recommend positioning it first and building everything else around it, rather than placing smaller elements first and trying to fit the boulder in afterward.
6. Multi-Level Deck with Distinct Zones
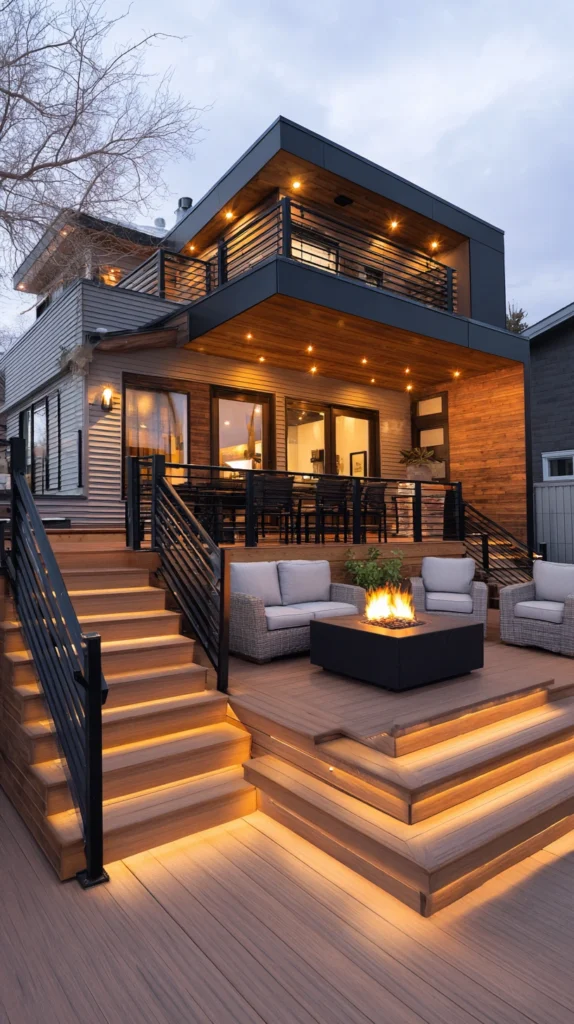
A tiered deck structure that steps down across a slope, with each level dedicated to a different function, like dining, lounging, or a hot tub.
If your yard slopes at all, a single flat deck usually means expensive excavation or an awkward retaining wall. A multi-level deck works with the slope instead, and it naturally divides your outdoor space into distinct rooms without any interior walls.
Mine steps down in three tiers, an upper level off the kitchen for dining, a middle level with lounge seating around a fire bowl, and a lower level that opens onto the lawn.
Style tip: Use a consistent railing and decking material across all levels, since visual continuity is what makes tiered levels read as one cohesive design instead of three separate afterthoughts.
A few structural notes:
- Plan stair transitions early, since awkward step placement between levels is the most common tiered-deck mistake
- Keep each level large enough to actually hold furniture comfortably, rather than making every tier a narrow pass-through
- Stagger railings or use partial half-walls between levels to preserve some privacy without fully separating the zones
This is a bigger structural project than most on this list, but it solves a sloped yard problem that flat paving simply can’t.
Permits are worth checking before you start framing anything. My local code required an inspection at the footing stage before decking could go down, and building that timeline in early saved me from a scheduling headache later in the project.
7. Cutting Garden Corner
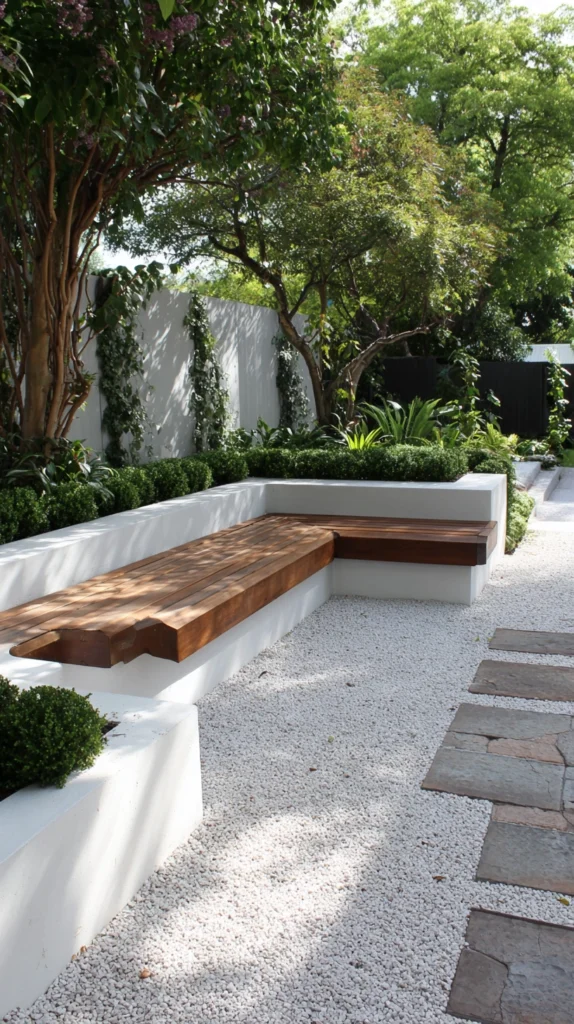
A dedicated bed grown specifically for cut flowers, planted in tidy rows rather than a naturalistic drift.
Unlike an ornamental border meant to be admired in place, a cutting garden is meant to be harvested constantly, which actually keeps it blooming harder and longer through the season.
I dedicated a 10×10 corner near the vegetable beds to this, growing zinnias, dahlias, cosmos, and snapdragons in simple straight rows, spaced for easy access rather than visual drift.
Budget tip: Grow from seed instead of buying starts, since a single packet of zinnia or cosmos seed can fill an entire row for less than the cost of one nursery six-pack.
A few things that keep a cutting garden productive:
- Deadhead and cut constantly, since most cutting flowers bloom harder the more you harvest
- Stagger a second seed sowing about a month after the first to extend the bloom window
- Choose long-stemmed varieties bred specifically for cutting rather than compact bedding types
This corner has become the single most photographed part of my yard, mostly because it changes completely every couple of weeks as different flowers peak.
Support netting made a bigger difference than I expected for taller varieties like dahlias and zinnias. Stretching a simple grid of garden netting a foot above the soil early in the season keeps stems upright without a single stake once plants reach full height.
8. Outdoor Kitchen with Bar Seating
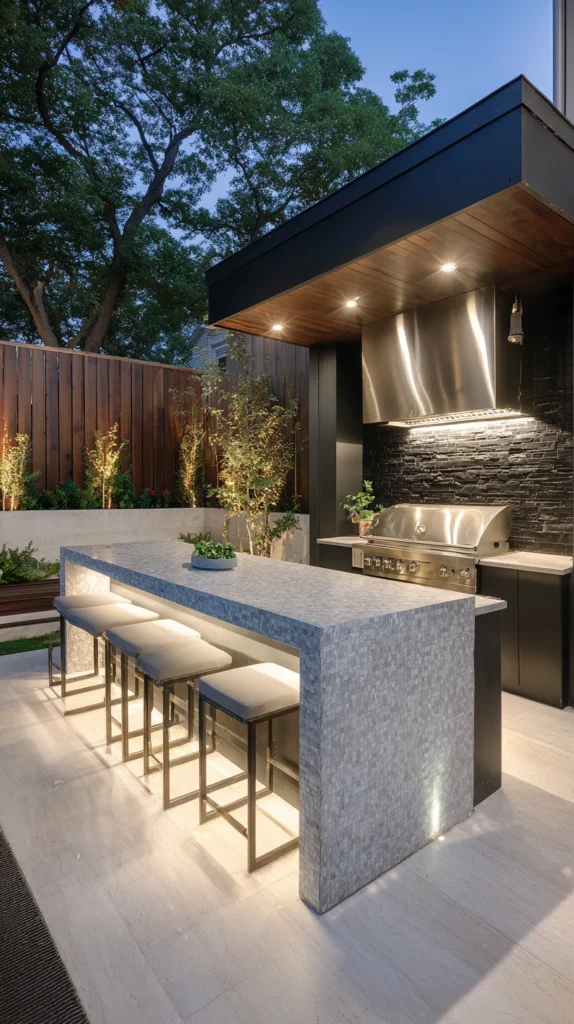
A built-in cooking and prep area, often anchored by a grill, counter space, and a run of bar-height seating facing the cook.
An outdoor kitchen turns cooking from a solo task at a standalone grill into a genuine social event, since guests can sit right at the counter instead of hovering nearby.
Mine is a simple L-shaped layout built from concrete block faced in stone veneer, with a built-in grill, a small prep sink, and a bar counter with three stools facing into the yard.
Budget tip: A modular outdoor kitchen frame kit costs significantly less than custom masonry work and still accepts the same stone veneer finish for a comparable final look.
A few planning details that matter:
- Run gas and water lines before any structural work begins, since retrofitting utilities afterward is far more expensive
- Orient the cooking side so smoke blows away from the seating side, not into it
- Choose a countertop material rated for outdoor use, since indoor stone can crack or stain quickly outside
Even a modest outdoor kitchen dramatically changes how often you actually use the backyard, since cooking and socializing happen in the same spot instead of splitting between the kitchen and the patio.
Storage ended up mattering more than I anticipated when planning the layout. Built-in cabinets for grilling tools, plates, and linens meant far fewer trips back into the house mid-meal, which is really the whole point of having an outdoor kitchen in the first place.
9. Moon Gate or Arbor Entry
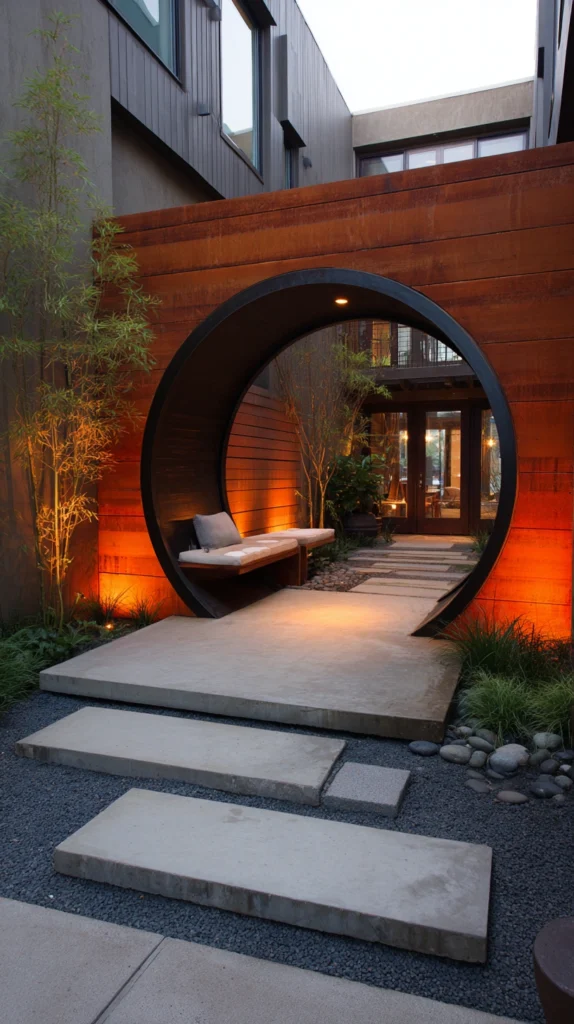
A dramatic arched entry, either a full circular moon gate or a simpler wooden arbor, marking the transition into a garden space.
A defined entry point does something subtle but powerful, it signals that you’re moving into a different part of the yard, even if there’s no fence or wall involved at all.
I built a simple wooden arbor at the entrance to my perennial border, about 7 feet tall, trained with climbing roses on both sides so it fills in as a genuine archway by midsummer.
Style tip: Position the arbor so it frames a specific view beyond it, like a focal tree or a piece of garden art, since an entry that leads to nothing specific loses most of its impact.
A few build considerations:
- Anchor posts deeply, since a climbing-vine-covered arbor catches wind and needs real stability
- Choose a vine that blooms during the season you use the yard most, rather than one that peaks in early spring before anyone’s outside
- Keep the opening wide enough, at least 4 feet, for comfortable two-person passage
Even a modest arbor does more to elevate a backyard’s overall design than almost any single planting bed, simply because it creates a moment of arrival.
I underestimated how heavy a mature climbing rose gets once it’s fully established. Reinforcing the crossbeam with an extra brace partway through the first season prevented any sagging once the vine filled in completely by midsummer.
10. Fire Feature Lounge
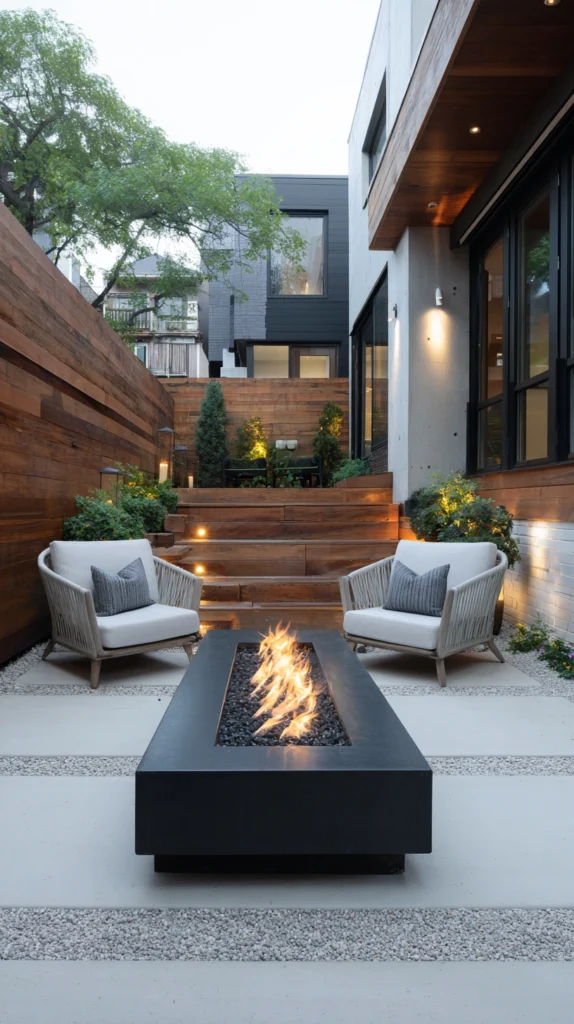
A dedicated seating area built specifically around a fire pit or fire table, with furniture arranged for conversation rather than facing outward.
A fire feature works best when the whole lounge area is designed around it from the start, rather than dropping a fire pit into an existing furniture arrangement as an afterthought.
Mine centers on a gas fire table surrounded by four low-slung outdoor sofas arranged in a tight square, set on a bluestone patio pad separate from the main dining area.
Budget tip: A propane fire table with a refillable tank costs less upfront and requires far less installation than a plumbed natural gas line, with only a minor tradeoff in tank refills.
A few things worth knowing before building this zone:
- Keep seating close, generally within 7 to 9 feet of the fire, since farther spacing loses the warmth and intimacy that makes the feature work
- Choose furniture with removable or weather-resistant cushions, since fire lounges often get used into cooler months when moisture is more of a factor
- Check local code on fire pit placement relative to structures and property lines before building
This zone tends to become the default gathering spot the moment temperatures drop, extending the usable outdoor season well past when the rest of the yard gets abandoned for the year.
A separate patio pad for the fire lounge, rather than tying it directly into the main dining patio, ended up being one of the better decisions in the whole layout. It lets both zones host separate groups at the same time without one conversation drowning out the other.
11. Vertical Living Wall
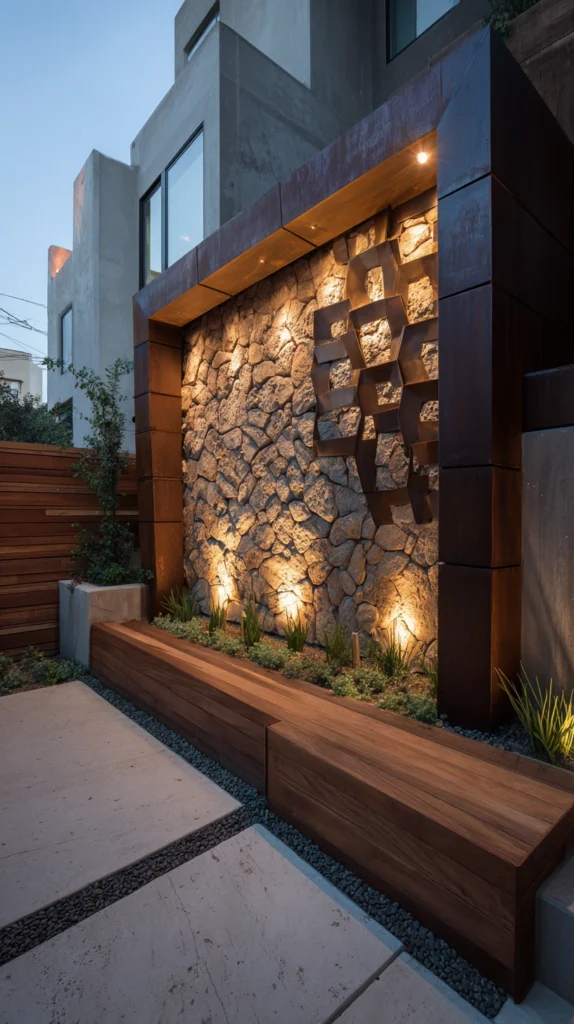
A structured wall of plants, either built into an existing fence or freestanding, using modular planting panels or simple pocket planters.
If floor space is limited, a living wall lets you add serious greenery and visual drama without giving up any usable ground area at all. It also turns a plain fence into the actual focal point of the yard.
I built mine on an 8-foot section of backyard fence using modular felt pocket panels, filled with a mix of trailing ferns, heuchera, and a few herbs within easy reach of the kitchen door.
Style tip: Mix leaf textures and colors deliberately, since a living wall planted with only one type of foliage reads as flat, while contrasting textures create the depth that makes this feature genuinely striking.
A few maintenance realities to plan for:
- Install a simple drip irrigation line, since hand-watering a vertical wall evenly is nearly impossible to keep up with
- Choose plants with similar light and water needs, since mismatched requirements within one wall system set some sections up for failure
- Expect to swap out a few underperforming plants each season as the wall matures
This is a higher-maintenance feature than most on this list, but nothing else adds this much visual density to a small footprint.
North or heavily shaded walls are a tougher fit for this idea than most people expect. My first attempt on a shaded fence struggled until I swapped in ferns and shade-tolerant heuchera instead of the sun-loving varieties I’d originally chosen.
12. Hammock and Shade Grove
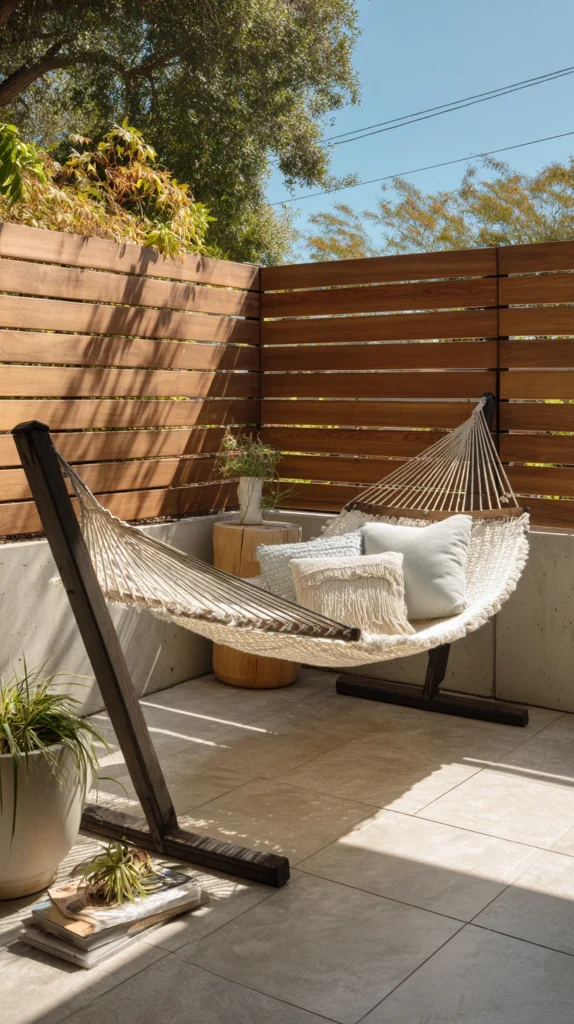
A cluster of small trees or a simple shade structure, anchored with a hammock or hanging chair as the centerpiece of a quiet corner.
Not every part of a backyard needs to be a gathering space. This idea is about carving out one deliberately quiet, shaded corner meant for a single person to disappear into for twenty minutes.
I planted a small grove of three multi-stem serviceberry trees in an underused back corner, with a hammock strung between two of them and a simple stone path leading in from the main lawn.
Budget tip: If you don’t have mature trees to anchor a hammock, a freestanding hammock stand costs far less than waiting years for trees to grow large enough to support one.
A few things worth considering:
- Choose tree spacing based on your actual hammock length plus a few feet of slack, not just aesthetic spacing
- Underplant the grove with shade-tolerant groundcover instead of struggling turf grass
- Keep the path in leading to this corner narrow and informal, since a grand entrance undercuts the intentionally quiet feel
This has become the one spot in my yard reserved purely for doing nothing, and somehow that makes it feel just as intentional as any of the more elaborate features here.
Young trees need real protection during the first couple of seasons if a hammock hangs between them. I used soft tree-friendly straps rather than rope, and I kept weight off the trunks entirely until they’d had two full growing seasons to establish stronger root systems.
13. Sculptural Lighting Design
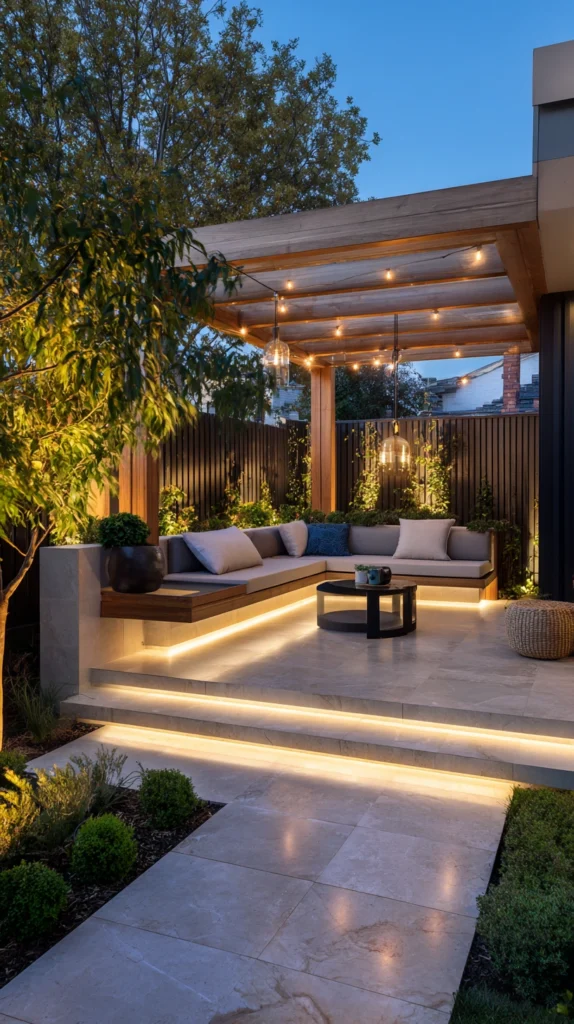
A layered outdoor lighting plan using uplights, string lights, and low path lighting together, rather than a single floodlight washing over the whole yard.
Most backyards get lighting as an afterthought, one bright light near the door and nothing else. Treating lighting as its own design layer completely changes how the space feels after sunset, which for a lot of people is when the yard actually gets used most.
My setup layers three types of fixtures, low-voltage path lights along the main walkway, uplights aimed into the canopy of two mature trees, and string lights strung across the dining pergola overhead.
Style tip: Light objects and layers, not open space, since aiming fixtures at a tree trunk, a piece of art, or a textured wall creates far more atmosphere than a flat wash of light across the lawn.
A few practical notes:
- Use warm-toned bulbs, generally around 2700K, since cooler white light tends to feel clinical outdoors
- Stagger fixture heights and types rather than relying on a single uniform light source throughout
- Put string lights and uplights on separate switches or smart plugs so you can adjust the mood without an all-or-nothing setup
Good lighting is often the single cheapest upgrade on this entire list relative to how much it changes the way a backyard feels once the sun goes down.
I’d also recommend testing fixture placement before permanently mounting anything. Running extension cords to a few tentative spots for a week let me see exactly how the shadows and highlights fell each night, which saved me from drilling holes in the wrong places.
Quick-Start Shopping List
- Low-voltage path lighting kit and a few uplight fixtures for trees or focal points
- A propane or gas fire table for an instant lounge anchor
- Perennial plants in odd-numbered groupings for a layered border
- A pre-cut cedar pergola kit for shaded dining
- Modular felt pocket panels for a starter living wall
Budget-Friendly and Rental-Friendly Version
If you’re renting or working with a smaller budget, start with layered lighting, a cluster of potted perennials arranged like a mini border, and a freestanding hammock stand. None of these require permanent structures or digging into ground you don’t own, and all three can move with you.
Success Indicators
You’ll know a design is working when you find yourself gravitating outside without a specific reason to, when guests naturally cluster in the space you designed for them instead of standing around awkwardly, and when the yard still looks intentional in every season rather than only at peak bloom.
A good aesthetic backyard also holds up after dark. If the space goes flat and unused the moment the sun sets, the design is missing a layer, usually lighting, that daytime photos don’t reveal.
- People linger in the space instead of passing through it
- The yard has a clear focal point from every major seating area
- At least one feature still looks good through a season with no active blooms
- The space feels different and specific after dark, not just dimly lit
Remember: the best aesthetic backyard isn’t the one with the most features crammed in, it’s the one where each addition earns its place by solving a real problem or creating a moment you’ll actually use, so build slowly, in layers, toward the yard you’ll genuinely want to spend time in rather than the one that just photographs well on day one.
Whichever features you start with, give each one a full season before deciding whether it earned its spot, since plants fill in, wood weathers, and even furniture arrangements tend to settle into their best version only after you’ve actually lived with them for a while.