14 Arizona Backyard Ideas for a Desert Oasis
My backyard was gravel. Just gravel, a block wall, and a hose bib nobody used. Standard builder-grade desert lot, the kind every third house on the street had.
I kept trying to force a green lawn into it. Reseeded twice. Watch the water bill climb and the grass die anyway by July.
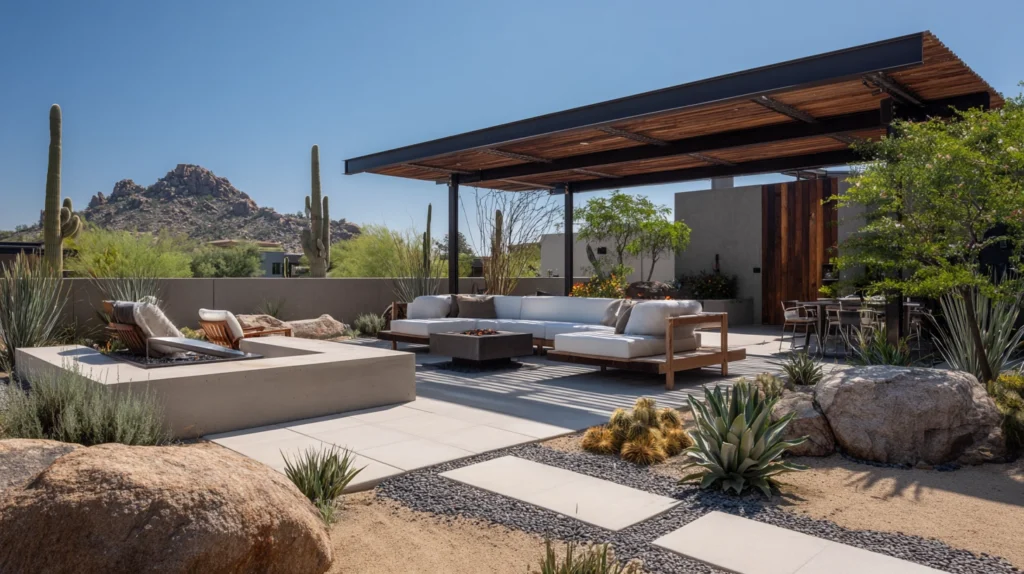
Then a landscaper walked the yard and said something that changed everything: stop fighting the desert, start designing with it.
We pulled the dying grass, brought in a boulder cluster, added a shade structure, and planted things that actually wanted to live here. The water bill dropped by half. The yard finally looked like it belonged in Arizona instead of apologizing for it.
Now the backyard is where every evening happens. Same lot, same sun, completely different relationship with the space.
Here are 14 ideas that turn a standard Arizona backyard into a genuine desert oasis, without fighting the climate to get there.
Why Most Arizona Backyards Fall Flat
The common mistakes:
The forced-lawn approach:
- Grass planted like the yard is in a different climate entirely
- Constant watering just to keep it from dying
- Brown patches by mid-summer regardless of effort
- Fighting the desert instead of designing with it
The bare gravel default:
- Builder-grade gravel spread flat with nothing else added
- No shade, no layers, no reason to spend time outside
- Technically low-maintenance but also lifeless
- Gravel alone is a blank canvas, not a finished yard
The wrong plant choices:
- Plants selected for looks alone, without checking water needs
- Non-native species requiring constant irrigation to survive
- A yard that looks lush for one season then struggles the rest of the year
- No structure once the initial planting fades
What a successful desert oasis backyard does:
Works with the climate instead of against it:
- Uses shade, water features, and native plants strategically
- Creates cool, usable zones during peak heat
- Layers texture and height with drought-tolerant plants
- Looks intentional and complete in every season, not just spring
My revelation: A desert yard does not need grass or dense greenery to feel like an oasis. Shade, water sound, and the right plant layering do more for comfort and beauty than lawn ever did.
1. The Shade Sail Lounge Area
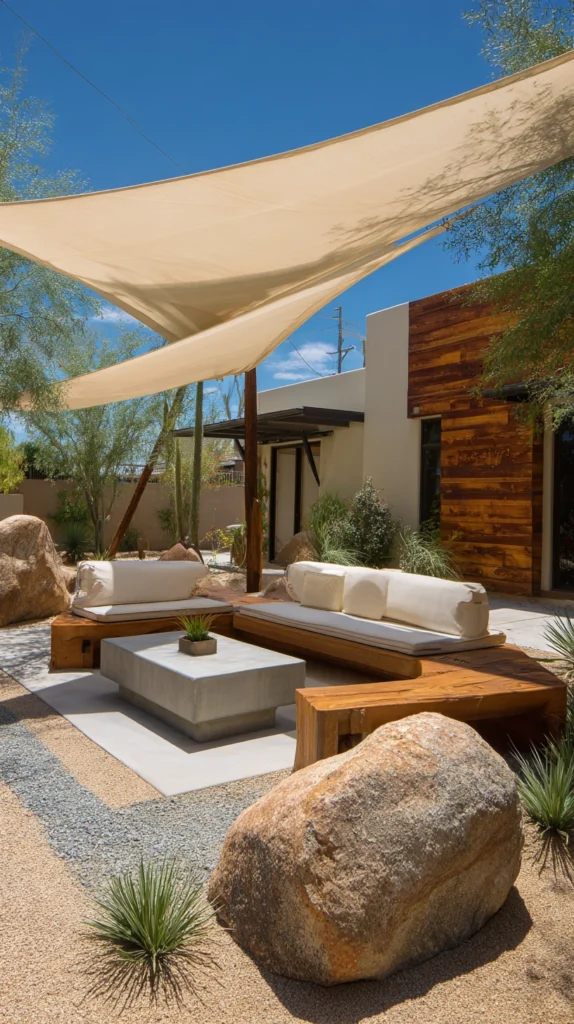
Large fabric shade sails stretched over a seating zone — the single most effective way to make a desert backyard usable during daylight hours.
My unusable afternoon backyard:
What I had:
- Full sun exposure across the entire patio from 10am to 6pm
- Furniture too hot to sit on by midmorning
- A backyard that only became usable after sunset
The shade sail discovery:
Why this solution works so well:
- Blocks up to 90% of direct UV exposure under the sail
- Drops the temperature in the shaded zone noticeably compared to open sun
- Installs without a permanent structure or major construction
- Available in colors that add design interest, not just function
Installation basics:
Getting it right:
- Anchor points need to be rated for wind load, typically posts or existing structure
- Angle the sail to block the harshest afternoon sun specifically
- Tension the fabric tightly to prevent sagging and pooling water
- Multiple overlapping sails create deeper, more consistent shade
Where this works best:
Ideal zones:
- Over a dining or lounge seating area
- Above a pool deck for sun relief between swims
- Covering a portion of turf or gravel play area for kids
Cost:
- Shade sail (12×12 to 16×16 feet): $80-250
- Mounting hardware and posts (if needed): $100-300
- Professional installation (optional): $200-500
- Total: $180-1,050
My shade sail lounge: A single large sail over the dining table made the space usable by 3pm instead of only after sunset, and it remains the single highest-impact addition to the entire yard.
Shade Sail Tips
Choose a UV-rated, breathable fabric:
Material matters:
- Solid tarps trap heat and can billow dangerously in wind
- Knitted shade cloth allows airflow while still blocking UV rays
- Look for a UV block rating of at least 90% for genuine relief
- Breathable fabric also dries faster after monsoon rain
Plan the angle around the sun’s actual path:
Positioning detail:
- Arizona sun angle shifts significantly between summer and winter
- Angle the sail to block the harshest 2pm-5pm summer sun specifically
- A sail angled only for morning shade leaves the worst heat uncovered
- Walk the yard at different times of day before finalizing anchor points
2. The Boulder and Gravel Xeriscape Bed
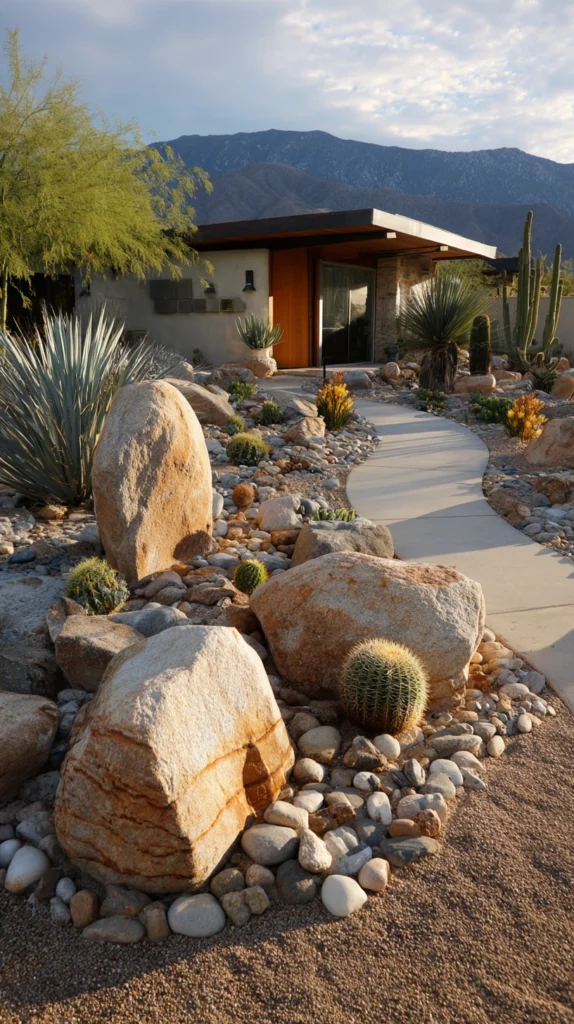
Large natural boulders arranged among decomposed granite and drought-tolerant plants — the foundational desert landscaping look.
My flat, empty gravel yard:
What was missing:
- Gravel spread evenly with nothing rising above ground level
- No sense of scale or natural landscape feeling
- A yard that looked installed rather than grown
The boulder xeriscape solution:
Why boulders transform a flat yard:
- Adds genuine vertical and dimensional interest without plants alone
- Mimics the natural desert landscape found throughout Arizona
- Provides permanent structure that requires zero maintenance
- Creates natural focal points for plant groupings around them
Building the bed:
Layout approach:
- Cluster boulders in odd-numbered groupings, never single scattered rocks
- Vary boulder size significantly within each cluster for natural scale
- Bury the bottom third of each boulder for a settled, natural look
- Layer decomposed granite around the base in a color complementing the boulders
Plant pairing:
What grows well among boulders:
- Golden barrel cactus clustered near the boulder base
- Red yucca for vertical spikes of color
- Trailing rosemary softening the boulder edges
- Agave for dramatic, sculptural contrast
Where this works best:
Ideal zones:
- Front yard entry beds
- Side yard transition zones
- Anchoring corners of a larger backyard layout
Cost:
- Boulders (delivered, per ton): $100-300
- Decomposed granite (per ton): $40-80
- Plants for the bed: $100-300
- Total: $240-680
My boulder xeriscape bed: A cluster of five boulders with golden barrel cacti and red yucca planted around the base gave the side yard genuine landscape presence for the first time, and it has required zero maintenance since installation.
Boulder Xeriscape Tips
Source boulders locally to match the region’s natural stone:
Authenticity detail:
- Imported or mismatched stone can look out of place against native surroundings
- Local landscape supply yards typically carry regionally appropriate boulder types
- Matching the boulder color to the natural desert palette nearby looks most cohesive
- This detail is often the difference between a designed bed and an obviously purchased one
Have boulders placed with equipment, not by hand:
Practical note:
- Large boulders genuinely require machinery for safe, precise placement
- Most landscape supply companies offer delivery with placement included
- Attempting to move large boulders manually risks injury and poor placement
- Budget the placement service into the project cost from the start
3. The Cool Deck Pool Surround
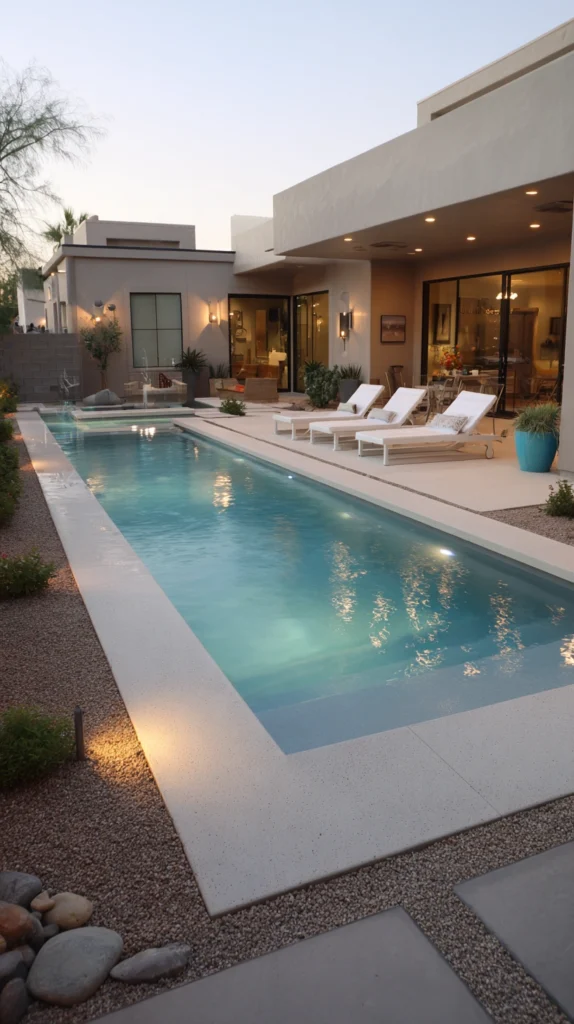
A textured, light-reflective pool deck coating designed to stay cooler underfoot than standard concrete — essential for barefoot use in Arizona heat.
My scorching pool deck problem:
What I was dealing with:
- Standard gray concrete deck too hot to walk on barefoot by 9am
- Guests hopping across the deck to avoid burning their feet
- A pool that was technically usable but uncomfortable to access
The cool deck solution:
Why this coating makes a measurable difference:
- Textured surface reflects more heat than smooth painted concrete
- Lighter color options reduce surface temperature significantly compared to dark concrete
- Slip-resistant texture adds safety around a wet pool area
- Renews the look of aging or cracked concrete without full replacement
Color and finish choices:
Style options:
- Light tan or sand tones for maximum heat reflection
- Cool gray for a more modern look, slightly less heat reduction
- Terracotta tones for warmth without sacrificing much cooling benefit
- Speckled multi-tone finishes for texture and visual interest
Where this works best:
Ideal applications:
- Full pool deck resurfacing
- Existing cracked or stained concrete needing a refresh
- Any barefoot-heavy zone near water features
Cost:
- Cool deck coating (per square foot, materials and labor): $4-8
- Average pool deck (600 sq ft): $2,400-4,800
- DIY coating kit (smaller areas): $150-350 for materials
My cool deck resurfacing: Recoating the pool deck in a light sand tone dropped the surface temperature enough that bare feet were finally comfortable by late morning, and it also disguised years of hairline cracks in the original concrete.
Cool Deck Tips
Choose the lightest color the design can support:
Heat reduction priority:
- Color has a bigger impact on surface temperature than texture alone
- Every shade darker meaningfully increases the surface heat
- Balance the desired aesthetic against the practical cooling benefit
- Lighter tones also reflect more light, brightening the whole pool area
Reseal every few years to maintain the cooling texture:
Maintenance requirement:
- The textured surface wears smoother over time with foot traffic
- Resealing restores both the texture and the reflective cooling property
- Skipping resealing lets the deck gradually heat up closer to bare concrete
- Plan for this as routine maintenance, not an optional extra
4. The Native Cactus and Succulent Garden
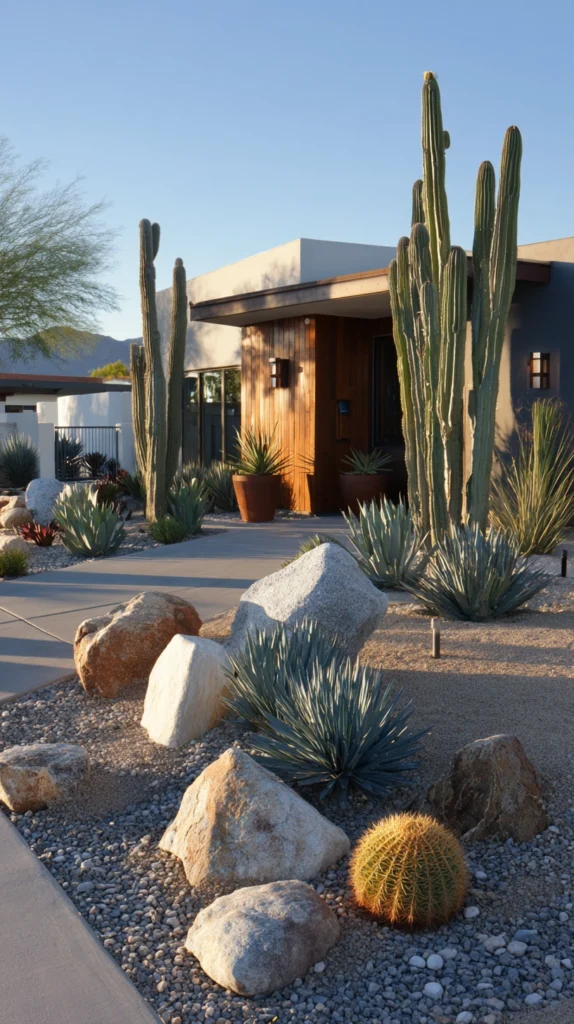
A curated collection of native and adapted cacti and succulents arranged by height and form — genuine low-water beauty without imported plants.
My struggle with non-native plants:
What kept failing:
- Plants chosen from a general nursery without checking desert suitability
- Constant supplemental watering just to keep them alive
- A garden that looked stressed rather than thriving most of the year
The native cactus discovery:
Why native and adapted species change everything:
- Evolved specifically for Arizona’s exact rainfall and heat patterns
- Require little to no supplemental water once established
- Genuinely thrive rather than merely survive through summer
- Available in enormous variety of form, from towering saguaro to low-growing succulents
Building the garden by height:
Layering approach:
- Tall anchor plants (saguaro, ocotillo) placed toward the back or center
- Medium height plants (barrel cactus, agave) filling the middle layer
- Low groundcover succulents (ice plant, hens and chicks) along the front edge
- Height variation creates the same visual interest structure as a traditional garden bed
Plant selection by zone:
Sun and space considerations:
- Full sun, larger space: saguaro, ocotillo, prickly pear
- Full sun, smaller space: golden barrel, agave, aloe
- Partial shade zones: some succulent varieties tolerate filtered light better
Where this works best:
Ideal placements:
- Entry garden beds
- Backyard perimeter borders
- Any zone previously struggling with non-native plants
Cost:
- Small to medium cacti and succulents: $10-40 each
- Larger specimen plants (mature saguaro, ocotillo): $150-800
- Average garden bed (mixed sizes): $200-600
My native cactus garden: Replacing a struggling non-native garden bed with saguaro, golden barrel, and agave meant the first summer in years where nothing in that bed looked stressed by August.
Native Cactus Tips
Check legal requirements before removing or relocating saguaro:
Important regulation:
- Arizona has specific permitting requirements around saguaro cactus
- Purchasing from a licensed nursery avoids any legal complication
- Never remove a saguaro from public or private desert land without proper permits
- A reputable nursery will already have this handled for purchased specimens
Space plants for their mature size, not their nursery size:
Common planting mistake:
- Cacti and succulents are often planted too closely together when young
- Research mature spread before finalizing plant spacing
- Overcrowded plantings require thinning later, disturbing root systems
- Proper initial spacing saves significant work in future years
5. The Ramada or Palapa Shade Structure
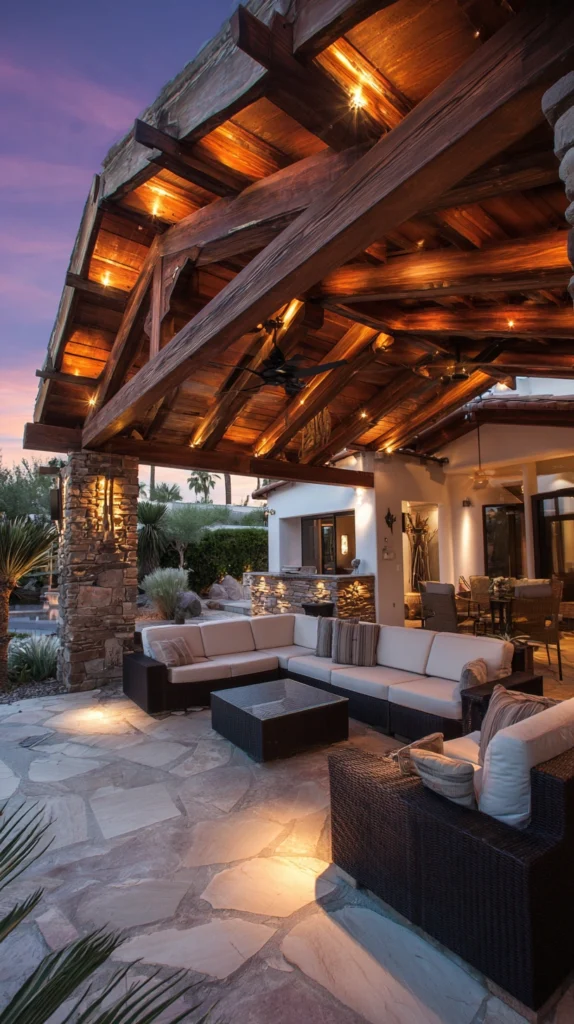
A freestanding wood or palm-thatched shade structure — a permanent architectural solution for full-yard shade coverage.
My search for permanent shade:
What shade sails could not solve:
- Wanted a more substantial, architectural shade solution
- A defined structure for year-round outdoor dining and lounging
- Something that would function as genuine outdoor living space, not just a sun blocker
The ramada solution:
Why a permanent structure changes the whole yard:
- Provides consistent shade regardless of sun angle throughout the day
- Creates a defined outdoor room with real architectural presence
- Supports ceiling fans, lighting, and even outdoor kitchen elements underneath
- Adds genuine value and function beyond what temporary shade offers
Structure material options:
Choosing the right style:
- Wood ramada for a classic Southwestern look
- Palapa with palm thatch roofing for a resort-style feel
- Metal pergola with a solid roof panel for modern durability
- Combination structures using stone pillars with a wood or metal roof
What to include underneath:
Completing the outdoor room:
- Ceiling fan for active air circulation in summer heat
- String lights or recessed lighting for evening use
- Misting system integrated into the structure for extra cooling
- Full outdoor kitchen or bar setup if space and budget allow
Where this works best:
Ideal placement:
- Directly off the back of the house for easy indoor-outdoor flow
- Anchoring a dining or entertaining zone
- Near the pool for shaded lounging without leaving the yard
Cost:
- Basic wood ramada kit: $1,500-4,000
- Custom-built ramada with electrical: $4,000-12,000
- Palapa structure: $2,500-8,000
My backyard ramada: Building a wood ramada with a ceiling fan and string lights turned the harshest part of the yard into the space we use every single evening, rain or shine, all year round.
Ramada Tips
Orient the structure to block the worst afternoon sun:
Positioning priority:
- Study the yard’s sun exposure across a full day before finalizing placement
- The structure should specifically address the 2pm-6pm summer sun angle
- A beautifully built ramada in the wrong position still leaves the yard unusable at peak heat
- This single planning step determines whether the investment pays off
Budget for a ceiling fan from the start:
Function priority:
- Shade alone helps, but moving air makes the biggest comfort difference
- Plan electrical access into the ramada design from the beginning
- Retrofitting electrical after construction is significantly more expensive
- A fan-equipped ramada is usable through far more of the Arizona summer
6. The Desert-Adapted Turf Alternative
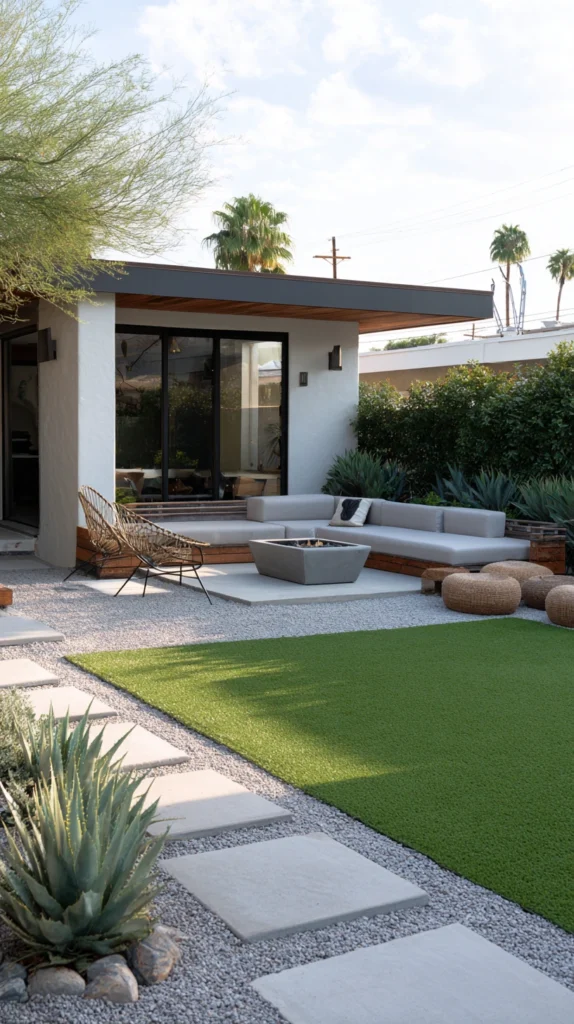
Synthetic turf or low-water native grass substitutes providing a soft, green surface without the water demands of traditional lawn.
My real lawn failure:
What kept happening:
- Sod planted with the best intentions, dead within two summers
- Water bills spiking without the lawn ever looking genuinely healthy
- Missing the soft, green play surface a lawn provides for kids and pets
The turf alternative solution:
Why this solves the real lawn problem:
- Provides the visual and functional green space without irrigation demands
- Synthetic turf specifically engineered for desert heat resists excessive fading
- Low-water native grass alternatives offer a more natural look with far less water than traditional sod
- Genuinely usable for kids and pets year-round without seasonal die-back
Choosing between synthetic and native grass alternatives:
Comparing the options:
- Synthetic turf: zero water, consistent green year-round, highest upfront cost
- Native buffalo grass: some water needed but far less than traditional sod, authentic texture
- Blue grama grass: extremely drought tolerant, slightly more textured appearance
Heat considerations for synthetic turf:
Managing surface temperature:
- Synthetic turf can get significantly hotter than natural grass in direct sun
- Choose products specifically designed with heat-reducing technology
- Position synthetic turf areas within partial shade when possible
- Infill materials matter, with some options staying cooler than others
Where this works best:
Ideal zones:
- Defined play areas for children or pets
- A contained green accent zone rather than full-yard coverage
- Areas with at least partial shade to manage synthetic turf heat
Cost:
- Synthetic turf (installed, per square foot): $8-14
- Native grass alternative seed and installation: $2-5 per square foot
- Average defined play zone (300 sq ft): $600-4,200
My synthetic turf play zone: A shaded 200 square foot turf area near the ramada gave the kids a genuinely soft, green space to play on year-round, at a fraction of what the previous failed lawn had cost in water alone.
Turf Alternative Tips
Keep synthetic turf areas smaller and shaded when possible:
Practical guidance:
- Large expanses of full-sun synthetic turf become uncomfortably hot
- A contained, partially shaded zone balances the benefits against the heat trade-off
- Full-yard synthetic coverage is rarely the most comfortable choice in Arizona specifically
- Pair with surrounding gravel or planting beds rather than wall-to-wall turf
Rinse synthetic turf periodically in pet-use areas:
Maintenance note:
- Pet waste and heat can create odor buildup on synthetic surfaces
- A regular hose rinse, plus occasional enzymatic cleaner, keeps the area fresh
- This maintenance is still far less demanding than mowing and watering real grass
- Budget a few minutes monthly for this upkeep
7. The Fire Pit Gathering Circle
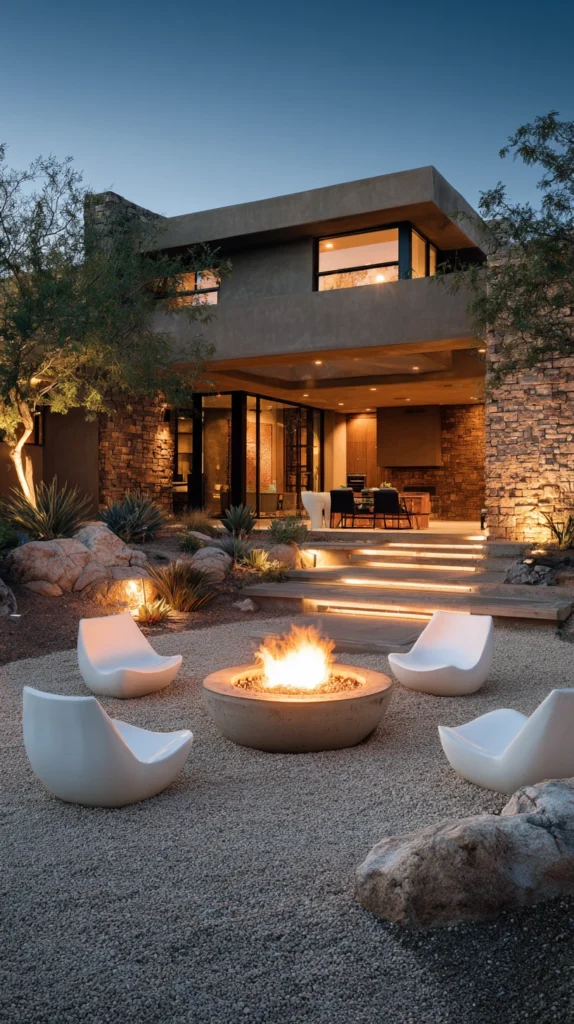
A built-in or portable fire pit surrounded by seating — extending backyard use into the cooler desert evenings and winter months.
My yard that emptied out after sunset:
What was missing:
- A reason to stay outside once the temperature dropped in the evening
- No defined gathering spot for evening conversation
- Missing the genuine desert experience of cool evenings under an open sky
The fire pit solution:
Why this extends the yard’s usable season:
- Arizona evenings, even in summer, cool significantly and become comfortable
- Winter months in particular become genuinely pleasant for outdoor gathering around fire
- Creates a natural, defined social zone that draws people together
- Works as a focal point even when unlit, with the right surrounding design
Fire pit style options:
Choosing the right type:
- Built-in stone or block fire pit for a permanent, custom look
- Portable metal fire pit for flexibility and lower upfront cost
- Gas fire pit for convenience, no wood smoke or ash cleanup
- Wood-burning for the most authentic desert campfire experience
Seating and surrounding design:
Completing the gathering circle:
- Built-in bench seating around a permanent fire pit
- Individual chairs arranged in a loose circle for flexibility
- Decomposed granite or pavers defining the gathering zone underfoot
- Low-water plantings surrounding the perimeter for a finished look
Where this works best:
Ideal placement:
- A defined zone separate from the main dining or lounge area
- Away from overhanging trees or structures for safety
- Positioned to take advantage of any distant mountain or sunset views
Cost:
- Portable metal fire pit: $80-300
- Built-in stone fire pit: $800-3,000
- Surrounding seating (four to six chairs): $300-1,200
- Total: $180-4,500
My fire pit gathering circle: A built-in gas fire pit with a ring of low chairs became the spot where every evening in the yard now ends, especially through the cooler months when it draws the whole family outside after dinner.
Fire Pit Tips
Check local ordinances before installing a wood-burning pit:
Regulation check:
- Many Arizona municipalities have specific rules around open burning
- Gas fire pits often face fewer restrictions than wood-burning options
- Confirm local requirements before finalizing the fire pit type
- This check prevents an expensive installation becoming unusable later
Position seating at a comfortable distance from the flame:
Comfort and safety detail:
- Seating too close becomes uncomfortably hot even in cooler weather
- A distance of roughly three to four feet from the pit edge is typically comfortable
- This spacing also meets most standard safety clearance recommendations
- Test the distance with an actual fire before finalizing permanent seating placement
8. The Desert Water Feature or Fountain
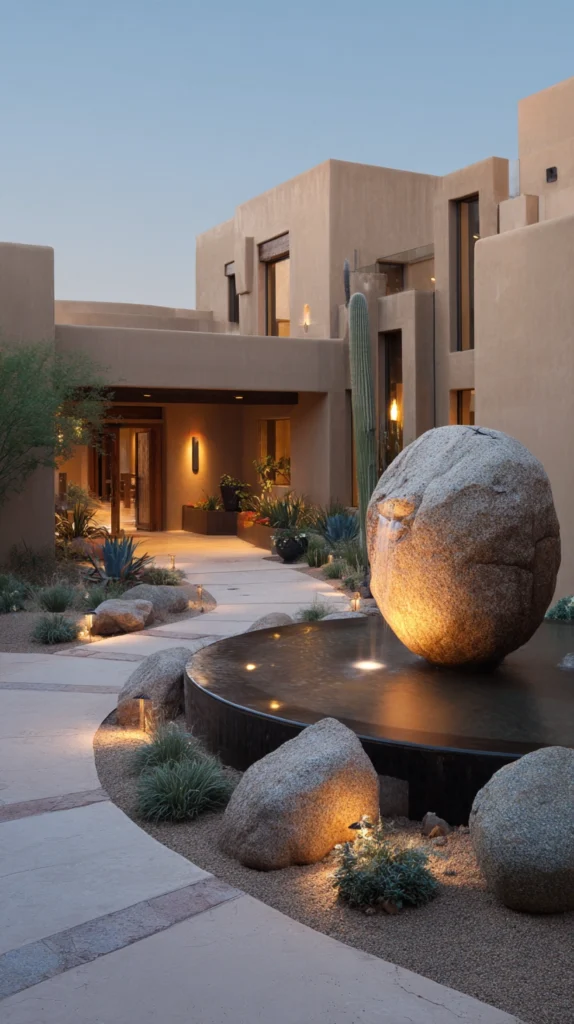
A recirculating fountain or small water feature — adding the sound and cooling sensation of water without the footprint of a full pool.
My silent, still backyard:
What was missing:
- No sound to mask nearby traffic or neighborhood noise
- A yard that felt visually complete but sensorially flat
- Wanted the psychological cooling effect water provides in a hot climate
The water feature solution:
Why sound and water change how a yard feels:
- Moving water sound genuinely masks unwanted background noise
- The sight and sound of water create a perceived cooling effect even without direct contact
- A relatively small, low-water-use feature delivers outsized sensory impact
- Recirculating systems use minimal water compared to what people assume
Feature style options:
Choosing the right type:
- Wall-mounted fountain for a compact, vertical solution
- Freestanding tiered fountain as a garden focal point
- Small recirculating stream feature through a boulder bed
- Simple bubbling urn fountain for the lowest-maintenance option
Placement for maximum impact:
Where to position it:
- Near a seating area where the sound carries clearly
- Visible from indoor living spaces through a window or door
- Integrated into a boulder xeriscape bed for a natural, cohesive look
Where this works best:
Ideal zones:
- Near a patio or lounge seating area
- Entry courtyards
- Adjacent to a ramada or covered gathering space
Cost:
- Small bubbling urn fountain: $100-300
- Tiered freestanding fountain: $200-800
- Custom boulder stream feature: $1,000-3,500
My desert fountain: A bubbling urn fountain tucked into the boulder bed near the patio masks the neighborhood noise completely, and the sound alone makes the whole yard feel several degrees cooler on the hottest afternoons.
Water Feature Tips
Choose a recirculating system to minimize water use:
Efficiency detail:
- Recirculating fountains reuse the same water continuously, not a constant fresh supply
- Water loss occurs mainly through evaporation, which is minimal for most feature sizes
- This makes water features far more water-efficient than most people assume
- A small feature typically uses less water monthly than a single lawn watering session
Clean and refill periodically to prevent algae and mineral buildup:
Maintenance requirement:
- Arizona’s hard water can leave mineral deposits on fountain surfaces
- A monthly cleaning and refill routine keeps the feature looking its best
- Algae growth is more likely in features receiving direct sun exposure
- Positioning within partial shade reduces both evaporation and algae growth
9. The Outdoor Kitchen and Bar Setup
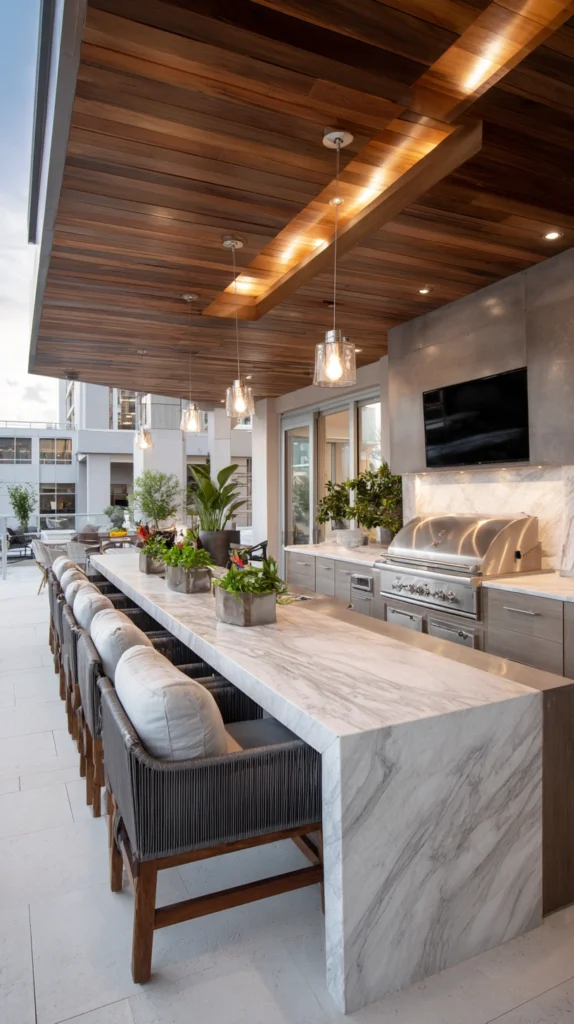
A built-in grill, counter space, and bar seating under cover — extending meal preparation and entertaining fully outdoors.
My back-and-forth cooking problem:
What was frustrating:
- Constantly walking back inside to the kitchen while grilling outside
- No real counter space or storage set up for outdoor cooking
- Guests gathered indoors near the kitchen instead of outside where the grill was
The outdoor kitchen solution:
Why this changes how the whole yard gets used:
- Keeps the cook and the gathering in the same outdoor space
- Genuinely extends entertaining capability without expanding the indoor kitchen
- Works especially well combined with a ramada or shade structure overhead
- Becomes a natural gathering point the way an indoor kitchen island does
Building the outdoor kitchen:
Core components:
- Built-in grill as the anchor appliance
- Counter space for prep and serving, in heat-resistant material
- A small bar refrigerator for drinks and easy access
- Bar seating along one side for guests to gather while cooking happens
Material choices for desert durability:
Surface and structure considerations:
- Stucco or stone exterior finish matching the home’s existing style
- Granite or concrete countertops that withstand direct sun exposure
- Stainless steel appliances rated specifically for outdoor use
- Shade coverage overhead to protect both the cook and the equipment
Where this works best:
Ideal placement:
- Directly under or adjacent to a ramada or covered structure
- Close to the main dining and lounge area for easy flow
- Positioned with some distance from bedroom windows for smoke and noise
Cost:
- Basic built-in grill island: $2,500-6,000
- Full outdoor kitchen with refrigerator and bar seating: $8,000-20,000
- DIY modular outdoor kitchen components: $1,500-4,000
My outdoor kitchen: Building a modest grill island with a small bar fridge and counter seating meant entertaining finally happened entirely outside, and guests naturally gathered around the cooking the way they used to gather in the indoor kitchen.
Outdoor Kitchen Tips
Cover the kitchen area to protect both people and equipment:
Protection priority:
- Direct sun exposure degrades outdoor appliances faster than shaded equipment
- Shade also makes the actual act of cooking significantly more comfortable
- Pair this project with a ramada or shade sail addition for full benefit
- An uncovered outdoor kitchen still works but wears and functions less well over time
Start with a smaller modular setup if budget is a concern:
Scaling the project:
- A single built-in grill with basic counter space delivers most of the core benefit
- Additional elements like refrigeration and bar seating can be added later
- Modular outdoor kitchen components allow this phased approach naturally
- This staged strategy avoids a large upfront cost for the full build
10. The Vertical Garden Wall
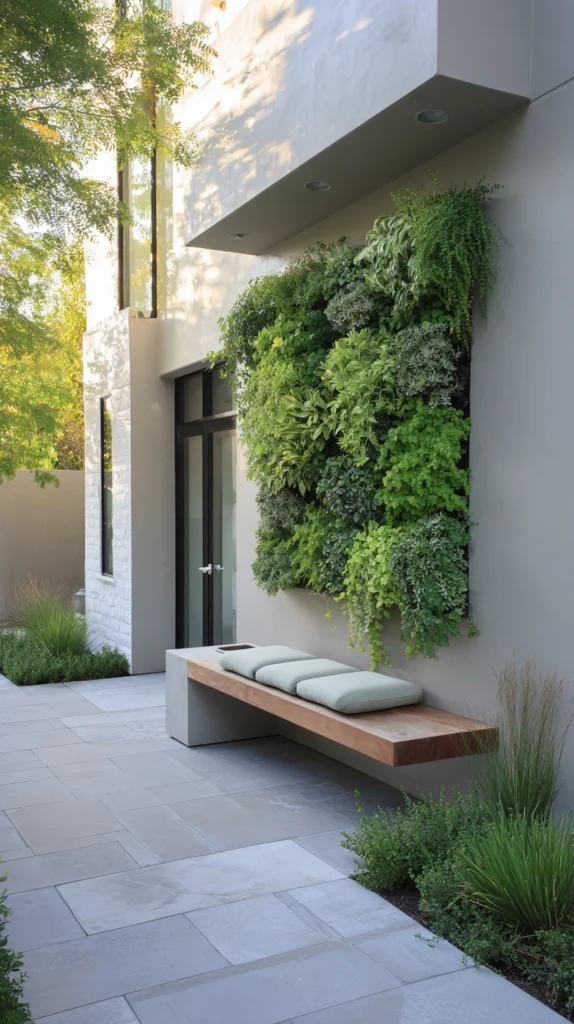
A living wall or tiered planter arrangement mounted against a block wall — adding greenery in a footprint that fits even the smallest desert yard.
My wasted block wall space:
What I was overlooking:
- A large blank block wall running the length of the yard
- Ground-level planting space limited in a smaller backyard
- Never considered the wall itself as usable growing space
The vertical garden solution:
Why a vertical approach works so well in tight desert yards:
- Uses wall space instead of competing for limited ground area
- Creates a genuine green focal point without a large footprint
- Drought-tolerant vining and trailing plants adapt well to vertical systems
- Transforms an otherwise plain block wall into the yard’s visual highlight
Vertical garden structure options:
Choosing the right system:
- Modular wall planter panels for a full living wall effect
- Simple tiered shelving with potted succulents for a lower-cost version
- Trellis with climbing, drought-tolerant vines for the most low-maintenance option
- Individual wall-mounted planters arranged in a deliberate grid pattern
Plant choices suited to vertical desert growing:
What thrives in this format:
- Trailing succulents like string of pearls or burro’s tail
- Drought-tolerant vines such as Arizona native passionflower
- Compact herbs in the lower tiers for a functional element
- Small barrel cacti in individual wall pockets for texture variation
Where this works best:
Ideal placement:
- Along a long, blank block wall
- Small side yards with limited ground planting space
- As a backdrop behind a seating or dining area
Cost:
- Modular wall planter system: $150-500
- Tiered shelving with pots: $80-250
- Trellis with climbing vines: $60-200
My vertical garden wall: Installing tiered planters against the previously bare block wall turned the least interesting part of the yard into a genuine green feature, and it uses almost no additional ground space to do it.
Vertical Garden Tips
Install a simple drip irrigation line to the vertical system:
Watering efficiency:
- Hand-watering a vertical garden is time-consuming and often uneven
- A small drip line run to each tier or panel keeps watering consistent
- This is especially important since vertical systems can dry out faster than ground beds
- A basic timer on the drip line automates the entire process
Choose a wall with at least partial shade for the widest plant options:
Placement consideration:
- Full, unrelenting west-facing sun limits which plants will thrive vertically
- A wall receiving morning sun and afternoon shade supports a wider plant variety
- East-facing or partially shaded walls are typically the most forgiving location
- Assess the wall’s actual sun exposure across a full day before installing
11. The Pergola-Covered Dining Zone
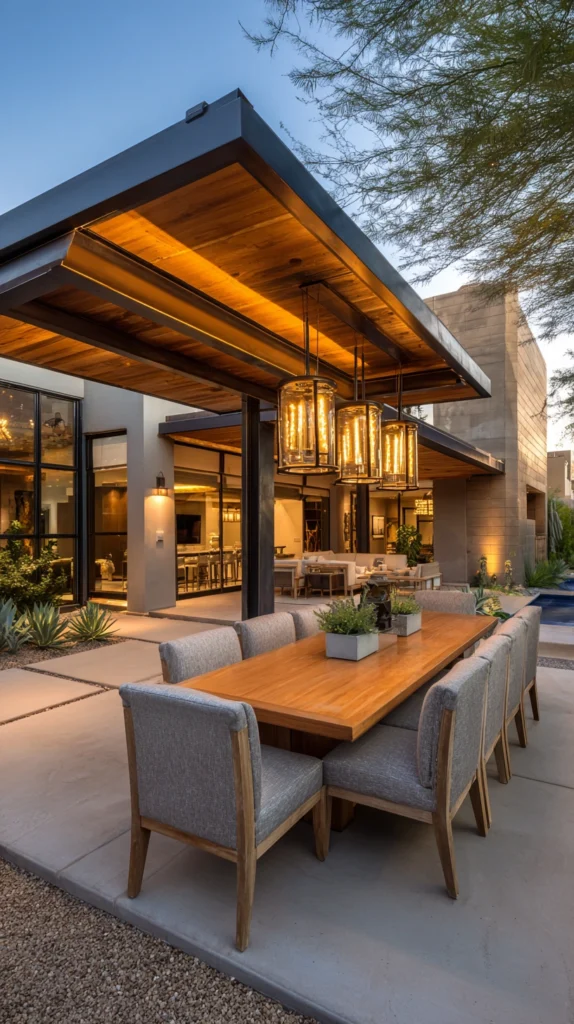
An open-slat pergola over the main outdoor dining table — filtered shade with a lighter, more open feel than a solid-roof structure.
My all-or-nothing shade dilemma:
What I was weighing:
- A solid ramada felt heavy and closed-in for the dining area specifically
- Full open sun made outdoor dining miserable most of the year
- Wanted filtered light rather than either extreme
The pergola solution:
Why open-slat shade suits a dining area specifically:
- Filters direct sun without eliminating natural light entirely
- Creates a lighter, more open feel appropriate for a dining setting
- Allows string lights or a simple shade cloth to be added when more coverage is wanted
- Pairs beautifully with climbing vines for a more dynamic, plant-integrated shade over time
Material and style options:
Choosing the pergola type:
- Wood pergola for a classic, warm look
- Metal or aluminum pergola for lower maintenance and longer lifespan
- Vinyl-coated pergola resisting sun fading and warping
- Adjustable louvered pergola roof for on-demand shade control
Enhancing the filtered shade:
Adding more coverage when needed:
- A retractable shade cloth panel across the top for peak summer heat
- Climbing drought-tolerant vines trained across the slats over time
- String lights woven through for evening ambiance
- A ceiling fan mounted to the pergola structure for active cooling
Where this works best:
Ideal placement:
- Directly over the main outdoor dining table
- Adjacent to the house for easy meal transport from the kitchen
- Combined with a vertical garden or vine feature along one supporting post
Cost:
- Basic wood pergola kit: $800-2,500
- Metal or aluminum pergola: $1,200-4,000
- Adjustable louvered pergola: $3,000-8,000
My pergola dining zone: A wood pergola with a retractable shade cloth panel over the dining table let us adjust coverage based on the actual sun that day, and the filtered light makes dinner outside feel far less enclosed than it would under a solid roof.
Pergola Tips
Add a retractable shade element for flexibility across seasons:
Seasonal adaptability:
- Open slats alone may not block enough sun during peak summer months
- A retractable canvas or shade cloth panel adds coverage exactly when needed
- Winter months can leave the panel open for maximum natural light and warmth
- This flexibility makes one structure work well across Arizona’s full seasonal range
Train climbing vines along the structure early:
Long-term planning:
- Vines take time to establish enough coverage to matter
- Planting drought-tolerant climbing species at installation gets a head start
- Within a couple of seasons, vine coverage adds genuine additional shade
- This combination of structure and living shade improves the space over time
12. The Desert-Friendly Lighting Design
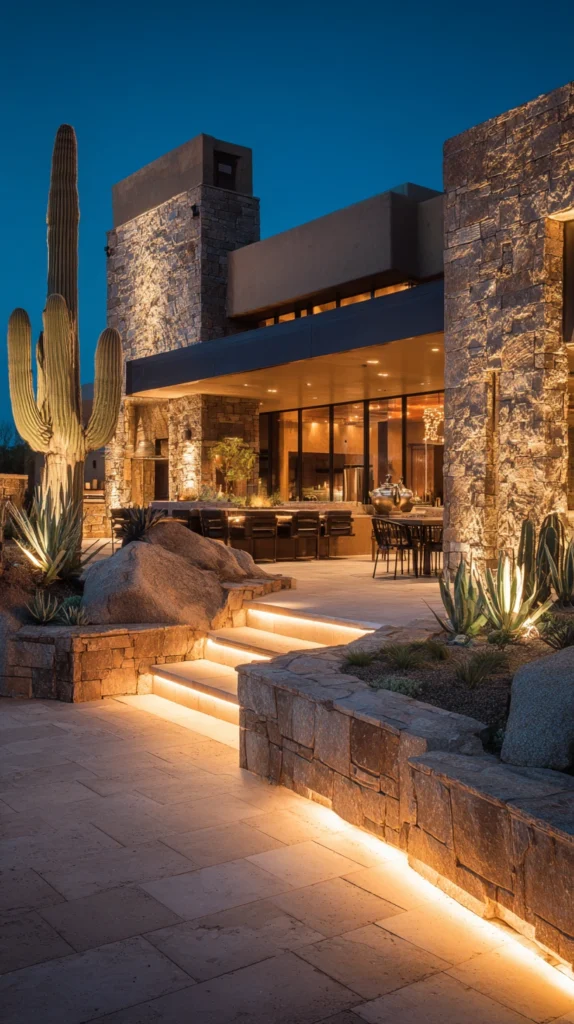
Layered outdoor lighting using warm, low-glare fixtures — extending the usable hours of a desert backyard well into the night.
My dark, unused evening yard:
What was happening:
- The yard essentially disappeared after sunset with no lighting plan
- A single harsh porch light was the only illumination available
- Evening use of the space stopped almost entirely once it got dark
The lighting design solution:
Why layered lighting matters specifically in the desert:
- Arizona evenings, once cooled, are often the most comfortable time to be outside
- Good lighting design extends actual usable hours significantly
- Warm-toned fixtures complement the desert’s natural earth tone palette
- Layered lighting creates ambiance rather than the flat glare of a single fixture
Building a layered lighting plan:
The three lighting layers:
- Path lighting along walkways for safety and gentle guidance
- Accent lighting highlighting boulders, cacti, and architectural features
- Ambient lighting (string lights, lanterns) over gathering and dining areas
Fixture and bulb choices:
Getting the tone right:
- Warm white LED bulbs (2700K-3000K) rather than cool white or blue-toned light
- Low-voltage landscape fixtures for energy efficiency and easy installation
- Solar-powered path lights for the lowest-maintenance option
- Uplighting on tall cacti and ocotillo creates dramatic desert silhouettes after dark
Where this works best:
Ideal application:
- Every desert backyard, regardless of other features present
- Especially valuable paired with a ramada, pergola, or fire pit gathering zone
- Along pathways connecting different functional zones of the yard
Cost:
- Solar path lights (set of 6-8): $40-100
- Low-voltage landscape lighting kit: $150-400
- Professional accent lighting installation: $500-2,000
My desert lighting design: Adding warm uplighting on the saguaro and string lights over the dining area meant the yard finally looked and felt inviting after dark, and evening use of the space increased immediately once the lighting went in.
Lighting Design Tips
Stick to warm color temperatures throughout the yard:
Consistency detail:
- Mixing warm and cool-toned bulbs throughout the yard looks disjointed
- Warm white (2700K-3000K) consistently complements desert stone, sand, and plant tones
- Cool white lighting can feel clinical against the natural desert palette
- Choosing one consistent color temperature across all fixtures ties the whole design together
Uplight tall, sculptural plants for dramatic nighttime shadows:
Design technique:
- Saguaro, ocotillo, and other tall specimens create striking shadows when uplit
- A single well-placed light beneath a tall cactus transforms it into a nighttime focal point
- This technique delivers outsized visual impact for a relatively small lighting investment
- Position the fixture close to the base, angled upward, for the most dramatic effect
13. The Desert Wildlife-Friendly Garden Zone
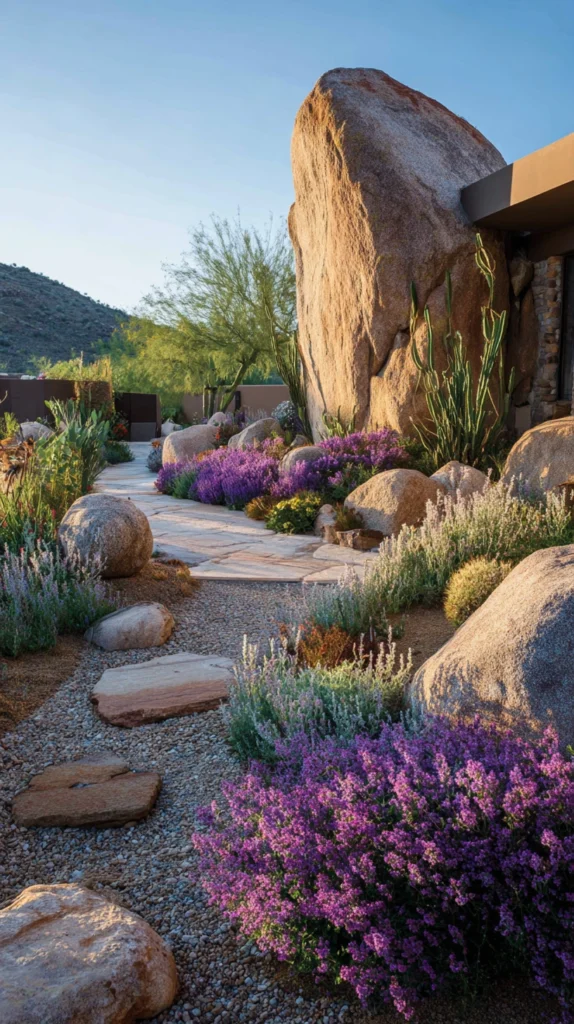
A dedicated planting area attracting hummingbirds, butterflies, and native pollinators — bringing genuine desert ecology into the backyard experience.
My yard with no life in it:
What was missing:
- A yard that looked complete but felt strangely still and quiet
- No birds, butterflies, or activity beyond the occasional lizard
- Missing the genuine sense of desert ecosystem the surrounding landscape has
The wildlife garden solution:
Why this adds a dimension no other feature provides:
- Native flowering plants specifically attract hummingbirds and pollinators
- Brings movement, sound, and genuine life to an otherwise static landscape
- Supports the broader desert ecosystem rather than existing separate from it
- Creates an ever-changing, living element that shifts with the seasons
Plant choices that attract wildlife:
Best options for pollinator activity:
- Red and orange tubular flowers (penstemon, salvia) specifically draw hummingbirds
- Desert milkweed supports monarch butterfly populations directly
- Chuparosa and fairy duster provide reliable nectar sources
- Flowering native shrubs like desert marigold support a wide range of pollinators
Supporting elements beyond plants:
Completing the habitat:
- A small, shallow water source for birds and pollinators
- Native flowering trees like palo verde providing both nectar and shade
- Avoiding pesticide use in and around the wildlife zone entirely
- Leaving some natural leaf litter and small brush piles for beneficial insects
Where this works best:
Ideal placement:
- A dedicated corner or border rather than scattered throughout
- Visible from a favorite window or seating area for regular viewing
- Combined with a small water feature for maximum wildlife draw
Cost:
- Native flowering plants: $10-30 each, $150-400 for a dedicated bed
- Small shallow water dish or birdbath: $20-80
- Palo verde or other flowering native tree: $80-250
My wildlife garden zone: A corner planted with penstemon, chuparosa, and a small water dish now draws hummingbirds every single morning, and it has become the most quietly rewarding feature in the entire yard.
Wildlife Garden Tips
Avoid pesticides entirely in and around this zone:
Non-negotiable practice:
- Pesticide use directly undermines the purpose of a wildlife-attracting garden
- Beneficial insects and pollinators are just as vulnerable as unwanted pests
- Choose manual removal or natural deterrents for any pest issues in this specific area
- This single commitment determines whether the zone actually functions as intended
Position the zone where it can be observed regularly:
Enjoyment factor:
- A wildlife garden tucked in an unseen corner loses much of its value
- Place it within view of a kitchen window, patio, or favorite seating spot
- Regular visibility turns the garden into a daily source of enjoyment
- This placement consideration is as important as the plant selection itself
14. The Multi-Zone Desert Layout
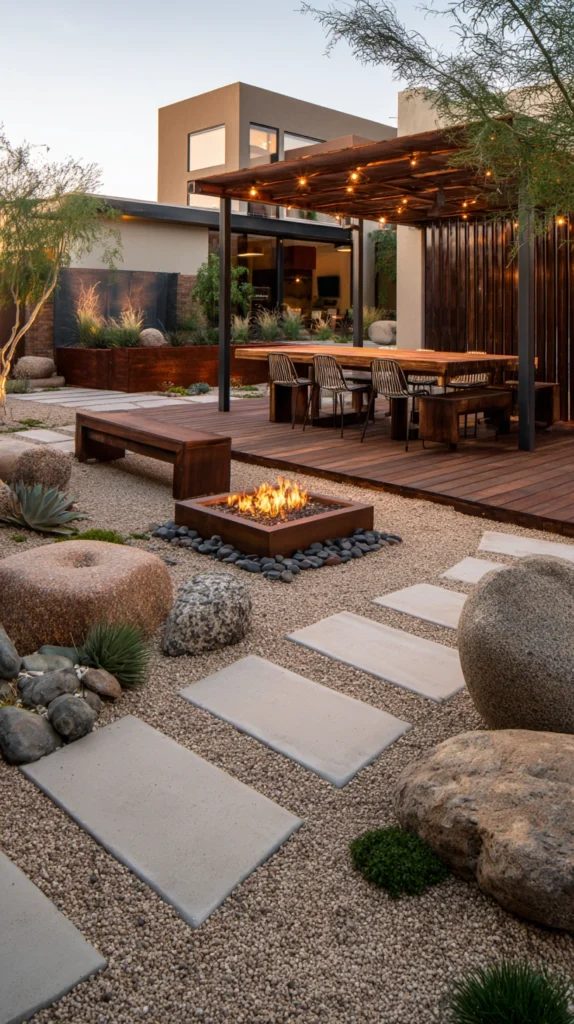
A backyard divided into distinct functional zones, each connected by pathways, rather than one undefined open space.
My single undefined yard problem:
What was limiting the space:
- One open area trying to serve dining, lounging, and play all at once
- No sense of distinct destinations within the yard
- A yard that felt smaller than its actual square footage because nothing was defined
The multi-zone solution:
Why dividing the yard makes it feel larger, not smaller:
- Defined zones create a sense of discovery and destination within the space
- Each zone can be purpose-built for its specific function
- Pathways connecting zones add visual interest and a sense of journey
- A yard with distinct areas consistently reads as larger than an equivalent open space
Common zones to include:
Building the layout:
- A shaded dining or entertaining zone under a ramada or pergola
- A fire pit gathering circle for evening use
- A xeriscape or wildlife garden zone as a quieter, contemplative area
- A play or turf zone for kids and pets, if needed
Connecting the zones:
Pathway and transition design:
- Decomposed granite paths linking each functional area
- Stepping stones through planting beds for a more organic transition
- Low lighting along pathways for safe, attractive nighttime navigation
- Subtle changes in ground material signaling the shift from one zone to the next
Where this works best:
Ideal yard size:
- Medium to large backyards with enough space to support distinct areas
- Yards currently feeling underused or undefined despite adequate square footage
- Homes wanting to maximize a yard’s function across multiple uses
Cost:
- Pathway materials (decomposed granite, per 100 sq ft): $150-400
- Full multi-zone layout, combining several ideas from this list: $3,000-15,000+
- Phased approach, one zone per season: spreads cost over time
My multi-zone backyard: Dividing the yard into a dining zone under the ramada, a fire pit circle, and a quiet wildlife corner made the space feel significantly larger than it had as one open area, and each zone now gets used for exactly what it was designed for.
Multi-Zone Tips
Plan the full layout before building any single zone:
Sequencing importance:
- Building zones one at a time without an overall plan risks a disjointed result
- Sketch the intended layout for the entire yard before starting construction
- This upfront planning ensures pathways and zones relate to each other cohesively
- Individual zones can still be built in phases once the full plan exists
Use consistent materials across zones for a cohesive feel:
Design cohesion:
- Wildly different materials in each zone can make the yard feel fragmented
- Repeating the same decomposed granite, boulder type, or plant palette throughout ties everything together
- Small material variations between zones are fine; the overall palette should stay consistent
- This consistency is what makes a multi-zone yard read as one designed space, not several unrelated projects
Choosing Your Desert Oasis Elements
By Yard Size
Small yards:
- Vertical garden wall (idea 10)
- Desert water feature or fountain (idea 8)
- Native cactus and succulent garden, contained bed (idea 4)
Medium yards:
- Shade sail lounge area (idea 1)
- Fire pit gathering circle (idea 7)
- Pergola-covered dining zone (idea 11)
Large yards:
- Ramada or palapa shade structure (idea 5)
- Outdoor kitchen and bar setup (idea 9)
- Multi-zone desert layout (idea 14)
By Priority
Cooling and comfort first:
- Shade sail lounge area (idea 1)
- Cool deck pool surround (idea 3)
- Ramada or palapa shade structure (idea 5)
Low-maintenance greenery:
- Native cactus and succulent garden (idea 4)
- Desert-adapted turf alternative (idea 6)
- Boulder and gravel xeriscape bed (idea 2)
Evening and entertaining:
- Fire pit gathering circle (idea 7)
- Outdoor kitchen and bar setup (idea 9)
- Desert-friendly lighting design (idea 12)
By Budget
Under $500:
- Vertical garden wall, basic version (idea 10)
- Desert water feature, small fountain (idea 8)
- Solar path lighting (idea 12)
$500-2,500:
- Shade sail lounge area (idea 1)
- Boulder and gravel xeriscape bed (idea 2)
- Portable fire pit with seating (idea 7)
$2,500-8,000:
- Ramada or palapa shade structure (idea 5)
- Pergola-covered dining zone (idea 11)
- Cool deck pool resurfacing (idea 3)
$8,000+:
- Outdoor kitchen and bar setup (idea 9)
- Multi-zone desert layout, full build (idea 14)
Maintenance Through the Seasons
Spring:
- Check drip irrigation lines after winter for cracks or clogs
- Prune any winter growth on flowering natives before summer heat
Summer:
- Monitor shade structures and turf areas for peak heat performance
- Refill and clean water features more frequently as evaporation increases
Fall:
- Ideal season for planting new natives, allowing roots to establish before summer
- Inspect lighting fixtures and replace any faded or damaged bulbs
Winter:
- Lightest maintenance season for most desert landscaping
- Good time for hardscape projects like boulders, pathways, and structures
My Complete Desert Oasis Journey
What I built across four years:
Year one ($850):
- Shade sail over the existing patio
- Boulder and gravel xeriscape bed replacing dead lawn
- Learned that shade alone changed how much the yard got used
Year two ($2,400):
- Native cactus and succulent garden
- Small bubbling fountain near the patio
- Learned that sound and green structure mattered more than lawn ever had
Year three ($4,200):
- Wood ramada with ceiling fan over the dining area
- Fire pit gathering circle
- Learned that permanent shade plus evening fire extended usable hours dramatically
Year four ($1,600):
- Desert-friendly lighting design throughout
- Wildlife garden corner
- Learned that the smallest, cheapest additions were often the most quietly rewarding
Total investment: $9,050 across four years Most important lesson: Shade changes a desert yard more than any other single element Single highest-impact change across all four years: The shade sail installed in year one, for the lowest cost of anything on this list
Getting Started This Weekend
Start with shade, not plants.
This weekend:
Step 1 — Track the sun across the yard for a full day:
- Note where shade naturally falls in the morning versus afternoon
- Identify the harshest, least usable zone during peak heat
- This observation determines where the first shade investment belongs
Step 2 — Choose one low-cost shade or comfort improvement:
- A shade sail over existing seating
- A portable fire pit for evening use
- Both are reversible and deliver immediate comfort improvement
Step 3 — Remove one struggling non-native element:
- A dying lawn patch or stressed non-native shrub
- Replace with decomposed granite as a placeholder, plants can follow later
- This single swap often reduces water use noticeably right away
Step 4 — Add one plant grouping suited to the actual climate:
- Three to five native or adapted plants clustered together
- Choose based on the specific sun exposure of that zone
- Small, deliberate plantings outperform scattered, mismatched ones
My recommendation:
Start with a shade sail and a boulder xeriscape bed:
- Lowest cost, highest immediate comfort and visual impact combination
- Both are foundational elements that later additions build naturally around
- Provides real information about how the yard wants to be used before bigger investments
Sit outside in the new shade at 3pm and notice how differently the yard feels before changing anything else.
Now go build the backyard that finally works with the desert instead of against it.
Quick Summary
The 14 Arizona backyard oasis ideas:
Shade and comfort:
- Shade sail lounge area (idea 1): fastest, lowest-cost comfort fix
- Ramada or palapa shade structure (idea 5): permanent architectural shade
- Pergola-covered dining zone (idea 11): filtered light for dining specifically
- Cool deck pool surround (idea 3): essential for barefoot pool use
Plants and structure:
- Boulder and gravel xeriscape bed (idea 2): foundational desert landscape look
- Native cactus and succulent garden (idea 4): genuine low-water beauty
- Vertical garden wall (idea 10): greenery in the smallest footprint
- Desert wildlife-friendly garden zone (idea 13): brings ecology and movement
Green alternatives:
- Desert-adapted turf alternative (idea 6): soft green surface without lawn’s water demand
Water and sound:
- Desert water feature or fountain (idea 8): cooling sound in a small footprint
Evening and entertaining:
- Fire pit gathering circle (idea 7): extends usable hours into cool evenings
- Outdoor kitchen and bar setup (idea 9): moves entertaining fully outside
- Desert-friendly lighting design (idea 12): extends usable hours after dark
Full layout:
- Multi-zone desert layout (idea 14): defines the whole yard into destinations
The universal desert oasis rules:
Always:
- Prioritize shade before any other backyard investment
- Choose native or well-adapted plants over general nursery selections
- Track actual sun exposure across a full day before placing structures
- Layer lighting in warm tones to extend usable evening hours
Never:
- Force a traditional lawn into a climate it was never suited for
- Plant without checking mature size and water needs first
- Leave a pool deck or patio in dark, heat-absorbing material
- Build a shade structure without first confirming the sun angle it needs to block
Common mistakes:
- Treating gravel alone as a finished landscape rather than a starting canvas
- Choosing plants for looks without checking desert suitability
- Skipping shade in favor of plants or water features first
- Ignoring evening and cooler-season use when planning the yard’s layout
- Building one undefined open space instead of distinct functional zones
Remember: shade is the single highest-impact investment in any Arizona backyard, native plants thrive where imported ones merely survive, water features deliver outsized comfort for a small footprint, evening and cooler months are often when a desert yard performs best, and the best desert oasis is the one designed with the climate rather than in spite of it.