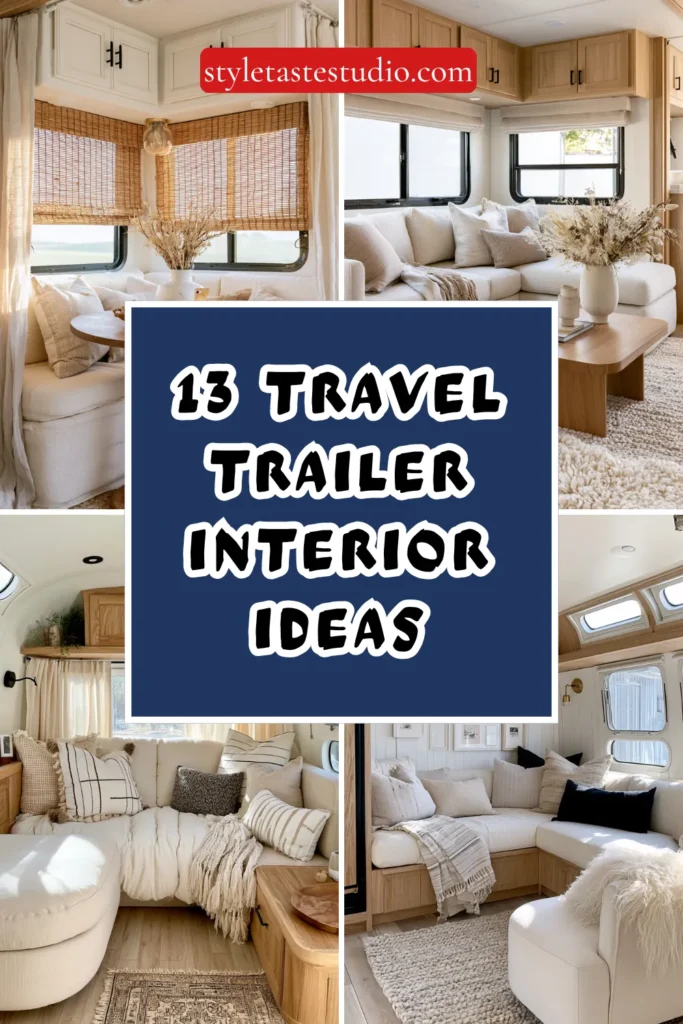
13 Travel Trailer Interior Ideas with Designer-Worthy Style
Designer-looking travel trailer interiors don’t come from spending more — they come from making fewer, better decisions. The trailers that stop people mid-scroll aren’t loaded with expensive fixtures and custom cabinetry.
They have a coherent color story, materials that feel intentional, and enough restraint to let each element breathe. In a space measured in square feet rather than rooms, every surface is visible from every other surface, which means visual clutter reads at ten times the intensity it would in a house.
These ideas work across trailer sizes and budgets. The organizing principle throughout is the same: quality of choice over quantity of pieces.
1. Commit to a Three-Color Palette Before Buying Anything
The single decision that separates designer-looking trailers from ones that feel assembled is making the color commitment first — before the first throw pillow, before the hardware, before the rug. Without it, individual purchases that each seem reasonable accumulate into a space that feels busy and unresolved.
A working three-color palette for a travel trailer follows a simple ratio: 60% dominant neutral, 30% secondary tone, 10% accent. The dominant neutral covers the largest surfaces — walls, major upholstery, and flooring. The secondary tone appears in bedding, window treatments, and larger accessories. The accent appears in hardware, small ceramics, and one or two intentional details.
Some combinations with proven staying power:
- Warm white walls, natural linen upholstery, matte black hardware
- Cream base, sage green secondary, aged brass accent
- Greige walls, warm walnut wood, and terracotta as the accent
- Soft white, navy, and woven natural fiber as the third element
Write the palette down before any purchase. When evaluating something new, hold it against what’s already in the trailer. If it doesn’t belong to one of the three tones, it doesn’t come in.
Tip: Collect paint chips and fabric swatches in the actual trailer under both natural daylight and your artificial lighting before finalizing. Colors shift significantly between a store and a moving interior — what looks warm in a showroom can read yellow or gray in a parked trailer under a different sky.
Budget: $0 — this is an editing decision, not a purchase
2. Replace Every Piece of Factory Hardware in One Session
Production travel trailers use generic hardware — chrome-plated plastic or flat brushed nickel pulls that are neither attractive nor durable. Replacing all of it at once is one of the most cost-effective upgrades in this list, and doing it in a single session rather than piecemeal ensures visual consistency across every cabinet and drawer.
The most designer-appropriate hardware finishes for travel trailers right now are matte black, aged or unlacquered brass, and brushed gold. Each reads as deliberate rather than default. Matte black works against light woods and white or cream cabinetry. Aged brass pairs with warm neutrals and wood tones. Brushed gold reads as elevated against greige or deep charcoal cabinetry.
Before ordering, measure the hole spacing on existing hardware — most production trailers use 3-inch or 3.75-inch center-to-center spacing, but verify before purchasing. A full set of 12–16 pulls from Amazon’s Cosmas, Ravinte, or Goldenwarm lines runs $35–$70 for the set. Each pull replaces in under two minutes with a screwdriver. Cabinet knobs for smaller doors or the bathroom vanity run separately at $2–$5 each.
Tip: Order all hardware from the same product line, even if you’re mixing pull lengths — a 3-inch and a 5-inch bar pull from the same collection will share the same finish and proportional language, which reads as curated rather than mismatched.
Budget: $40–$85
3. Install Peel-and-Stick Shiplap or Wood Plank Panels on the Accent Wall
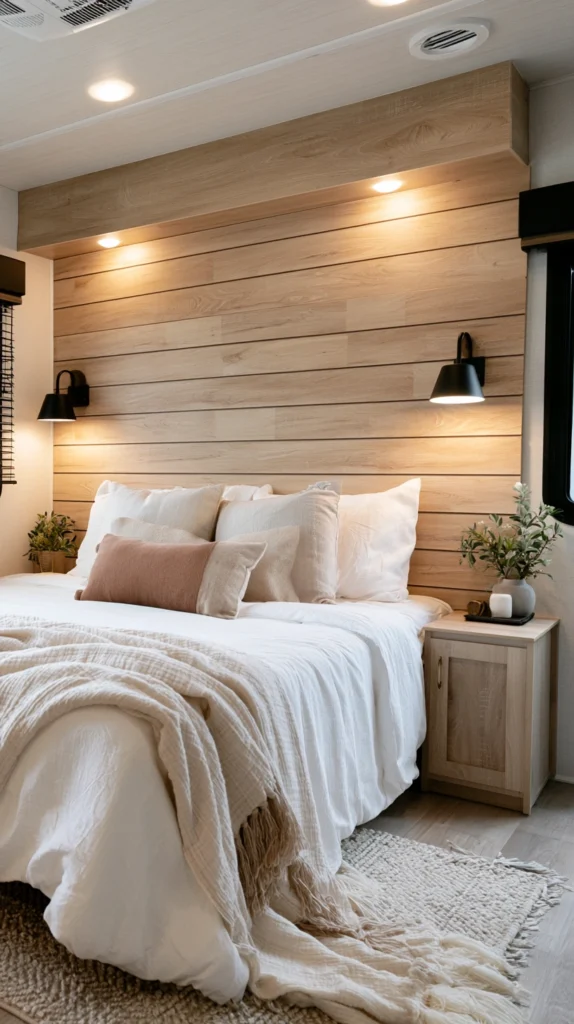
A single wall treated with peel-and-stick wood plank panels does more to shift the interior character of a travel trailer than almost any other surface change. The keyword is single — one wall behind the bed or the main seating area, not the whole trailer. Full coverage tips from characterful to visually overwhelming in a compact space.
Stikwood’s reclaimed pine panels and WallArt’s 3D wood plank tiles are both practical camper choices — no power tools, minimal weight addition, and true peel-and-stick adhesion that holds through road vibration when applied to a properly prepared surface. Stikwood runs $5–$8 per square foot in honey pine, weathered gray, and dark walnut. For a more contemporary shiplap look, NovaBold’s peel-and-stick shiplap panels come in white, gray, and natural tones at $3–$6 per square foot.
A standard accent wall behind a queen travel trailer bed is approximately 60×48 inches, or about 20 square feet. Order 15% extra to account for cuts around any outlets, vents, or trim pieces. Wipe the wall with isopropyl alcohol before applying — even trace amounts of cleaning product residue will cause edges to lift within weeks of vibration.
Tip: Run plank panels horizontally rather than vertically on an accent wall. Horizontal lines visually elongate the wall and make the trailer feel wider — vertical planks do the opposite and make low ceilings feel lower.
Budget: $80–$185
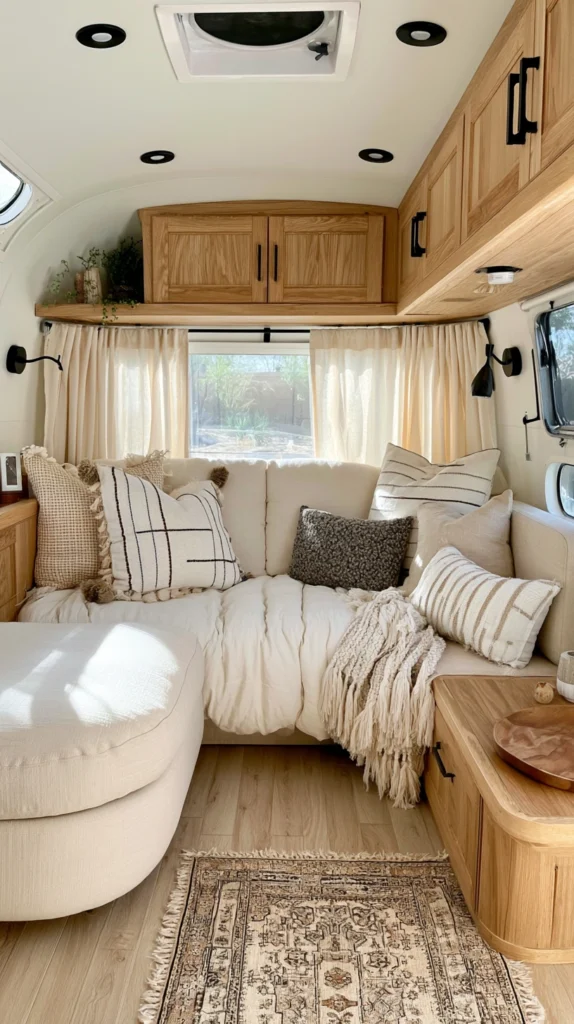
4. Upgrade to Linen or Velvet Throw Pillows in Your Palette Tones
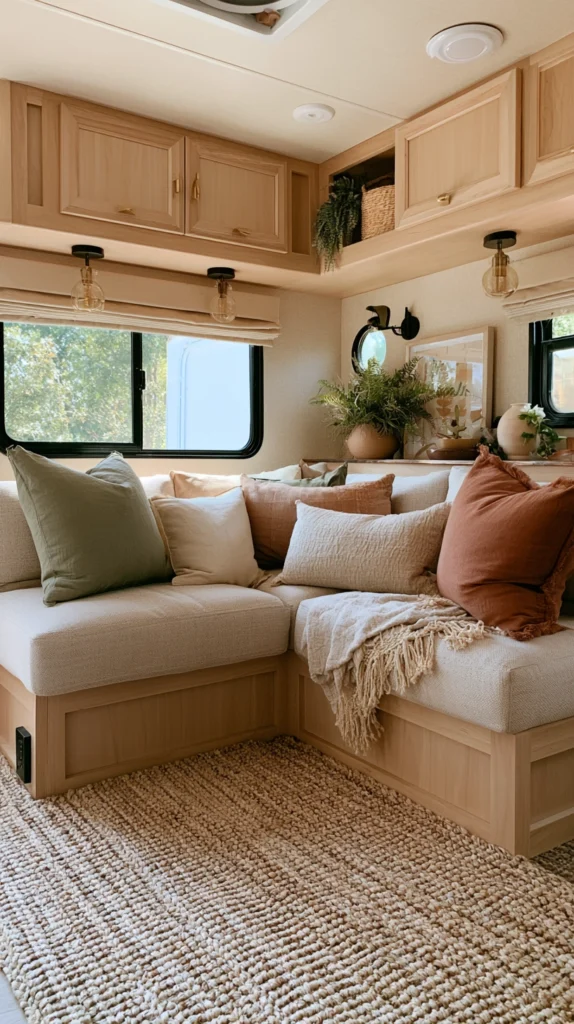
Throw pillows are where most travel trailer interiors either pull together or fall apart. Factory seating cushions are designed for durability rather than aesthetics, and the pillows that come with them — if any — are almost always a generic neutral that fails to connect to any coherent design story.
Replacing them with two to four carefully chosen pillows in your established palette tones immediately makes the seating area look intentional. The material matters as much as the color:
- Linen: Works in earthy, coastal, and natural palettes. Relaxed texture without looking casual.
- Velvet: Adds visual luxury in a single piece. Best in muted tones — sage, dusty rose, deep navy — rather than saturated colors.
- Woven cotton or textured jacquard: Holds pattern well and doesn’t show wear the way solid fabrics do.
For a seating area with two facing benches or a sofa, two larger pillows (20×20 inches) plus one lumbar pillow (14×20 inches) is typically the right quantity — enough to register as designed, not so many that they occupy sitting space.
Tip: Use an insert 2 inches larger than the cover size — a 20×20 cover with a 22×22 insert. The resulting fullness is what distinguishes a designer-looking pillow from a flat, underfilled one.
Budget: $45–$120
5. Hang Woven Window Shades Instead of Factory Blinds
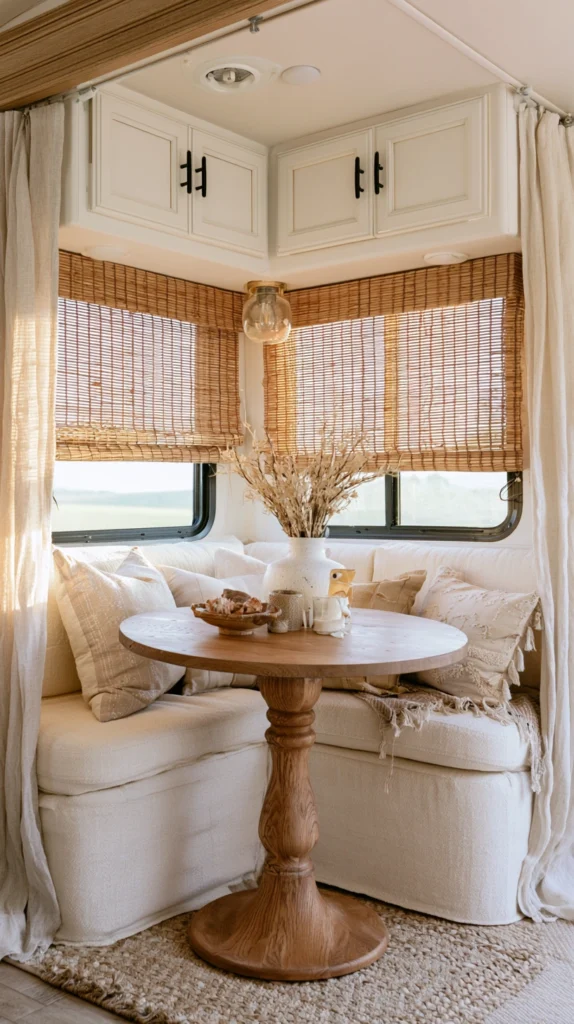
Factory roller blinds and cellular shades in travel trailers are among the most utilitarian-looking elements in the space — and among the easiest to replace. Woven wood shades in bamboo, rattan, or jute filter light rather than blocking it, which creates a warm, dappled glow through the window rather than a flat, bright rectangle or complete darkness.
Standard travel trailer window widths typically fall at 24, 27, 30, or 36 inches. Home Depot’s Natural Light Bamboo Roll-Up Shades and Target’s Threshold Woven Wood Roman Shade series cover most of these dimensions without custom ordering at $20–$45 per window. For windows that fall between standard sizes, mount the shade slightly outside the window frame — the visual width increase reads better than a shade that floats in a too-wide opening.
For sleeping, layer a separate blackout roller shade on the same brackets behind the woven shade. This gives full light control at night without sacrificing the daytime atmosphere that makes woven shades worth installing.
Tip: Unroll woven shades fully for 24 hours before hanging. Packaging curl is significant with bamboo and rattan materials — a day of flat unrolling produces a shade that hangs straight immediately, rather than needing weeks to relax into place.
Budget: $80–$200 for a full trailer
6. Replace the Dinette Cushions with Custom-Cut Foam and New Fabric
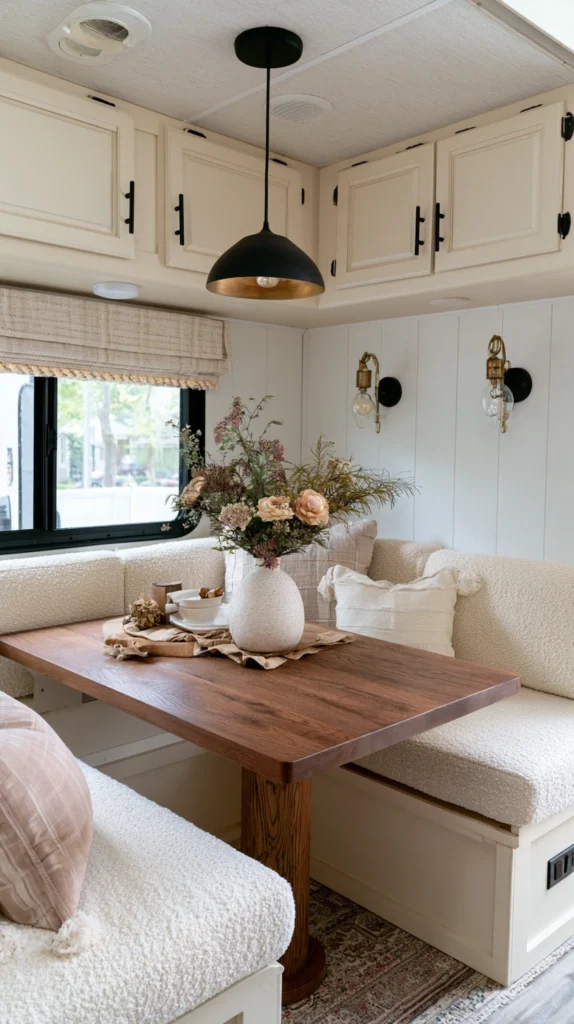
Dinette seating cushions in production travel trailers are almost universally underperforming — compressed foam in a generic fabric that wears quickly and holds stains permanently. Replacing them with new foam cut to size and a fabric of your choice is the upgrade that makes the largest functional and visual difference in the main living area.
The process is more accessible than it sounds:
- Measure existing cushions and order high-density foam (2.0 lb density minimum for seating), cut to size from Foam Factory or Foamorder — both ship cut-to-dimension pieces. Expect $15–$35 per cushion, depending on thickness and size.
- Choose a fabric rated for upholstery use — minimum 30,000 double rub for durability. Performance fabrics from Greenhouse Fabrics or a local upholstery shop handle spills and cleaning far better than decorator-weight fabric.
- Sew simple envelope-style cushion covers with a hidden zipper — or have a local seamstress do it for $15–$25 per cover.
Total cost for a four-cushion dinette replacement runs $80–$180, depending on fabric choice — significantly less than a trailer renovation, with a result that looks custom because it is.
Tip: Choose a fabric with a subtle texture or tone-on-tone pattern rather than a solid color for dinette cushions. Solid fabrics show every crease and contact mark; a slight texture or weave pattern absorbs visual noise and looks better between cleanings.
Budget: $80–$180
7. Add a Genuine Wool or Cotton Area Rug Over Factory Flooring
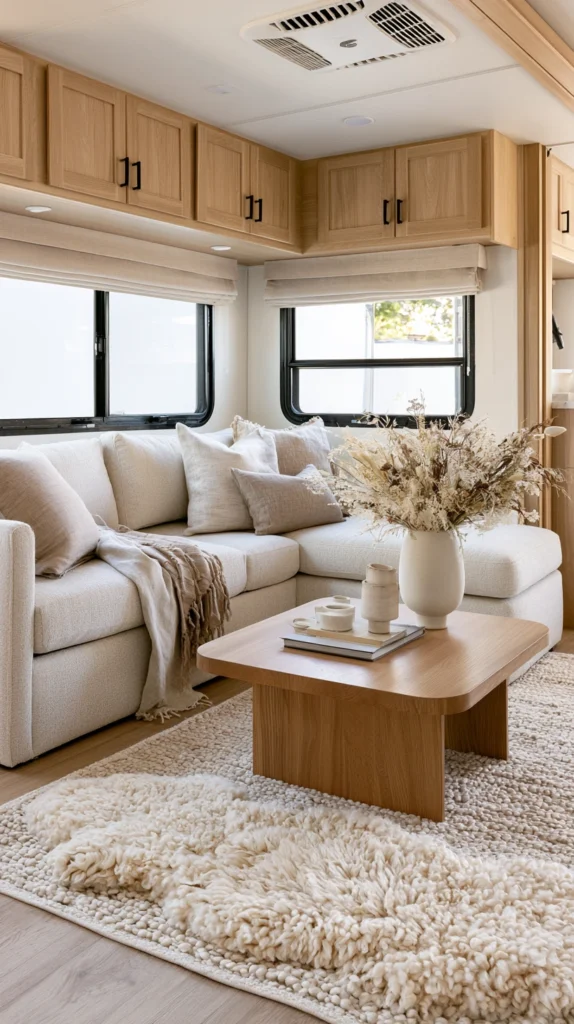
Factory travel trailer flooring — vinyl plank or commercial carpet — is designed for durability and ease of replacement rather than any aesthetic quality. A genuine wool or woven cotton area rug laid over it in the main living area immediately shifts the quality of the space, introducing the kind of natural material and color depth that manufactured flooring can’t replicate.
For a travel trailer living area, a 4×6-foot rug typically covers the main floor space without overlapping into the kitchen or blocking cabinet access. For a longer open floor plan, a 5×7 or a runner configuration works better. In terms of construction:
- Wool rugs hold color best over time and are naturally soil-resistant. Dash & Albert and Lorena Canals make wool options at accessible price points.
- Flat-weave cotton rugs are lighter, machine-washable, and easier to secure flat on vinyl flooring. Better for high-traffic trailers that see muddy entry regularly.
- Jute and sisal add the most natural texture but absorb moisture — avoid in trailers that regularly see wet weather entry.
Use a non-slip rug pad cut to size underneath, regardless of the rug type. Natural fiber and woven rugs have minimal grip on vinyl flooring, and a shifting rug in a moving trailer is both an annoyance and a tripping hazard.
Tip: Choose a rug in a tone slightly warmer than your neutral base — if your walls are cool white, choose a rug in warm cream or natural. The slight warmth differential between floor and wall creates depth rather than a flat monochrome effect.
Budget: $55–$180
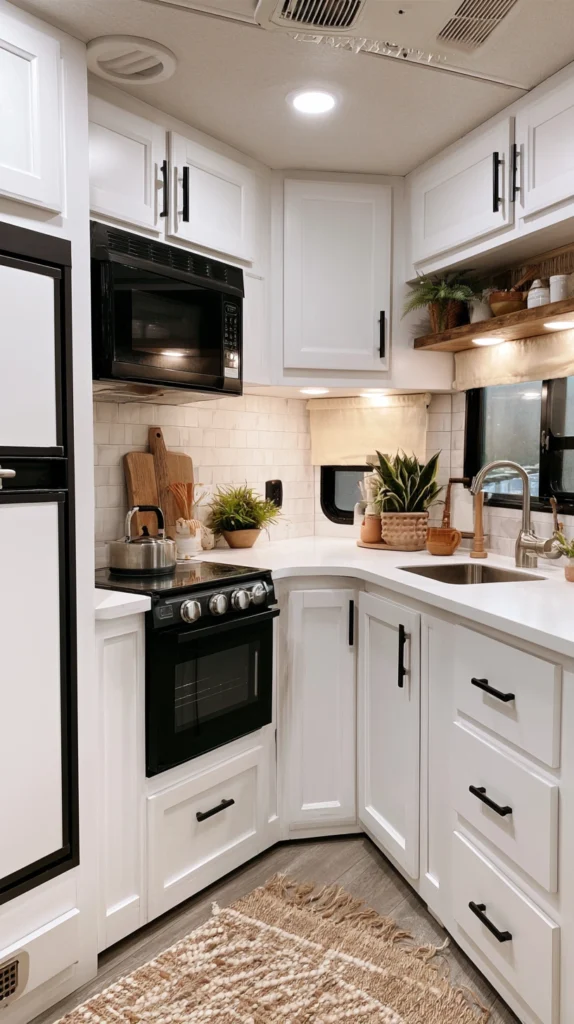
8. Install Undermount or Puck Lighting Under Kitchen Cabinets
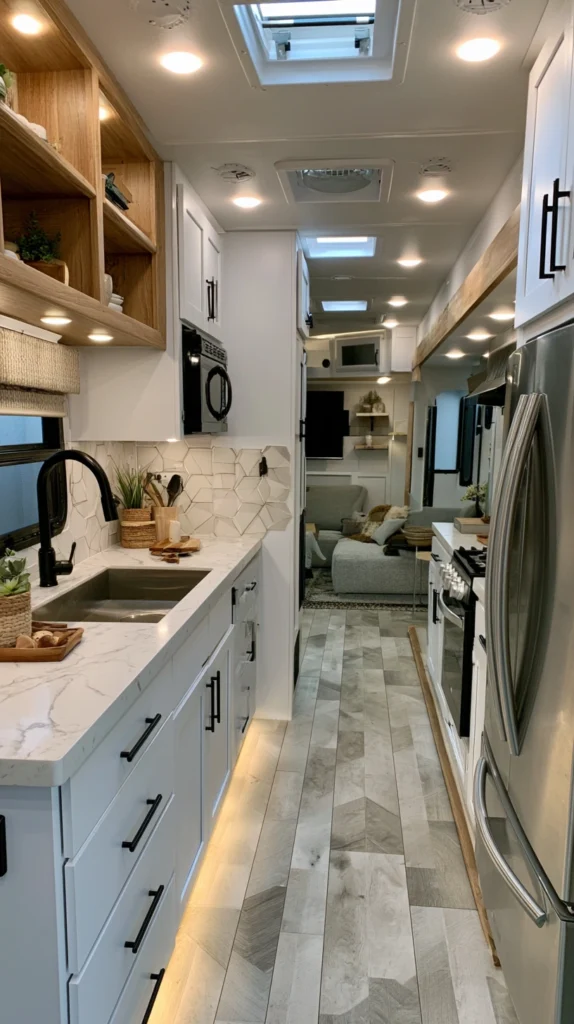
Overhead lighting in a travel trailer kitchen is almost always a single fixture positioned to illuminate the countertop from above and behind — the worst possible configuration for actual task lighting and for the visual quality of the space. Undermount lighting installed on the underside of upper cabinets changes both problems simultaneously.
Adhesive puck lights and plug-in LED strip lights both work without wiring:
- LED strip lights (Govee or Litcessory brands) are the most flexible option — they run the full length of the cabinet underside and produce even light rather than the pools that puck lights create. A 6-foot strip runs $15–$28 and connects to a USB power source or can be hardwired into an existing outlet.
- Rechargeable puck lights (AMIR or OMERIL brands) require no wiring at all — they mount adhesively and charge via USB. Ideal for rental trailers or situations where cutting into the cabinet underside isn’t practical.
In either case, mount the lights toward the back of the cabinet, the underside rather than the front edge. Back-positioned lights illuminate the countertop working surface rather than the front of the cabinet face, which is where the light is actually needed.
Tip: Choose lights with a color temperature of 2700K–3000K for the kitchen specifically. This warm range makes food and surfaces look natural and inviting. Cool white at 4000K+ in a small trailer kitchen reads as clinical and flattens the color story of everything around it.
Budget: $25–$65
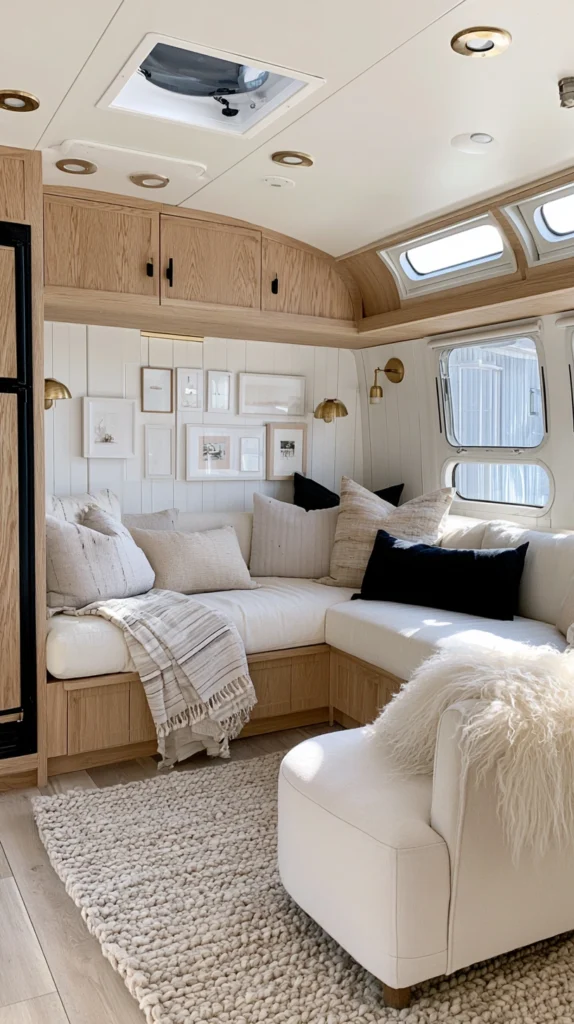
9. Introduce a Gallery Wall of Framed Prints Above the Sofa or Bed
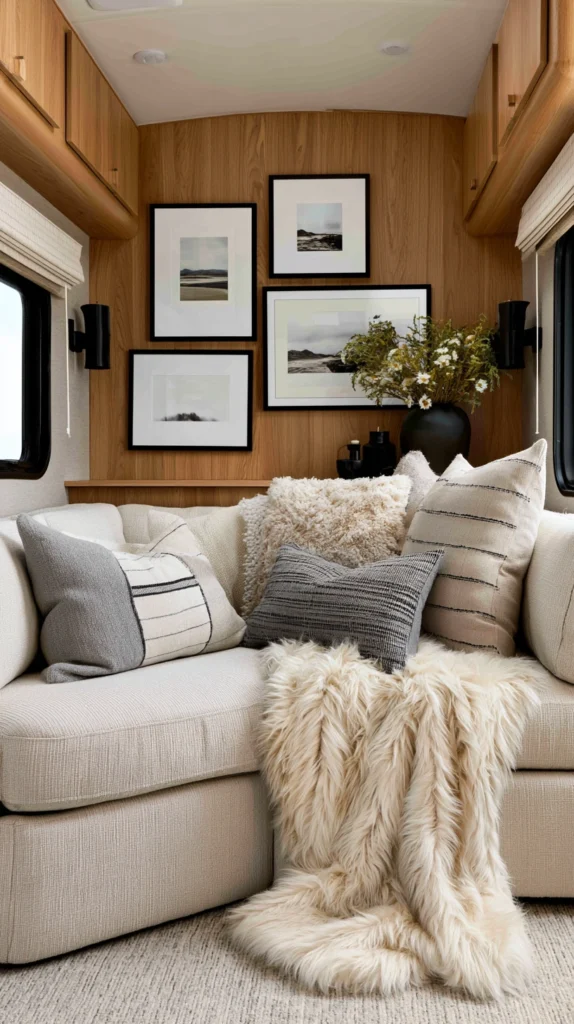
A bare wall above primary seating or the bed is the most common untreated surface in a travel trailer interior, and it’s one of the most impactful places to introduce visual interest at low cost. A gallery arrangement of two to four framed prints in consistent frames creates a focal point that makes the space feel considered in a way that a single large piece rarely achieves at this scale.
For travel trailer use, the approach requires some practical thinking:
- Use frames with acrylic rather than glass — identical visual quality, a fraction of the weight, and no risk of breakage in transit.
- Mount with two anchor points per frame rather than one — a single hook allows road vibration to shift frames and eventually damage the wall at the mounting point.
- Choose prints that share a visual connection — same color palette, same subject matter, or same aesthetic style — rather than a random assortment. Three prints that belong together read as curated; three unrelated prints read as accumulated.
For print sourcing, Society6, Artifact Uprising, and Desenio all offer printable and shipped art at accessible prices. For a travel trailer, prints with some connection to landscape, nature, or travel have the most contextual logic — they reinforce the purpose of the space rather than ignoring it.
Tip: Create a paper template of each frame and tape it to the wall before hammering a single nail. Adjust the arrangement until the spacing looks right, then transfer the hanging hardware positions directly from the template to the wall. This eliminates the multiple-hole problem that makes gallery walls look approximate.
Budget: $45–$130
10. Swap the Bathroom Vanity Light for a Warm-Toned Bar Fixture
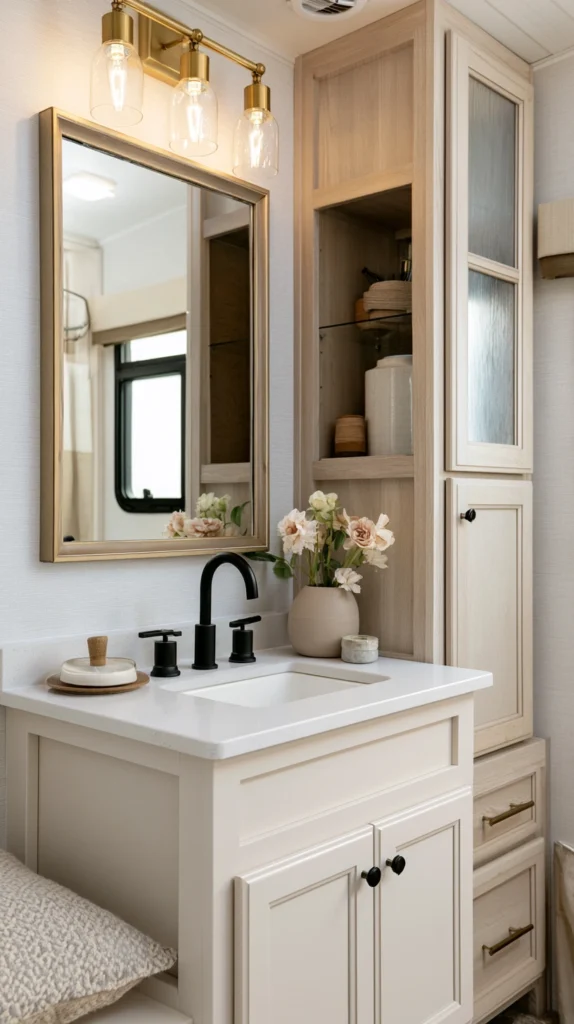
The factory vanity light in most travel trailers is a builder-grade strip fixture with cool white bulbs — and it’s doing active damage to the bathroom aesthetic every time it’s on. Replacing it with a warm-toned bar fixture in brass, matte black, or brushed nickel is the single upgrade that most improves how the bathroom looks and feels.
Most travel trailer vanity fixtures are hardwired and connect through a standard junction box, which makes replacement a direct swap in most cases — turn off the 12V or 120V circuit at the source, disconnect the existing fixture’s wiring, connect the replacement’s wiring in kind, and mount. The whole process takes 20–30 minutes with basic electrical comfort. If the wiring connection is unfamiliar, a licensed electrician will complete this in under an hour for $50–$80 in labor.
For fixture selection, a 2-light or 3-light bar in aged brass or matte black at 18–24 inches wide fits most travel trailer vanity configurations. Capital Lighting and Feiss both make quality fixtures in this format at $45–$85. Pair with G25 globe bulbs in the 2700K range for a warm, flattering light quality.
Tip: Replace the bulbs in any existing fixture with warm 2700K globe bulbs before spending anything on a new fixture. If the existing fixture shape is the main problem, then replace it — but if bulb temperature is most of the issue, $12 in new bulbs may deliver 80% of the improvement.
Budget: $55–$120
11. Use Open Shelving with Styled Storage Instead of Closed Cabinets
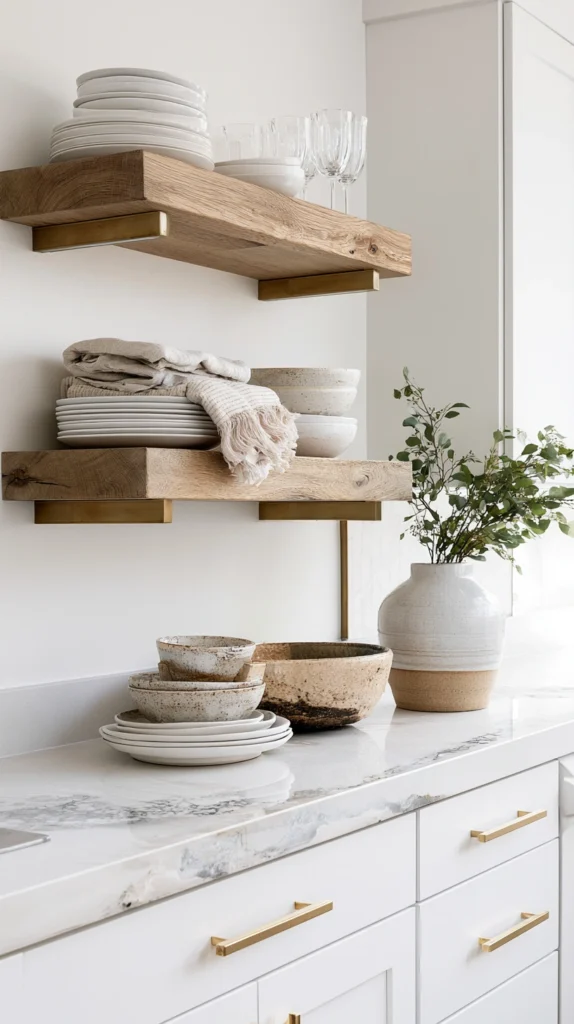
Travel trailers with closed cabinetry throughout tend to feel storage-heavy and visually compressed — every wall becomes a cabinet face. Converting one section of a closed cabinet to open shelving or replacing a blank wall section with floating shelves introduces visual breathing room and creates space for the kind of intentional styling that makes an interior look designed.
For open shelving that works practically in a moving trailer:
- Use brackets rated for at least 30 lbs and mount into wall studs, or use toggle bolts — shelves with attractive items on them carry real weight.
- Keep shelf depth at 8 inches maximum in a kitchen context and 10 inches in a living area — deeper shelves become obstacles in narrow trailer corridors.
- Apply a thin lip rail along the front edge of each shelf, or use museum putty on displayed items — everything that looks good, stationary needs to be secured for transit.
Style the shelves with items that are actually used rather than decorative objects alone. A small plant, three or four cookbooks stacked horizontally, a ceramic pitcher, and a jar of pasta read as intentional and lived-in. A shelf full of small figurines and decorative objects reads as staged.
Tip: Remove one door from an existing closed cabinet rather than building new shelving. The resulting open section breaks up the cabinet-face wall and costs nothing beyond the decision to remove a door.
Budget: $30–$95 for floating shelf installation
12. Add Brass or Aged Metal Accents Throughout as a Unifying Thread
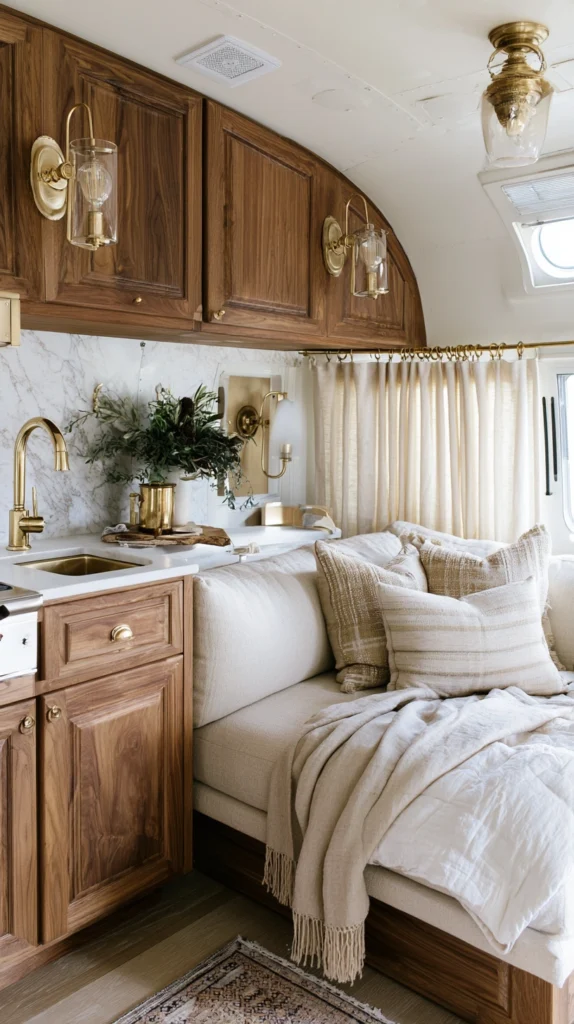
Designer interiors rarely achieve their cohesion through color alone — there’s almost always a material thread running through the space that connects disparate elements into a unified whole. In a travel trailer, that thread is most effectively a metal finish: aged brass, unlacquered bronze, or dark iron appearing consistently in hardware, lighting, hooks, and small accessories.
The material appears in places where most people default to whatever came installed:
- Curtain rod brackets and finials
- Towel rings and toilet paper holders
- Coat hooks near the entry
- Picture hanging hardware
- Candle holders or small decorative vessels
None of these individual pieces carries significant weight in the design. Together, appearing in the same finish across every room of the trailer, they create the visual consistency that makes a space feel like someone made decisions rather than assembled purchases. Aged brass is the most versatile finish for this application — it works against warm whites, natural woods, and earth tones equally well.
Tip: Unlacquered brass develops a natural patina over time that most people find more attractive than the original finish. If patina concerns you, choose lacquered brass or brushed gold, which holds its original color indefinitely.
Budget: $35–$90 to outfit a full trailer
13. Treat Every Surface as Part of the Same Visual Story
The difference between a travel trailer that looks like a decorator touched it and one that looks assembled piece by piece comes down to whether every decision was made in reference to the same underlying logic — or whether each purchase happened independently.
This is less a specific upgrade than a discipline applied to all the other upgrades:
- The hardware finish reappears in the light fixture and the curtain rod.
- The palette established in the bedding shows up in the rug and the throw pillows.
- The natural fiber texture of the window shades echoes in the basket storage and the rug.
- The wood tone on the accent wall is the same tone as the floating shelf brackets.
In practice, this means creating a physical sample board — even just a piece of cardboard with paint chips, fabric swatches, and hardware samples attached — and checking every purchase against it before it enters the trailer. This process takes about 15 minutes to set up and saves the cost and effort of returning pieces that looked right in isolation but don’t work in context.
Tip: Photograph the trailer interior regularly as you make changes, and evaluate the photos rather than the space in person. The camera reveals visual discord that’s easy to overlook when you’re physically inside a space — the same disconnect a decorator sees immediately on a first visit.
Budget: $0 — this is a way of working, not a product category
Final Thoughts
Designer style in a travel trailer is a product of subtraction as much as addition. The trailers that look the most considered are the ones where the fewest wrong decisions were made — not the ones where the most pieces were added. A coherent palette, quality materials in the places that matter most, and a consistent finish thread running through the hardware and lighting will outperform a trailer loaded with individual upgrades that don’t speak to each other.
Start with the palette decision, then the hardware, then the single accent wall. Build from the structural elements outward toward the smaller details. Every piece added after that should earn its place by reinforcing what’s already there — not by introducing a new direction that dilutes it.