13 Modern Camper Decor Ideas for a Clean and Stylish RV
Decorating an RV isn’t the same as decorating a home. Every inch is load-bearing in function, and every pound you add affects fuel efficiency. The best modern camper interiors don’t just look good — they’re engineered to feel intentional in a space that’s usually under 300 square feet.
These ideas skip the generic and go straight into what actually works: specific materials, real measurements, and honest product guidance.
1. Use a Strict Three-Color Rule to Avoid Visual Chaos
Small spaces amplify clutter, and color clutter is the fastest way to make an RV feel cramped. The solution isn’t minimalism for its own sake — it’s structure.
Apply the 60-30-10 rule:
- 60% base neutral (white, warm greige, or light gray)
- 30% secondary tone (sage, slate blue, or terracotta)
- 10% accent used sparingly — one throw pillow, one vase
In practice: white walls, sage cushion covers, one terracotta pillow. Not four different patterns competing for attention.
Finish tip: Always choose matte finishes on walls. They hide seams and screws far better than gloss — a detail that matters a lot in factory-built interiors.
Budget: Zero cost if you’re reusing what you own. Paint alone runs $20–$35 per quart for quality interior latex.
The three-color rule sounds limiting, but it’s actually freeing — every new purchase either fits the palette or it doesn’t, which makes decorating decisions much faster.
2. Replace Overhead Lighting with Layered Puck Lights
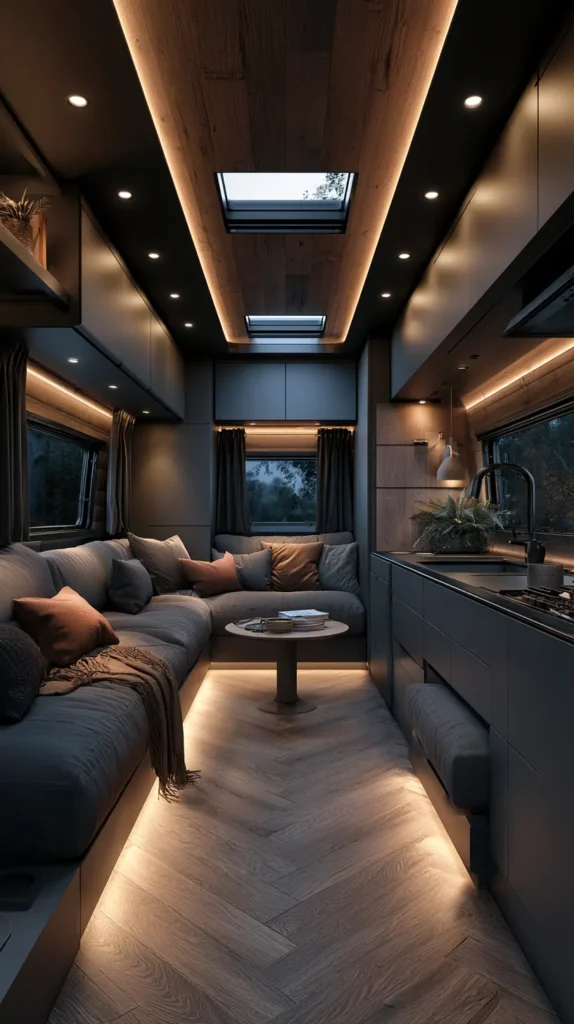
Factory overhead lighting in most RVs runs off cheap fluorescent or yellow-toned LEDs that flatten the space and quietly drain your battery. Replacing them is both an aesthetic and a practical upgrade.
Where to install 12V LED puck lights:
- Under upper cabinets for task lighting
- Along the kickboard beneath the sofa for ambient glow
- Inside upper cabinet interiors so they feel built-in
What to look for:
- Color temperature of 3000K–3500K for a warm, modern feel
- Each puck draws 1–3 watts, so six of them pull less power than one factory fixture
- Wireless battery-operated versions (Kohree, Brilliant Evolution) install with adhesive — no wiring needed
Add a dimmer switch to the main circuit and the whole space shifts from “hallway” to “hotel room” after dark.
Budget: $25–$60 for a full set of puck lights. Dimmer switch adds another $10–$20.
Lighting is the single highest-impact change per dollar in any RV interior. It changes how every other element in the room reads, day and night.
3. Swap Cushion Foam to Fix Both Comfort and Aesthetics
Most RV dinette and sofa cushions use 1.5–1.8 lb density foam that compresses within two years. By then it doesn’t just feel bad — it looks bad, and no cover change fixes a saggy base.
The replacement spec that works:
- 2.0 lb density, 36-ILD foam — firm enough to hold shape, soft enough for long sits
- Cut to size at suppliers like The Foam Factory
- Wrap in 1-inch Dacron batting before re-covering for that slightly rounded, furniture-store look
For the fabric:
- Outdoor-rated upholstery (Sunbrella or equivalent) at $25–$40/yard
- Resists moisture and UV far better than indoor fabric in a vehicle environment
- Holds color through temperature swings that would fade regular fabric within a season
Budget: $80–$150 for foam on a full dinette replacement. Add $60–$120 for fabric depending on yardage.
This is the upgrade that surprises people most — the same dinette can look like a completely different piece of furniture once the foam and cover are replaced properly.
4. Install Open Floating Shelves with Lip Rails
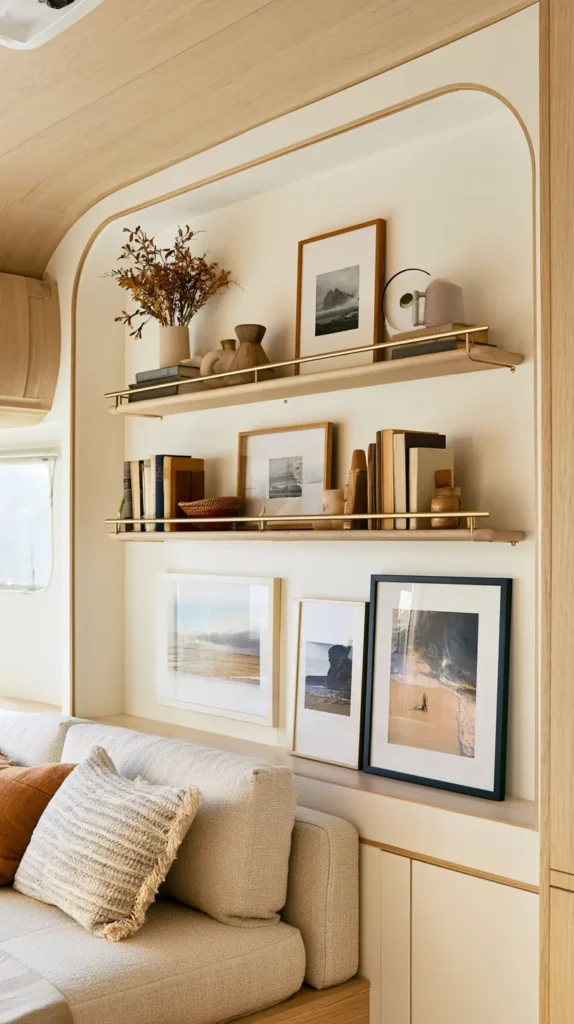
Open shelving reads as modern and airy compared to boxy overhead cabinets. The catch: items will fly off while you’re moving unless the shelves are built for it.
How to do it right:
- Use 3/4-inch birch plywood or IKEA LACK boards trimmed to fit
- Screw a 1-inch lip rail along the front edge of each shelf
- Keep depth at 6 inches maximum — items stay visible and accessible
- Finish in the same tone as your cabinets so it reads as intentional, not added-on
To keep items in place while traveling:
- Museum putty under decorative objects
- Non-slip shelf liner on the base of every shelf
A single floating shelf running the length of a slide-out wall adds visual storage without adding visual weight — one of the few tricks that makes a small space feel larger, not smaller.
Budget: $20–$45 per shelf depending on material and length.
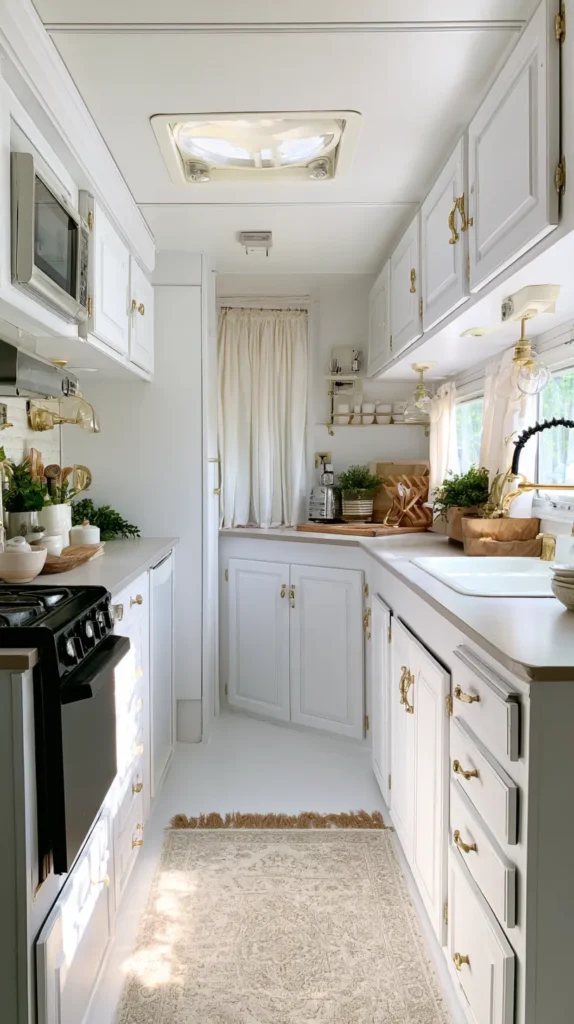
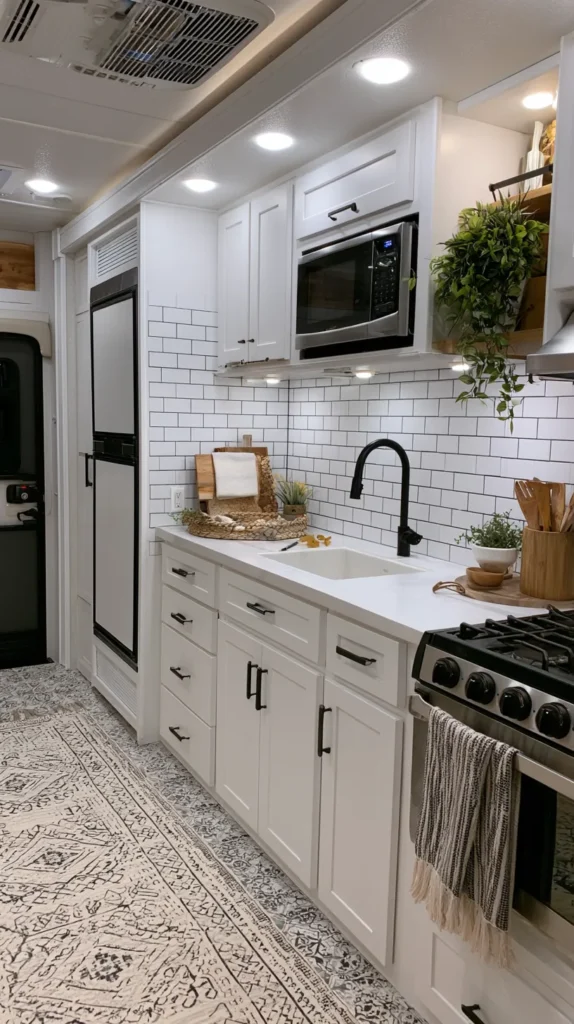
5. Upgrade Hardware to Unify the Kitchen and Cabinets
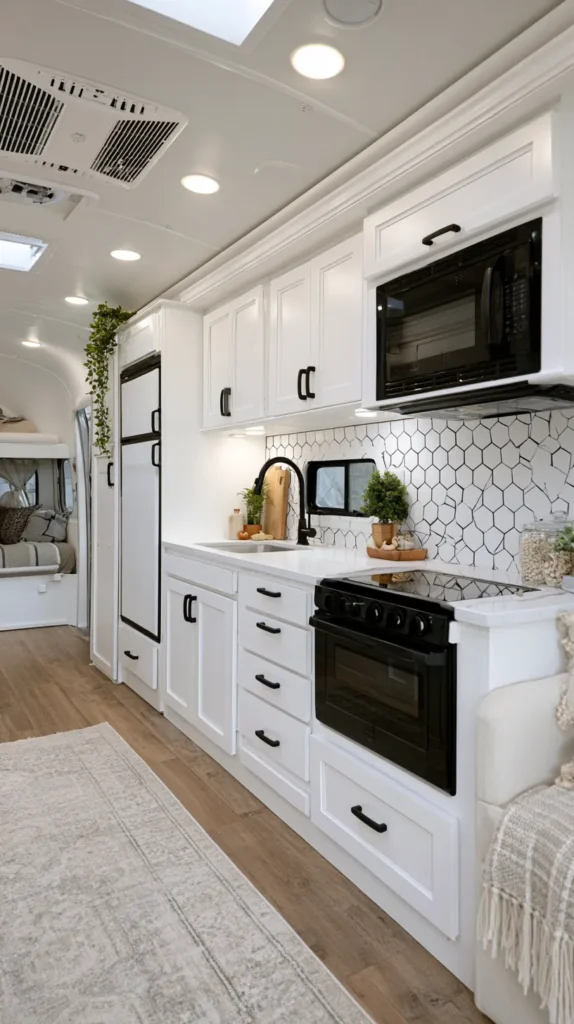
Default plastic or brushed-gold knobs on most rigs signal “rental unit” immediately. Swapping hardware is the easiest transformation in any RV interior — no tools beyond a screwdriver required.
What to buy:
- Matte black bar pulls — 96mm or 128mm center-to-center spacing covers most standard RV cabinet holes without new drilling
- Budget picks: $1–$3 per pull on Amazon
- Quality picks: Amerock or Cosmas at $5–$10 each with noticeably better weight and finish
Don’t stop at knobs:
- Replace exposed hinges with concealed European-style hinges (Blum or Grass, available at Rockler)
- They give a seamless, furniture-grade look and actually open smoother than factory hinges
Budget: $40–$80 for a full RV kitchen including hinges and pulls.
The kitchen can look a full decade newer for under $60. It’s the highest ROI task on this entire list if you’re short on time or budget.
6. Use Window Film Instead of Curtains for a Cleaner Look
Curtains in an RV block light badly, bunch awkwardly, and absorb moisture and odors over time. There’s a cleaner solution that handles privacy without sacrificing daylight.
Window film options by need:
- Frosted or decorative static-cling film (Rabbitgoo, Artscape) — privacy with full light diffusion, installs with water, peels off cleanly
- One-way mirror film — reads as reflective from outside in daylight while staying transparent from inside
Where curtains still make sense:
- Sleeping area windows only, where blackout matters
- Use a simple tension-rod Roman shade in natural linen — cleaner than gathered curtains
Weight savings: 3–5 lbs compared to a full curtain setup — meaningful on a rig where payload matters.
Budget: $15–$35 for window film per window. Roman shades run $20–$50 each.
This swap also removes a significant maintenance task — no more taking down, washing, and re-hanging curtains every few weeks in a space that collects dust and condensation fast.
7. Refinish Cabinets with Chalk Paint, Not Peel-and-Stick
Peel-and-stick contact paper on cabinet doors looks impressive in photos and terrible within six months. Edges lift in humidity and temperature swings — both of which RVs experience constantly. Chalk paint is the real answer.
Why chalk paint works in RVs:
- Bonds to laminate and MDF without primer
- Dries matte and hides surface imperfections
- Handles travel vibration without cracking when properly sealed
The process:
- Clean cabinet surfaces thoroughly with degreaser
- Apply two coats with a foam roller, 220-grit sand between coats
- Seal with clear wax or water-based polycrylic for durability
Product picks: Annie Sloan or Rust-Oleum Chalked in white or soft gray.
Budget: $40–$60 in paint for a full RV kitchen. Brushes and sandpaper add another $10–$15.
This finish also photographs well and adds perceived resale value — if you’re planning to sell the rig eventually, a chalk-painted kitchen is one of the first things buyers notice.
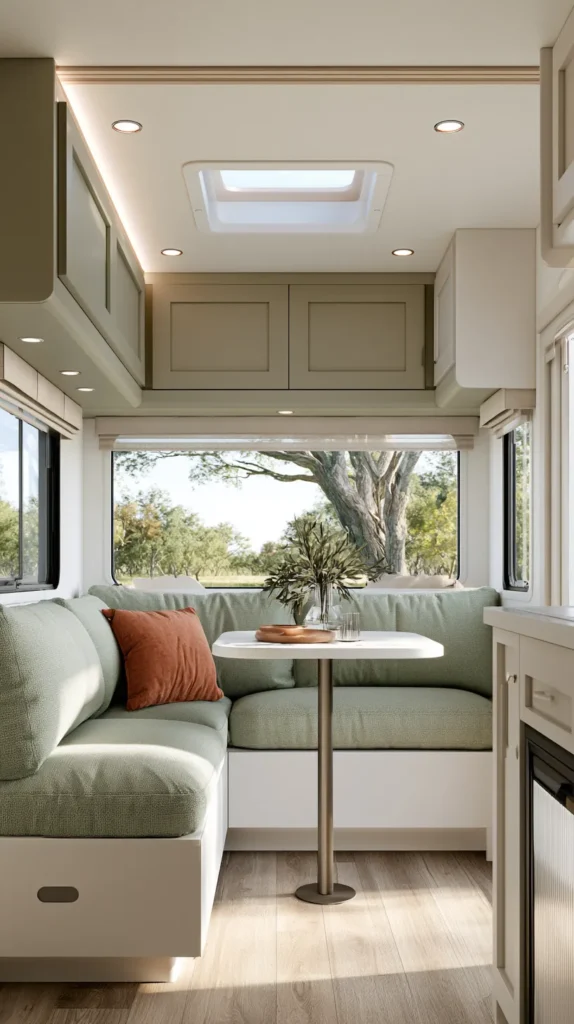
8. Define Zones with an Outdoor Rug
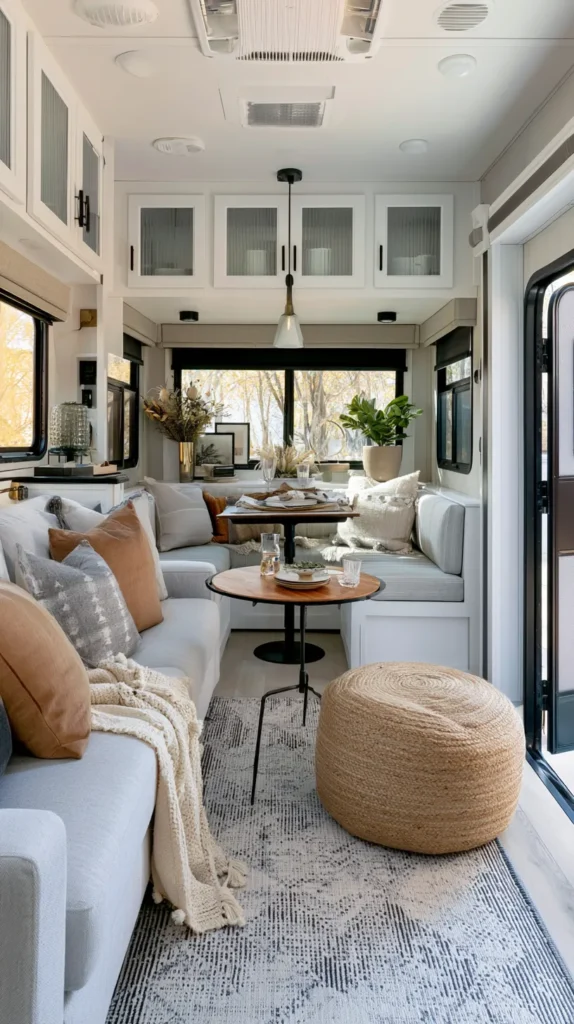
In an open-plan RV, the living and dining area blur together visually. A well-placed rug fixes this without any construction.
What to look for:
- 5×7 or 5×8 size placed under the dinette to anchor that zone
- Polypropylene construction — not wool or cotton — for moisture and mildew resistance
- Flatweave styles in geometric or abstract patterns read more modern and don’t trap debris
Top pick for RV use: Ruggable’s washable rugs — the cover unzips and runs through a standard washer, which matters in a space that tracks in mud, sand, and campfire ash regularly.
Weight note: Stick to rugs under 8 lbs to keep load addition minimal.
Budget: $60–$150 depending on size and brand. Ruggable runs $120–$180 for this size range.
Beyond aesthetics, a rug dramatically changes how the floor feels underfoot — especially in coaches with vinyl or laminate flooring that gets cold on early mornings.
9. Paint the Ceiling a Shade Lighter Than the Walls
Most RV ceilings yellow over time. Repainting them is a low-effort change with a surprisingly large impact on how spacious the interior feels.
The technique:
- Use pure white (Sherwin-Williams Extra White SW 7006 is a reliable choice) while keeping walls a warm neutral
- A lighter ceiling recedes visually, adding perceived height — critical in coaches with 78–80 inch headroom
- Use a foam roller with 3/8-inch nap to avoid texture marks on vinyl ceilings
What to watch:
- Tape the ceiling-wall joint carefully — clean lines there are what separate a professional-looking result from an amateur one
- One quart covers a typical 30-foot coach ceiling
Budget: $20–$35 for a quart of quality ceiling paint.
It’s one of the most underrated upgrades on this list. The ceiling is the largest uninterrupted surface in an RV interior, and painting it properly changes the entire room’s proportions.
10. Add a Barn Door to the Bathroom Instead of a Swing Door
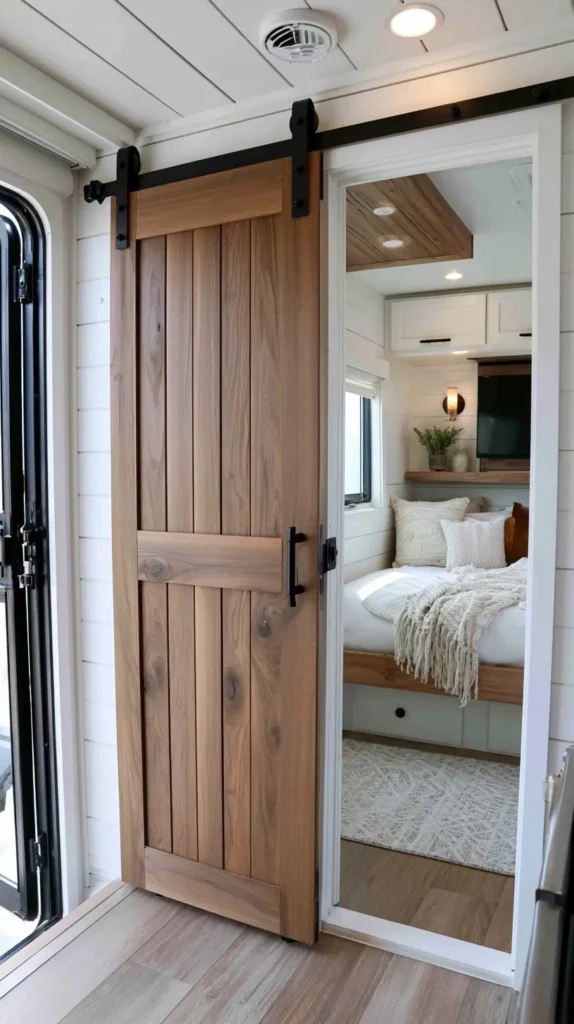
RV swing doors consume 4–6 square feet of functional floor space every time they open. A barn door conversion slides flat against the wall and gives that space back permanently.
How to build one that’s road-safe:
- Use 1×6 tongue-and-groove pine boards glued and nailed to a plywood backer
- Keep total door weight under 15 lbs
- Install a top-mount sliding track rated for 50+ lbs (Winsoon and Smartstandard offer reliable options)
- Seal with polyurethane if the bathroom generates steam
Travel safety details:
- Add a floor guide to prevent swinging side-to-side on the road
- A magnetic catch keeps it closed while moving
Budget: $35–$55 for hardware. $20–$40 for lumber. Total: $55–$95.
The barn door is the kind of upgrade that guests notice immediately — it changes the entire feel of the entry and living area, not just the bathroom access.
11. Replace the Backsplash with Peel-and-Stick Tile That Actually Lasts
Unlike cabinet contact paper, peel-and-stick backsplash tile holds up well because it’s applied to a stable, flat wall surface that doesn’t flex during travel the way cabinet doors do.
Brands that hold up:
- Aspect, Smart Tiles, and Tempaper all have solid track records in vehicle environments
- Subway tile format in white or light gray with matte finish is the most versatile modern choice
Installation notes:
- Most RV kitchens run 18–24 inches wide and 12 inches tall — two to three sheets cover it
- Apply over a clean, lightly deglossed surface for best long-term adhesion
- Press firmly along all edges, especially corners near the stove where heat and steam concentrate
Budget: $25–$50 total.
This is the highest visual-impact-per-dollar change in the RV kitchen. It transforms a dated or bare wall into something that looks intentional and finished in under an hour.
12. Use Tension Rods to Organize Under the Sink and Inside Cabinets
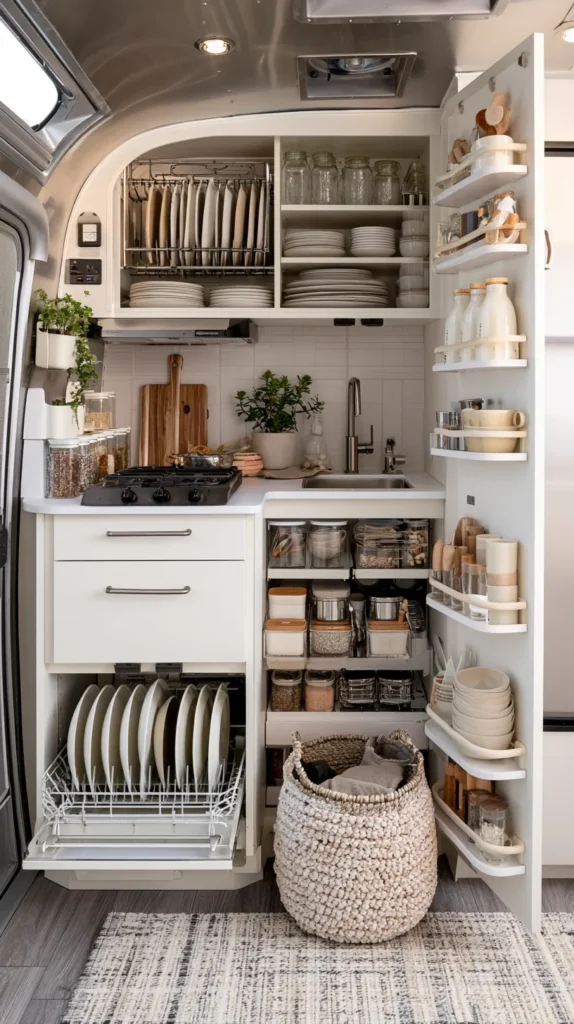
Visible organization is part of the decor in a small space. When cabinet doors open, what’s inside reflects directly on how the whole interior feels.
Under the sink:
- Install horizontal tension rods between the cabinet walls to create a second-tier shelf for spray bottles
- Keeps bottles upright and separated during travel without any drilling
Inside upper cabinets:
- A rod across the interior front edge prevents stacked plates from sliding
- Non-slip cabinet liner on every surface below
For open-shelf areas:
- Clear acrylic bins (IKEA VARIERA line, $5–$10 each) make the interior of any shelf look intentional from across the room
Budget: $5–$15 for tension rods. $20–$40 for a full set of VARIERA bins.
Organization solutions that are invisible until a door opens are exactly the kind of detail that makes an RV feel like a thoughtfully designed space rather than a converted vehicle.
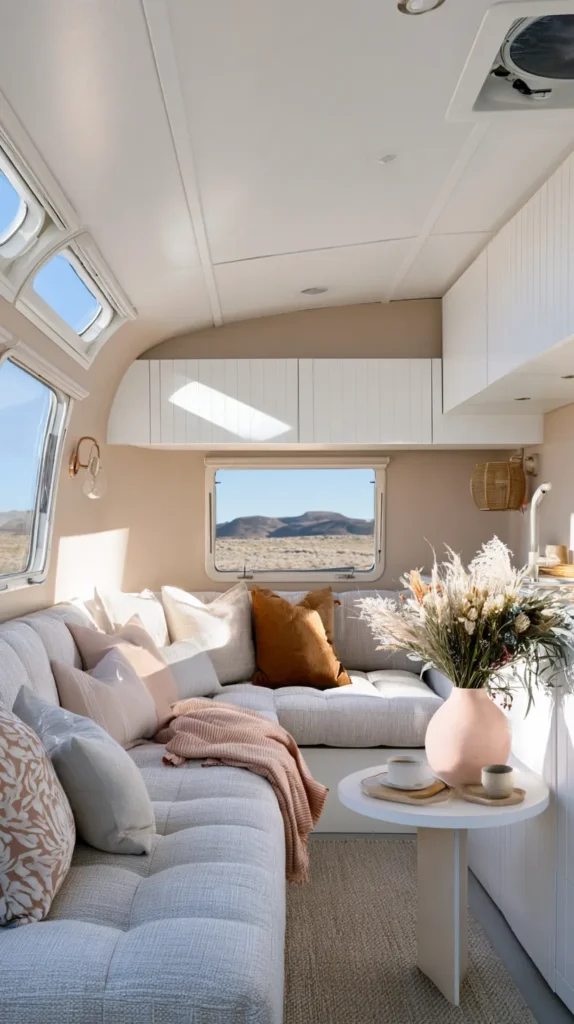
13. Invest in One Statement Textile Instead of Many Small Ones
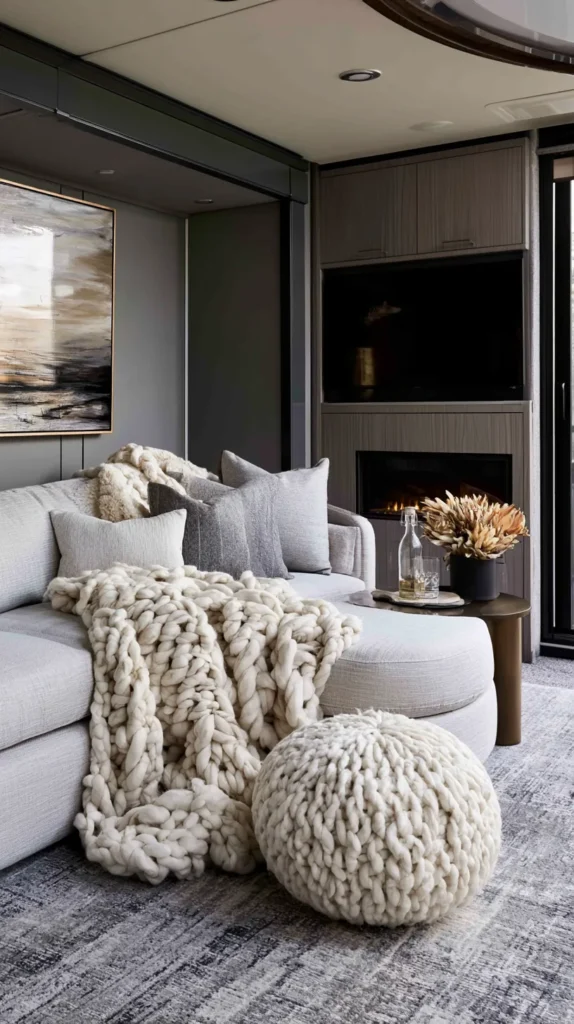
The most common mistake in RV decorating is over-accessorizing — too many small items trying to add personality, all competing, none landing. One well-chosen textile does more visual work than five small decorative objects combined.
Statement textile options that work in RVs:
- A chunky hand-knit throw in a neutral tone draped over the sofa
- A single macramé wall panel (24–36 inches wide) above the dinette
- A woven basket used as a catch-all that doubles as texture
Why one piece works better than many:
- In a space where every object is visible from every other spot, restraint reads as curation
- Single large pieces anchor a zone; clusters of small pieces create visual noise
- One quality item is easy to swap seasonally without redecorating the whole space
Budget: $30–$80 for a quality throw or wall panel. Far less than the $15-per-item accumulation most people end up with.
Restraint is the design philosophy that separates modern camper interiors that look curated from ones that look cluttered. When in doubt, remove one thing rather than add another.