13 Small Kitchen Fall Makeover Ideas on a Budget
My kitchen looked exactly the same in every season for six years. White cabinets, beige walls, one fruit bowl, zero indication that the calendar had ever moved past June.
Tried buying a pumpkin-shaped dish towel once. Sat alone on the oven handle looking like a forgotten seasonal aisle clearance item, not a styled kitchen. Took it down within a week.
Then I learned that a small kitchen makeover is about layered, repeatable changes across every visible surface, not one random seasonal object. Open shelves, counters, the window, even the cabinet hardware, all working together on a tight budget.

Now my kitchen feels completely different walking in every October, and the entire transformation cost less than a single piece of new furniture would have.
Let me show you 13 budget-friendly ideas that turn a small kitchen into a genuinely fall-feeling space without a single dollar spent on renovation.
Why Small Kitchens Are Actually the Easiest Room to Transform for Fall
The scale advantage:
Why small works in your favor here:
- A small kitchen has less total surface area to update than any other room in the home
- Every dollar spent covers proportionally more of the visible space
- Changes that would be too small to register in a large open kitchen become significant focal points in a compact one
The budget reality of kitchen decorating:
What most people assume versus what is true:
- Most people assume kitchen decorating means new cabinets, new counters, or new appliances
- A seasonal kitchen refresh requires none of these
- The actual budget categories are: small textiles, a few jars and containers, some open shelf styling, and minor hardware or lighting swaps
Why repeatable, layered changes beat single statement pieces:
The system principle:
- One pumpkin on the counter reads as a leftover decoration
- Five or six small, coordinated changes across different surfaces read as a complete seasonal refresh
- This is the same principle that makes mantels, bedrooms, and living rooms succeed: a palette and system, not an isolated object
My revelation: A small kitchen rewards consistency across many tiny surfaces far more than it rewards one expensive purchase. The entire room can shift seasons for less than the cost of one new small appliance.
1. Swap to Warm-Toned Dish Towels and Oven Mitts (The Cheapest Color Change Available)
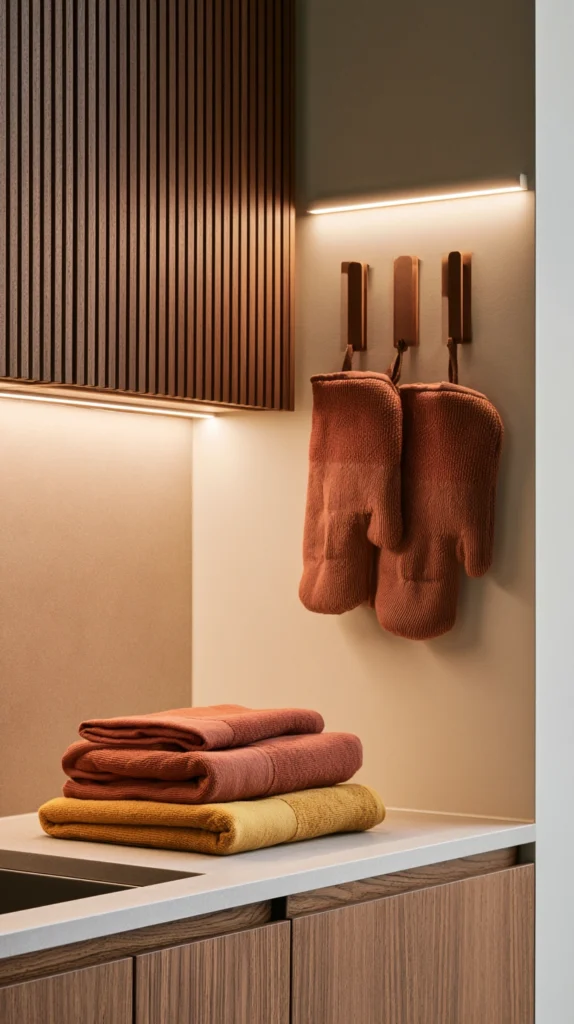
Replacing everyday kitchen linens with fall-colored versions — the single least expensive way to shift a kitchen’s entire color temperature.
My single pumpkin towel mistake:
What I had tried first:
- One novelty pumpkin-print towel hung on the oven handle
- Everything else in the kitchen unchanged
- The towel looked randomly placed rather than part of an intentional color shift
Why dish towels and oven mitts matter more than expected:
The visibility factor:
- These items are used and seen constantly, multiple times daily
- They occupy visually prominent spots: the oven handle, the stove area, hanging hooks near the sink
- Changing several of these small textiles simultaneously creates a noticeable, cohesive shift without touching anything structural
Color and material choices:
What to look for:
- Solid rust, terracotta, mustard, or deep olive tones rather than printed pumpkin or leaf graphics
- Waffle-weave or linen-blend cotton (texture reads as more intentional than thin flat-weave printed towels)
- A coordinated set of three to four towels in slightly varied tones within the same warm color family
Where to source them cheaply:
Best budget sources:
- Target’s seasonal home section (often $4-8 per towel)
- HomeGoods and TJ Maxx (frequently $3-6 per towel, best value if shopping in person)
- IKEA (solid color towels in warm tones, $2-5 each, available year-round)
The full textile swap:
Beyond just dish towels:
- Oven mitts in a matching or coordinating tone
- A small kitchen rug or mat near the sink in a fall color
- Cloth napkins if displayed in an open holder or basket
Placement strategy:
Maximizing visibility:
- One towel on the oven handle (the most visible spot in most kitchens)
- One draped over the sink edge or on a hook nearby
- One folded on the counter near a frequently used appliance
- This spreads the color change across the room rather than concentrating it in one spot
Cost:
- Four dish towels: $16-32
- One set of oven mitts: $8-15
- Total: $24-47
My towel swap result: Replacing every dish towel and the oven mitts with rust and mustard tones for under $40 total changed the kitchen’s overall color temperature more immediately than I expected, since these items are touched and seen constantly throughout the day.
Dish Towel Tips
Buy slightly more than needed:
The rotation advantage:
- Kitchen towels get used and washed frequently
- Having six to eight in rotation, rather than just the three or four on display, means the displayed ones can be swapped for fresh ones without disrupting the color scheme
- This small buffer keeps the kitchen looking consistently fresh throughout the season
Avoiding literal pumpkin graphics:
Why solid colors work better:
- A printed pumpkin or leaf graphic towel reads as seasonal decor specifically for fall and looks out of place by December
- A solid rust or olive towel reads as a genuinely chosen color, blending into a year-round kitchen palette while still feeling distinctly autumnal during the season
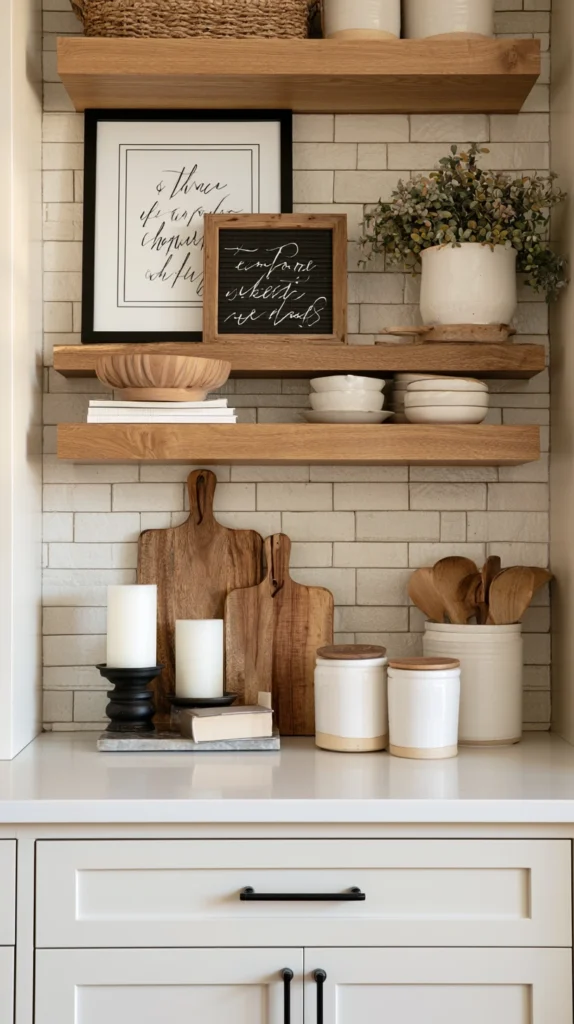
2. Open Shelf Styling With Seasonal Pantry Items (Function as Decor)

Rearranging open shelving to highlight fall-appropriate pantry staples — using items already being purchased anyway as the season’s decorative layer.
My empty open shelf problem:
What was happening:
- One small open shelf above the counter, used purely for storage
- Plain glass jars of flour and sugar, no visual coordination
- A missed opportunity, since open shelving is inherently more visible than closed cabinets
Why pantry staples make excellent decor:
The zero-additional-cost principle:
- Many fall-appropriate pantry items are things already being purchased for cooking and baking anyway
- Displaying them attractively costs nothing beyond the jars themselves, since the food was a planned purchase regardless
Fall-appropriate items to display:
What naturally fits the season:
- Dried pasta in warm wheat tones
- Whole grains: farro, wild rice, or barley in clear jars
- Dried beans (cranberry beans, black beans) which have beautiful natural coloring
- Whole spices: cinnamon sticks, star anise, whole cloves in small jars
- A jar of dried apple rings or dried orange slices (doubling as the scented decor from companion fall articles)
The jar selection:
Choosing the right vessels:
- Clear glass jars allow the food’s natural color and texture to become the visual interest
- Amber or smoked glass jars add warmth even before considering what is inside
- Uniform jar shapes across the shelf create a cohesive, organized look; mismatched jars can still work if grouped by similar height
Sourcing affordable jars:
Budget options:
- IKEA glass storage jars ($2-6 each)
- Dollar stores and discount retailers for basic clear glass jars
- Reused jars from store-bought products (pasta sauce jars, jam jars) with labels removed
Arrangement principles:
Building the shelf composition:
- Group jars by height, tallest toward the back or one end
- Leave some breathing room rather than packing the shelf completely full
- Add one non-food object (a small wooden cutting board leaned upright, a small ceramic pitcher) to break up the row of jars
Labeling for cohesion:
A small additional touch:
- Simple kraft paper labels or chalkboard-style labels add a unified, slightly rustic look
- This is optional but elevates the shelf from “stored pantry items” to “intentionally styled display”
Cost:
- Glass jars (6-8 jars): $15-35
- Labels: $5-10
- Pantry items: already part of the regular grocery budget
- Total: $20-45
My open shelf result: Transferring my existing pasta, grains, and dried beans into matching glass jars and arranging them by height transformed a purely functional shelf into the most visually interesting spot in the kitchen, all without buying a single decorative object that was not also genuinely useful.
Open Shelf Tips
Rotate seasonally without buying new items:
A sustainable system:
- In fall, prioritize warm-toned grains and dried goods toward the front of the shelf
- In other seasons, rotate different pantry items forward
- This means the same set of jars can represent different seasons throughout the year simply by changing which contents are displayed most prominently
Avoiding overfilling:
The styling restraint:
- A shelf packed completely edge to edge looks cluttered rather than curated
- Leaving roughly 20-30% open space between groupings allows each jar to be appreciated individually
3. A Small Fall Fruit and Gourd Bowl (Edible, Temporary, and Genuinely Affordable)
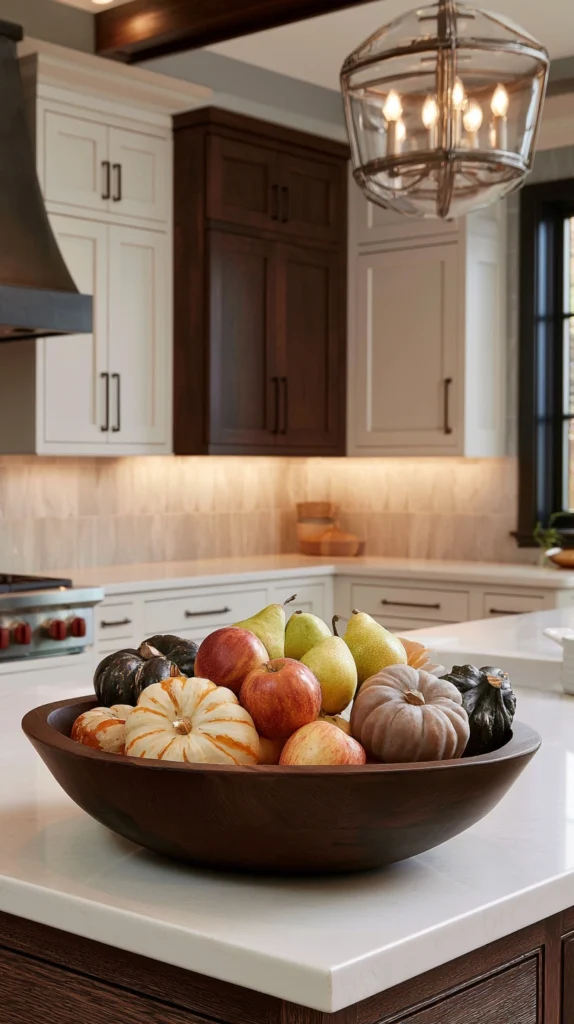
A simple bowl filled with seasonal fruit and small gourds on the counter — the most traditional and most budget-friendly kitchen centerpiece available.
My empty counter centerpiece problem:
What was missing:
- No counter centerpiece at all, or an inconsistent rotation of whatever fruit happened to be in the kitchen that week
- No intentional color or seasonal coordination
Why this is the most budget-friendly idea on the entire list:
The dual-purpose principle:
- Unlike purely decorative pumpkins, fruit in the bowl gets eaten and replaced naturally as part of the household’s regular routine
- This means the “decor” budget is largely absorbed into the grocery budget that exists regardless
Fall-appropriate fruit and gourd choices:
What to include:
- Apples (any variety, the most classic fall fruit, often the most affordable seasonal fruit available)
- Pears
- A few small decorative gourds or mini pumpkins (genuinely cheap at farmers markets and grocery stores in early fall, typically $1-3 each)
- Pomegranates for a deeper color note, if budget allows (slightly pricier but adds rich color)
Bowl selection:
Choosing the right vessel:
- A wooden bowl adds warmth and fits naturally into a fall palette
- A simple ceramic bowl in an earthy glaze
- Avoid anything overly modern or glossy, which can fight the rustic, seasonal quality of the contents
Sourcing an affordable bowl:
Budget options:
- Thrift stores (wooden or ceramic bowls, often $3-8)
- IKEA (simple wooden bowls, $8-15)
- Already-owned mixing bowls repurposed for display
Placement on the counter:
Where this works best:
- Centered on the main counter, if space allows, as the kitchen’s focal point
- On a small kitchen island or peninsula if the main counter is too crowded with appliances
- Near the entry point to the kitchen, so it is one of the first things seen
Color coordination within the bowl:
Building visual interest:
- Mix red and yellow apples for color contrast
- Add the gourds toward the edges, letting the fruit dominate the center
- A few stems of dried wheat or a single cinnamon stick tucked among the fruit adds texture without additional major cost
Cost:
- Bowl (if not already owned): $5-15
- Fruit and gourds: $8-15 (largely absorbed into regular grocery spending)
- Total: $13-30 (often less, since fruit would be purchased regardless)
My fruit and gourd bowl result: A simple wooden bowl filled with apples, a few pears, and three small mini pumpkins became the kitchen’s most noticed seasonal change for under $20 total, and because the fruit gets eaten and replenished as part of normal grocery shopping, this decor essentially maintains itself.
Fruit Bowl Tips
Replenish regularly to avoid spoilage decor:
Keeping it fresh:
- A bowl of fruit left untouched for weeks eventually looks neglected rather than charming
- Treating the bowl as a genuine fruit supply, eaten from and refilled regularly, keeps it looking fresh throughout the season
- The gourds, unlike the fruit, can remain in place for the full season since they do not spoil at the same rate
Varying the gourd shapes:
Visual interest through variety:
- Mixing warty gourds, smooth mini pumpkins, and elongated squash shapes creates more visual texture than uniform shapes
- Farmers markets typically offer more shape variety than grocery stores for very little additional cost
4. Affordable Cabinet Hardware Swap (The Highest-Impact Small Budget Change)
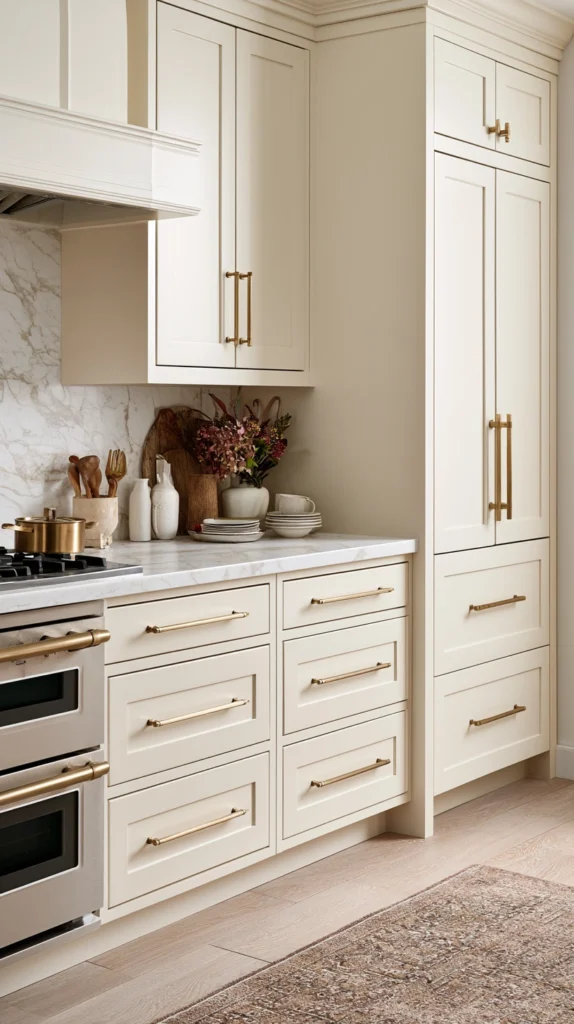
Replacing existing cabinet knobs and pulls with warm-toned options — a change frequently cited as having the best dollar-for-dollar visual impact in kitchen updates.
My builder-grade hardware problem:
What I had:
- Plain brushed nickel knobs throughout the kitchen
- Cool-toned metal fighting against every warm fall color I tried to introduce elsewhere
- A change I had assumed would be expensive, until pricing it out
Why hardware specifically matters for a seasonal-feeling kitchen:
The metal temperature principle:
- Cool metals (chrome, brushed nickel, stainless) read as clean and modern but fight against warm fall color palettes
- Warm metals (brass, bronze, matte black with warm undertones) support and enhance fall colors throughout the rest of the kitchen
- Since hardware appears dozens of times throughout a kitchen (every cabinet and drawer), this single category of change has outsized visual impact
Hardware style and finish options:
What to choose for a fall-friendly palette:
- Brushed or aged brass (the warmest option, pairs beautifully with rust, terracotta, and olive)
- Matte black with a slightly warm undertone (more dramatic, still works with fall colors if not stark cool black)
- Oil-rubbed bronze (a middle option, warm-toned but more subdued than brass)
Sourcing affordable hardware:
Budget sources:
- Home improvement stores’ basic hardware lines (often $2-5 per knob or pull)
- Amazon multi-packs (frequently the most economical per-piece pricing, $15-30 for a set of 10-15)
- Facebook Marketplace or thrift stores for secondhand hardware in good condition (occasionally available in bulk lots very cheaply)
The installation process:
Why this is genuinely a budget DIY project:
- Remove existing hardware (typically one or two screws per piece)
- Check that new hardware uses the same screw spacing as existing holes, or purchase hardware specifically matching the current spacing to avoid drilling new holes
- Attach new hardware using the existing screws or the screws provided with the new pieces
- A standard kitchen with 15-20 cabinet and drawer pulls typically takes one to two hours total
Partial swaps for tighter budgets:
A lower-cost alternative:
- Rather than replacing every single knob and pull, focus on the most visible cabinets: those at eye level or directly facing the kitchen’s main entry point
- This partial approach still shifts the overall metal tone noticeably while spending significantly less
Cost:
- Full kitchen hardware swap (15-20 pieces): $40-90
- Partial swap (most visible cabinets only): $15-35
- Total: $15-90 depending on scope
My hardware swap result: Replacing all of my brushed nickel knobs with warm brushed brass for under $60 total and about ninety minutes of work changed how every other fall color in the kitchen read, the same rust towels and terracotta jars suddenly felt intentional rather than fighting against cool-toned hardware throughout the room.
Hardware Swap Tips
Measure existing screw spacing before buying:
Avoiding a frustrating mismatch:
- Cabinet pulls (the longer style with two screw holes) come in standardized spacing measurements
- Measuring the distance between existing screw holes before purchasing new hardware prevents buying pieces that do not align with the current drilled holes
- Knobs (single screw, no spacing concern) are simpler in this regard
Saving old hardware:
A practical consideration for renters:
- If renting, keep the original hardware carefully labeled and stored
- This allows reverting to the original hardware before moving out, while still enjoying the seasonal and aesthetic benefit of the swap during the lease
5. A Small Herb Garden on the Windowsill (Living Greenery That Also Cooks Dinner)
Potted herbs displayed on the kitchen windowsill — combining living greenery, fall color through pot choice, and genuine culinary function.
My bare windowsill:
What was there:
- An empty windowsill above the sink
- No greenery anywhere in the kitchen
- A missed opportunity for both decor and practical cooking ingredients
Why herbs specifically fit a budget fall kitchen refresh:
The function-and-form principle:
- Unlike purely decorative plants, herbs serve an immediate practical purpose in cooking
- Many fall recipes (soups, roasted vegetables, braises) rely heavily on herbs like rosemary, thyme, and sage
- This means the “decor” budget is partially offset by reduced grocery spending on fresh herbs that would otherwise be purchased per-use
Best herbs for a windowsill in fall:
What thrives in this setting:
- Rosemary (hardy, fragrant, visually appealing with its needle-like leaves)
- Thyme (compact, easy to maintain, useful in nearly every fall braise or roast)
- Sage (the leaves themselves carry a beautiful silvery-green color that fits fall palettes naturally)
- Parsley (less specifically “fall” but useful and easy to maintain through cooler months indoors)
Pot selection for fall:
Choosing vessels that fit the aesthetic:
- Small terracotta pots (the most classic, most affordable option, $2-5 each)
- Reused cans or jars wrapped in twine or burlap for a budget, textured alternative
- A uniform set of small ceramic pots in an earthy glaze, if slightly more budget allows
Sourcing the herbs themselves:
Budget approach:
- Starter plants from grocery store garden sections or hardware stores ($3-6 per plant)
- Growing from seed (significantly cheaper per plant but requires more lead time before the herbs are usable)
- Propagating from cuttings of an existing plant, if access is available, for essentially no cost
Windowsill arrangement:
Building the display:
- Line pots in a row if the sill is long and narrow
- Vary heights slightly if pots differ in size, creating gentle visual rhythm
- A small tray beneath the pots protects the windowsill from water damage and unifies the grouping visually
Maintenance for kitchen herbs specifically:
Practical care:
- Most kitchen herbs need a sunny windowsill (south or west facing ideal) and water roughly twice weekly
- Trimming for cooking use actually encourages bushier growth, making regular culinary use beneficial to the plant’s appearance as well
Cost:
- Herb starter plants (4 varieties): $12-24
- Terracotta pots: $8-20
- Total: $20-44
My windowsill herb garden result: Four small terracotta pots of rosemary, thyme, sage, and parsley above my kitchen sink cost under $35 total and provided both a genuine green, living element to the kitchen and fresh herbs for fall cooking throughout the entire season, eliminating the need to buy fresh herb packets at the grocery store nearly every week.
Windowsill Herb Tips
Choosing the sunniest window:
Light requirements matter:
- Herbs generally need at least four to six hours of direct sunlight for healthy growth
- If the kitchen window does not receive sufficient light, consider a small, inexpensive grow light positioned discreetly above the pots rather than abandoning the herb garden idea entirely
Harvesting correctly to encourage growth:
The cutting technique:
- Snip stems just above a leaf node rather than pulling leaves individually
- This encourages the plant to branch out and grow fuller rather than becoming sparse and leggy over time
6. A Coordinated Canister and Container Set (Replacing Mismatched Storage)
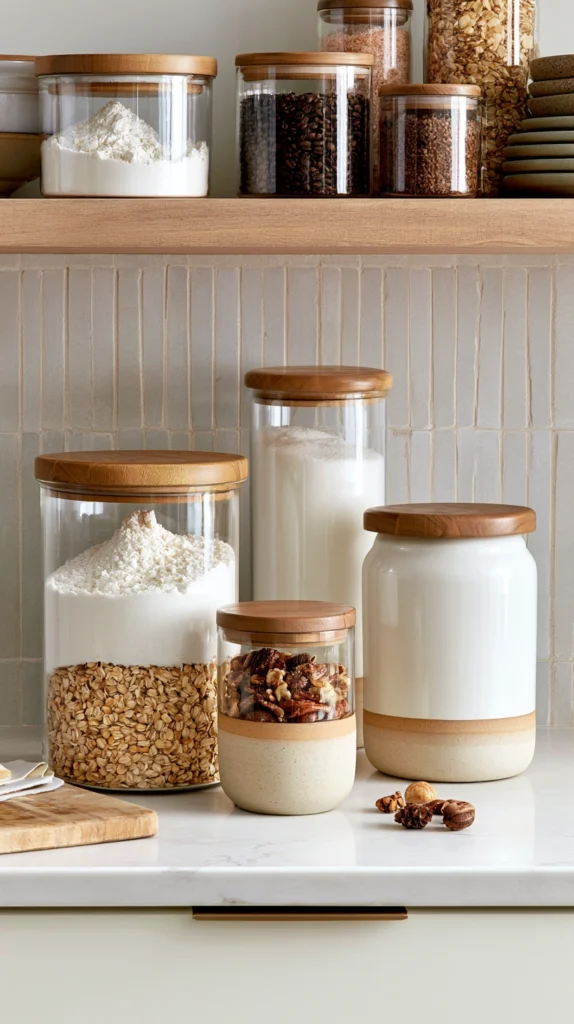
Swapping mismatched food storage containers for a unified, fall-toned set — bringing visual order to one of the most commonly neglected areas of kitchen counter and pantry organization.
My mismatched container chaos:
What was happening:
- A random assortment of plastic containers, leftover jars, and mismatched canisters
- No visual cohesion, no intentional color story
- A source of constant low-level visual clutter on the counter
Why coordinated storage matters for a small kitchen specifically:
The visual noise reduction principle:
- In a small kitchen, every visible surface carries more relative visual weight than in a larger space
- Mismatched containers create disproportionate visual chaos relative to their actual size
- A coordinated set, even a budget one, dramatically calms the overall visual field
Material and color choices for fall:
What to look for:
- Glass canisters with wood or matte black lids (a warm, natural combination)
- Ceramic canisters in earthy glazes (terracotta, cream, deep olive)
- Avoid: bright plastic, mismatched branding from various food product containers left on display
Sourcing an affordable coordinated set:
Budget options:
- IKEA glass jars with wood lids ($4-10 each, very budget-friendly for a full coordinated set)
- HomeGoods and TJ Maxx (often the best selection and pricing for ceramic canister sets, $15-30 for a set of three to four)
- Amazon basic glass canister sets ($20-40 for a set of four to six)
What goes in the coordinated containers:
Practical contents:
- Flour, sugar, and other baking staples (the most common and useful canister contents)
- Coffee beans or loose tea
- Pasta, rice, or other dry goods, connecting back to the open shelf styling from idea 2
Placement strategy:
Where the canisters live:
- On the counter near the area where baking or cooking most frequently happens
- On open shelving, integrated with the pantry display from idea 2
- Grouped together rather than scattered individually around different counter areas
Cost:
- Coordinated canister set (4-6 pieces): $20-50
- Total: $20-50
My coordinated canister result: Replacing five mismatched plastic containers and random jars with a single coordinated set of glass canisters with wood lids for under $35 dramatically calmed the visual chaos on my counter, and the warm wood lids fit naturally into the broader fall color palette I was building throughout the rest of the kitchen.
Canister Tips
Labeling for both function and style:
A small additional touch:
- Simple wood-burned or printed labels on canister lids add both function (knowing what is inside without opening) and a cohesive, slightly rustic visual detail
- This is optional but inexpensive ($5-10 for a label set) and elevates the overall presentation
Decanting consistently:
Maintaining the system:
- The visual benefit of coordinated canisters depends on consistently transferring purchased goods into them rather than leaving the original packaging out
- Building this small habit into the grocery unpacking routine maintains the kitchen’s organized appearance with minimal ongoing effort
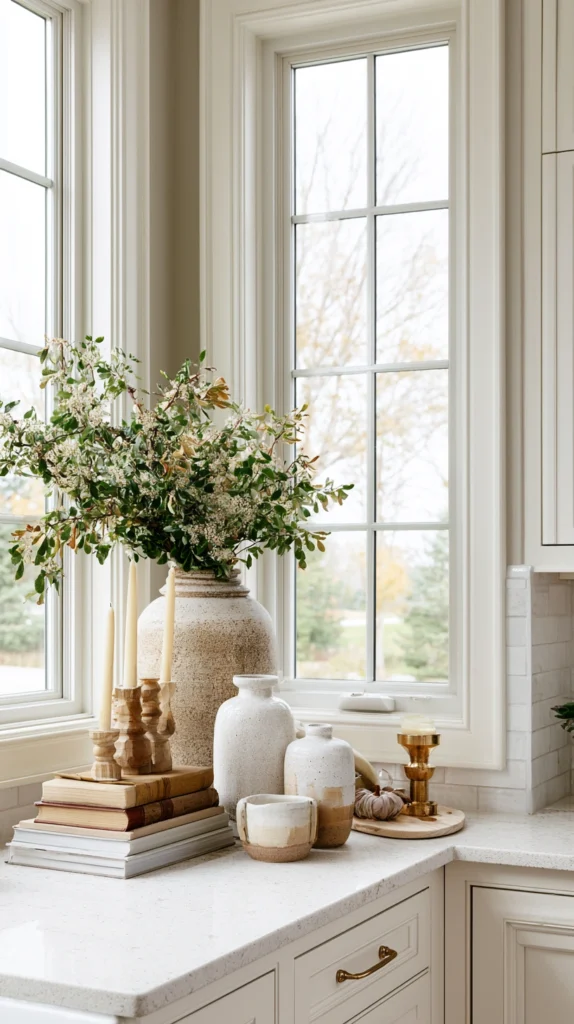
7. A Small Bud Vase or Dried Flower Arrangement on the Counter (Minimal Floral Investment)
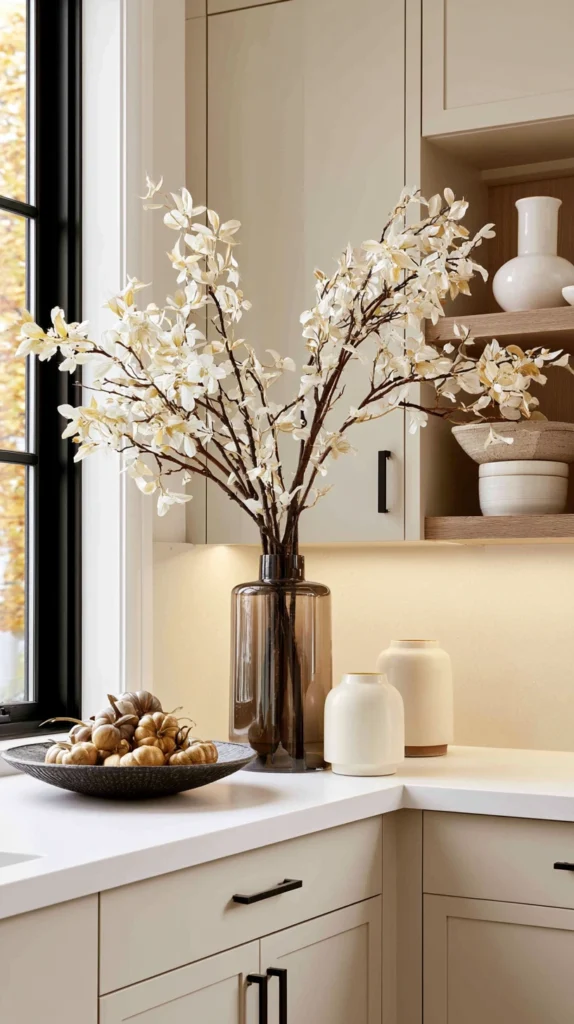
A single small vase with seasonal dried or fresh stems — the smallest possible floral investment that still provides genuine visual warmth.
My empty counter corner:
What was missing:
- A small unused corner of counter space with nothing styled there at all
- An opportunity for a minimal floral touch that did not require an elaborate or expensive arrangement
Why a small bud vase outperforms a large floral arrangement on a budget:
The proportional cost principle:
- A large floral arrangement requires significantly more stems, and therefore significantly more cost, to fill the visual space
- A single small bud vase with just one to three stems provides a meaningful decorative touch for a fraction of the cost
- In a small kitchen specifically, a small vase is also more proportionally appropriate than an oversized arrangement would be
Fall stem choices for a small vase:
Affordable options:
- A single dried wheat or grass stem (often available at craft stores for a dollar or two per stem, or foraged for free)
- A small branch of dried eucalyptus (referenced elsewhere in fall decor guidance for its fragrance and visual appeal)
- One or two stems of dried baby’s breath, which dries naturally and holds its shape well
- A single fresh sunflower or chrysanthemum stem during the appropriate part of the season, for a brighter, more colorful touch
Vase selection:
Choosing an affordable vessel:
- A small thrifted bud vase ($2-6)
- A repurposed small glass bottle (a reused condiment or beverage bottle, cleaned and repurposed)
- A small ceramic creamer or pitcher, if one is already owned but rarely used for its original purpose
Placement:
Where this works in a small kitchen:
- A windowsill corner, alongside or near the herb pots from idea 5
- A small unused counter corner
- On a small shelf if floor and counter space is limited
Cost:
- Vase: $2-8 (or already owned)
- Stems (one to three): $2-8
- Total: $4-16
My small bud vase result: A single thrifted glass bottle with two stems of dried wheat, found for under five dollars total, brought a small but genuine floral touch to an otherwise unused counter corner, proving that even the smallest floral gesture contributes meaningfully to a kitchen’s overall seasonal feeling.
Bud Vase Tips
Foraging for free stems:
A zero-cost option:
- Many dried grasses, seed heads, and small branches found along roadsides, in parks, or in a backyard work beautifully in a small bud vase
- This eliminates the cost entirely for those with access to appropriate outdoor spaces and the willingness to forage responsibly
Replacing fresh stems before they wilt:
Maintaining a fresh appearance:
- If using fresh rather than dried stems, monitor for wilting and replace promptly
- A wilted flower in a small, highly visible vase looks worse than no flower at all, while dried stems avoid this maintenance concern entirely
8. A Painted Accent on One Small Surface (The Smallest Possible Paint Commitment)
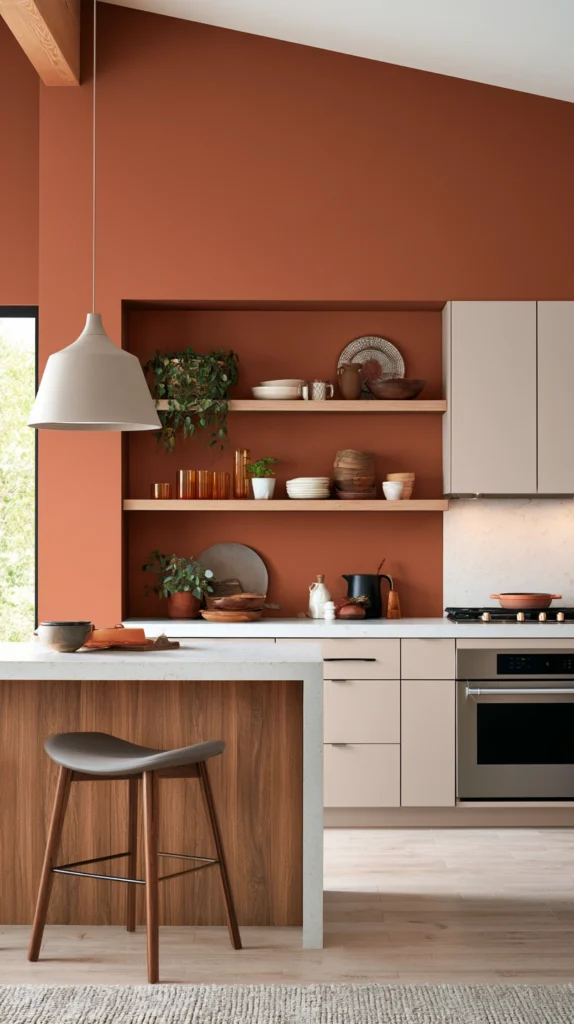
Paint applied to just one small, contained kitchen surface — bringing the highest-impact, lowest-cost design tool (paint) into a kitchen makeover without repainting any major surface.
My fear of painting anything in the kitchen:
Why I had avoided this entirely:
- Assumed any kitchen paint project meant repainting cabinets or walls, both significant undertakings
- Did not realize how much impact a much smaller painted surface could provide
Why a small painted surface works so well in a small kitchen:
The proportional impact principle:
- In a small kitchen, even a modestly sized painted surface occupies a meaningful percentage of the total visible area
- This means a small project (a single cabinet door, a small shelf, a backsplash accent area) delivers outsized visual impact relative to its size and cost
Surfaces worth considering for a small painted accent:
Low-commitment options:
A single cabinet door or drawer front:
- If the kitchen has open shelving alongside closed cabinets, painting just one or two visible cabinet doors a deep fall color (terracotta, olive, or rust) creates a focal point without repainting the entire kitchen
- Cost: one small can of cabinet-appropriate paint, $15-25
A small shelf or shelf backing:
- If open shelving exists, painting the wall directly behind the shelf (rather than the shelf itself) in a deep, warm color makes the displayed items pop forward visually
- Cost: a paint sample pot is often sufficient for this small an area, $5-10
A small kitchen stool or chair:
- If a small stool or chair lives in the kitchen, painting it a bold fall color is an easy, low-risk way to introduce color without touching any built-in surface
- Cost: $10-20 in paint, assuming the stool or chair is already owned
Paint selection:
Choosing the right product for kitchen use:
- Cabinet-grade paint (more durable, withstands kitchen humidity and cleaning better than standard wall paint) for any frequently touched surface like a cabinet door
- Standard interior paint is sufficient for a wall section behind shelving that receives no direct contact
Preparation matters more in a kitchen:
Why kitchen surfaces need extra prep:
- Cabinet surfaces in particular often have grease or residue buildup, even if not visibly dirty
- A thorough cleaning with a degreasing solution before painting prevents poor paint adhesion and a less durable result
Cost:
- Sample or small paint can: $5-25
- Total: $5-25
My painted accent result: Painting just the wall section directly behind my open pantry shelf in a deep terracotta color, using a five-dollar sample pot, made every jar and dried good displayed in front of it noticeably more visually interesting, this remains the single cheapest change on this entire list relative to its visual impact.
Painted Accent Tips
Testing on a small board first:
Avoiding kitchen-specific paint mistakes:
- Kitchen lighting (often a mix of overhead and under-cabinet lighting) can affect how a color reads differently than in other rooms
- Painting a small test board and observing it under the kitchen’s actual lighting before committing to the final surface prevents an unwelcome surprise
Choosing a washable finish:
Practical kitchen considerations:
- Even for a small accent area, a satin or semi-gloss finish (rather than flat) withstands kitchen humidity and occasional cleaning much better
- This is a worthwhile small upgrade over the cheaper flat finish option, even at a slightly higher cost per can
9. A Layered Table Runner or Placemat Set (If the Kitchen Has a Table or Island Seating)
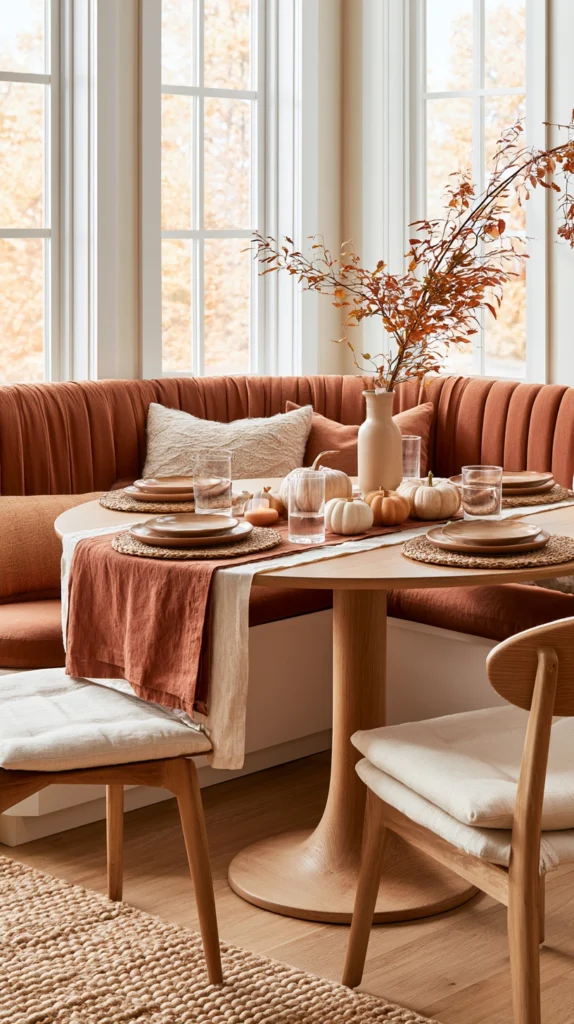
A textile layer added to any kitchen table, island counter seating, or breakfast bar — extending the color and texture changes from dish towels into the kitchen’s eating area.
My bare table problem:
What was missing:
- A small kitchen table with absolutely no styling
- A direct continuation of the bare, seasonless quality found throughout the rest of the kitchen before the broader makeover began
Why this surface deserves its own dedicated attention:
The eating-area distinction:
- A kitchen table or counter seating area is used and seen differently than the cooking and storage areas
- It benefits from a slightly more “set table” quality, similar to but more casual than a dining room table runner
Runner versus placemats:
Choosing the right approach:
Table runner:
- Works well for a small kitchen table, running down the center
- Provides a base for a small centerpiece (connecting to the bud vase from idea 7, or the fruit bowl from idea 3)
- A single piece, generally simpler to source and style than a full placemat set
Placemats:
- Better suited to individual seating at a counter or bar, where each spot needs its own defined space
- Can be mixed slightly (two different but coordinating fall colors) for a collected, less matched-set appearance
Material and color choices:
Fall-appropriate textiles:
- Linen or cotton runners in rust, mustard, or olive
- Woven placemats with some natural texture (rattan or jute-style woven mats)
- Avoid printed pumpkin or leaf patterns for the same reason established with the dish towels in idea 1: solid colors transition more gracefully across the full season
Sourcing affordably:
Budget sources:
- Target and HomeGoods seasonal sections ($8-15 for a runner, $10-20 for a set of placemats)
- IKEA (simple woven or solid-color options, often the most budget-friendly, $5-12)
Building the full table styling:
Layering with other ideas from this list:
- Runner as the base layer
- Small fruit and gourd bowl (idea 3) or bud vase (idea 7) as the centerpiece
- Coordinating cloth napkins, if desired, rolled or folded simply at each place setting
Cost:
- Table runner: $8-15
- Or placemat set: $10-20
- Total: $8-20
My table runner result: A simple rust-colored linen runner under my small fruit bowl centerpiece, costing under $12, finally gave my kitchen table a sense of being intentionally set rather than simply existing as bare furniture, this single textile layer tied the table into the same color story as the dish towels and canisters throughout the rest of the kitchen.
Table Runner Tips
Sizing the runner correctly:
Avoiding a mismatched proportion:
- A runner should generally extend slightly beyond the table’s edges on each end, not stop short
- Measuring the table length before purchasing prevents the disappointing result of a runner that looks too small for the surface
Washing schedule for kitchen table textiles:
Practical maintenance:
- A kitchen table runner or placemat set, given proximity to food and daily use, requires more frequent washing than dish towels used purely for kitchen tasks
- Choosing a machine-washable cotton or linen blend, rather than a delicate or dry-clean-only fabric, keeps this maintenance manageable
10. A Small Chalkboard or Wood Sign With a Seasonal Message (A Personal, Low-Cost Detail)
A small handwritten or printed sign displaying a simple fall-appropriate phrase — the most personal and lowest-cost decorative object on this entire list.
My blank wall space:
What was missing:
- A small unused section of wall or shelf space
- No personal or text-based decorative element anywhere in the kitchen
Why a small sign works well in a budget kitchen makeover:
The cost-to-personality ratio:
- A small chalkboard or wood sign costs very little, often under ten dollars
- It introduces a personal, specific touch that purely material or textural changes (towels, jars, hardware) do not provide on their own
Sign style options:
Chalkboard:
- A small chalkboard, either purchased inexpensively or made from a thrifted picture frame with chalkboard paint applied to the glass
- Allows the message to change throughout the season or even week to week
- Cost: $5-15 for a small purchased chalkboard, or $3-8 in materials for a DIY version
Wood sign:
- A small piece of scrap wood with a simple stenciled or hand-painted phrase
- More permanent than chalkboard but still very low-cost if using scrap or reclaimed wood
- Cost: $5-15 in materials for a DIY version
Phrase selection:
What to write:
- A simple, non-clichéd phrase: a specific recipe note, a favorite quote about autumn, or simply a word like “harvest” or “gather”
- Avoid the most overused phrases that have become visual clichés in seasonal decor; a slightly more specific or personal phrase reads as more genuine
Placement:
Where this small sign works:
- Leaned against the backsplash, rather than mounted, for easy seasonal changes
- On the open shelf from idea 2, integrated among the jars and pantry items
- Propped on the windowsill alongside the herb pots from idea 5
DIY construction for a wood sign:
Simple process:
- Sand a small scrap wood piece smooth
- Stencil or hand-letter the chosen phrase using acrylic paint
- Seal with a matte clear coat if desired for durability
- Lean or prop in the chosen location
Cost:
- Purchased small chalkboard: $5-15
- DIY wood sign materials: $5-15
- Total: $5-15
My small sign result: A scrap wood sign reading “harvest the good” propped against my open shelf, made for about six dollars in materials, added a small personal and textual layer to the kitchen that the towels, jars, and hardware alone did not provide, several guests have specifically commented on this small, low-cost detail.
Small Sign Tips
Changing the chalkboard message seasonally:
Maximizing a single purchase:
- A chalkboard sign can be updated for every season or holiday using the same five-dollar purchase repeatedly
- This makes it one of the most cost-effective decorative items over a full year, even though it appears on a list specifically about fall
Avoiding overly large text:
Proportion in a small space:
- In a small kitchen, an oversized sign with very large lettering can feel disproportionate
- A smaller sign with modest lettering generally integrates more gracefully among the other small-scale styling throughout the room
11. A Few Pieces of Warm-Toned Pottery or Ceramic Displayed Openly (Thrifted Character)
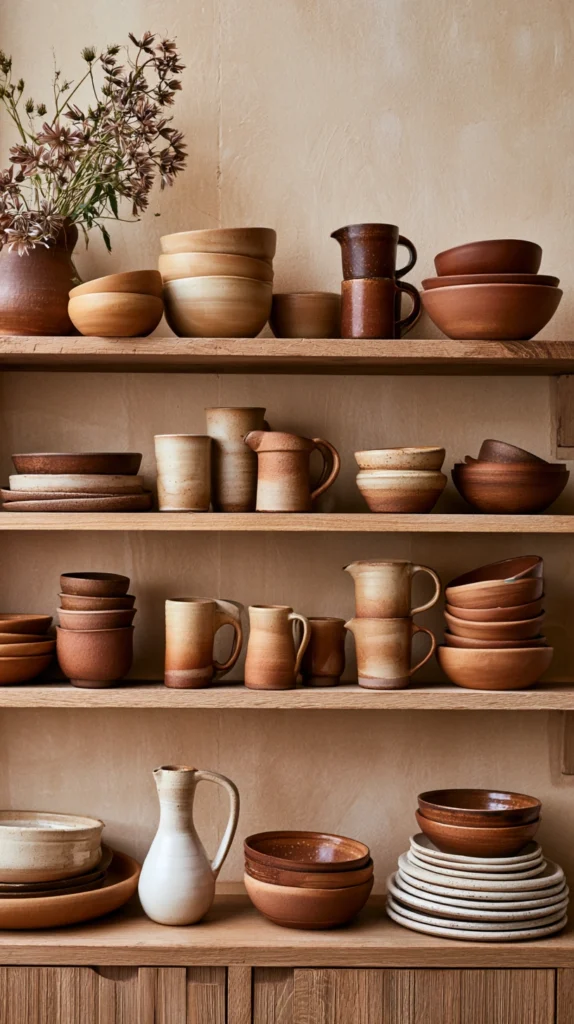
Secondhand ceramic pieces in earthy glazes, displayed on open shelving or the counter — bringing genuine, characterful objects into the kitchen for very little money.
My uniform, store-bought kitchen items:
What I had:
- Matching dinnerware and basic ceramic pieces, all purchased new from the same big box source
- Nothing with any individual character or history
- A kitchen that, while functional, told no particular story
Why thrifted pottery specifically suits a fall kitchen budget makeover:
The character-per-dollar principle:
- Secondhand ceramic pieces are often available for a fraction of their original retail price
- Earthy, handmade-looking glazes (browns, rusts, olive, cream) happen to align naturally with fall color palettes
- Each piece, having its own slight variation or imperfection, contributes more individual character than a uniform new set
What to look for:
Best thrifted finds for this purpose:
- A single interesting bowl, used as a fruit bowl alternative or simply displayed
- A small pitcher or jug, useful for holding utensils or simply displayed with a stem or two
- Mismatched mugs in earthy tones, displayed on an open shelf or hung from small hooks
- A casserole dish or baking vessel with an interesting glaze, displayed when not in active use
Sourcing thrifted pottery:
Best sources:
- Thrift stores (often $1-5 per piece, occasionally less)
- Estate sales (slightly higher cost but often better quality and more interesting pieces, $3-15)
- Facebook Marketplace (particularly for larger pieces like a full mixing bowl or pitcher)
Display strategies:
Where these pieces go:
- Integrated into the open shelf styling from idea 2, adding ceramic variety among the glass jars
- A small grouping on the counter, holding utensils or simply displayed
- Hung mugs on small hooks beneath a shelf, adding both function and visual interest
Color coordination:
Choosing pieces that work together:
- Even without an exact color match, pieces within the same general warm, earthy family (browns, rusts, creams, olive-greens) read as cohesively chosen rather than randomly accumulated
- A single very bright or cool-toned piece, even if individually interesting, can disrupt the overall palette if not chosen carefully
Cost:
- Three to five thrifted pottery pieces: $10-30
- Total: $10-30
My thrifted pottery result: Finding a small brown stoneware pitcher and two mismatched earthy mugs at a thrift store for a combined eight dollars added genuine character and visual interest to my open shelf display that no new, matching purchase could have replicated at any price point.
Thrifted Pottery Tips
Inspecting for cracks and chips before purchasing:
A practical thrifting consideration:
- Run fingers along the rim and base of any potential piece, checking for hairline cracks that may not be immediately visible
- Minor surface imperfections (small glaze variations, slight asymmetry) are usually desirable character; structural cracks are not
Washing thoroughly before display or use:
Hygiene and care:
- Wash any secondhand ceramic piece thoroughly with hot, soapy water before placing it in food-related display or actual use
- This simple step ensures the piece is both safe and genuinely ready for its new role in the kitchen
12. Warm String Lights or a Small Battery Lantern (Evening Atmosphere for Almost Nothing)
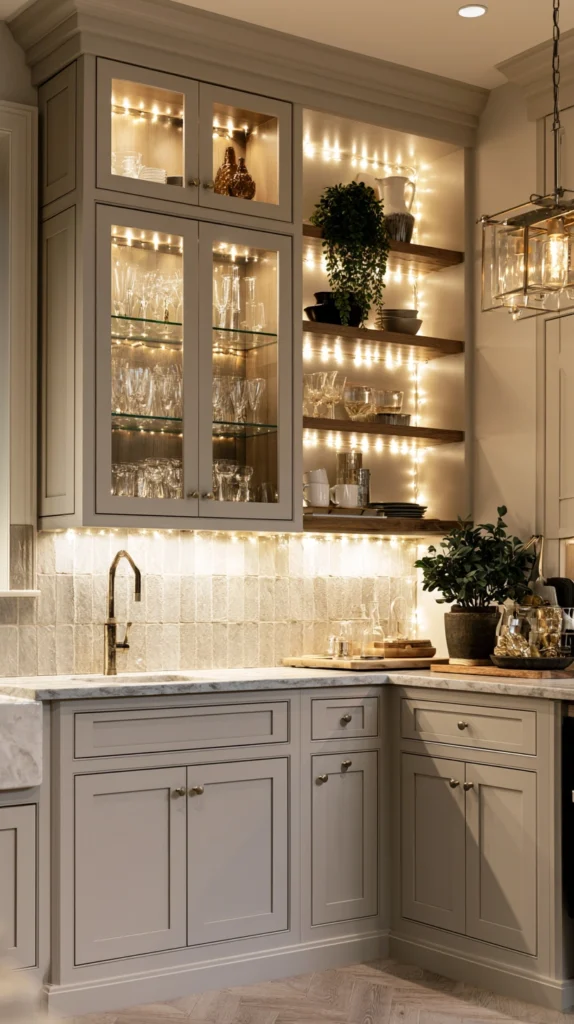
Small-scale warm lighting added to one area of the kitchen — extending the warm, layered lighting principle established throughout fall decor guidance into the kitchen specifically.
My single overhead light problem:
What was happening:
- One bright overhead kitchen light, the only light source in the room
- No warmth, no atmosphere, particularly noticeable during evening cooking and cleanup
Why small-scale lighting works in a budget kitchen makeover:
The low-cost, high-impact principle:
- Unlike under-cabinet lighting installation (which involves electrical work and higher cost), small battery or plug-in additions require no professional installation
- A few dollars in string lights or a small lantern provides meaningful atmospheric warmth without any renovation
String light placement options:
Where this works in a small kitchen:
- Along the top of open shelving, providing soft warm light across the displayed jars and pottery from previous ideas on this list
- Around a window frame, adding a warm glow visible from outside as well as within
- Tucked along the underside of a cabinet, providing a soft glow above the counter
Choosing the right string lights:
What to look for:
- Warm white bulbs specifically (2200-2700K), never cool white, consistent with the warm lighting principle established throughout fall decor
- Battery-operated for the most flexible placement, or plug-in if a nearby outlet makes this more practical
- A timer function, if available, automates the evening on and off cycle
Small lantern alternative:
A single decorative light source:
- A small battery lantern with a warm LED candle inside, placed on the open shelf or counter
- Provides a single warm focal glow rather than a distributed string of lights
- Particularly effective combined with the pottery and jar displays from earlier ideas, creating a small evening vignette
Sourcing affordably:
Budget options:
- Amazon basic warm white string lights ($8-15 for a 10-15 foot strand)
- Target or HomeGoods small battery lanterns ($10-20)
- Dollar stores occasionally carry basic battery tea lights or small string light options for significantly less
Cost:
- String lights: $8-15
- Or small battery lantern: $10-20
- Total: $8-20
My string light result: Adding a simple strand of warm white string lights along the top of my open pantry shelf for under ten dollars transformed the evening atmosphere of the entire kitchen, the soft warm glow across the jars and pottery display created exactly the cozy, layered lighting effect that the rest of my fall decor guidance had established as essential, now extended into the one room that had been entirely overlooked.
Kitchen Lighting Tips
Avoiding light strands too bright for the space:
Calibrating intensity:
- Some string lights, even at warm color temperature, can be quite bright individually
- Looking for strands described as “fairy lights” or with a lower lumen rating per bulb typically provides a softer, more atmospheric effect appropriate for this kind of accent use
Timer use for consistency:
Building the habit automatically:
- A simple plug-in timer, if using plug-in rather than battery lights, ensures the lights turn on automatically each evening without requiring a manual switch
- This small automation makes the atmospheric benefit consistent and effortless throughout the season
13. A Small Coordinated Cutting Board and Utensil Display (Functional Tools as Visual Texture)
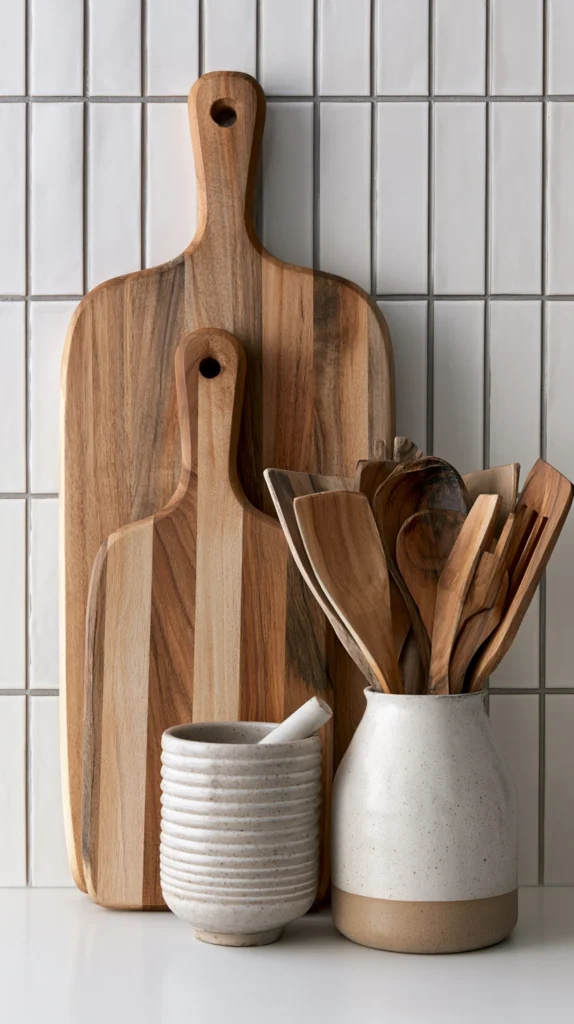
Wooden cutting boards and utensils displayed upright rather than hidden in drawers — the final layer that brings warmth and texture to the most heavily used working area of the kitchen.
My hidden tool storage:
What was happening:
- Cutting boards stacked flat in a cabinet, utensils crowded into a single drawer
- No visual presence for objects that are, in fact, used multiple times daily
- A missed opportunity for warmth and texture in the kitchen’s most functional zone
Why displaying these specific tools fits a fall budget makeover:
The authenticity-through-function principle:
- Unlike purely decorative objects, a displayed cutting board or utensil crock is genuinely used daily
- Wood specifically, as a material, contributes warmth and texture that align naturally with a fall color and material palette
- This idea requires essentially no new purchases if good wooden tools are already owned; it simply changes how they are stored
Cutting board display:
How to show off wooden boards:
- Stand one or two boards vertically in a narrow gap between the counter and a wall, or in a dedicated small plate rack repurposed for this use
- Lean a particularly beautiful board against the backsplash as a piece of kitchen art when not in active use
- This works particularly well with the live-edge or visibly grained wooden boards referenced in broader fall decor guidance about cutting boards as art
Utensil crock:
Choosing the right vessel:
- A wooden, ceramic, or galvanized metal crock, rather than a plastic utensil holder
- Filled with wooden-handled utensils specifically (wooden spoons, a wooden spatula) for maximum textural and color consistency
- Positioned near the stove for genuine functional access, doubling as both tool storage and visual decor
Sourcing affordably:
Budget approach:
- Many wooden cutting boards and utensils are likely already owned; this idea may require zero additional purchase
- If purchasing new, thrift stores and discount kitchen retailers offer wooden boards and utensils for significantly less than specialty kitchen shops
- A simple ceramic or galvanized crock for utensil storage: $8-20
Visual coordination with the rest of the kitchen:
Tying this into the broader fall palette:
- Wood tones throughout this display echo the wood lids on the coordinated canisters from idea 6 and the wooden bud vase or fruit bowl from earlier ideas
- This repetition of material across multiple small changes throughout the kitchen is what creates a cohesive overall feeling rather than a collection of disconnected individual updates
Cost:
- Utensil crock (if not already owned): $8-20
- Cutting boards: often already owned, or $10-25 if purchasing a new display-worthy piece
- Total: $0-45 depending on what is already owned
My cutting board and utensil display result: Simply changing how my existing wooden cutting boards and wooden-handled utensils were stored, standing the boards upright near the counter and gathering the utensils into a small ceramic crock instead of a drawer, cost almost nothing and added genuine warmth and texture to the kitchen’s most-used working area, this was the final piece that made every other change on this list feel connected into one complete fall kitchen story.
Cutting Board Display Tips
Choosing boards with visible grain for display:
Selecting the most decorative pieces:
- Not every cutting board needs to be displayed; reserve the ones with the most beautiful wood grain or interesting shape for visible storage, keeping more utilitarian plastic boards tucked away in a cabinet
- This selective display approach maximizes visual impact without requiring every kitchen tool to be aesthetically pleasing
Oiling boards before display:
A small maintenance step with visual payoff:
- A light coat of food-safe mineral oil on a wooden cutting board, applied before standing it on display, deepens the wood color and grain visibility significantly
- This inexpensive five-minute step ($5-8 for a bottle of mineral oil, lasting many applications) makes a noticeable difference in how rich the displayed board appears
Choosing Your Small Budget Kitchen Priorities
By immediate visual impact per dollar:
Highest impact, lowest cost:
- Cabinet hardware swap (idea 4): the most frequently cited highest-impact small kitchen change
- Painted accent on one small surface (idea 8): paint remains the most powerful low-cost design tool
- Dish towel and oven mitt swap (idea 1): touches the most-used textiles in the room
Moderate impact, very low cost:
- Open shelf styling (idea 2)
- Fruit and gourd bowl (idea 3)
- Small bud vase (idea 7)
By effort level:
Lowest effort:
- Fruit and gourd bowl (idea 3): assemble in minutes
- Small bud vase (idea 7): a single quick purchase and arrangement
- Dish towel swap (idea 1): purely a purchasing decision, no installation
Moderate effort:
- Hardware swap (idea 4): a short DIY project
- Open shelf restyling (idea 2): requires sourcing jars and reorganizing
- Coordinated canisters (idea 6): requires decanting and organizing
Higher effort (though still low cost):
- Windowsill herb garden (idea 5): ongoing care required
- Painted accent (idea 8): a small but genuine paint project
- Cutting board and utensil display reorganization (idea 13)
By total budget available:
Under $50 total:
- Choose three to four of the lowest-cost ideas (fruit bowl, bud vase, small sign, dish towels) for a noticeable but minimal-cost refresh
$50-150 total:
- Add the hardware swap, open shelf styling, and coordinated canisters for a more complete transformation
$150-250 total:
- Incorporate nearly every idea on this list, including the herb garden, table runner, thrifted pottery, and string lights, for the fullest possible small-budget makeover
Building the Complete Small Kitchen System
Layering the changes for maximum cohesion:
The textile layer:
- Dish towels (idea 1) and table runner (idea 9) introduce the core fall color palette through fabric
The display layer:
- Open shelf styling (idea 2), coordinated canisters (idea 6), and thrifted pottery (idea 11) build the visual centerpiece areas
The living layer:
- Fruit and gourd bowl (idea 3), windowsill herbs (idea 5), and bud vase (idea 7) add genuine organic, living elements
The hardware and surface layer:
- Cabinet hardware (idea 4) and the painted accent (idea 8) shift the room’s underlying material and color foundation
The personal and atmospheric layer:
- Small sign (idea 10), string lights (idea 12), and cutting board display (idea 13) add the final, most individual touches
Maintenance Through the Season
Weekly:
- Rotate fruit in the bowl, replenishing as eaten
- Water windowsill herbs
- Wash and rotate dish towels in use
Monthly:
- Refresh canister contents as used
- Dust open shelf displays and thrifted pottery
- Check string lights for any needed bulb replacement
End of season:
- Decide which elements (hardware, canisters, pottery) remain as permanent kitchen fixtures versus which were specifically fall-seasonal (dish towel colors, the small sign’s message, fresh gourds)
- Store seasonal-only items for next year, keeping the more permanent upgrades in place year-round
My Complete Small Kitchen Budget Makeover
What I built across one month:
Week 1 ($75):
- Dish towel and oven mitt swap
- Fruit and gourd bowl
- Small bud vase
Week 2 ($95):
- Cabinet hardware swap
- Coordinated canister set
Week 3 ($80):
- Open shelf restyling with jars and pantry items
- Windowsill herb garden
Week 4 ($55):
- Painted accent behind the open shelf
- String lights along the shelf
- Small wood sign
Total investment: $305 across one month Result: A small kitchen that felt completely transformed for the season, at a fraction of the cost of any single new appliance or piece of furniture Most impactful single change: The cabinet hardware swap, which affected how every other color and material choice throughout the kitchen read
Getting Started This Weekend
Start with the cheapest, fastest changes first.
This weekend:
Step 1 — The fruit and gourd bowl:
- A twenty-minute task using a bowl already owned or thrifted cheaply
- Immediate visual impact on the counter
Step 2 — The dish towel swap:
- A single shopping trip to replace three or four towels
- Changes the color story of the most frequently touched textiles in the room
Step 3 — Assess the hardware:
- Measure existing cabinet hardware spacing
- Price out a full or partial swap for the following weekend
My recommendation:
The fruit bowl and dish towel swap together cost under $60 and require no tools, no installation, and less than an hour of total effort, providing the fastest possible noticeable shift in how the kitchen feels before committing to any of the more involved projects further down this list.
Now go give your small kitchen the budget-friendly fall makeover it has been missing.
Quick Summary
The 13 small budget kitchen fall makeover ideas:
Textiles and fabric:
- Dish towel and oven mitt swap (idea 1): the cheapest color change available
- Table runner or placemats (idea 9): extending color into the eating area
Display and storage:
- Open shelf styling with pantry items (idea 2): function as decor, zero additional cost
- Coordinated canister set (idea 6): replacing visual chaos with calm
- Thrifted pottery display (idea 11): character for very little money
Living and organic elements:
- Fruit and gourd bowl (idea 3): the most budget-friendly centerpiece, partially self-funding through groceries
- Windowsill herb garden (idea 5): living greenery with genuine culinary function
- Small bud vase (idea 7): minimal floral investment, maximum proportional impact
Hardware and surface changes:
- Cabinet hardware swap (idea 4): the highest-impact small budget change available
- Painted accent on one surface (idea 8): the smallest possible paint commitment
Personal and atmospheric touches:
- Small chalkboard or wood sign (idea 10): personality at minimal cost
- Warm string lights or lantern (idea 12): evening atmosphere for almost nothing
- Cutting board and utensil display (idea 13): functional tools as visual texture
The non-negotiable rules:
Always:
- Choose solid warm colors over printed seasonal graphics for the longest-lasting visual appeal
- Layer multiple small changes across different surfaces rather than relying on one large purchase
- Use items that serve a genuine function (food, herbs, tools) wherever possible to offset cost
- Coordinate metal tones (warm hardware) with the rest of the room’s warm color choices
Never:
- Assume a kitchen makeover requires renovation-level spending
- Rely on a single isolated decorative object to carry the entire seasonal feeling
- Choose cool-toned hardware or lighting alongside an otherwise warm fall palette
- Let fruit or fresh herbs go unused and neglected, undermining their dual decorative and functional value
The budget kitchen formula:
Warm textiles + coordinated open storage + one living element + warm hardware + one small personal touch = a complete seasonal transformation achievable for under $300, often significantly less.
Common mistakes:
- Buying printed pumpkin or leaf graphic items that look out of place by the following month
- Spending the entire budget on one item rather than spreading it across multiple visible surfaces
- Forgetting that pantry staples and fresh produce can double as decor at no additional cost
- Overlooking cabinet hardware as a budget lever, assuming any hardware change requires professional installation
- Letting displayed organic elements (fruit, herbs, dried stems) go stale or neglected without replenishment
Remember: A small kitchen’s limited surface area works in your favor on a tight budget, since every dollar covers proportionally more visible space than in a larger room, cabinet hardware remains one of the most consistently cited highest-impact-per-dollar changes in any kitchen update regardless of budget size, items that are functional (fruit, herbs, cutting boards, dish towels) provide decorative value essentially for free since they would be purchased or owned regardless of the seasonal makeover, paint remains the single most powerful low-cost design tool even when applied to the smallest possible surface, and the complete transformation depends on layering several small, coordinated changes across many surfaces rather than searching for one perfect, larger purchase to solve the entire room at once.