13 Modern Rustic Camper Ideas with Warm Wood Accents
Wood does something in a small space that no other material quite replicates — it adds warmth without weight, texture without clutter, and a sense of permanence that makes a camper feel less temporary.
Modern rustic isn’t about stuffing a camper with reclaimed barn wood and mason jars. It’s a more restrained aesthetic: clean lines combined with natural materials, functional pieces that also happen to be beautiful, and a palette that feels warm without being dark or heavy.
These ideas are organized around how real camper spaces work — from walls and floors to surfaces, lighting, and the small details that pull everything together.
1. Install Peel-and-Stick Wood Plank Panels on One Accent Wall

The fastest way to introduce a wood aesthetic into a camper is a single accent wall rather than attempting to panel every surface. One well-chosen wall — typically the one behind the bed or the main seating area — transforms the entire feel of the space without making it feel enclosed or heavy.
Peel-and-stick wood plank panels from brands like Stikwood or WallArt are the practical choice for campers specifically because they require no adhesive, no power tools, and add almost no weight. Stikwood’s reclaimed pine planks run approximately $5–$8 per square foot and come in warm honey, weathered gray, and dark walnut tones. For a modern rustic look, the honey or natural pine tones work best — they read as warm without pulling the palette too dark.
Measure the wall carefully before ordering. Most camper walls behind a full bed are 60–72 inches wide and 36–48 inches tall, putting a typical accent wall project at 15–25 square feet. Order 10–15% extra to account for cuts around outlets or vents.
Tip: Wipe the wall surface with isopropyl alcohol before applying — even a light film of cleaning product residue from previous use will cause edges to lift within weeks of travel vibration.
Budget: $80–$200
2. Replace Factory Cabinet Hardware with Brushed Brass or Matte Black Pulls
Cabinet hardware is almost always the most overlooked detail in a camper — and it’s one of the easiest to change. Factory pulls in most production RVs are either chrome-plated plastic or flat brushed nickel, neither of which pairs well with a warm wood aesthetic.
Brushed brass bar pulls (sometimes called “golden brass” or “antique brass satin”) complement warm wood tones the way a warm white complements cream — they’re in the same temperature family without being identical. For a slightly cooler modern rustic look, matte black works against lighter woods like pine or birch. Avoid polished chrome or polished brass — both read as dated against natural wood surfaces.
Standard RV cabinet pulls use 3-inch or 3.75-inch hole spacing. Measure existing holes before ordering. A set of 10 pulls runs $25–$50 on Amazon or Wayfair for decent quality, and replacement takes about 10 minutes with a screwdriver. No drilling required if you match the spacing.
Tip: Replace drawer pulls and cabinet pulls at the same time for visual consistency. Mixing pull styles across a small space creates a restless quality that undermines the cohesion you’re building with the wood accents.
Budget: $25–$60
3. Add a Live-Edge Wood Shelf as a Functional Display Surface
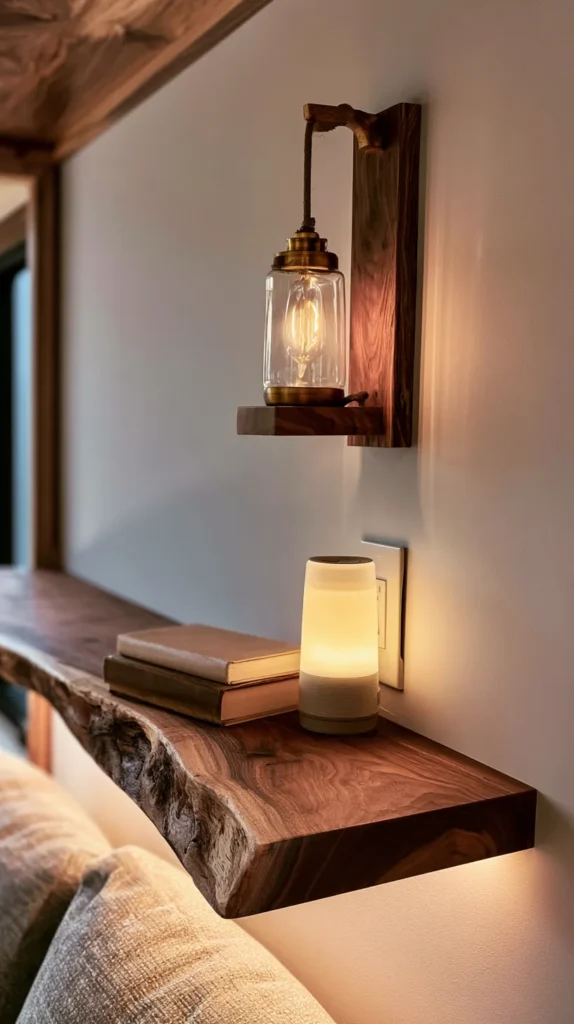
A single live-edge shelf — one where the natural outer edge of the wood is preserved rather than cut straight — brings more character to a camper than almost any other single piece. It reads as deliberate and custom even in a mass-produced space.
Live-edge slabs are available at most lumber yards and home improvement stores, typically in walnut, oak, cherry, and poplar. For camper use, a slab 18–24 inches long and 6–8 inches deep is ideal — wide enough to be functional, short enough to not dominate the wall. Sand to 220 grit, apply two coats of food-safe Danish oil or Rubio Monocoat, and mount with floating shelf brackets rated for at least 15 lbs.
Use the shelf actively rather than decoratively. A small succulent, two or three books stacked horizontally, and a rechargeable lantern turn it into a purposeful vignette rather than a staging exercise. In a camper, surfaces that look good but serve no function become clutter magnets within the first trip.
Tip: Secure items on the shelf with museum putty or small lip rails during travel. A live-edge shelf with everything tumbled off it mid-drive loses the visual point immediately.
Budget: $40–$120
4. Lay a Natural Fiber Runner Over Factory Flooring

Most camper floors are either vinyl plank or a thin commercial carpet — both practical, neither warm. A natural fiber runner in jute, sisal, or seagrass laid along the main walkway introduces organic texture that pairs directly with wood tones throughout the space.
Jute is the softest of the three and works best in campers that don’t see heavy outdoor foot traffic. Sisal is more durable and easier to spot clean but has a slightly coarser texture underfoot. Seagrass sits between both in texture and durability and holds color well over time. Any of the three in a natural, undyed tone will complement warm wood accents without competing with them.
For a typical camper walkway, look for runners in the 2×6 or 2×8 foot range. Use a thin non-slip pad underneath — most natural fiber rugs have minimal grip on vinyl flooring, and shifting rugs in a moving camper are both annoying and a tripping hazard.
Tip: Avoid natural fiber rugs in campers that regularly see wet or muddy entry — they absorb moisture slowly and can develop a mildew smell if not dried thoroughly. In high-traffic wet-weather use, a washable cotton runner is a better practical choice.
Budget: $30–$90
5. Use Wood Slice or Log Coasters as Surface Accents
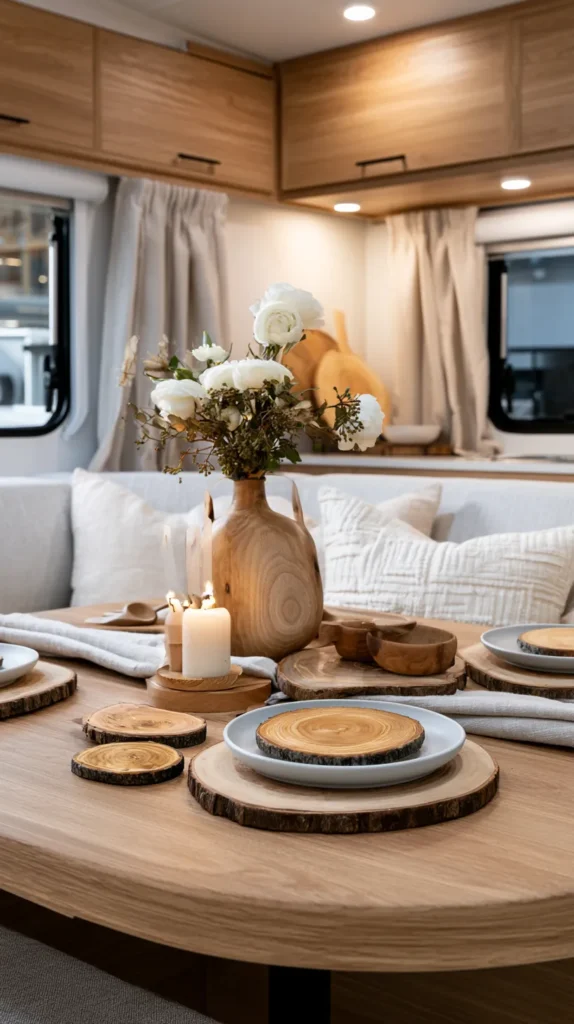
Small wood details scattered intentionally throughout a camper reinforce the aesthetic without requiring any installation. Wood slice coasters — cut from birch or maple branches and sanded smooth — are among the most affordable and versatile of these details.
A set of four to six coasters ($12–$25 on Etsy for handmade versions, less for production sets) placed on the dinette table or countertop works as both functional protection and visual accent. Choose unsealed natural versions for maximum texture contrast, or lightly sealed ones for easier cleaning. Pair them with matte ceramic mugs rather than plastic cups to maintain the aesthetic continuity.
Extend the same logic to other small surfaces: a thin butcher block trivet near the stove, a small wood cutting board left on the counter rather than stored away, or a wood-handled utensil crock instead of a plastic one. None of these cost significant money but collectively they build a coherent visual language throughout the space.
Tip: Birch wood slices are the most widely available and tend to stay lightest in color over time — they won’t darken with oil or humidity the way walnut or cherry will, which keeps the palette consistent with lighter wood accents.
Budget: $15–$45
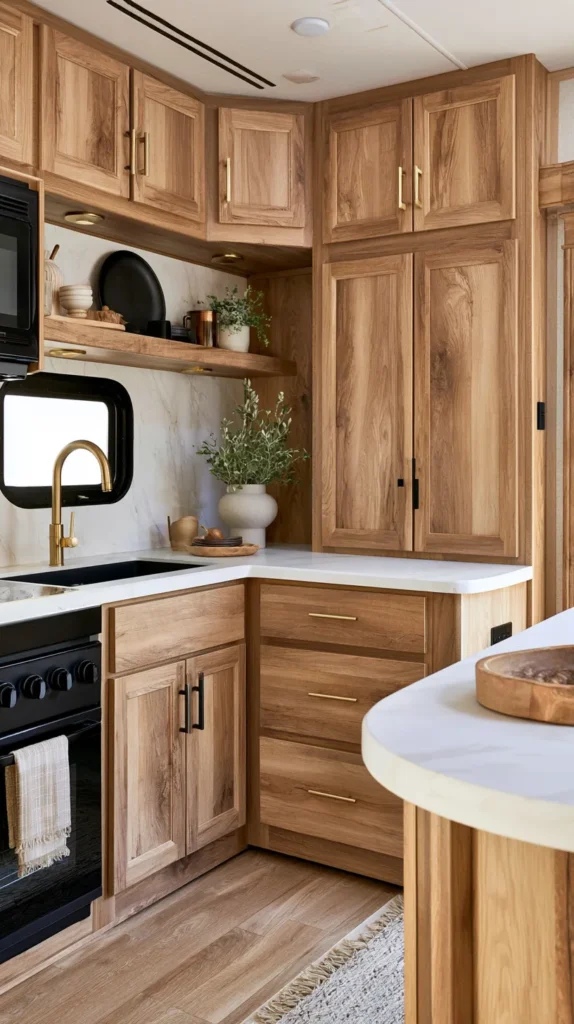
6. Install Reclaimed Wood Floating Shelves in the Kitchen Area
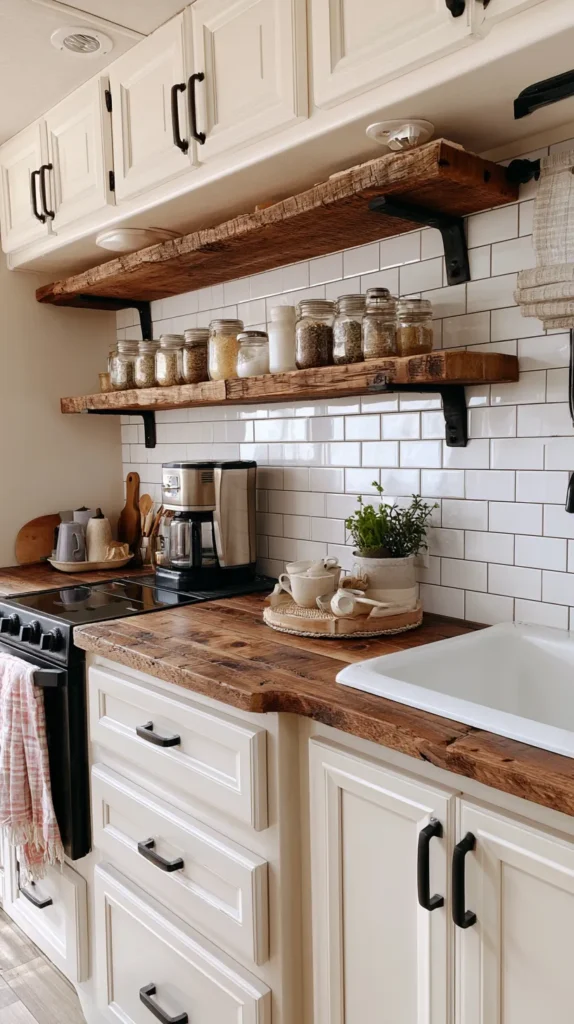
The kitchen zone of a camper is almost always the most utilitarian-looking area — stainless appliances, flat cabinet faces, and very little visual texture. Adding two floating shelves in reclaimed or rough-sawn wood above the counter introduces warmth directly where the space needs it most.
Reclaimed wood shelves don’t need to be sourced expensively. Many lumber yards sell “character grade” boards — wood with visible knots, grain variation, and color inconsistency — at $2–$4 per linear foot. A 24-inch shelf cut from a 2×8 board, sanded lightly to remove splinters but not aggressively enough to remove character, sealed with two coats of matte polyurethane, and mounted on black iron floating shelf brackets creates exactly the right modern rustic look.
Use the shelves to store items you reach for daily: spice jars, a small plant, cooking oil, a jar of coffee. Shelving that holds genuinely used items looks intentional. Shelving that holds decorative objects alone starts to feel precious in a working camper.
Tip: Keep shelf depth at 6 inches maximum in a camper kitchen to avoid blocking movement along the counter. Deeper shelves in tight kitchen spaces become obstacles rather than assets.
Budget: $35–$90
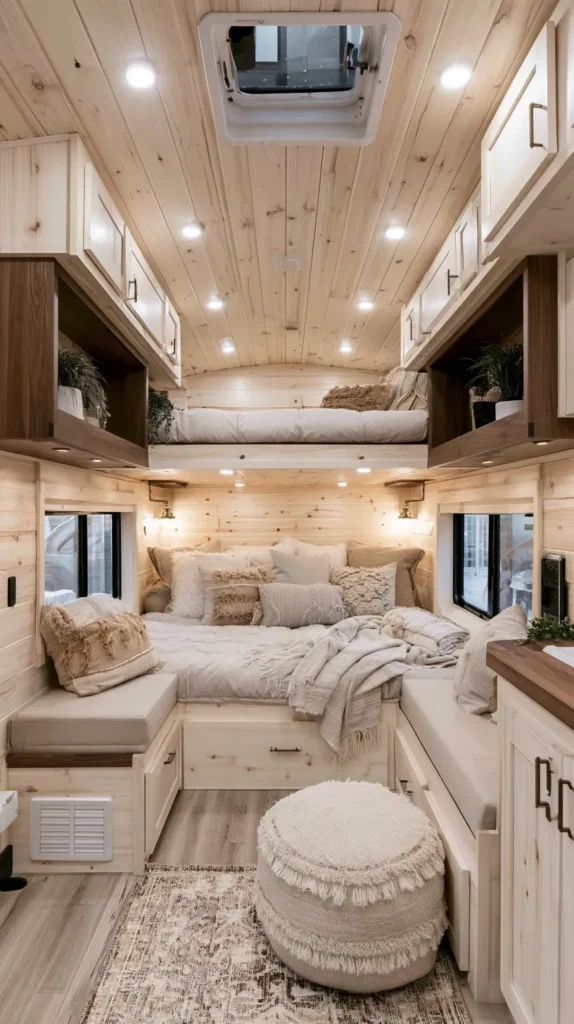
7. Wrap the Bed Frame or Headboard in Thin Wood Veneer
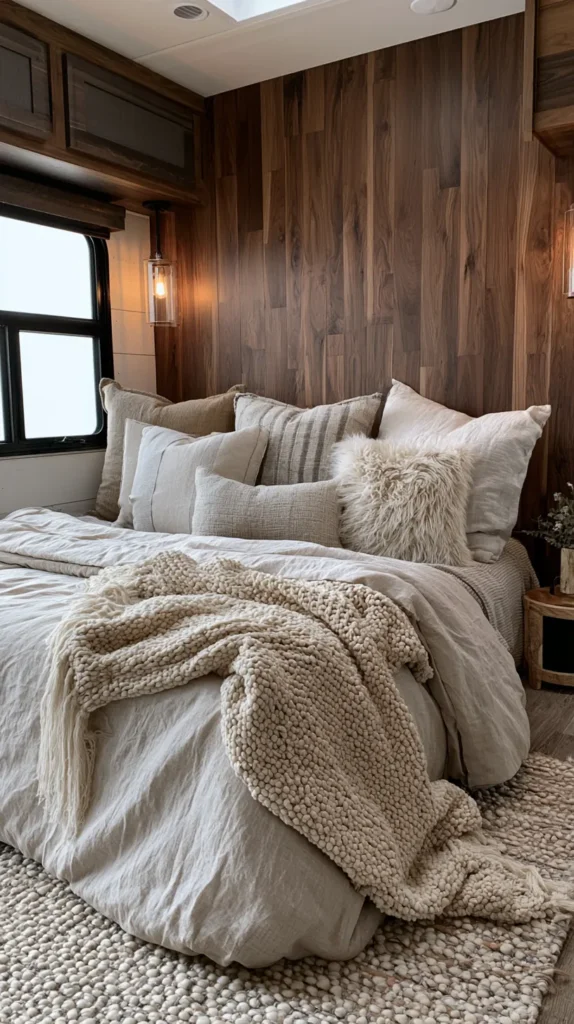
The sleeping area is where most people spend the most visual time in a camper — lying in bed and looking at the space around them. A headboard or bed surround covered in thin wood veneer sheet completely transforms this zone without the weight or thickness of solid wood.
Peel-and-stick wood veneer sheets (Timber Veneer Sheets on Amazon, or similar products) come in 24×48-inch panels in species including maple, walnut, cherry, and birch. At approximately $15–$25 per panel, a full headboard wall typically requires two to three panels. The material is thin enough to cut with scissors or a craft knife, flexible enough to wrap slight curves, and light enough to not affect weight distribution in the sleeping area.
Apply to a clean, dry surface. Bed surrounds built from MDF or plywood in many production campers accept veneer adhesion better than painted wood — the key is ensuring the surface is clean and free of wax or silicone from cleaning products.
Tip: Use the headboard veneer in a species that’s slightly darker than your accent wall planks — the tonal variation between a pale pine accent wall and a walnut-toned headboard creates depth rather than a monotone wood-everything look.
Budget: $45–$90
8. Swap Out the Bathroom Vanity Area with Wood-Tone Accents
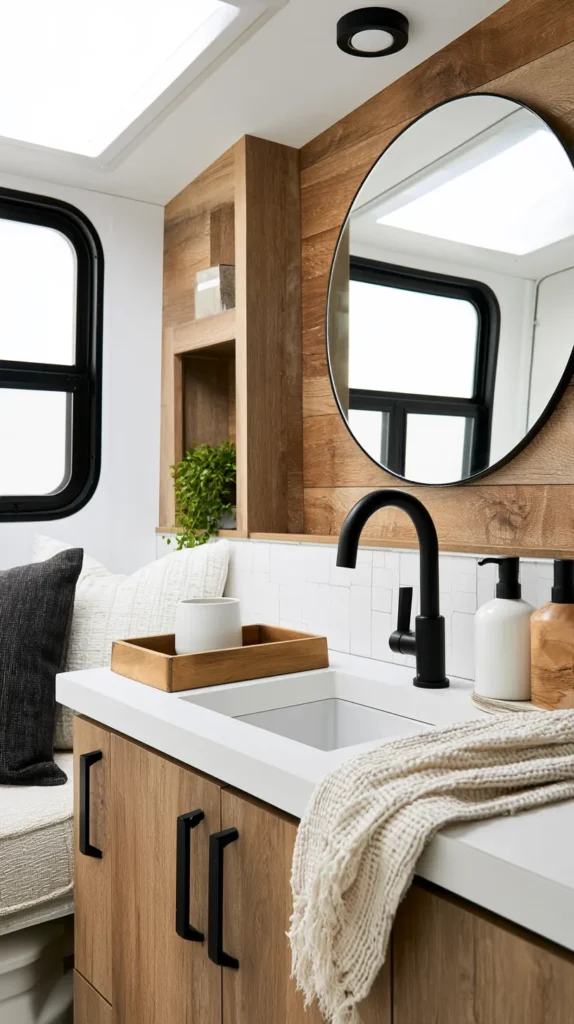
Camper bathrooms are almost universally the coldest-feeling space in the unit — white walls, chrome fixtures, and a plastic countertop. Introducing even minimal wood tone in this area has an outsized effect.
The simplest upgrade is a small wooden tray on the countertop to hold toiletries. A 6×10-inch acacia tray ($12–$20) corrals soap, a small plant, and a candle while introducing natural material onto an otherwise sterile surface. Pair with a wood-handled toothbrush holder or a bamboo soap dish to reinforce the material language without overwhelming a small counter.
If the bathroom has any exposed wall space, a 12×12-inch peel-and-stick wood panel directly above the sink or behind the toilet creates a focused accent without requiring full wall coverage. Use a moisture-resistant product specifically — Stikwood makes a weatherproof version designed for wet areas that holds up in steam-prone bathrooms.
Tip: Keep all wood accessories in the bathroom either sealed or naturally moisture-resistant. Bamboo and teak are the most forgiving species in humid environments. Unsealed pine in a bathroom will gray and swell within a few months.
Budget: $30–$75
9. Use Edison Bulb String Lights on a Wood Branch or Dowel Mount
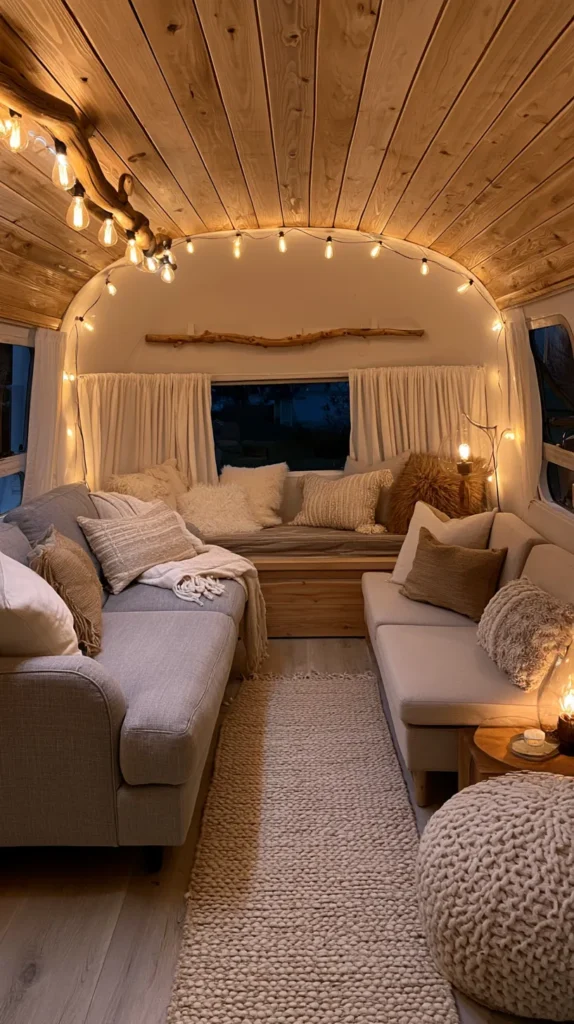
Edison bulb string lights are a staple of the rustic aesthetic, but how they’re mounted determines whether they look thoughtful or thrown together. Draping them over nails is the thrown-together version. Mounting them on a natural branch or a turned wood dowel is the intentional version.
Find a straight branch roughly 18–24 inches long and 1–1.5 inches in diameter — fallen birch or maple branches work well and are easy to sand smooth. Mount it horizontally on the wall with two small cup hooks or branch brackets, and drape the string lights over it so they hang in a gentle arc. The branch becomes a deliberate element rather than something to hide.
For the bulbs themselves, warm white Edison-style LEDs in the 2200K–2400K range produce the amber glow most associated with the rustic aesthetic. Avoid cool white versions — they undermine the warmth that makes this setup work. A 10-foot strand with 20 bulbs runs $12–$20 and is sufficient for most camper living areas.
Tip: Run the string lights to a small smart plug or a basic timer so they come on automatically at dusk without requiring manual switching — this keeps the ambient light consistent without having to think about it.
Budget: $20–$55
10. Build a Fold-Down Wood Table for the Bedroom or Hallway
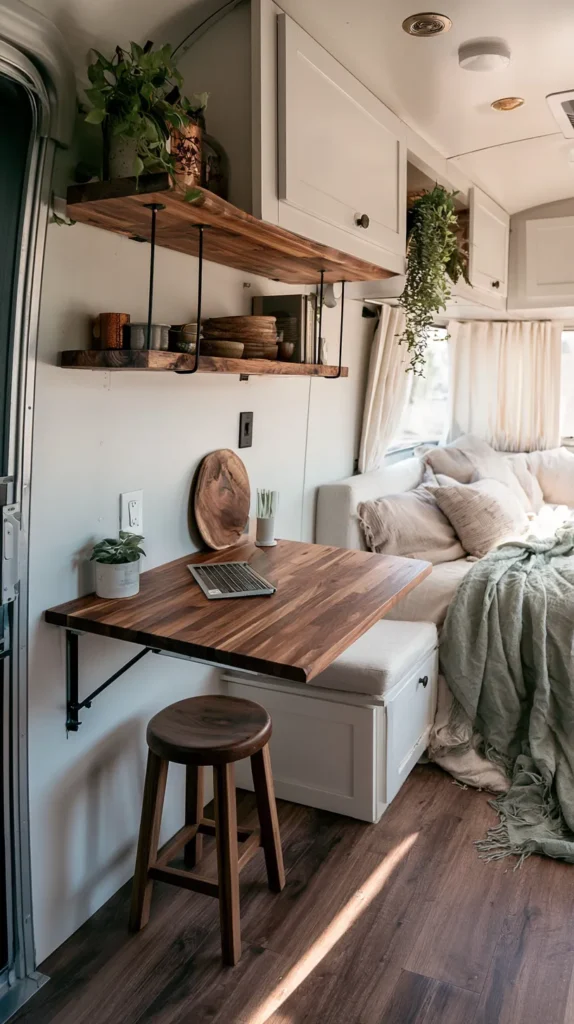
Many campers have unused wall space in the bedroom or hallway that could function as a work surface, reading tray, or breakfast area if there were a surface to use. A fold-down table mounted directly to the wall solves this without permanently occupying floor space.
A basic fold-down table uses a piano hinge, a single piece of 3/4-inch hardwood plywood or solid wood board, and a folding leg bracket or chain support. Cut the board to approximately 18×24 inches, sand and seal it, mount it at a comfortable seated height (28–30 inches from the floor), and add a folding metal leg to support the outer edge when down. Total cost in materials: $30–$55. Total wall space used when folded up: zero.
For a more refined look, use a butcher block offcut rather than plywood. Butcher block scraps are often available for $15–$30 at lumber yards and provide a much richer surface grain than construction plywood.
Tip: Mount the table into a wall stud or use toggle bolts rated for at least 50 lbs — a fold-down table takes real dynamic load when someone leans on it, and a wall that flexes under pressure will eventually pull the mounting hardware loose.
Budget: $40–$90
11. Introduce Woven Wood Roman Shades Instead of Factory Blinds
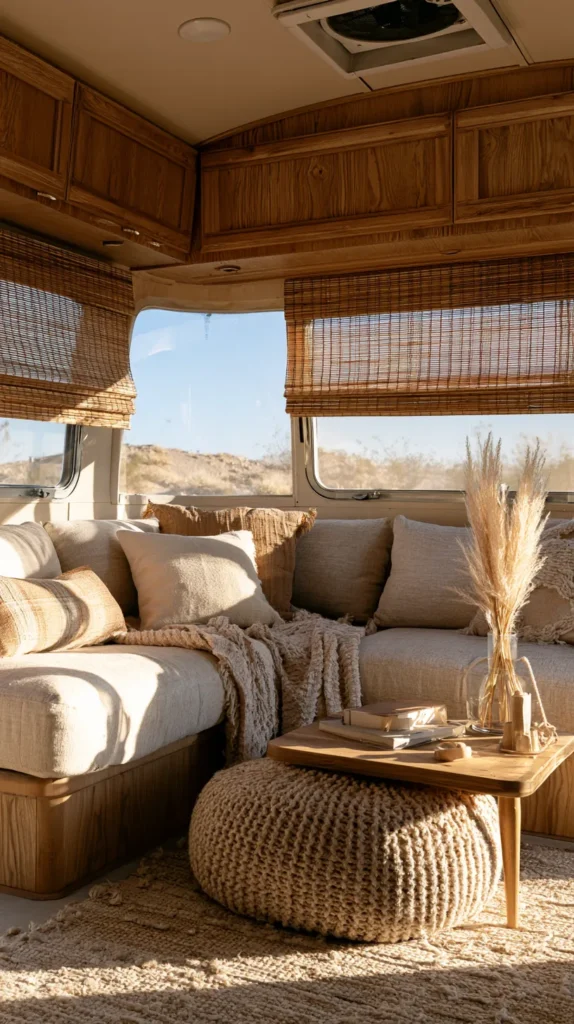
Woven wood shades — sometimes called bamboo roman shades or matchstick blinds — are one of the most effective single window upgrades in a rustic camper build. They filter light rather than blocking it, which means even when drawn they allow a warm, dappled glow into the space rather than creating total darkness.
Look for shades made from rattan, bamboo, or jute weave. Many are available in custom widths through Budget Blinds or Smith & Noble, but standard 24-inch, 27-inch, and 36-inch widths from Target or Home Depot cover most camper window sizes without custom ordering. For windows that fall between standard sizes, mounting the shade slightly outside the window frame adds visual width and makes standard sizing work.
These shades don’t provide blackout capability, so keep a separate roller blackout shade for sleeping if light control matters. Use the woven shade for daytime atmosphere and the blackout for nighttime privacy — layering both on the same window takes about 2 inches of depth from the frame but keeps both functions available.
Tip: Unroll woven wood shades fully for a day before installation — they often have a curl from packaging that relaxes with time and hangs much more evenly once it does.
Budget: $25–$120 per window
12. Add Wood-Handled or Wood-Trimmed Kitchen Tools as Visual Details

The kitchen is a zone where functional objects are constantly visible — and replacing plastic-handled tools with wood-handled versions shifts the aesthetic without adding anything to the space. This is the easiest and cheapest upgrade in the entire list.
A wood-handled dish brush instead of plastic, a set of beechwood cooking utensils instead of nylon, a bamboo paper towel holder instead of chrome — each individual swap costs almost nothing, but together they make the kitchen area feel curated rather than outfitted from a camping supply store.
Acacia and beechwood are the most durable species for kitchen tools and hold up to regular washing without cracking if you avoid soaking them. Dry them after washing rather than leaving them in a dish rack — this extends the life significantly in the compressed moisture environment of a camper.
Tip: A single magnetic knife strip in natural wood (rather than the common stainless steel version) mounted on the backsplash keeps knives accessible and adds a focal point that ties the kitchen area together visually.
Budget: $20–$65
13. Create a Cohesive Wood Tone Palette by Limiting Species to Two
The single most common mistake in rustic camper design is mixing too many wood tones and species. Pine accent wall, walnut hardware, cherry cutting board, rattan shade, bamboo mat — each individual piece looks fine in isolation but together they create a visually restless space that feels inconsistent rather than curated.
The rule that works in practice: choose two wood tones maximum. One lighter, one darker. For example — natural pine for wall planks and shelving, paired with walnut-stained accents for hardware, trays, and smaller details. Or whitewashed oak for the headboard, with honey-toned bamboo for accessories. The contrast between two tones creates depth; adding a third or fourth breaks the coherence.
When evaluating wood-toned products before purchasing, hold them against your existing pieces or compare photos in the same lighting. The same walnut board can look orange-brown in warm light and gray-brown in cool light — match tones in similar lighting conditions to avoid surprises once everything is installed.
Tip: Treat woven materials like jute, rattan, and seagrass as neutral — they sit outside the wood tone palette rather than competing with it, so they can be added freely without disrupting the two-tone rule.
Budget: $0 — this is an editing decision, not a purchase
Final Thoughts
Modern rustic camper design works because it builds on what a camper already is — a small, functional space — rather than fighting against it. Wood accents work with the scale of the space rather than overwhelming it, and the aesthetic rewards restraint. Two well-chosen tones, one strong accent wall, a few surface details, and warm lighting will do more than a full renovation that misses the underlying logic.
Start with the pieces that have the highest visual impact for their cost: hardware, a single accent wall, and lighting. Add from there based on what the space actually needs rather than filling every surface. The campers that look best aren’t the ones with the most wood — they’re the ones where every piece of it earns its place.