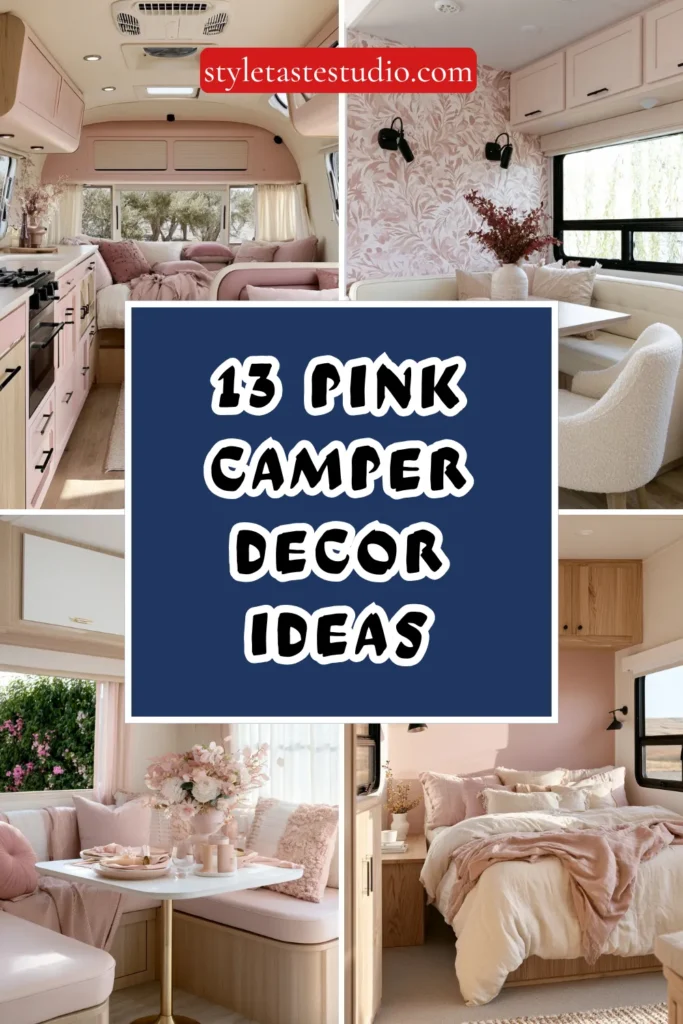
13 Pink Camper Decor Ideas That Never Go Out of Style
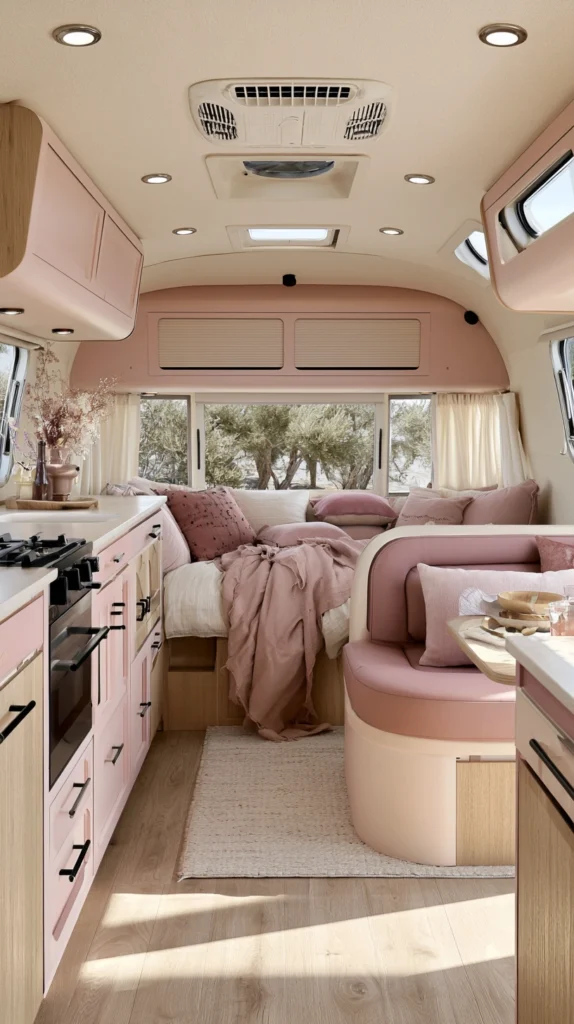
Pink in a camper works when it’s treated as a serious design choice rather than a novelty one. The version that ages well isn’t bubblegum pink with flamingo accents — it’s dusty rose paired with warm neutrals, blush layered against natural wood, or deep mauve anchored with matte black hardware.
These are colors with actual staying power, and in the compressed scale of a camper interior, they read as sophisticated rather than precious when handled with restraint.
The ideas below are organized around how real camper spaces function — from walls and surfaces to textiles, hardware, and the small details that make a color palette feel intentional rather than accidental.
1. Paint One Wall in Dusty Rose or Vintage Blush
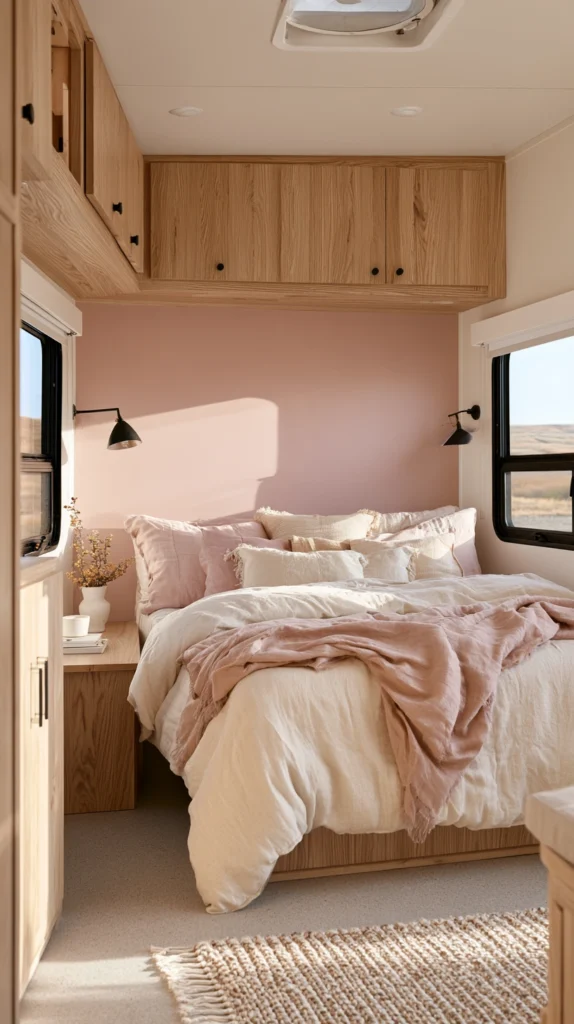
A single painted wall carries more visual weight in a camper than in any other interior — there simply isn’t enough space for the eye to rest anywhere else. Done in dusty rose or vintage blush, it reads as warm and intentional without overwhelming the proportions of a narrow space.
The tones that hold up best over time are the ones leaning slightly toward gray or brown rather than pure pink. Benjamin Moore “Mellow Rose” (2173-40) and Sherwin-Williams “Antique Rose” (SW 0008) both work well — they stay warm under artificial lighting rather than shifting neon. Farrow & Ball “Calamine” No.230 is the more expensive option but delivers exceptional depth in a matte finish that photographs beautifully and hides minor wall imperfections.
Use a satin finish rather than flat — camper walls collect contact marks, and a wipeable surface is non-negotiable for longevity. Apply two coats over a white primer base using a 4-inch foam roller for the smoothest result on slightly textured camper wall surfaces. A standard accent wall behind a full bed runs approximately 15–22 square feet, putting paint cost at $20–$45 for a quality latex product.
Tip: Test the color directly on the camper wall under both natural daylight and your artificial lighting before committing. Blush tones are particularly sensitive to light temperature — what reads as soft pink in a paint store can read either peachy or lavender in a camper depending on the bulb color temperature.
Budget: $25–$55
2. Replace Factory Hardware with Brushed Rose Gold Pulls
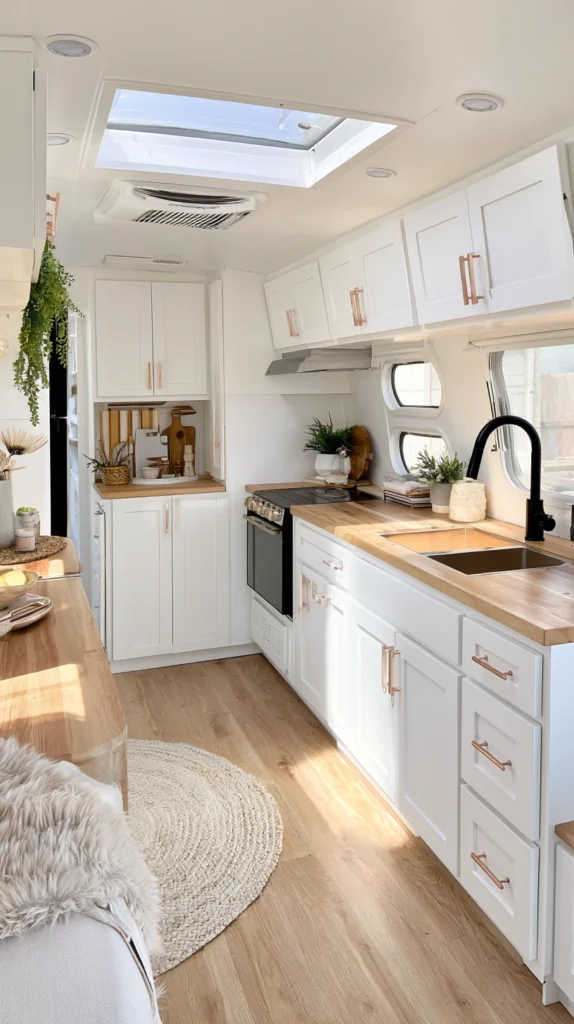
Cabinet hardware in production campers is almost always a generic brushed nickel or chrome-plated plastic pull — neither of which does anything for a pink palette. Rose gold pulls are one of the few hardware finishes that work directly within a pink color story rather than simply beside it.
Brushed rose gold bar pulls in 3-inch or 3.75-inch center-to-center spacing cover the majority of production camper cabinet configurations without requiring new holes. Measure existing hole spacing before ordering — most camper cabinets use one of those two standard dimensions. A set of 10 pulls from Amazon’s Cosmas or Ravinte lines runs $28–$50 and installs in under 15 minutes with a screwdriver. For a slightly more refined option, Anthropologie Home carries ceramic-and-brass pulls in blush and rose tones at $6–$12 each that add texture alongside the color.
Replace all hardware in the same session — mixing finishes across a small space creates visual restlessness that undermines whatever cohesion you’re building elsewhere. If the existing hardware uses unusual hole spacing, a backplate covers the old holes and allows standard-spacing pulls to be installed without drilling.
Tip: Matte rose gold holds its finish longer than polished rose gold in a camper environment. Polished finishes show fingerprints and micro-scratches within weeks of regular use; matte finishes absorb contact without showing it.
Budget: $30–$65
3. Layer Blush Linen Bedding with a Textured Throw
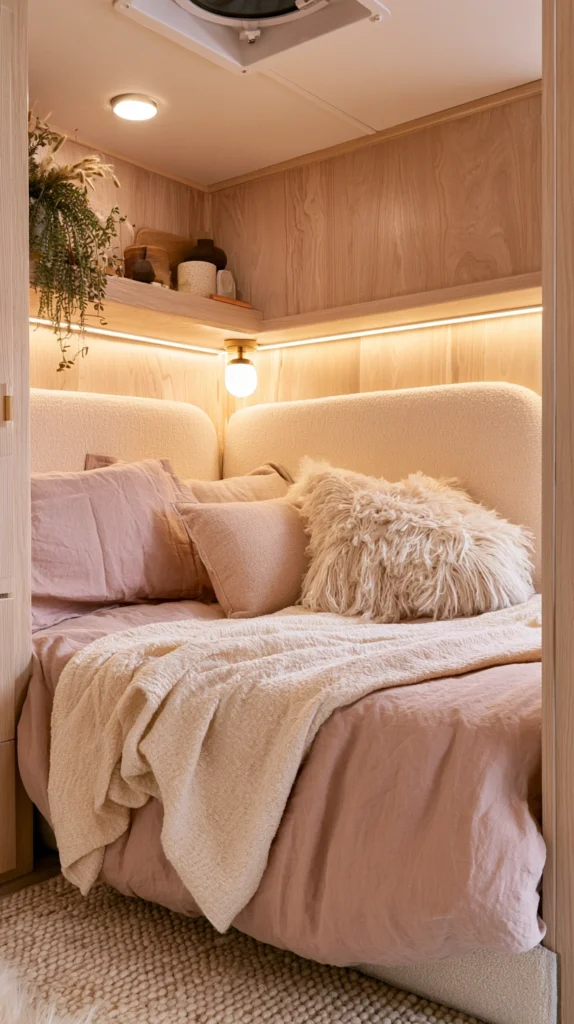
Bedding dominates the visual weight of most camper sleeping areas — it’s the largest unbroken surface in the space. A blush linen duvet cover with a textured throw at the foot of the bed is the most efficient way to establish a pink palette while keeping the space feeling considered rather than themed.
Parachute Home’s Linen Duvet Cover in “Rose” or Cultiver’s “Dusty Pink” are the benchmark options — pre-washed linen in true blush tones that soften further with every wash without shifting color significantly. For a more affordable entry point, H&M Home’s washed linen sets in their blush colorway perform well at $55–$80 for a full set. Pair with a throw in a complementary texture rather than an identical tone — a waffle-weave cotton in ivory, a chunky knit in warm cream, or a lightweight wool blend in oatmeal all add dimension without competing with the main color.
For a duvet insert, choose one with a cotton shell at minimum 300 thread count to prevent fill migration during travel vibration. A duvet with a well-secured insert holds its shape across seasons of movement in a way that a standard comforter doesn’t.
Tip: Limit the bedding palette to blush plus one neutral. A second accent color — even a gentle sage or terracotta — tips the composition away from cohesive and toward eclectic in a space this small.
Budget: $60–$165
4. Install Peel-and-Stick Wallpaper in a Pink Floral or Botanical Print
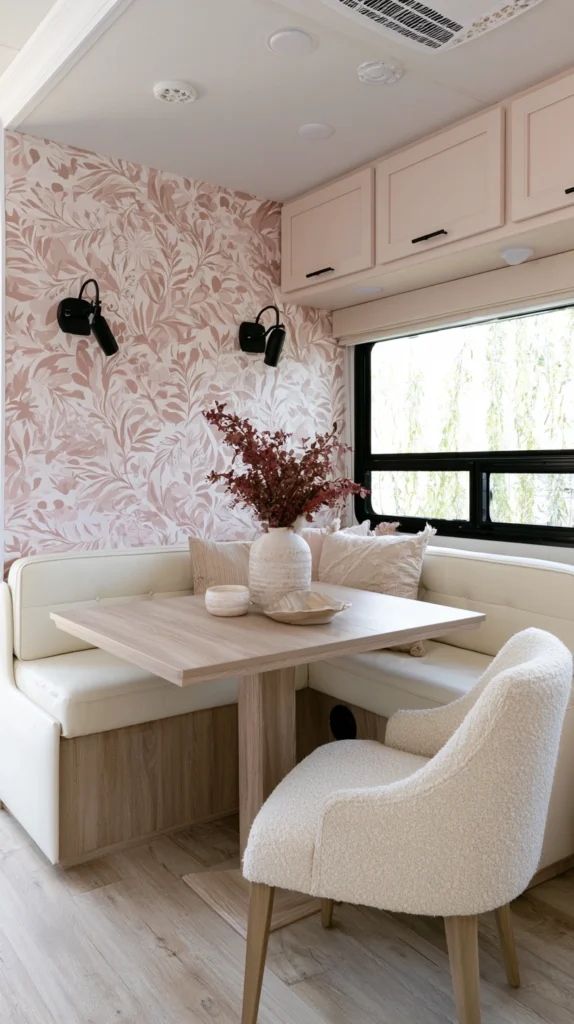
Peel-and-stick wallpaper gives a camper wall more personality than any paint color, and a pink botanical print is one of the patterns with the most longevity — it reads as layered and considered rather than trendy, particularly in small doses.
Rifle Paper Co.’s “Garden Party” and “Rosa” patterns in blush colorways, available through Chasing Paper, are the most-referenced options in this category — small-scale floral repeats in dusty pink, cream, and sage that work on a single accent wall without overwhelming a compact interior. Each roll covers approximately 18 square feet; a standard camper accent wall requires two rolls. For a more graphic alternative, Spoonflower’s marketplace carries independent designer patterns including pink maximalist botanicals and subtle vintage rose prints at $18–$28 per yard.
Surface preparation determines how long peel-and-stick wallpaper lasts in a camper context. Wipe the wall with isopropyl alcohol, let it dry completely, then apply panels from top to bottom overlapping by a quarter inch at each seam. Travel vibration tests adhesion at the edges specifically — press seams firmly and consider a very thin bead of wallpaper paste along each edge for permanent insurance.
Tip: Apply peel-and-stick wallpaper in panels no wider than 24 inches in a camper. Narrower panels are significantly easier to align on walls that aren’t perfectly flat and allow individual panel replacement if one section lifts.
Budget: $55–$130
5. Hang Pink-Toned Woven or Macramé, Wall Art
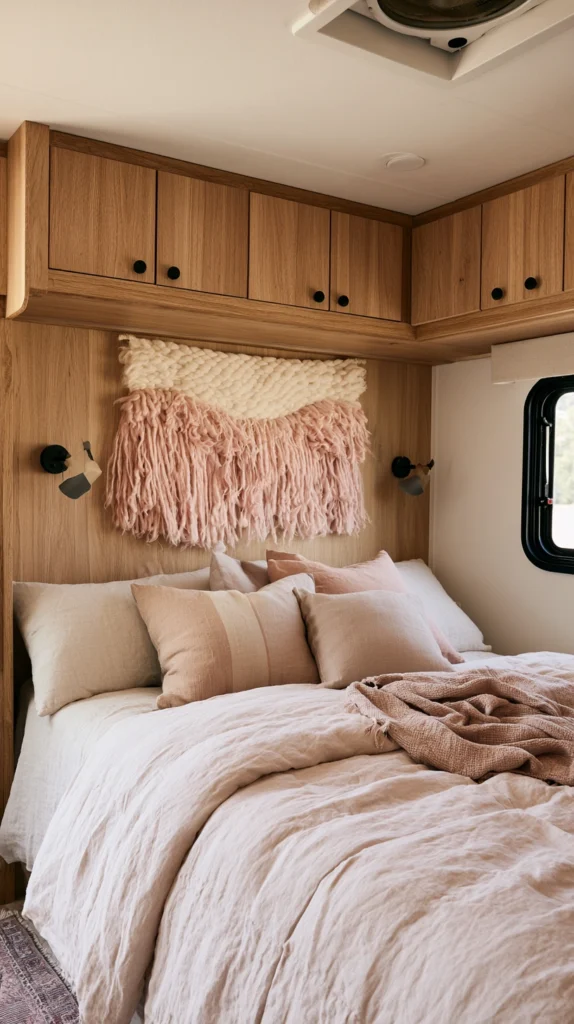
A woven wall hanging in natural cotton with blush or dusty rose threads is one of the few decorative pieces that adds texture, color, and warmth simultaneously to a flat camper wall — and it mounts with a single nail or adhesive hook rather than requiring brackets or hardware.
For camper proportions, look for hangings in the 12–18 inch width range. A piece wider than that competes with the window and door trim that dominate narrow camper walls. Etsy is the most reliable source for handmade woven pieces in specific blush or mauve tones — search “blush macramé wall hanging” and filter to listings that show finished color in natural daylight rather than styled studio photography, which tends to wash pink tones toward white.
Position the hanging above the bed or above the dinette seating — places where it’s seen from a resting position and where the wall has enough uninterrupted space for it to read as a deliberate choice rather than a space-filler. A piece mounted behind a door or in a corner loses the entire visual point.
Tip: Natural fiber macramé with blush-dyed cotton fringe holds its color better than synthetic fiber versions. Look for listings that specify natural cotton rather than polyester — polyester macramé develops a plastic sheen over time that undermines the soft quality of a pink palette.
Budget: $28–$85
6. Use a Pink Patterned Outdoor Rug at the Entry or Step
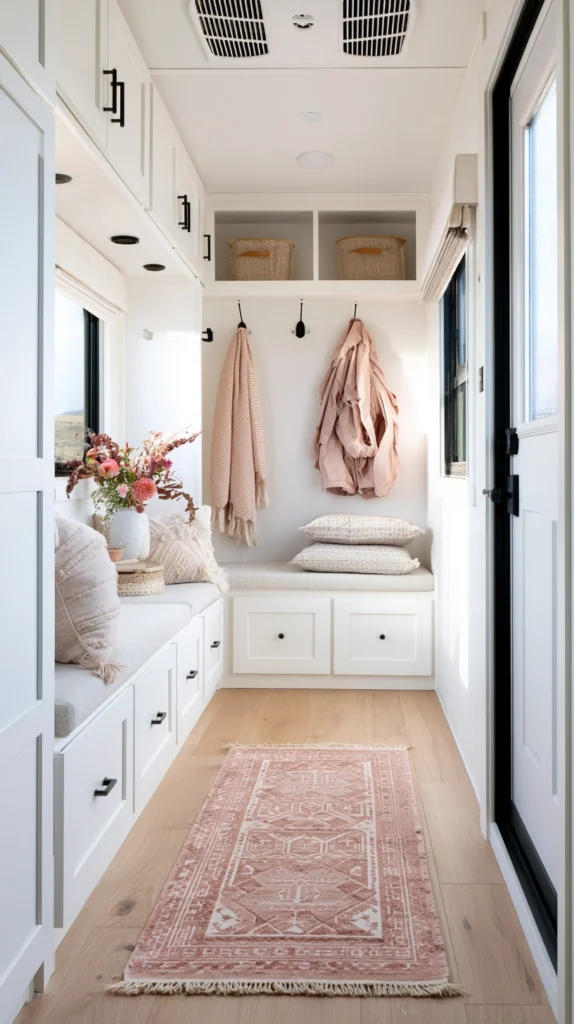
The small rectangle of floor at the camper entry or bottom step sees more traffic than any other surface in the space, and a washable outdoor rug in a pink geometric or stripe pattern is one of the most practical earthy upgrades available — it’s also one of the first things visible when the door opens.
Outdoor-rated rugs from Ruggable, Loloi’s “Rowan” line, or IKEA’s SUNNEBY range in pink and blush tones are all machine-washable, which is the non-negotiable requirement for an entry rug in a camper. Ruggable’s two-piece system is particularly well suited to this use — the rug pad attaches to the floor without permanent adhesive, and the cover can be pulled off and washed after a muddy weekend. For a 2×3-foot entry placement, look for rugs with a flat weave or low pile rather than a shag — low-profile rugs sit flat without bunching under the door swing.
A pink stripe or simple geometric pattern ages better than novelty prints — gingham, thin stripes, and diamond lattice patterns in blush and cream have decades of interior design precedent and look as appropriate in five years as they do now.
Tip: Cut a piece of non-slip pad to the exact size of the rug and place it underneath, even if the rug claims to be non-slip. Vinyl flooring and any lateral motion during entry make non-slip backing a safety issue rather than just a convenience.
Budget: $25–$75
7. Swap the Bathroom Accessories for Blush Ceramic Pieces
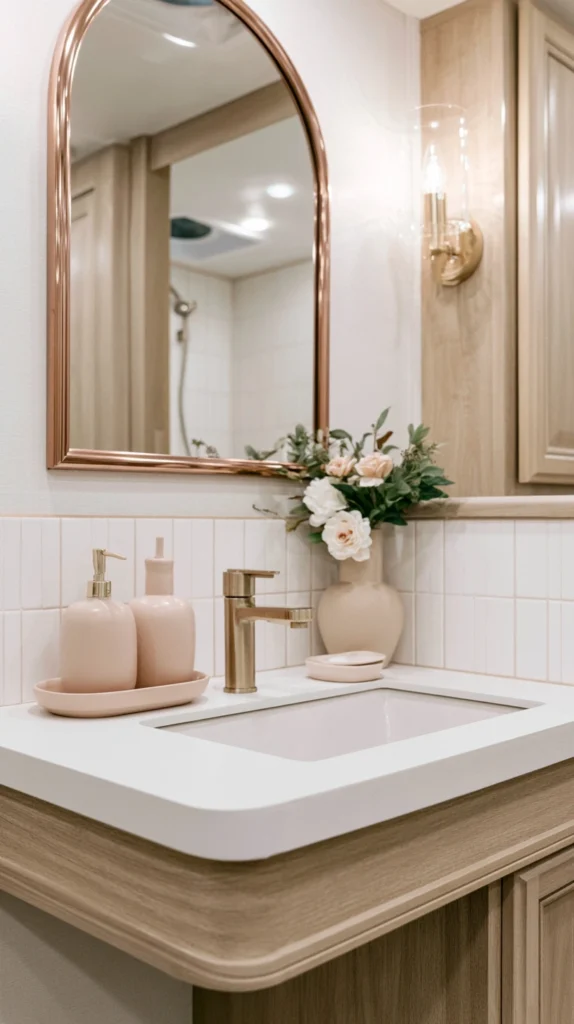
The camper bathroom defaults to chrome and white plastic — functional, cold, and visually disconnected from whatever palette exists in the rest of the space. Replacing even two or three plastic accessories with blush or dusty pink ceramic pieces closes that gap immediately.
A matte ceramic soap dispenser in dusty rose ($14–$22 at TJ Maxx, HomeGoods, or Amazon), a ceramic toothbrush holder in a matching tone ($10–$18), and a small round ceramic tray to corral toiletries ($12–$20) create a cohesive accessory story on a surface that previously had none. The weight of the ceramic in a camper bathroom requires some securing — use a small loop of museum putty on the base of each piece, or place them inside the low-walled tray so they’re contained without being fixed.
For the vanity mirror, a thin brass or rose gold frame — even an adhesive frame overlay, available on Etsy for $18–$35 — transforms a plain factory mirror into something that participates in the pink and warm metal palette rather than sitting inert on the wall.
Tip: Keep all pink bathroom accessories in the same tonal family — matte dusty rose throughout rather than mixing dusty pink with hot pink or blush with magenta. In a bathroom measured in square feet, tonal inconsistency reads as a mistake rather than variety.
Budget: $40–$85
8. Add a Pink-Shade Table or Clip Lamp for Ambient Lighting
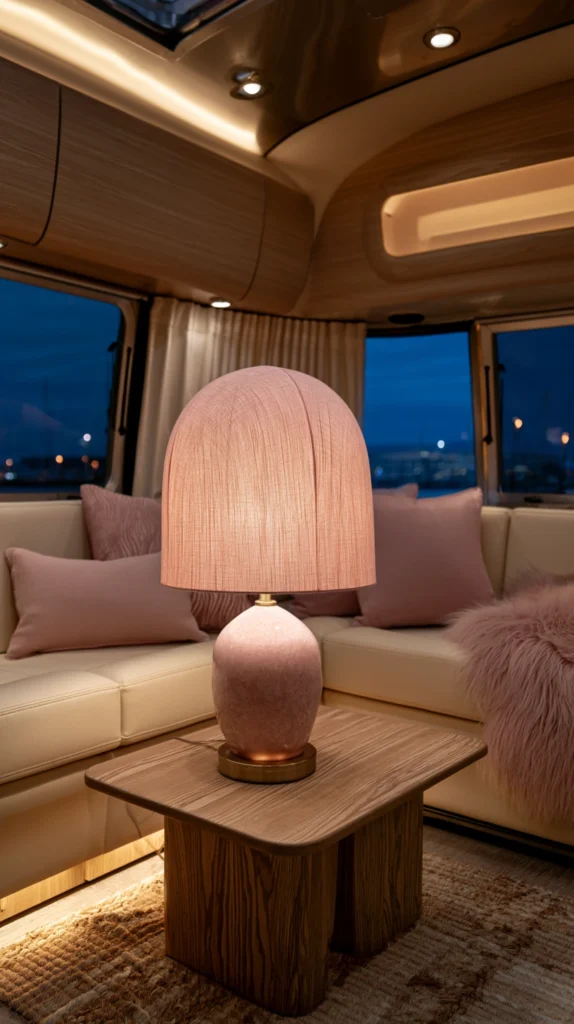
Factory lighting in most campers is a single overhead fixture with a cool white LED — sufficient for function, terrible for atmosphere. A clip lamp or small table lamp with a blush or rose-tinted shade introduces warm, directional light that transforms the quality of the interior in the evening and makes the pink palette visible in the way it was designed to be seen.
Small clip-on lamps with fabric shades are the most practical camper option — they attach to shelves, headboard frames, or cabinet edges without requiring a surface to rest on. Searching “clip lamp blush shade” or “clip reading lamp fabric shade” on Amazon or Wayfair returns options at $18–$35. For a slightly more considered option, a rechargeable wireless table lamp with a warm LED in a blush ceramic or rose-tinted glass base — Gingko Design’s Bolder and Chunk lamps are frequently referenced — works on any surface without a power cord and provides 8–12 hours of continuous light per charge.
Choose bulbs in the 2200K–2700K range. This warm amber range brings out the warmth in blush tones and softens the harder edges of a camper interior in a way that cool or daylight bulbs actively undermine.
Tip: A lamp with a dimmer function is worth seeking out specifically for camper use. The range between “bright enough to read” and “atmosphere only” is where most of the value lives in a small pink interior.
Budget: $22–$65
9. Use Pink and White Stripe Ticking Fabric for Throw Pillows
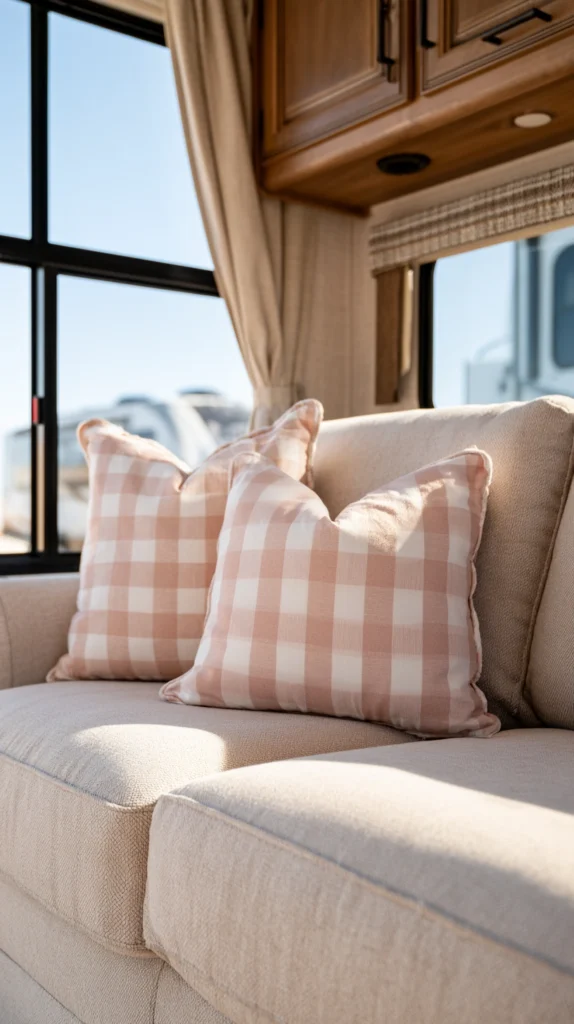
Throw pillows in a camper need to earn their place twice — once visually and once practically, since they occupy space that could be a sitting room during the day and are constantly relocated. A tight-woven ticking stripe fabric in pink and white or blush and cream produces a pillow cover that’s visually strong, durable enough for regular handling, and classic enough to still look right years from now.
Ticking stripe has approximately 150 years of continuous use as a decorative fabric — it predates trends rather than following them, which makes it one of the safest pattern choices for longevity. Pink and white ticking pillow covers are available through Caitlin Wilson, Serena & Lily, and numerous Etsy sellers in 18×18-inch and 20×20-inch standard sizes at $18–$45 per cover. For camper use, choose covers with an envelope closure rather than a zipper — envelope covers are easier to remove for washing and don’t develop zipper snag issues with repeated handling.
Two matching pillows on the camper seating area or bed are sufficient. Three or more creates a staging effect in a compact space that reads as uncomfortable to actually use.
Tip: Fill pillow inserts with a down-alternative fill at least 20% larger than the cover size — an 18×18 cover filled with a 20×20 insert. This creates the full, slightly overstuffed look that photographs well and maintains shape between trips better than a fitted insert.
Budget: $35–$90
10. Introduce Dried Floral Arrangements in Pale Pink Tones
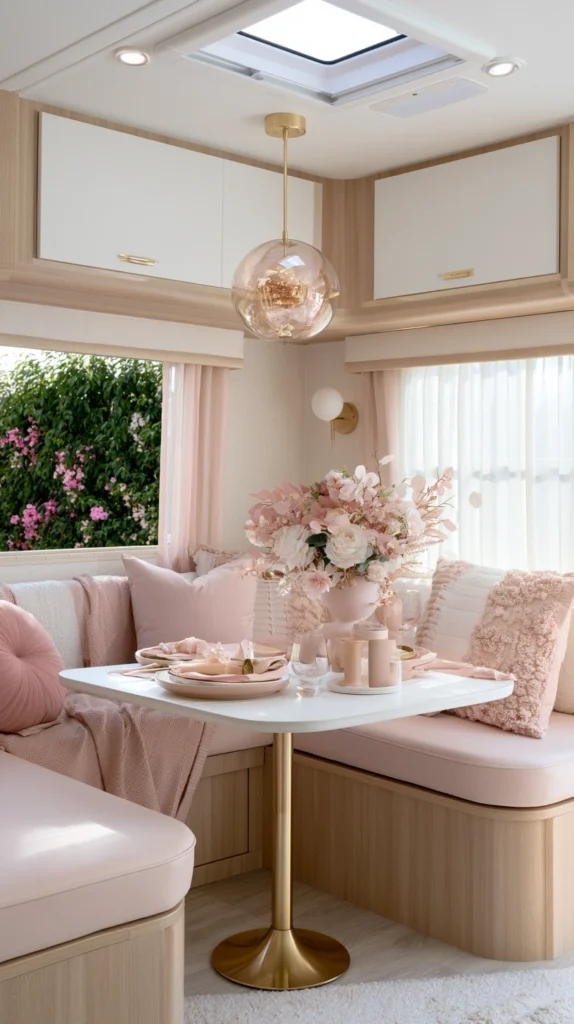
Dried flowers solve the live-plant problem in a camper — they require no water, no light management, and no concern about what happens to them during a week when the camper is sealed and parked. A small arrangement of dried pampas, dried roses, or bleached bunny tail grass in a matte ceramic vase holds the softness of the pink palette without any of the maintenance.
For tone, dried pink roses and dried strawflowers in blush hold their color best over time — they fade slowly toward a dustier, more muted version of themselves rather than browning. Dried pampas in natural cream or pale pink work as a neutral structural element that anchors smaller flowers without dominating them. A mixed arrangement of three to five stem varieties at varying heights, placed in a 4–6-inch matte ceramic vase in cream or blush, works well at the dinette table or on a shelf.
Secure the vase during travel with museum putty or by placing it inside a basket that prevents lateral movement. Dried arrangements are light but top-heavy — a base that can’t move is the only thing that prevents them from tipping.
Tip: Source dried florals from small Etsy shops rather than large retailers when possible — the color curation is significantly more precise, and many sellers will customize a bundle to a specific color palette, which matters when you need a specific dusty rose tone rather than whatever is in a pre-made set.
Budget: $22–$60
11. Line Kitchen Shelves with Pink Scallop or Gingham Paper
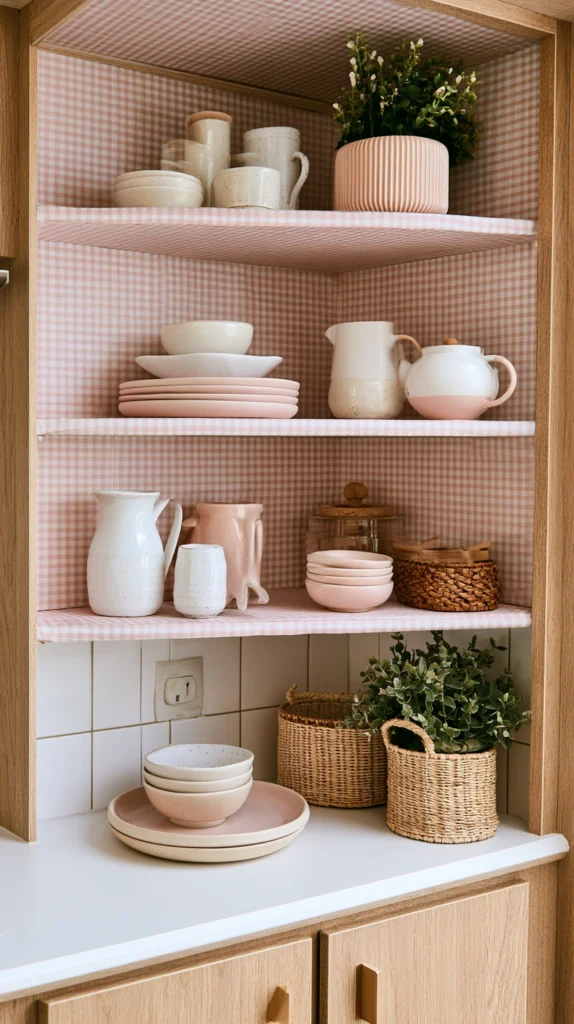
Open kitchen shelving in a camper is constantly visible, and the back wall of a shelf — usually a flat white laminate — is wasted visual real estate. Lining that back wall with pink patterned shelf paper introduces color in a space that costs almost nothing to alter and is completely reversible.
Pink gingham shelf liner and scallop-print contact paper are both available on Amazon and Etsy at $8–$15 per roll, which is typically enough to cover a full camper kitchen’s shelving back panels. Cut each piece to fit the back of the shelf rather than the shelf floor itself — applied vertically to the back panel, the pattern reads more clearly and isn’t obscured by whatever sits on the shelf. Use a small piece of double-sided tape at the corners to keep it flat without permanent adhesion.
For a more polished result, cut the top edge of the paper with a scallop punch or decorative scissors before applying. The finished edge reads as deliberate and custom in a way that a straight cut doesn’t.
Tip: Match the shelf liner tone to your accent color — if your bedding is dusty rose and your hardware is rose gold, use a soft blush gingham rather than a bright pink stripe. The liner is a background detail, not a focal point, and it works best when it reinforces rather than competes.
Budget: $10–$30
12. Mount a Small Oval or Arch Mirror with a Brass or Rose Gold Frame
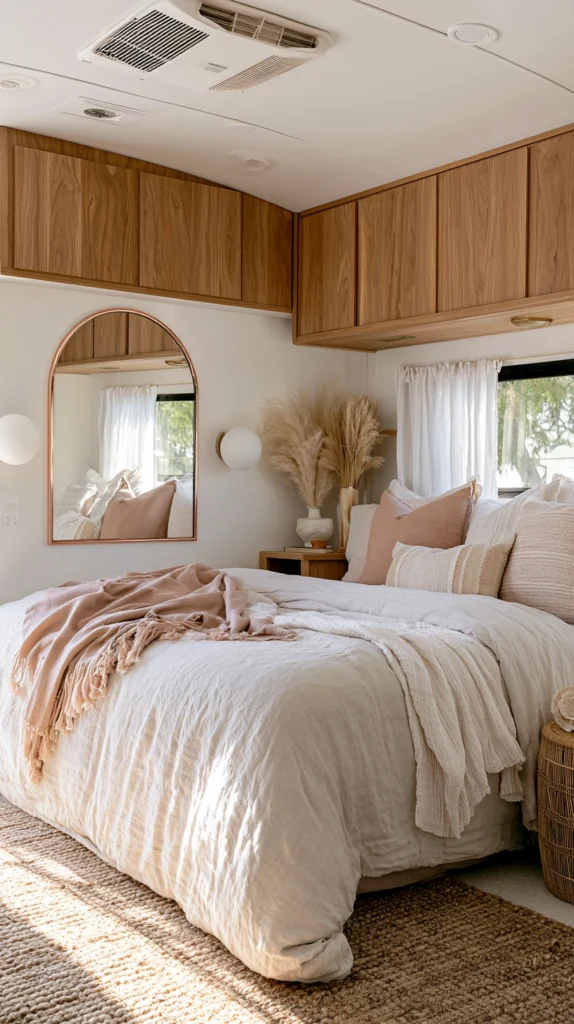
The arch mirror trend has been running long enough at this point that it’s moved out of trend status and into something closer to a classic silhouette — which is exactly the type of piece that ages well in a pink camper interior. A small oval or arch-shaped mirror with a brass or rose gold frame, mounted in the bedroom or bathroom area, adds reflected light, perceived depth, and material warmth simultaneously.
For a camper scale, look for mirrors in the 10×14-inch to 14×20-inch range. Larger mirrors add significant weight and require substantial mounting hardware — anything over 10 lbs needs to go into a wall stud, and many camper walls have studs at non-standard spacing.
The Threshold Arch Mirror from Target in the 14×20 format and the Umbra Trigg Mirror both hit the right size and price point at $35–$65. For a more character-filled option, vintage brass oval mirrors appear regularly on eBay and Facebook Marketplace for $20–$45 and arrive with a patina that new production mirrors can’t replicate.
Mount with two anchor points rather than one — a single hook allows the mirror to swing with road vibration and eventually damages both the wall and the mirror’s hanging hardware.
Tip: Position the mirror to reflect a window rather than a blank wall. A mirror that reflects outdoor light doubles the quality of natural light in the space and gives the camper interior the visual depth that makes it feel larger than its actual footprint.
Budget: $30–$75
13. Anchor the Entire Pink Palette to One Warm Neutral
A pink camper interior that consists only of pink — pink walls, pink bedding, pink accessories — tips designed to overwhelm within a small space. Pink reads best when it has a grounding partner, and the choice of that partner determines whether the palette feels romantic, modern, earthy, or playful.
The most enduring pairings are blush with warm white or cream (soft and airy), dusty rose with natural wood tones (earthy and warm), and deeper mauve with matte black (graphic and modern). Each of these pairings gives the pink room to exist without dominating — the neutral provides visual rest between the color accents. In a 200-square-foot camper, 30–40% pink across walls, textiles, and accessories with 60–70% neutral is roughly the right proportion for a space that feels intentionally designed rather than monothematic.
When evaluating neutrals, hold fabric swatches and paint samples against your pink pieces in the camper’s own lighting before purchasing. Warm white looks cream-adjacent under warm bulbs and slightly yellow under cool ones — the lighting environment of the specific camper changes every neutral calculation.
Tip: Natural woven materials — jute, rattan, seagrass — function as neutrals in a pink palette and can be added freely without disrupting the proportion balance. They bring texture rather than color and sit outside the pink-versus-neutral equation entirely.
Budget: $0 — this is a design decision, not a purchase
Final Thoughts
Pink camper decor lasts when it’s built around permanence rather than the moment — dusty rose instead of hot pink, brass instead of chrome, linen instead of polyester.
The ideas above aren’t difficult or expensive, but they work together only when the underlying palette decision is made first. Two tones — pink and a grounding neutral — applied consistently across walls, surfaces, textiles, and hardware will always produce a more coherent result than assembling individual pieces that each seem right but don’t speak to each other.
Start with the single highest-impact change: the accent wall or the bedding, depending on which surface dominates the specific camper layout. Build from there toward the small details. The spaces that feel finished aren’t the ones with every idea implemented — they’re the ones where every choice belongs.