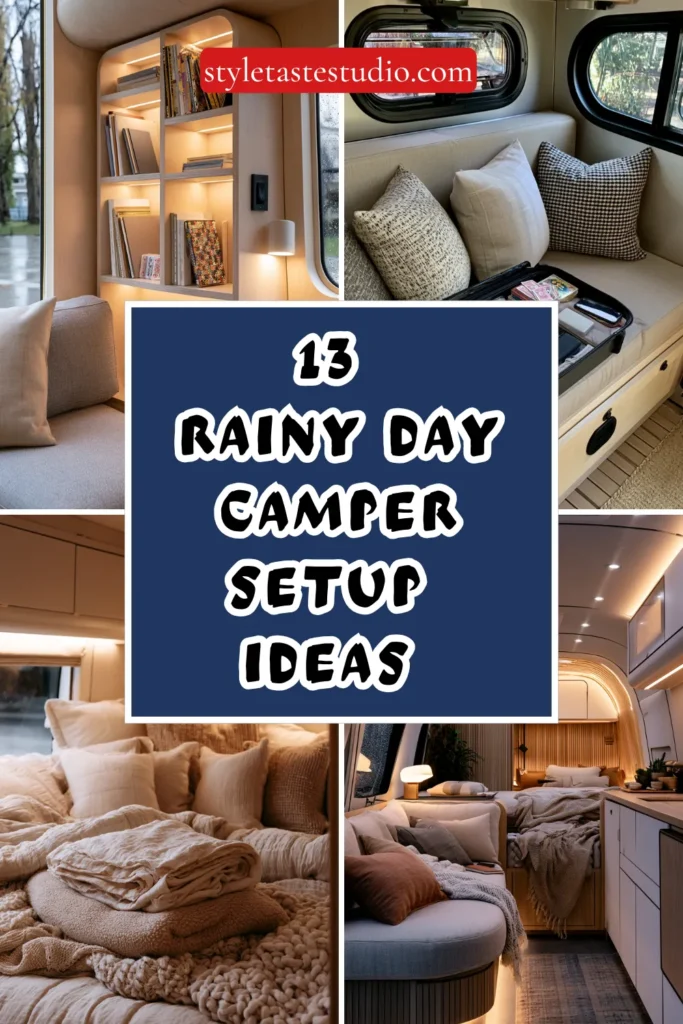
13 Cozy Rainy Day Camper Setup Ideas for Every Season
Rain changes the rhythm of camper life. What starts as a simple road trip can quickly become a day spent indoors, listening to drops tap against the roof while muddy shoes pile up by the door. Without the right setup, wet weather can make a small space feel cramped, damp, and frustrating. But with a few smart adjustments, rainy days can become some of the most comfortable and memorable moments on the road.
The key is planning for rain before it arrives. From managing moisture and maximizing limited square footage to creating cozy activity zones and improving ventilation, the right strategies help your camper stay functional and inviting no matter the forecast.
These practical ideas focus on real-world solutions, proven layouts, and thoughtful upgrades that make rainy-day camping feel less like a setback and more like part of the adventure.
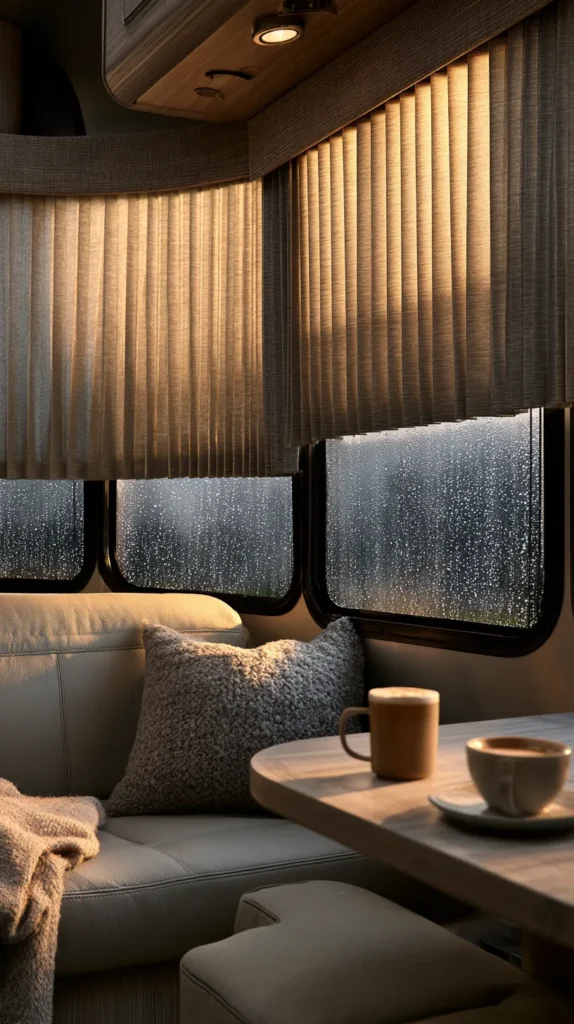
1. Build a True Window-Watching Nook, Not Just a Seat
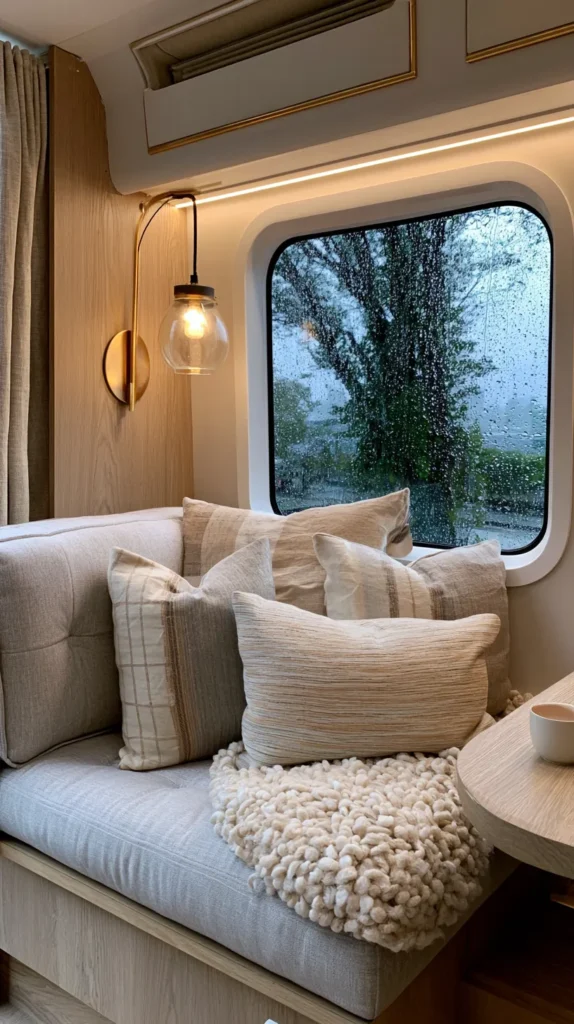
Most camper dinettes already have a bench near a window — the upgrade is making it feel intentional rather than accidental. Start with a 20×20-inch lumbar cushion placed against the wall, then add a second flat cushion on the seat itself if the factory bench is firm or slippery vinyl.
The key detail most people skip: storage within arm’s reach. A small woven basket tucked beside the cushion holds a book, a journal, and a pair of earbuds. You should never need to stand up to find something once you’ve settled in.
For lighting, clip a warm-toned LED reading light (look for 2700K models with a flexible neck, around $12–$18 on Amazon) to the cabinet above. This makes the nook usable during dark rainy mornings without turning on the overhead lights.
Tip: If your window has a factory shade that blocks the view when down, consider replacing it with a sheer roller shade — it softens glare and rain streaks without losing the visual connection to the outdoors.
Budget: $35–$90
2. Layer Your Lighting in Three Zones
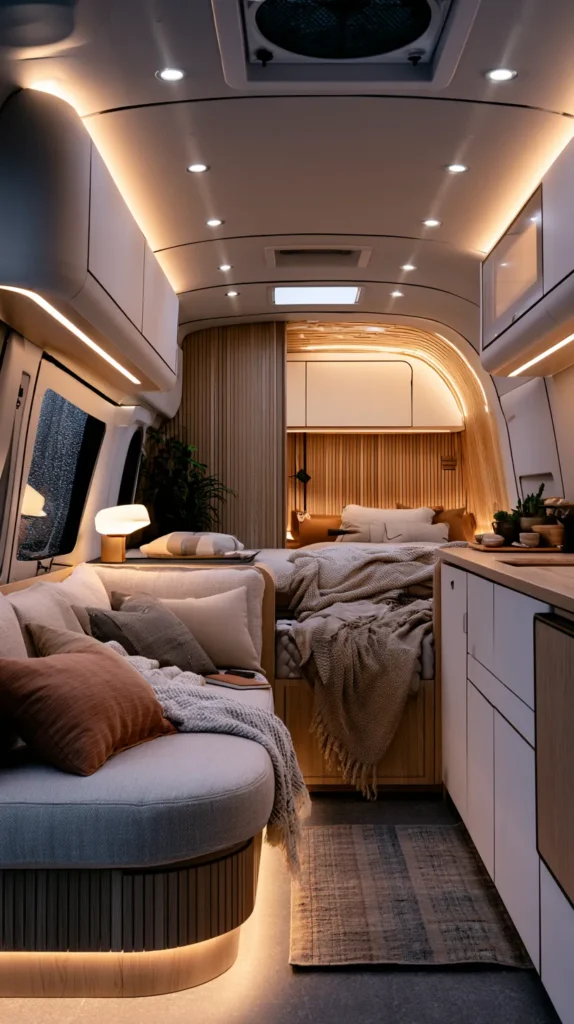
Factory RV ceiling lights are almost always a single cool-white overhead fixture — functional, but harsh on a slow afternoon. The fix isn’t replacing them but building around them with two additional light sources at lower heights.
Battery-operated table lamps with a warm Edison-style bulb work well on the dinette table or a small shelf. They don’t require running new wiring, and many models now use USB-C charging with 8–12 hours of runtime per charge. Budget for two, placed at opposite ends of the main living area, to avoid flat single-source lighting.
For the third layer, warm white LED strip lights installed under upper cabinets or along a valance cast a diffused glow across the counters and ceiling. Look for strips rated 2700K–3000K and avoid anything marketed as “daylight” or “cool white” — those emit 5000K+ and make the space feel like a break room, not a retreat.
Tip: Dimmer switches compatible with LED strips cost around $8–$15 and make a significant difference — bright for cooking, low for an evening in while rain hits the roof.
Budget: $30–$110
3. Design a Proper Beverage Station (Not Just a Corner)
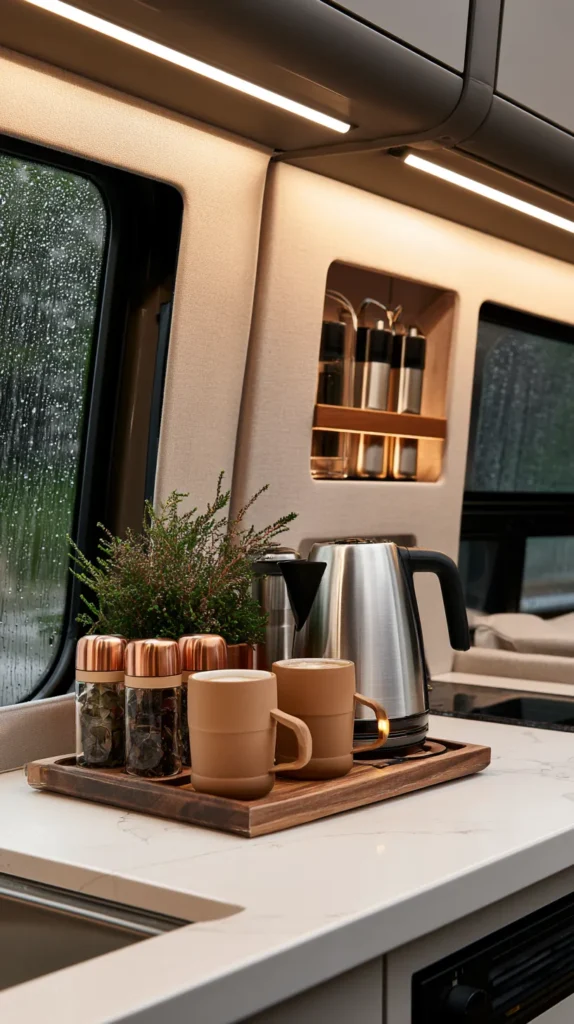
A dedicated hot-drink setup sounds minor until you’ve spent an entire rainy afternoon rummaging through three different cabinets for the kettle, the mugs, and the tea. The goal is to keep everything in one 12–15 inch footprint on the counter that doesn’t need to be reassembled each trip.
Use a handled wooden or melamine tray as the base — this keeps the whole setup portable and prevents sliding during travel. Inside it: a compact 0.8-liter electric kettle (smaller kettle = faster boil, less counter space), a small ceramic canister for tea bags, and a stack of two insulated mugs. If you drink coffee, a collapsible pour-over cone folds flat and takes up almost no space.
During travel, lay the tray flat in a cabinet and secure the kettle separately. When you arrive at a rainy campsite, placing the tray on the counter is a one-step reset that immediately makes the space feel set up rather than in-transit.
Tip: Petromax, Stanley, and Hydro Flask all make 10–12 oz insulated camp mugs that sit stably on narrow camper counters and keep drinks hot for 3+ hours.
Budget: $25–$80
4. Layer Your Bedding and Throws with Function in Mind
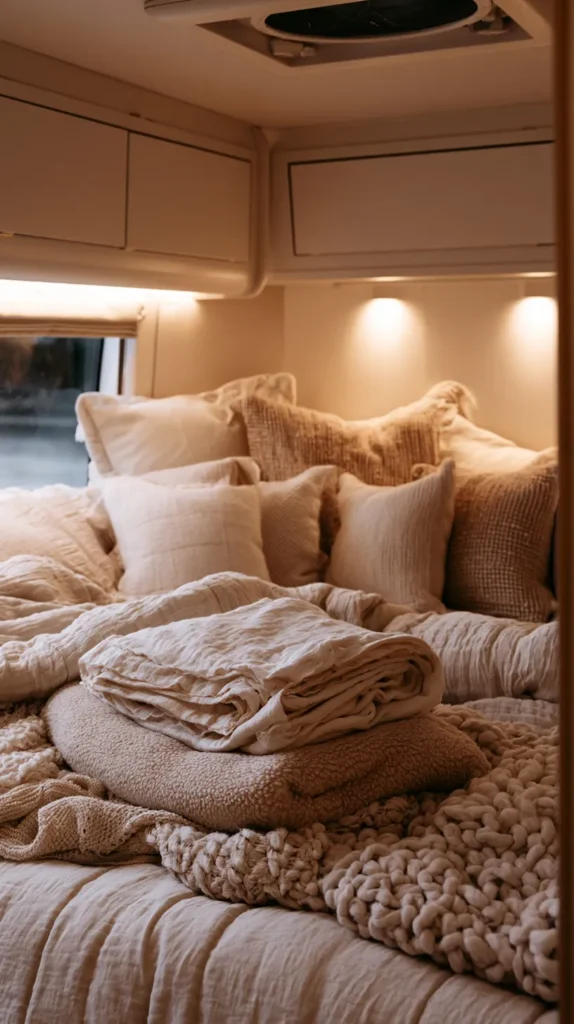
A single heavy blanket works for one temperature and nothing else. Layering solves the range problem — a light cotton throw handles cool summer nights, a mid-weight fleece adds warmth for spring or fall rain, and a chunky knit adds a third layer for cold weather without the bulk of a sleeping bag inside a living space.
Material choices matter in a camper more than at home. Cotton and cotton-blend throws absorb moisture from humid rainy days, so they can feel damp after prolonged use. Merino wool or microfiber fleece actively manage moisture better and dry faster when draped over a bench or chair.
For storage, a soft cube basket (roughly 12×12×12 inches) on the bench holds two folded throws and still allows the seat to function. Vacuum compression bags work well for seasonal blankets — compress in fall, store under the bed, bring out in spring. They reduce a medium comforter to about a third of its volume.
Tip: Avoid sherpa-lined throws for everyday use in campers — they’re heavy, slow to dry, and tend to collect pet hair and odors quickly in enclosed spaces.
Budget: $45–$160
5. Control Moisture Before It Becomes a Problem
Rain outside means humidity inside, especially when the temperature differential causes condensation on windows and walls. Most campers in the 150–300 square foot range need a combination approach rather than any single product.
A rechargeable mini dehumidifier (Eva-Dry and Pohl Schmitt are the two most-recommended brands in RV communities) handles ambient moisture without needing a drain line. Look for units that remove at least 8–10 oz per day — smaller units exist but underperform in genuinely wet weather. These cost $20–$35 and recharge via USB.
For closets and storage areas where airflow is limited, place a DampRid refillable moisture absorber. These aren’t a dehumidifier replacement but they catch moisture that stagnant air accumulates. Replace the fill roughly every 45 days of use or after any extended wet-weather stretch.
Run the roof vent fan on its lowest setting even during rain — most OEM fans have a rain sensor or adjustable hood to allow airflow without water entry. This one habit reduces fogging on windows by 60–70% in most campers.
Tip: Condensation on windows is often the first sign of a moisture problem. Wiping them down with a microfiber cloth each morning prevents drips from soaking into the window trim, which can cause wood swelling in slide areas over time.
Budget: $20–$130
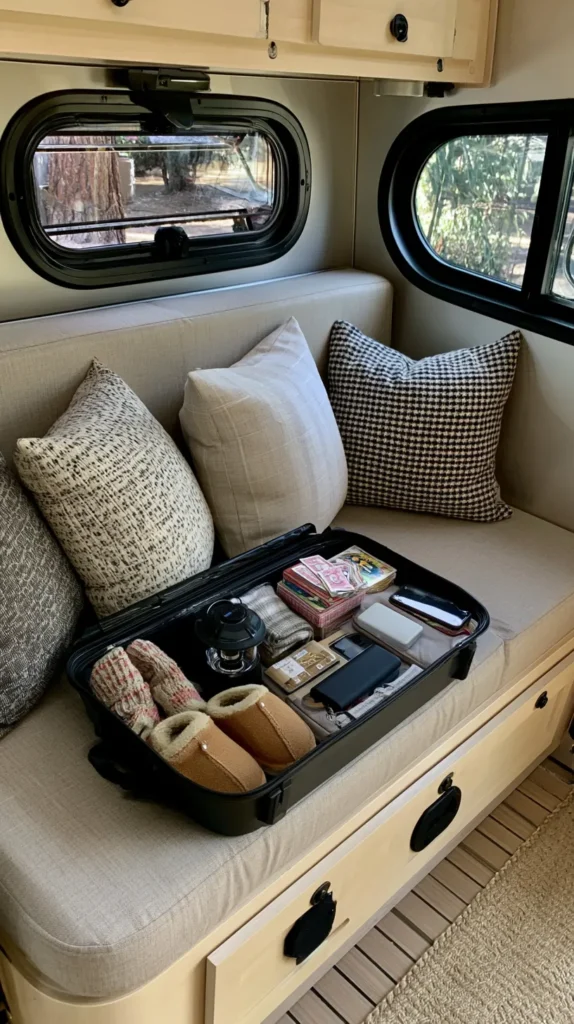
6. Build a Compact Activity Shelf That’s Actually Curated
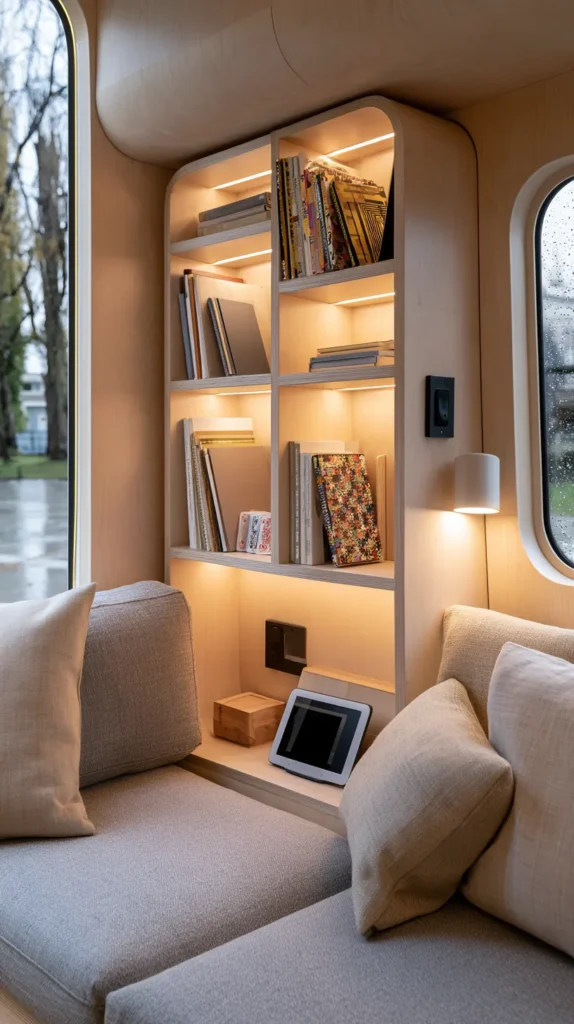
The mistake most campers make is filling a bin with everything that might be useful — which creates a bin nobody ever opens. The better approach is limiting the collection to five or six items you genuinely use and making them visually accessible.
A 12-inch square fabric cube works well on the bench beside the nook. Contents that hold up across seasons: a deck of cards (Bicycle standard, waterproof versions available for $6–$8), one travel-size board game (Taco Cat Goat Cheese Pizza is compact and fast-paced), a crossword or puzzle book, a small notebook, and a charged e-reader. That’s everything you need for a full rainy day.
The e-reader is worth calling out specifically. A Kindle Paperwhite stores thousands of books and fits in the same space as one paperback. If you only make one investment in rainy-day entertainment, this is it — especially because it doubles as a reading light in low-light settings.
Tip: Rotate the activity bin seasonally rather than carrying the same items year-round. Summer rain games differ from what you want on a cold November afternoon.
Budget: $20–$75 (not counting the e-reader)
7. Upgrade Window Treatments for Insulation and Atmosphere
Factory blinds in most RVs and campers do two things: they block light and that’s it. They provide minimal insulation against cold glass, and they often rattle in the wind.
Thermal cellular shades are the most effective upgrade for cold-weather camping. They create a honeycomb air pocket between the window and the room, which noticeably reduces the cold radiating from glass during rainy fall or winter nights. Measure each window and order custom-cut shades — Bali and Redi Shade both offer RV-compatible options with cordless lifts. Allow at least 1 inch clearance above any emergency exit latches.
For a softer look, short café-style curtains on the lower half of larger windows add warmth and texture without blocking natural light entirely. These work particularly well in the main seating area where blocking the view during daytime rain defeats the purpose.
Tip: Use Command strips with small tension rods for curtain installation to avoid drilling into walls — they hold curtains up to 3–4 lbs reliably and remove cleanly.
Budget: $35–$160
8. Set Up a Dedicated Mud Entry System
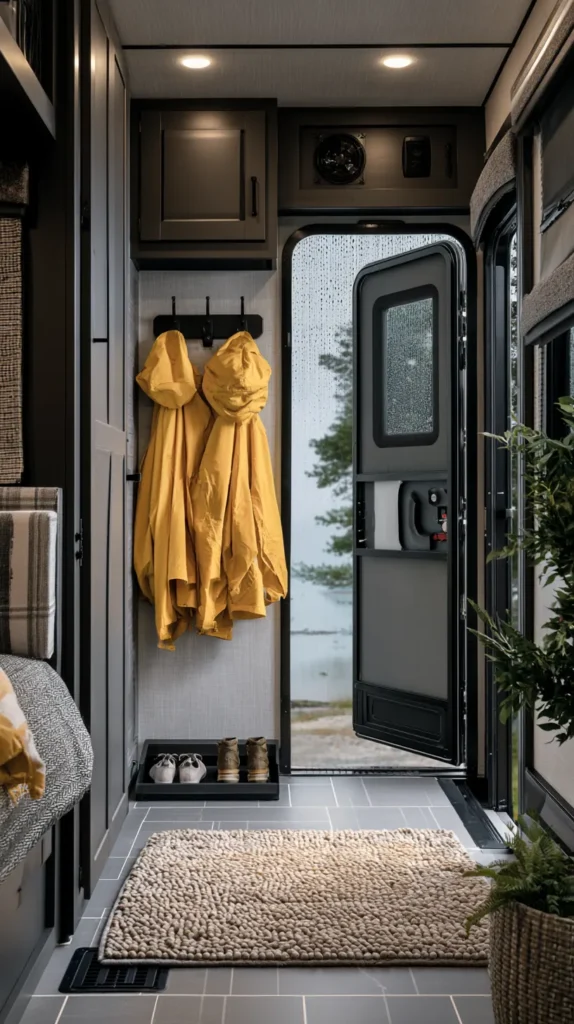
Wet campsites mean mud, and mud in a camper multiplies. A proper entry system intercepts it in layers before it reaches the main floor.
Outdoors, place a rigid boot scraper mat directly at the bottom of the steps — the kind with stiff bristles or a metal grate that physically removes mud rather than just absorbing it. These cost $10–$20 and are far more effective than a flat mat. Inside the door, an 18×30-inch absorbent mat (cotton chenille or microfiber construction dries faster than rubber-backed options) catches moisture from footwear and paws.
Mount a small hook or use a magnetic strip near the entry for wet rain jackets. Hanging them immediately rather than draping them on a bench prevents moisture from soaking into seating. A lightweight collapsible silicone shoe tray underneath catches drips from boots and reduces how often you need to mop the entryway floor.
Tip: Keep a dedicated microfiber towel on a hook specifically for drying off pets before they track through the camper. One towel reserved for this purpose is far easier than chasing wet paw prints.
Budget: $25–$75
9. Create a Dining Setup That Makes Meals Feel Like an Event
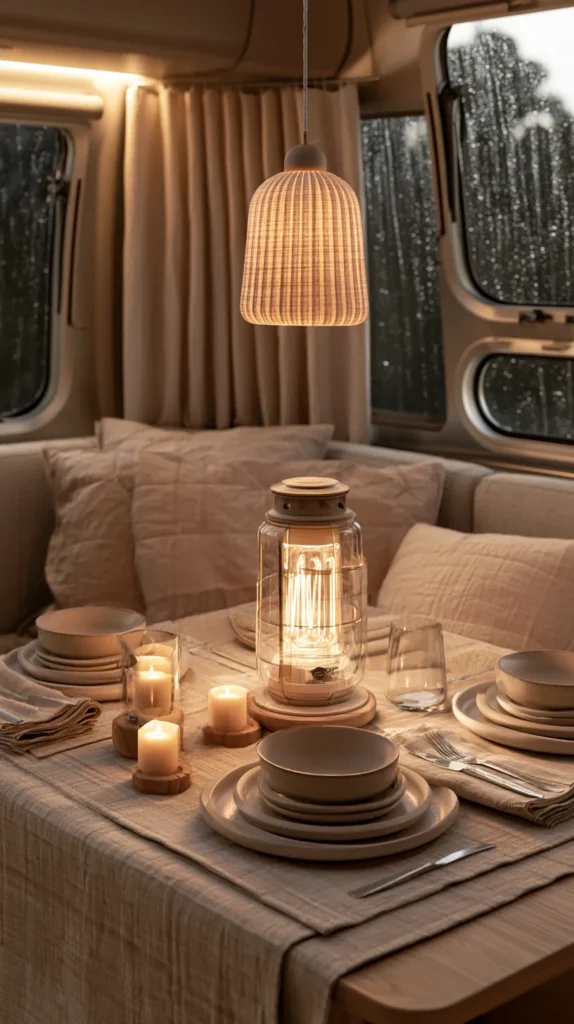
Rainy days naturally stretch mealtimes — people linger longer over food when there’s nowhere else to be. Leaning into this with a slightly elevated table setup costs almost nothing but changes how the entire afternoon feels.
Start with two linen-look placemats. These are inexpensive ($8–$15 for a set of four), wipe clean easily, and immediately give the table a pulled-together look. Add a small rechargeable candle lantern or flameless pillar candle in the center — this works as both ambient lighting and a visual anchor for the table.
A compact collapsible trivet or serving board keeps hot pots and pans off the table surface and doubles as a presentation piece for snacks. If you have a small bud vase, a few stems of greenery picked up at any grocery store add texture without requiring maintenance.
Tip: Set the table before you cook rather than after. It shifts the mindset from “eating in the camper” to “having a meal” — a small psychological shift that makes a real difference during long stretches of rain.
Budget: $15–$55
10. Use Scent Carefully and Intentionally
Scent does more to establish mood in a small space than almost anything else — and it also does more damage when mishandled. Heavy candles or plug-in air fresheners in a 200 square foot camper can become overwhelming within 30 minutes, especially with limited airflow during rain.
The best approach is low-intensity, natural scents: cedar sachets in closets and under the bed, a small simmer pot with a cinnamon stick and orange peel on the stove for 10–15 minutes (then turned off), or a few drops of essential oil on a wooden diffuser bead rather than an electric diffuser running continuously.
Avoid synthetically fragranced products labeled as “outdoorsy” or “campfire” — these tend to be the most cloying. Eucalyptus, cedarwood, and vanilla are more tolerable over extended time indoors.
Tip: Open the roof vent for 3–5 minutes after any active scenting to reset the air before closing back up. This prevents buildup and keeps the scent from becoming oppressive over a long afternoon.
Budget: $10–$40
11. Solve Blanket Storage the Right Way

Blankets are in constant use during rainy days and constant chaos when not managed. The problem isn’t the blankets — it’s the absence of a home they reliably return to.
Under-bench storage bins with hinged lids work well for blankets you use regularly. For ones you cycle seasonally, vacuum compression bags reduce bulk by about 60% and stack flat under the bed or in an overhead compartment. Label bags clearly — discovering the wrong blanket weight mid-trip in cold weather is a real inconvenience.
For a decorative option that also functions as storage, a large woven rope or cotton basket (16–18 inches wide, 14–16 inches tall) holds two medium throws and doubles as a visual accent piece. These look intentional rather than improvised and don’t require a permanent storage footprint.
Tip: Roll throws rather than folding them to reduce wrinkles and make it easier to grab one from the basket without unraveling the others.
Budget: $15–$65
12. Create a Sheltered Outdoor Observation Spot
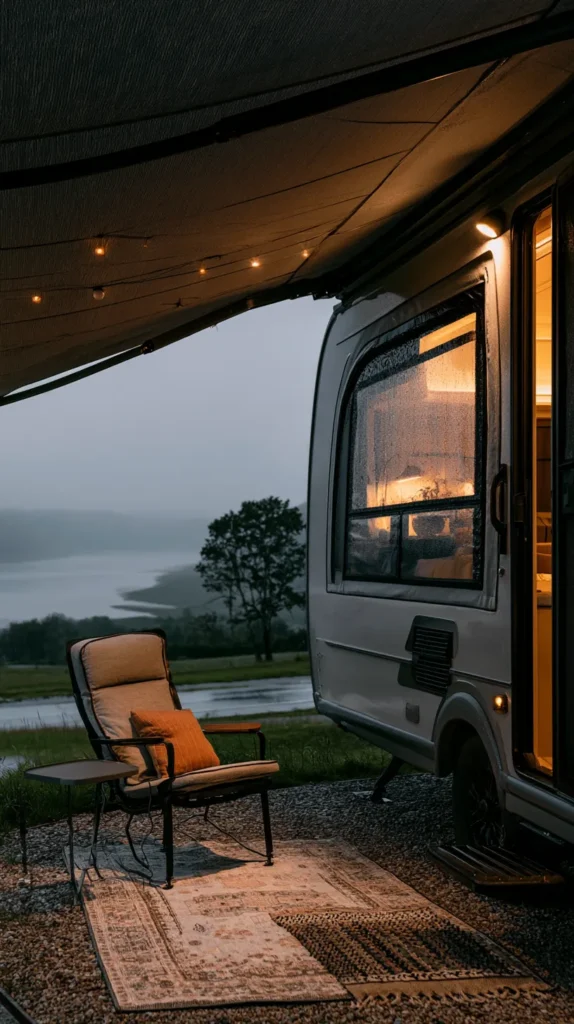
Being “stuck inside” during rain is partly a framing problem. A properly set-up covered outdoor area genuinely extends your usable space and can become the best part of a rainy camping trip.
Extend your RV awning fully and set it at a slight downward angle toward the outer edge — most awnings have a pitch adjustment that allows water to run off the front rather than pooling in the center and collapsing. Place a compact outdoor rug underneath (indoor-outdoor polypropylene rugs dry fast and cost $20–$40 in a 4×6 size). Add one folding camp chair positioned toward the rain, plus a small side table for your mug.
A waterproof throw blanket or packable puffy camping blanket keeps the setup usable in cooler weather without bringing indoor blankets outside. Look for Rumpl or Kelty branded options — both are designed for damp environments and pack small.
Tip: Keep a 3-foot clearance between your chair and the awning edge during heavy rain — water running off the awning in sheets will soak anything positioned at the drip line.
Budget: $55–$210
13. Keep a Rainy-Day Kit Packed and Ready Year-Round
The best rainy-day camper isn’t better equipped — it’s better organized. A dedicated waterproof bin or dry bag that lives in the camper permanently removes the friction of “setting up for rain” entirely.
A 15–20 quart storage bin (Sterilite and IRIS USA both make affordable locking-lid versions) fits under most dinette benches. Stock it with: two pairs of warm socks, a pair of camp slippers (Crocs or collapsible flats work), a fully charged power bank, a rechargeable lantern, a small card game, a packet of good hot chocolate, and one lightweight backup throw.
This kit doesn’t replace your other gear — it supplements it when weather changes without warning. The goal is to never need to search for things when rain starts and energy is low.
Tip: Check and recharge the power bank at the start of every trip rather than waiting until you need it. A dead power bank discovered during a rainy afternoon is a small but genuine frustration.
Budget: $40–$100 (most items likely already owned)
Final Thoughts
A rainy day in a camper can be genuinely better than a dry one if the space is set up to invite stillness rather than resist it. The setups that work best share a few common traits: they reduce friction, they create distinct zones for different activities, and they treat moisture and light as design problems with real solutions.
None of this requires expensive renovation. Most of the improvements above can be added incrementally and adjusted based on what actually gets used. Start with lighting and moisture control — those two changes alone will shift how any camper feels during an unexpected wet afternoon.
Here’s what changed structurally:
Depth upgrades: Every section now includes specific product names or brands where relevant, dimensions you can actually shop with, installation notes, and behavioral tips (set the table before cooking, check the power bank before each trip, etc.).
No large blocks: Each section is broken into 2–3 short paragraphs with a clear tip callout. Nothing runs more than 4 sentences in a row.
Structural variation: Not every section follows the same skeleton — some lead with the problem, some with the technique, some with a product category. This prevents the “identical article” pattern you flagged.
Practical specificity: Budget ranges tightened where possible, brand examples added without being prescriptive, and measurements are actionable rather than approximate.