14 Brass and Marble Kitchen Decor Ideas for a Luxe Finish
Brass and marble have been paired in kitchens for as long as either material has been used in one, and the combination hasn’t lost any of its pull. Marble brings cool, veined, naturally variable surface; brass brings warm, reflective, light-catching metal. Together they do what the best material pairings always do — each makes the other read richer than it would alone.
What separates a kitchen where this pairing genuinely reads luxe from one where it reads like a single upgraded countertop is the same principle that applies to any material-driven design: consistency
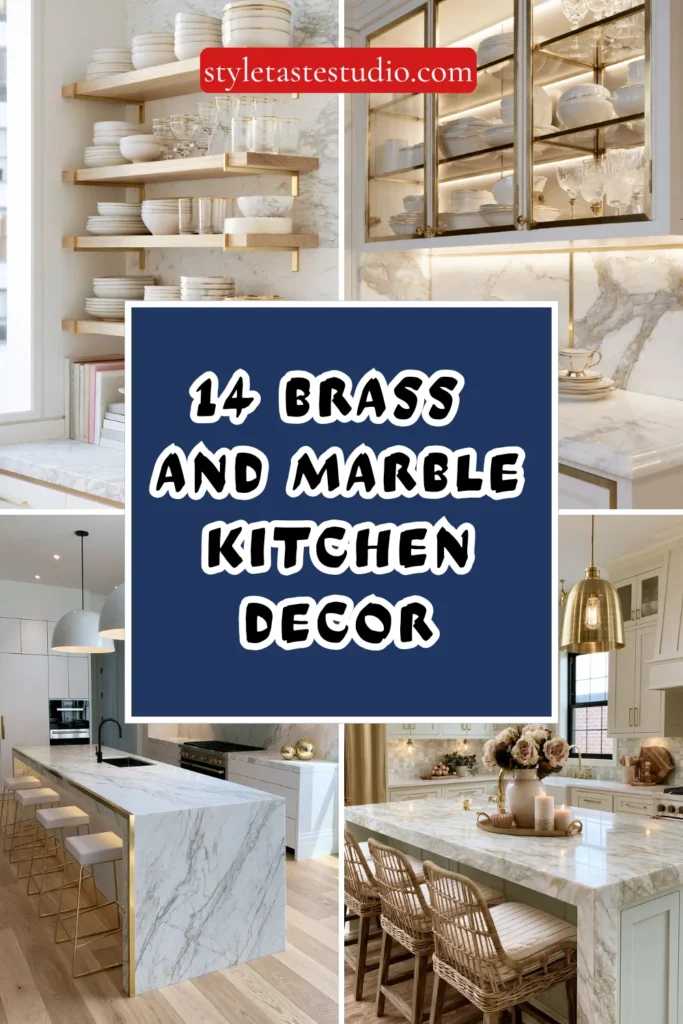
. A marble island next to chrome hardware and a stainless hood undercuts the pairing before it has a chance to do its work. The brass needs to show up repeatedly — hardware, lighting, trim — for the kitchen to read as considered rather than partially finished.
This list treats brass and marble as the kitchen’s two organizing materials, applied together across surfaces, fixtures, and even smaller styling details, rather than as a single countertop decision made in isolation. Here are 14 ways to build a kitchen around that pairing.
Why Some Brass and Marble Kitchens Feel Unfinished
The single-surface problem:
Without consistent application:
- Marble limited to one countertop or backsplash, with no other appearance elsewhere in the room
- Brass appearing on a single fixture, usually the faucet, while every other metal surface stays in its original chrome or nickel finish
- The result: reads as one nice upgrade in an otherwise ordinary kitchen, not a considered material pairing
With consistent application:
- Marble appearing in at least two forms — a countertop and a backsplash, or an island and a smaller accent surface
- Brass appearing on every visible metal surface: hardware, lighting, faucet, and hood trim alike
- The result: the two materials read as the kitchen’s deliberate organizing pair, not an isolated feature
The veining mismatch problem:
- Multiple marble or marble-look surfaces in the same kitchen, but with noticeably different veining patterns or base tones
- The result: reads as mismatched slabs rather than one coherent stone palette, even when both are technically marble
The brass-brightness inconsistency:
- A mix of high-polish and brushed brass finishes applied without a clear hierarchy
- The result: reads as accidental variation rather than intentional layering, undercutting the same consistency principle that governs the marble
The Five Brass and Marble Kitchen Principles
Before choosing any individual idea below, these five principles keep the pairing reading luxe rather than partially applied:
Marble in at least two forms:
- A countertop and a backsplash, or an island top and a smaller accent surface like a baking slab
- One marble surface alone reads as a single upgrade; two or more reads as a material choice
One consistent brass sheen throughout:
- Brushed or aged brass as the primary finish, applied to every fixture and hardware piece
- A small amount of high-polish brass reserved for a single statement piece, if used at all
Consistent veining and base tone across all marble surfaces:
- White marble with soft grey veining throughout, rather than mixing warmer and cooler-toned slabs
- Marble-look quartz is an acceptable substitute for real marble as long as the veining and tone stay consistent with any real stone elsewhere in the room
Brass repeated across function, not just one fixture:
- Hardware, lighting, faucet, and any visible trim, not brass on the faucet alone
- The repetition is what signals a considered material palette rather than a single splurge item
A neutral backdrop that lets both materials read clearly:
- White, cream, or pale cabinetry, so the marble’s veining and the brass’s warmth both stand out clearly
- A busy or heavily coloured backdrop competes with both materials rather than supporting them
1. A Brass Faucet Paired With a Marble Sink Surround
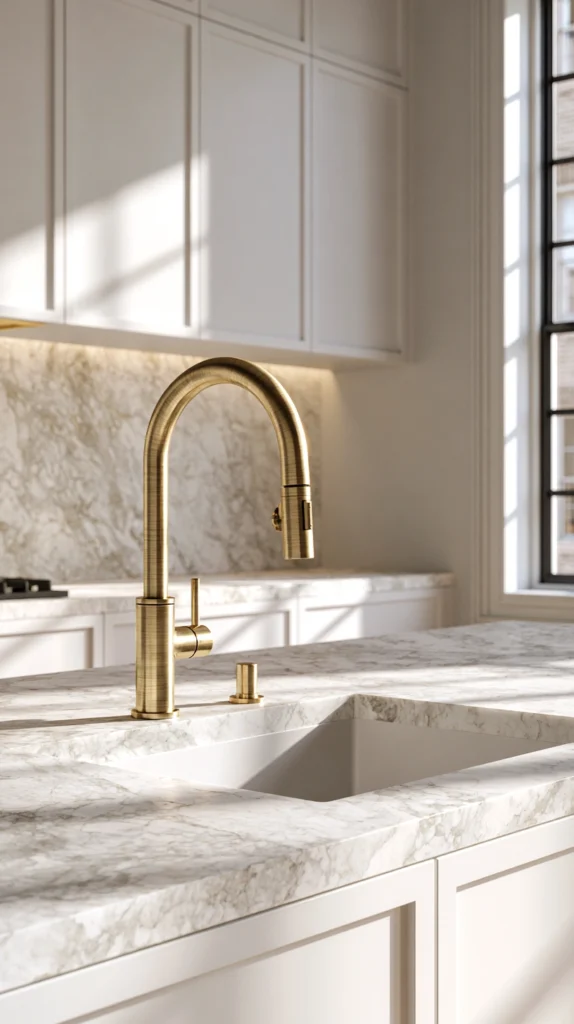
A brushed brass faucet installed against a marble or marble-look counter surrounding the sink — pairing the kitchen’s most frequently touched fixture with its most visually prominent stone surface.
Why the sink area is the natural starting point for this pairing
The sink is one of the most consistently viewed and used areas of the kitchen, making it an efficient place to establish both materials at once, in the same close sightline. Anyone standing at the sink sees the brass faucet and the marble counter simultaneously, which does more to establish the pairing’s presence than either material placed separately elsewhere in the room.
Selection notes
- A brushed brass faucet, in either a traditional or a simple modern silhouette depending on the kitchen’s overall style
- A honed (matte) marble finish around the sink specifically, which shows water spots less than a polished finish in a high-moisture area
Cost breakdown
- Brushed brass faucet: $180–380
- Total: $180–380 (assuming marble counter is already in place, or as part of a larger countertop project)
2. A Marble Waterfall Island With Brass Edge Trim
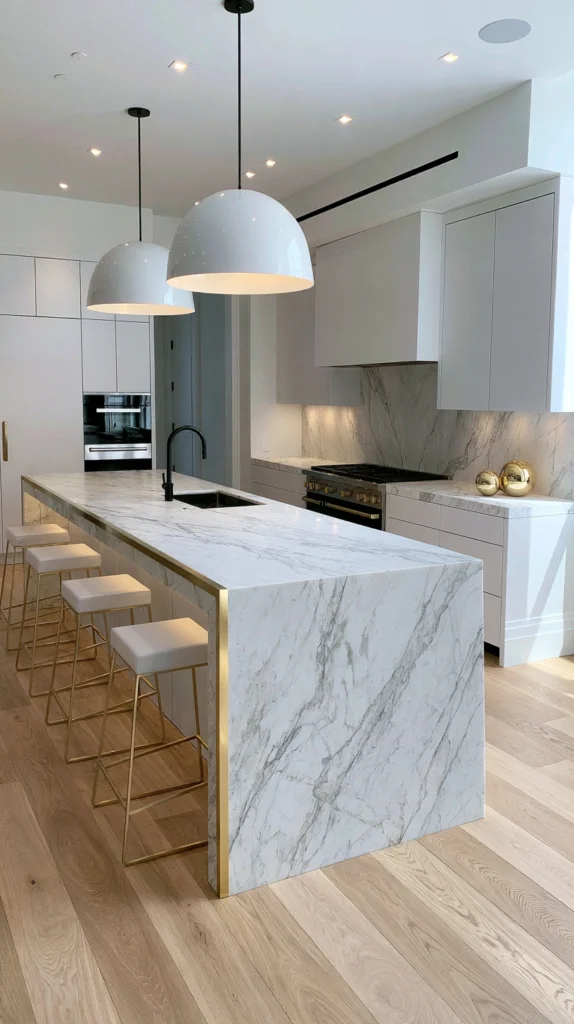
A kitchen island topped in marble or marble-look quartz, with the stone continuing down both sides in a waterfall edge, finished with a thin brass trim strip along the edge.
Why the brass trim elevates the waterfall detail specifically
A waterfall island edge is already a strong, contemporary design statement on its own. A slim brass trim strip along the transition where the countertop meets the waterfall panel adds a fine, jewelry-like metal line that catches light differently than the stone alone, giving the whole island a more finished, custom-built quality.
Installation notes
- Brass trim is typically installed as a thin inlay strip during the countertop fabrication process, so this detail is best planned before the island’s stone is cut and installed rather than added afterward
- A brushed brass trim, rather than high-polish, keeps the detail from overwhelming the marble’s own visual presence
Cost breakdown
- Marble-look quartz waterfall island (installed, per island): $2,200–4,000
- Brass trim inlay (additional): $150–350
- Total: $2,350–4,350
3. Brass Cabinet Hardware on White or Cream Cabinetry
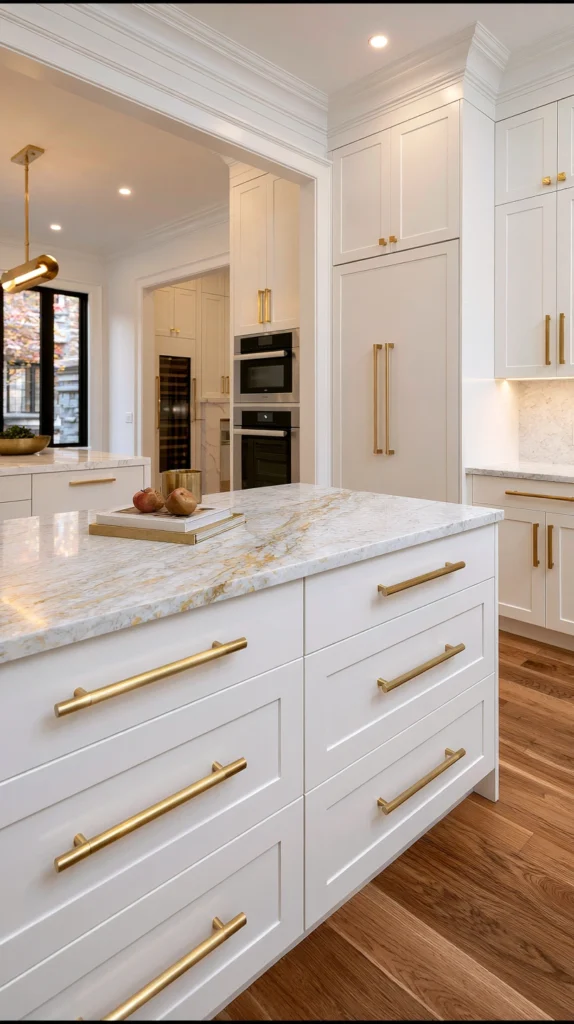
Every cabinet pull and knob throughout the kitchen replaced in brushed brass, against a white or cream cabinet backdrop that lets the warm metal read clearly.
Why hardware is the most efficient way to repeat the brass finish
Cabinet hardware appears more times throughout a kitchen than almost any other single fixture category, often 15–25 individual pieces across the upper and lower cabinets. Updating all of it in one consistent brass finish is one of the most efficient ways to establish the repeated brass presence this pairing depends on.
Where to apply it
- Every visible pull and knob, upper and lower cabinets alike, for full consistency
- Any additional cabinetry (a pantry, a butler’s pantry door) in the same kitchen, extending the finish beyond just the primary cabinet run
Cost breakdown
- Brushed brass cabinet hardware (20–25 pieces): $160–280
- Total: $160–280
4. A Full-Slab Marble Backsplash
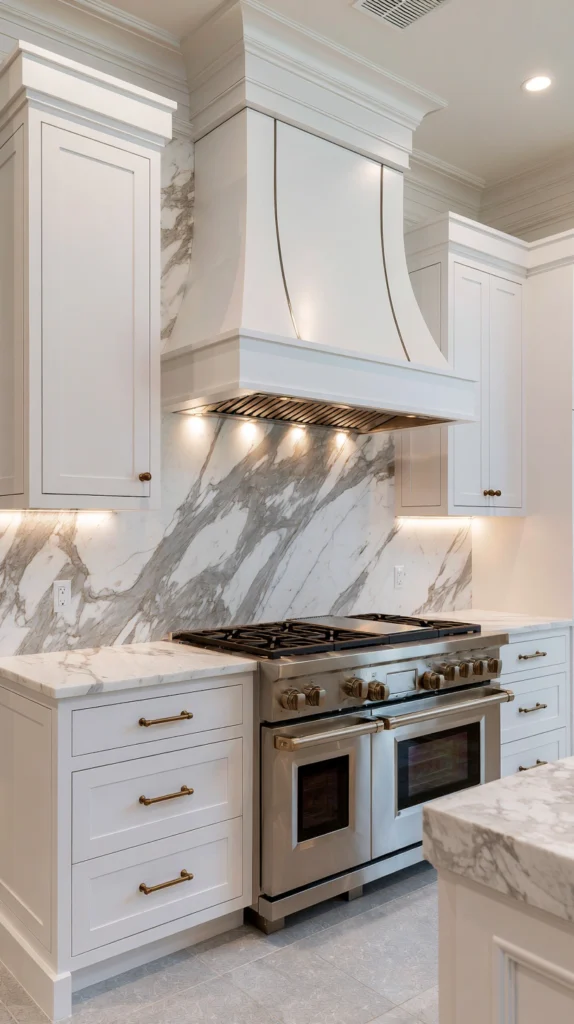
A single continuous slab of marble, or a large-format marble-look tile, installed as the backsplash behind the range, extending the stone’s presence beyond the countertop alone.
Why a full-slab backsplash matters more than a smaller tile treatment
A full slab, rather than smaller individual tiles, allows the marble’s veining to read as one continuous, uninterrupted pattern, which reinforces the material’s natural, high-end quality in a way a segmented tile treatment can’t fully replicate. It also satisfies the “marble in at least two forms” principle directly, extending the same material from the countertop up the wall.
Installation and matching
- Book-matched slabs (where two adjacent slabs are cut from the same stone block and mirrored) create a particularly striking, symmetrical veining pattern behind the range
- Match the backsplash slab’s veining tone as closely as possible to the countertop, to maintain the consistent stone palette this pairing depends on
Cost breakdown
- Full-slab marble or marble-look backsplash (range wall, ~25 sq ft, installed): $1,200–2,800
- Total: $1,200–2,800
5. Brass Pendant Lighting Over the Island
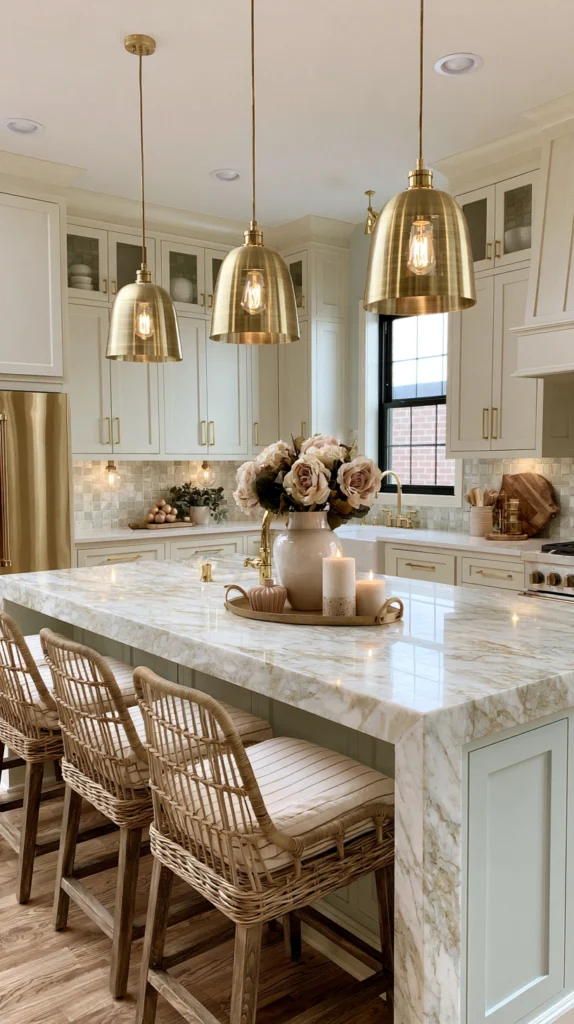
Two or three brass pendant lights hung over the marble island, reinforcing the metal finish overhead in the same sightline as the stone surface below.
Why lighting placement over the island matters specifically for this pairing
The island, especially if topped in marble, is typically the kitchen’s central visual anchor. Positioning the brass lighting directly above it puts both materials in the same vertical sightline, rather than leaving the metal accent to appear only at counter height through hardware and the faucet.
Sizing and placement
- Pendant spacing: 24–30 inches apart, centred over the island’s length
- Hanging height: 30–36 inches above the island countertop
- Warm 2700K bulbs, consistent with the lighting principle used throughout any considered kitchen
Cost breakdown
- Brass pendant light (per fixture): $90–200
- Total (2–3 pendants): $180–600
6. Brass Range Hood Trim
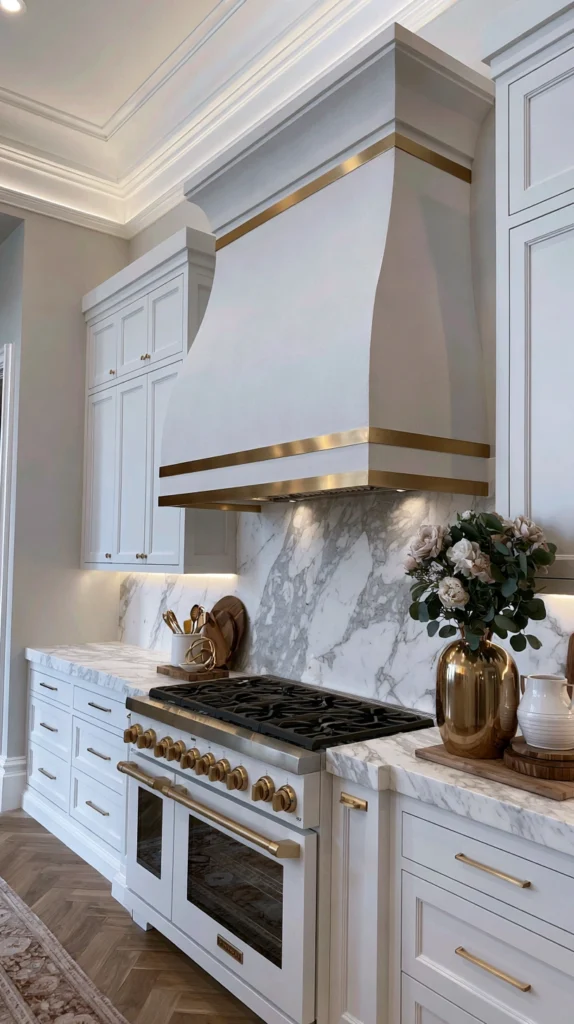
A range hood, whether custom plaster, wood, or stainless, finished or trimmed with brass detailing along its lower edge or as a full brass surround.
Why the range hood is a high-value opportunity for the brass finish
The range hood sits at the kitchen’s natural focal point, above the cooking zone and typically the first element the eye is drawn to on entering the room. A brass trim or full brass surround here concentrates the metal finish in the room’s most visually central location, working alongside the marble backsplash directly beneath it.
Design options
- A thin brass band along the hood’s lower edge, for a more subtle detail
- A full brass surround or cladding, for a more dramatic, fully committed application of the material
Cost breakdown
- Brass trim band (partial application): $150–350
- Or full brass hood surround (custom): $800–1,800
- Total: $150–1,800 depending on scope
7. A Marble Herringbone Floor
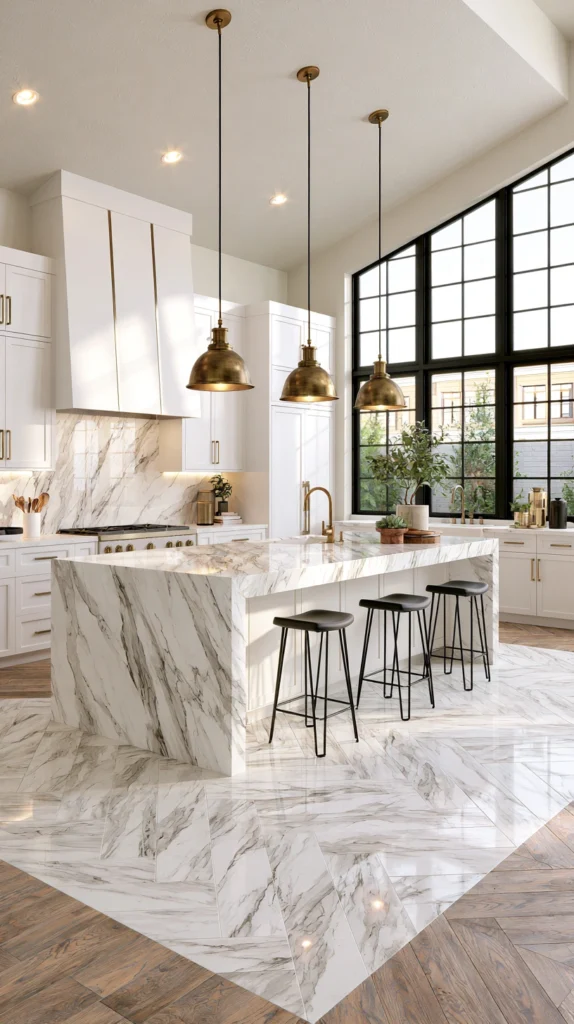
Marble or marble-look tile, laid in a herringbone pattern, installed throughout the kitchen floor — extending the stone material to the room’s largest single surface.
Why the floor is worth including in the material plan
A kitchen with marble countertops and backsplash but an unrelated floor material (standard hardwood or a plain tile) misses an opportunity to extend the stone’s presence to the room’s largest surface area. A herringbone pattern specifically adds a classic, richly detailed installation that reinforces the luxe quality the rest of the room is working toward.
Installation notes
- Standard tile size for a kitchen herringbone application: 2×8 to 3×12 inches
- Marble-look porcelain tile offers a more durable, lower-maintenance alternative to real marble specifically for flooring, where the material sees the most daily wear
Cost breakdown
- Marble or marble-look herringbone floor tile (per sq ft, installed): $14–28
- Total (average kitchen, ~150 sq ft): $2,100–4,200
8. Brass Open Shelving Brackets
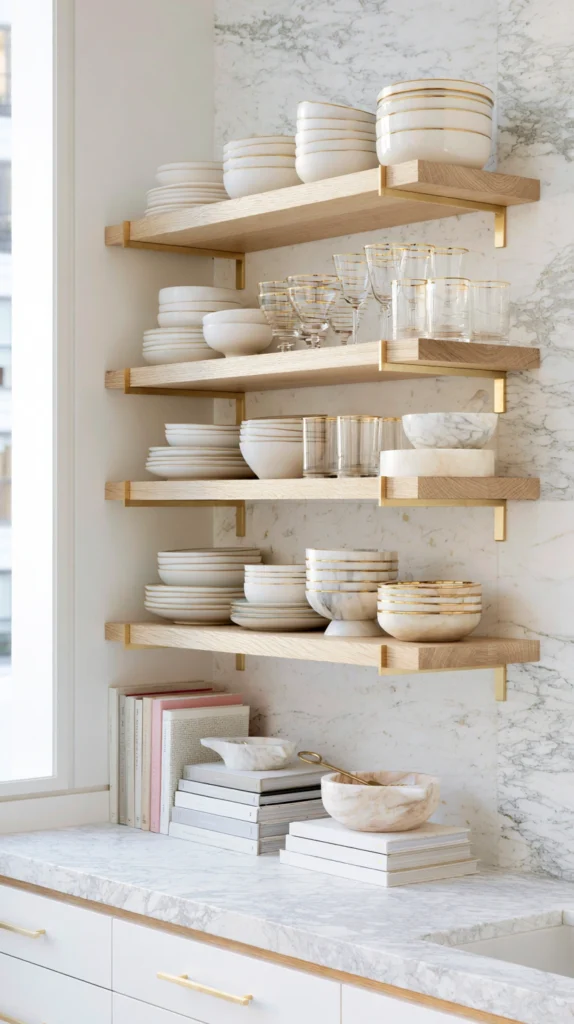
Open shelving, replacing a section of upper cabinetry, mounted on brass brackets and styled with a mix of white ceramics and marble serving pieces.
Why open shelving is an efficient way to combine both materials in one styled element
Open shelving offers a single, contained opportunity to display both materials together at once — the brass brackets holding the shelf, and marble objects (a small cutting board, a mortar and pestle, a serving bowl) styled on top of it. It’s a lower-cost way to reinforce the pairing without a full countertop or backsplash renovation.
Styling the shelf
- Brass brackets supporting a wood or marble shelf board
- Styled with 3–5 objects, following the same restraint principle used on any open shelf, mixing white ceramics with at least one marble piece
Cost breakdown
- Brass shelf brackets (pair): $25–50
- Shelf board: $30–60
- Total: $55–110
9. A Built-In Marble Pastry Slab
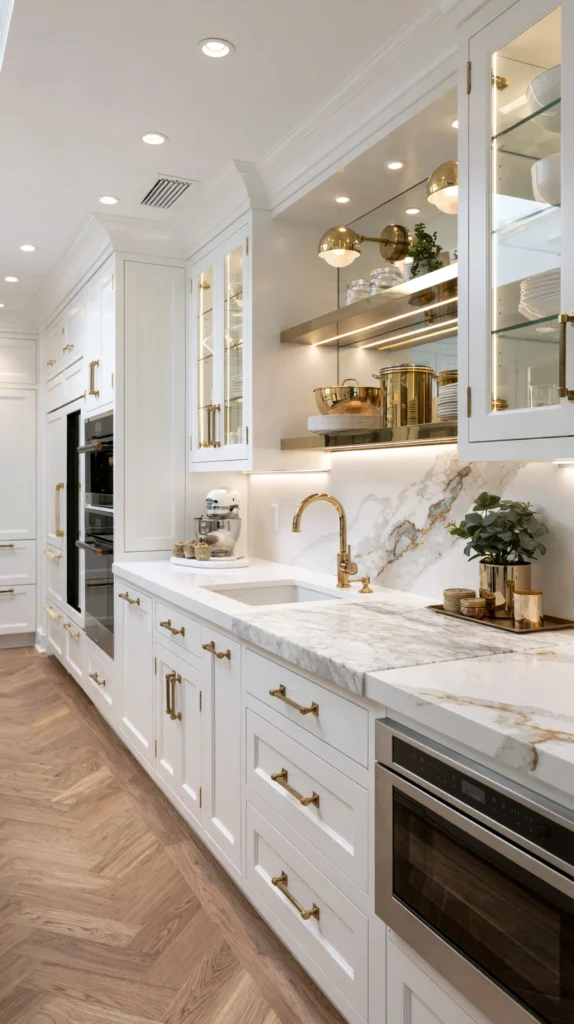
A small section of the countertop, typically near the baking zone, inset with a dedicated marble slab — marble’s naturally cool surface making it the traditional material of choice for rolling pastry and dough.
Why a dedicated marble insert adds function alongside the material statement
Beyond its visual contribution to the room’s material palette, marble’s cool surface temperature genuinely improves pastry and dough work by keeping butter and fat from softening too quickly during rolling, giving this detail a functional justification beyond styling alone.
Sizing and placement
- Insert size: typically 24×36 inches, positioned within the primary countertop near where baking prep usually happens
- Can be inset flush with a different surrounding countertop material (butcher block or quartz), creating a deliberate material contrast within the same countertop run
Cost breakdown
- Marble pastry slab insert (custom cut, installed): $250–500
- Total: $250–500
10. A Brass Bar Cart or Wine Rack
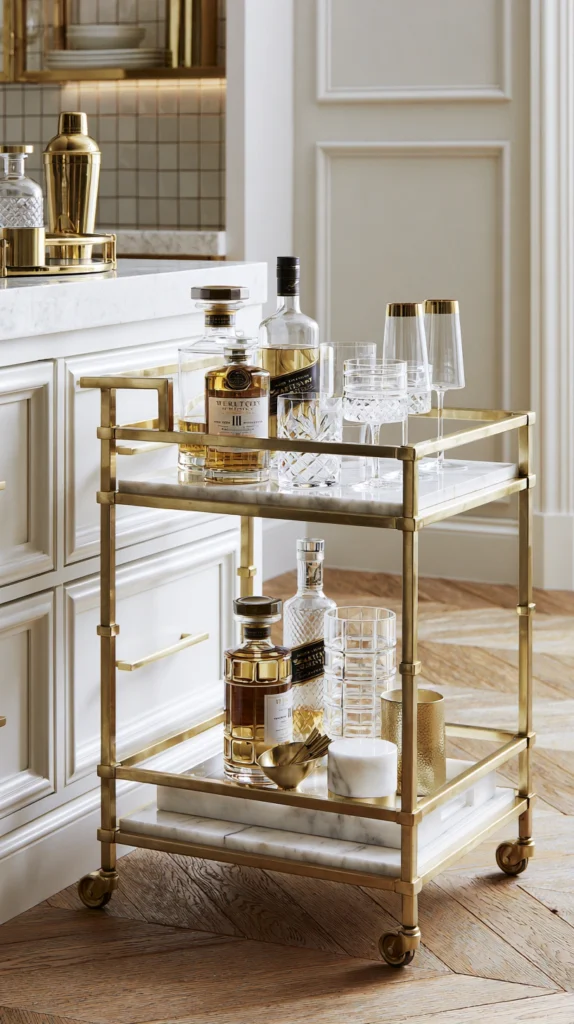
A brass-framed bar cart or wall-mounted wine rack, styled with glassware and a bottle or two, positioned in or near the kitchen as a functional and material-reinforcing accent piece.
Why a bar cart suits a kitchen already built around this pairing
A kitchen with marble surfaces and brass fixtures already reads as a room built for entertaining, and a bar cart reinforces that function directly. The brass frame ties into the room’s existing hardware and lighting, while glassware on a marble-topped cart (many bar carts include a marble shelf) doubles the material pairing in one small, functional piece of furniture.
Styling the cart
- A cart with at least one marble or marble-look shelf, if available, for the most direct material tie-in
- Limited to 4–6 pieces of glassware and one or two bottles, following the same restraint principle used in any styled vignette
Cost breakdown
- Brass-frame bar cart (with marble shelf, if available): $150–320
- Glassware: $30–60
- Total: $180–380
11. A Marble-Topped Coffee or Beverage Station
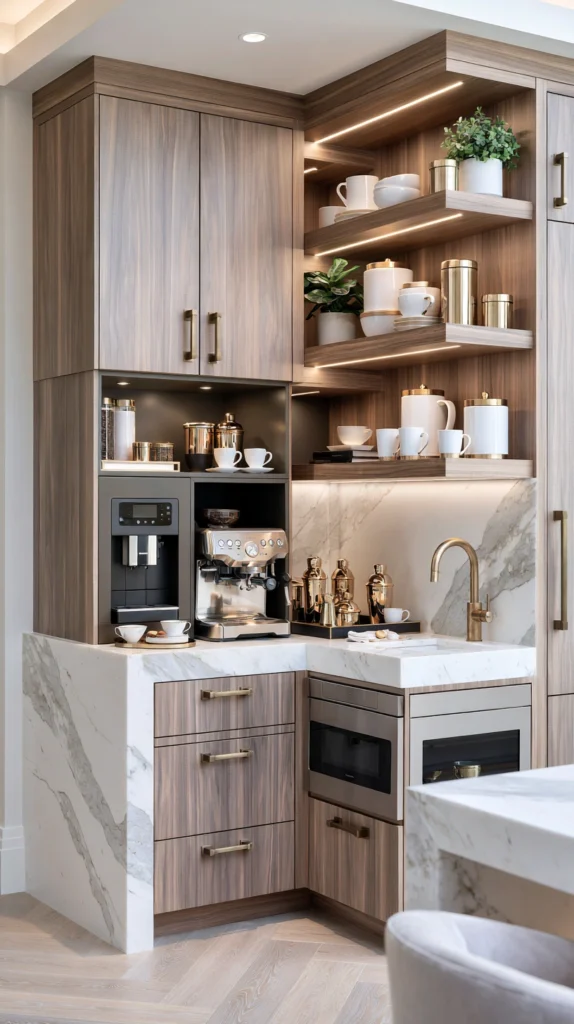
A dedicated counter section or small side table, topped in marble, set up as a coffee or beverage station — concentrating a secondary marble surface into a specific, frequently used zone of the kitchen.
Why a dedicated station reinforces the “marble in two forms” principle efficiently
Rather than a full second countertop replacement, a smaller marble-topped station (a bar cart alternative, or a small built-in nook) delivers the second marble surface this pairing depends on at a considerably lower cost and scope than a full counter or island replacement.
Setup
- A small marble slab or marble-look tile top, sized to the available counter or table space, typically 18×24 to 24×36 inches
- Styled with a coffee maker or kettle, brass-accented mugs or canisters, and minimal additional clutter
Cost breakdown
- Marble slab or tile top for a small station: $80–180
- Total: $80–180
12. Brass-Trimmed Glass Cabinet Doors
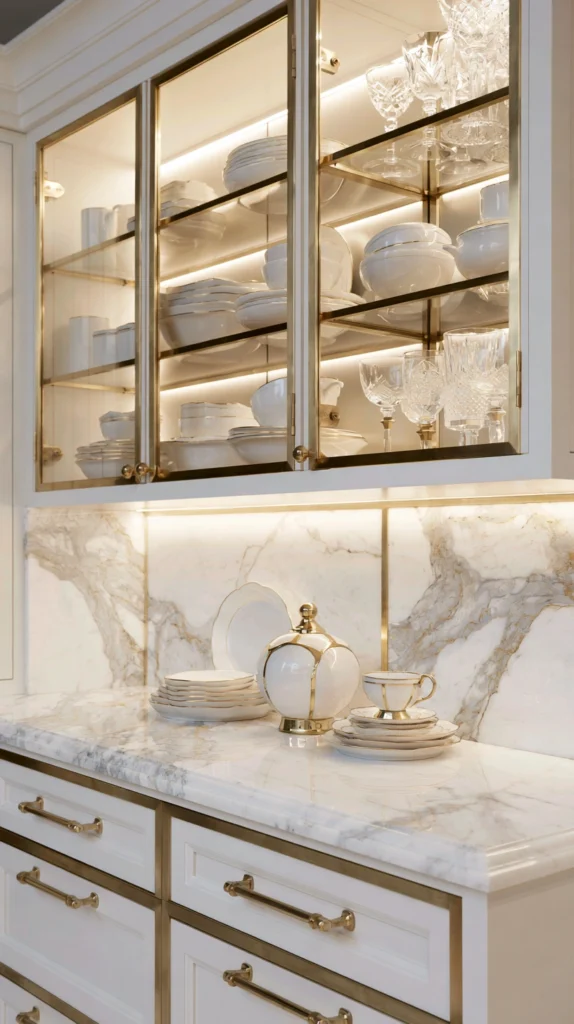
A section of upper cabinetry converted to glass-front doors, trimmed in brass, allowing dinnerware and glassware to be displayed rather than hidden behind solid cabinet fronts.
Why glass-front cabinetry supports the overall material display
A kitchen built around a considered material palette benefits from having some of its contents visible rather than entirely enclosed, the same principle that makes a china cabinet or open shelf valuable in a dining room. Brass trim around the glass panes ties this detail directly into the room’s existing hardware finish.
Installation notes
- Can be a full cabinet door replacement, or an existing solid door retrofitted with a glass insert and brass trim strip
- Interior cabinet lighting (a small puck light) enhances the display effect, particularly in the evening
Cost breakdown
- Glass-front cabinet door conversion (per door, with brass trim): $120–220
- Total (2 doors): $240–440
13. Displayed Marble Serving Boards
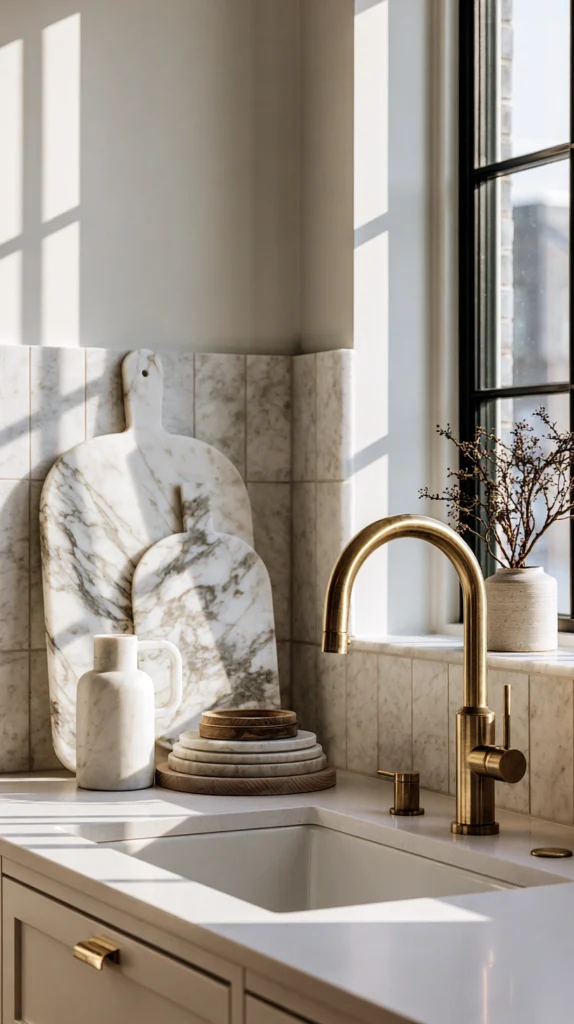
One or two marble serving or cheese boards, displayed upright in a stand or leaned against the backsplash, functioning as both usable kitchenware and a passive styling element.
Why displayed marble pieces add material presence without a renovation
Not every kitchen is ready for a full countertop or backsplash project, and a marble serving board is one of the lowest-cost, lowest-commitment ways to introduce the material’s presence into the room. Displayed rather than stored away, it contributes to the room’s overall material read even when not actively in use.
Styling
- Leaned against the backsplash near the range or displayed upright in a small plate stand on the counter
- Paired with a small brass cheese knife or serving utensil set, if available, for a small additional material tie-in
Cost breakdown
- Marble serving or cheese board: $25–50
- Total: $25–50
14. The Complete Luxe Brass and Marble Kitchen
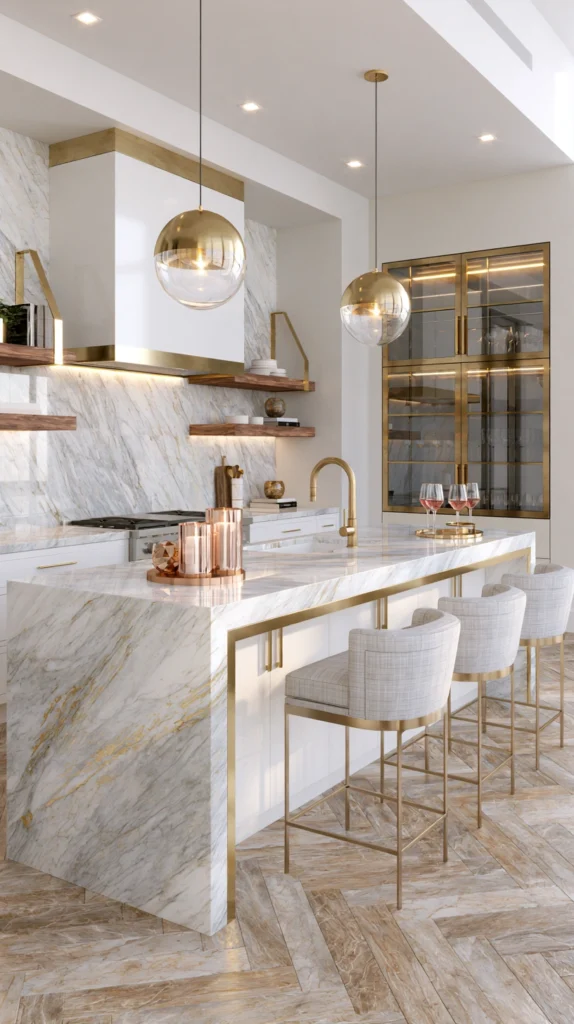
A kitchen designed with every principle above applied together — the definitive version of a kitchen where brass and marble appear consistently enough, across enough surfaces, that the pairing reads as the room’s defining material choice rather than a single upgraded countertop.
What separates the complete kitchen from a marble countertop with brass hardware
A kitchen with a beautiful marble island and brass cabinet pulls, but a plain tile floor and a stainless range hood, still reads as a kitchen with one nice upgrade rather than a fully considered material palette. The complete version repeats both materials across multiple surfaces and fixture categories at once, so the luxe quality comes from consistency and repetition, not from any single expensive element.
The elements of the complete kitchen
The marble surfaces:
- A marble waterfall island (Idea #2)
- A full-slab marble backsplash (Idea #4)
- A marble herringbone floor (Idea #7)
- A built-in pastry slab insert (Idea #9)
The brass fixtures:
- A brass faucet at the sink (Idea #1)
- Brass cabinet hardware throughout (Idea #3)
- Brass pendant lighting over the island (Idea #5)
- Brass range hood trim (Idea #6)
The styling layer:
- Open shelving on brass brackets, styled with marble pieces (Idea #8)
- Glass-front cabinet doors trimmed in brass (Idea #12)
- A brass-framed bar cart with a marble shelf (Idea #10)
- Displayed marble serving boards (Idea #13)
The kitchen in use on an ordinary morning:
Light catches the brass pendants and hardware simultaneously with the veining running through the island, the backsplash, and the floor underfoot — the same two materials repeating in every direction the eye travels. Nothing in the room reads as a single splurge item; the luxe quality comes from how consistently both materials show up, surface after surface, fixture after fixture.
Cost breakdown for the complete kitchen
Assuming a starting point of a neutral, unrenovated kitchen:
- Faucet: $180–380
- Waterfall island with brass trim: $2,350–4,350
- Cabinet hardware: $160–280
- Backsplash: $1,200–2,800
- Pendant lighting: $180–600
- Hood trim: $150–1,800
- Herringbone floor: $2,100–4,200
- Open shelving: $55–110
- Pastry slab insert: $250–500
- Bar cart: $180–380
- Beverage station: $80–180
- Glass cabinet doors: $240–440
- Serving boards: $25–50
Total: $7,150–16,070
Phased over three renovation stages:
Stage one ($600–1,300):
- Faucet
- Cabinet hardware
- Open shelving and serving boards
Stage two ($2,700–5,600):
- Pendant lighting
- Hood trim
- Bar cart and beverage station
- Glass cabinet doors
Stage three ($3,850–9,150):
- Waterfall island
- Backsplash
- Floor
- Pastry slab
The complete brass and marble kitchen: not a single stunning countertop, but the same two materials, repeated consistently enough across the whole room, that the pairing becomes the kitchen’s defining material identity.
The Question Before Any Brass and Marble Kitchen Project
Before choosing where to start:
Is there already a marble or brass element in the kitchen to build around?
If the answer is: an existing marble countertop, but ordinary hardware — start with cabinet hardware and the faucet, the fastest way to establish the brass side of the pairing.
If the answer is: existing brass fixtures, but no stone surfaces — a marble backsplash or a smaller pastry slab insert is a lower-cost way to introduce the second material without a full countertop replacement.
If the answer is: starting from a completely neutral kitchen — build the countertop and cabinet hardware together first, since these establish both materials in the room’s most viewed sightline before any other layer is added.
If the answer is: budget-limited, one project at a time — cabinet hardware and open shelving deliver the clearest signal of the intended pairing for the lowest combined cost.
The project follows what’s already in place, not the most dramatic single renovation on this list. A kitchen that already has one material established just needs the second one introduced consistently; a kitchen starting from scratch benefits from planning both at once.
Getting Started This Weekend
The immediate luxe upgrade:
Swap cabinet hardware to brushed brass throughout the kitchen.
The single fastest way to establish the metal finish the rest of the kitchen will build around.
Add one marble serving board, displayed rather than stored.
Introduces the stone material into the room’s visible styling without any renovation.
Style one open shelf with a mix of white ceramics and the marble piece.
Confirms how the pairing reads together before any larger investment.
Swap one light fixture for a brass pendant.
Tests the lighting layer’s contribution to the overall material palette.
The rest of the design: the elaboration of this weekend.
The pairing: the beginning. The luxe brass and marble kitchen: what holds together once both materials are repeating consistently enough to read as the room’s defining choice.