15 Cheap Wood Ceiling Ideas That Still Look High-End
A wood ceiling is one of the fastest ways to make a room feel finished and architecturally interesting, but most people assume it means a big renovation budget. In reality, there are plenty of low-cost materials and techniques that get the same warm, textured look for a fraction of the price of a full custom install.
Below are 15 ways to bring a wood ceiling into a room, from full plank installs to smaller accent treatments, with real numbers on material cost, coverage, and budget so the project is easy to actually plan and finish in a weekend or two.

Wood Type Considerations
Pine and other softwoods:
- Least expensive option per sq ft
- Takes stain and paint easily
- Best for most budget-focused projects
- Softer surface, dents more easily
Reclaimed or salvaged wood:
- More character and texture
- Often free or very low cost
- Needs inspection for nails and pests
- Best for a rustic or farmhouse look
Plywood and veneer:
- Most budget-friendly per square foot
- Large panels cover ground quickly
- Can be stained to mimic pricier wood
- Best for large ceilings on a tight budget
1. Install Tongue-and-Groove Pine Boards
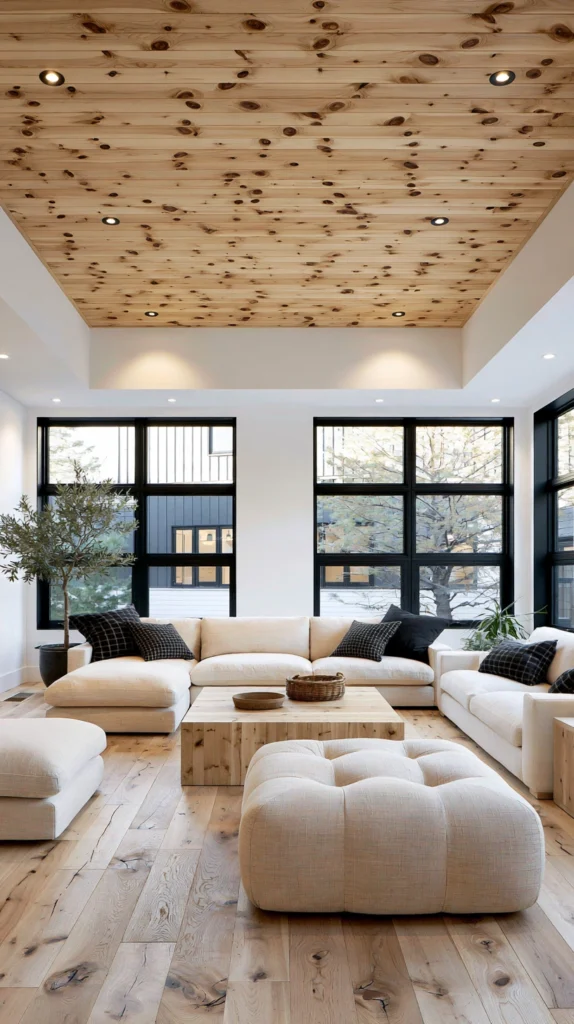
Tongue-and-groove pine is one of the most classic and budget-friendly wood ceiling materials, since the interlocking edges make installation straightforward even for a first-time DIYer. Standard pine boards run 3.5-5.5 inches wide, so a 10×12 ceiling (120 sq ft) needs roughly 130-150 sq ft of material accounting for waste.
Budget: $2-4 per sq ft for pine boards, or $260-600 total for a 120 sq ft ceiling. Choose a lower grade of pine (with visible knots) over clear-grade lumber, since it costs significantly less and the knots actually add character once stained.
Pine takes both stain and paint well, which makes it one of the most flexible wood options if you’re not sure yet whether you want a natural wood look or a painted finish. Plan for the boards to acclimate in the room for 3-5 days before installation.
This step matters more than people expect, since wood that hasn’t adjusted to the room’s humidity can shrink or gap slightly after installation, leaving visible lines between boards a few weeks later.
2. Add a Shiplap Ceiling for a Farmhouse Look
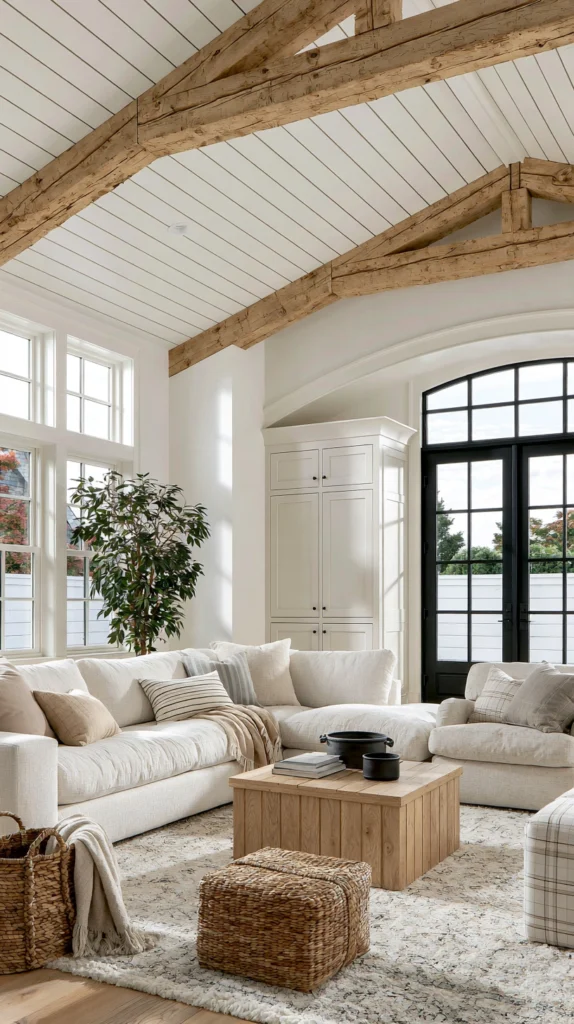
Shiplap’s overlapping horizontal boards create the same rustic farmhouse look on a ceiling that it’s known for on walls. Standard shiplap boards run 5.5-7.25 inches wide, and a 120 sq ft ceiling needs about the same coverage as tongue-and-groove.
Budget: $1.50-3.50 per sq ft, or $200-500 total for a 120 sq ft ceiling. MDF-based shiplap is the cheapest option and paints beautifully, while real wood shiplap costs more but takes stain if you want a natural finish.
The slight shadow gap between each shiplap board is what gives the ceiling its texture, so use spacers (even scrap wood shims work) to keep a consistent 1/8 inch gap as you install each row. This consistency is what separates a professional-looking shiplap ceiling from one that reads as slightly uneven.
Painting shiplap white or a soft cream is the most common approach and helps a lower ceiling feel taller and brighter rather than heavier.
3. Use Stained Plywood Panels for a Modern Wood Look
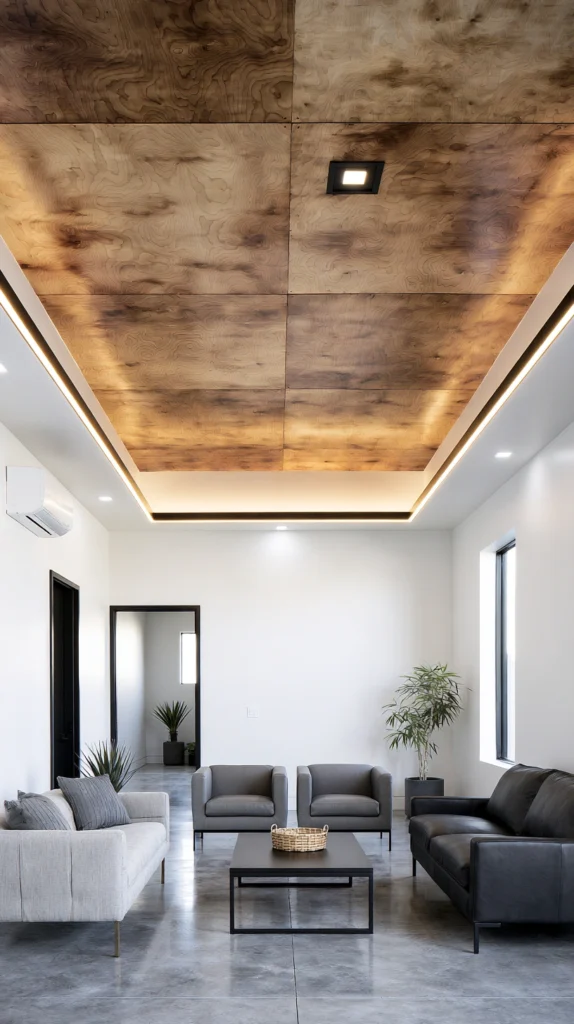
Plain plywood, sanded and stained, is one of the cheapest ways to cover a large ceiling area with a warm wood look. Standard plywood sheets are 4×8 feet, so a 120 sq ft ceiling needs about 4 full sheets.
Budget: $30-60 per sheet for a quality sanded plywood, or roughly $150-250 total for a 120 sq ft ceiling. Choose a birch or oak veneer plywood over basic construction-grade plywood, since the grain pattern reads far more intentional once stained.
Sanding the plywood surface progressively (starting at 120 grit and finishing at 220 grit) before staining is the step that makes the biggest visual difference, since a rushed sanding job will show blotchy, uneven stain absorption. Seal the plywood edges where sheets meet with wood filler before staining for the cleanest finished seams.
This approach works especially well in a modern or minimalist room where the goal is a large, uninterrupted wood surface rather than individual board lines.
4. Add Peel-and-Stick Wood Ceiling Planks
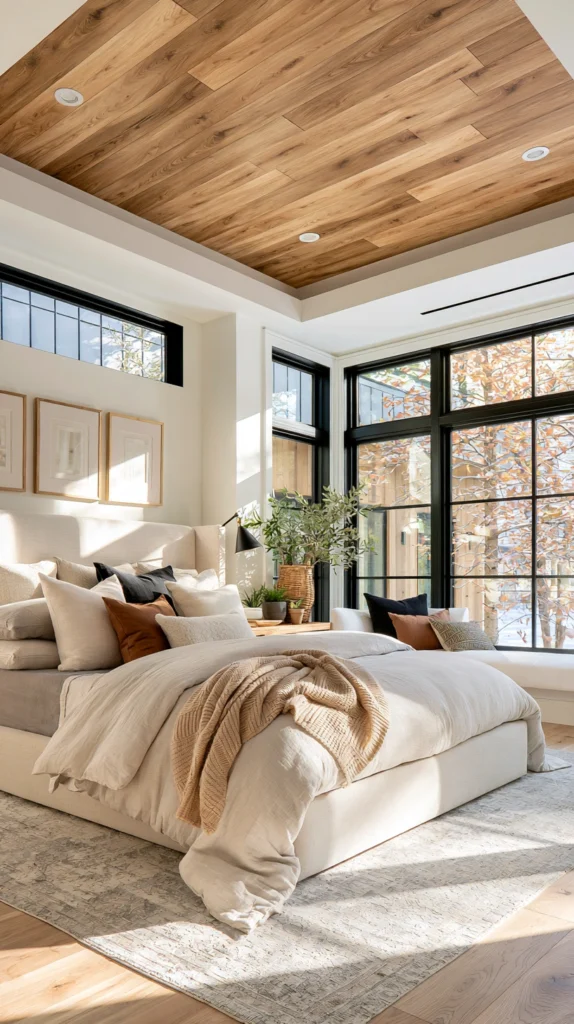
Peel-and-stick wood planks are designed for exactly this kind of project and require no nails, glue, or major tools. Standard peel-and-stick planks come in packs covering 10-20 sq ft, so a 120 sq ft ceiling needs 6-12 packs depending on brand.
Budget: $2.50-4 per sq ft, or roughly $300-480 total for a 120 sq ft ceiling. This is one of the fastest options on this list to install, often completed in a single afternoon by one person.
Because these planks are adhesive-backed, cleaning and priming the ceiling surface beforehand matters more than with a nailed installation, since any dust or texture underneath can prevent the adhesive from bonding fully. This is also one of the only fully removable options on the list, making it a strong choice for renters.
Peel-and-stick planks typically come pre-finished in a range of wood tones, so there’s no staining or sealing step required after installation.
5. Build a Reclaimed Pallet Wood Ceiling
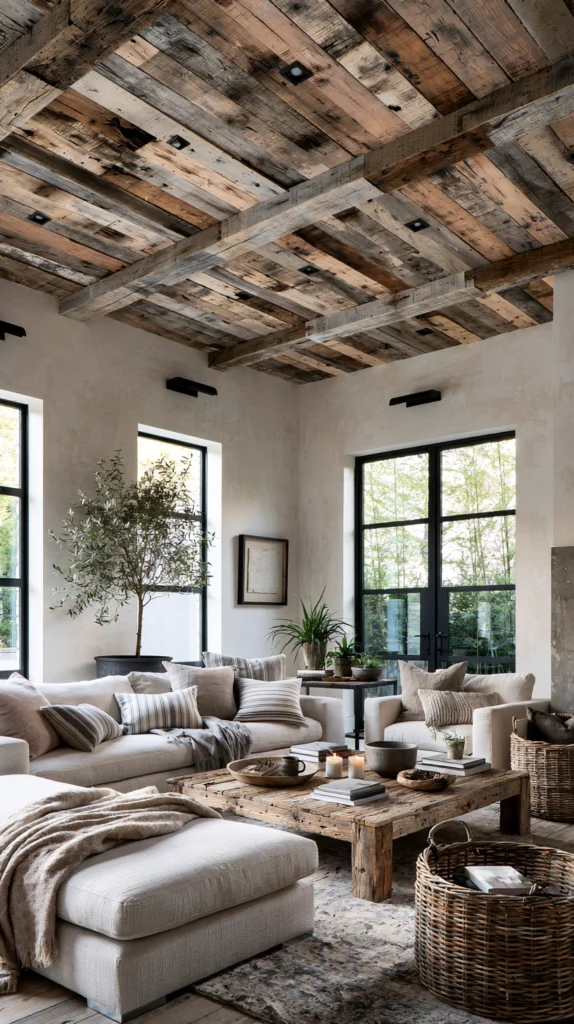
Pallet wood is one of the cheapest and most texturally interesting wood ceiling materials, since the boards already carry a weathered, reclaimed look. A single standard pallet yields roughly 8-10 sq ft of usable board material, so a 120 sq ft ceiling needs 12-15 pallets.
Budget: often free to $10 per pallet if sourced from local businesses, or $50-150 total for a 120 sq ft ceiling. Factor in a few hours of deconstruction time, since pallets need to be carefully disassembled without splitting the boards.
Only use pallets stamped “HT” (heat-treated) rather than “MB” (methyl bromide fumigated), since heat-treated pallets are safe for indoor use while chemically treated ones are not. Sand any rough or splintered edges before installation, particularly on a ceiling where debris could fall.
This is the most labor-intensive option on the list, but also often the cheapest in raw material cost if pallets are sourced for free.
6. Whitewash a Wood Ceiling for a Coastal Look
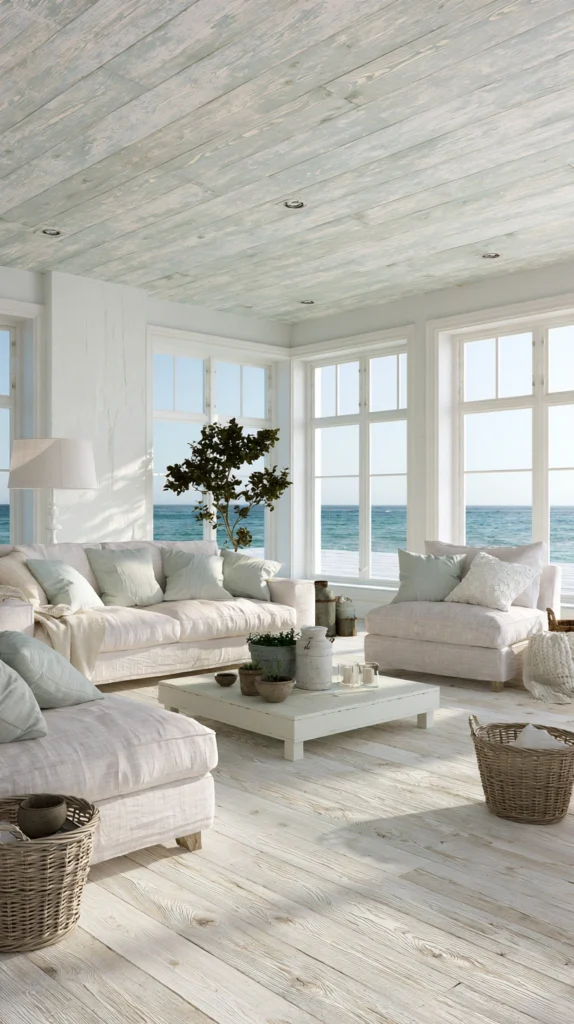
Whitewashing lets the wood grain show through a soft, translucent white finish rather than fully covering it like paint. This technique works on nearly any wood type already installed, including pine, plywood, or reclaimed boards.
Budget: $20-40 for whitewash pigment or a mix of white paint and water, enough to cover a 120 sq ft ceiling. This is one of the cheapest finishing techniques on this list since it uses minimal product per square foot.
Mixing your own whitewash from equal parts white paint and water gives you full control over opacity, and testing the ratio on a scrap piece of the same wood first is worth the extra ten minutes before committing to the full ceiling. Wipe excess whitewash off with a rag while it’s still wet for the most authentic, worn look.
This technique is especially well suited to a coastal, Scandinavian, or farmhouse-style room where a heavier, fully opaque paint would feel too stark.
7. Install Wood Veneer Ceiling Tiles
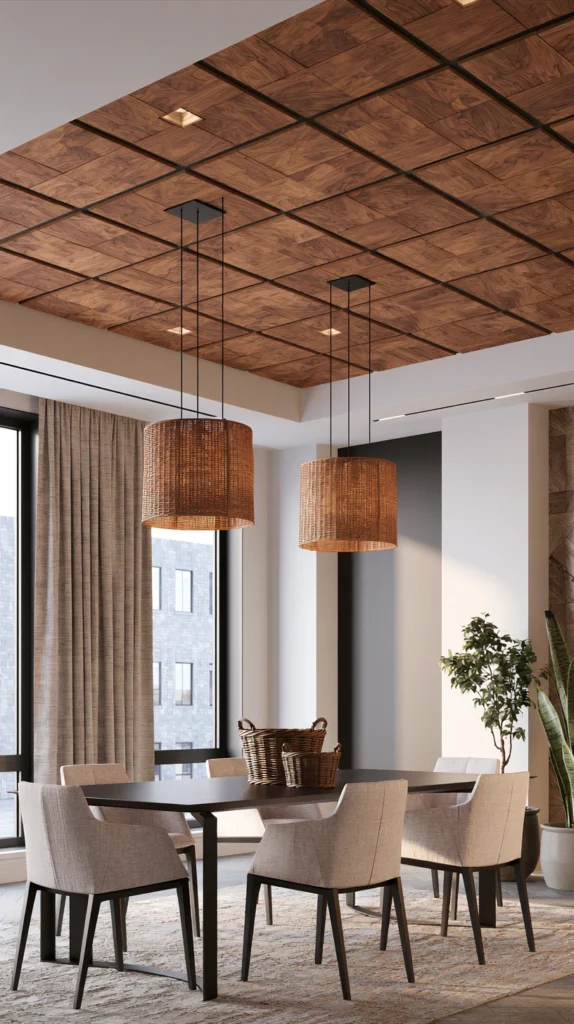
Wood veneer tiles offer the texture and warmth of solid wood at a lower material cost, since they use a thin wood layer over a lighter core material. Standard veneer tiles run 12×12 or 12×24 inches, so a 120 sq ft ceiling needs 120-240 tiles depending on size.
Budget: $2-5 per sq ft, or roughly $240-600 total for a 120 sq ft ceiling. This falls in a similar price range to solid tongue-and-groove boards but with a lighter overall material weight, which matters for ceiling installation specifically.
The lighter weight of veneer tiles compared to solid wood boards makes them noticeably easier to install solo on a ceiling, where working overhead already adds physical difficulty to any project. Use a construction adhesive rated for ceiling applications in addition to any mechanical fasteners for the most secure long-term hold.
This option works well in rooms where a fully solid-wood ceiling would add more structural weight than desired.
8. Add Faux Wood Beams for an Accent Look
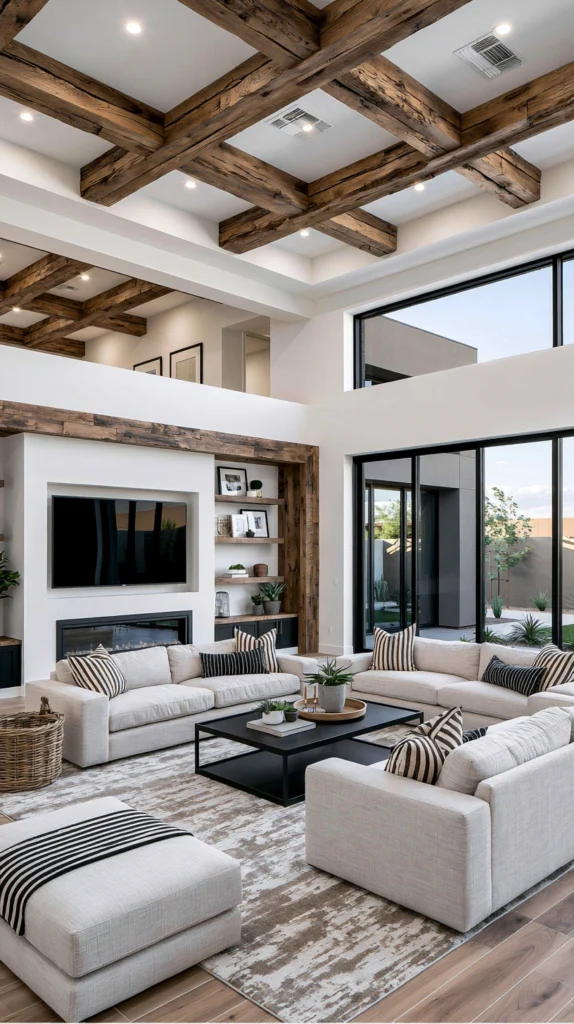
Faux wood beams made from lightweight polyurethane or hollow wood boxes recreate the look of structural timber beams without the weight or cost of solid lumber. Standard faux beams run 6-10 inches wide and are sold in lengths matching common room widths.
Budget: $30-80 per linear foot depending on material and finish, or roughly $300-800 for a room with 3-4 beams spanning 10-12 feet each. This is significantly cheaper than sourcing and installing real structural timber beams.
Polyurethane faux beams are the lightest and easiest to install solo, often simply glued and screwed into ceiling joists without needing additional structural support. Hollow wood-box beams cost slightly more but allow for a more textured, real-wood surface if you plan to stain rather than use a pre-finished faux beam.
Spacing beams evenly across a ceiling — typically every 24-36 inches — creates the most balanced, intentional-looking result.
9. Use Cedar Planks for a Spa-Like Ceiling
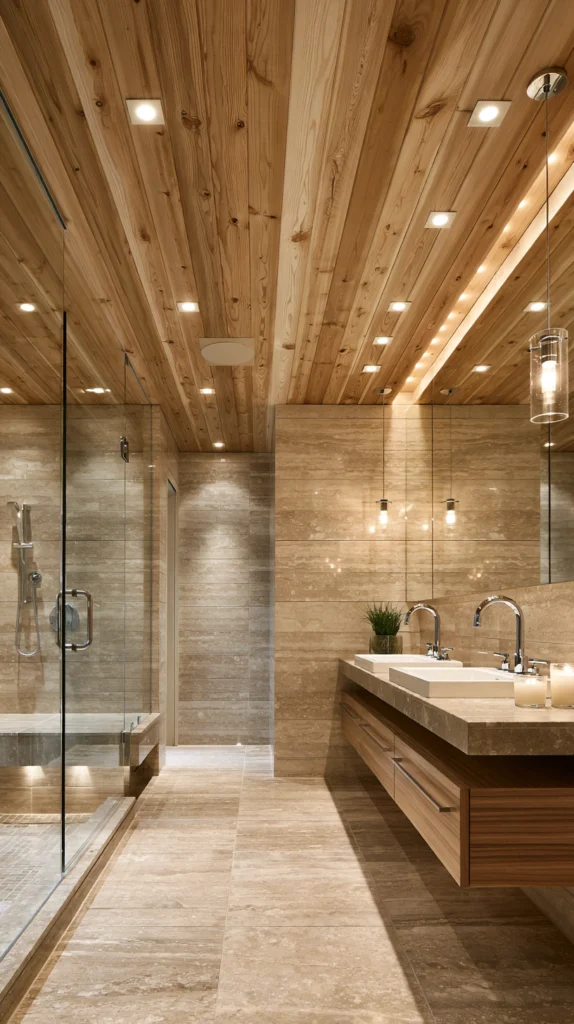
Cedar brings a warm color and a light natural fragrance that makes it a popular choice for bathrooms, saunas, and covered porches in addition to standard living spaces. Standard cedar tongue-and-groove boards run 3.5-5.5 inches wide, similar to pine.
Budget: $3-6 per sq ft, or roughly $360-720 total for a 120 sq ft ceiling. Cedar costs more than pine but naturally resists moisture and pests, which matters in a bathroom or humid climate.
Cedar’s natural oils mean it typically doesn’t need a sealant for basic indoor use, though a clear coat is worth adding in a bathroom or other high-humidity room to help the wood resist moisture damage over time. Let cedar boards acclimate for at least 3-5 days in the installation room before starting.
This is one of the pricier options on this list per square foot, but still meaningfully cheaper than most contractor-installed ceiling treatments.
10. Create a Herringbone Wood Pattern Ceiling
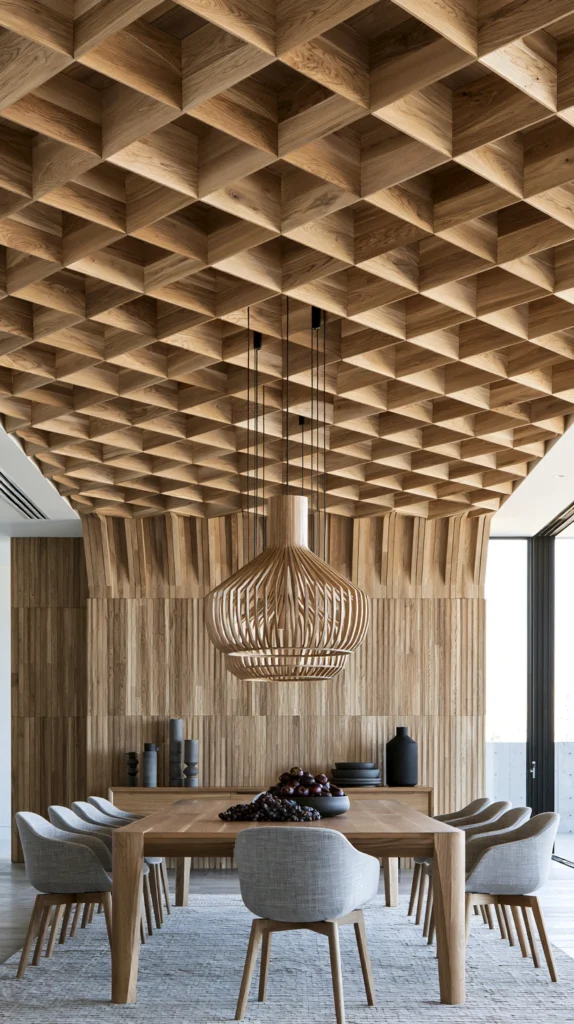
Herringbone patterning turns basic wood boards into a much more visually complex, high-end-looking ceiling. This technique works with pine, plywood strips, or even leftover flooring boards cut to size.
Budget: $3-5 per sq ft including extra material for angled cuts, or roughly $400-650 total for a 120 sq ft ceiling. Budget for slightly more material than a straight-board install, since angled cuts create more waste.
A miter saw is close to essential for this project, since consistent 45-degree cuts are what make the herringbone pattern look crisp rather than uneven. Starting the pattern from the center of the ceiling and working outward in both directions keeps the design symmetrical, which matters more with herringbone than with any other pattern on this list.
This technique takes longer to install than a straight-board ceiling, so plan for a full weekend rather than a single afternoon.
11. Paint Wood Beadboard for a Cottage Ceiling
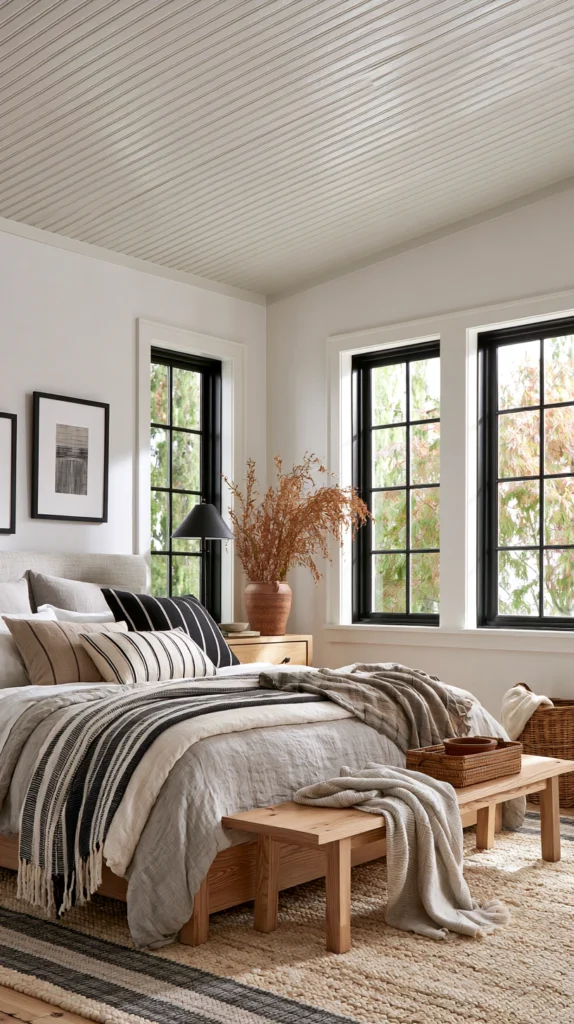
Beadboard’s narrow, grooved planks bring texture to a ceiling even after being painted a solid color, which makes it a popular choice for cottage and coastal-style rooms. Standard beadboard panels run 4×8 feet and cost less than individual tongue-and-groove boards.
Budget: $1-2.50 per sq ft, or roughly $150-350 total for a 120 sq ft ceiling. This is one of the cheapest options on the list, especially in sheet form rather than individual planks.
Painting beadboard a soft white or pale color keeps a room feeling bright and airy while still adding the textured, grooved detail that makes beadboard distinct from a flat ceiling. Prime beadboard thoroughly before painting, since the grooves can trap and unevenly absorb paint if skipped.
This is a strong option for a small bathroom, laundry room, or nursery, where the ceiling detail adds character without darkening the space.
12. Add a Wood Slat Accent Ceiling
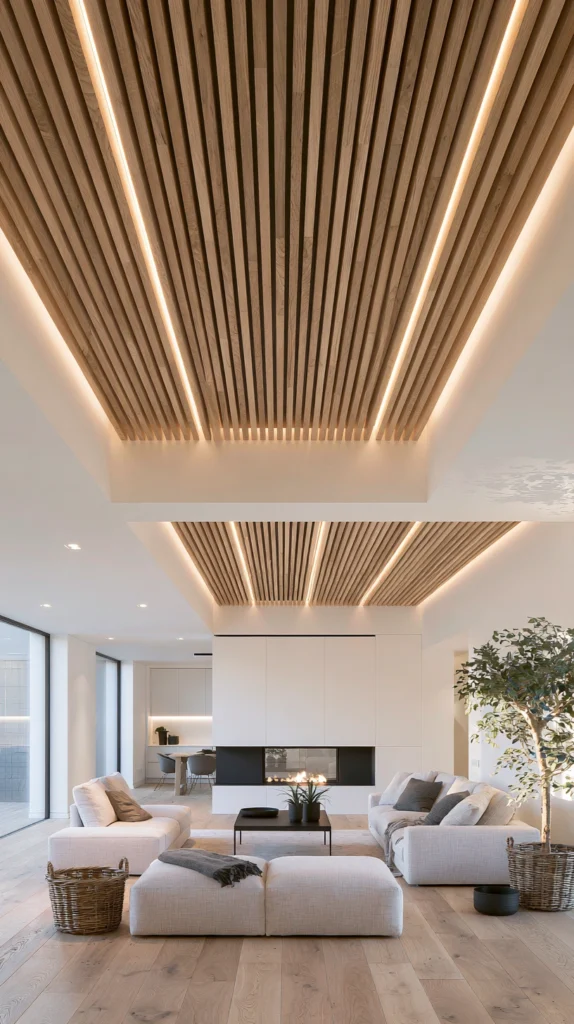
Wood slats spaced evenly with small gaps between them create a modern, architectural look that costs less than covering the entire ceiling surface edge to edge. Standard slats run 1-3 inches wide with 1-2 inch gaps between them.
Budget: $2-4 per linear foot of slat material, or roughly $200-400 for a 120 sq ft ceiling using a slat-and-gap pattern. This uses noticeably less material than a fully covered ceiling, since the gaps reduce total board count.
Pre-finished slat panels (some sold specifically as ceiling or wall slat systems) simplify installation significantly compared to cutting and spacing individual boards by hand. If cutting your own slats from standard lumber, a simple spacer jig cut to your chosen gap width keeps spacing consistent across the entire ceiling.
This look pairs especially well with a modern or Scandinavian-style room, and can also conceal recessed lighting or speakers behind the slats if planned in advance.
13. Try a Chevron Wood Pattern for Extra Detail
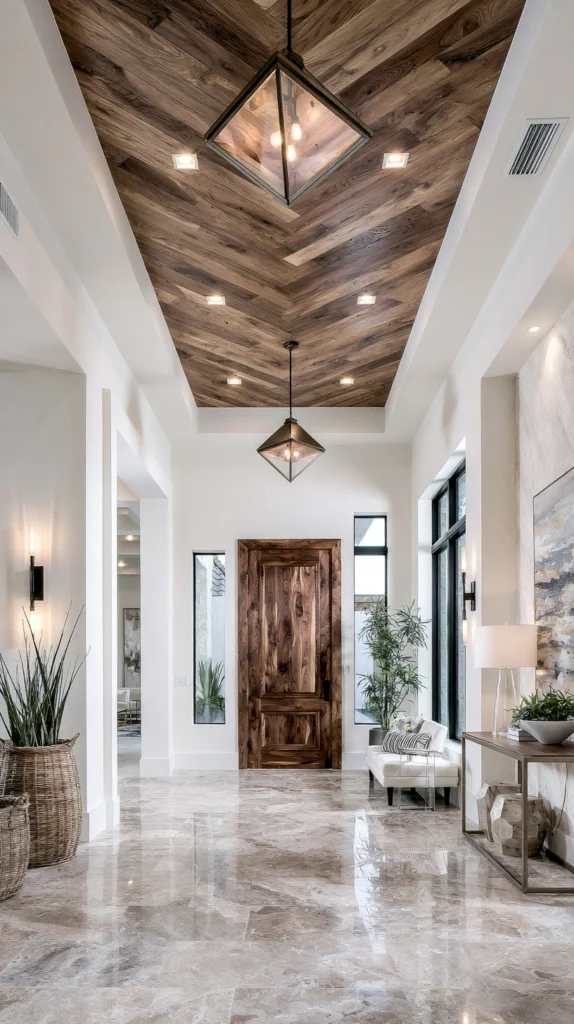
Chevron is similar to herringbone but uses continuous angled boards meeting at a point rather than interlocking rectangular pieces, creating a bolder zigzag look. This technique works well with pine, plywood strips, or leftover flooring.
Budget: $3-5 per sq ft including extra material for angled cuts, or roughly $400-650 total for a 120 sq ft ceiling. Similar in cost to herringbone, since both require the same angled-cutting approach.
A miter saw set to a consistent angle (usually 45 degrees) is essential here as well, and cutting a template piece first to confirm the angle and length before cutting the full batch of boards saves significant material waste. Starting from a centerline, as with herringbone, keeps the zigzag pattern symmetrical across the full ceiling.
Chevron reads slightly bolder and more graphic than herringbone, making it a good choice for a room where the ceiling is meant to be a clear design statement.
14. Install Drop-In Wood Ceiling Tiles
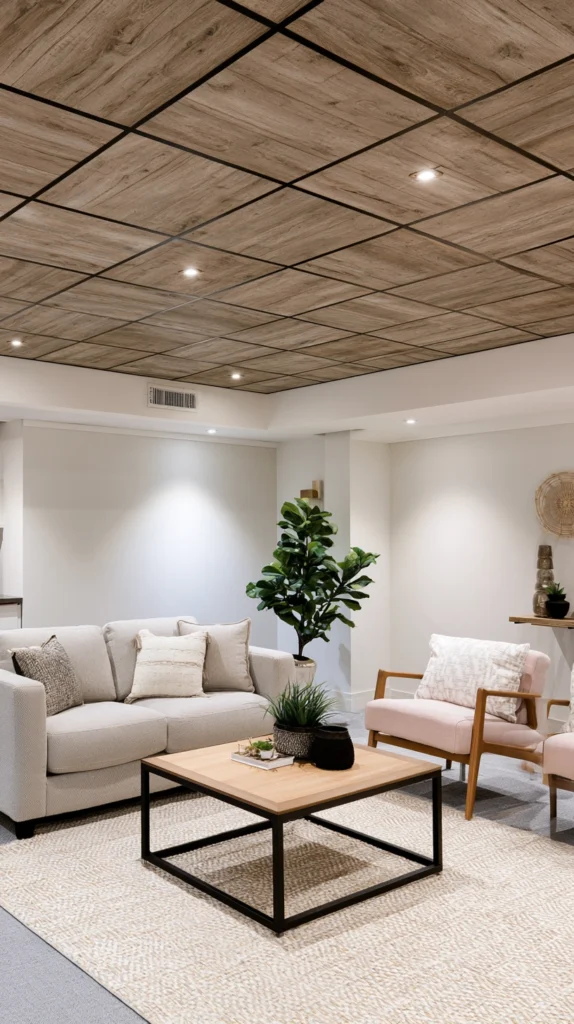
For rooms with an existing drop ceiling grid, wood-look tiles can replace standard acoustic tiles for an instant upgrade with no structural changes. Standard drop ceiling tiles run 2×2 or 2×4 feet, so a 120 sq ft ceiling needs 15-30 tiles depending on size.
Budget: $8-20 per tile depending on finish quality, or roughly $200-500 total for a 120 sq ft ceiling. This is one of the fastest wood ceiling upgrades possible if a drop grid is already in place, since tiles simply lift in and out.
Because these tiles drop into an existing grid, this is one of the few options on this list that requires no tools, adhesive, or fasteners at all, making it realistic to complete in under an hour for most rooms. Many wood-look drop tiles are made from a lightweight composite rather than solid wood, which keeps them easy to lift into a standard grid without extra support.
This is a particularly good option for basements or offices where a drop ceiling is already in place and a full renovation isn’t practical.
15. Use Salvaged Barn Wood for Ultimate Character
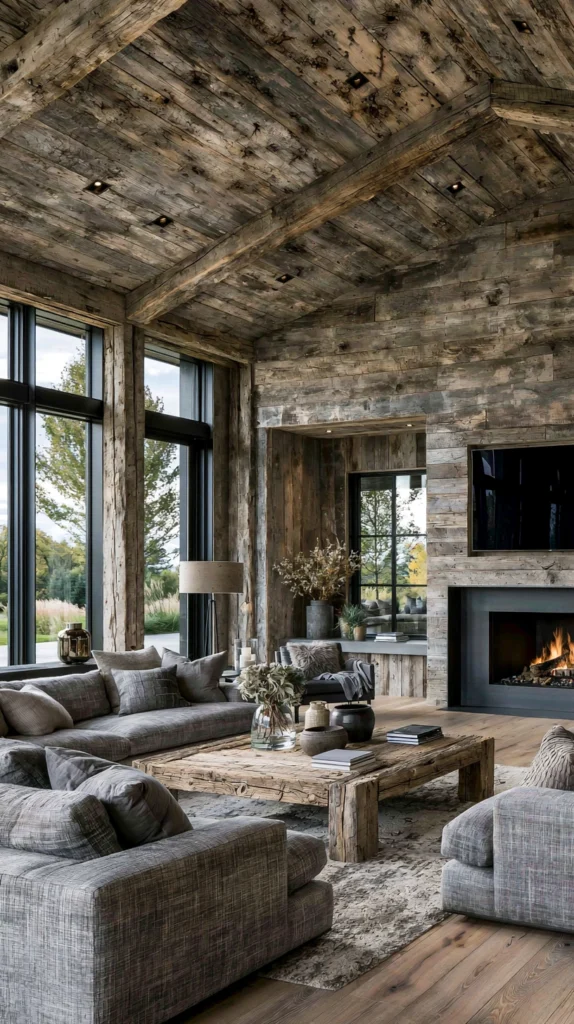
Salvaged barn wood carries the most texture, character, and history of any option on this list, since each board shows genuine decades of weathering. Coverage varies by source, but plan for roughly the same 120-150 sq ft of material for a 120 sq ft ceiling accounting for cuts and waste.
Budget: often $2-6 per sq ft if purchased from a reclaimed lumber yard, or significantly less if sourced directly from a barn demolition. This is more expensive than pallet wood but still typically cheaper than new specialty lumber.
Barn wood should always be inspected for nails, insect damage, and structural soundness before installation, and a light sanding pass removes splinters without stripping away the weathered surface that makes this material appealing in the first place. Sourcing from a reputable reclaimed lumber dealer rather than an unknown demolition site also reduces the risk of hidden pest damage.
This is the best option on the list if the goal is a genuinely one-of-a-kind ceiling with visible history in the grain, knots, and old nail holes.
Where to Find Cheap or Free Wood
Local sourcing often costs far less than buying new lumber from a big-box store, and it’s worth checking a few places before ordering anything online.
Reclaimed lumber yards typically carry barn wood, old fencing, and salvaged flooring at a fraction of new specialty wood pricing, and staff can usually tell you which boards are structurally sound for a ceiling install.
Local moving companies, warehouses, and grocery stores often give away pallets for free just to clear space, so a quick phone call before a weekend project can save the entire material budget on a pallet wood ceiling.
Online marketplaces and local classifieds are also worth checking for leftover flooring, fencing, or trim from other people’s finished renovation projects, since these are frequently sold at a steep discount or given away entirely.
Quick Start Tool List
Before starting any wood ceiling project:
- Stud finder to locate ceiling joists
- Miter saw for angled cuts (herringbone, chevron)
- Nail gun or construction adhesive
- Level and chalk line for straight rows
- Safety glasses and a respirator mask for sanding
Budget-Friendly Version
Lowest-cost options overall:
- Pallet wood (often free to source)
- Painted beadboard sheets
- Peel-and-stick planks for a no-tool install
- Whitewash finish over existing wood
Success Indicators
- Boards or panels sit flush with consistent gaps
- No visible gaps or warping after the first few weeks
- Ceiling reads as a deliberate design choice, not a patch job
- Lighting fixtures and vents are cleanly integrated around the wood
- The finished look matches the intended style (rustic, modern, coastal, or farmhouse)
Remember
Let all wood acclimate in the room for several days before installing to prevent gaps or warping later, always locate ceiling joists with a stud finder before fastening anything overhead, choose a lower-grade or reclaimed wood over premium lumber to keep costs down since ceiling wood is rarely touched or worn the way flooring is, wear eye protection and a dust mask for any sanding or cutting done overhead, and treat a wood ceiling as one of the highest-impact, lowest-cost upgrades available for the amount of visual change it delivers.