14 Bed Nook Ideas That Turn Any Alcove Into a Cozy Retreat
An alcove with a bed in it does something a bed against a wall never quite manages. It creates the sense of sleeping inside the room rather than on the surface of it — contained, protected, separate from the rest of the space in a way that makes sleep feel more deliberate.

The challenge is that most alcoves arrive unfinished. A recessed space in a wall, a space under a staircase, a bump-out in a hallway — all of these have potential that requires some specific thinking to realize.
These fourteen ideas cover built-in approaches, textile methods, lighting strategies, storage solutions, and the small details that turn a structural accident into an intentional sleeping retreat.
1. Install Curtains on All Three Open Sides for Instant Enclosure
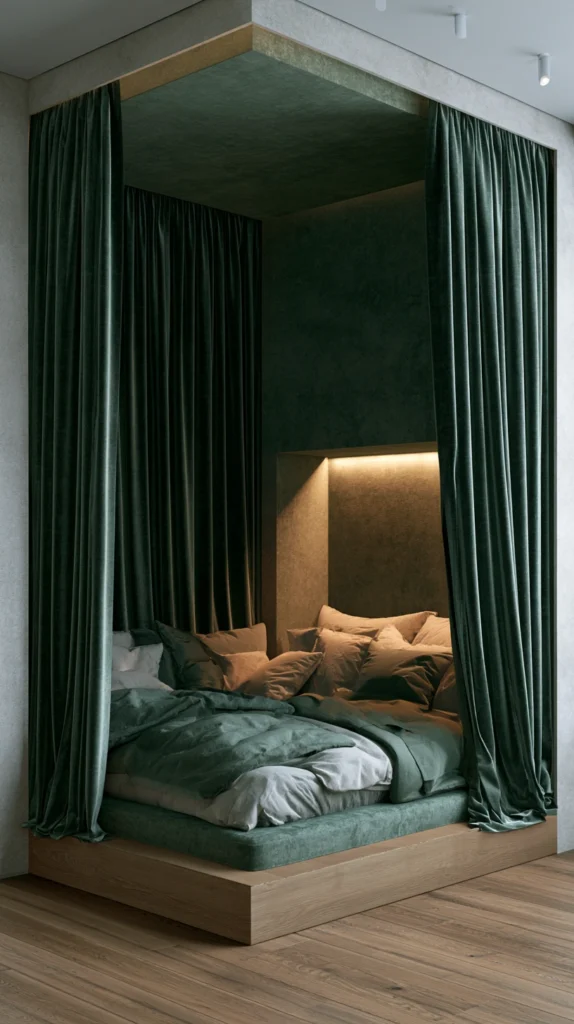
The fastest way to define an alcove as a bed nook rather than a bed that happens to be in a recess is curtains.
Floor-to-ceiling curtains hung from a ceiling-mounted track or a rod across the opening create a threshold — a visible boundary between the sleeping space and the rest of the room. When open, they frame the nook. When closed, they create a private sleeping pod from a rod and some fabric.
For the most contained effect, hang curtains on all three open sides rather than just the front opening. Side curtains prevent light from entering at the periphery and create the enclosed quality that makes the nook feel intentional rather than incidental.
Velvet curtains add acoustic softness and visual weight. Linen panels add lightness and texture. For a cozy retreat quality, velvet in deep forest green, navy, or warm burgundy tends to work better than neutral or light-colored panels.
A ceiling-mounted curtain track runs $15–$40 for a basic system. Curtain panels run $20–$50 per panel.
Tip: Use blackout lining on the curtains rather than standard lining. In an alcove, even small light leaks from the surrounding room are amplified by the enclosed space. Blackout lining makes the nook genuinely dark when needed, which improves sleep quality beyond what curtains alone achieve.
Budget: $60–$150 for curtains on three sides
2. Build Simple Plywood Shelves Into the Side Walls
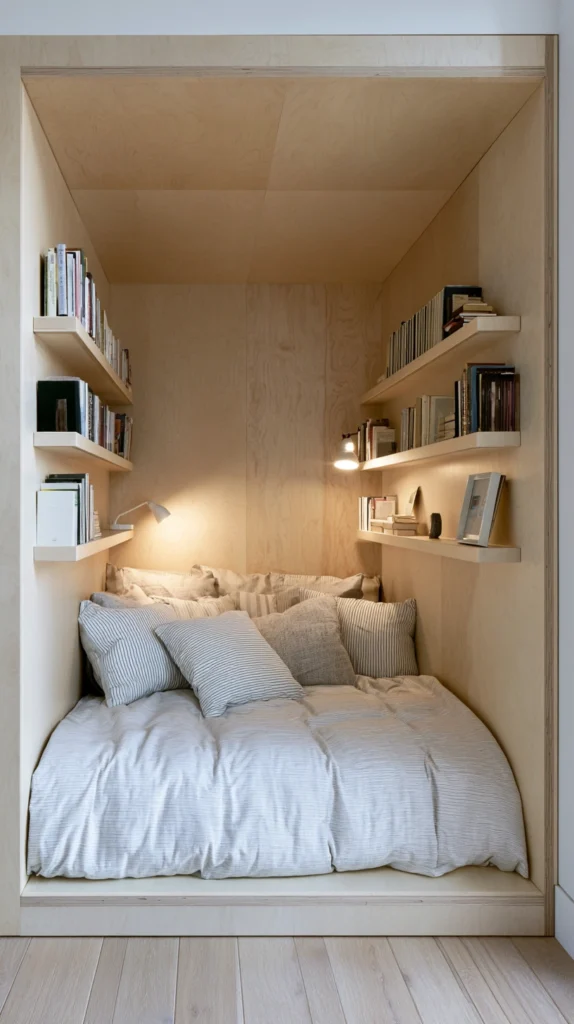
The side walls of a bed nook are the most useful real estate in the arrangement. They’re at arm’s reach from the pillow, they’re not occupied by the bed itself, and built-in shelves on them turn dead vertical space into functional storage.
Simple plywood shelves cut to span the full side wall depth and mounted at headboard height create bedside table functionality on both sides simultaneously. Books, a reading lamp, a water glass, a phone charger — everything that typically crowds a nightstand lives on the wall instead, which frees up floor space and keeps the nook from feeling cluttered.
Sand the plywood to 220 grit, apply one coat of primer and two coats of the same paint as the nook interior, and the shelves read as built-in rather than added. A router run along the front edge creates a small lip that prevents items from sliding off during sleep.
Three shelves per side at 8 inches deep, cut from 3/4-inch plywood, cost $20–$40 in materials.
Tip: Mount the lowest shelf at exactly the mattress height rather than slightly above or below it. A shelf at mattress height creates a continuous surface between the shelf and the bed edge that functions as a bedside table extension — items reach naturally from lying down without leaning or stretching.
Budget: $20–$60 for both sides
3. Paint the Interior of the Nook a Different Color from the Room
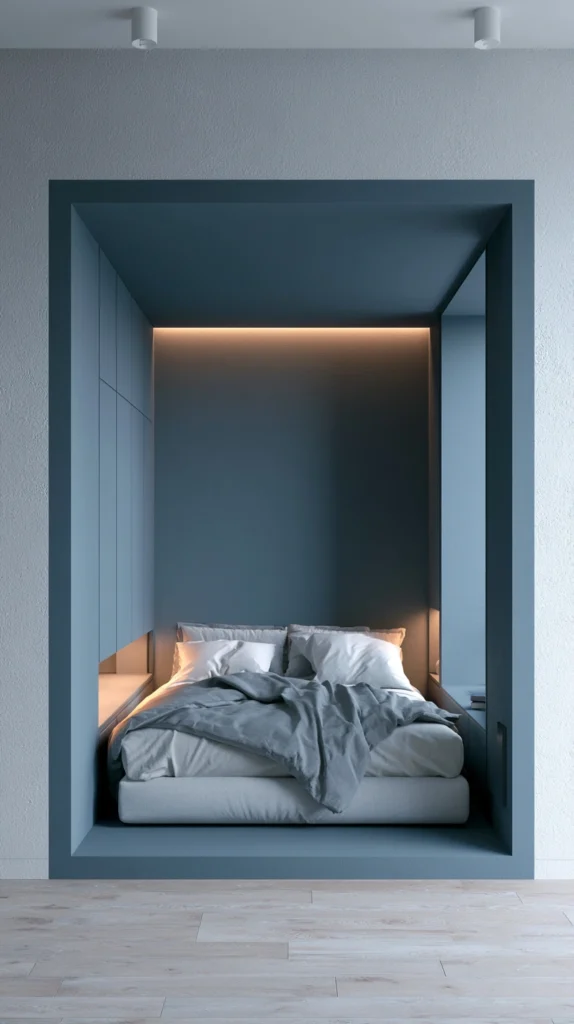
The interior surfaces of an alcove — the back wall and the two side walls — form a contained zone that accepts a different paint color without the risk of overwhelming a full room.
Painting the nook interior a darker, richer tone than the surrounding room creates depth. The nook recedes visually, which makes it feel more cave-like and enclosed. A room with warm white walls and a nook interior in deep green, slate blue, or warm terracotta reads as having an intentional sleeping zone rather than a bed pushed into a recess.
This also works in the opposite direction — painting the nook interior in a warm off-white when the surrounding room is a medium tone creates a glowing, candle-lit quality that makes the sleeping space feel luminous rather than enclosed.
For the cave-like approach: Sherwin-Williams Cascades (SW 6483), Benjamin Moore Black Forest Green (2047-10), or Farrow & Ball Down Pipe (No. 26).
A quart of paint covers an average alcove interior for $15–$30.
Tip: Paint the ceiling of the nook the same color as the side and back walls rather than the same as the room ceiling. A continuously colored interior — walls and ceiling the same tone — creates a more immersive enclosed quality than walls alone. The ceiling is the most commonly missed surface in this approach.
Budget: $15–$35
4. Use a Thin Platform or Raised Base to Define the Bed Level
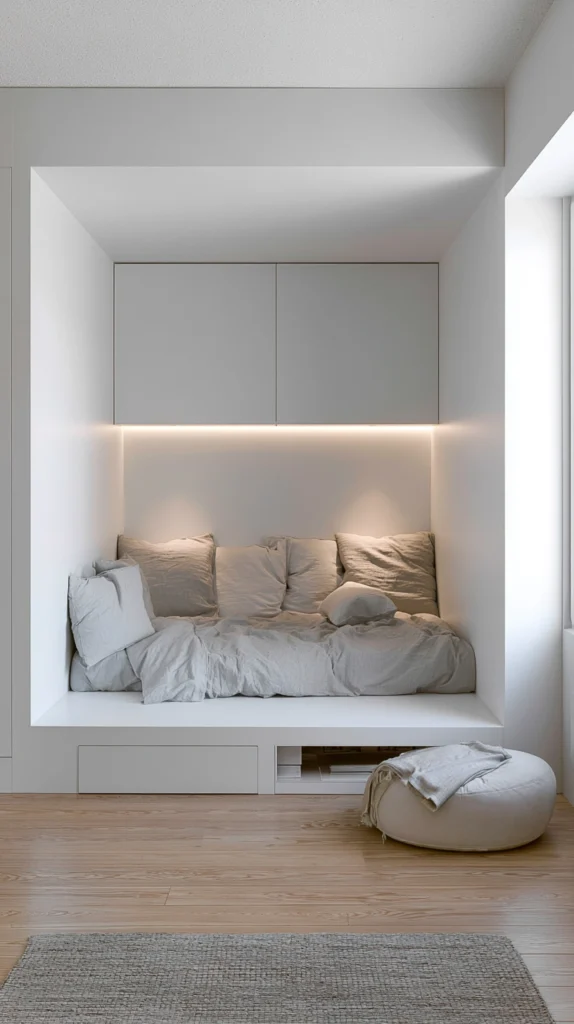
A bed that sits directly on the floor of an alcove without any platform reads as a mattress placed in a recess. A bed raised on a platform — even 4–6 inches — reads as a designed sleeping zone.
The platform doesn’t need to be elaborate. A simple base built from 2×4 lumber and 3/4-inch plywood, sized to the mattress dimensions plus 2 inches on each side, creates a clean base that lifts the bed visually and provides the option for under-platform storage drawers.
Paint or stain the platform to match the nook interior. A painted platform in the same color as the nook walls visually integrates the sleeping surface into the overall design — the bed becomes part of the nook rather than furniture placed inside it.
Materials for a basic platform run $40–$80 depending on size and whether drawers are added.
Tip: Build the platform 2 inches shorter than the nook depth rather than flush with the opening. This creates a small step at the entrance to the nook that physically marks the threshold between the sleeping space and the room, reinforcing the separation without requiring a door.
Budget: $40–$90 including materials
5. Install Recessed Lighting in the Ceiling of the Nook
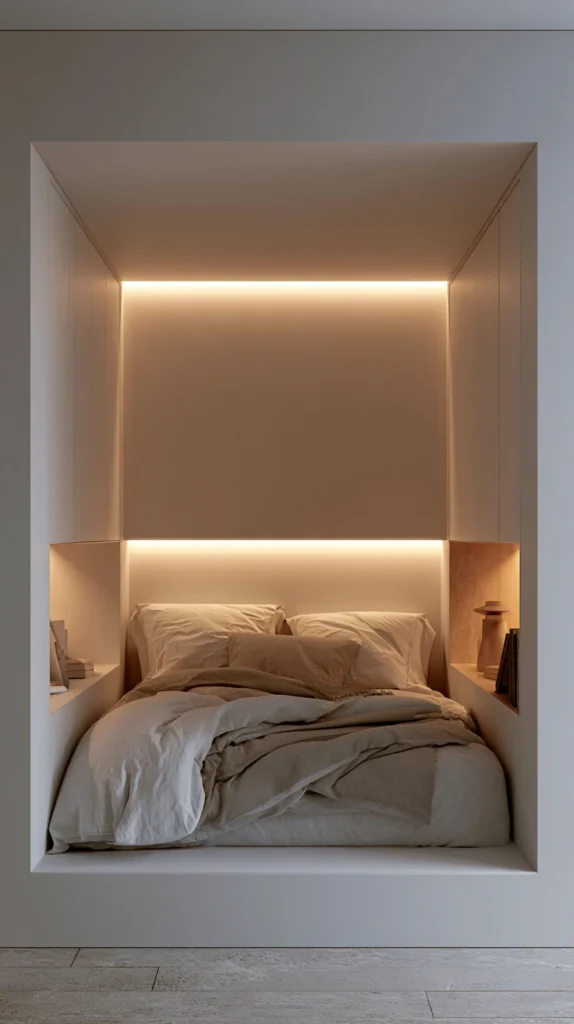
Standard overhead room lighting provides poor light inside a bed nook. The nook walls create shadows that the ceiling fixture can’t reach, which makes reading in the nook uncomfortable and makes the space feel dim in the wrong way — unintentionally dark rather than intentionally cozy.
Recessed LED puck lights installed in the nook ceiling directly above the head of the bed solve this. They provide directed reading light from above without the visual intrusion of a lamp fixture at eye level, and they can be switched independently from the room lighting so the nook can be lit when the rest of the room is dark.
For a warm atmosphere, use recessed lights rated at 2700K. For adjustability, wire them to a dimmer switch — the ability to go from reading brightness to near-dark without turning off entirely is particularly valuable in a sleeping space.
LED recessed puck lights run $8–$15 each. Wiring requires basic electrical knowledge or a short electrician visit.
Tip: Install two puck lights at the nook ceiling rather than one centered fixture. Two lights positioned over each side of the bed provide even illumination for two people and prevent the single-center-light shadow that falls directly onto a book held at reading angle.
Budget: $30–$80 including lights and dimmer switch
6. Add a Canopy or Fabric Ceiling Inside the Nook
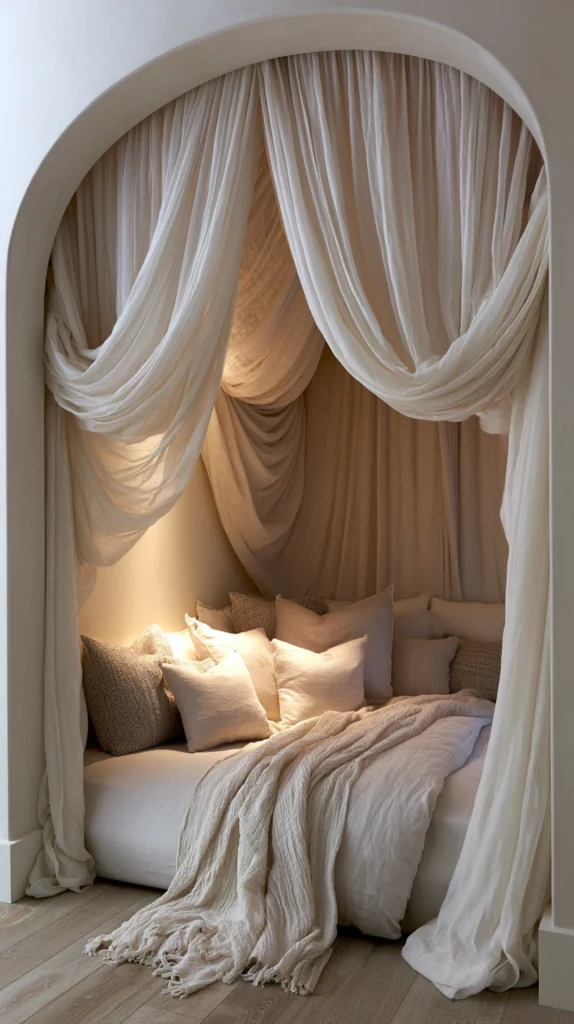
A fabric ceiling installed inside the nook — draped fabric attached at the nook ceiling edges and gathered at the center — creates the tent-like quality that makes a sleeping space feel sheltered rather than just enclosed.
This requires no structural work. Use curtain wire or a series of small hooks at the nook ceiling perimeter. Gather light fabric — sheer linen, cotton voile, or lightweight muslin — at a central point using a ceiling hook, allowing it to drape outward to the edges. The gathered center creates the canopy silhouette; the peripheral attachment creates the tented walls.
For a cozier, less airy effect, use a heavier linen or a loosely woven cotton rather than a sheer. The heavier fabric drapes in folds rather than floating, which gives the ceiling a more substantive quality.
Fabric for a nook canopy ceiling runs $15–$40 depending on yardage and material. Hardware runs $5–$15.
Tip: Use a warm-toned fabric — cream, oatmeal, blush, or soft gold — rather than pure white. Pure white fabric overhead in low light reads as cold and slightly clinical. A warm-toned fabric catches the lamp and candlelight from below and glows gently.
Budget: $20–$55
7. Layer Textiles Heavily on the Bed Itself
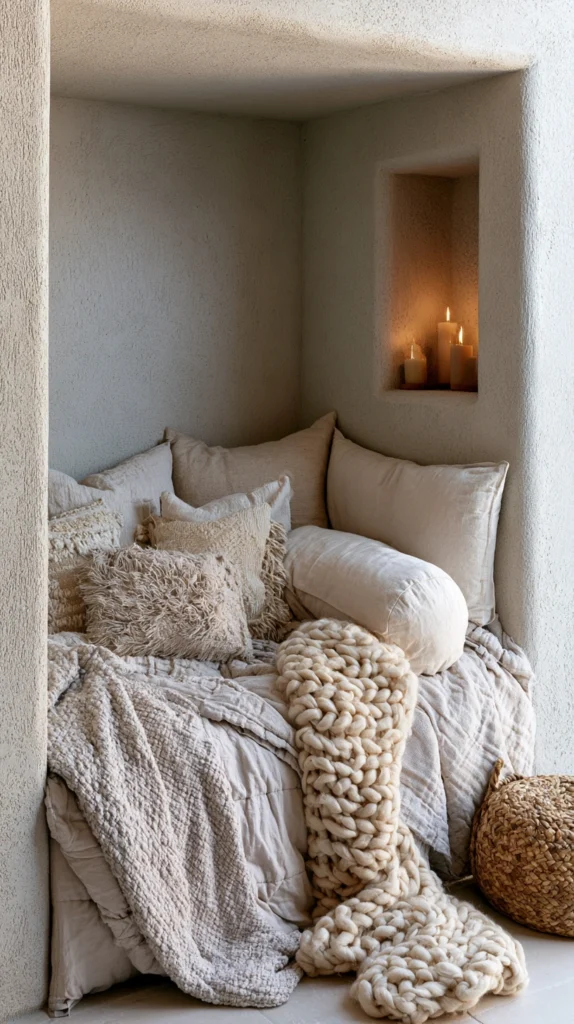
The bed inside a nook should be layered to a degree that would look excessive in an open bedroom. The containment of the nook absorbs the visual volume of multiple textiles in a way that an open bed in a large room doesn’t.
Start with a fitted sheet and a flat sheet, add a cotton blanket, then a heavier quilt or duvet, then two or three throw pillows against the back wall, then a chunky knit throw folded at the foot. This level of layering in an open room looks like an unmade bed with too many blankets. Inside a nook, it looks like a nest.
Choose textiles that relate in tone — different shades of the same warm color family rather than matched sets. A cream sheet, a soft grey blanket, a warm white quilt, an oatmeal throw, and dusty pink pillows all work together because they share a warm, muted quality.
Tip: Use a bolster pillow rather than standard pillows against the back wall of the nook. A bolster runs the full width of the sleeping space and creates a clean, continuous line against the back wall — better suited to the architecture of a nook than individual pillows that don’t span the full width.
Budget: $40–$120 for additional textiles
8. Create Storage Drawers in the Platform Base
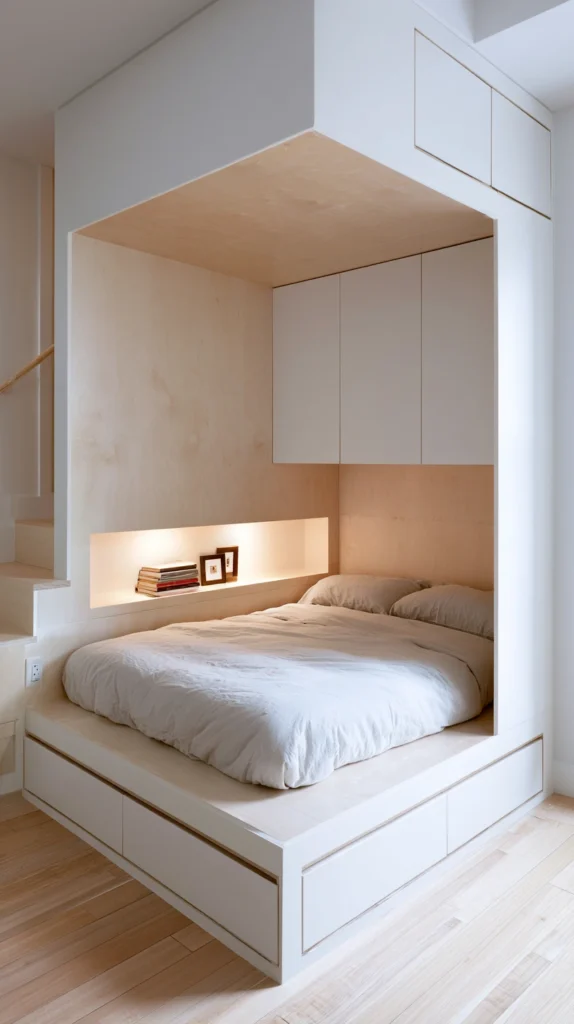
A platform base under the nook bed is most valuable when it holds storage — and platform storage in a nook is the kind of hidden, integrated space that earns back the footprint of the built-in construction many times over.
Simple drawer boxes built into the platform front hold seasonal bedding, spare pillows, clothing overflow, or anything else that would otherwise need separate furniture. Two to four drawers spanning the full width of the platform is typical for a twin or full-sized nook bed.
Use full-extension drawer slides rated for at least 75 lbs per drawer. Soft-close slides eliminate the slamming sound that regular slides produce — relevant in a sleeping space where the drawer might be opened in the dark or at night.
The drawer faces can be painted the same color as the platform and nook interior to read as invisible, or in a contrasting natural wood for a built-in furniture look.
Full-extension drawer slides run $12–$20 per pair. Materials for two to four drawers total $60–$120.
Tip: Add a small leather pull or a simple routed finger groove to drawer faces rather than a hardware pull. Hardware pulls catch bedding and clothing — integrated pulls or recessed grooves don’t project from the face and eliminate the snagging problem entirely.
Budget: $80–$150 for a complete platform with drawers
9. Install a Pegboard or Hook System on One Side Wall
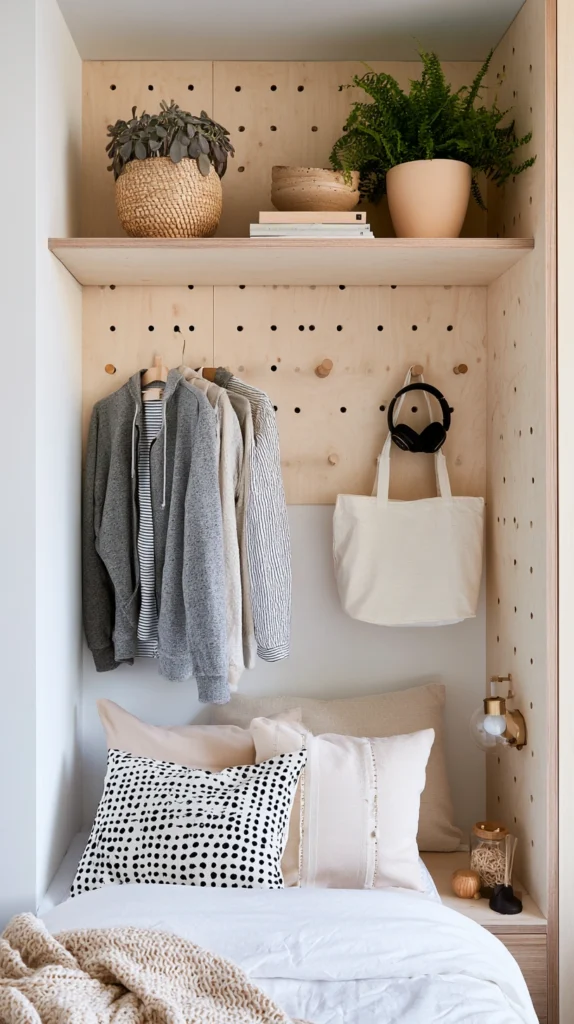
One side wall of the nook — the side you exit from most naturally — is the ideal location for a small organizational system that handles the items that accumulate around a bed.
A small pegboard panel, a series of wooden wall hooks, or a mounted rail with attachments at 10–12 inches above mattress height provides hanging space for a robe, tomorrow’s outfit, a bag, headphones, and whatever else tends to pile on the bed or floor beside a sleeping space.
For the hobbitcore or cozy aesthetic, wooden wall hooks in a turned or carved style read better than metal pegboard. A simple painted wooden rail with five or six wooden hooks spaced 3–4 inches apart covers everything that needs hanging without requiring installation of a full pegboard system.
Wooden wall hook rails run $15–$35. Individual turned wooden hooks run $3–$8 each.
Tip: Mount the hook rail at a height that allows a hanging robe to clear the mattress by at least 4 inches. A robe or jacket that rests on the mattress surface collects lint, catches on bedding when withdrawn, and eventually pulls the fabric in a way that damages both items.
Budget: $15–$40
10. Use String Lights or LED Strip Lights Along the Ceiling Edge
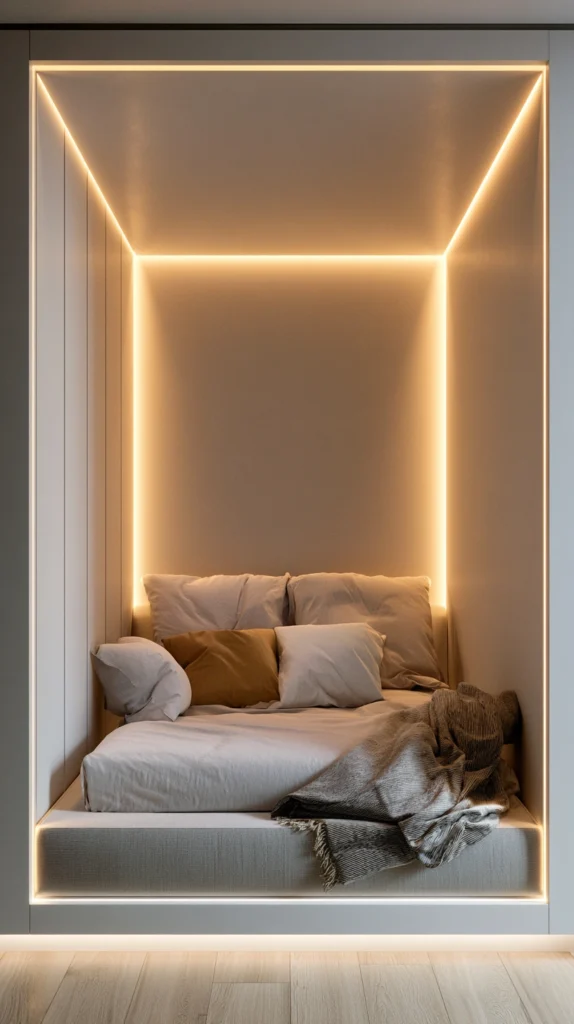
Warm string lights run along the perimeter of the nook ceiling — where the ceiling meets the side walls — create a glow that frames the sleeping space from above without pointing light directly at the face.
This perimeter lighting approach provides ambient illumination for the nook without the harshness of an overhead fixture or the visual intrusion of a bedside lamp at eye level. It’s the equivalent of candlelight at the ceiling edges — present everywhere and visible from nowhere specific.
For the best effect, use copper wire micro-LED string lights in the 2200K–2700K range rather than standard string lights. The thin copper wire disappears against the ceiling edge, leaving only the light points visible.
A 20-foot copper wire strand with 200 micro-LEDs is sufficient for most nook perimeters and runs $10–$18. Attach to the ceiling edge with small adhesive hooks.
Tip: Connect the string lights to a smart plug set to a daily timer so they come on at sunset and turn off at sleep time automatically. The consistent timing turns the lighting into a sleep cue rather than something that needs to be managed each evening.
Budget: $12–$25
11. Add a Small Fold-Down Desk to the End Wall
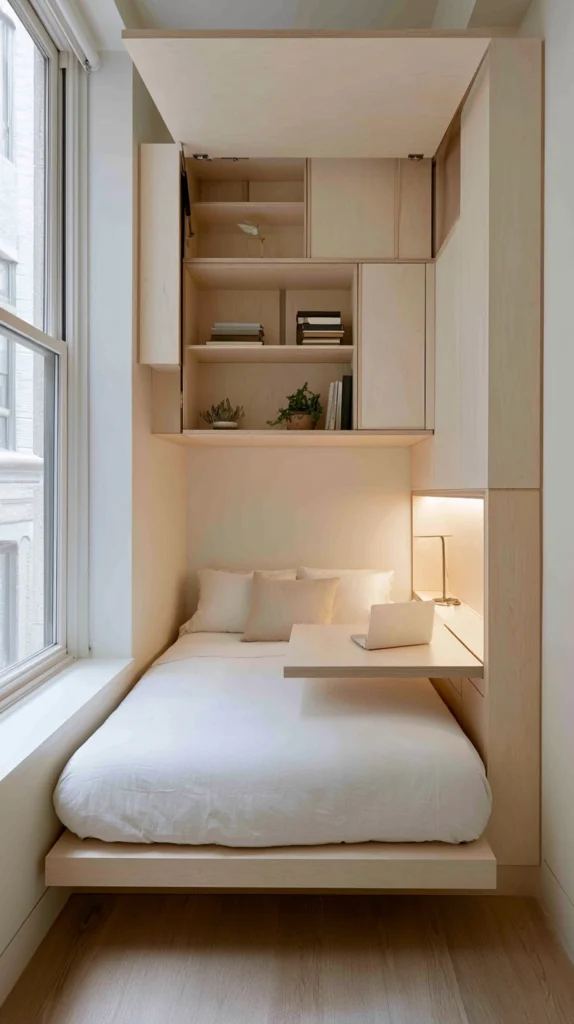
An alcove large enough to hold a bed is often large enough to add a fold-down desk surface at the foot of the bed — turning the nook from a sleeping space into a compact sleeping and working retreat.
A fold-down desk mounted on the end wall of the nook at a comfortable seated height — 28–30 inches from the floor — deploys for work and folds flush when not in use, taking up zero of the nook’s limited floor space when sleeping is the priority.
A butcher block offcut or a piece of 3/4-inch hardwood plywood finished in the nook’s interior color makes the fold-down surface look intentional. Mount with a piano hinge at the bottom edge and a folding metal leg bracket at the outer edge for support when open.
Materials for a fold-down desk run $30–$60. Add a simple LED desk lamp on the wall beside it — mounted rather than standing — to keep the small surface completely clear for work use.
Tip: Size the fold-down desk to 24 inches wide rather than the full nook width. A desk that spans the entire wall width creates a barrier at the foot of the bed when deployed — a narrower desk allows movement alongside it while still providing a functional work surface.
Budget: $35–$70
12. Apply Wallpaper to the Back Wall Only
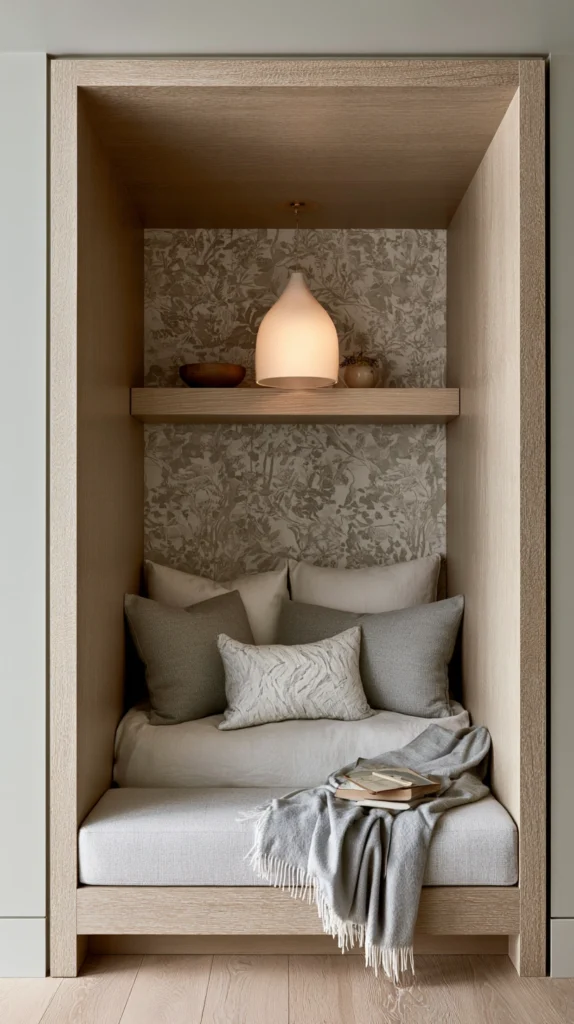
The back wall of a nook is the wall you look at while lying in bed. It’s the most visually prominent surface in the sleeping space and the one that most rewards deliberate treatment.
Peel-and-stick wallpaper on the back wall alone — not the side walls or the room — creates a focused pattern feature that frames the sleeping position without overwhelming the nook’s enclosed character.
For a cozy retreat quality, choose a pattern with depth: a botanical print in muted tones, a textured linen-look in a warm neutral, a damask in soft gold and cream, or a hand-drawn style floral in dusty pink and sage. The pattern should have enough visual interest to reward looking at from a horizontal position but not so much contrast that it stimulates rather than calms.
Peel-and-stick wallpaper in a nook back wall project typically requires one roll. NuWallpaper and Chasing Paper both make options suitable for this use at $25–$55 per roll.
Tip: Measure the back wall precisely and order 10% extra. The back wall of a nook is rarely a perfect rectangle — heating vents, electrical outlets, and slight wall irregularities all require careful cutting, and running short mid-project in a contained space is harder to work around than in an open room.
Budget: $25–$60
13. Build Window Seat Storage at the Base If an Alcove Has a Window
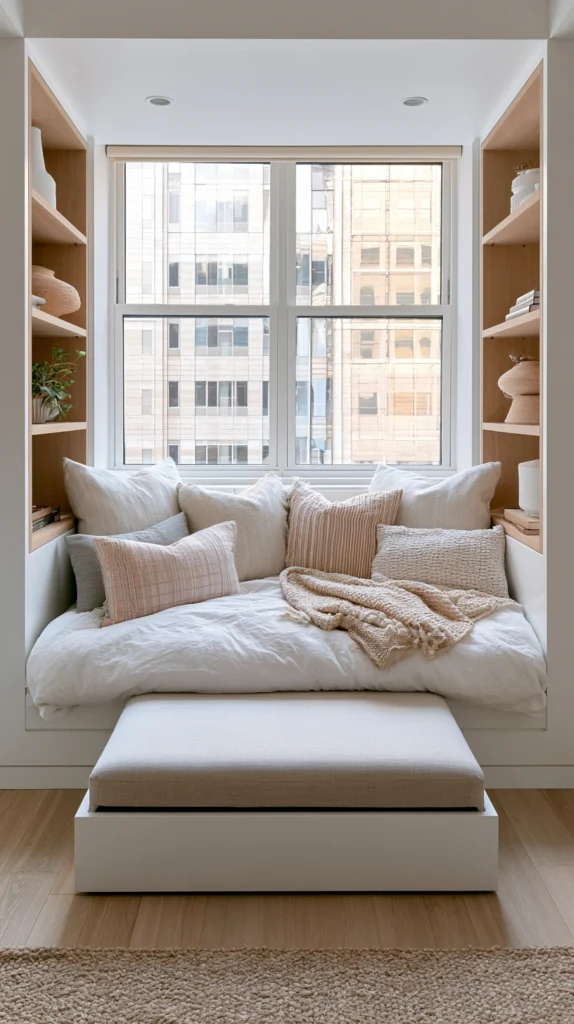
An alcove with a window at the back is the most valuable variant of a bed nook — natural light, a view, and the most romantic sleeping position possible.
If the nook has a window, the platform base beneath it can double as a window seat storage bench during the day when the nook is not being used for sleeping. Access the storage from the top via lift-up hinged lid rather than drawers — the window prevents front-access drawers on the back wall side.
Build the storage compartment from 3/4-inch plywood with piano hinges at the rear edge of the lid. Use heavy-duty lid supports ($6–$10 per pair) to hold the lid open while retrieving items — a lid that falls closed unexpectedly in a nook is a genuine injury risk in a confined space.
Line the interior with cedar tongue-and-groove planks for bedding storage — cedar naturally repels moths and keeps stored textiles smelling fresh.
Materials for a window seat storage base run $60–$120 depending on size.
Tip: Install a window treatment inside the nook at the window itself rather than on the room side. Curtains hung on the room side of the window are outside the enclosed nook space and don’t provide the light control and privacy that curtains hung within the nook directly at the window do.
Budget: $65–$130
14. Treat the Nook Entrance as an Architectural Feature
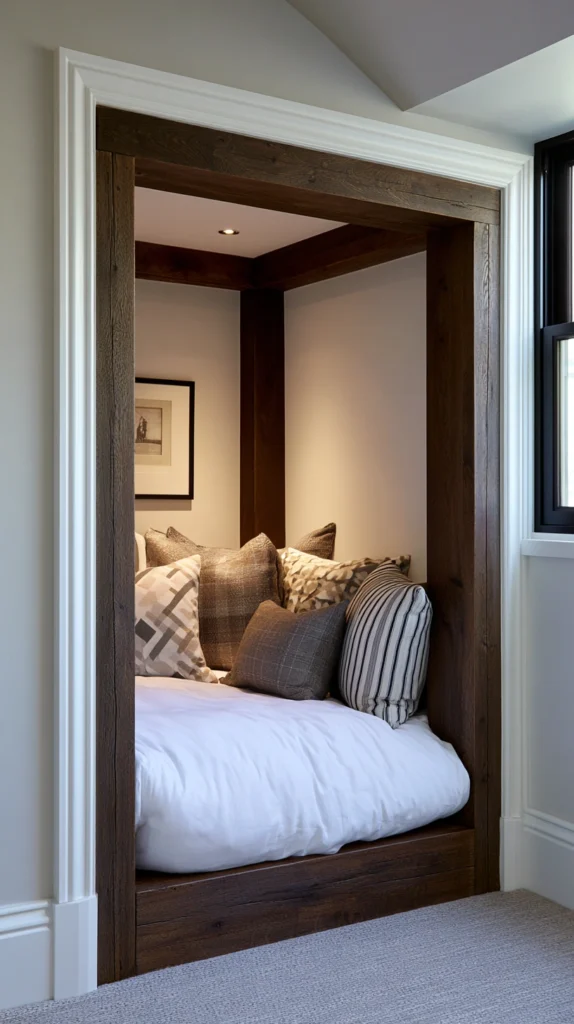
The opening of a nook — where the recessed space meets the room — is usually left unfinished. Raw drywall edge, an uneven corner, or a structural element that marks the boundary without defining it.
Treating the nook entrance as a deliberate architectural detail completes the design in a way that all the interior work can’t quite achieve on its own. Options range from simple to more involved: adding casing trim around the opening (the same profile used around interior doors), installing a small arch using flexible drywall bead, adding a wooden beam across the top opening, or painting the opening edge in a contrasting color that frames the nook interior like a doorway.
The wooden beam across the top opening is the most impactful and least complicated option. A piece of 4×6 or 4×8 lumber stained in a dark walnut or aged oak tone, mounted flush to the top edge of the opening, immediately gives the nook the architectural quality of a built-in feature rather than a repurposed alcove.
A standard 6-foot length of 4×6 lumber runs $15–$25 at a home improvement store. Dark stain runs $8–$15.
Tip: Mount the beam at the exact ceiling height of the nook opening rather than at the room ceiling height if these differ. A beam at the natural opening height frames the nook at its actual boundary. A beam mounted higher floats above the opening and looks like a separate decorative element rather than an architectural threshold.
Budget: $25–$45
Final Thoughts
A bed nook works because it solves something the open bedroom doesn’t quite manage — it gives sleep a dedicated architectural home rather than a corner of a multipurpose room.
The ideas that do the most to achieve this quality are the ones that define the boundary: the curtains, the contrasting paint color, the platform base, the beam at the entrance. These establish the nook as a separate space. Everything inside — the layered textiles, the recessed lighting, the shelves at mattress height — builds on that established separation.
Start with the curtains or the paint. Both establish the nook’s identity immediately and cost well under $100. Build from there with whatever the specific alcove’s dimensions and structural character allow.