14 Backyard Pathway Ideas to Try This Year
My backyard used to have one thing connecting the patio to the shed: a worn strip of dead grass where I’d walked the same route a thousand times.
It worked, technically. But it looked like an accident, not a design choice.
Then I started actually building pathways instead of just wearing them in. Same yard, completely different feel.
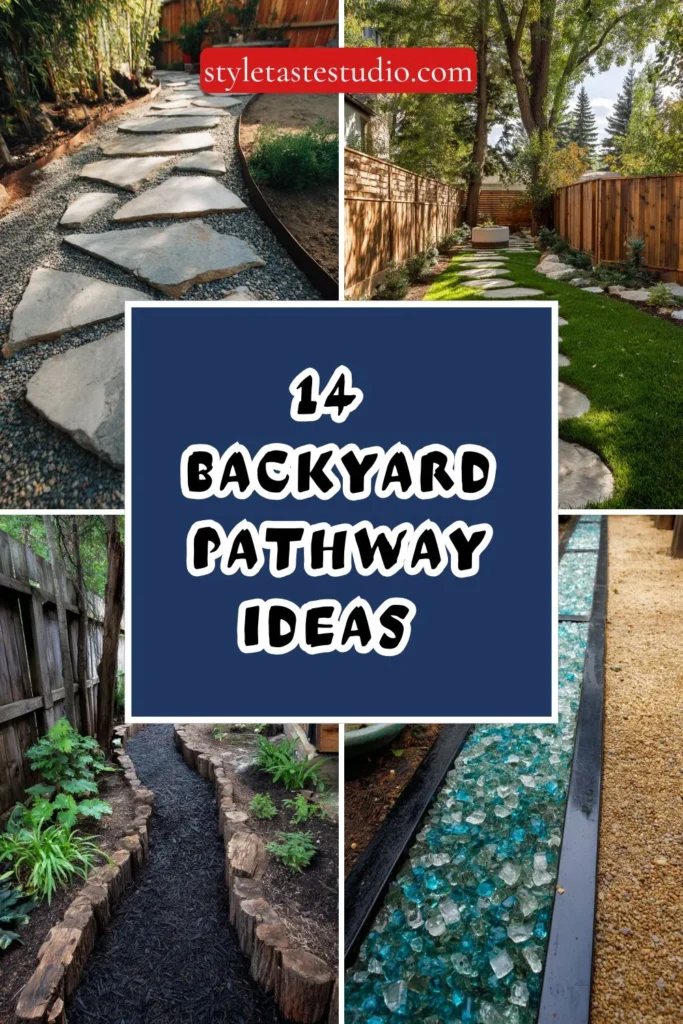
Here are 14 backyard pathway ideas that turn a boring walk from point A to point B into an actual feature of your landscape.
Every one of these can be built in a weekend or two, no contractor required, and most use materials you can find at a regular hardware store or a local salvage yard.
I’ve mixed in options for every budget and skill level below, from a simple stepping stone path anyone can lay in an afternoon to a poured concrete design that takes a bit more planning, so skim ahead to whichever fits your yard and your patience.
1. Classic Flagstone Stepping Path
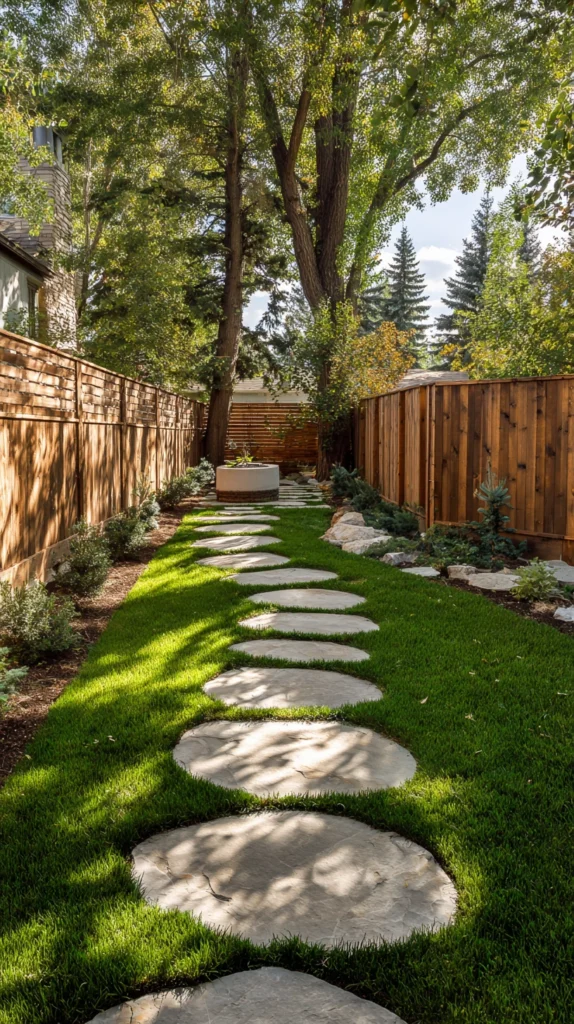
Irregular flat stones set with gaps for grass or groundcover to grow between them.
Flagstone is the pathway most people picture first, and it earns that reputation. The irregular shapes look natural no matter how casually you place them, and the gaps between stones give you a spot to tuck in creeping thyme or moss.
I laid mine on a bed of compacted sand rather than concrete, spacing the stones about 2 inches apart and filling the gaps with a mix of soil and creeping thyme seed.
Budget tip: Buy flagstone by the pallet from a local quarry instead of individually from a garden center, since per-square-foot pricing drops dramatically at bulk volume.
A few things that make this design work:
- Set each stone so it sits flush or slightly below grade to avoid tripping hazards
- Keep gaps consistent, roughly 1.5 to 2 inches, so the pattern reads as intentional
- Choose stones at least 18 inches across for a comfortable stride length
The gaps do need occasional weeding if you don’t fill them with groundcover, but once thyme or moss establishes, it actually chokes out weeds on its own.
I’d also recommend dry-fitting the entire layout before setting a single stone permanently. Laying stones out loosely first let me shuffle a few pieces around until the stride felt natural, which saved me from resetting stones after the fact.
2. Gravel and Steel Edging Path
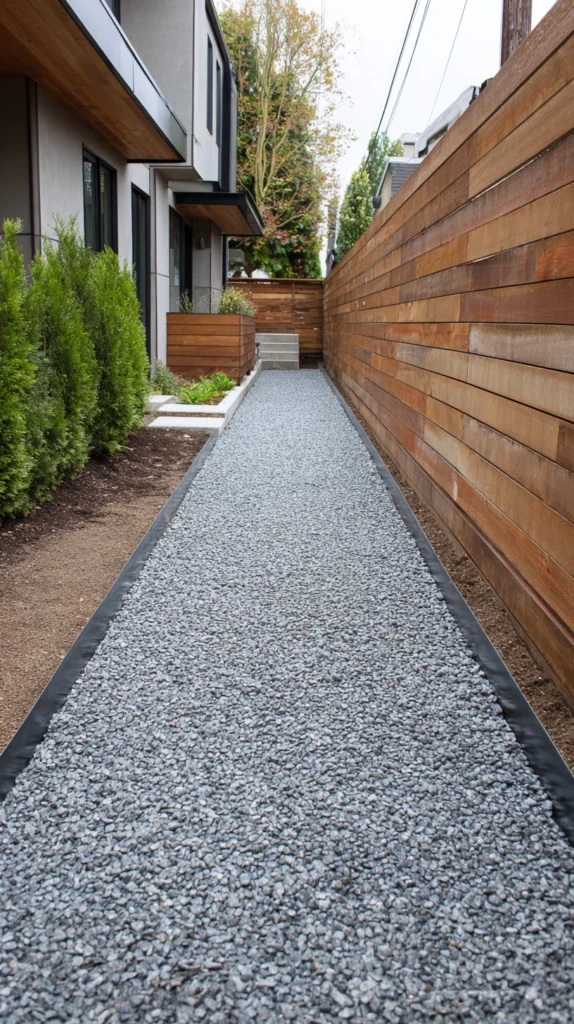
A crushed gravel path contained by clean steel or aluminum edging strips.
This is the design I’d recommend to anyone who wants a modern, low-maintenance look without spending a fortune. Gravel drains well, never needs mowing, and the steel edging keeps it from migrating into your beds.
Mine runs about 3 feet wide from the back door to a small seating area, filled with 3/8-inch pea gravel over a compacted base and a layer of landscape fabric underneath.
Style tip: Choose a gravel color that contrasts with your house siding or fence, since a path that blends in too closely with the background loses its visual definition entirely.
Things to get right the first time:
- Always use landscape fabric under gravel, or weeds will punch straight through within a season
- Compact the base layer before adding fabric and gravel, since a soft base leads to ruts and low spots
- Top off gravel every couple of years since foot traffic pushes stones outward over time
Gravel paths are also the cheapest option on this entire list if you’re working with a tight budget and a lot of ground to cover.
One thing I underestimated at first was how differently gravel sizes behave underfoot. Pea gravel shifts and scatters more than angular crushed stone, so if you’re covering a longer run, a slightly larger angular gravel actually stays put better over time.
3. Brick Herringbone Walkway
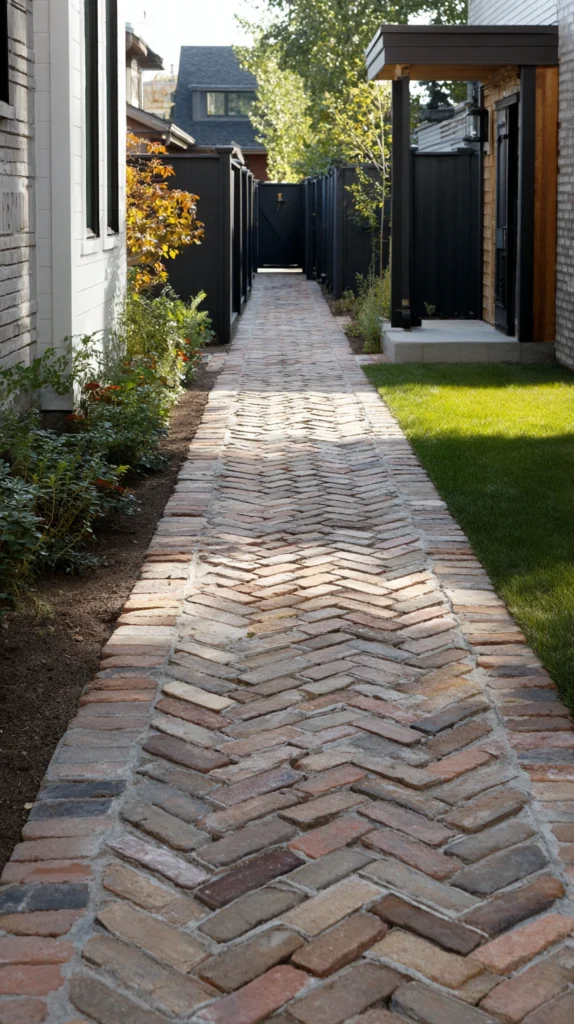
Reclaimed or new brick pavers laid in a classic herringbone pattern.
Herringbone brick reads as instantly traditional and formal, which makes it a great fit for cottage-style or older homes. The interlocking pattern is also more structurally stable than a straight running bond, so it holds up better to heavy foot traffic over time.
I used reclaimed brick from a demolition salvage yard for mine, laying each brick at a 45-degree angle against its neighbor over a sand-and-gravel base.
Budget tip: Reclaimed brick often costs half of new brick and comes with a weathered patina that would otherwise take years to develop naturally.
A few notes if you’re taking this on:
- Snap a chalk line down the center of the path before you start, since herringbone drifts off-square fast without a guide
- Expect to cut some bricks at the path edges to keep the pattern clean
- Add polymeric sand between joints to lock bricks in place and discourage weeds
This is one of the more labor-intensive paths on the list, but the finished look is hard to match with any other material.
Give yourself more time than you think you’ll need. My first attempt at herringbone took nearly three times longer than a straight running bond would have, mostly because of how many edge cuts the angled pattern required along both borders.
4. Stepping Stone Lawn Path
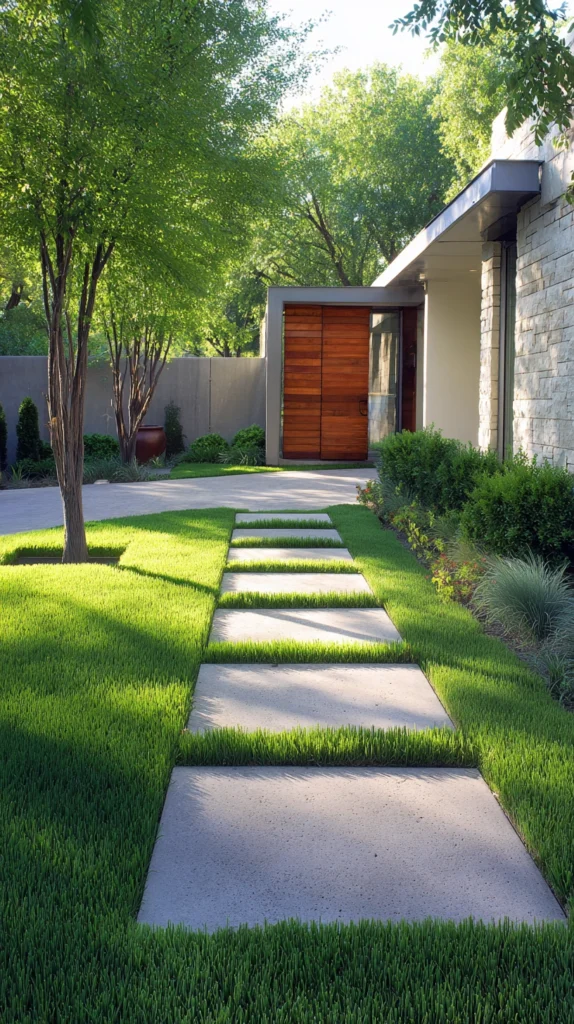
Individual round or square concrete pavers set directly into an existing lawn.
This is the easiest, fastest pathway you can build if your yard already has grass you like and just need a defined route across it. No excavation of an entire strip, just individual stepping stones set at natural walking intervals.
I set mine using pre-cast 18-inch round concrete pavers, spacing them at a comfortable stride of about 24 inches center to center, cutting the sod beneath each one and setting it flush with the surrounding grass.
Style tip: Walk the actual route you naturally take before placing any stones, and mark it with spray paint first, since a path that follows an unnatural line will get ignored in favor of a worn dirt track right next to it.
Quick guidelines for spacing and setting:
- Space stones for your actual stride, not a guess, since mismatched spacing makes the path awkward to walk
- Set stones about half an inch below grade so a mower can pass right over them
- Use at least 12 to 16 inch stones for stability underfoot
Because there’s no continuous excavation, this is also the pathway idea most renters can pull off without permanently altering the yard.
If the lawn underneath is thick and healthy, cutting a clean plug for each stone takes more effort than it looks like it should. A simple edging spade made the job faster than the flat shovel I started with, especially through dense turf.
5. Mulch and Timber-Edged Woodland Path
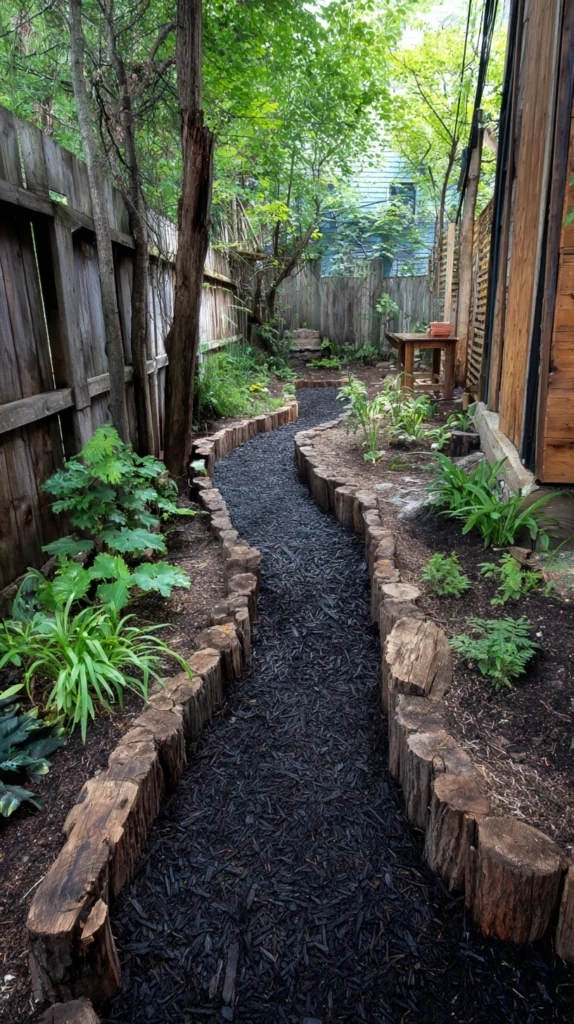
A soft wood mulch path bordered by timber or log edging, ideal for garden or wooded areas.
If your backyard backs up to trees or a naturalistic garden bed, a mulch path fits the setting far better than stone or brick ever could. It’s soft underfoot, quiet to walk, and blends into a woodland or cottage garden instead of competing with it.
Mine winds through a shaded side yard, edged with reclaimed cedar logs staked into the ground and filled with a few inches of dark hardwood mulch.
Budget tip: Ask a local tree service if they’re dropping off wood chips for free, since many companies will deliver a full truckload at no cost just to avoid a dump fee.
Keep these details in mind:
- Refresh mulch once or twice a year since it breaks down and compacts over time
- Curve the path rather than running it straight, which fits the informal feel and slows your pace through the space
- Use logs, branches, or even stacked stone as edging to keep mulch from spreading into beds
This is also one of the cheapest paths to build if you already have access to fallen branches or a wood chipper.
Fresh wood chips can temporarily rob nitrogen from the soil they touch, so I keep mine well away from the edges of nearby planting beds until the chips have had a season to break down and settle.
6. Poured Concrete Pad Path (Modern Minimalist)
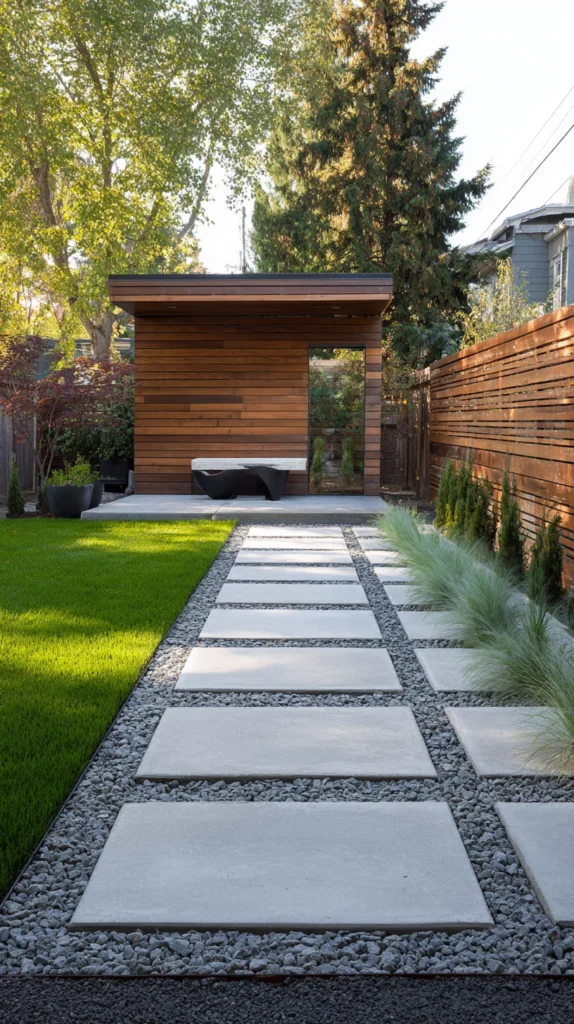
A series of square or rectangular poured concrete pads set at regular intervals, with gravel or grass filling the gaps.
This design has a clean, architectural look that fits contemporary homes especially well. Instead of one continuous slab, individual pads create a rhythm as you walk, with negative space between each one instead of a solid ribbon of concrete.
I poured mine using simple 2×2-foot wooden forms, spacing each pad 4 inches apart and filling the gaps with the same pea gravel used elsewhere in the yard.
Style tip: Keep the pad size and spacing perfectly consistent along the entire run, since even minor irregularities are much more noticeable in a geometric, minimalist design than in a casual flagstone path.
A few build notes:
- Let each pad cure fully, usually about a week, before walking on it
- Use a broom finish on the wet concrete for grip, since a smooth trowel finish gets slick when wet
- Consider adding a border strip of steel edging to keep the design crisp over time
This is a more involved DIY than gravel or mulch, but it’s still achievable without professional concrete equipment if you’re comfortable mixing and pouring small batches.
Small batch bags of ready-mix concrete are far easier to manage than mixing your own from raw materials, especially for a first attempt. I poured one pad at a time rather than trying to mix and place several forms in a single session.
7. Pebble Mosaic Path
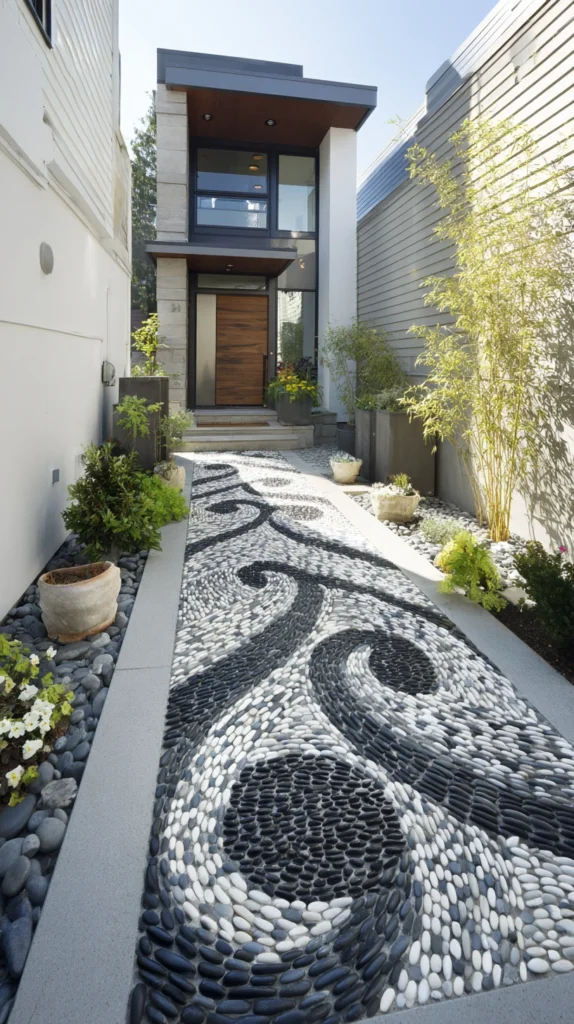
A decorative path made from small river pebbles set in mortar, often arranged in patterns or simple designs.
Pebble mosaic is the most artistic option on this list, and it turns a functional path into something closer to a piece of yard art. Rounded river pebbles are set edge-up in mortar, which creates both texture and a genuinely unique pattern.
I built a short 6-foot stretch of mine near a garden entrance, using a mix of black and white pebbles laid in a simple wave pattern, since a full-length pebble path is a significant time investment.
Budget tip: Buy pebbles in bulk by the bag from a landscaping supply yard rather than small decorative bags from a craft store, which can cost five times as much for the same material.
Things worth knowing before you start:
- This path is slow to build, expect roughly one square foot per hour of focused work
- Pebbles need to be set on edge, not laid flat, for both grip and durability
- Seal the finished mortar to protect the pattern from weathering
Because of the time commitment, most people use pebble mosaic as an accent section rather than an entire pathway, often near an entry point or a focal garden bed.
Sort your pebbles by color and size before you start setting them. Digging through a mixed pile mid-project slows the work down considerably, and having sorted piles within reach made a noticeable difference in how quickly I could keep the pattern consistent.
8. Grass and Paver Grid Path
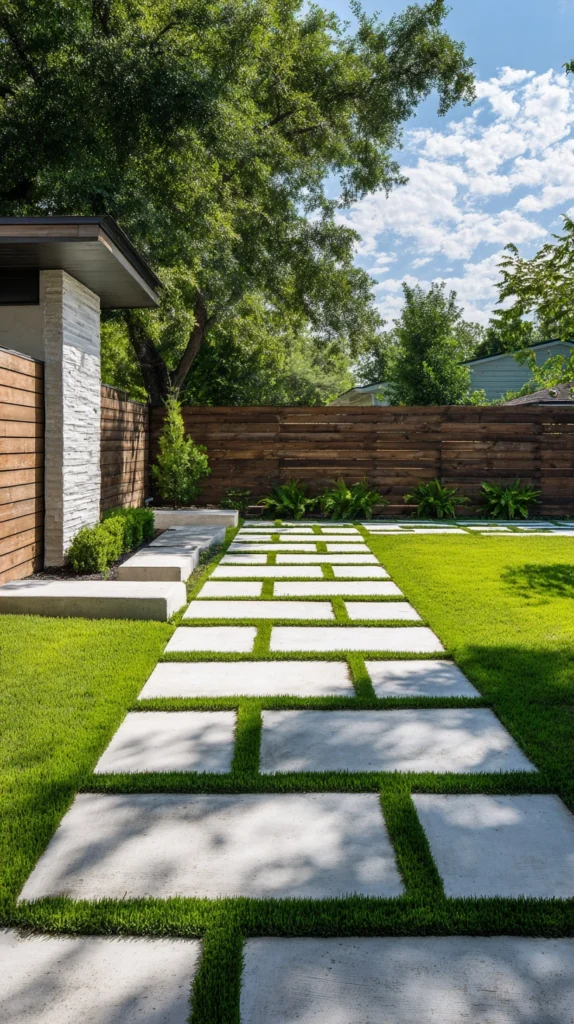
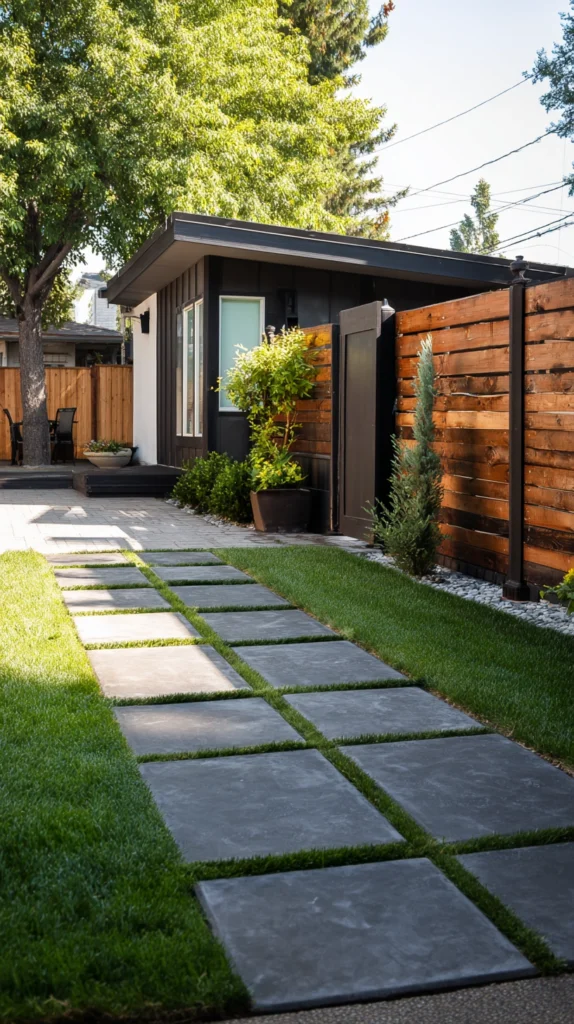
Square or rectangular pavers set with grass growing in the joints between them, creating a checkerboard look.
This design keeps a good amount of green in the yard while still giving you a stable, defined surface to walk on. It’s a popular choice for driveways too, but scaled down it works beautifully as a garden path.
Mine uses 12×12-inch concrete pavers spaced about 3 inches apart, set into a bed of sandy soil with turf grass filling the joints between them.
Style tip: Choose a grass variety that tolerates some foot traffic, since a delicate lawn seed mix will thin out quickly in the joints of a well-used path.
A few practical notes:
- Set pavers slightly below the grass height so a mower can glide right over the entire path
- Water the grass joints more frequently than the rest of your lawn, since the soil volume in each joint is smaller
- Expect to overseed the joints once or twice a year to keep them full
This design gives you the best of both worlds, a defined walking surface and a yard that still reads as mostly green from a distance.
Shade is worth checking before committing to this layout. A joint planted with grass under a heavily shaded tree canopy will thin out no matter how much you overseed, so I swapped a few joints in my shadiest stretch for moss instead of fighting a losing battle with turf.
9. Recycled Material Path (Repurposed and Reclaimed)
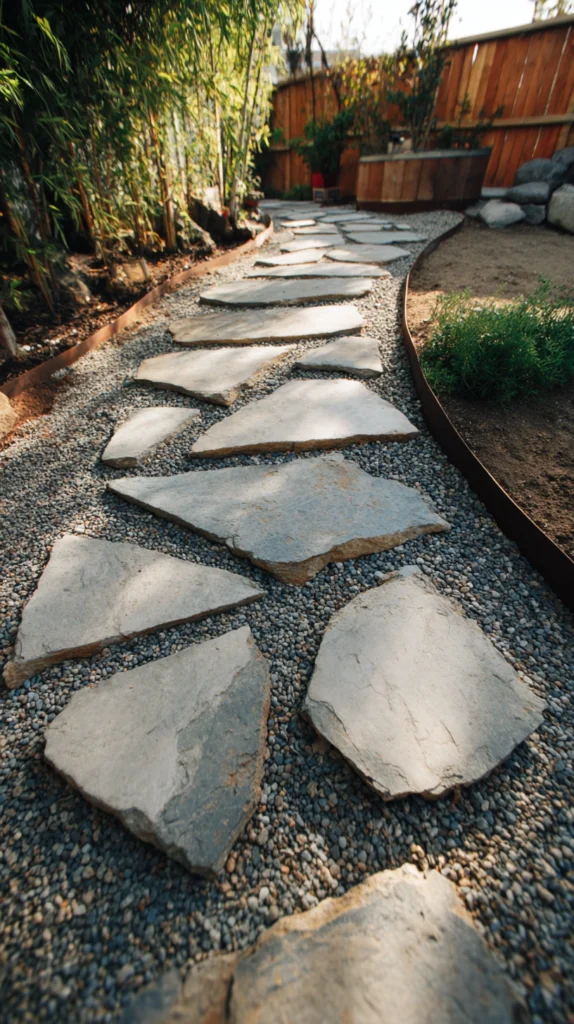
A pathway built from salvaged materials like broken concrete, old bricks, or reclaimed wood rounds instead of new purchased material.
If you’re leaning toward a low-cost, sustainable build, this is the category to explore. Broken concrete, sometimes jokingly called urbanite, can be laid almost exactly like flagstone once you break it into manageable pieces.
I used chunks of broken driveway concrete for a short utility path along my fence line, breaking the larger slabs down with a sledgehammer and laying them the same way I’d lay flagstone.
Budget tip: Post in a local online marketplace asking for free broken concrete or pavers, since homeowners doing driveway or patio demolition are often desperate to avoid a dump fee themselves.
Keep these tips in mind:
- Wear gloves and eye protection when breaking concrete, since edges can be sharp and unpredictable
- Lay pieces with the smoother side facing up for a safer walking surface
- Mix in some new material, like fresh gravel joints, to keep the overall look from feeling too rough
This is easily the cheapest path on the entire list if you have access to demolition debris, and it keeps usable material out of a landfill.
Not all broken concrete looks the same once it’s been outside for a while, so I let my salvaged pile sit through one rain before laying it, which made it easier to spot pieces that were staining or discoloring unevenly and set those aside.
10. Curved Lawn-Edged Stone Path
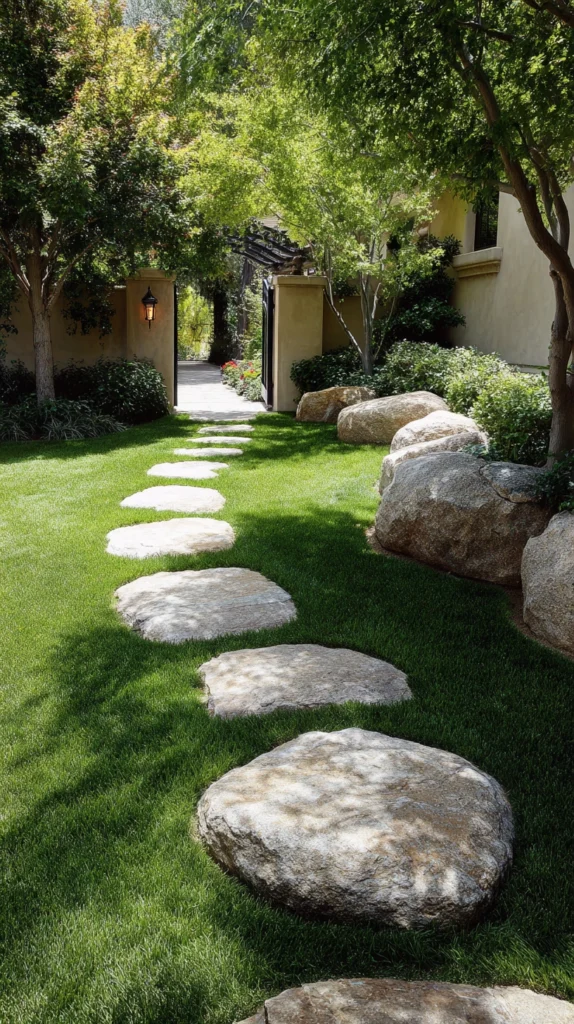
A gently curving stone or paver path bordered by clean, mowed lawn edges rather than mulch or gravel shoulders.
Curves instantly make a yard feel larger and more intentional than a straight shot from one point to another. Pairing a curved path with crisp lawn edges keeps the design feeling tidy even though the line itself is relaxed.
Mine curves gently around an existing tree, using irregular flagstone set into the lawn with a clean, hand-cut edge maintained along both sides.
Style tip: Avoid sharp S-curves or tight zigzags, since a gentle, sweeping curve reads as natural while an exaggerated wiggle looks more like indecision than design.
A few things that keep this design sharp:
- Re-edge the lawn border every few weeks during peak growing season to keep the line crisp
- Use a garden hose laid on the ground to plan the curve before cutting any sod
- Keep the curve radius wide, generally no tighter than what a wheelbarrow could comfortably navigate
The ongoing edge maintenance is the tradeoff here, but the payoff is a path that looks like it was professionally designed rather than just placed.
A half-moon edging tool made a real difference in how crisp the line stayed between mowings. I keep one hanging by the back door specifically for quick touch-ups instead of hauling out a full string trimmer every time the edge starts to blur.
11. Raised Boardwalk Path
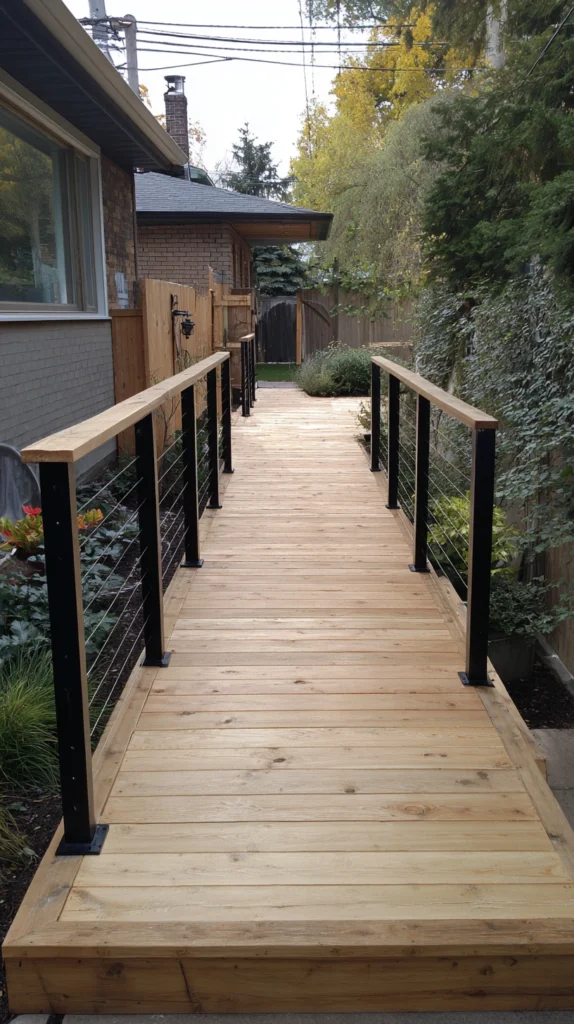
An elevated wooden walkway, useful for crossing wet, low-lying, or uneven sections of yard.
If part of your backyard tends to stay soggy, slopes awkwardly, or has exposed roots, a raised boardwalk solves the problem instead of fighting it. It also adds a distinct architectural element that flat paths can’t offer.
I built mine over a low spot that used to turn into standing water after every heavy rain, using pressure-treated joists set on concrete deck blocks and cedar decking boards laid across the top.
Budget tip: Use composite decking scraps or end-of-run lumber from a home improvement store’s discount rack, since a narrow boardwalk doesn’t need full-length boards for most of its run.
A few build considerations:
- Space deck blocks no more than 4 feet apart to prevent sagging over time
- Leave small gaps between boards for drainage and airflow underneath
- Add a simple handrail if the boardwalk sits more than a few inches above grade
This is a more carpentry-heavy project than most on this list, but it’s often the only design that actually solves a genuinely wet or uneven yard problem.
Pressure-treated lumber is worth the extra cost over standard cedar for anything touching the ground or sitting near consistent moisture, even though cedar looks nicer initially. My deck blocks are rated for ground contact too, which matters more in a low, damp spot than it would on a dry, elevated deck.
12. Tumbled Glass and Pebble Border Path
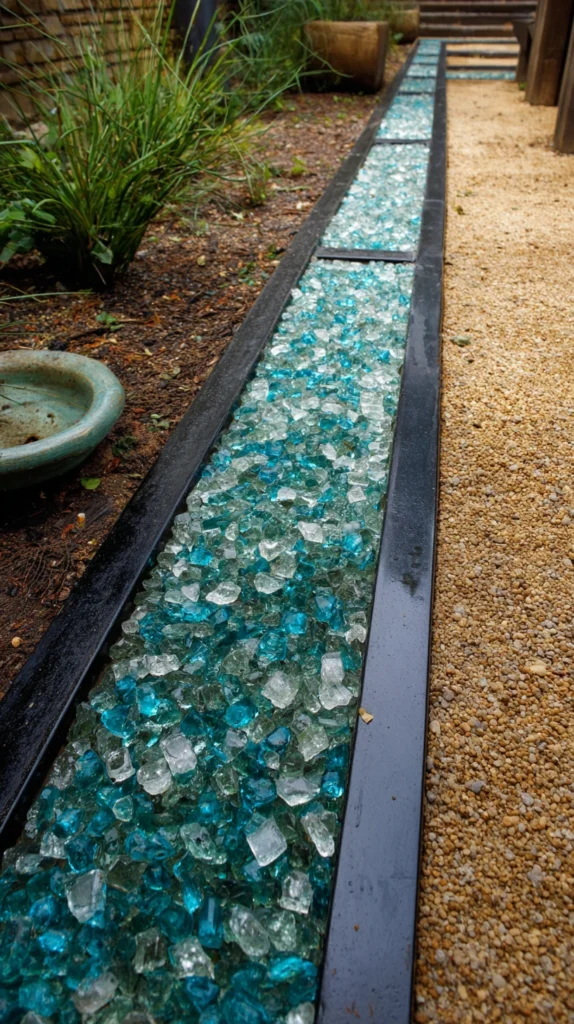
A gravel or decomposed granite path accented with borders of tumbled recycled glass or colored pebbles.
This is a fun way to add color and a little shimmer to an otherwise neutral gravel path, especially in a modern or coastal-themed yard. Tumbled glass is smooth and safe underfoot, made specifically for landscaping use.
I ran a strip of decomposed granite down the center of mine, bordered on both sides with a narrow ribbon of blue and green tumbled glass held in place with steel edging.
Style tip: Use tumbled glass only as an accent border, not the entire walking surface, since covering a full path in glass gets expensive fast and isn’t necessary to get the visual effect.
A few things worth knowing:
- Always buy glass labeled specifically for landscaping, since it’s tumbled smooth and safe to walk near
- Keep the glass border narrow, 3 to 4 inches is usually enough to catch the eye without dominating
- Rinse the glass occasionally to keep dust and pollen from dulling its shine
This is one of the more distinctive, less common pathway ideas here, and it stands out especially well lit by low-voltage path lighting at night.
Direct sunlight makes a genuine difference in how much the glass catches light throughout the day, so I placed my border along the sunnier side of the path rather than centering it, which gives it a noticeably brighter glow during peak afternoon hours.
13. Interlocking Rubber Paver Path
Recycled rubber pavers, often made from repurposed tires, snapped or set together to form a soft, slip-resistant path.
Rubber pavers are a practical choice for anyone dealing with mobility concerns, kids, or pets, since the surface is soft, grippy, and far more forgiving underfoot than stone or concrete.
I used interlocking rubber pavers for a short run connecting the patio to a play area, since the give in the material made it an easy sell for a yard that gets a lot of barefoot traffic.
Budget tip: Look for rubber pavers made from recycled tires rather than new rubber compounds, which are typically both cheaper and more environmentally friendly.
A few notes on installation:
- Set pavers on a level, compacted base, since the interlocking edges need a flat foundation to stay snug
- Choose a textured surface finish for better grip when wet
- Expect some color fading over years of sun exposure, which is normal for most rubber paver products
This isn’t the most visually elegant option on the list, but it’s hard to beat for comfort, safety, and sheer practicality in a high-traffic family yard.
Temperature swings affect rubber more than most other paving materials, so panels can expand slightly in peak summer heat. I left a small gap between sections during installation rather than butting them perfectly tight, which has prevented any buckling through two full summers.
14. Living Groundcover Path
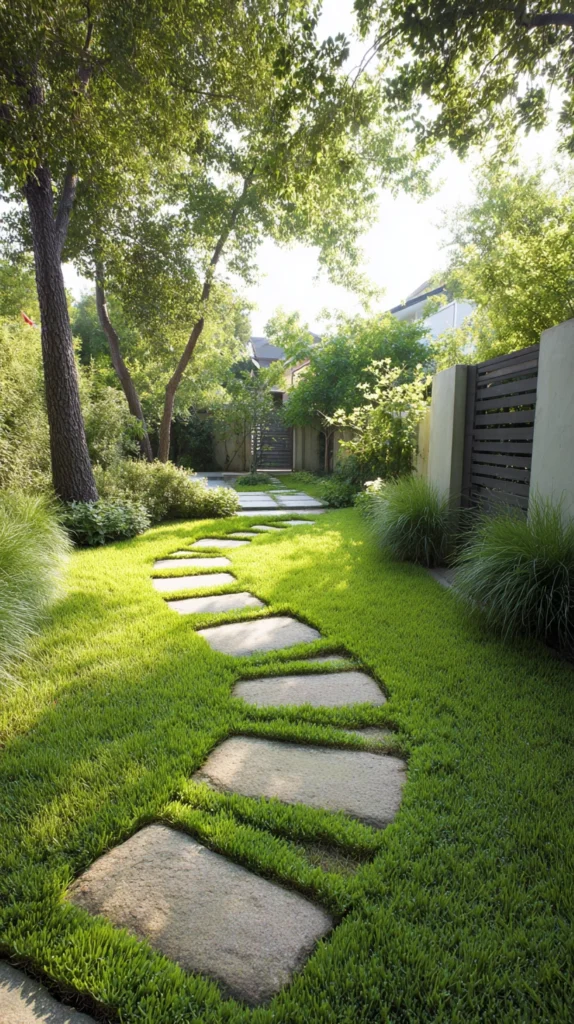
A path made almost entirely of a tough, walkable groundcover like creeping thyme or Irish moss, with minimal or no hard material at all.
This is the softest, greenest version of a pathway you can build, essentially replacing hard material with a living carpet that can handle light foot traffic. It works best in a route that doesn’t get heavy daily use.
I converted a side path that only gets occasional foot traffic into a solid stretch of creeping thyme, using a handful of stepping stones spaced through it just for definition rather than full coverage.
Style tip: Choose a groundcover variety specifically rated for foot traffic, since ornamental groundcovers that aren’t built for walking will thin out and die back within a season.
A few things that make this work long term:
- Start with plugs rather than seed for faster, more even establishment
- Keep a few strategically placed stepping stones for wetter months when soil stays soft
- Expect a full season before the groundcover fills in completely and can handle regular walking
Once established, this is genuinely one of the lowest-cost, lowest-maintenance paths here, and it smells incredible every time you brush past it.
Foot traffic is what actually helps creeping thyme spread and thicken over time, so resist the urge to route around it while it establishes. Light, regular walking encourages denser, tighter growth compared to a section that’s fenced off and left completely untouched.
Quick-Start Shopping List
- Landscape fabric and steel or aluminum edging for gravel paths
- Pre-cast concrete stepping pavers for a fast lawn path
- Reclaimed brick or broken concrete from a local salvage source
- Creeping thyme or Irish moss plugs for joint fill or a full groundcover path
- Polymeric sand for locking brick or paver joints in place
Budget-Friendly and Rental-Friendly Version
If you’re renting or don’t want anything permanent, stick with stepping stones set directly on top of the lawn or a gravel path with removable edging. Both can be lifted and relocated without leaving a scar on the yard, and neither requires digging a permanent foundation.
Success Indicators
You’ll know a pathway design is working when people actually walk on it instead of cutting a shortcut through the grass next to it, when it still looks clean after a season of weather and foot traffic, and when maintaining it takes minutes rather than becoming its own weekend chore.
A good path also earns its keep in the off season. If it still looks intentional and holds its shape through winter or a dry summer with no upkeep at all, the design and materials were the right fit for your climate.
- Foot traffic naturally follows the path instead of cutting new shortcuts beside it
- The surface stays stable and even after a full season of weather
- Edges, joints, or borders hold their shape without constant touch-ups
- The path still looks intentional in photos taken months after installation, not just the day it was finished
Remember: the best backyard pathway is the one that follows the route you actually walk, matches the amount of maintenance you’re honestly willing to do, and fits the overall feel of your yard rather than fighting against it, so pick the idea that solves a real problem in your space before you pick the one that just looks best in photos.