14 Easy Backyard Vegetable Garden Design Ideas Anyone Can Pull Off
My first vegetable garden was a sad rectangle of tilled dirt against the back fence.
It grew food, technically. But it looked like an afterthought, and honestly, it felt like one too.
Then I started treating garden design as seriously as I treat garden growing. Same plants, same soil, completely different result.
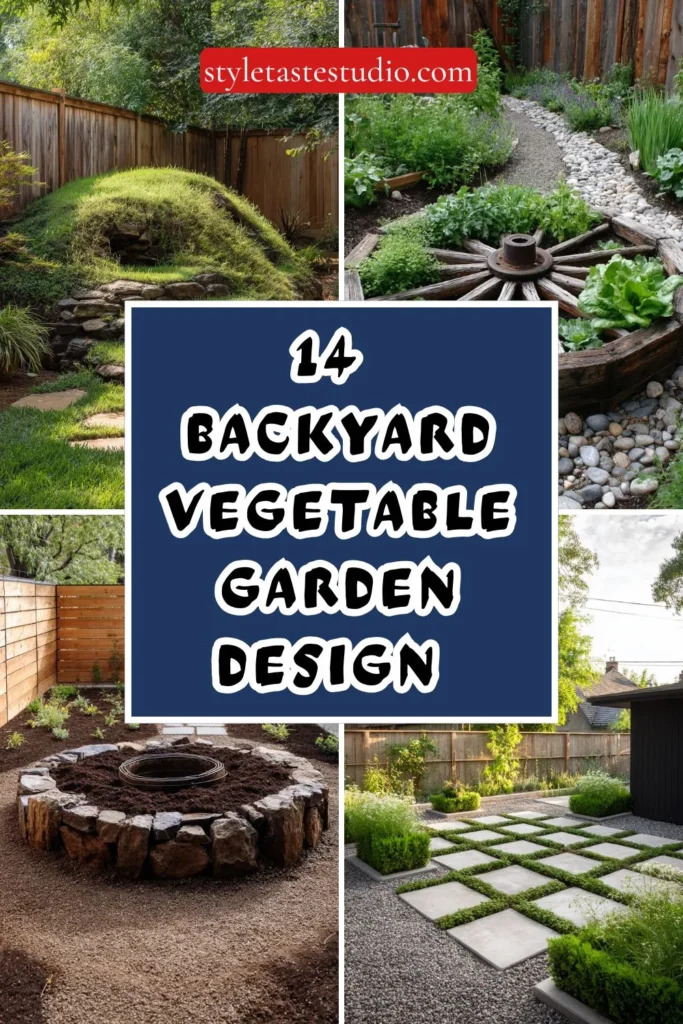
Here are 14 backyard vegetable garden designs that turn a plain patch of dirt into something you actually want to walk outside and look at.
Every one of these is beginner-friendly. No landscape architecture degree required, and most can be built over a single weekend with tools you probably already own.
I’ve grouped them loosely from structured and formal on one end to loose and low-effort on the other, so skim ahead to whichever style matches your yard, your budget, and honestly, your patience level.
1. The Classic Raised Bed Grid
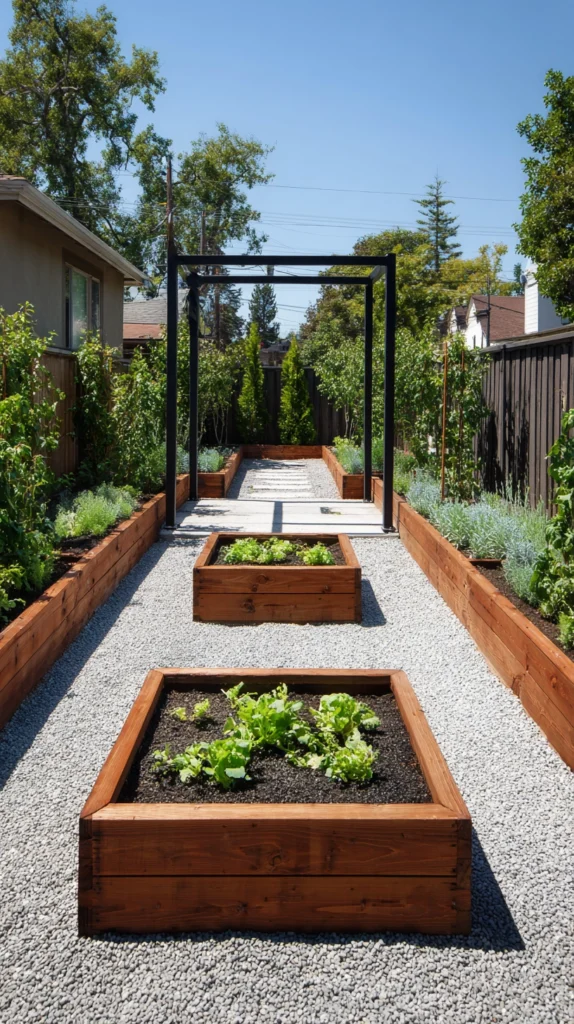
Four rectangular beds arranged in a simple grid with gravel or mulch paths between them.
This is the design most people picture when they think “vegetable garden,” and there’s a reason it’s stuck around for decades. It’s orderly, it’s easy to maintain, and it makes crop rotation almost automatic since you’ve already got four distinct sections.
I built mine with 2×10 cedar boards, four beds at 4×8 feet each, with 2-foot gravel paths running between them in a plus-sign pattern. A trellis arch over the center path where two beds meet gives it a focal point instead of just four boxes sitting in a yard.
Budget tip: Untreated pine from a big box store runs about a third of the cost of cedar and will still last 5-7 years if you don’t mind replacing boards eventually.
The grid layout also makes irrigation simple. A single soaker hose can snake through all four beds if you plan the paths right, which saves you from dragging a hose around every evening.
What I like most is that it photographs well. If you ever want to sell your house, or just show off on Instagram, a tidy grid reads as “intentional” in a way that scattered pots never do.
One thing I’d do differently if I rebuilt it: I’d size the beds to exactly double the width of my arm’s reach, around 3 to 4 feet, instead of guessing. Anything wider and you end up stepping into the bed to reach the middle, which compacts soil you worked hard to keep loose.
2. The Keyhole Garden
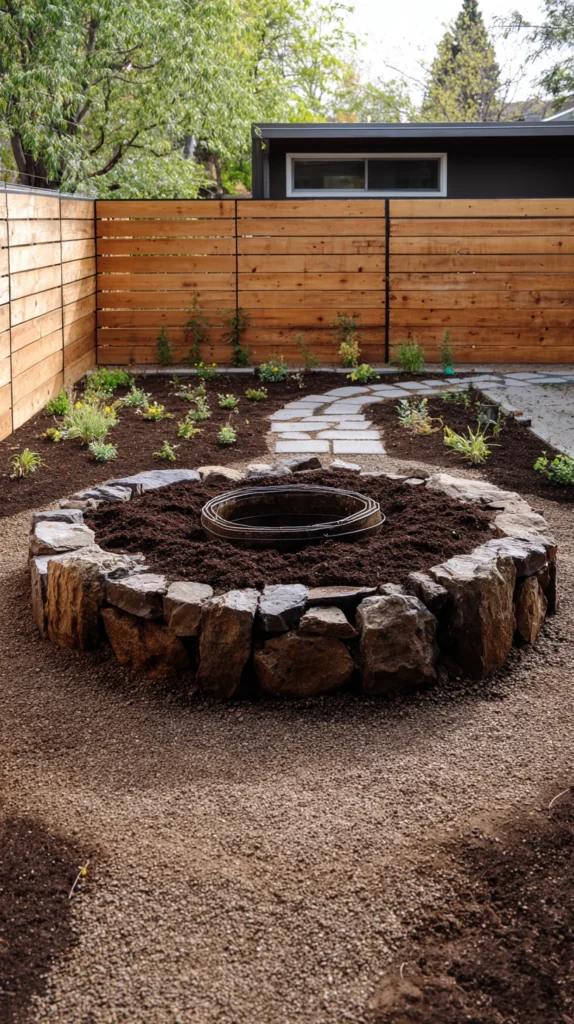
A circular or horseshoe-shaped bed with a notch cut in so you can walk into the center without stepping on soil.
Keyhole gardens originated as a solution for water-scarce regions, built with a compost basket in the middle that feeds nutrients and moisture outward as you water it directly.
Mine is roughly 6 feet across, built from stacked stone with a wire mesh compost cylinder standing in the dead center. I toss kitchen scraps and yard waste into that cylinder weekly, and the whole bed feeds off the runoff.
Style tip: Build the walls a few inches taller on the back side than the front, so the bed slopes gently toward the center and water naturally drains where the compost basket sits.
The compact footprint means you can grow an enormous variety of vegetables in a small space, since almost every plant is within arm’s reach from the center notch.
It’s also one of the lowest-maintenance beds I’ve built. Because you’re never stepping on the soil, it never compacts, and the compost core keeps fertility high without me adding much else during the season.
The one thing that catches people off guard is the wall height. Go too low and you’ll be bending over anyway, which defeats the purpose. I settled on 3 feet at the tallest point after realizing my first attempt at 18 inches still had me stooping to weed.
3. Cottage-Style Mixed Beds
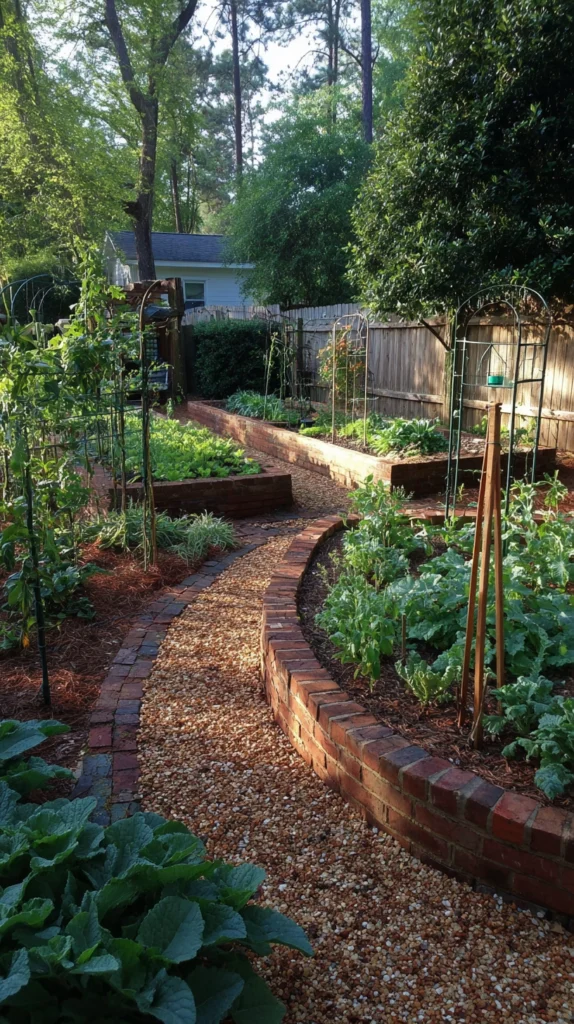
Vegetables, herbs, and flowers planted together in loose, informal drifts instead of separated rows.
This design borrows from English cottage gardens, where nothing is planted in a straight line and everything is meant to spill into everything else. Tomatoes lean against zinnias, lettuce edges tuck under calendula, and basil fills whatever gaps are left.
I dedicated one 10×10 section of my yard to this approach, using a curved border of reclaimed brick instead of a straight-edged bed. Height goes toward the back with staked tomatoes and pole beans, then steps down through bushy peppers and eggplant, finishing with a low border of lettuce, marigolds, and nasturtiums.
Budget tip: Skip buying separate flower seed packets and use marigolds and calendula, which are cheap, self-seed readily, and double as pest deterrents for your vegetables.
The mixing isn’t just for looks. Interplanting vegetables with flowers confuses pests that hunt by scent, and it draws in pollinators that your tomatoes and squash need to set fruit.
This is also the most forgiving design on this list if your plant spacing knowledge is shaky. Because everything is layered and irregular, a slightly crowded pepper plant just reads as “lush” instead of “mistake.”
I do still map out a rough plan on paper before planting, even though the final look is loose. Grouping in odd-numbered clusters of three or five, rather than planting single specimens scattered evenly, is what actually creates that “drift” effect instead of a random scatter.
4. The Potager (French Kitchen Garden)
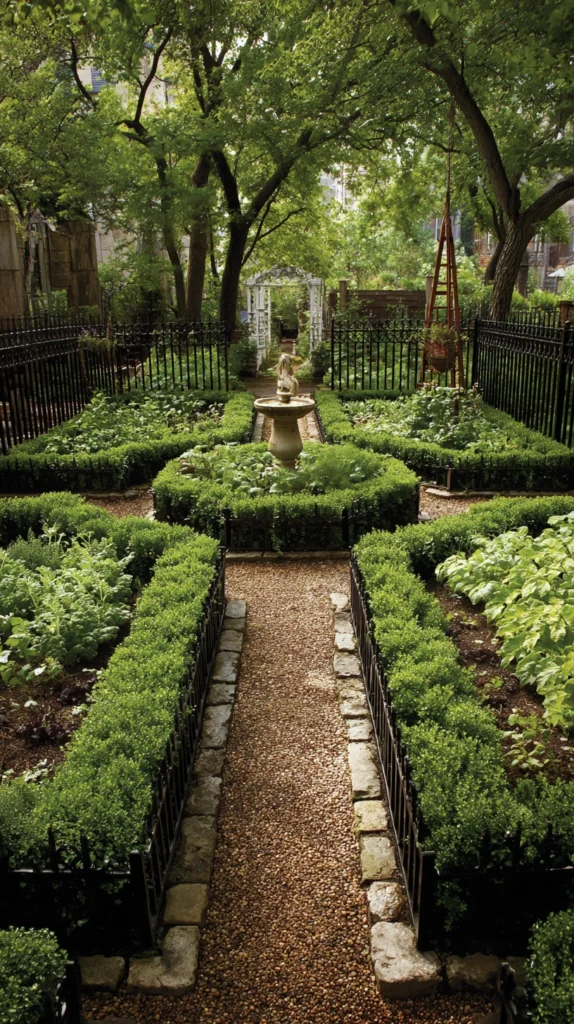
A formal geometric layout, usually with a central path and symmetrical beds, designed to be as decorative as it is productive.
The potager tradition comes from French estate gardens where the vegetable plot sat right outside the kitchen door and was expected to look elegant enough for guests to stroll through.
I laid mine out as four triangular beds meeting at a central sundial, edged in dwarf boxwood I picked up on clearance. Each triangle gets planted with a different color theme, deep purple basil and eggplant in one, bright orange calendula and carrots in another.
Style tip: Edge each bed with a low, consistent border like boxwood, lavender, or even painted brick, since the crisp outline is what makes a potager read as formal instead of just another vegetable patch.
Symmetry is the whole point here, so resist the urge to let one bed run wild while the others stay tidy. If a plant in one quadrant needs staking, stake its mirror in the opposite quadrant too, even if it doesn’t strictly need it yet.
This design takes a bit more upfront planning than the others, but the payoff is a garden that looks intentional and finished from the very first season, before anything has even fully grown in.
Keep the central feature simple. A sundial, birdbath, or even a large terracotta pot works fine, since the geometry of the beds is doing most of the visual work already, and an overly busy centerpiece competes with it instead of anchoring it.
5. Vertical A-Frame Trellis Rows
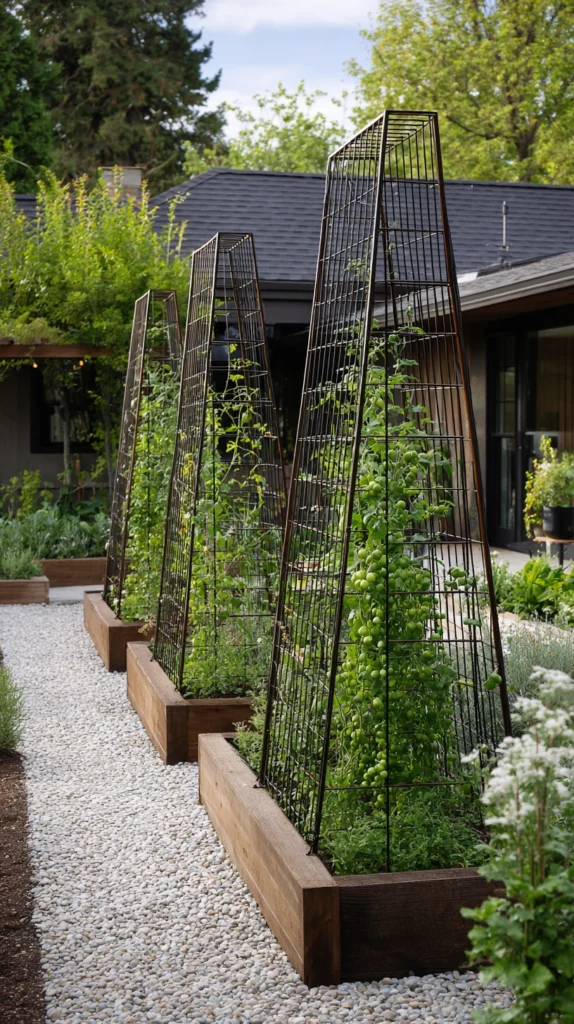
Freestanding A-frame trellises that turn flat garden space into climbing wall space for vining crops.
If your backyard is narrow or your soil is poor, going vertical solves both problems at once. An A-frame trellis takes up almost no ground footprint while giving cucumbers, pole beans, and small melons a full 6 feet of climbing surface.
I built mine from cattle panel bent into an arch and secured to wooden stakes at both ends, straddling a narrow 18-inch bed. Cucumbers climb one side, pole beans climb the other, and the shaded tunnel underneath is cool enough that I tuck lettuce and spinach beneath it through early summer.
Budget tip: A single 16-foot cattle panel costs less than three pre-made trellis kits and can be cut and bent into two or three separate A-frames for different beds.
Vertical growing also makes harvesting dramatically easier on your back. No more crouching to find cucumbers hidden under sprawling vines, everything hangs at eye level or waist level instead.
Airflow around vertical plants is better too, which cuts down on the powdery mildew and fungal issues that flat-grown squash and cucumbers are prone to in humid climates.
Anchor the legs deep and secure. A fully grown cucumber vine loaded with fruit catches wind like a sail, and I learned that lesson the hard way when an under-staked frame toppled mid-July, taking the whole harvest down with it.
6. The Wagon Wheel Herb and Vegetable Bed
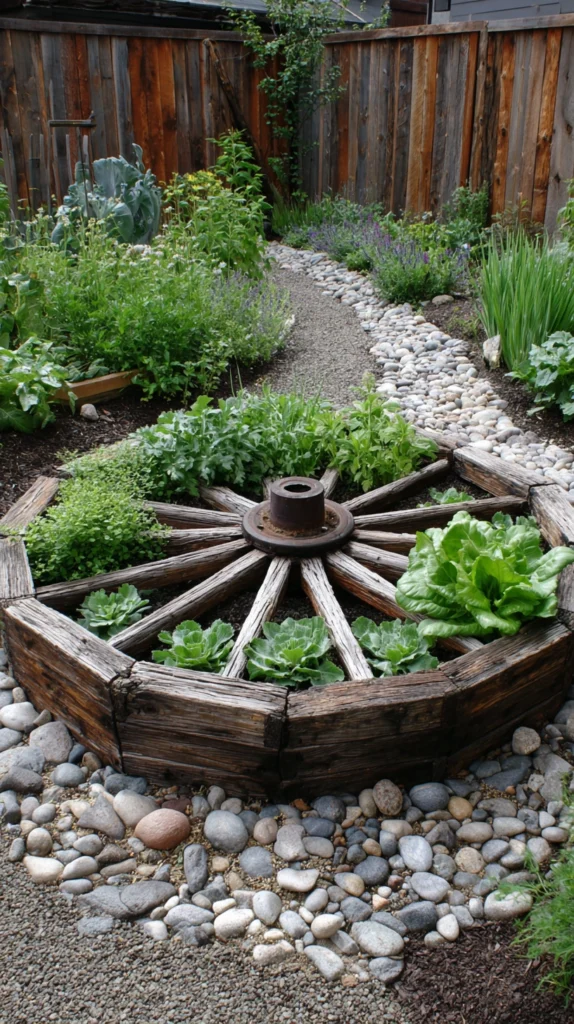
A circular bed divided into wedge-shaped sections by an actual or implied wagon wheel pattern, radiating from a center point.
This is a close cousin of the mandala garden, but scaled down and focused specifically on kitchen crops instead of ornamental color blocking. Each wedge holds one crop family, which makes rotation and harvesting almost effortless.
Mine is built around an old wooden cart wheel I found at a salvage yard, laid flat on the ground as the literal dividing structure between eight small wedges. Herbs fill the wedges closest to the center where the soil stays driest, while thirstier crops like lettuce and chard take the outer wedges.
Style tip: If you can’t find a real wagon wheel, brick or flat stone laid in radiating lines creates the exact same visual effect for a fraction of the hunt.
The circular shape means nothing is ever more than a couple steps from a path, so you’re never trampling through one crop to reach another.
It’s also a genuinely fun design for kids to help plant, since each wedge is small enough to be its own mini project instead of one overwhelming bed.
Keep the wedges roughly equal in size, even if the crops inside vary in vigor. Uneven wedges throw off the radial symmetry that makes this design read as deliberate, and it starts looking lopsided the moment one section outgrows its neighbors.
7. Raised Bed and Container Combo Patio Garden
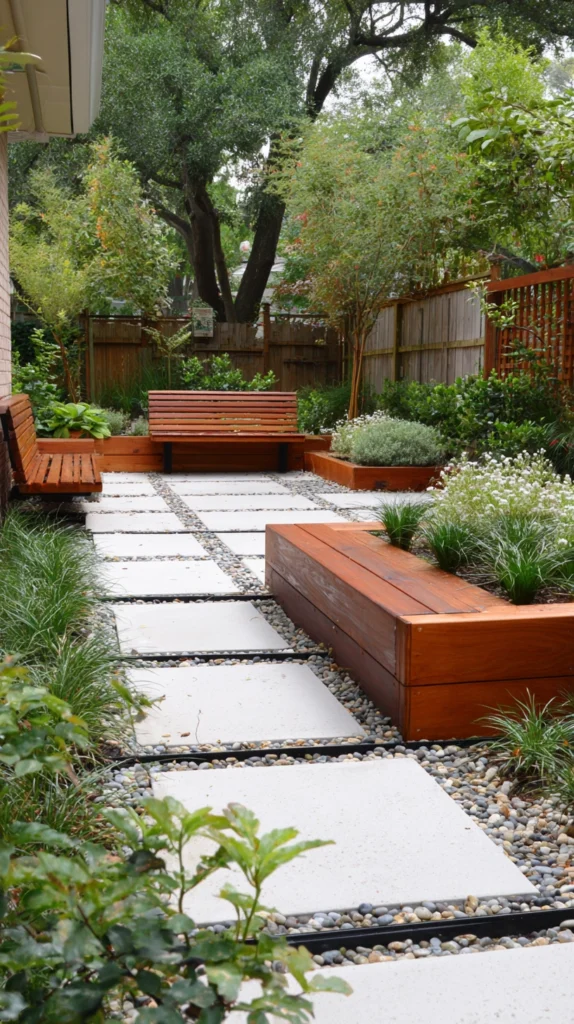
A mix of raised beds and large containers arranged on a patio or hardscape area for renters or small yards.
Not everyone has open dirt to work with, and this design proves you don’t need it. By combining a couple of low raised beds with a rotating cast of large fabric grow bags and glazed ceramic pots, you get the visual weight of a full garden on a completely paved surface.
My patio setup uses two 2×4 raised beds along the fence line for deep-rooted crops like tomatoes and peppers, plus a cluster of 15-gallon fabric grow bags for potatoes, and a few glazed pots for herbs near the door.
Budget tip: Fabric grow bags cost a fraction of ceramic pots and actually grow better roots because they air-prune, so save the pretty ceramic for a couple of statement herb pots and use fabric bags for the workhorse crops.
Grouping containers in odd numbers, three or five instead of two or four, reads as more intentional and less like leftover pots scattered around.
Because everything is mobile, this design is also the easiest one to reconfigure through the season, sliding heat-loving pots into full sun in June and pulling lettuce pots into afternoon shade once July gets brutal.
Containers on hardscape dry out faster than in-ground beds, no matter how large the pot. I check mine daily in peak summer, and a layer of mulch on top of the container soil cuts down noticeably on how often I’m hauling out the watering can.
8. The Salad Table
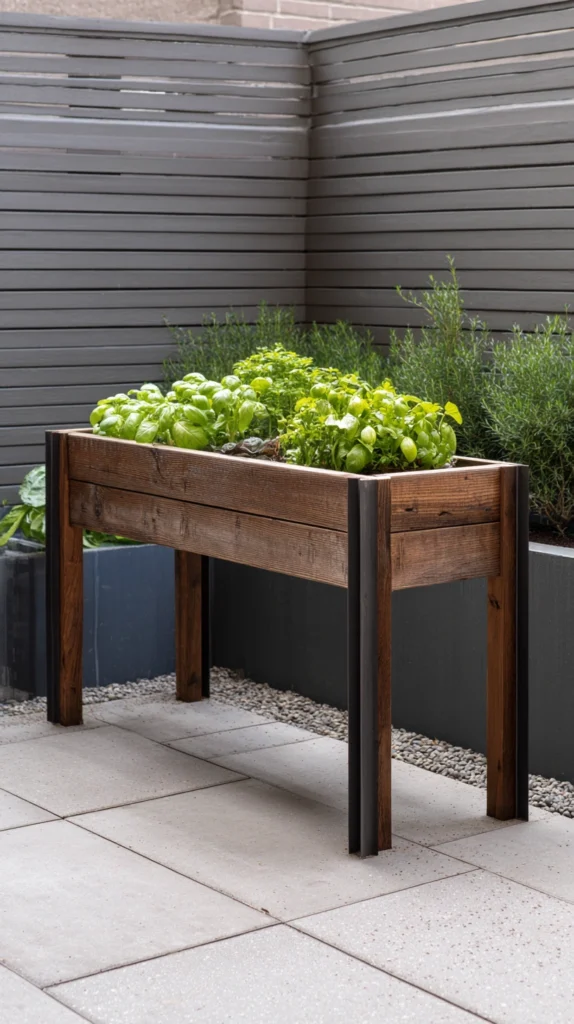
A single elevated, shallow bed on legs, built specifically for quick-growing greens and herbs at counter height.
A salad table solves the specific problem of bending over to harvest lettuce, and it does it in a footprint small enough for even the tightest backyard or apartment patio.
Mine is a simple wooden frame, about 2×4 feet, standing on legs at 30 inches, with a shallow 6-inch soil depth and hardware cloth stapled underneath for drainage. Shallow-rooted greens like lettuce, spinach, arugula, and herbs are the only thing it’s built for, but it produces an absurd amount of salad from a tiny space.
Style tip: Paint the frame a bold color, I used a deep teal, since a salad table sits right at eye level on a patio and functions almost like a piece of furniture rather than a hidden garden bed.
Because the soil depth is shallow, it dries out faster than a full raised bed, so plan on watering every day or two in warm weather rather than the every-few-days schedule a deeper bed allows.
The real advantage is succession planting. With such a small area, you can resow a section every couple weeks and keep a steady rotation of baby greens coming all season instead of one big harvest that bolts before you can eat it all.
Make sure the legs are wide and stable, not just tall. A narrow-footed table loaded with wet soil can tip in a strong gust, so I widened my base stance about halfway through building mine after a test wobble made it clear the original design wasn’t going to hold.
9. Straw Bale Row Garden
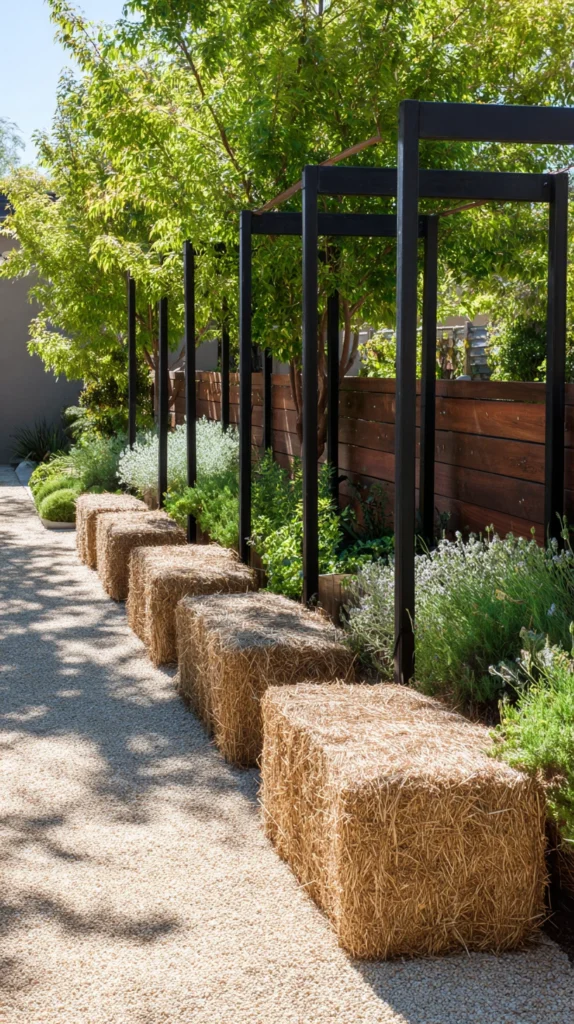
Vegetables planted directly into conditioned straw bales lined up in rows, no digging required.
Straw bale gardening is the answer for anyone dealing with terrible native soil, a sloped yard, or a landlord who won’t allow permanent beds. You condition the bales with a couple weeks of watering and nitrogen fertilizer, then plant straight into them.
I lined up eight bales in two rows of four along a side yard that had nothing but compacted clay underneath. By the end of the season the bales had started composting themselves, and I planted a second round of fall greens directly into the same softened bales.
Budget tip: Ask a local farm supply store for bales that are slightly damaged or discounted at the end of the season, since a cracked bale performs exactly the same for gardening purposes as a perfect one.
The bales themselves become an attractive, uniform design element, especially if you arrange them in a clean row and let vining crops like squash trail down the sides.
At the end of the season, the spent bales break down into excellent compost, so this design essentially builds your soil for next year while producing this year’s harvest.
Conditioning is the step people skip, and it’s the one that matters most. Skimp on the two weeks of watering and nitrogen feeding, and the bale won’t have started breaking down enough to hold moisture or feed your plants once you transplant into it.
10. Hugelkultur Mound Bed
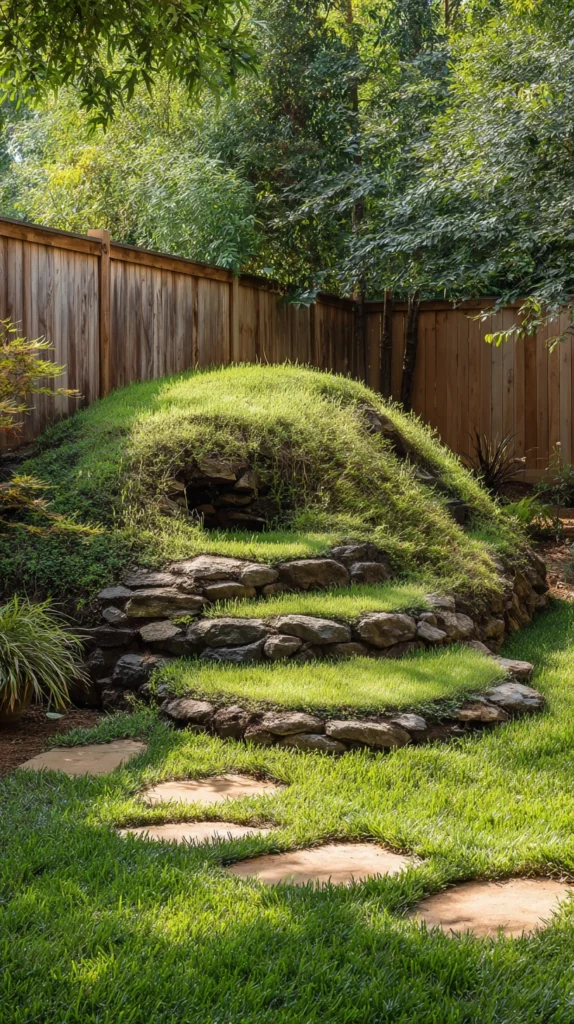
A raised mound built over buried logs and branches, which slowly decompose and feed the bed for years.
Hugelkultur is a German permaculture technique that turns yard waste into a self-fertilizing raised bed. You dig a shallow trench, fill it with logs, branches, and brush, then cover the whole pile with soil and compost to create a mounded bed.
My mound sits about 3 feet tall at the center and 8 feet long, built over a pile of old fallen branches I would have otherwise paid to have hauled away. The buried wood acts like a sponge, holding moisture deep in the bed so I water noticeably less than my flat beds nearby.
Style tip: Plant low, trailing crops like squash or strawberries near the base of the mound and taller crops like tomatoes or trellised beans toward the top, so the whole shape reads as a deliberate tiered hill rather than a lumpy pile of dirt.
The decomposing wood inside generates gentle warmth as it breaks down, which can extend your growing season slightly on both ends compared to a flat bed sitting at ground temperature.
It does take real effort to build the first time, but a well-built hugelkultur mound can keep feeding a bed for 5-10 years before it needs to be rebuilt, which makes it one of the lowest long-term maintenance designs here.
Expect the mound to settle noticeably in the first year, sometimes losing a foot of height as the buried wood compresses. I plant lighter, shallow-rooted crops that first season and save the deeper-rooted, heavier feeders for once the mound has stabilized.
11. Espalier Fruit and Vegetable Fence Line
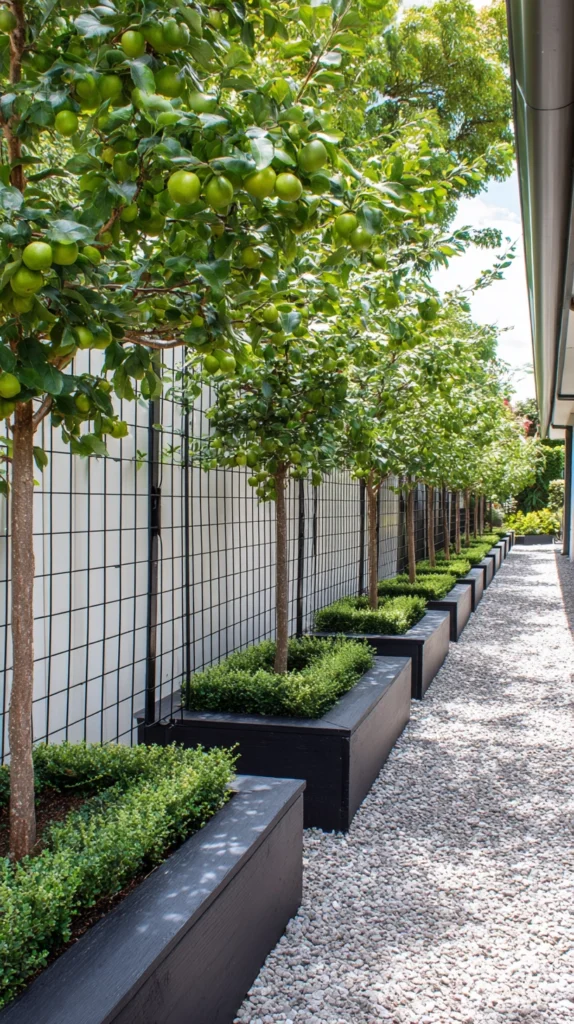
Fruit trees or vining vegetables trained flat against a fence or wire framework along a property line.
Espalier is traditionally a fruit tree technique, but the same wire-and-training method works beautifully for vining vegetables along a fence you already have. It turns a boring boundary line into a productive, sculptural feature.
I strung horizontal wires along my back fence at 18-inch intervals and trained a mix of espaliered dwarf apple and grape vines across it, filling gaps below with bush beans that don’t need the wire at all.
Budget tip: Galvanized wire and eye screws cost under $20 to wire an entire fence line, which is far cheaper than any pre-built trellis system of the same length.
Training takes patience, you’re tying and redirecting new growth every couple of weeks through the growing season, but the flat, tidy result looks like something out of a design magazine rather than an accident.
This is also a smart choice if your yard is genuinely narrow, since an espaliered fence line produces a real harvest while taking up almost no depth of usable ground.
If you’re renting, check with your landlord before attaching wire directly to a shared fence, and consider building a freestanding wire frame just in front of it instead, so the training structure comes down with you when you move.
12. Sunken Bed (Waffle Garden)
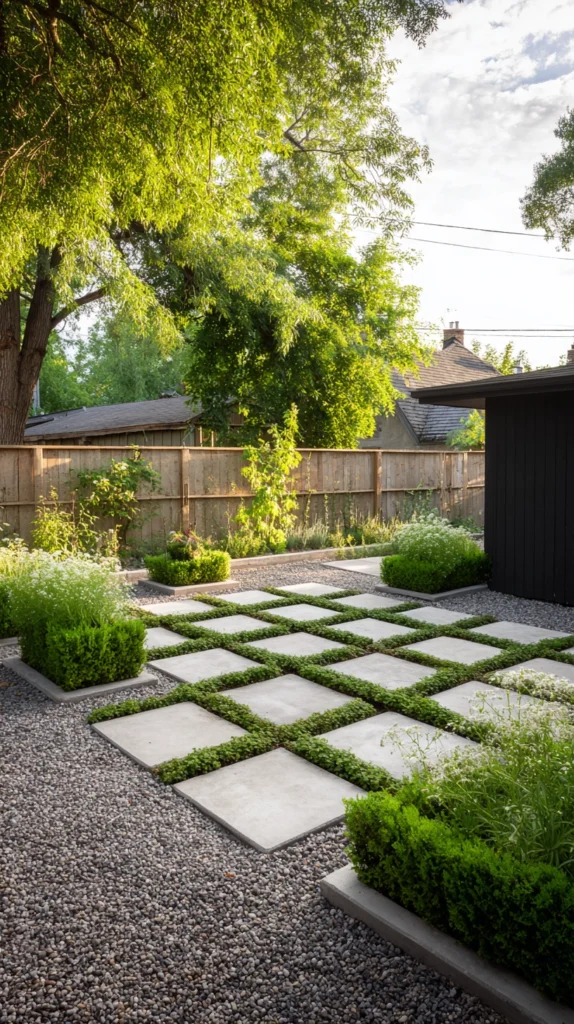
Beds dug slightly below grade with raised soil borders, designed to trap and hold water in dry climates.
This is an old Southwestern design, sometimes called a waffle garden, built for regions where water is precious. Instead of raising the bed up, you dig it down a few inches and build small soil berms around each planting pocket to catch every drop of water or rain.
I built mine in a hot, dry corner of the yard that used to bake into hardpan by July. Each planting pocket is about 2×2 feet, dug 4 inches below grade, with a 3-inch soil berm ringing it, arranged in a grid of nine pockets like a tic-tac-toe board.
Style tip: Mulch the sunken pockets heavily with straw or wood chips, since the mulch combined with the sunken shape can cut watering frequency nearly in half compared to a flat bed in the same spot.
Each pocket can hold its own crop, so this design works like a mini grid garden while solving a completely different problem than raised beds do.
If you live somewhere hot and dry, this is genuinely one of the most water-efficient designs you can build, and it costs nothing but the labor of digging.
This design isn’t a fit for areas with heavy rainfall or poor drainage, since the sunken pockets can fill and stay soggy after a storm. Save it for genuinely arid or seasonally dry climates where every drop of water is worth trapping.
13. Living Fence Vegetable Border
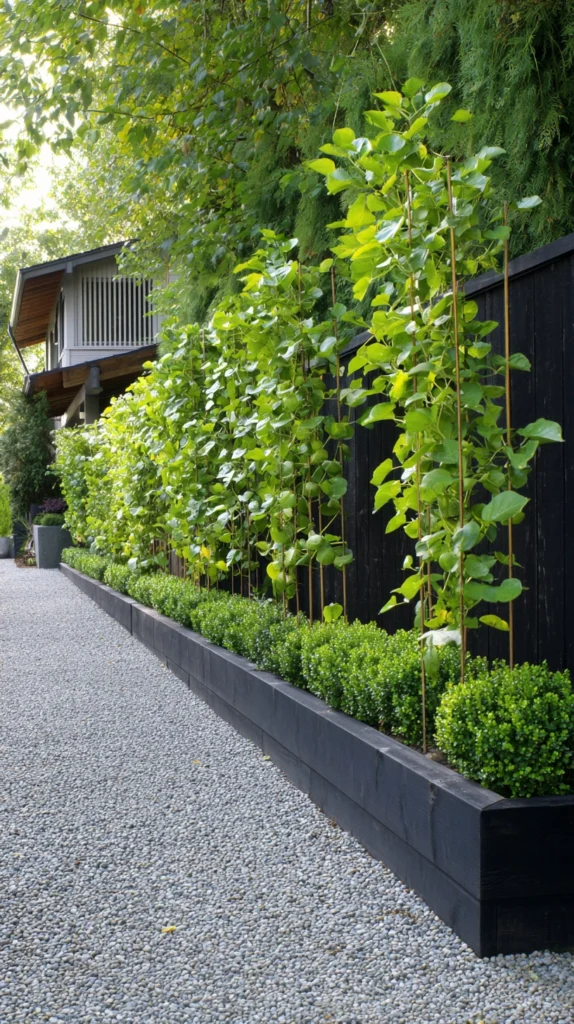
A dense border planting of tall, structural vegetables like corn, amaranth, or okra used to define garden edges instead of a built fence or hedge.
Instead of buying lumber or hedging shrubs to mark the edge of your vegetable garden, you plant a living wall of tall crops that does the job for free while also feeding you.
I used a mixed row of sweet corn, red amaranth, and okra along the back property line, all planted close together in a single dense row about 18 inches wide. By midsummer it’s a solid 6-foot wall of texture and color that completely screens the neighbor’s shed.
Budget tip: Amaranth reseeds itself aggressively once established, so after the first year you’ll get a free living fence with almost no seed cost at all.
Because the border is doing double duty as screening and as food, you get privacy and a harvest from the same strip of ground you might otherwise waste on ornamental shrubs.
The one tradeoff is that this border needs full sun and will cast shade on whatever’s directly behind it, so plan shade-tolerant crops like lettuce on the north side of your living fence.
Corn especially needs to be planted in blocks rather than a single thin line to pollinate properly, so if corn is part of your border, double up the row width in at least one section rather than keeping it a single stalk deep the entire length.
14. The No-Dig Lasagna Bed
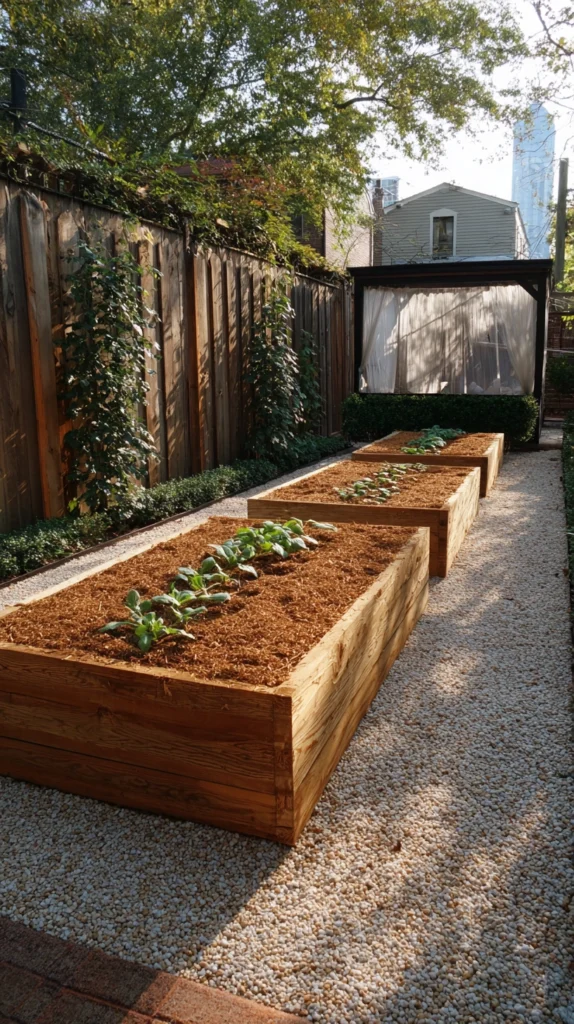
Layered cardboard, compost, and mulch built directly on top of grass or bare dirt, with no tilling or digging at all.
Lasagna gardening, also called sheet mulching, is the fastest way to build a new bed from scratch without renting a tiller or breaking your back with a shovel. You layer cardboard directly over grass to smother it, then stack compost, leaves, and mulch on top.
I built a 4×12 bed this way over what used to be a patch of struggling lawn, using flattened moving boxes as the base layer, then alternating compost and shredded leaves until the pile stood about 10 inches tall. I let it sit for a month before planting, though you can technically plant into it immediately if you add a few inches of finished compost on top.
Budget tip: Cardboard and fall leaves are free almost everywhere, so a full-sized lasagna bed can be built for the cost of a few bags of compost, often under $30 total.
The layered look, especially right after building it, has a tidy, deliberate appearance that a lot of new gardeners don’t expect from what’s essentially a compost pile.
Over a season or two, the whole thing breaks down into rich, loose soil that’s noticeably better than anything you’d get from tilling the original ground, and the grass underneath is long gone by the time you’re done.
Overlap the cardboard layer generously, at least a few inches at every seam, since grass and weeds will find any gap and push straight through it within weeks. This is the one shortcut that guarantees you’ll be dealing with a weedy mess halfway through the season.
Quick-Start Shopping List
- Untreated cedar or pine boards for raised beds
- A roll of galvanized wire or one cattle panel for trellising
- Flattened cardboard boxes and bagged compost for a lasagna bed
- Fabric grow bags for a container or patio setup
- Marigold and calendula seed packets for interplanting
Budget-Friendly and Rental-Friendly Version
If you’re renting or working with a tight budget, skip anything permanent. Fabric grow bags, a salad table on legs, and a straw bale row can all be packed up or left behind without leaving a trace on the property, and none of them require digging into ground you don’t own.
Success Indicators
You’ll know a design is working when you’re harvesting more than you expected from the space, when the bed still looks intentional in the middle of a messy growing season, and when maintenance starts feeling like a few minutes a day instead of a weekend project.
A good design also survives a skipped week. If one busy week of forgotten watering or weeding sends the whole thing into visible decline, the layout is probably working against your actual routine rather than with it, and it may be worth simplifying before you invest more time or money.
Remember: the best backyard vegetable garden design is the one that matches your actual soil, sunlight, and how much bending, digging, or watering you’re honestly willing to do each week, so pick the idea that fits your real life before you pick the one that just looks best in photos.