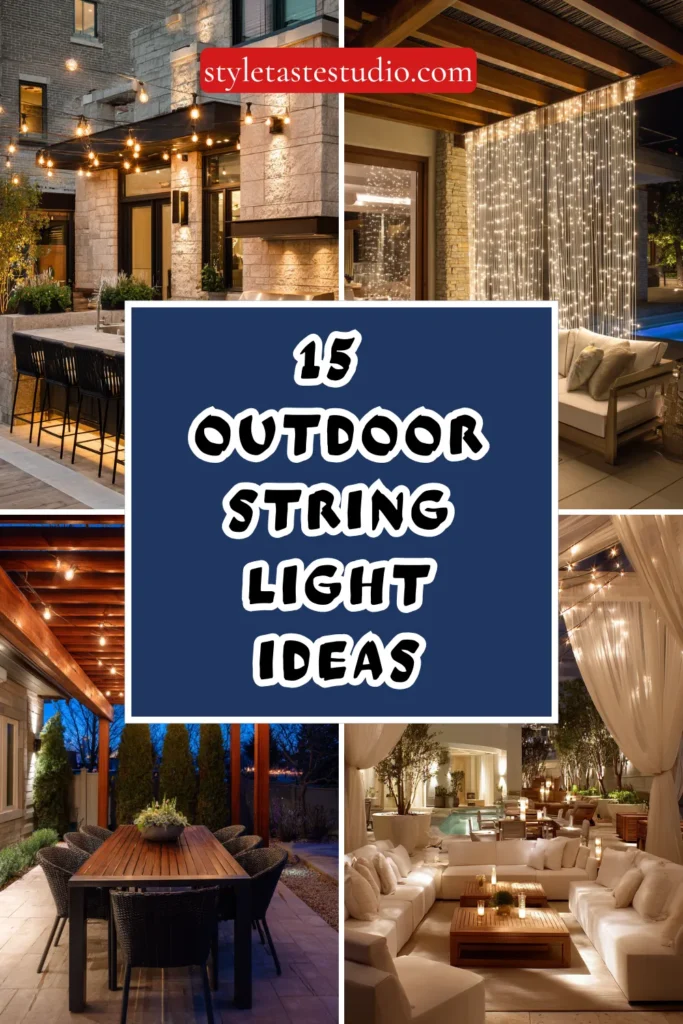
15 Outdoor String Light Ideas for Year-Round Ambiance
Most people put string lights up for one party in July and take them down, tangled, sometime around Thanksgiving.
That’s a shame, because the right string light setup earns its keep across all four seasons, not just the warm ones. A patio that goes dark and unused from October through March is a patio that isn’t paying you back for the space it takes up.
The trick isn’t buying more lights. It’s placing the ones you have with actual intention, and choosing a few setups built to survive winter instead of getting hauled inside the second it gets cold.
Here are 15 ways to use outdoor string lights so the ambiance lasts all year, not just one long weekend.
1. Catenary Lines Strung Wall to Wall
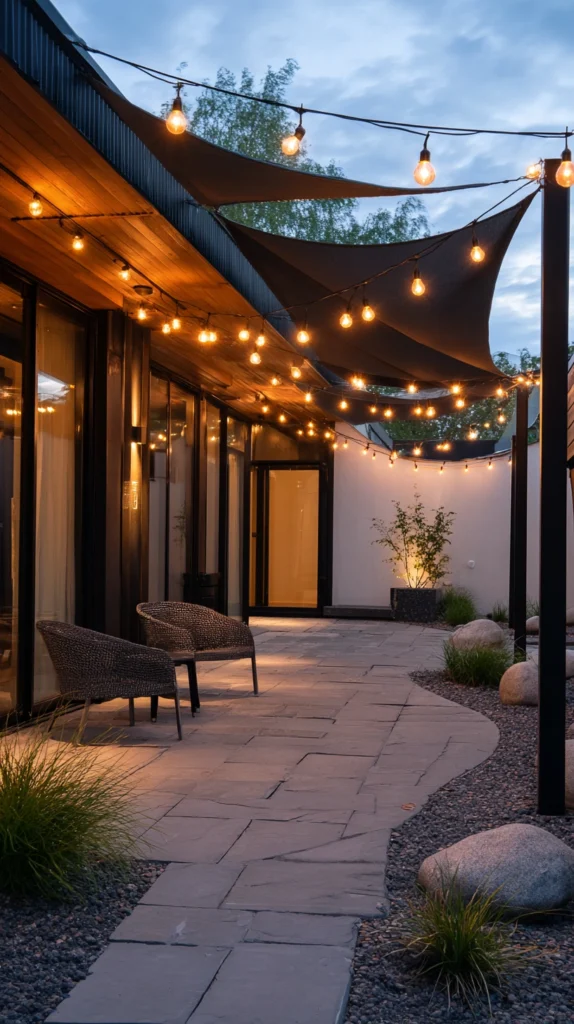
Heavy-gauge cable strung between two fixed points, either buildings, posts, or a mix of both, with string lights clipped along the cable’s natural sag rather than pulled taut.
The gentle droop between anchor points is what separates this look from a straight, tight line of bulbs. That sag reads as intentional and architectural, closer to what you’d see strung across a restaurant courtyard than a backyard afterthought.
I ran 7/16-inch steel cable between my house and a freestanding post 20 feet away, letting it sag about a foot at the center, then clipped warm white bulbs along the cable’s length using turnbuckle tensioners at each anchor point.
Budget tip: A cable and turnbuckle kit sold specifically for string lights costs less than most people expect, and the same hardware works whether you’re stringing 15 feet or 60.
A few things worth getting right:
- Anchor into structural framing or a properly set post, never just siding or a fence panel, since cable tension pulls harder than it looks
- Leave enough sag that the cable isn’t fighting gravity, generally about 2 percent of the total span
- Use a turnbuckle at one end so you can adjust tension after the first season of wind and weather
This setup holds up through real wind in a way that lights strung loosely between two random hooks never quite manages.
2. Lights Woven Through a Pergola Grid
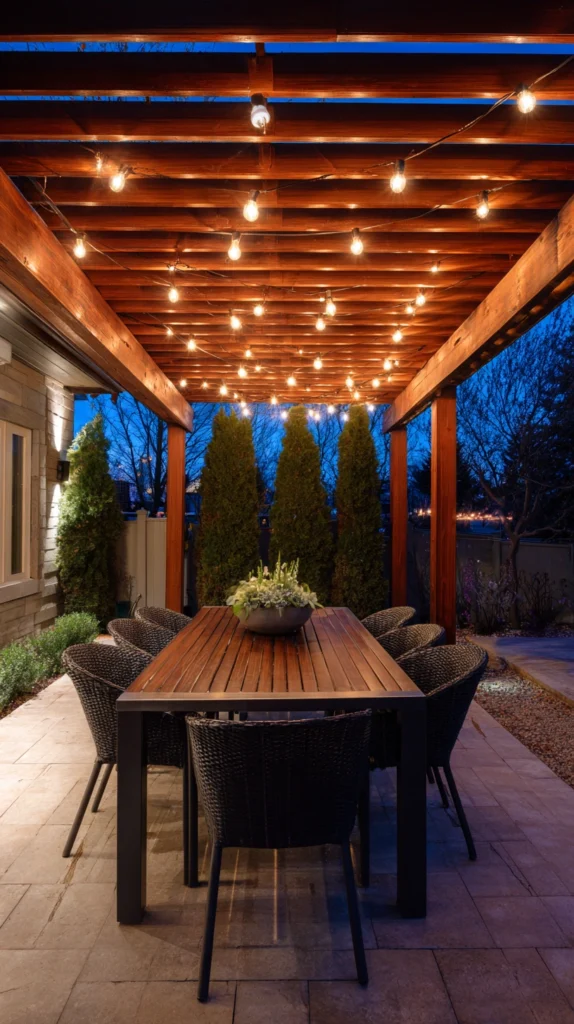
String lights threaded through the rafters of an existing pergola, running perpendicular to the beams so the bulbs create an even grid overhead rather than a single strand.
A pergola already gives you the structure most people build cable systems from scratch to achieve. Weaving lights through the rafter grid means the ceiling of light follows the architecture you’ve already got instead of fighting against it.
I ran five parallel strands across my pergola’s rafters, spacing each run about a foot apart, then added two shorter crossing strands to fill in the gaps near the edges where the grid looked sparse.
Style tip: Space runs evenly rather than clustering more lights toward the center, since an uneven grid reads as unfinished the moment you’re standing directly underneath it looking up.
A few installation notes:
- Use insulated cup hooks screwed directly into the rafters rather than nails, which pull loose with wind and expansion
- Run wiring along the top of the beams where possible, keeping cords out of sight from below
- Plan your outlet access before starting, since a pergola built without an electrical run nearby often means an extension cord solution isn’t far off
The overhead grid effect works especially well over a dining table, since the light falls fairly evenly across the whole surface instead of pooling at one end.
3. A Single Dramatic Strand Framing a Tree Canopy
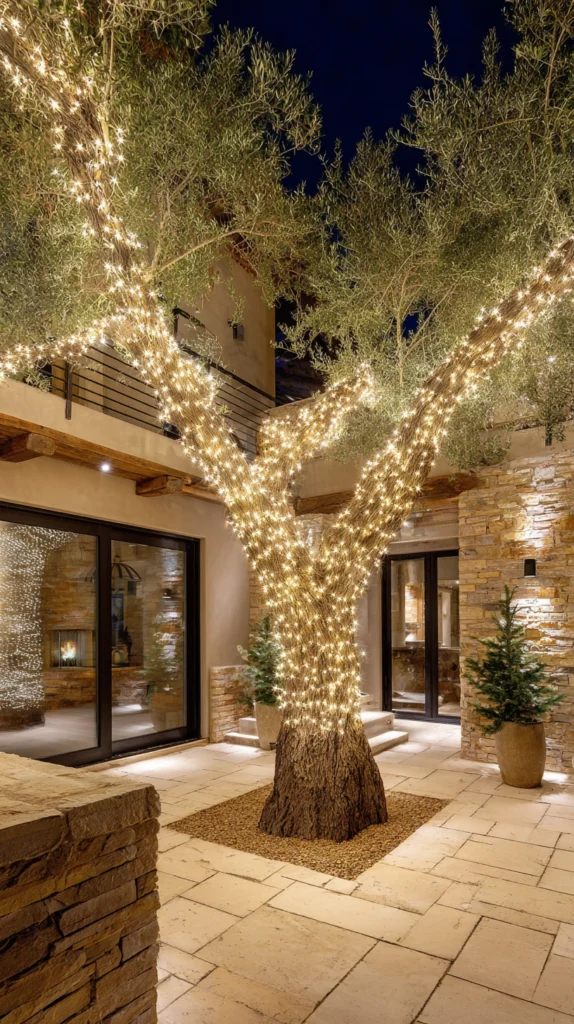
Lights wound loosely up a mature tree’s trunk and out along its main branches, following the tree’s actual shape rather than wrapping it uniformly top to bottom.
A tree lit this way becomes its own focal point after dark, visible from well beyond the immediate seating area. It’s a different kind of ambiance than lighting meant purely for a dining or lounge zone, more landscape feature than functional lighting.
I wound warm white lights loosely up the trunk of an old oak at the edge of my yard, then ran two strands out along the lowest major branches, leaving the upper canopy dark so the effect stays grounded rather than overwhelming the whole tree.
Budget tip: You don’t need to light an entire tree to get the effect, lighting just the trunk and lower branches usually reads as more intentional than an attempt to cover a mature tree’s full canopy, and it uses a fraction of the lights.
A few things worth knowing:
- Use outdoor-rated lights specifically designed for direct weather exposure, since this installation typically stays up longer than a patio string
- Avoid wrapping cords tightly around a trunk that’s still actively growing, which can girdle the bark over years
- Choose LED bulbs specifically for tree wrapping, since incandescent bulbs generate more heat directly against bark and leaves
Lit this way, a single tree can anchor an entire backyard’s evening atmosphere without a single bulb over the patio itself.
4. Lights Layered Along a Fence Line at Two Heights
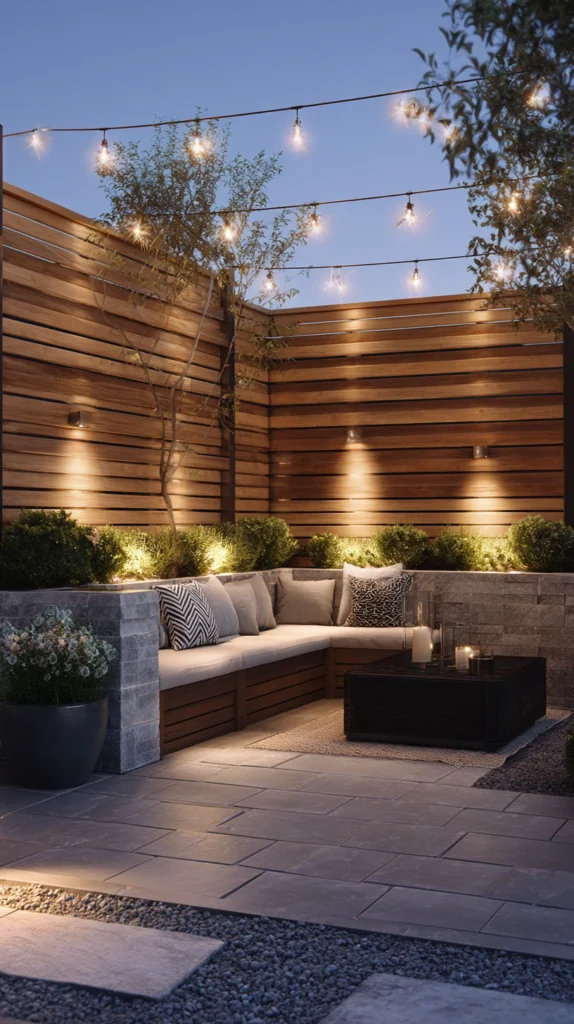
Two separate runs of string lights along a fence, one mounted higher near the top rail and a second run lower, closer to eye level, rather than a single strand.
Most fence lighting is just one line strung along the top, which lights the fence but does little for the actual seating area in front of it. Adding a second, lower run brings light down into the space people are actually using.
I mounted one run of warm white lights along the top of my cedar fence and a second run about waist height along a lower rail, spacing the two runs far enough apart that they read as deliberately layered rather than accidentally doubled up.
Style tip: Keep the two runs on different color temperatures if your fixtures allow it, a slightly warmer tone on the lower run specifically, since this subtle shift adds depth without requiring a second color altogether.
A few practical notes:
- Use insulated staples or clips rated for outdoor cable, not standard fence staples, which can fray the cord’s protective sheathing over time
- Keep the lower run high enough that it clears anyone walking directly along the fence line
- Test both runs on the same circuit before final installation, since running two separate strands sometimes means two separate plugs to manage
This layered approach makes a plain fence line feel like an actual design element rather than just the yard’s boundary marker.
5. Globe Lights Strung Above a Fire Pit Circle
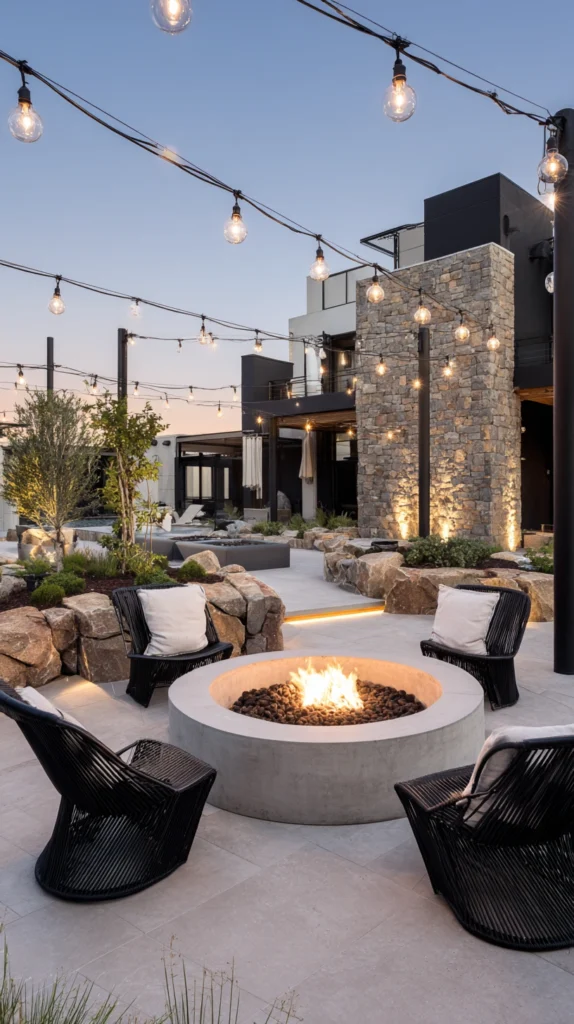
Larger globe-style bulbs, rather than the smaller mini lights used elsewhere, strung in a wide circle above a fire pit seating area at a height well above head level.
Globes read differently than mini lights specifically because of their scale, they hold their own as individual points of light rather than blending into a single glowing line, which suits the more spread-out, circular seating typical around a fire pit.
I strung a circle of 2-inch globe bulbs on a run of black cable, suspended between four freestanding poles set just outside my fire pit’s seating ring, high enough that heat rising from the fire doesn’t reach the bulbs directly.
Budget tip: Freestanding light poles designed specifically for this purpose cost less than you’d expect and avoid needing to run cable to trees or structures that may not be conveniently positioned around a fire pit.
A few things worth planning:
- Keep bulbs at least 7 feet above the fire pit itself, since rising heat can affect both bulb life and the cord’s outer sheathing over time
- Choose shatter-resistant plastic globes rather than glass for a space where sparks occasionally travel upward
- Space poles evenly around the circle, generally four to six depending on the pit’s size, for consistent coverage
Globe lights specifically hold up well through a full evening around a fire, since their larger scale doesn’t wash out the way smaller bulbs can once flames are providing their own competing light source.
6. A Grid Overhead for an Open Patio With No Trees or Posts
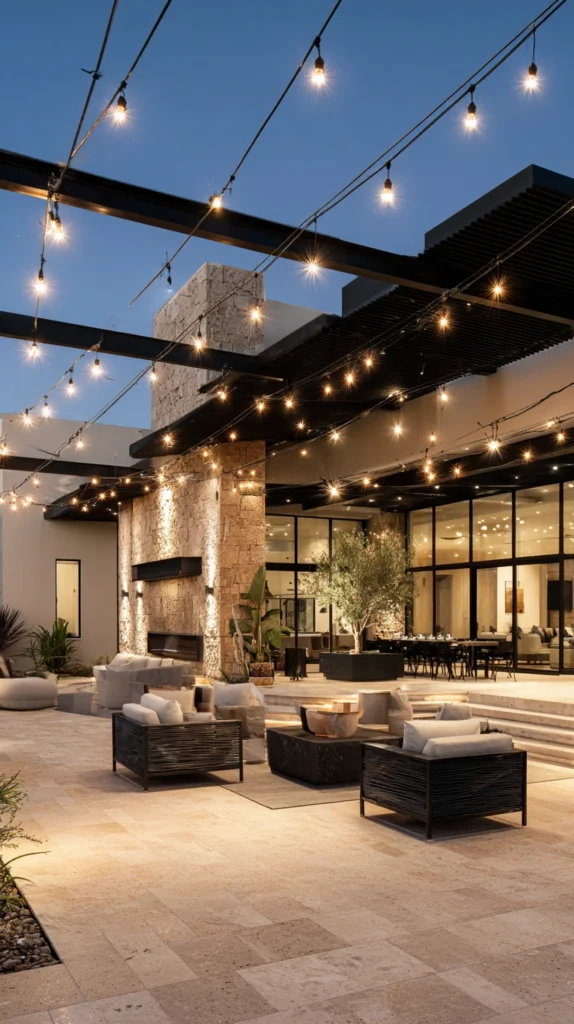
An overhead grid of crisscrossing string lights supported entirely by newly installed poles, built specifically for a patio with no existing trees, pergola, or structure to anchor from.
Not every patio has something convenient to string lights between. This setup solves that from scratch, essentially building the support structure the lighting itself needs before a single bulb goes up.
I installed four galvanized steel poles at the corners of my patio, set in concrete footings, then ran a crisscrossing grid of cable between all four, clipping string lights along each cable run to create full overhead coverage.
Budget tip: Repurposed rebar or electrical conduit, properly capped and set in concrete, works nearly as well as purpose-built decorative poles at a fraction of the material cost.
A few installation notes:
- Set footings below your local frost line if poles will stay up year-round, since frost heave can shift shallow footings within a season or two
- Angle poles slightly outward from vertical, generally a few degrees, to counteract the inward pull of tensioned cable
- Run the crisscross pattern with at least four to six lines total for even coverage rather than just two lines forming a simple X
This is the most labor-intensive setup on this list if you’re starting from a completely bare patio, but it also delivers the most complete, professional-looking overhead coverage of any option here.
7. Warm Light Along Deck Stair Risers for Safety and Ambiance
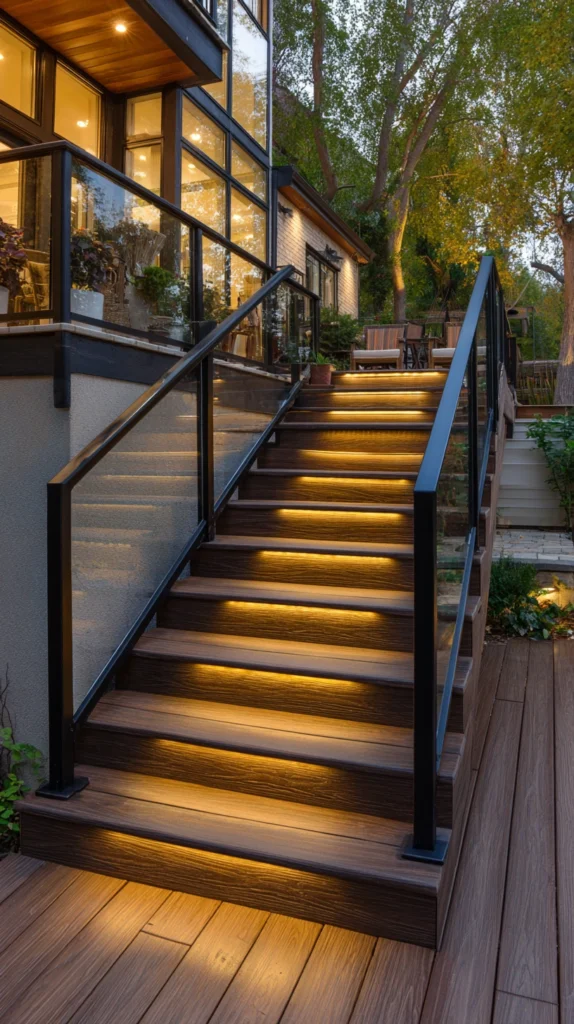
Small string lights or rope lights tucked beneath the nosing of deck stair treads, providing subtle uplighting on each step rather than a single light at the top or bottom.
This setup does real functional work, lighting a path that’s genuinely unsafe to navigate in the dark, while also adding a soft glow that reads as considerably more atmospheric than a single floodlight ever could.
I tucked a warm white rope light along the underside of each stair tread’s nosing on my deck stairs, running the full length as a single continuous strand rather than separate lights per step.
Budget tip: Rope light sold by the foot and cut to length costs less than pre-cut string light sections designed for stairs, and one continuous run means fewer connection points to eventually fail.
A few practical notes:
- Choose a low-voltage system specifically for this application, since it’s safer for a spot where feet and hands make regular contact
- Secure the light firmly under the tread’s overhang so it’s not visible when looking directly at the steps, only as a soft glow along the edge
- Test the full run before final installation, since stair lighting is one application where a dead section actually creates a safety issue rather than just an aesthetic one
Stair lighting is one of the few ideas on this list that genuinely justifies itself on function alone, even before considering how good it looks after dark.
8. Lights Threaded Through a Living Privacy Screen
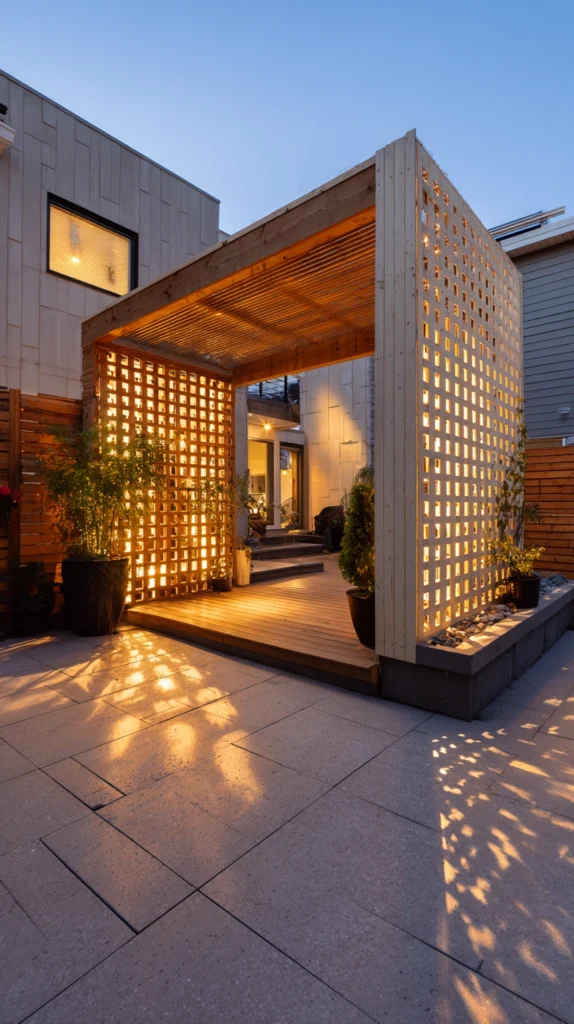
String lights woven through a planted privacy hedge, trellis vine, or living wall, integrating the lighting directly into greenery rather than mounting it on a separate structure.
Threading lights into actual foliage creates a softer, more diffused glow than lights strung against open air, since leaves and branches scatter and filter the light rather than presenting it as a single sharp point.
I wove a warm white micro-light strand through a climbing hydrangea trained against my side fence, tucking the wire behind the main stems so it disappears into the foliage during the day and only reveals itself once lit at night.
Style tip: Choose the smallest bulb size available for this specific application, since oversized bulbs threaded through delicate foliage tend to look bulky rather than integrated.
A few practical notes:
- Thread lights loosely enough that the plant has room to keep growing without the wire cutting into new stems
- Reposition or add strands as the plant fills in over subsequent seasons, since a young planting won’t have the same coverage as one that’s had a few years to mature
- Choose a fully weatherproof strand rated for direct contact with wet foliage, since leaves hold moisture against the wire far more than open air does
By midsummer, once the vine has filled in completely, this setup barely reads as string lights at all, more like the plant itself is quietly glowing.
9. A Rotating Seasonal Color Approach
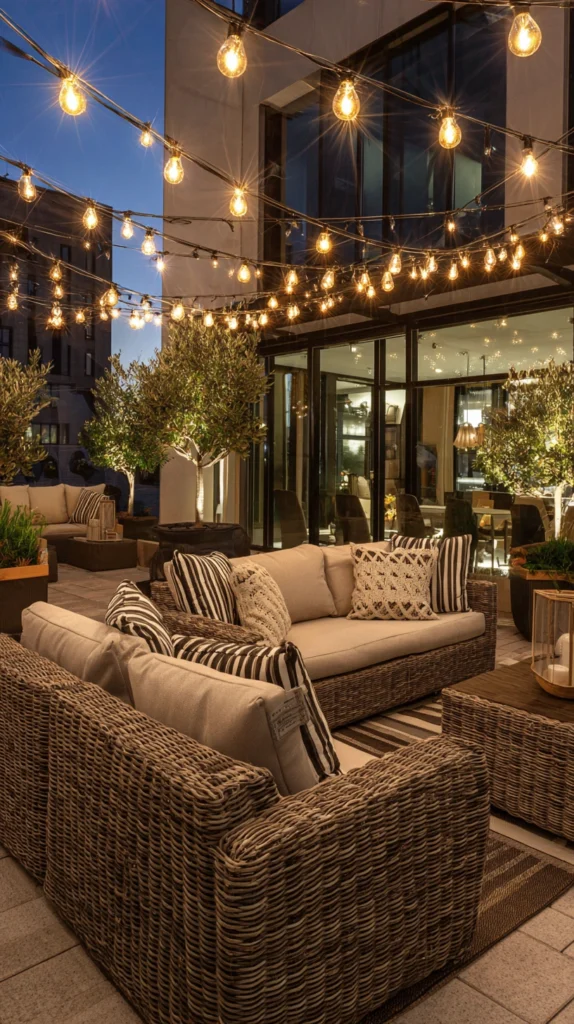
The same physical light installation, kept up and wired year-round, but swapped between warm white, deep amber, and cool white bulbs depending on the season, rather than buying entirely new lights for each one.
Keeping a single hardware setup in place and simply changing bulb color is a far more sustainable approach to year-round lighting than treating each season as its own separate decorating project.
I keep one permanent cable run across my patio and swap between warm amber bulbs for fall and winter, standard warm white for spring and summer, and add a brief run of cooler white lights specifically during the coldest weeks when I want the space to feel crisp rather than cozy.
Budget tip: Buying one quality cable and mounting system once, then only replacing the bulbs themselves seasonally, costs considerably less over several years than buying entirely new light sets for every season.
A few things worth knowing:
- Choose a socket and bulb system with a standardized base, so swapping bulb colors doesn’t require swapping the entire strand
- Store unused seasonal bulbs indoors between uses, since UV exposure degrades unused bulbs sitting outside just as much as ones left burning
- Keep a small log of which bulb color you used each season if you’re experimenting, since it’s easy to forget which combination actually worked best a year later
This approach turns what’s usually a once-a-year decorating chore into a permanent installation you simply adjust rather than rebuild.
10. Lights Mounted Beneath a Covered Porch Ceiling
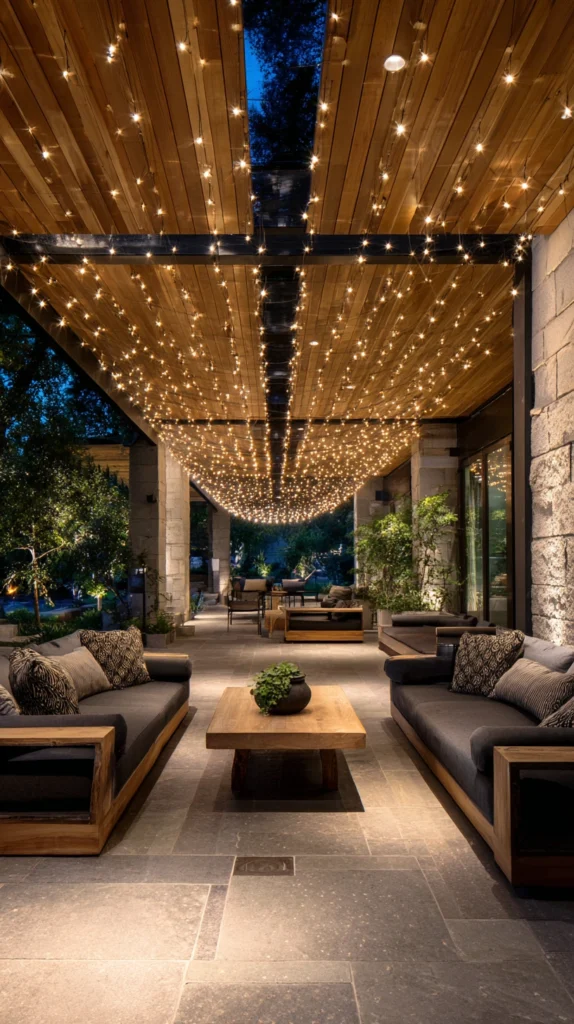
String lights attached directly to the underside of a covered porch roof, run in parallel lines across the ceiling rather than hung freely at head height.
A covered porch ceiling is one of the more overlooked surfaces for string lights, since most people default to hanging them lower where they’re more visible, when running them along the actual ceiling protects the fixtures from weather while still casting a warm downward glow.
I ran three parallel strands of warm white lights across my covered porch’s ceiling, spaced about 18 inches apart, using cup hooks screwed directly into the porch’s finished ceiling boards.
Budget tip: A covered ceiling protects lights from direct rain exposure, which means standard outdoor-rated strands last considerably longer here than the same lights strung in a fully exposed location.
A few installation notes:
- Space runs evenly across the ceiling width for consistent light distribution rather than clustering toward one side
- Choose a warm bulb temperature specifically, since a covered porch ceiling reflects light back down more directly than an open-air installation
- Keep wiring tucked along ceiling boards or beams rather than looping loosely, both for appearance and to avoid a snag hazard for anyone standing on porch furniture
A covered porch lit this way stays usable through actual rain, which is more than most outdoor lighting setups on this list can claim.
11. Vertical Curtain Strands Along a Railing or Pergola Post
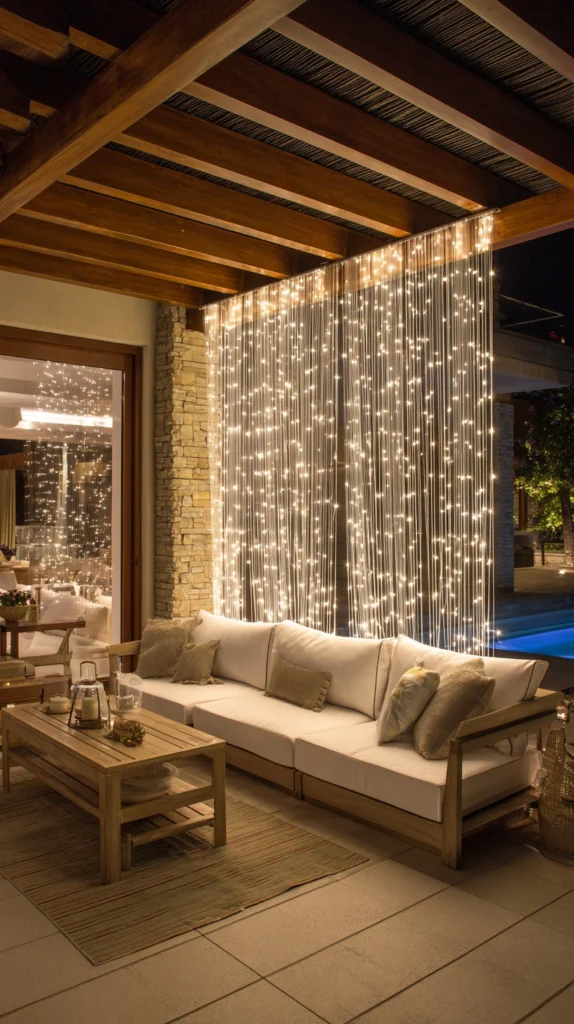
Lights hung in straight vertical drops rather than horizontal runs, creating a curtain-like effect along a railing, post, or the open side of a pergola.
Vertical light curtains add a distinctly different visual rhythm than the horizontal lines most string light setups default to, and they work especially well as a soft, glowing boundary along an otherwise open edge of a patio or deck.
I hung a series of vertical light curtains from my pergola’s top beam down along one open side, spacing each drop about 8 inches apart, creating a soft glowing wall that partially screens the patio from the street without fully blocking the view.
Style tip: Vary the length of each vertical strand very slightly rather than cutting them to a perfectly uniform height, since a small amount of natural variation reads as intentional rather than a measuring error.
A few practical notes:
- Weight the bottom of each strand slightly if the installation location sees regular wind, to keep the curtain from tangling
- Choose a curtain light product specifically designed for this drop configuration, since standard single-strand lights aren’t built with this many connection points
- Test the full curtain’s plug and connection points before final installation, since this configuration has more individual connection points than a simple horizontal run
This vertical approach gives you a soft sense of enclosure along one open edge without building an actual wall or screen.
12. A Small Cluster Installation for Balconies and Apartments
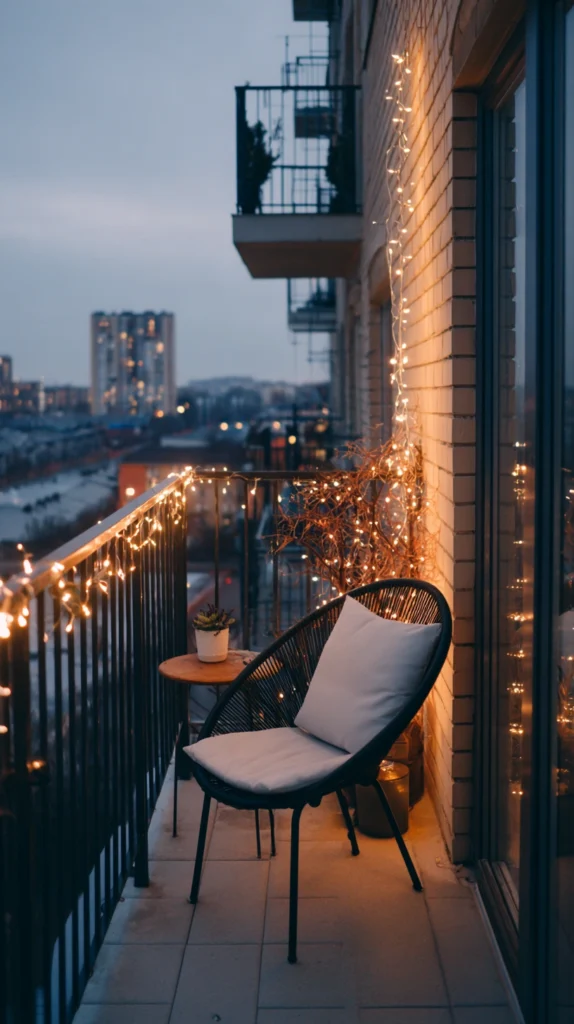
A compact, battery-powered or plug-in string light setup scaled specifically for a small balcony or apartment patio, using clips and adhesive hooks rather than any permanent mounting hardware.
Not everyone has a yard to string lights across, and a smaller, renter-friendly setup delivers real ambiance in a fraction of the space without requiring drilled holes or permanent fixtures.
I clipped a battery-powered warm white strand along my apartment balcony railing, adding a second short strand looped loosely around a single potted tree, all using adhesive clips rated for outdoor use that come off cleanly at move-out.
Budget tip: Battery-powered string lights cost more per strand than plug-in versions but eliminate the need for outdoor outlet access entirely, which matters considerably for a balcony without a nearby exterior plug.
A few practical notes:
- Choose adhesive hooks specifically rated for outdoor temperature swings, since standard indoor adhesive hooks fail quickly with heat and cold cycling
- Opt for a timer or solar-charging battery pack if regularly swapping batteries isn’t practical
- Keep the overall scale modest rather than trying to replicate a full backyard setup in a small space, since an oversized installation on a small balcony reads as cluttered rather than cozy
This scaled-down approach proves that a small footprint doesn’t have to mean skipping the ambiance altogether.
13. Lights Combined With Sheer Outdoor Curtains for Softened Glow
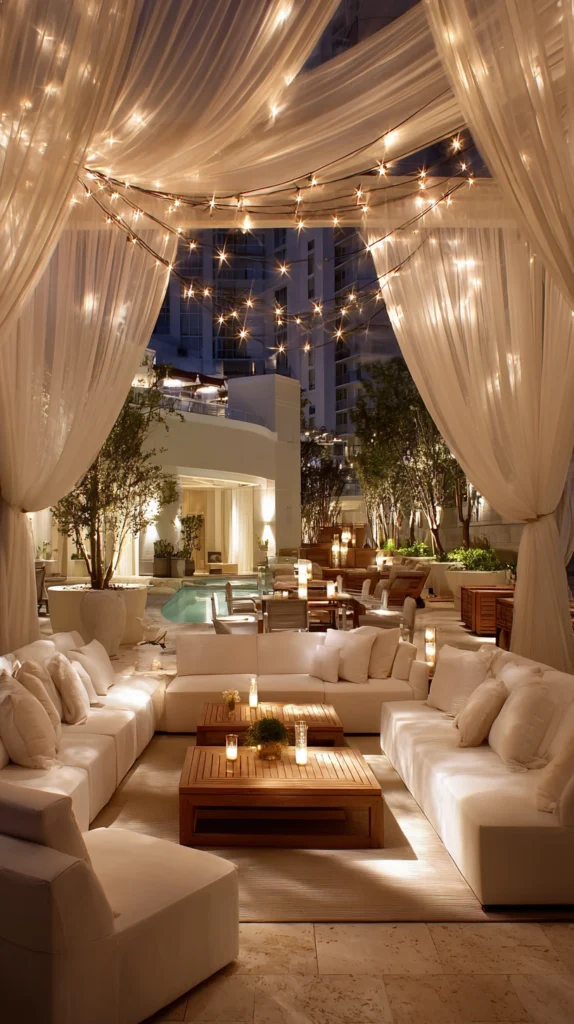
String lights hung directly behind sheer, lightweight outdoor curtain panels, using the fabric to diffuse and soften the light rather than leaving bulbs fully exposed.
The fabric does real optical work here, turning individual points of light into a broader, softer glow that reads more like ambient lighting than a string of visible bulbs.
I hung a simple curtain track along one side of my covered patio, added lightweight sheer outdoor fabric panels, and ran a string light strand directly behind the fabric so the bulbs’ glow diffuses through the material rather than shining as distinct points.
Style tip: Choose a lighter-weight, more sheer fabric specifically for this application, since a heavier or more opaque curtain blocks too much light rather than softening it.
A few practical notes:
- Mount the light strand a few inches behind the fabric rather than pressed directly against it, both for safety and for a more even diffusion effect
- Choose outdoor-rated fabric specifically, since standard indoor sheers degrade quickly with sun and moisture exposure
- Draw curtains back during the day to let the space read as open, reserving the diffused glow effect specifically for evening use
This combination turns simple string lights into something closer to ambient room lighting, which is a genuinely different effect than the more common look of visible individual bulbs.
14. A Dedicated Winter Installation Using Icicle-Style Strands
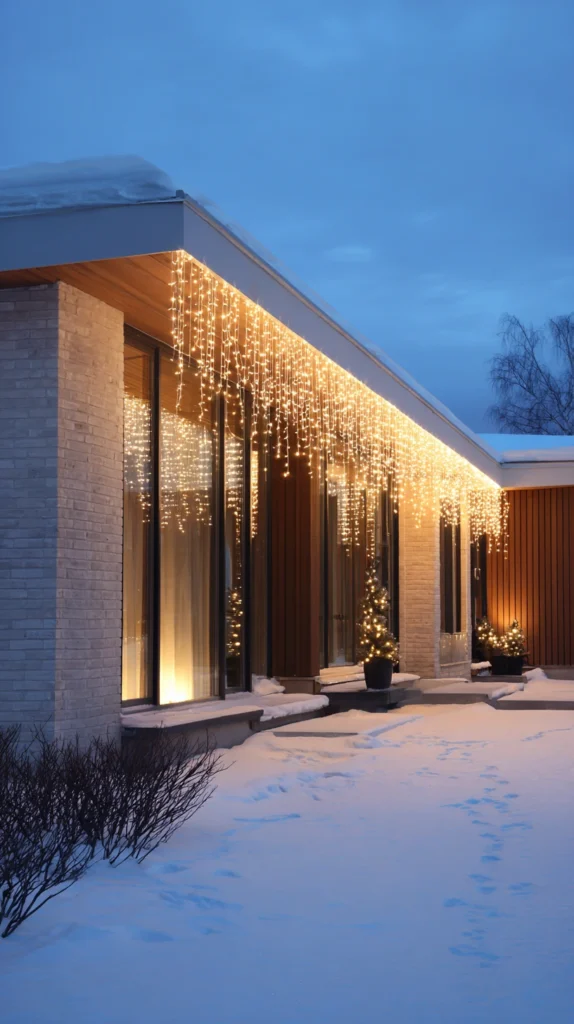
Icicle-style string lights mounted along a roofline or eave specifically for the coldest months, chosen and installed separately from a home’s main patio lighting setup rather than treated as an extension of it.
Rather than trying to make one lighting setup work for every season, a dedicated winter installation acknowledges that the coldest months call for a genuinely different look and location than a summer patio string.
I mount icicle-style lights along my home’s front eave specifically from late November through February, using clips designed to attach directly to gutters without any drilling, then remove and store them once the season turns.
Budget tip: Gutter clips designed specifically for icicle lights install and remove in a fraction of the time that adhesive hooks or permanent hardware would require, which matters if you’re planning to take the whole installation down each spring.
A few practical notes:
- Choose LED icicle lights specifically, since they handle repeated cold-weather use and generate far less heat against snow or ice buildup than older incandescent versions
- Test the full strand indoors before installing outdoors in cold weather, since some connections are easier to troubleshoot at room temperature
- Store lights indoors during the off-season rather than leaving them coiled outside, since UV exposure and temperature swings shorten a strand’s usable life considerably
Treating winter lighting as its own separate project, rather than an awkward extension of your summer patio setup, tends to produce a more genuinely seasonal look rather than a slightly mismatched compromise.
15. Lights Integrated Into an Outdoor Kitchen or Bar Area
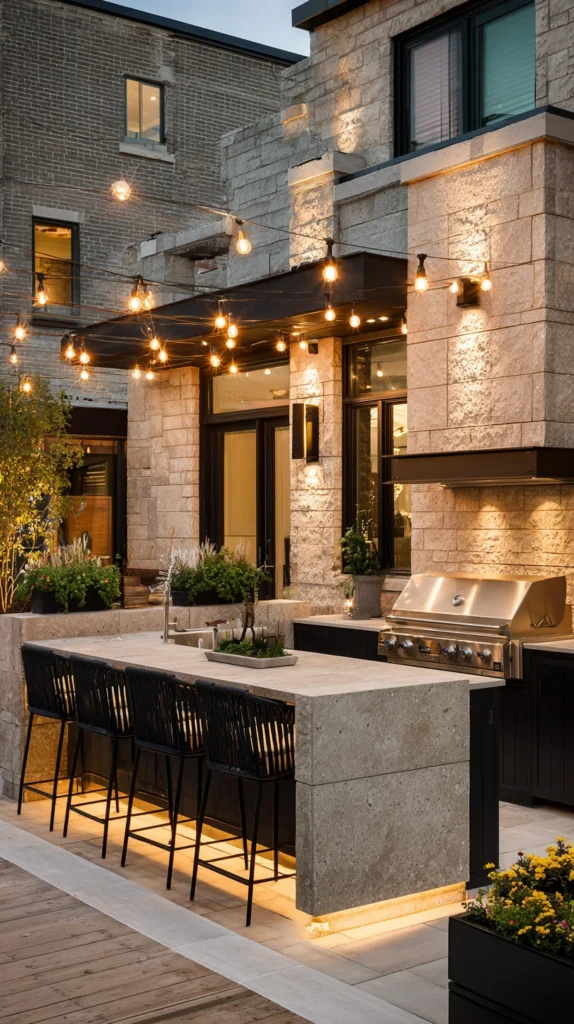
String lights run specifically above a built-in outdoor kitchen, grill station, or bar cart area, positioned to provide genuine task lighting rather than purely decorative ambiance.
A cooking or bartending area needs more direct, even light than a lounge or dining zone does, and positioning string lights specifically overhead here, rather than just extending a broader patio installation into the space, gives that functional area the brighter coverage it actually needs.
I ran a tighter cluster of warm white lights directly above my outdoor kitchen’s prep counter and grill, spaced closer together than the lights elsewhere on my patio, specifically to provide enough usable light for actual cooking after dark.
Budget tip: Using the same style of lights throughout your outdoor space, just spaced closer together over functional areas like a kitchen, keeps material costs down compared to installing an entirely separate lighting system for that zone.
A few practical notes:
- Space bulbs noticeably closer together over a cooking or prep area than you would over a purely lounge-oriented seating zone
- Choose a brighter bulb wattage specifically for this section if your string light system allows mixed wattages along a single run
- Keep string lights positioned high enough above a grill that heat and smoke don’t reach the bulbs or cord directly
Giving a functional cooking area its own denser, brighter lighting treatment means you’re not squinting at a cutting board under the same soft glow meant for lounging nearby.
If You’re Only Installing One Setup This Year
The catenary cable system pays off the most relative to effort, since the hardware itself is reusable indefinitely and the sag-and-tension look reads as considerably more finished than a straight strand pulled taut between two points.
Hardware That’s Worth Buying Once, Properly
- Turnbuckle tensioners and eye hooks rated for actual outdoor cable tension, not just decorative string light clips
- A genuinely weatherproof extension cord and timer if your setup isn’t wired to a dedicated outdoor outlet
- Extra bulbs in the exact base and wattage your strand uses, since a single dead bulb sometimes takes down an entire older-style strand
A Detail That Separates a Good Setup From a Great One
Even spacing matters more than most people expect before they’ve actually installed a string light system themselves. A run with bulbs clustered unevenly, tighter in some spots and stretched thin in others, reads as unfinished no matter how good the bulb color or hardware quality actually is, so measure and mark your spacing before you start clipping lights up rather than eyeballing it as you go.