14 Easy Privacy Walls Backyard Ideas Anyone Can Pull Off
My backyard used to back right up to a neighbor’s second-story window, and I could feel it every single time I sat outside.
Nothing wrong was happening. It just never felt like my own space.
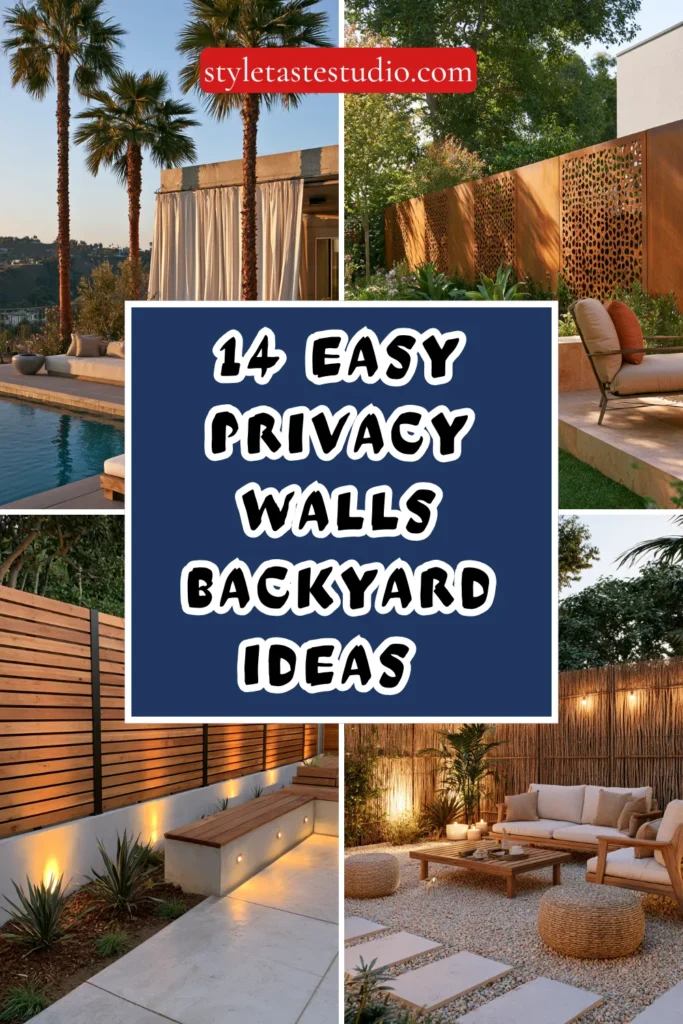
Then I started building actual privacy into the yard instead of just hoping nobody was looking. Same yard, completely different sense of being able to relax in it.
Here are 14 privacy wall ideas that block sightlines without turning your backyard into a fortress.
Every one of these can be tackled in a weekend or two, and most don’t require a contractor.
1. Horizontal Slat Fence Panel
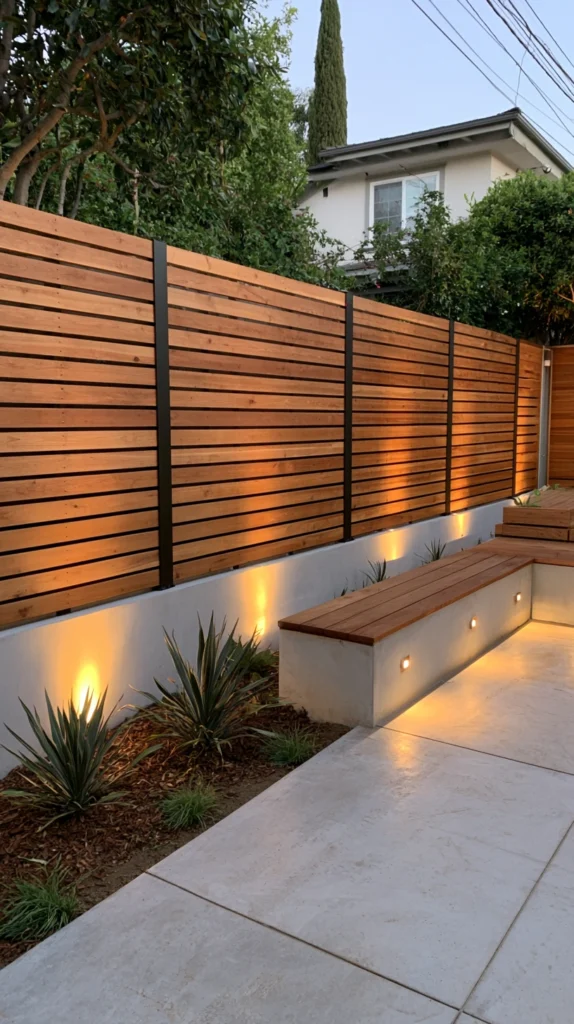
A modern privacy fence built from evenly spaced horizontal wood slats instead of traditional vertical boards.
Horizontal slats read as noticeably more current than a standard vertical picket or board fence, and the clean lines pair well with almost any style of house. Small gaps between boards also let air move through, which cuts down on the wind load a solid fence has to fight.
I built mine using cedar 1×6 boards spaced with a half-inch gap, screwed horizontally onto steel posts set every 8 feet along the property line.
Budget tip: Buy cedar fence boards in bulk from a lumber yard rather than pre-made panel sections, since cutting and assembling your own slats runs noticeably cheaper than paying for pre-built panels.
A few build details that matter:
- Use a spacer block cut to your exact gap width so every course lines up without measuring each board individually
- Pre-drill screw holes near board ends to prevent cedar from splitting
- Seal boards with an exterior stain before installation, since it’s far easier to coat all sides on the ground than after the fence is standing
The small gaps do let in slivers of light and motion, but from a normal seated distance, the wall reads as fully private.
Steel posts made a bigger difference than I expected compared to wood posts. Mine haven’t shifted or leaned at all over three seasons, whereas a neighbor’s identical wood-post version has already needed one post reset.
2. Living Bamboo Screen
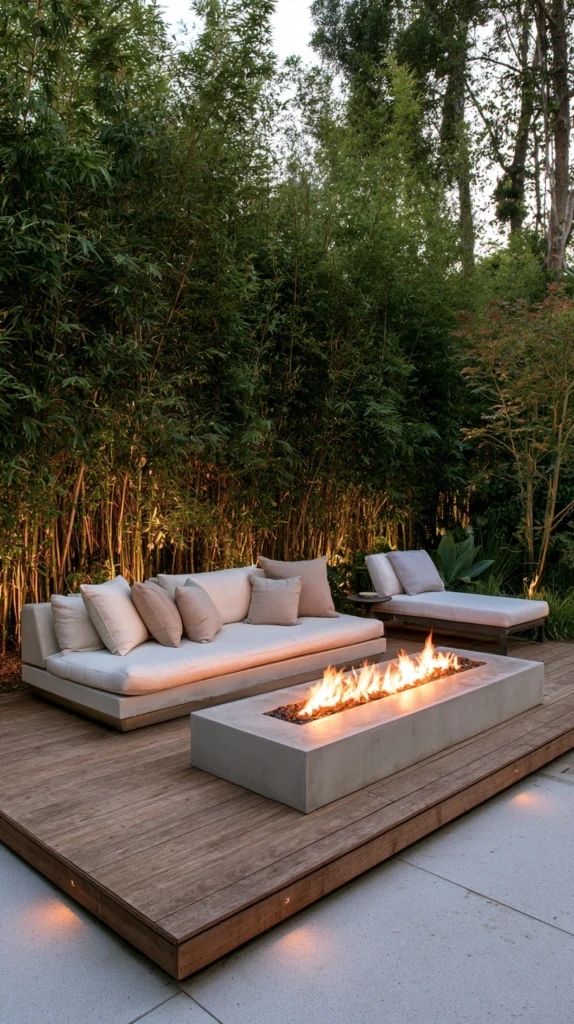
A dense planted row of clumping bamboo, used as a fast-growing green wall instead of a built structure.
Bamboo is the plant most people reach for when they want privacy fast, and clumping varieties in particular deliver serious height within just a couple of growing seasons without the invasive spreading that running bamboo is known for.
I planted a row of Golden Goddess clumping bamboo along my side yard, spacing plants about 3 feet apart to let them merge into one continuous green wall by year two.
Style tip: Choose a clumping variety specifically, never running bamboo, since running types spread aggressively through underground rhizomes and can invade neighboring yards within a single season.
A few things worth knowing before planting:
- Water deeply and consistently through the first full year while roots establish
- Mulch heavily around new canes to retain moisture and suppress competing weeds
- Expect visible height within the first year, but full screening density usually takes two to three seasons
This is one of the few privacy solutions on this list that actually improves over time instead of needing repair or replacement.
Root barriers are worth installing even with clumping varieties, just for peace of mind. I sank a shallow plastic root barrier along the property line anyway, since even slow-spreading clumping bamboo can push a few inches further than expected over a decade.
3. Lattice Panel with Climbing Vine
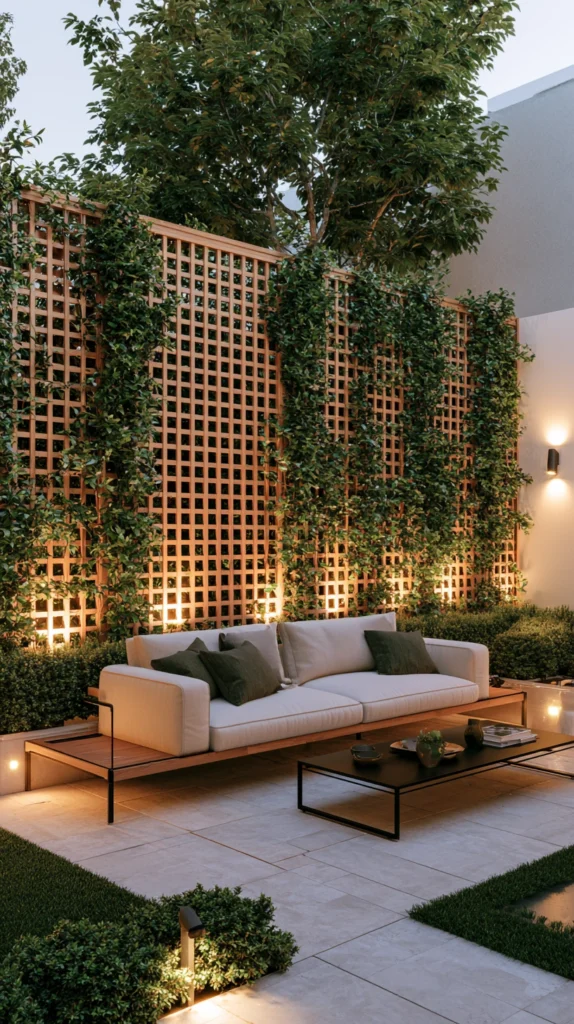
An open lattice framework, either wood or vinyl, planted with a fast climbing vine that fills in the gaps over a season or two.
A lattice panel alone offers only partial screening, which is exactly the point. Once a vine fills in, you get a living wall with texture and seasonal change that a solid fence can never offer.
I installed cedar lattice panels along the top of an existing 4-foot fence to add another 2 feet of height, then planted clematis at the base to climb through the open grid.
Budget tip: Attach lattice directly to an existing fence rather than building a freestanding frame, which cuts material costs roughly in half and uses structure you’ve already got in place.
A few planning notes:
- Choose a vine suited to your climate and sun exposure, since a shade-loving vine planted in full sun will struggle to fill in
- Attach lattice a couple inches off the fence surface so climbing tendrils have something to grip
- Prune annually to keep growth directed where you actually want screening, rather than letting it sprawl unevenly
The open structure underneath also means far less wind resistance than a solid panel, which matters if your yard deals with strong seasonal gusts.
Clematis specifically needs its roots kept cool and shaded even while the vine itself climbs into full sun. I planted mine behind a low groundcover that shades the base, which made a noticeable difference in how vigorously it filled in that first season.
4. Corten Steel Privacy Screen
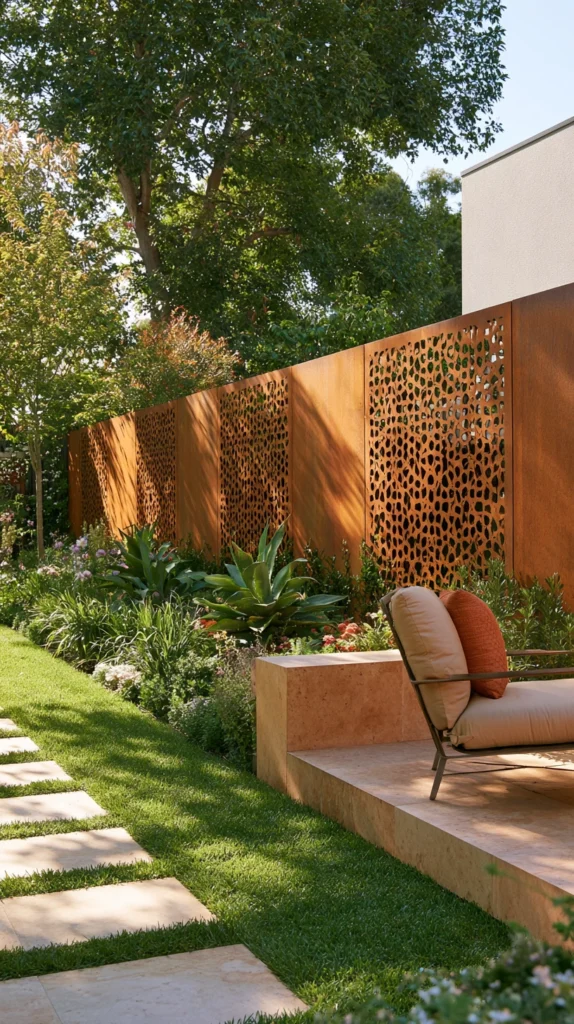
A modern screen made from weathering steel panels, often laser-cut with a decorative pattern, that develops a rich rust patina over time.
Corten steel is a strong choice for anyone who wants an architectural, low-maintenance privacy feature that never needs painting or staining. The rust-like patina that develops is actually a protective layer, not ongoing decay, so the material essentially finishes itself.
I installed a single 6×8 foot Corten panel with a laser-cut geometric pattern as a focal privacy screen next to my patio, rather than running it the full length of the yard.
Style tip: Use Corten as an accent screen rather than a full perimeter fence, since the material is expensive per square foot and reads best as a deliberate focal feature rather than a background wall.
A few installation details:
- Set panels on a concrete footing or steel post base, since Corten is heavy and needs real structural support
- Expect visible rust runoff onto surrounding pavement during the first several months as the patina develops, and plan surfaces accordingly
- Choose a pattern with enough solid steel to actually block sightlines, since some decorative cutouts prioritize looks over real privacy
This is one of the pricier options on this list, but it’s also nearly maintenance-free once installed, with no staining, sealing, or repainting ever required.
Ordering panels pre-drilled from the fabricator saved me a huge amount of hassle compared to trying to drill through hardened weathering steel myself with standard bits, which struggled and dulled quickly during a test cut.
5. Tall Grass Privacy Border
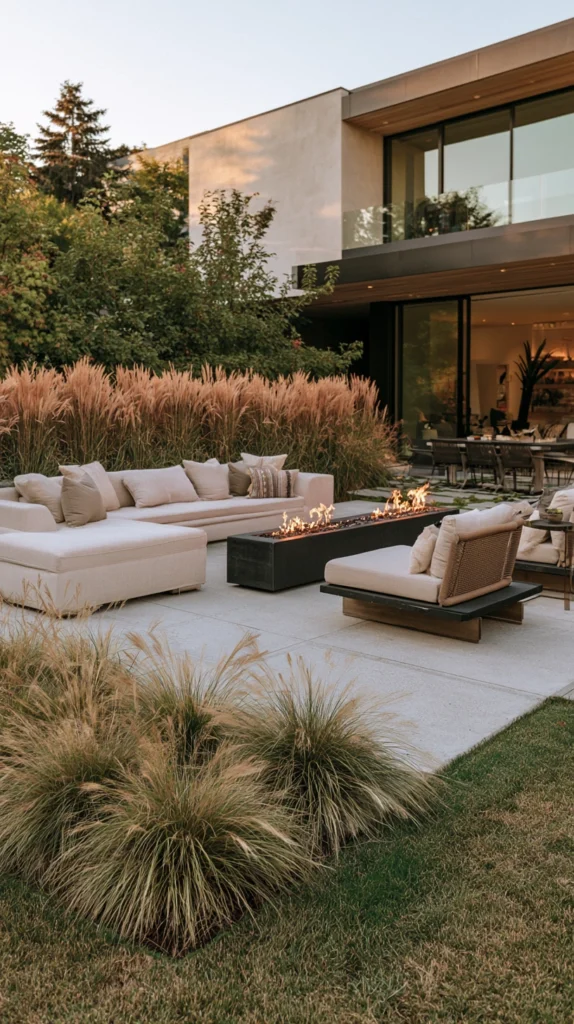
A dense planted row of ornamental grasses, chosen for height and fullness, used as a soft, moving privacy screen.
Grasses bring a completely different quality to privacy screening than a wall or hedge. They move with the wind, catch light beautifully, and soften what would otherwise be a hard visual boundary.
I planted a row of Karl Foerster feather reed grass along my back property line, spacing clumps about 2 feet apart, which reach a solid 5 feet of screening height by midsummer each year.
Budget tip: Divide established grass clumps from a friend’s yard or your own existing plantings instead of buying new plants, since most ornamental grasses can be split and replanted for free every few years.
A few things worth knowing:
- Cut grasses back hard in late winter before new growth starts, or the old growth will look ragged through spring
- Choose upright, clumping varieties rather than sprawling types for the cleanest screening line
- Expect grasses to die back in winter in colder climates, which means seasonal privacy rather than year-round coverage
This is a strong option if you mainly use your backyard in the warmer months and don’t need privacy screening through a snowy winter.
Wind was more of a factor than I anticipated with a grass this tall. I staggered two rows instead of a single line along the busiest stretch, and the layered depth blocks a sightline even when a strong gust flattens the front row temporarily.
6. Freestanding Cedar Privacy Panels on Casters
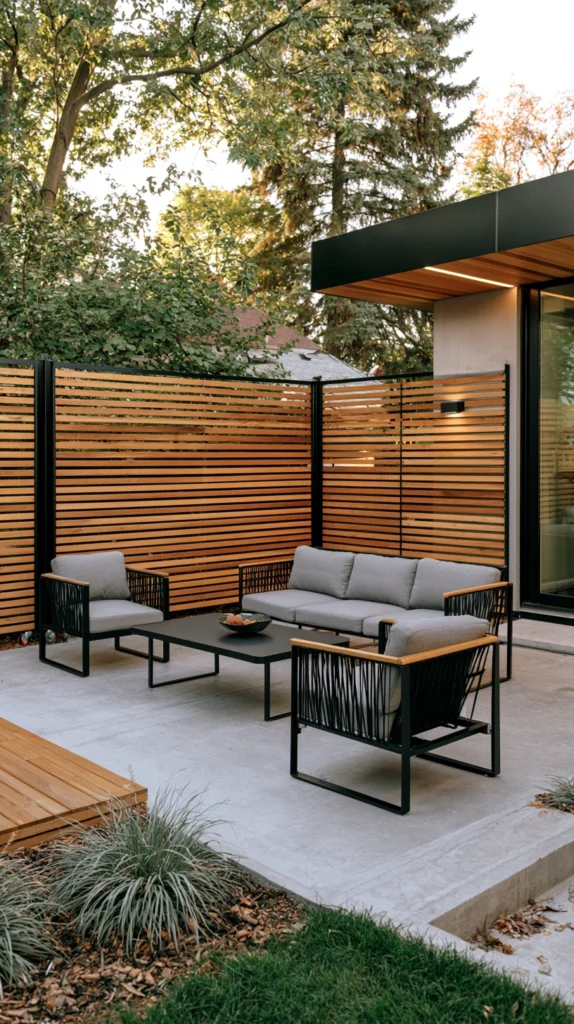
Modular wooden privacy panels mounted on locking wheels, designed to be repositioned wherever screening is needed at any given moment.
This is the pathway idea, applied to walls, for anyone who wants flexibility rather than commitment. Instead of a fixed fence line, you get portable panels that can be rolled into place for a dinner party and rolled away when you want an open view again.
I built three 4×6 foot cedar slat panels, each mounted on a simple wooden base frame with locking caster wheels, that I reposition depending on where the sun or a neighbor’s sightline happens to be that day.
Style tip: Build panels tall enough to actually block a standing sightline, generally at least 6 feet, since a shorter portable panel ends up screening very little once you account for the height of an actual person.
A few build notes:
- Use locking casters so panels don’t drift once positioned
- Keep panel weight manageable, since an oversized panel becomes difficult for one person to move alone
- Weight the base generously, since a tall, narrow panel can tip in strong wind without enough ballast
This is easily the best privacy option here if you’re renting, since nothing gets installed permanently and the whole setup moves with you.
The base frame ended up being more important than the panel itself. My first version used a base that was too narrow, and even a moderate gust nearly tipped it, so I widened the footprint on the second build and haven’t had an issue since.
7. Living Hedge Wall
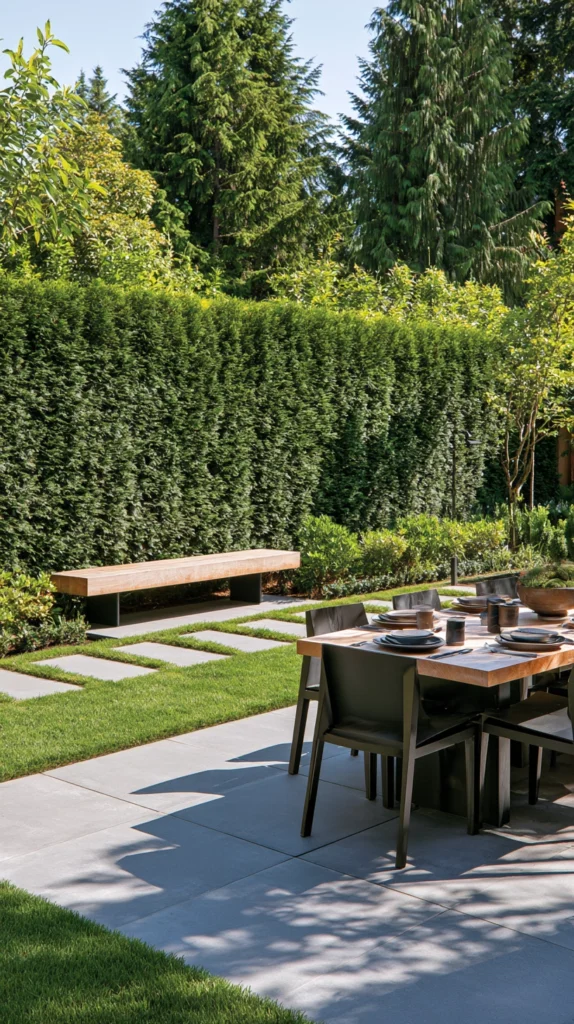
A dense, tightly maintained hedge, like boxwood, arborvitae, or privet, sheared into a clean, formal wall shape.
A well-maintained hedge is one of the most timeless privacy solutions there is, and unlike a fence, it actually gets more effective as a sound and wind buffer as it matures.
I planted a row of emerald green arborvitae along my side property line, spaced about 3 feet apart, which have grown into a solid 8-foot green wall over roughly five years.
Budget tip: Buy smaller, younger plants in bulk rather than mature specimens, since the price difference per plant is substantial and a young hedge closes the gap within just a couple of growing seasons.
A few maintenance realities to plan for:
- Shear hedges once or twice a year to maintain a clean, formal shape rather than letting them grow wild
- Water deeply during the first two years while root systems establish
- Space plants tightly enough to merge into a solid wall, but not so tight that airflow gets restricted and disease sets in
A hedge takes real patience compared to a built fence, but the payoff is a privacy wall that actually improves in both density and sound dampening every year it’s in the ground.
Deer pressure is worth researching before committing to arborvitae specifically, since it’s a favorite target in a lot of regions. I sprayed a repellent through the first two winters until the hedge grew tall enough that browsing damage stopped being a real risk.
8. Pergola with Retractable Privacy Curtains
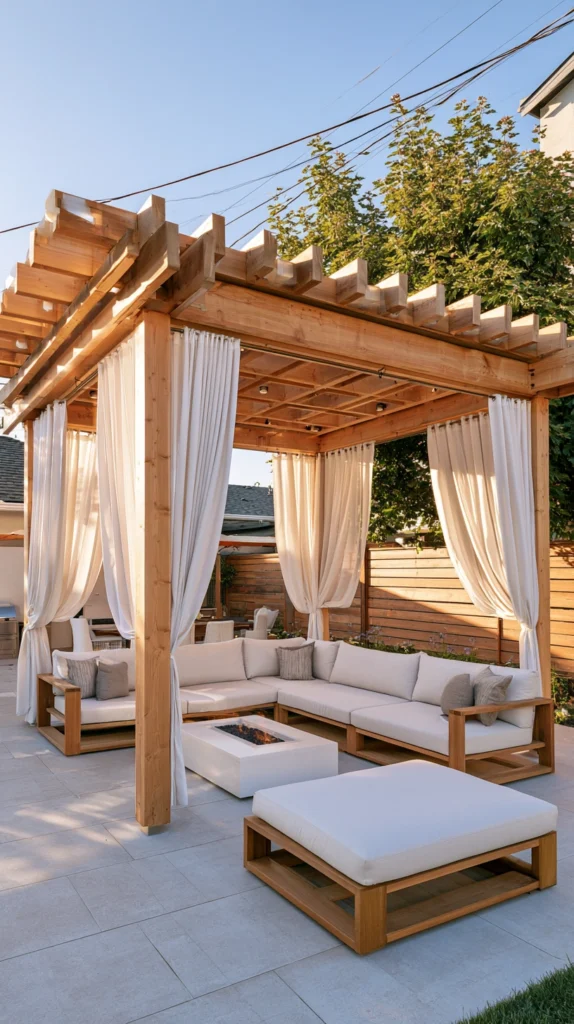
An open pergola structure fitted with outdoor curtain panels on a track or tension wire, allowing privacy to be opened or closed on demand.
This design solves a specific problem, wanting an open, airy feel most of the time but full privacy for certain moments, like an evening dinner or a hot tub session, without committing to a permanent solid wall.
I added heavy-duty outdoor curtain panels to two sides of an existing cedar pergola, hung on simple tension wire with grommet-top curtains that slide easily by hand.
Style tip: Choose outdoor-rated fabric specifically, like solution-dyed acrylic, since standard indoor curtain fabric will fade and mildew quickly when left exposed to weather.
A few practical notes:
- Use stainless steel grommets and hardware to avoid rust staining on the fabric over time
- Weight the bottom hem slightly so curtains don’t billow uncontrollably in wind
- Choose a color that won’t show dirt and pollen buildup too obviously between washes
This is a genuinely flexible option that gives you the best of both an open pergola and a fully private enclosure, depending entirely on how you want to use the space on any given day.
Tieback hardware turned out to matter more than I expected for daily use. Simple rope tiebacks kept the panels from sagging or catching wind when fully open, instead of just bunching loosely at one end of the track.
9. Stacked Stone or Block Privacy Wall
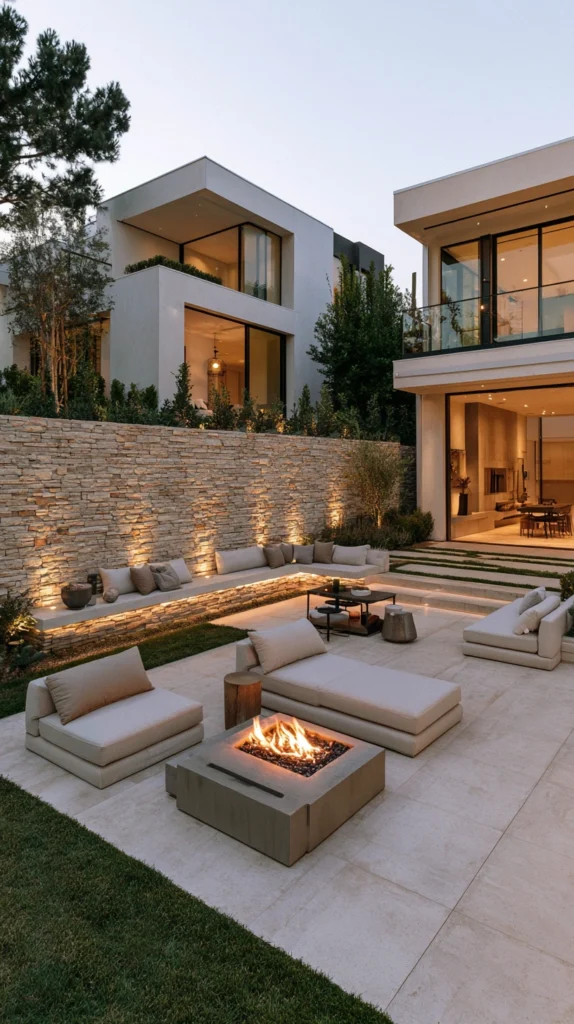
A solid masonry wall built from stacked stone, concrete block, or veneer-faced block, offering permanent, maximum privacy and sound dampening.
If you want the most complete privacy solution on this entire list, a solid masonry wall is it. Nothing blocks sightlines, sound, and wind quite as effectively as solid stone or block.
I built a 6-foot wall along the section of my yard closest to a busy alley, using standard concrete block faced with a thin stone veneer to soften the industrial look of raw block.
Budget tip: Use standard CMU block for the structural wall and add stone veneer only on the visible face, which delivers the finished stone look at a fraction of the cost of a fully solid stone wall.
A few things worth knowing before starting this project:
- Check local code for height limits and setback requirements, since masonry walls are more heavily regulated than fences in most areas
- Include weep holes or drainage gaps at the base to prevent water from pooling against the wall
- Budget for a proper footing below the frost line, since this is the step most DIYers underestimate both in cost and necessity
This is the most expensive and labor-intensive option here, and it’s often worth bringing in a mason for the structural block work even if you handle the veneer finishing yourself.
Underground utilities are the one thing I almost skipped checking before digging a footing trench. A quick call to the local utility locator service before any digging began caught a sprinkler line I would have otherwise cut straight through.
10. Woven Willow or Wattle Fence
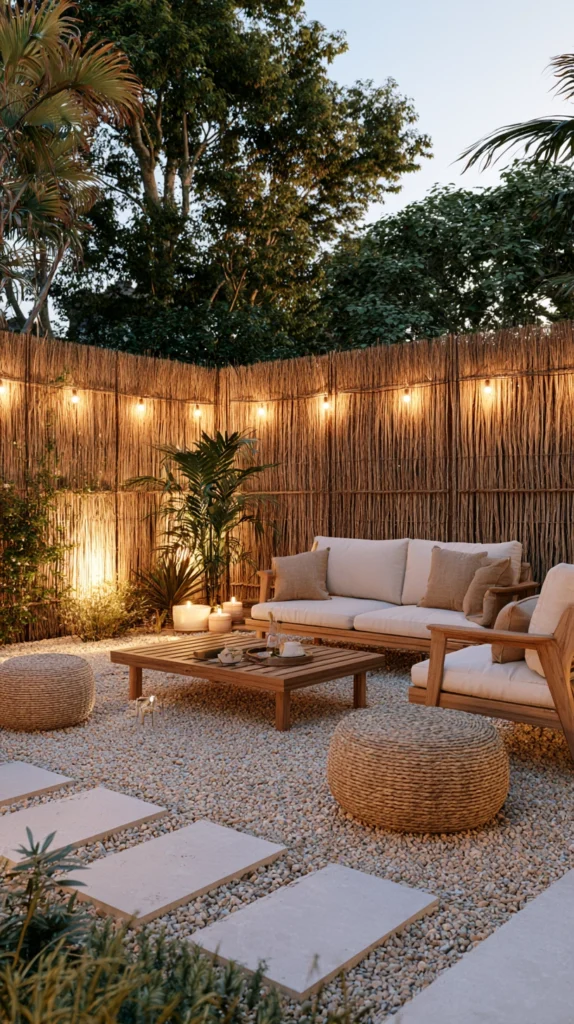
A rustic privacy fence woven from flexible willow branches or reclaimed wood strips, threaded horizontally between upright stakes.
Wattle fencing is an old technique that’s seeing a real resurgence, and it fits cottage, farmhouse, and naturalistic garden styles better than almost anything else on this list. It also uses minimal milled lumber, which appeals to anyone leaning toward a low-impact build.
I wove mine using willow branches harvested from a friend’s overgrown willow tree, threading them horizontally between cedar stakes driven every 18 inches along a short side-yard run.
Budget tip: Ask around for anyone with an overgrown willow, dogwood, or hazel that needs pruning, since flexible branches for wattle weaving are usually free if you’re willing to do the cutting yourself.
A few weaving notes:
- Use fresh, flexible branches, since dried wood cracks and breaks instead of bending around the stakes
- Weave tightly and pack rows down as you go for a denser, more private finished wall
- Expect a rustic, informal texture rather than a crisp, uniform surface, which is part of the appeal
Willow wattle fencing typically lasts five to seven years before needing replacement, which makes it a lower-commitment option than most permanent structures on this list.
Soaking older branches overnight before weaving brought back enough flexibility to use them without snapping, which stretched my usable material further than I expected once I realized fresh-cut wasn’t strictly required for every piece.
11. Board and Batten Privacy Fence
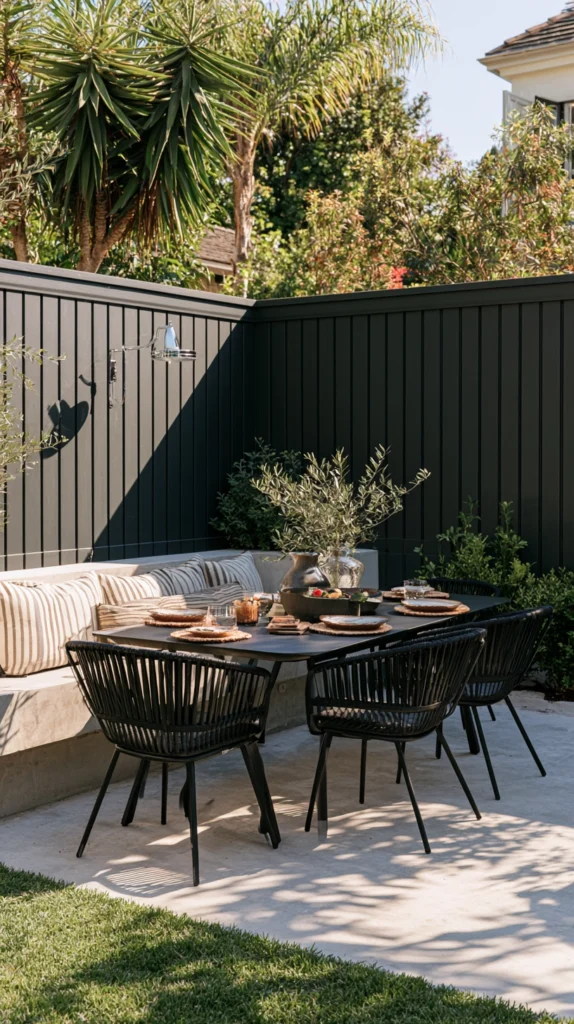
A solid vertical fence built from wide boards with narrow battens covering every seam, creating a completely opaque, gap-free wall.
Board and batten is the fence style to reach for when you want zero visibility through the wall at all, unlike slatted or woven designs that leave small gaps. The overlapping battens also add a subtle vertical rhythm that keeps a solid wall from looking flat.
I built mine using 1×8 cedar boards for the main field with 1×2 battens centered over every seam, standing 6 feet tall along the full width of my back property line.
Style tip: Paint or stain the boards and battens in slightly different tones, since a subtle contrast between the two layers adds depth that a single flat color doesn’t achieve.
A few build details:
- Leave a small gap, around a quarter inch, between main boards to allow for natural wood expansion
- Center each batten carefully over its seam before nailing, since an off-center batten is immediately noticeable
- Prime and paint before installation for full coverage on all edges, not just the visible face
Because there are no gaps at all, this design also does a genuinely good job of muffling street noise compared to slatted or lattice-style fences.
Board width affects how the fence handles wind more than most people realize. My first section used wider boards than the rest, and that stretch noticeably flexes more in strong gusts than the narrower-board sections beside it.
12. Trellis Privacy Wall with Espaliered Fruit
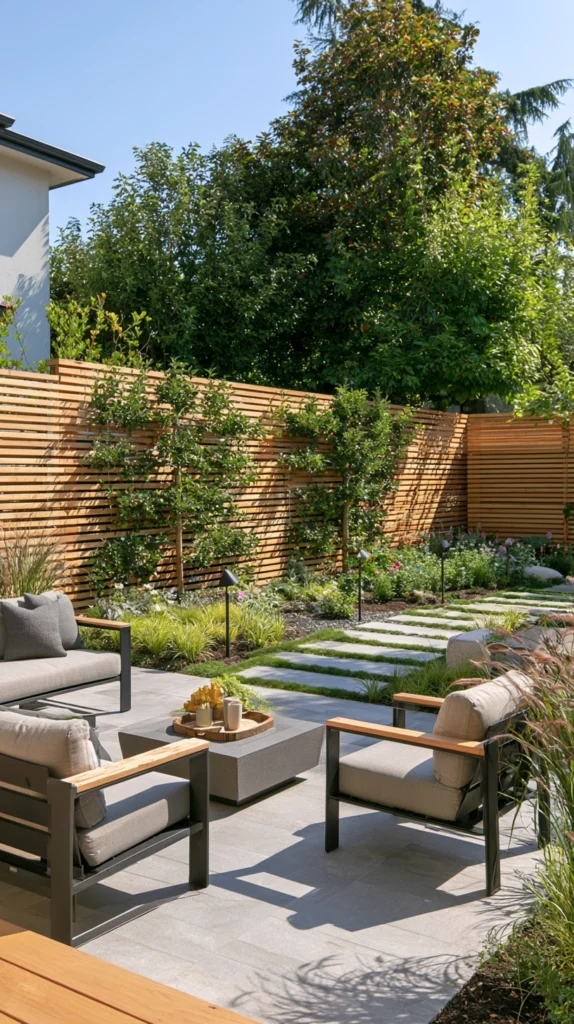
A tall wire or wood trellis frame planted with espaliered fruit trees or vines, trained flat to create a productive, layered privacy screen.
This idea combines screening with a real harvest, training fruit trees or grapevines flat against a support structure so they grow tall and wide instead of round, filling in like a living wall over a few seasons.
I strung horizontal wires along a 6-foot cedar frame and trained a row of espaliered apple trees across it, filling gaps below the trees with climbing grape vines for denser lower coverage.
Budget tip: Start with young, inexpensive bare-root fruit trees rather than pre-trained espaliered specimens, since training the branches yourself over a couple seasons costs a fraction of buying trees already shaped.
A few things to plan around:
- Train new growth by tying it to the wires every couple of weeks during the growing season
- Expect screening to build gradually over three to five years as branches fill out
- Choose fruit varieties suited to your climate zone, since a mismatched variety will struggle regardless of how well it’s trained
This is a slower build than most privacy solutions here, but it’s also one of the only options that gives you an actual harvest in exchange for the wait.
Pruning discipline in the first two years matters more than people expect, since it’s tempting to let a healthy young tree just grow naturally. I forced myself to cut back anything growing forward or backward off the wire, which is the only reason mine trained flat instead of turning bushy.
13. Outdoor Curtain Wall on Cable
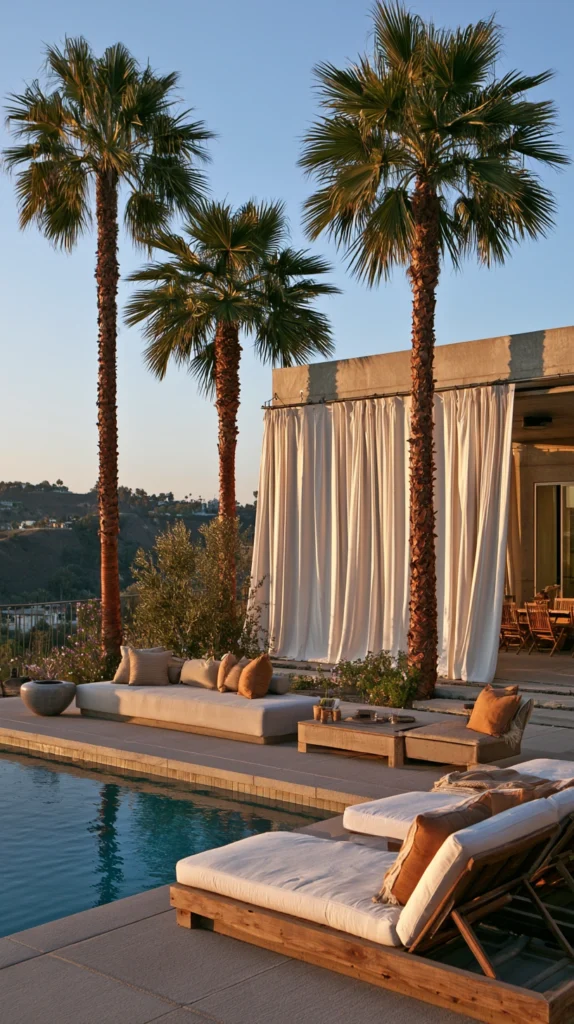
A run of heavy outdoor drapery panels hung on a stainless steel cable strung between posts, creating a soft, fabric privacy wall.
This design brings a resort-style softness to backyard privacy that hard materials can’t match. Fabric moves with the breeze, filters light beautifully, and can be pulled fully open when you want an unobstructed view.
I strung stainless cable between two 8-foot cedar posts and hung a run of solution-dyed canvas panels, wide enough to fully overlap and block the sightline from a neighboring deck.
Style tip: Choose panels wider than the gap they’re covering, since curtains hung at their exact measured width look thin and skimpy once they’re actually in place and moving with the wind.
A few practical notes:
- Use marine-grade cable and hardware to resist rust in outdoor conditions
- Hem the bottom of each panel with a weighted rod to keep fabric from flapping excessively
- Expect to wash or replace panels every few years as sun exposure fades and weakens the fabric over time
This is one of the fastest privacy solutions to install on this entire list, and it’s also one of the easiest to fully remove if you ever change your mind about the layout.
Cable sag became a real issue by the end of the first summer, since fabric weight stretches steel cable over time. A simple turnbuckle at one end let me retension the line in a couple of minutes instead of taking the whole system down to fix it.
14. Mixed Material Screen Wall
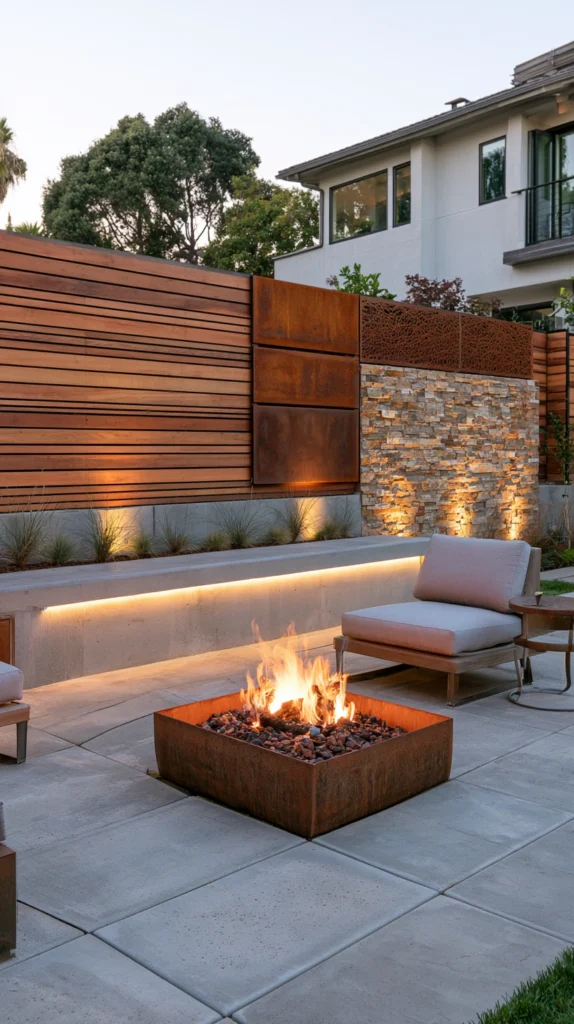
A privacy wall that combines two or more materials, like wood slats paired with metal panels or stone paired with living plants, in a single deliberate composition.
Rather than choosing one material for the entire run, this approach breaks a long privacy wall into distinct sections, which keeps a large expanse of screening from feeling monotonous while still blocking every sightline you need blocked.
My side yard wall alternates horizontal cedar slat sections with two narrow Corten steel panels spaced along the run, tying the whole thing together with a continuous cedar cap rail across the top.
Budget tip: Reserve the more expensive material, like steel or stone, for just one or two accent sections, and build the bulk of the wall in a cheaper material like standard cedar boards.
A few things that help this design succeed:
- Keep a consistent height and cap detail across every material section so the wall reads as one cohesive design instead of several unrelated pieces stitched together
- Limit yourself to two or three materials total, since more than that starts to look chaotic rather than intentional
- Repeat each material at least twice along the run if the wall is long, which creates rhythm instead of a single random insert
This is a more advanced design to plan than a single-material fence, but it’s often the option that ends up looking the most custom and considered once it’s finished.
Sketching the full elevation on paper before buying a single board saved me from a lopsided layout. Seeing the material transitions drawn out to scale made it obvious my first plan had too many small sections crammed close together.
Quick-Start Shopping List
- Cedar 1×6 or 1×8 boards for a slat or board and batten fence
- A roll of stainless steel cable and marine-grade hardware for a curtain wall
- Clumping bamboo or arborvitae starts for a living privacy screen
- Standard CMU block and thin stone veneer for a masonry wall
- Locking caster wheels for a portable panel build
Budget-Friendly and Rental-Friendly Version
If you’re renting, skip anything set in concrete. Freestanding cedar panels on casters, a run of outdoor curtains on cable strung between temporary posts, or a cluster of tall potted bamboo can all block a sightline without touching the property permanently, and every one of them moves with you.
Success Indicators
You’ll know a privacy solution is working when you can sit outside without instinctively checking who might be watching, when the screen still looks intentional rather than makeshift after a full season of weather, and when it blocks the actual sightline you built it for, not just the general direction of the problem.
A good privacy wall also earns its keep in every season, not just the one you built it in. If it disappears in winter or leaves gaps once leaves drop, it may only be solving half the problem.
- You stop noticing or worrying about the sightline it was built to block
- The material or planting still looks intentional after a full year of weather
- It blocks the specific view it was designed for, tested from your actual seating height
- Maintenance stays manageable rather than becoming its own recurring chore
Remember: the best backyard privacy wall is the one that solves your specific sightline problem without turning the whole yard into a walled-in box, so measure the actual view you want blocked before you build, and choose a material and height that fixes that one problem rather than over-building for privacy you don’t really need.