15 Vegetable Garden Layout Ideas for Every Gardener
A vegetable garden that has been laid out well is easier to manage, more productive, and considerably more enjoyable to work in than one that has simply accumulated beds and paths without a guiding logic.
The layout determines how light reaches the plants, how the soil is managed, how crops are rotated, and how much time is spent walking between harvesting and the kitchen. Getting it right at the beginning saves years of working around decisions that were never properly made.
The fifteen layouts below cover every scale of vegetable growing — from a single raised bed on a terrace to a large productive plot — and every level of formality, from the strict symmetry of a traditional kitchen garden to the relaxed integration of vegetables into an ornamental border. Each one includes a cost guide and a practical tip to help you plan and build with confidence.
1. The Classic Four-Bed Rotation Layout
Budget: $100 – $400
Four equally sized beds divided by two crossing paths, with crops rotated between the beds on a four-year cycle — brassicas, roots, legumes, and alliums each occupying a different bed each season — is the most organised and most productively efficient vegetable garden layout available for a standard growing space.
Each bed should be no wider than 120 cm so the centre can be reached from both sides without stepping on the soil. Paths of at least 60 cm between beds allow comfortable wheelbarrow access. The four-bed system makes crop rotation intuitive — each group simply moves one bed clockwise each spring — which significantly reduces the planning required at the start of each new season.
Layout tip: Mark the centre of the four-bed layout with a single vertical focal point — a wigwam of climbing beans, a standard gooseberry, or an obelisk. The central feature gives the layout a visual anchor at the convergence of the two main paths and reinforces the formal, organised quality that makes this vegetable garden layout so satisfying to work within and to look at.
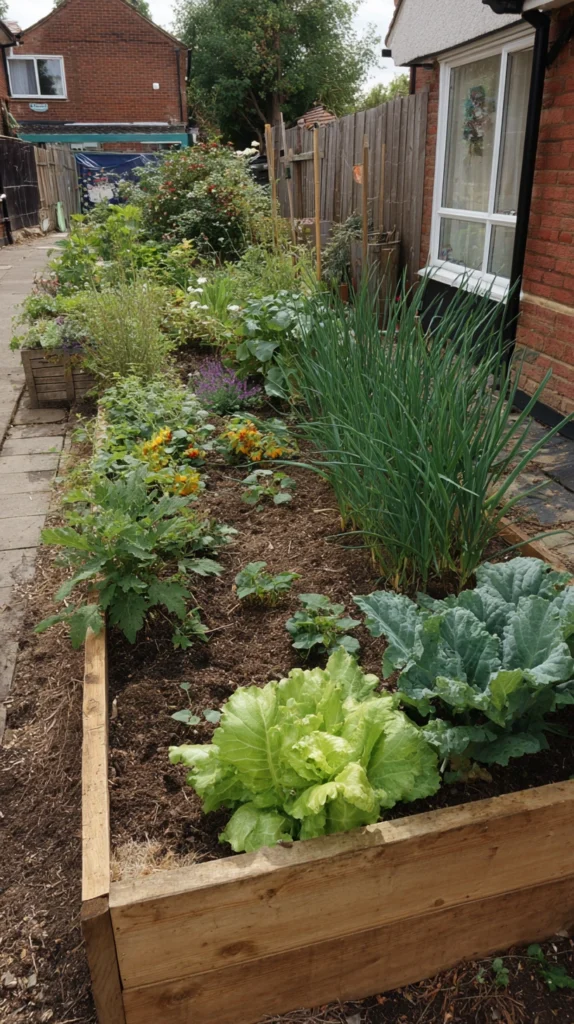
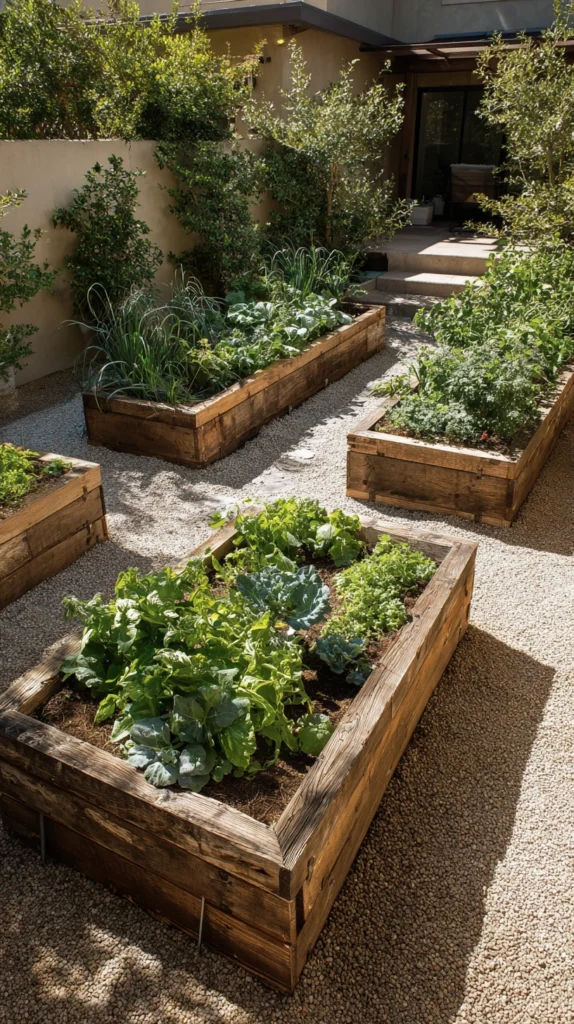
2. The Single Raised Bed Starter Layout
Budget: $40 – $150
A single raised bed of 120×60 cm is the most achievable and most immediately rewarding vegetable garden layout for a beginner, a small space, or anyone testing the practice before committing to a larger growing area. In a single bed of this size, four or five different crops can be grown simultaneously with enough variety to make the harvest genuinely useful.
A timber raised bed kit costs $30–$80. Fill with a 50/50 mix of topsoil and garden compost at $20–$40 per large bag. Divide the bed into four sections with a simple string line or small plank edges — one section each for a fast crop (salad), a root crop (beetroot), a fruiting crop (cherry tomato), and a permanent herb. This simple division organises the growing without overcomplicating the layout.
Layout tip: Position the raised bed in the sunniest available spot — minimum six hours of direct sun per day — rather than the most convenient or most visible position. Sun exposure is the single most important variable in raised bed productivity and a well-sited bed in an inconvenient corner of the garden always outperforms a poorly sited bed in an ideal location from every other perspective.
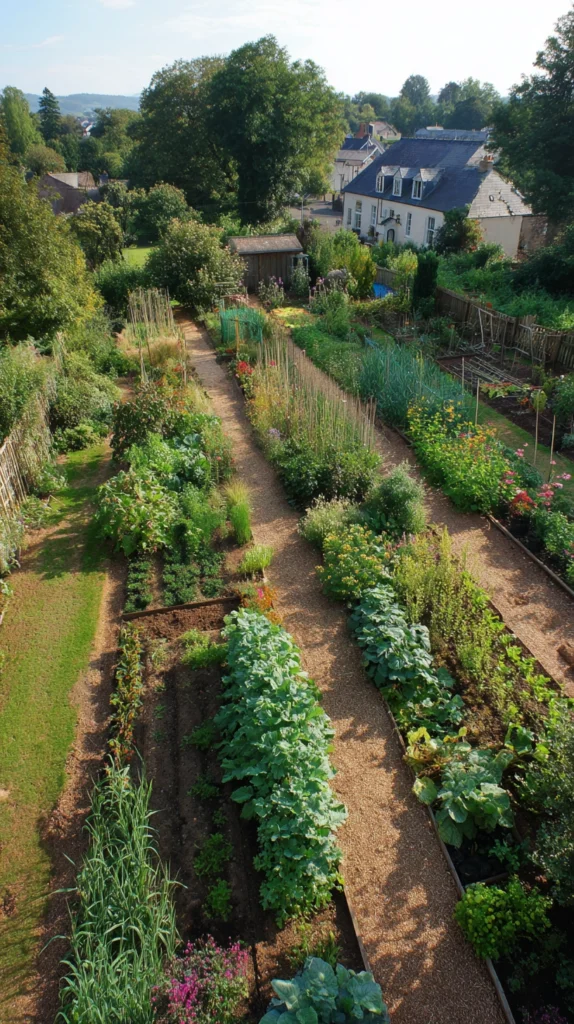
3. The Long Row Traditional Layout
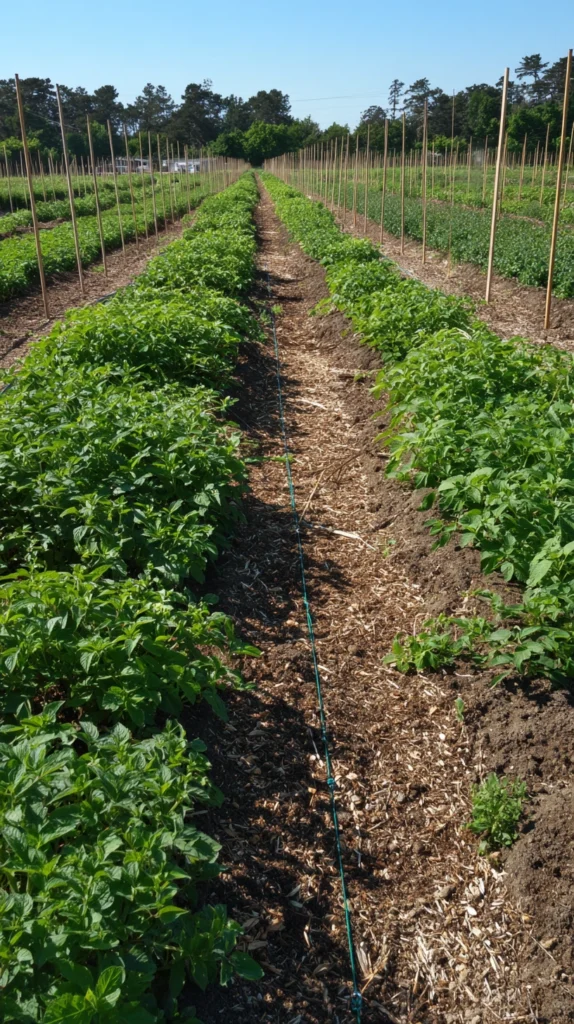
Budget: $30 – $150
Long parallel rows running north to south across a level plot — with wide rows to one side for tall crops and narrow rows to the other for low-growing ones — is the traditional vegetable garden layout that has been used on allotments and kitchen gardens for centuries. It suits a rectangular plot, allows mechanical cultivation between rows, and is the most efficient layout for crops grown in large quantities.
Mark rows with canes and string before sowing to keep the lines straight — a crooked row is hard to hoe cleanly without damaging plants. North to south orientation ensures that taller crops on the north side do not shade shorter ones to the south through the growing season. Space rows according to the widest crop in each group rather than the narrowest.
Layout tip: Leave a permanent access path every four rows rather than walking along the rows themselves. A plot with access paths built into the layout is easier to manage, suffers less soil compaction, and looks considerably more organised than one where the path is wherever there is space to stand at any given moment. Mark permanent paths from the first season and never cultivate them.
4. The No-Dig Lasagne Bed Layout

Budget: $30 – $100
A no-dig layout built from layers of cardboard and compost directly over existing grass or weeds creates a new vegetable growing area in an afternoon without any digging, rotovating, or soil preparation beyond the cardboard base layer. Multiple beds can be created simultaneously across any area of ground.
Cardboard from any supermarket is free. Garden compost or well-rotted manure at $20–$50 per large bag supplies the growing medium for one standard 120×60 cm bed. Overlap cardboard joins by 20 cm minimum and top with 15 cm of compost before planting. By the following season the cardboard has fully broken down and the worm activity beneath it has improved the native soil structure significantly.
Layout tip: Create all intended beds in the same session rather than one at a time. Building a complete layout of three or four beds simultaneously takes the same effort as building one and ensures the path network between beds is planned and established from the beginning rather than added around beds that were placed without reference to how they connect to each other.
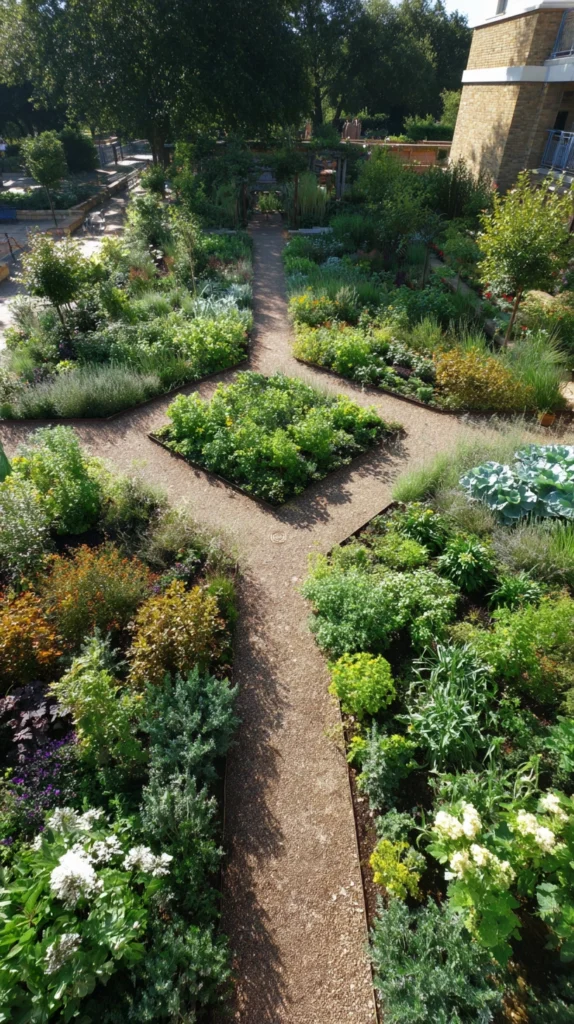
5. The Potager or French Kitchen Garden Layout
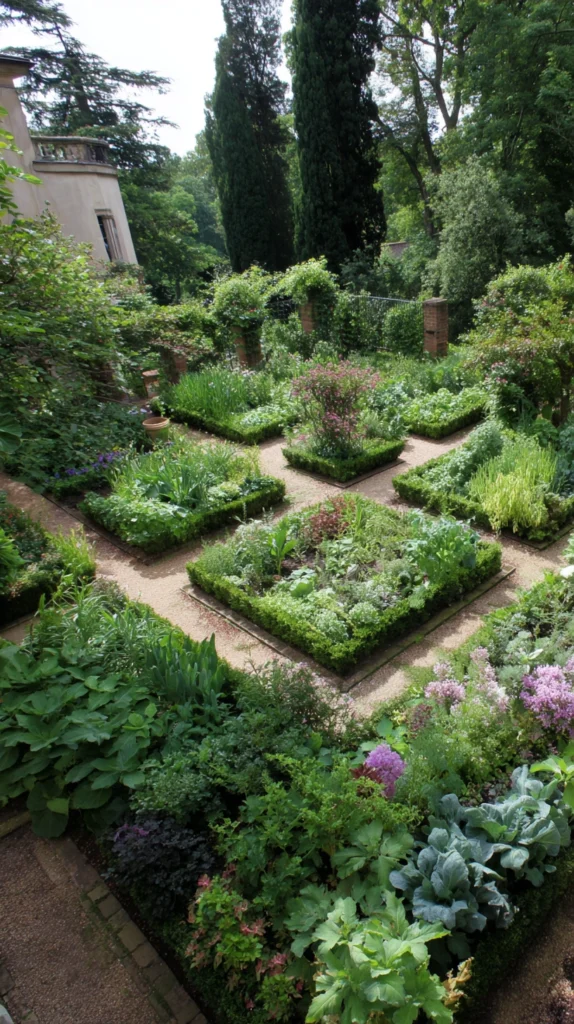
Budget: $200 – $800
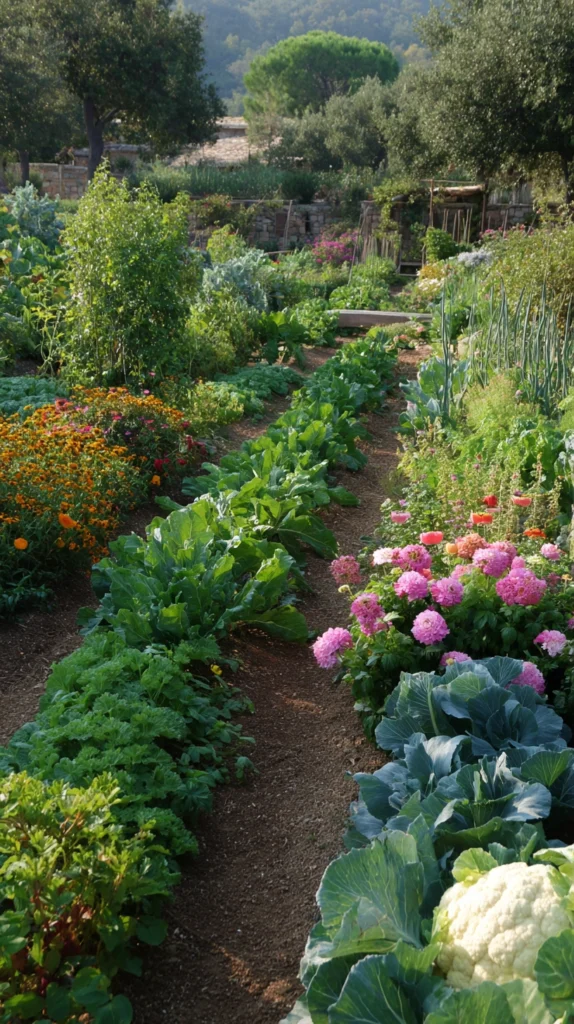
The potager integrates ornamental and productive planting in a formally laid-out garden that is as beautiful as it is productive. Geometric beds edged with low box or lavender hedging, climbing beans on decorative obelisks, and a mix of productive and ornamental plants in each bed create a kitchen garden that is a garden feature in its own right rather than a functional area separate from the ornamental garden.
The formal edging is the defining element — box plants cost $2–$5 each and require 15–20 plants per 2-metre bed edge. Lavender as an alternative edging costs $4–$10 per plant and needs trimming twice yearly. The decorative obelisks cost $20–$60 each and should be installed before any climbing crops are planted beside them rather than retrofitted into an established planting.
Layout tip: Keep the potager layout symmetrical even if the planting within each bed is not. A symmetrical layout structure — matching beds on each side of the central path — creates the formal quality that makes a potager look designed even during the untidy mid-season period when vegetables in full growth are rarely as neat as any garden plan anticipates.
6. The Square Foot Garden Layout
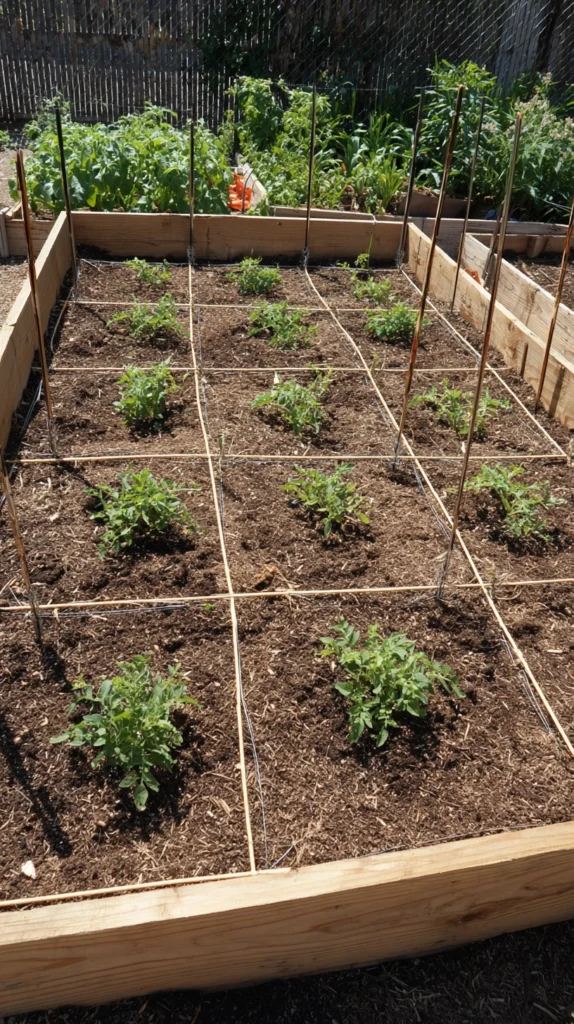
Budget: $50 – $180
The square foot gardening system divides a raised bed into a grid of 30×30 cm squares, with each square planted with a different crop at a density calibrated to the size of the mature plant — one courgette per square, four lettuces per square, sixteen radishes per square. It is the most intensively productive layout available for a small growing area.
A 120×120 cm raised bed divided into a 4×4 grid of sixteen squares costs $50–$120 in materials. Mark the grid with string or narrow timber battens pressed into the compost surface. The grid makes succession planting straightforward — individual squares are cleared and resown as crops finish rather than waiting for a whole bed to empty before replanting.
Layout tip: Keep a simple chart of which crop occupies each square and when it was sown. Sixteen squares managed without a written record quickly becomes confusing — different crops mature at different rates and a chart updated at each sowing and harvest decision makes the system significantly easier to manage than memory alone, particularly across a full growing season.
7. The Keyhole Bed Layout

Budget: $80 – $250
A circular raised bed with a keyhole-shaped path cut into one side — allowing the gardener to reach the centre of a large bed without stepping on the growing area — is the most space-efficient raised bed layout available for a garden where circular or curved forms suit the wider design better than rectangular beds.
A circular bed of 180 cm diameter with a 60 cm wide keyhole path provides access to every part of the growing surface from the path. Build from timber, stone, or brick at a height of 30–45 cm. The circular form requires more material than a rectangular bed of equivalent growing area but allows a wider central planting zone than any rectangular bed that can be accessed from both sides.
Layout tip: Compost the centre of a keyhole bed by filling the central column — directly at the apex of the keyhole path — with a wire mesh composting cylinder. Kitchen scraps added to the cylinder break down and leach nutrients outward into the surrounding growing medium, reducing the need for separate feeding of plants in the bed through the growing season.
8. The Vertical Growing Layout
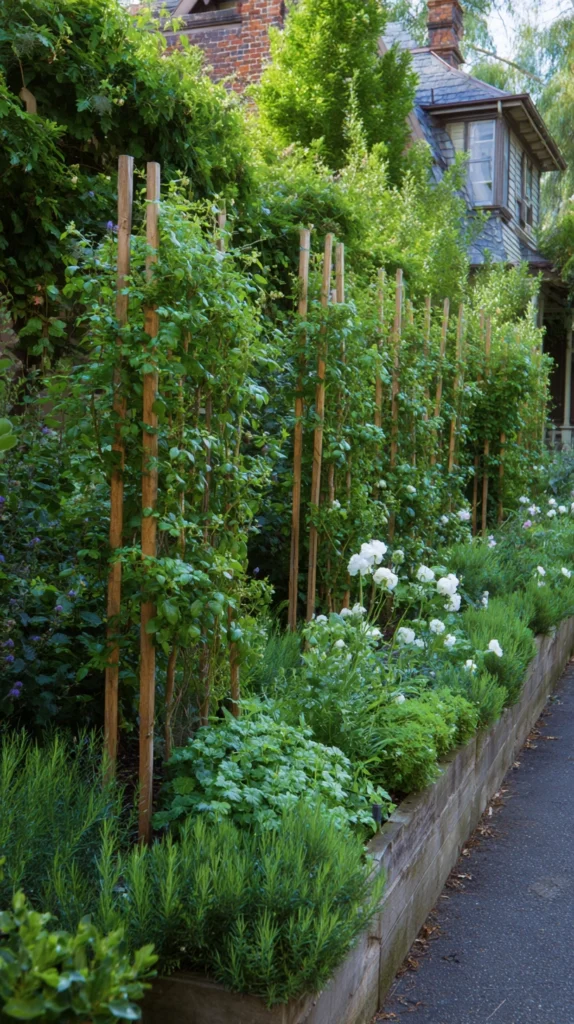
Budget: $60 – $250
A vegetable garden layout built around vertical growing — climbing beans, cucumbers, and squashes trained up frames, trellis panels, and obelisks — produces significantly more food per square metre of ground space than a horizontal layout of equivalent footprint, making it the most productive layout available for small or restricted gardens.
A simple A-frame of two canes per plant costs $3–$5 per pair. A permanent wooden trellis panel of 180×90 cm costs $20–$50 and supports beans, cucumbers, and climbing courgettes across multiple seasons. A growing arch of two bent hazel poles supporting climbing plants across a path costs $15–$30 and creates a productive and visually striking tunnel feature within the vegetable garden layout.
Layout tip: Position all vertical structures on the north side of the vegetable garden so that the shade they cast falls northward and away from shorter crops rather than over them. A climbing bean frame positioned incorrectly can shade a significant area of low-growing crops — sited correctly on the northern boundary it adds growing space without reducing light for anything else in the garden.
9. The Allotment Strip Layout
Budget: $50 – $200
A traditional allotment-style layout — a large rectangular plot divided into equal strips running across the width of the space, each strip dedicated to a different crop family — is the most practical layout for a large-scale productive garden where diversity of crops and ease of management are the primary priorities.
Strips of 90–120 cm wide running across a 3-metre wide plot allow cultivation from both sides without stepping onto the growing area. A central path running the length of the plot divides it into two halves that can be managed independently. Mark strip boundaries with wooden pegs and string each season and move the crop family in each strip one position along the length of the plot for simple and effective crop rotation.
Layout tip: Dedicate one permanent strip to perennial crops — asparagus, rhubarb, Jerusalem artichoke, and perennial herbs — that do not need moving each season. A permanent perennial strip at one end of the plot simplifies the annual rotation plan for the remaining strips by removing the perennial crops from the rotation logic entirely.
10. The Container and Bag Layout for Paved Spaces
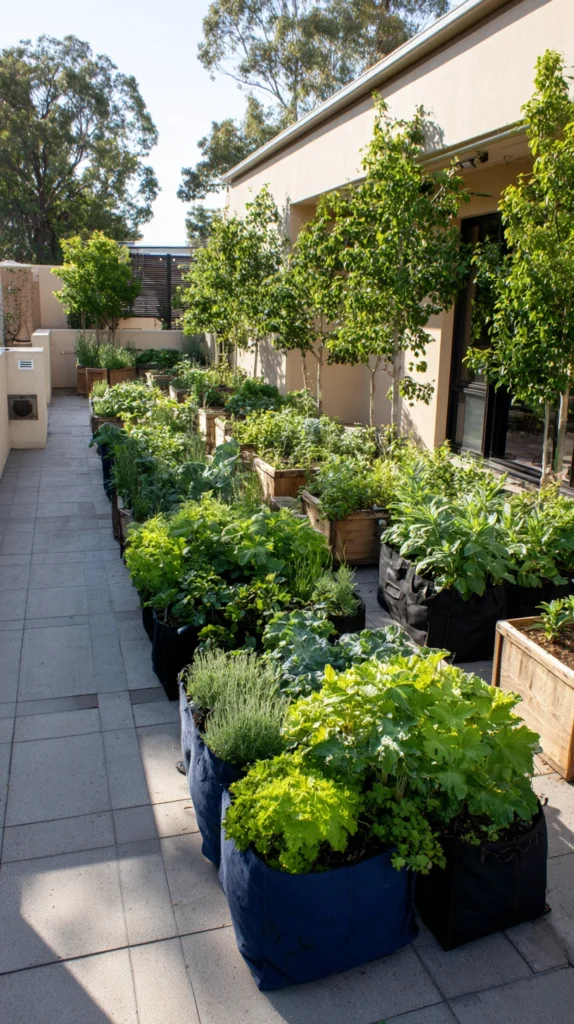
Budget: $40 – $200
A vegetable garden created entirely from containers, grow bags, and large pots on a paved terrace, balcony, or courtyard is the most flexible and most accessible productive layout for gardeners without access to open ground. The container layout can be scaled from a single grow bag to a full terrace of coordinated planters.
Standard grow bags cost $8–$15 each and support two tomato or three chilli plants. Large 40-litre containers cost $15–$30 each and suit courgettes, potatoes, and dwarf beans. Arrange containers in a consistent grid or row pattern for the most organised appearance — a paved growing space with containers placed at random angles and distances looks untidy regardless of the quality of the plants within them.
Layout tip: Use matching containers throughout the layout — the same material, size, and colour — rather than a collection of different pot types assembled as plants were acquired. A layout of twelve matching containers is visually resolved. The same twelve containers in twelve different materials, colours, and sizes is visually chaotic regardless of what is growing in them. Consistency in the containers is the single most impactful organisational decision in a patio vegetable garden.
11. The U-Shaped Raised Bed Layout
Budget: $150 – $500
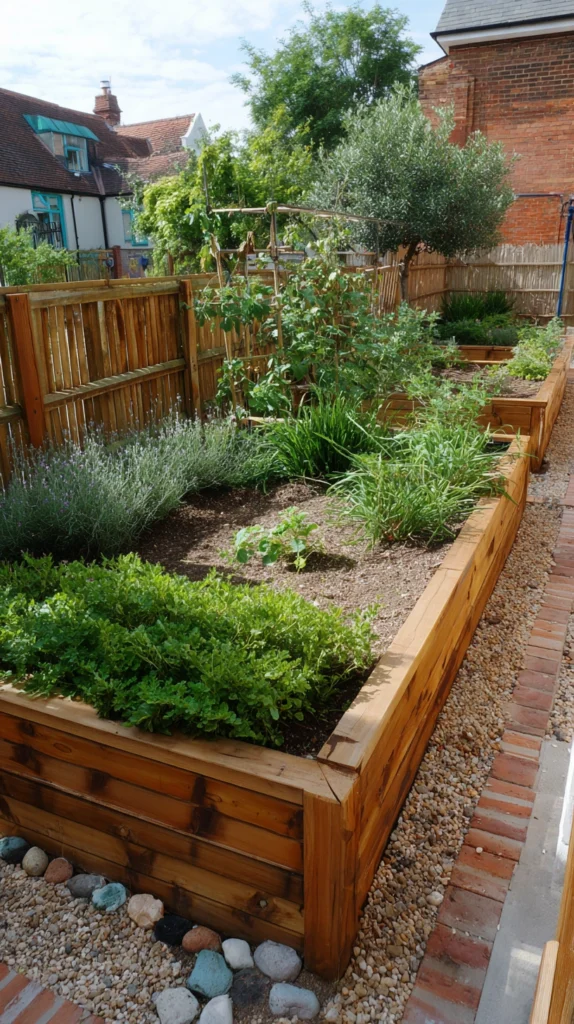
Three raised beds arranged in a U-shape around a central working area create a compact, ergonomically efficient growing layout that allows access to all three beds from a single standing position without any movement between them — the most comfortable and most productive arrangement for a gardener who wants to maximise harvesting efficiency in a small space.
Each bed of the U should be no wider than 60 cm so the back of the bed can be reached from the front without stretching. A U-shape of three 120×60 cm beds at a working height of 75–90 cm — accessible from a standing or seated position — provides approximately 2 square metres of growing space within an overall footprint of 150×150 cm. The raised height also eliminates bending, which is the most significant ergonomic advantage of this layout.
Layout tip: Build the U-shaped beds at a height that suits the primary gardener’s working position rather than the standard 30–45 cm ground-level height. A bed at 75–90 cm height is completely accessible to a standing gardener and to a wheelchair user without any adaptation — a genuinely universal design that requires no modification to serve any gardener effectively.
12. The Food Forest Layout
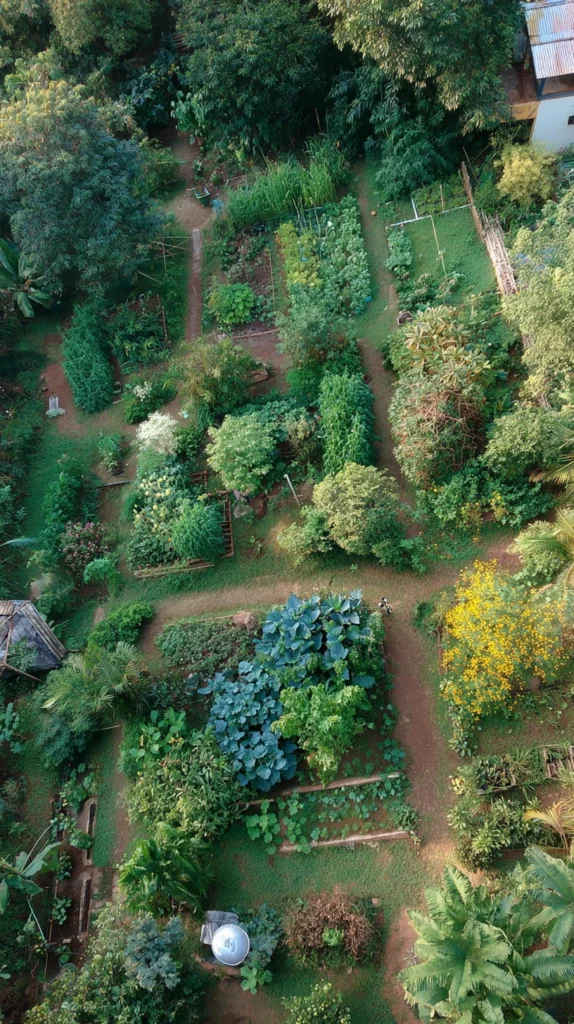
Budget: $200 – $1,000
A food forest layout — multiple layers of productive planting from canopy fruit trees down through shrub fruits, climbing plants, herbaceous crops, and ground cover — creates the most self-sustaining and lowest-maintenance productive garden layout available. Once established it requires very little input and produces a diverse harvest across all growing layers simultaneously.
A standard fruit tree costs $25–$80. Soft fruit bushes run $8–$25 each. Climbing plants suitable for the mid-layer including kiwi, grape, and climbing bean cost $10–$40 each. Ground cover crops of strawberry, mint, and alpine strawberry cost $2–$8 per plant. The food forest takes three to five years to reach a productive equilibrium but requires progressively less maintenance with each passing season as the system becomes self-regulating.
Layout tip: Position the tallest canopy trees at the north edge of the food forest layout rather than the centre. Fruit trees in the centre cast shade over all lower planting layers, dramatically reducing the productivity of the soft fruits and herbaceous crops beneath them. A northern tree line allows the full growing season sun to reach every level of the food forest from the south throughout the day.
13. The Grow-Your-Own Cut Flower and Vegetable Layout
Budget: $60 – $250
A layout that combines cut flowers — dahlias, cosmos, sweet peas, and zinnias — with vegetables in the same beds or in adjacent dedicated sections creates the most visually beautiful productive garden available and the most enjoyable to spend time in through the growing season. The flowers attract pollinators that improve vegetable yields and provide a continuous supply of stems for cutting throughout the summer.
Dedicate one third of the growing area to cut flowers and two thirds to vegetables for a balanced productive and aesthetic result. Dahlia tubers cost $3–$10 each. Sweet pea seeds run $3–$6 per packet. Cosmos seeds cost $2–$5. Zinnia seeds run $2–$4. The entire cut flower section can be planted for $20–$40 in seed and tuber cost, making it the most affordable aesthetic addition available for any vegetable garden layout.
Layout tip: Position the cut flower section at the front of the vegetable garden — the part most visible from the main viewpoint — and the less ornamental productive crops behind it. A vegetable garden seen from the house or the main garden path with a foreground of flowering dahlias and cosmos looks deliberately designed rather than purely functional, which is the quality that makes the growing area a genuine garden feature rather than a purely productive one.
14. The Children’s Garden Layout
Budget: $50 – $200
A small dedicated section of the vegetable garden designed specifically for children to plant, tend, and harvest — with easy crops, clearly labelled beds, and a layout at child height — creates the most consistently engaging introduction to food growing available and significantly increases the likelihood that children develop a lasting relationship with growing food.
A single 120×60 cm raised bed at 30 cm height costs $30–$80. Plant with fast, rewarding crops that children find exciting: cherry tomatoes ($3–$6 per plant), giant sunflowers ($2–$4 per packet), strawberries ($2–$5 per plant), and rainbow chard ($2–$4 per packet). Label each crop with a handmade sign using a painted stone or a lolly stick — the act of making the label is itself a meaningful part of the growing engagement.
Layout tip: Give children genuine ownership of their section — let them choose what to grow from a curated shortlist of appropriate crops rather than planting whatever is convenient. A child who chose their own crops is significantly more invested in watering, weeding, and harvesting them than one who is tending crops chosen for them by an adult. The ownership of the decision is part of the educational value of the layout.
15. The Edible Landscape Layout
Budget: $200 – $800
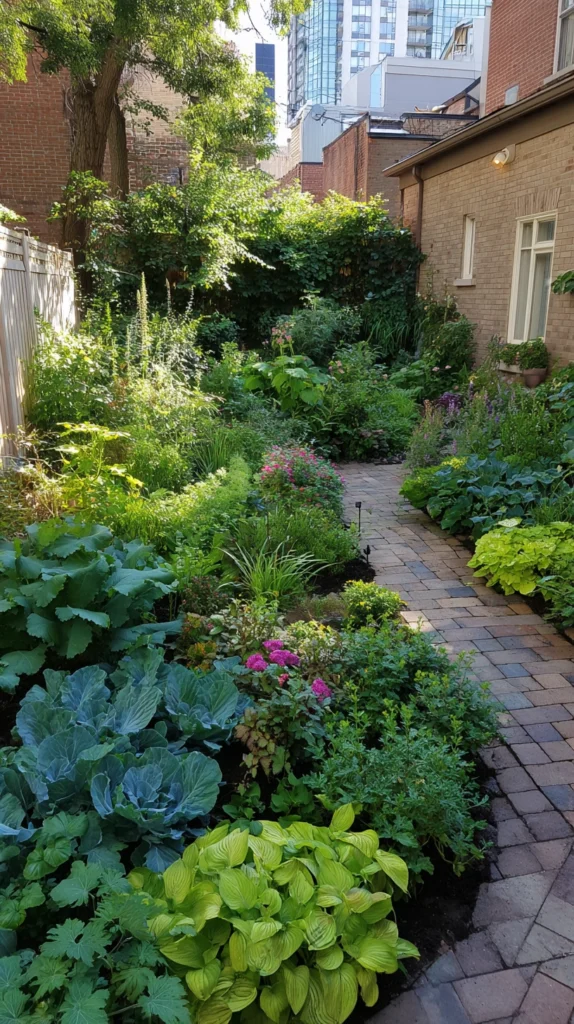
An edible landscape integrates productive plants throughout the entire garden rather than confining them to a designated vegetable area — fruit trees as specimen trees, blueberry bushes as ornamental shrubs, kale and chard in the perennial border, climbing beans on the garden arch, herbs along the path edge. Every part of the garden produces something edible without any part of it looking like a vegetable plot.
The edible landscape layout requires no separate vegetable area — it works with the existing garden structure and simply replaces ornamental plants with productive equivalents wherever the conditions suit. An espalier apple on the south-facing fence costs $30–$80. Kale as a border plant costs $2–$5 per plant. A standard bay tree as a focal point costs $30–$80. The productive garden appears nowhere and everywhere simultaneously.
Layout tip: Choose the most ornamentally attractive variety of every edible plant rather than simply the most productive one. Red-stemmed chard, purple-podded beans, ornamental kale, multi-coloured tomato varieties, and copper fennel are all productive and visually significant enough to hold their place in an ornamental garden setting. A purely functional crop variety placed in an ornamental border looks out of place regardless of how productively it performs.
The best vegetable garden layout is not the most ambitious one — it is the one that fits the time, space, and growing experience of the person who will maintain it through every week of the season. A small, well-planned layout that is consistently managed and harvested produces more food and more satisfaction than a large, ambitious layout that becomes overwhelming by July and is largely abandoned by August.
Start with the layout that feels genuinely manageable for where you are now rather than aspirationally ambitious for where you hope to be. Build it well, maintain it consistently through one full season, and let what you learn from that first year inform every expansion decision that follows. The vegetable gardeners who grow the most food are almost never the ones who started with the most space.