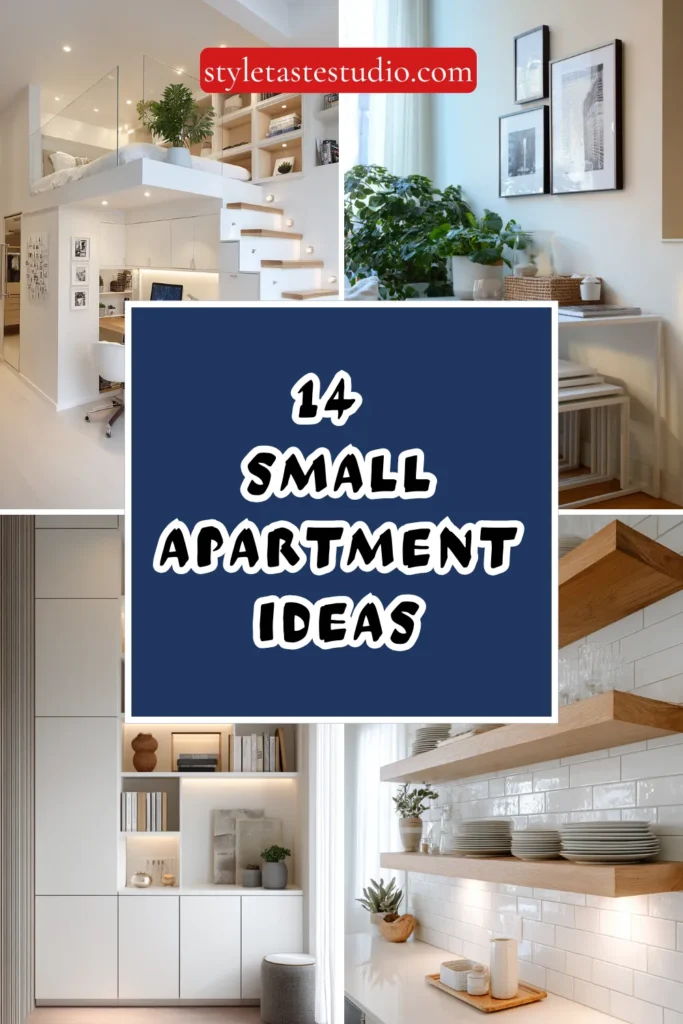
14 Small Apartment Ideas
My first apartment was 480 square feet. One room doing the job of four: bedroom, living room, office, and somehow also a dining room whenever anyone visited.
I furnished it like I had double the space. A full-size sofa, a bulky coffee table, a dresser that ate half the bedroom wall. Every piece fought every other piece for the same six feet of floor.
Then I stopped buying furniture sized for a house and started buying furniture sized for the actual room. A daybed instead of a sofa and bed combination. A drop-leaf table instead of a fixed dining table. Vertical storage instead of anything wide.
The apartment did not get bigger. It just stopped feeling like it was constantly apologizing for its size.
Here are 14 ideas that make a small apartment function like a much larger one, without pretending the square footage is something it is not.
Why Most Small Apartments Feel Smaller Than They Are
The common mistakes:
The oversized furniture trap:
- Furniture purchased at a full-size showroom scale
- Pieces that would work in a house but overwhelm an apartment
- No consideration of actual clearance and walking paths
- A room that feels cramped regardless of what is in it
The everything-visible approach:
- No closed storage, so every item stays in constant visual view
- Countertops, shelves, and surfaces covered with daily-use objects
- A small space reading as cluttered even when it is not messy
- Visual noise competing with the room’s actual function
The single-purpose furniture mindset:
- Every piece serving exactly one function, requiring more pieces overall
- A coffee table that is only a coffee table, a bed that is only a bed
- No consideration of multi-functional alternatives
- More furniture crammed into less space than necessary
What a successful small apartment does:
Makes every square foot and every piece work harder:
- Furniture scaled specifically to the room’s actual dimensions
- Closed storage reducing visual clutter significantly
- Multi-functional pieces reducing the total furniture footprint
- Vertical space used as deliberately as floor space
My revelation: A small apartment is not a smaller version of a house. It needs its own logic, its own furniture scale, and its own storage strategy entirely.
1. The Multi-Functional Daybed or Sleeper Sofa
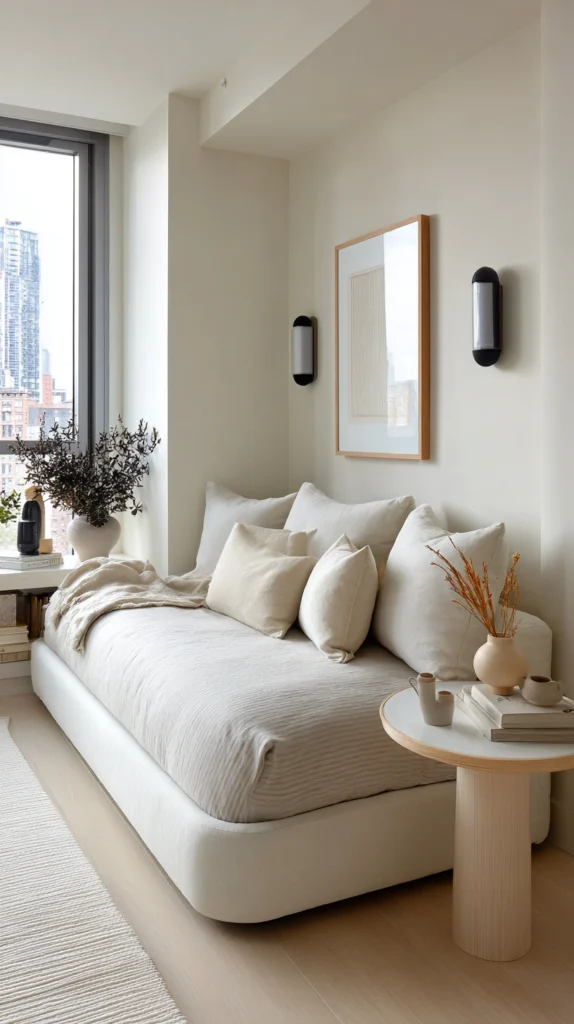
A daybed or quality sleeper sofa replacing separate bed and sofa furniture — collapsing two large furniture footprints into one.
My separate bed and sofa problem:
What I had:
- A twin bed against one wall and a small sofa against another
- Both pieces underused, since the room could not comfortably fit either at full scale
- No genuine living room feel and no genuine bedroom feel, just two compromises
The daybed discovery:
Why combining these functions works so well:
- A daybed functions as genuine seating during the day and a real bed at night
- Frees an entire second furniture footprint for other use
- Quality sleeper sofas have improved significantly beyond the uncomfortable versions of the past
- The single biggest square-footage saving available in a studio or small one-bedroom
Choosing the right piece:
What to look for:
- A daybed with a trundle for occasional guest sleeping without permanent bulk
- A sleeper sofa with a quality mattress, not the thinnest available option
- Sizing that fits the room’s actual dimensions, not the largest available model
- Fabric or material easy to maintain given the piece’s daily double duty
Where this works best:
Ideal spaces:
- Studio apartments needing one room to serve as both living and sleeping space
- A home office that occasionally doubles as a guest room
- One-bedroom apartments with an especially small bedroom
Cost:
- Daybed with trundle: $250-700
- Quality sleeper sofa: $600-2,000
- Total: $250-2,000
My daybed setup: Replacing a separate bed and loveseat with one daybed against the wall freed up enough floor space for an actual reading chair, and the room finally felt like it had a real living area during the day.
Daybed Tips
Choose a mattress upgrade if the piece allows it:
Comfort priority:
- Many daybeds and sleeper sofas ship with a thin, low-quality mattress
- A mattress topper or replacement mattress dramatically improves nightly comfort
- This upgrade is worth the additional cost given how much this single piece is used
- Test the mattress firmness before committing, since return policies on furniture mattresses vary
Style with pillows that work for both day and night use:
Practical styling:
- Bed pillows tucked away during the day, decorative pillows out for lounging
- A storage basket nearby makes the daily transition quick and simple
- This small routine keeps the piece looking intentional in both its daytime and nighttime roles
- A cohesive pillow and throw palette helps the piece read as furniture, not obviously a bed
2. The Vertical Storage Wall
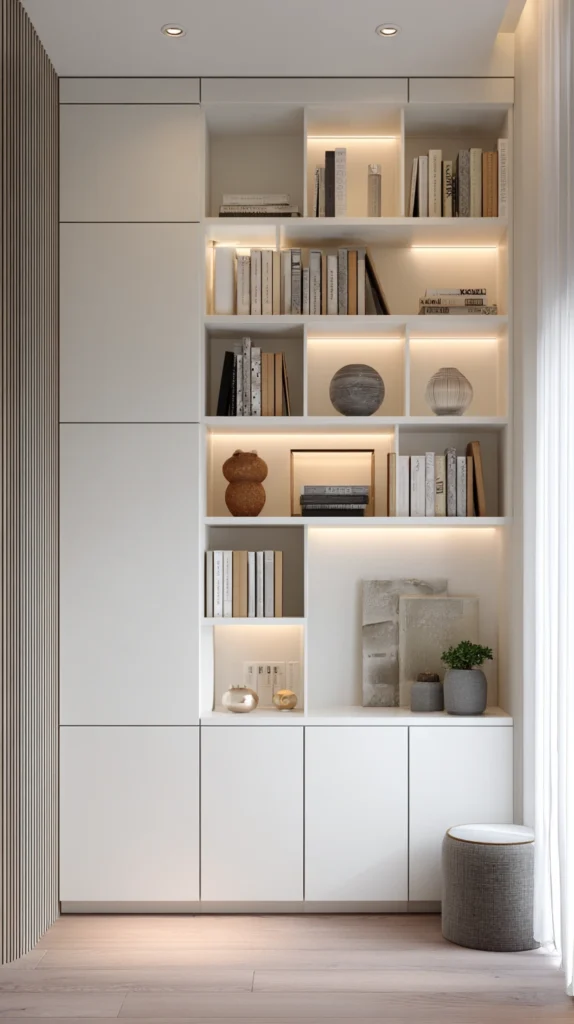
Floor-to-ceiling shelving or a full storage wall — using height instead of floor footprint to gain genuine storage capacity.
My floor-level storage limit:
What was holding me back:
- All storage furniture stopping around waist or shoulder height
- Significant unused wall space above every piece of furniture
- Constantly running out of storage despite having a reasonably sized room
The vertical storage solution:
Why going up solves what floor space cannot:
- Ceiling height is almost always underused in a small apartment
- Floor-to-ceiling shelving adds significant storage without expanding the furniture footprint
- Creates a genuine architectural feature rather than just functional storage
- The single most effective way to add capacity without losing floor space
Building the storage wall:
Approach options:
- Freestanding floor-to-ceiling bookshelf units, unattached for renters
- Wall-mounted shelving brackets for a more open, lighter-feeling storage wall
- A closed cabinet system on the lower half with open shelving above
- Modular cube storage stacked to full height for maximum flexibility
Styling to avoid visual overwhelm:
Keeping it from feeling cluttered:
- Group items by color or category rather than scattering randomly
- Leave some negative space rather than filling every shelf completely
- Use baskets or bins on lower shelves to contain smaller items out of view
- Reserve the top shelves for less frequently used items, given the reduced daily access
Cost:
- Freestanding floor-to-ceiling bookshelf: $150-500
- Wall-mounted shelving system: $100-400
- Total: $100-500
My vertical storage wall: Installing floor-to-ceiling shelving along one wall doubled the apartment’s usable storage without taking up a single additional inch of floor space, and it became a genuine design feature rather than just extra shelving.
Vertical Storage Tips
Anchor tall freestanding units to the wall for safety:
Safety consideration:
- Tall, floor-to-ceiling furniture carries tip-over risk, especially in an apartment with foot traffic
- Anti-tip straps or brackets are inexpensive and simple to install
- This step is essential regardless of whether the unit is freestanding or built-in
- Most furniture retailers include anti-tip hardware with tall shelving units
Use a rolling step stool for genuine top-shelf access:
Practical solution:
- Storage above easy reach becomes underused if accessing it is inconvenient
- A small folding step stool, stored discreetly, keeps top shelves genuinely functional
- This small addition ensures the full height of the storage wall gets used
- Without it, the upper shelves often become forgotten, wasted space
3. The Drop-Leaf or Extendable Dining Table
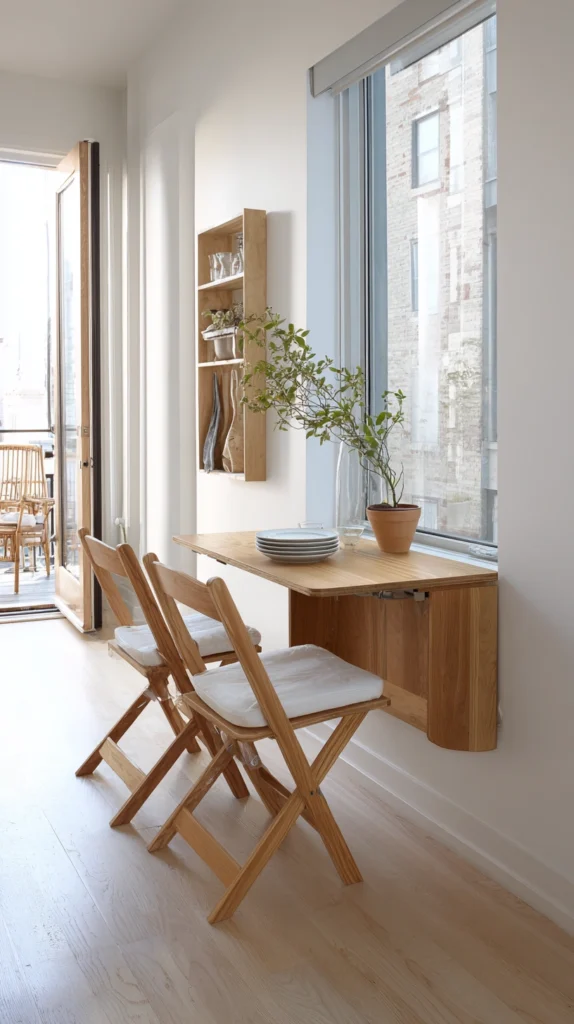
A table with folding leaves that expands for meals and guests, then collapses back to a slim profile against the wall.
My permanent dining table problem:
What was frustrating:
- A fixed dining table taking up significant floor space at all times
- Full table size needed only occasionally, for guests or larger meals
- Daily foot traffic constantly navigating around unnecessary bulk
The drop-leaf solution:
Why an expandable table solves this exactly:
- Collapses to a narrow profile for daily use, expands only when needed
- Can push flush against a wall when not in use, reclaiming floor space
- Available in styles ranging from farmhouse to modern, fitting any decor direction
- One of the most practical furniture solutions specific to small space living
Sizing and placement:
Getting it right:
- Choose a table that, collapsed, fits comfortably against a wall or in a corner
- Confirm the expanded size still allows comfortable clearance for pulled-out chairs
- Consider a round drop-leaf table for slightly easier navigation around a smaller room
- Measure the available wall space before selecting a specific model
Where this works best:
Ideal spaces:
- Studio apartments with a defined dining nook
- Small kitchens needing occasional full-size dining capacity
- Any apartment regularly hosting guests for meals despite limited daily space
Cost:
- Basic drop-leaf table: $100-300
- Higher-quality wood drop-leaf table: $300-800
My drop-leaf table: Keeping the table collapsed against the wall for daily use and expanding it only when guests come over reclaimed nearly three feet of walking space every single day.
Drop-Leaf Table Tips
Choose folding chairs that store easily alongside the table:
Complementary furniture:
- Bulky dining chairs undermine the space-saving benefit of a collapsible table
- Folding or stackable chairs, stored in a closet or against a wall, complete the strategy
- This pairing means the full dining setup can disappear entirely when not needed
- Look for folding chairs with a design quality matching the table, not purely utilitarian options
Add furniture pads to protect the wall when pushed flush:
Maintenance detail:
- Repeatedly pushing a table against the wall can scuff paint over time
- Small felt or rubber pads on the table’s back edge prevent this wear
- This small addition protects the wall without affecting the table’s function
- A simple fix that saves a repaint down the line
4. The Bed Frame with Built-In Storage
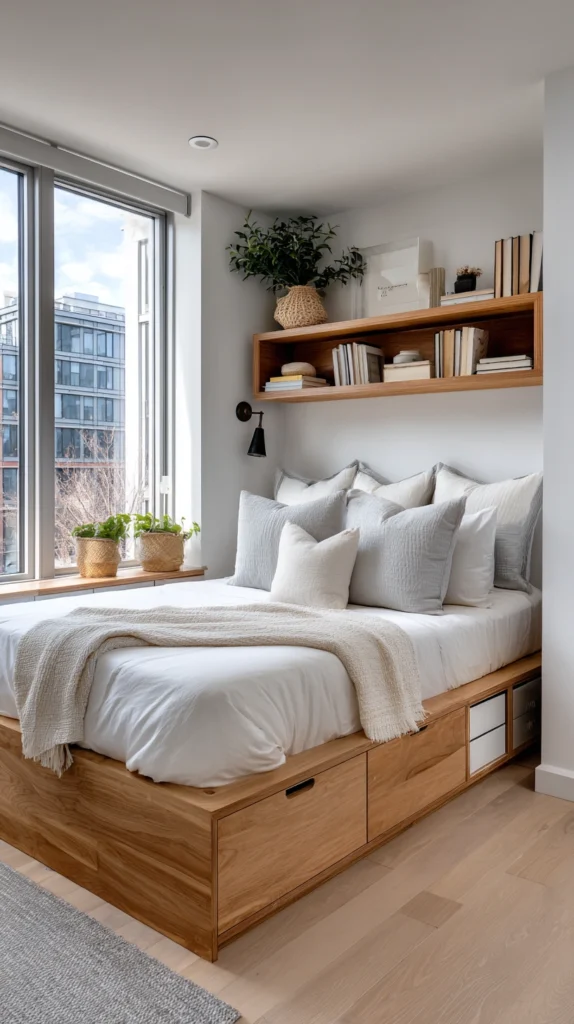
A platform bed frame with drawers or lift-up storage underneath — turning otherwise wasted under-bed space into genuine storage capacity.
My wasted under-bed space:
What I had not considered:
- A standard bed frame with open, unused space underneath
- Off-season clothing and extra linens stored in bins scattered around the closet
- Significant available storage volume going completely unused beneath the bed
The storage bed solution:
Why this converts dead space into real function:
- The area beneath a standard bed is substantial and almost always unused
- Built-in drawers or lift-up storage capture this volume without any added footprint
- Particularly valuable in an apartment without a dedicated closet or with limited closet space
- One of the highest storage-to-footprint ratios available in any furniture category
Storage bed style options:
Choosing the right type:
- Platform bed with built-in drawers on one or both sides
- Lift-up storage bed, with the mattress platform hinging up to reveal storage below
- A standard bed frame paired with rolling storage bins as a lower-cost alternative
- Storage headboards adding additional shelving above the bed itself
What to store underneath:
Making the most of the space:
- Off-season clothing and bedding
- Extra linens and towels
- Suitcases and travel gear
- Seasonal decor items used only occasionally
Cost:
- Platform bed with drawers: $300-900
- Lift-up storage bed frame: $400-1,200
- Rolling under-bed storage bins (with a standard frame): $30-80
My storage bed: Switching to a platform bed with built-in drawers eliminated the need for a second dresser entirely, and it freed up enough closet space to finally hang coats properly instead of piling them on a chair.
Storage Bed Tips
Measure ceiling and mattress clearance before choosing a lift-up frame:
Fit verification:
- Lift-up storage beds require adequate room for the mattress platform to rise fully
- Low ceilings or an already-tall mattress can make full access difficult
- Confirm the specific model’s clearance requirements against the actual bedroom dimensions
- This check prevents purchasing a frame that cannot function as intended in the space
Organize under-bed drawers by category, not by convenience:
Storage system:
- Randomly filled drawers become disorganized quickly given their below-eye-level location
- Dedicate each drawer to a specific category, like off-season clothing or extra linens
- Small drawer dividers or bins within the larger drawer improve this further
- This system prevents the under-bed storage from becoming a forgotten catch-all
5. The Room Divider or Curtain Zone Definition
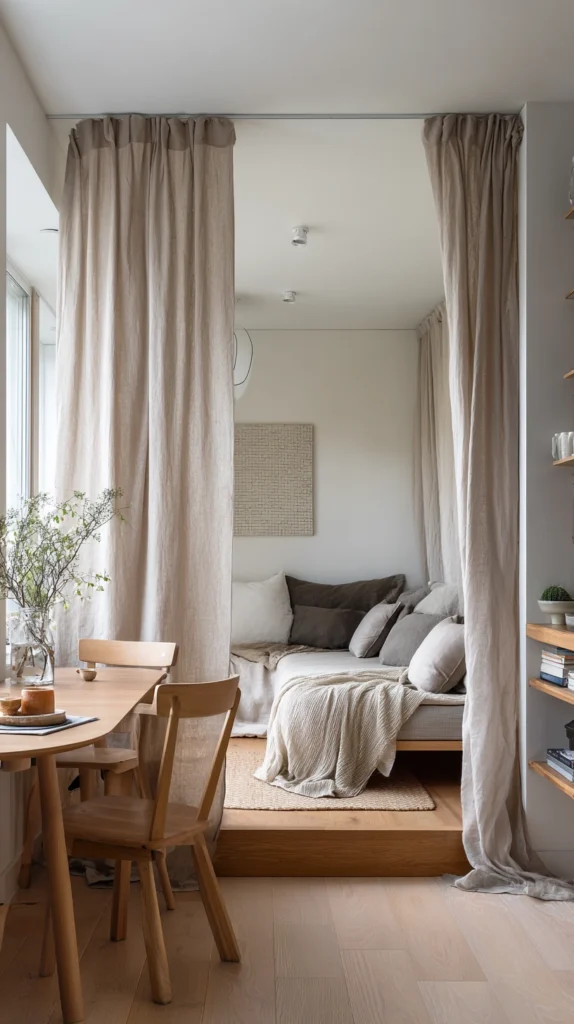
A freestanding screen, bookshelf, or ceiling-mounted curtain used to visually separate a studio into distinct functional zones.
My undefined single-room studio:
What was missing:
- One open room trying to serve as bedroom, living room, and office simultaneously
- No visual cue signaling where one function ended and another began
- A space that felt smaller because nothing within it felt distinct
The room divider solution:
Why dividing a single room makes it feel larger, not smaller:
- Defined zones create a sense of multiple distinct areas rather than one undifferentiated room
- Visual separation, even without a solid wall, changes how the brain perceives the space
- A studio with clear zones consistently reads as more functional than one open expanse
- Works especially well separating a sleeping area from the main living space
Divider style options:
Choosing the right approach:
- A floor-to-ceiling curtain on a ceiling-mounted track, fully open or closed as needed
- A tall bookshelf, functioning as both storage and visual separation
- A folding privacy screen for a flexible, movable division
- An open shelving unit allowing light through while still defining the zones
Where to place the divider:
Zoning strategy:
- Between the sleeping area and the main living space in a studio
- Separating a small home office corner from the rest of the room
- Defining an entryway zone near the front door in an open floor plan
Cost:
- Folding privacy screen: $60-200
- Ceiling-mounted curtain track and curtain: $80-250
- Tall bookshelf divider: $150-500
My curtain room divider: A ceiling-mounted curtain separating the sleeping nook from the main living area meant the bed disappeared visually during the day, and the studio genuinely felt like it had two separate rooms instead of one crowded space.
Room Divider Tips
Choose a divider that still allows light to pass through:
Light consideration:
- A fully solid divider can make a small studio feel darker and more closed off
- Open shelving, sheer curtains, or slatted screens maintain light flow while still defining zones
- This balance keeps the space feeling divided without feeling smaller
- Reserve fully opaque dividers for zones specifically needing privacy, like a sleeping area
Confirm ceiling-mounted tracks are appropriate for a rental:
Rental consideration:
- Ceiling mounting typically requires drilling, which may not be permitted in a lease
- Tension rods or freestanding dividers avoid this issue entirely for renters
- Check the lease terms before committing to any permanently mounted divider solution
- A freestanding option can always be replaced later if a permanent mount becomes possible
6. The Wall-Mounted Folding Desk
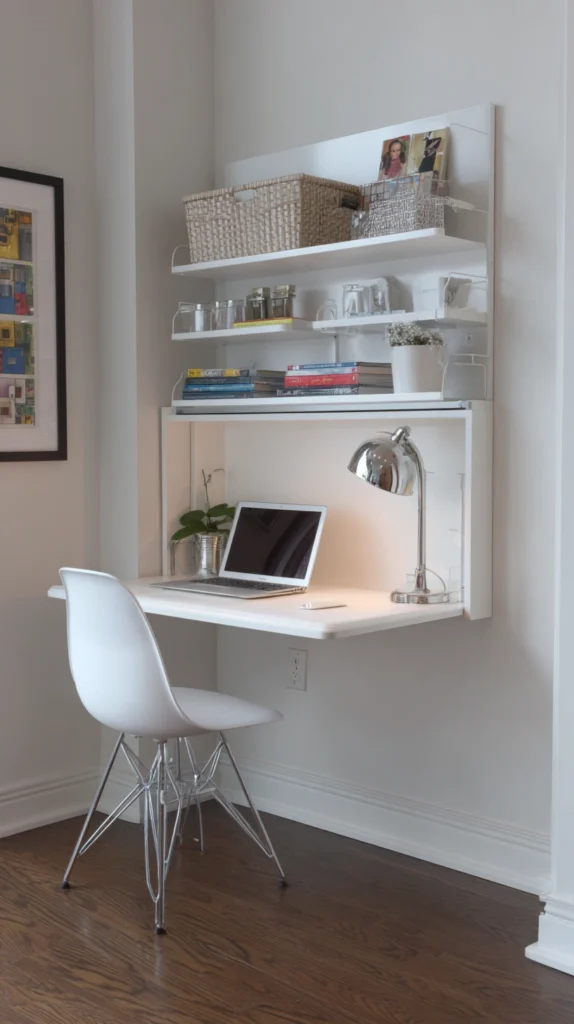
A desk that folds flat against the wall when not in use, providing a full work surface only when needed.
My permanent desk footprint:
What was frustrating:
- A standard desk occupying floor space around the clock
- The desk used for only a few hours a day, taking up permanent room the rest of the time
- No good alternative location given the apartment’s limited square footage
The folding desk solution:
Why this recovers meaningful floor space:
- Provides a full-size work surface only during actual work hours
- Folds completely flat against the wall the rest of the time
- Frees the floor space for movement or other use when the desk is not needed
- A genuinely practical solution for anyone working from a small apartment
Style and mounting options:
Choosing the right setup:
- A simple wall-mounted drop-leaf desk, hinged directly to the wall
- A murphy-style desk combined with fold-down shelving above
- A slim floating shelf desk for the most minimal, lightweight option
- Built-in folding desks integrated into an existing shelving unit
Making it functional when open:
Completing the workspace:
- A wall-mounted monitor arm to save additional desk depth
- A small wall-mounted shelf above for supplies, keeping the desk surface clear
- A folding or stackable chair stored nearby when the desk is not in use
Cost:
- Basic wall-mounted folding desk: $60-180
- Higher-quality built-in folding desk: $200-600
My folding wall desk: Installing a fold-down desk in the corner of the living area meant the workspace disappeared entirely outside of work hours, and the apartment stopped feeling like it had a permanent home office crammed into the living room.
Folding Desk Tips
Mount into wall studs for a fully weight-bearing desk:
Installation safety:
- A folding desk supporting a laptop and daily use needs secure, stud-mounted installation
- Drywall anchors alone are typically insufficient for this application
- Locate studs with a stud finder before finalizing mounting hardware
- This step ensures the desk remains stable and safe through regular daily use
Keep cords managed for a clean fold-away appearance:
Cable management:
- Visible tangled cords undermine the clean look of a folded-away desk
- Cord clips or a small cable box keep cords contained and out of sight
- Plan cord routing before final installation, considering where the desk folds to
- This detail is what keeps the space looking genuinely clean when the desk is closed
7. The Mirror Wall for Perceived Space
A large mirror or grouped mirror arrangement positioned to reflect light and visually double the perceived depth of a room.
My dark, closed-in feeling room:
What was working against me:
- A room with limited natural light and no reflective surfaces
- A genuinely small footprint that felt even smaller without any visual depth trick
- No sense of expansion anywhere in the space
The mirror wall solution:
Why mirrors genuinely change how a small room feels:
- Reflects both natural and artificial light, brightening the entire room
- Creates the visual illusion of doubled depth in whichever direction it faces
- Works especially well positioned opposite a window to reflect outdoor light inward
- One of the most effective, purely visual small-space tricks available
Mirror placement strategy:
Getting the positioning right:
- Directly across from the room’s main window for maximum light reflection
- Along a narrow hallway to create the sense of a wider passage
- Behind a console or entry table to expand the entry area visually
- A gallery-style cluster of smaller mirrors for a more decorative, layered effect
Style options:
Choosing the right mirror:
- A single large, simple frame for the cleanest visual expansion effect
- A full-length leaning mirror doubling as both function and decor
- An arched or oversized round mirror for a softer, more current look
Cost:
- Large wall mirror: $80-300
- Full-length leaning mirror: $60-200
- Gallery cluster of smaller mirrors: $100-250 total
My mirror wall: A large mirror hung directly across from the apartment’s only window doubled the amount of natural light reaching the back of the room, and the space genuinely felt larger the moment it went up.
Mirror Wall Tips
Position the mirror to reflect something worth reflecting:
Placement consideration:
- A mirror facing a blank wall or clutter only reflects more of the same
- Position mirrors to reflect windows, plants, or an attractive part of the room
- This detail determines whether the mirror enhances the space or just doubles a flaw
- Walk the room and view potential mirror placements before finalizing installation
Secure large mirrors properly for safety:
Installation safety:
- Large or heavy mirrors require appropriate wall anchors or stud mounting
- Improperly secured mirrors present a genuine safety risk, especially in a smaller apartment with more foot traffic near walls
- Follow the manufacturer’s specific mounting recommendations for the mirror’s weight
- This step is not optional regardless of how tempting a quick hanging solution seems
8. The Nesting and Stackable Furniture Set
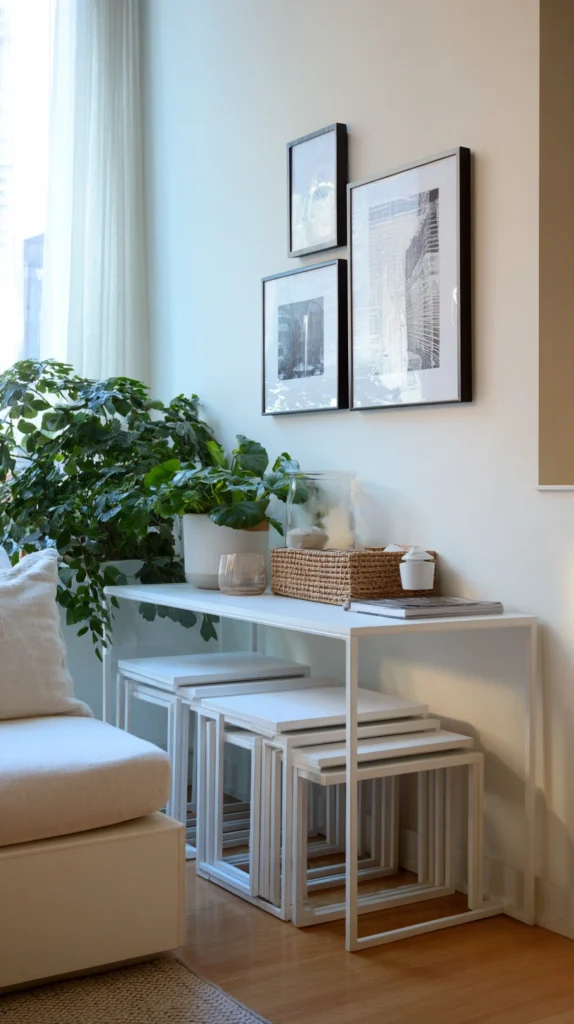
Nesting side tables, stackable stools, or collapsible furniture that consolidates into a smaller footprint when not fully in use.
My too-many-single-purpose-tables problem:
What was cluttering the room:
- A coffee table, a side table, and extra seating all as separate, fixed pieces
- Furniture needed only occasionally taking up permanent floor space
- No flexibility to reduce the furniture footprint on a typical day
The nesting furniture solution:
Why nesting and stackable pieces solve this specific problem:
- Multiple tables consolidate into the footprint of a single table when not needed
- Stackable stools provide extra seating for guests without permanent floor presence
- Genuinely flexible, expanding for entertaining and shrinking for daily use
- A practical answer to the common small-apartment tension between enough seating and enough floor space
Where to use nesting furniture:
Application areas:
- Nesting side tables next to a sofa or daybed
- Stackable stools tucked beneath a console or in a closet corner
- Collapsible ottomans doubling as extra seating and storage
Style considerations:
Choosing pieces that still look intentional:
- Matching materials across the nesting set for a cohesive look even when separated
- Varying heights within a nesting set add visual interest when displayed together
- Choose finishes that work both stacked together and used independently
Cost:
- Nesting side table set (2-3 pieces): $80-250
- Stackable stools (set of 2-3): $60-180
My nesting table set: Three nesting tables that tuck together into the space of one meant I could offer extra surface area to guests without those tables sitting empty and in the way every other day of the week.
Nesting Furniture Tips
Choose a finish durable enough for frequent moving:
Material durability:
- Nesting and stackable furniture gets moved and repositioned more than fixed pieces
- A durable finish resists scuffing and wear better than a delicate one
- Solid wood or well-sealed finishes hold up better to this frequent handling
- This consideration matters more here than for furniture that stays permanently in place
Keep the smallest piece accessible for daily use:
Practical arrangement:
- The smallest nesting table often serves as the primary daily-use surface
- Position it for easy access, with larger pieces tucked further beneath or behind
- This arrangement means the set functions well even before guests require the full set pulled out
- A small detail that keeps the furniture genuinely useful every day, not just during entertaining
9. The Over-the-Door and Behind-the-Door Storage
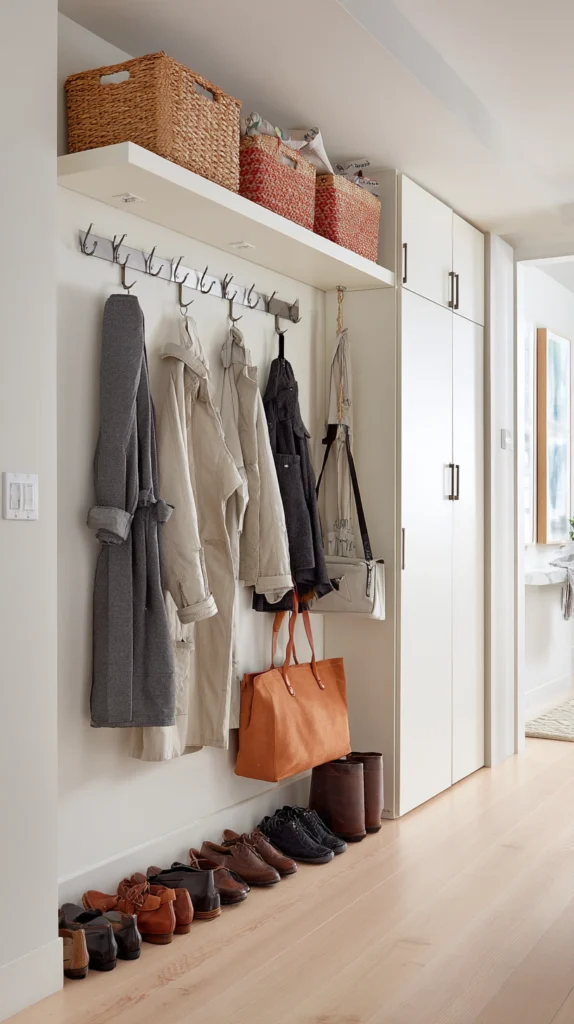
Hanging organizers, hooks, and slim shelving units utilizing the back of doors — genuinely unused space in almost every apartment.
My overlooked door space:
What I had not considered:
- Every door in the apartment with completely bare backside space
- Closet, bathroom, and entry doors all offering unused vertical real estate
- Storage needs unmet despite this significant available space going untouched
The over-the-door solution:
Why this space deserves genuine consideration:
- Present in every apartment regardless of layout or size
- Requires no permanent installation or wall damage in most cases
- Provides meaningful storage capacity for items otherwise cluttering visible surfaces
- One of the most overlooked storage opportunities in small space living
What works well in this location:
Application by door:
- Bathroom door: over-the-door towel racks or a hanging shower caddy for extra toiletries
- Closet door: shoe organizers, hanging jewelry organizers, or slim shelving
- Entry door: a hook rack for bags, keys, and outerwear
- Pantry or kitchen closet door: hanging organizers for spices or cleaning supplies
Hardware options:
Choosing the right system:
- Over-the-door hooks requiring no tools or installation
- Adjustable tension rod systems for slim shelving
- Command hook-style adhesive solutions for lightweight, renter-friendly options
Cost:
- Over-the-door hook rack: $15-40
- Over-the-door shoe or storage organizer: $15-35
- Slim over-the-door shelving unit: $30-80
My over-the-door storage: Adding a simple hook rack to the back of the entry closet door gave keys, bags, and umbrellas a permanent home for the first time, clearing an entire pile that had previously accumulated on the counter.
Over-the-Door Tips
Confirm door swing clearance before adding bulkier organizers:
Fit consideration:
- Some over-the-door shelving units add enough depth to interfere with the door closing fully
- Measure the available clearance before purchasing a bulkier storage system
- Slimmer hook-based options rarely present this issue
- This check prevents purchasing a system that ultimately cannot be used as intended
Match hardware finish to existing door and cabinet hardware:
Cohesion detail:
- Mismatched hook or bracket finishes can look like an obvious afterthought
- Choosing a finish coordinating with existing doorknobs or cabinet pulls ties the addition in visually
- This small detail keeps functional storage from looking purely utilitarian
- A minor consideration that meaningfully improves the finished look
10. The Compact Kitchen Cart or Rolling Island
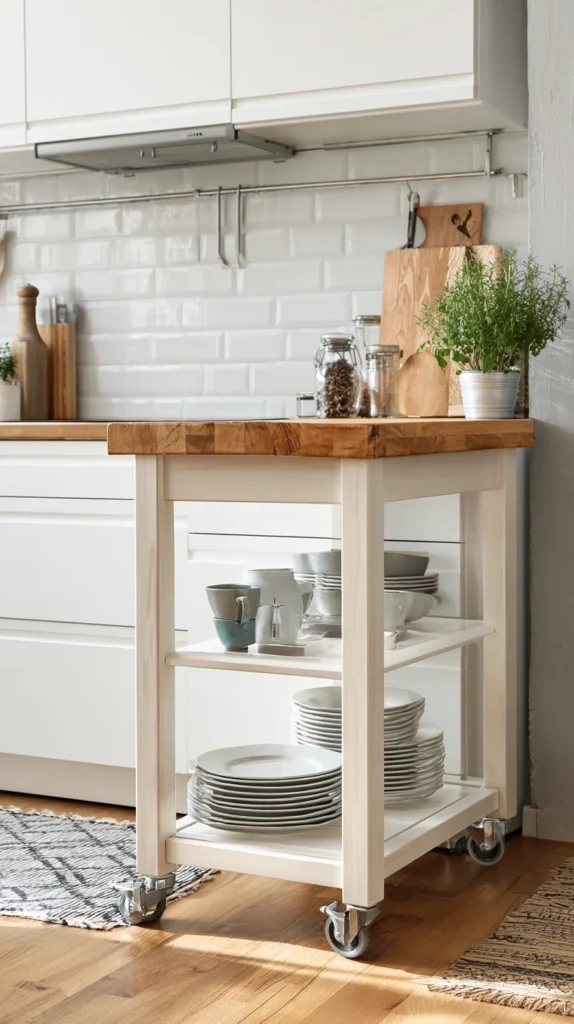
A slim rolling kitchen cart providing additional counter space and storage — mobile enough to tuck away or reposition as needed.
My insufficient counter space:
What was limiting the kitchen:
- A galley kitchen with almost no usable counter space
- Meal prep constantly competing with existing appliances for the same small area
- No permanent solution given the kitchen’s fixed, limited footprint
The rolling cart solution:
Why mobility is the key advantage here:
- Provides genuine additional counter space exactly when needed
- Rolls out of the main kitchen footprint when not actively in use
- Can double as a serving cart, a bar cart, or additional storage depending on the day
- Far more flexible than any fixed counter extension could be in a small kitchen
Choosing the right cart:
What to look for:
- A slim profile that fits through doorways and narrow kitchen paths
- Locking wheels for stability during actual use
- A butcher block or durable surface material for genuine food prep use
- Built-in storage below, such as shelves or drawers, maximizing the cart’s overall value
Where to use it:
Application flexibility:
- Rolled into the kitchen during meal prep, then tucked into a corner afterward
- Used as a temporary bar or serving station when entertaining
- Positioned semi-permanently in a dining nook as extra storage when not needed in the kitchen
Cost:
- Basic rolling kitchen cart: $80-200
- Butcher block top cart with storage: $150-400
My rolling kitchen cart: A slim butcher block cart tucked into the corner most days rolls directly into the kitchen during meal prep, effectively doubling my counter space exactly when I need it most.
Rolling Cart Tips
Measure doorways and pathways before purchasing:
Fit verification:
- A cart too wide for the kitchen doorway or hallway defeats its mobile purpose entirely
- Measure the narrowest point the cart will need to pass through before buying
- This check is especially important in older apartments with narrower doorways
- A cart that cannot actually move where needed loses its primary advantage
Assign the cart a specific home base when not in use:
Organization habit:
- A cart without a designated resting spot tends to end up in the way
- Identify a specific corner or nook where the cart lives between uses
- This habit keeps the cart from becoming its own clutter problem
- Consistency here is what makes the mobility feature actually work in daily life
11. The Floating Shelf Kitchen Storage
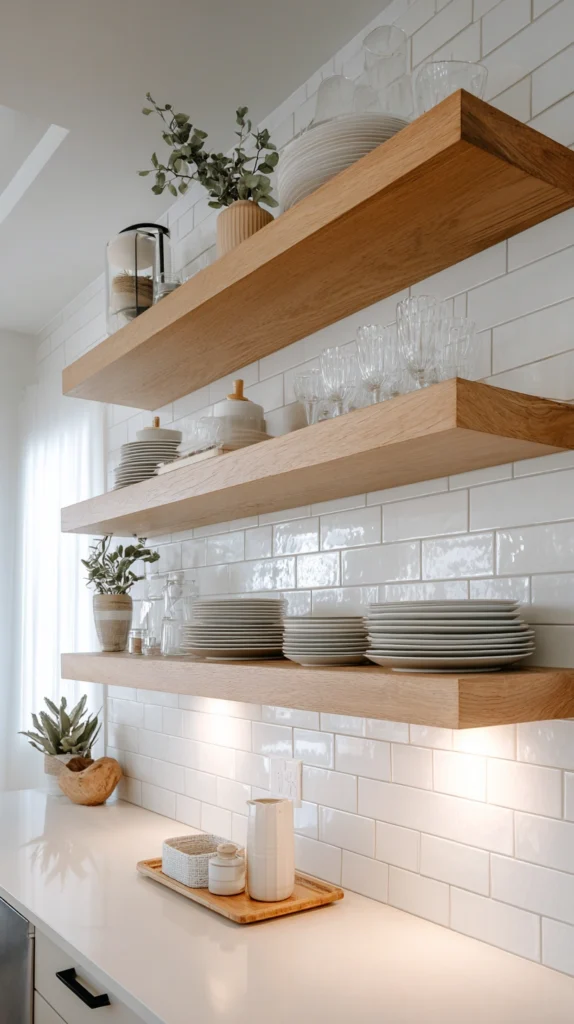
Open floating shelves replacing upper cabinets or filling gaps above counters — lightweight storage that avoids the visual bulk of closed cabinetry.
My cramped, cabinet-heavy kitchen feel:
What was making the kitchen feel smaller:
- Upper cabinets creating a boxed-in, heavy visual effect in an already tight space
- No breathing room anywhere in the sightline
- A kitchen that felt more closed off than its actual square footage required
The floating shelf solution:
Why open shelving works especially well in a small kitchen:
- Removes the visual bulk of closed cabinet doors and frames
- Creates a lighter, more open feeling even within the same physical footprint
- Provides genuine storage for frequently used dishware and glasses
- Often installs with less disruption than replacing full upper cabinetry
Installation and styling:
Getting it right:
- Mount shelves securely into wall studs, especially for anything holding dishware
- Space shelves with enough clearance for typical glasses and plates to stand upright
- Style with a mix of function (everyday dishes) and a few decorative objects
- Keep the overall display edited rather than fully packed for the cleanest look
Where this works best:
Ideal kitchens:
- Small galley kitchens wanting a more open feel
- A single wall gap between existing cabinets
- Rental kitchens wanting a lower-commitment alternative to replacing cabinetry
Cost:
- Floating shelf brackets and boards (per shelf): $25-60
- A typical three-shelf installation: $75-180
My floating kitchen shelves: Replacing one upper cabinet with three floating shelves opened up the sightline into the kitchen significantly, and the everyday dishes displayed there are actually easier to access than they were behind a cabinet door.
Floating Shelf Tips
Mount securely into studs, particularly for dishware storage:
Installation safety:
- Floating shelves holding daily dishware need genuinely secure mounting
- Drywall anchors alone are typically insufficient for this specific weight and daily use
- Locate studs before finalizing shelf placement, adjusting position if needed
- This step prevents both damage to dishes and potential injury from a failed shelf
Keep displayed items to roughly two-thirds of the available shelf space:
Styling restraint:
- Fully packed open shelves in a small kitchen can look cluttered rather than airy
- Leaving some visible negative space keeps the open shelving feeling intentional
- Rotate less frequently used items to closed storage instead of displaying everything
- This restraint is part of what makes open shelving succeed over closed cabinetry in a small space
12. The Curtain-Concealed Closet Alternative
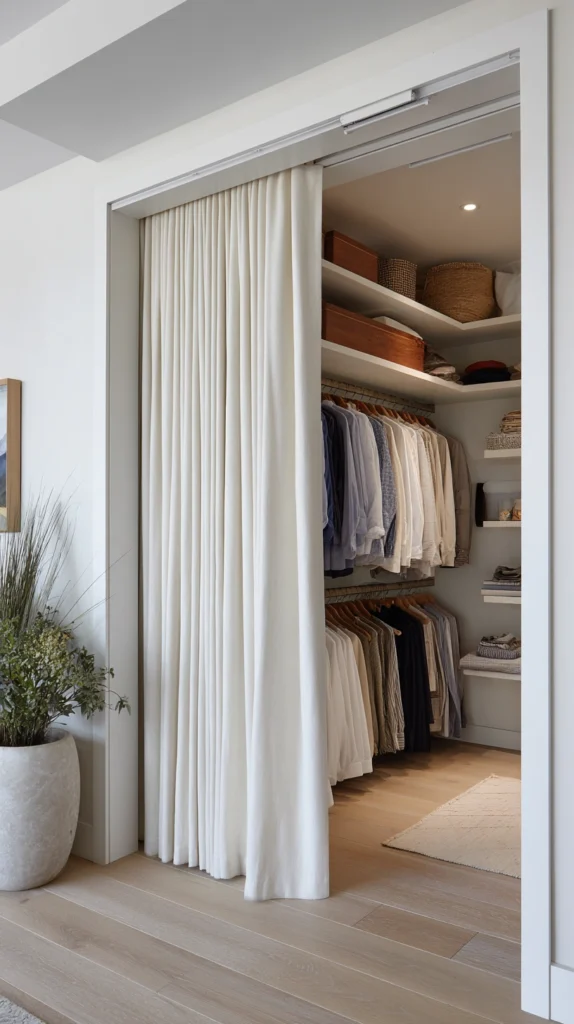
A curtain rod and fabric panel used in place of a closet door, or to create a closet space where none exists — a flexible, low-cost storage solution.
My missing or awkward closet situation:
What I was working with:
- An apartment with minimal or oddly shaped closet space
- A bifold closet door that swung awkwardly into an already tight room
- No good built-in solution for hanging clothing storage
The curtain closet solution:
Why a curtain often outperforms a traditional door here:
- Requires no swing clearance, unlike a hinged or bifold door
- Can be installed to create closet storage in a nook that has no closet at all
- A simple curtain rod and fabric panel install quickly and remove just as easily for renters
- More affordable and flexible than replacing or repairing an existing closet door
Building the setup:
Installation approach:
- A tension rod or wall-mounted curtain rod spanning the closet or nook opening
- A closet rod installed inside the space for actual hanging storage
- Fabric chosen to coordinate with the room, since it becomes a visible design element
- Shelving added above or beside the hanging rod for folded items
Where this works best:
Ideal applications:
- Apartments with an awkward or missing bifold closet door
- Creating closet storage in an alcove or unused corner with no existing closet
- Renters wanting a reversible alternative to a permanent door replacement
Cost:
- Curtain rod and fabric panel: $40-100
- Closet rod and brackets (if building storage from scratch): $20-50
- Total: $60-150
My curtain closet: Removing an awkward bifold door and replacing it with a simple curtain panel eliminated the door swing that had been eating into the room’s only clear floor path, while still keeping the closet’s contents neatly concealed.
Curtain Closet Tips
Choose a fabric substantial enough to fully conceal contents:
Material consideration:
- Thin or sheer fabric can allow closet contents to show through, undermining the clean look
- A medium to heavyweight curtain fabric provides better concealment
- Lined curtain panels offer the most complete coverage if visibility is a concern
- This detail matters more here than in a purely decorative curtain application
Confirm rod installation method suits the lease terms:
Rental consideration:
- Wall-mounted rods typically require drilling, which may not be permitted
- Tension rods avoid this issue entirely and are simple to install and remove
- Check the specific weight capacity of a tension rod against the fabric and rod combination chosen
- This verification prevents an installation that either violates lease terms or fails under the fabric’s weight
13. The Slimline Console Entry Table
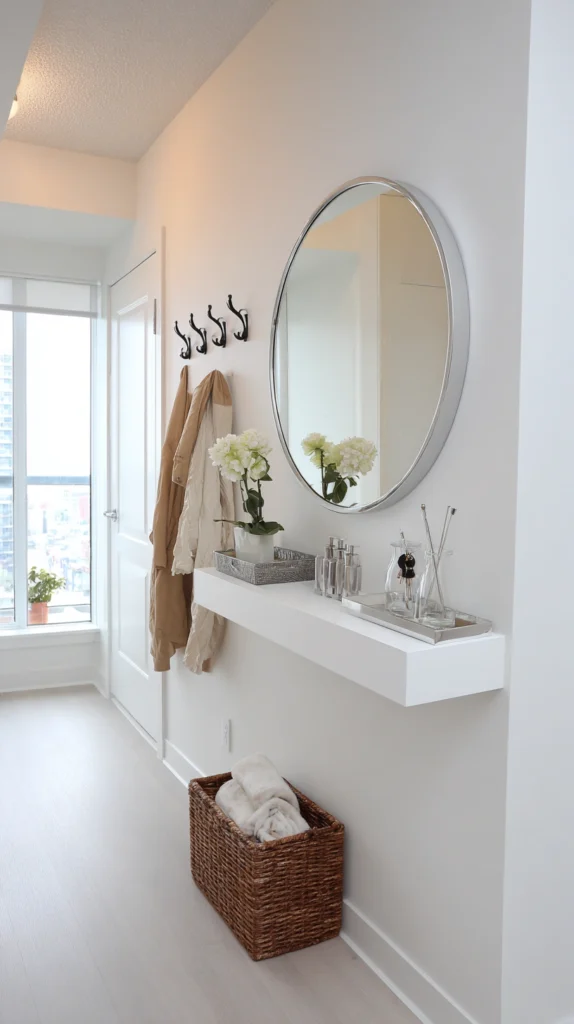
A narrow, shallow console table just inside the entry — providing a landing spot for keys and bags without eating into walking space.
My cluttered entry counter:
What was happening:
- Keys, mail, and bags landing on the kitchen counter immediately upon entry
- No dedicated spot near the door for these daily items
- Clutter migrating throughout the apartment because nothing had an assigned home
The slimline console solution:
Why a narrow console solves this specific problem:
- Provides a genuine landing spot exactly where it is needed, right at the entry
- A shallow depth (typically eight to twelve inches) avoids blocking walking paths
- Creates a small but genuine transition moment between outside and the apartment’s main space
- Prevents daily clutter from migrating to less appropriate surfaces elsewhere
Choosing the right piece:
Sizing and style considerations:
- A depth of eight to twelve inches keeps the piece from obstructing a narrow entry
- A piece with a drawer or small shelf beneath adds contained storage for keys and mail
- Wall-mounted floating console options save even more floor space if the entry is especially tight
- Choose a finish and style connecting to the room visible just beyond the entry
Styling the console:
Completing the entry moment:
- A small tray for keys and loose items
- A mirror above for a last-look check before heading out
- A hook rack mounted just above or beside the console for bags and coats
Cost:
- Slimline console table: $80-250
- Wall-mounted floating console: $60-180
My slimline entry console: An eight-inch-deep console just inside the door finally gave keys and mail a designated spot, and the kitchen counter has stayed noticeably clearer since it stopped being the default landing zone for everything.
Slimline Console Tips
Measure the entry clearance before selecting a specific depth:
Fit verification:
- Even a few extra inches of console depth can meaningfully narrow a tight entry path
- Measure the available clearance carefully, accounting for the door’s full swing
- A wall-mounted floating console can be the better choice in an especially narrow entry
- This measurement step prevents a console that technically fits but makes daily movement difficult
Add a small tray to contain daily items rather than letting them scatter:
Organization detail:
- An empty console surface tends to accumulate loose, scattered items over time
- A small tray or shallow bowl corrals keys, mail, and pocket items into one contained spot
- This detail keeps the console looking intentional rather than becoming its own clutter zone
- A simple, low-cost addition that meaningfully improves the console’s daily function
14. The Lofted or Elevated Sleeping Area
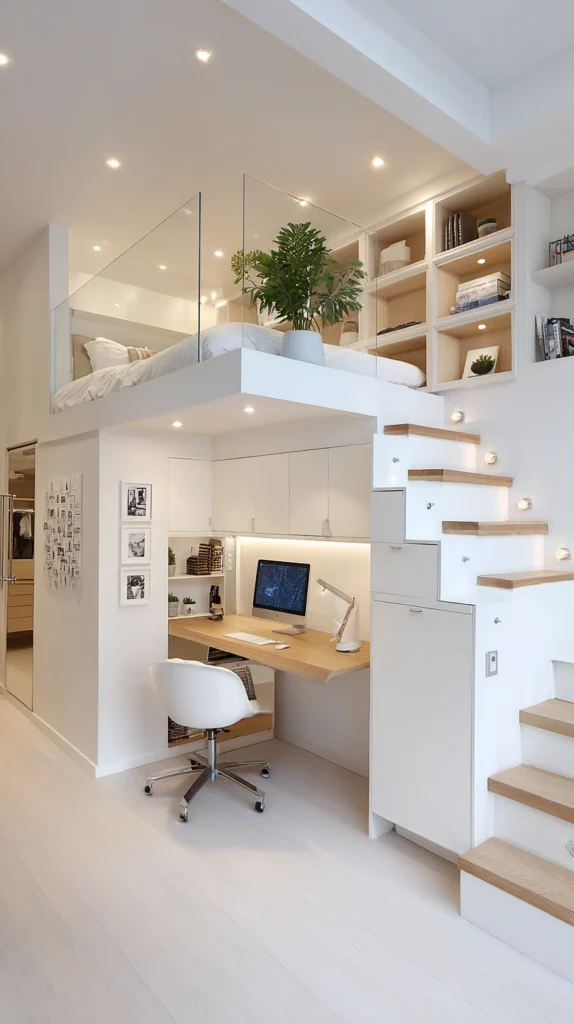
A loft bed or elevated sleeping platform, freeing the entire floor space beneath for a living area, desk, or storage.
My single-function floor space:
What was limiting the apartment:
- A standard bed occupying a significant footprint at floor level
- That entire footprint serving only one function, sleeping, for a third of each day
- No good alternative given a studio’s inherently limited floor space
The loft solution:
Why elevating the bed changes the apartment’s entire function:
- Frees the full floor footprint beneath the bed for another genuine function
- Common uses beneath a loft bed include a desk, seating area, or additional storage
- Effectively adds a functional zone to the apartment without adding square footage
- The most dramatic space-multiplying solution available for a studio specifically
Building the loft area:
Structure options:
- A purpose-built loft bed frame with a designated space beneath
- A raised platform bed constructed to allow furniture underneath
- Professional or custom-built lofts for apartments with adequate ceiling height
- Ready-made loft bed frames as a lower-commitment, moveable option
What to place underneath:
Maximizing the reclaimed space:
- A desk and office chair for a self-contained home workspace
- A small seating area with a chair and side table
- Additional closed storage, such as dressers or bins, if floor space is not otherwise needed
Where this works best:
Ideal spaces:
- Studio apartments with adequate ceiling height to support a loft comfortably
- Younger renters or those in a first apartment prioritizing floor space over sleeping height
- Apartments where the sleeping area and living area share the same room
Cost:
- Ready-made loft bed frame: $300-800
- Custom-built loft platform: $800-2,500
My lofted sleeping area: Raising the bed and placing a small desk directly beneath it meant the studio finally had a genuinely separate work zone, created entirely from floor space that previously did nothing but hold a bed.
Loft Bed Tips
Confirm ceiling height comfortably supports both the loft and the space beneath:
Clearance requirement:
- A loft too high can feel unsafe or claustrophobic when getting in and out of bed
- The space beneath needs enough clearance for its intended use, whether a desk or seating
- Measure the apartment’s actual ceiling height and compare it against the specific loft frame’s dimensions
- This check is essential before committing to any loft bed purchase, especially a custom build
Add secure guardrails and a stable ladder or stairs:
Safety essentials:
- A loft bed requires genuine guardrails on all open sides, not just a token barrier
- A stable ladder or, ideally, integrated stairs makes nightly access safer and more comfortable
- These safety features should never be treated as optional additions
- Verify any purchased loft frame meets genuine safety standards before use
Choosing Your Small Apartment Solutions
By Apartment Type
Studio apartments:
- Room divider or curtain zone definition (idea 5)
- Multi-functional daybed or sleeper sofa (idea 1)
- Lofted or elevated sleeping area (idea 14)
One-bedroom apartments:
- Bed frame with built-in storage (idea 4)
- Wall-mounted folding desk (idea 6)
- Slimline console entry table (idea 13)
Small kitchens:
- Compact kitchen cart or rolling island (idea 10)
- Floating shelf kitchen storage (idea 11)
By Effort Level
Lowest effort:
- Over-the-door and behind-the-door storage (idea 9)
- Nesting and stackable furniture set (idea 8)
- Slimline console entry table (idea 13)
Medium effort:
- Mirror wall for perceived space (idea 7)
- Curtain-concealed closet alternative (idea 12)
- Drop-leaf or extendable dining table (idea 3)
- Compact kitchen cart or rolling island (idea 10)
Higher commitment:
- Vertical storage wall (idea 2)
- Bed frame with built-in storage (idea 4)
- Wall-mounted folding desk (idea 6)
- Lofted or elevated sleeping area (idea 14)
By Budget
Under $150:
- Over-the-door and behind-the-door storage (idea 9)
- Curtain-concealed closet alternative (idea 12)
- Slimline console entry table, floating version (idea 13)
$150-400:
- Wall-mounted folding desk (idea 6)
- Nesting and stackable furniture set (idea 8)
- Room divider or curtain zone definition (idea 5)
- Floating shelf kitchen storage (idea 11)
$400-800:
- Drop-leaf or extendable dining table (idea 3)
- Vertical storage wall (idea 2)
- Compact kitchen cart or rolling island (idea 10)
$800+:
- Multi-functional daybed or sleeper sofa (idea 1)
- Bed frame with built-in storage (idea 4)
- Lofted or elevated sleeping area (idea 14)
Maintenance Through the Years
Weekly:
- Reset daybed and multi-functional pieces to their daytime configuration
- Clear entry console and rolling cart of accumulated clutter
Monthly:
- Reassess vertical storage and under-bed storage for items no longer needed
- Check all wall-mounted and folding hardware for looseness from regular use
Before any move:
- Confirm which installed elements (rods, brackets, shelving) are portable versus built-in
- Document any wall-mounted hardware locations for reinstallation in a new space
My Complete Small Apartment Journey
What I set up across three apartments:
Apartment one, 480 sq ft ($680):
- Daybed replacing a separate bed and sofa
- Curtain room divider separating the sleeping nook
- Learned that combining furniture functions mattered more than any single clever purchase
Apartment two, 620 sq ft ($920):
- Vertical storage wall and floating kitchen shelves
- Drop-leaf dining table against the wall
- Learned that going vertical solved storage problems floor space never could
Apartment three, 550 sq ft ($540):
- Wall-mounted folding desk and slimline entry console
- Nesting side tables and over-the-door storage throughout
- Learned that the smallest, cheapest additions often solved the most persistent daily friction
Total investment: $2,140 across three apartments Most important lesson: Furniture scale matters more than furniture quantity in a small space Single highest-impact change across all three apartments: The multi-functional daybed, for eliminating an entire redundant furniture footprint
Getting Started This Weekend
Start by removing, not adding.
This weekend:
Step 1 — Identify the single most oversized piece of furniture in the space:
- Something purchased for a different, larger space
- The piece most consistently in the way of daily movement
- This is often the best candidate for replacement with a scaled-down alternative
Step 2 — Choose one vertical storage opportunity:
- A blank wall, the back of a door, or space above existing furniture
- Vertical space is almost always the most underused resource in a small apartment
- This addition rarely requires removing anything else first
Step 3 — Add one multi-functional piece:
- A nesting table set, a storage ottoman, or a fold-away desk
- Choose based on whichever daily function currently lacks a good solution
- One well-chosen multi-functional piece often replaces the need for two single-purpose ones
Step 4 — Assign every frequently used item a specific home:
- Keys, mail, bags, and daily essentials each need one consistent spot
- This step costs nothing and immediately reduces daily visual clutter
- Often the single fastest way to make an apartment feel more spacious
My recommendation:
Start with vertical storage and one multi-functional furniture swap:
- Vertical storage delivers immediate capacity without touching the floor plan
- A multi-functional swap, like a daybed or a drop-leaf table, addresses the biggest footprint issue directly
- Both changes work together and set the foundation for every other idea on this list
Walk through the apartment after both changes and notice how much more floor space feels genuinely open before adding anything else.
Now go set up the apartment that finally works with its actual size instead of constantly fighting it.
Quick Summary
The 14 small apartment ideas:
Furniture that does double duty:
- Multi-functional daybed or sleeper sofa (idea 1): the biggest single footprint saving
- Drop-leaf or extendable dining table (idea 3): full size only when needed
- Nesting and stackable furniture set (idea 8): flexible seating and surfaces
Storage that goes up, not out:
- Vertical storage wall (idea 2): the most effective use of unused height
- Bed frame with built-in storage (idea 4): converts dead space beneath the bed
- Floating shelf kitchen storage (idea 11): lighter, more open kitchen storage
- Over-the-door and behind-the-door storage (idea 9): genuinely unused space in every apartment
Zoning and definition:
- Room divider or curtain zone definition (idea 5): makes one room feel like several
- Lofted or elevated sleeping area (idea 14): adds a full functional zone beneath the bed
- Curtain-concealed closet alternative (idea 12): flexible storage without door swing
Function-specific solutions:
- Wall-mounted folding desk (idea 6): a workspace that disappears when not needed
- Compact kitchen cart or rolling island (idea 10): mobile counter space exactly when needed
- Slimline console entry table (idea 13): a landing spot that doesn’t block the entry
Visual space tricks:
- Mirror wall for perceived space (idea 7): light and depth without adding square footage
The universal small apartment rules:
Always:
- Scale furniture to the room’s actual dimensions, not a showroom’s
- Use vertical space as deliberately as floor space
- Choose multi-functional pieces over single-purpose ones where possible
- Give every frequently used item a specific, assigned home
Never:
- Furnish a small apartment with full-size, house-scaled furniture
- Leave usable height above furniture and shelving completely unused
- Assume closed storage is unnecessary in a smaller space
- Let daily clutter migrate to whatever surface happens to be nearest the door
Common mistakes:
- Buying furniture sized for a future, larger home instead of the current space
- Leaving the back of every door and the top third of every wall completely unused
- Choosing single-purpose furniture when a multi-functional alternative exists
- Skipping zone definition in a studio, leaving one undifferentiated open room
- Underestimating how much a large mirror or open shelving can change a room’s feel
Remember: furniture scale matters more than furniture quantity, vertical space is almost always the most underused resource in a small apartment, multi-functional pieces consistently outperform single-purpose ones, defined zones make a studio feel larger rather than smaller, and the best small apartment is the one designed specifically for its actual size, not apologized for.