15 Hobby Room Design Ideas
My hobby room used to be a card table shoved in the corner of the guest bedroom, surrounded by bins I never fully unpacked. Every project meant hauling supplies out, working for an hour, then packing everything back up before anyone needed the bed made.
I kept telling myself the room did not matter as much as the hobby itself. Then I actually gave that corner real thought, dedicated shelving, a proper work surface, good lighting, and the difference was not subtle at all. I started using the space almost every day instead of once every few weeks.
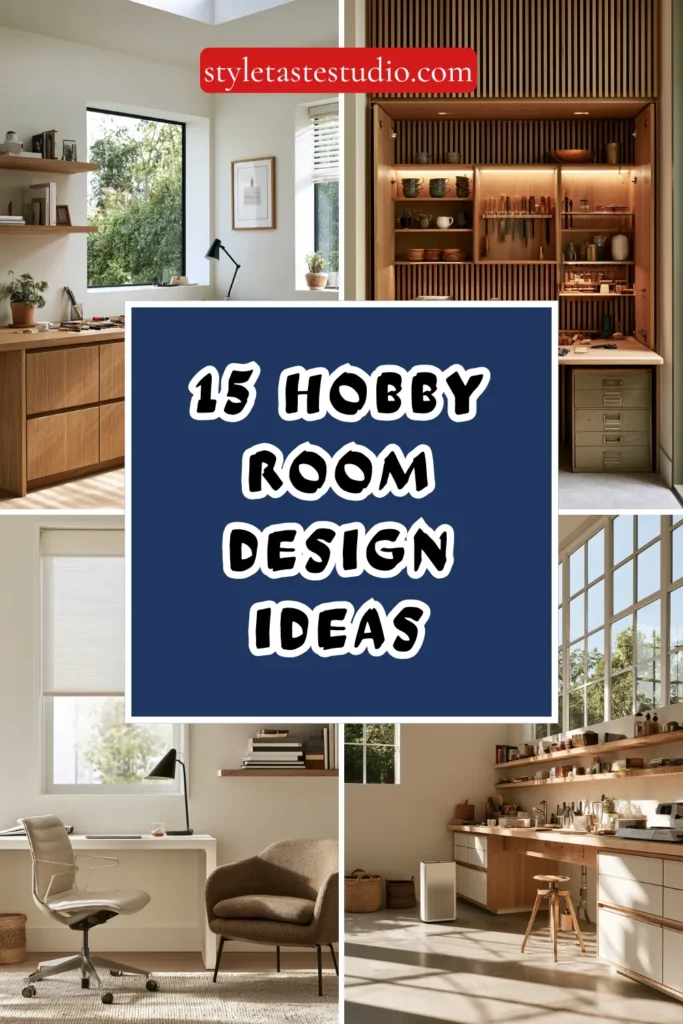
A hobby room does not need to be large or expensive to genuinely change how often you actually do the hobby. It needs to be designed around the specific way you work, not just stocked with supplies and hoped for the best.
Here are 15 ideas for building a hobby room that actually gets used, whatever the hobby happens to be.
Why Most Hobby Rooms Go Unused
The common mistakes:
The storage-only approach:
- A room or corner filled entirely with bins and shelving, with no actual workspace
- Supplies organized beautifully but nowhere genuinely functional to use them
- A room that looks like storage rather than somewhere work actually happens
- Missing the working surface that makes a hobby space genuinely usable, not just tidy
The pack-up-every-time setup:
- A shared or multi-purpose space requiring full setup and teardown for every session
- The friction of that process quietly discouraging use over time
- A hobby practiced far less often than intended, simply because starting became a hassle
- Missing the value of a space that stays ready between sessions
The wrong lighting for the actual work:
- Overhead lighting alone, inadequate for detailed close work
- Harsh, cool lighting that makes color-based work like painting or sewing genuinely difficult
- A room that looks fine on a walkthrough but proves frustrating during actual use
- Lighting treated as an afterthought rather than a core functional requirement
What a successful hobby room does:
Removes the friction between wanting to work and actually starting:
- A dedicated, ready-to-use work surface that does not require setup each time
- Storage organized around actual workflow, not just visual tidiness
- Lighting specifically suited to the hobby’s actual demands
- A space designed around how the person actually works, not a generic template
My revelation: The single biggest factor in whether a hobby room gets used is how much friction exists between deciding to work and actually starting. Every design decision should be aimed at reducing that friction.
1. The Dedicated Work Surface That Stays Set Up
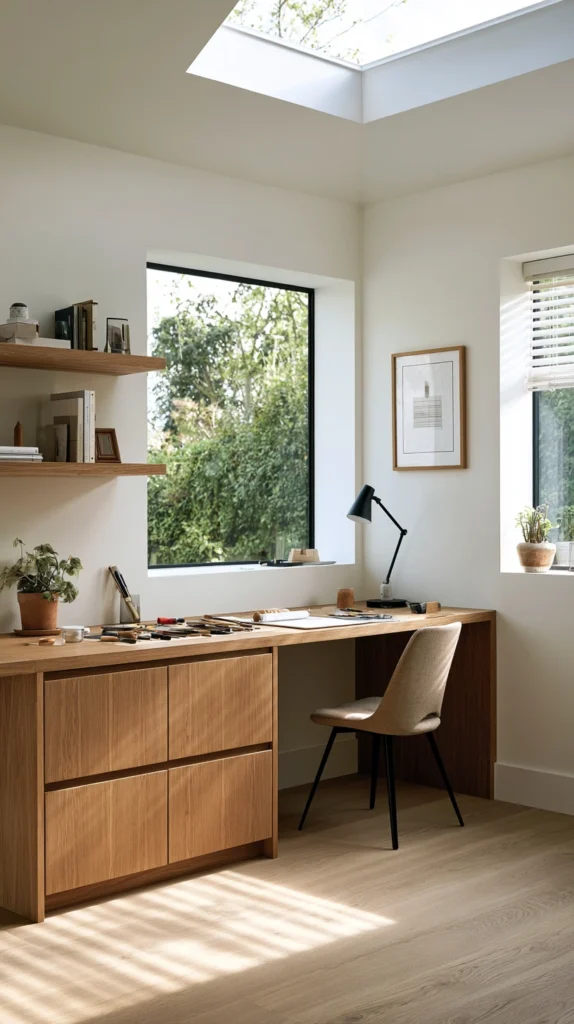
A work table or desk kept permanently clear and ready for the hobby, never requiring full setup or teardown between sessions.
My constant setup and teardown cycle:
What I had:
- A shared table requiring full clearing before any project could begin
- Supplies packed away after every session, then unpacked again the next time
- A hobby practiced far less often than intended, purely because starting took real effort
The dedicated surface discovery:
Why a permanently ready table changes actual usage patterns:
- Removes the single biggest source of friction between intention and action
- A five-minute project becomes genuinely possible when no setup time is required
- Projects can be left mid-progress, exactly where they were, rather than fully dismantled
- The single highest-impact change available for increasing how often a hobby actually gets practiced
Choosing the right work surface:
What to look for:
- A table sized appropriately for the specific hobby’s typical project scale
- A surface material suited to the work, such as a self-healing cutting mat surface for crafting or a sealed, easy-clean surface for painting
- Adequate depth for both active work and some staged supplies within reach
- Stability appropriate to the hobby, particularly important for anything involving tools or machinery
Protecting the investment of dedicated space:
Making the commitment sustainable:
- Establish a household rule that this specific surface is not used for other purposes
- If space is genuinely shared, consider a table that can be visually “closed” with a cover rather than physically cleared
- Communicate the surface’s dedicated purpose clearly to other household members
Cost:
- Basic dedicated work table: $80-300
- Specialized surface (cutting mat table, easel, workbench): $150-600
My dedicated work surface: Committing one corner of the spare room permanently to an uncluttered sewing table, never used for anything else, meant sewing sessions that used to require twenty minutes of setup now start the moment I sit down.
Dedicated Surface Tips
Establish a firm household rule protecting the surface from other uses:
Boundary setting:
- A dedicated surface that gradually accumulates mail, other projects, or general clutter loses its core benefit
- A clear, communicated rule, this table is for the hobby only, protects the investment
- This boundary matters especially in shared or multi-purpose rooms where the temptation to repurpose the space is constant
- Revisit and reinforce this rule periodically if the surface starts accumulating unrelated items
Choose a surface material matched specifically to the hobby’s actual demands:
Material appropriateness:
- A surface poorly suited to the hobby, too soft for cutting, too absorbent for painting, undermines daily usability
- Research the ideal surface material for the specific hobby before finalizing the table choice
- This match significantly affects both the work’s quality and the surface’s own longevity
- A slightly higher upfront cost for the correct material often proves more practical than a generic table requiring constant protective workarounds
2. The Pegboard Tool Wall
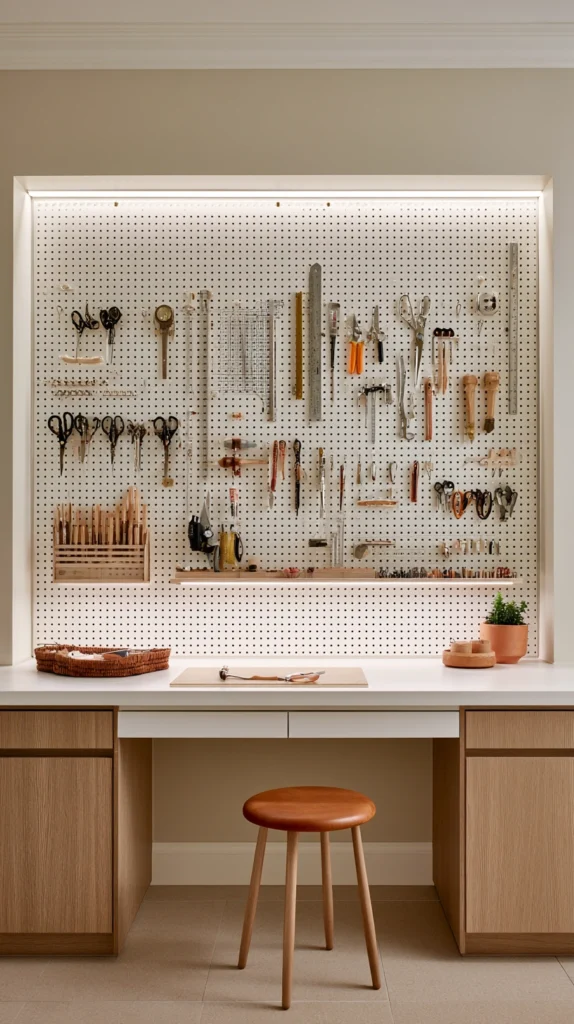
A full wall or large panel fitted with pegboard, holding tools and frequently used supplies in clear view and easy reach.
My buried, hard-to-find tools:
What was slowing down every project:
- Tools and small supplies stored in drawers and bins, requiring search time before any work could begin
- Frequently used items buried beneath less frequently used ones
- A missed opportunity for the kind of instant visual access a pegboard system specifically provides
The pegboard wall solution:
Why visible, accessible tool storage matters so much for hobby rooms specifically:
- Every tool visible and immediately reachable, eliminating search time before starting work
- Customizable hook and shelf configuration adapts to nearly any hobby’s specific tool collection
- The visual display itself often serves as inventory, making it immediately clear what needs replacing or restocking
- One of the most versatile, adaptable storage systems available for a dedicated hobby space
Installing the pegboard wall:
Construction basics:
- Standard pegboard panels, mounted with appropriate spacers to allow hook insertion behind the board
- Sized to cover as much of one wall as the room reasonably allows
- A variety of hook, shelf, and bin attachments suited to the specific tools being stored
- Painted or left natural, depending on the room’s overall aesthetic
Organizing the pegboard:
Arranging for actual workflow:
- Group tools by function or by project stage, rather than purely by size or type
- Position the most frequently used tools at the most easily reachable height
- Trace tool outlines directly onto the pegboard for a clear visual cue of where each item belongs
Cost:
- Pegboard panels (per 4×8 sheet): $15-30
- Hooks, shelves, and bins: $30-80
- Total for a full wall: $60-150
My pegboard tool wall: Mounting a full pegboard wall in the hobby room and tracing outlines for every frequently used tool eliminated the search time that used to eat into every single work session, and restocking supplies is now as simple as noticing an empty outline.
Pegboard Tips
Trace tool outlines directly onto the board for a clear “everything has a place” system:
Organization technique:
- A pegboard without outlines can gradually become disorganized as tools are used and returned inconsistently
- Tracing each tool’s outline creates an immediate visual cue for where it belongs, encouraging consistent returns
- This system also makes it immediately obvious when a tool is missing or still in use elsewhere
- A relatively small amount of setup effort that significantly improves the system’s long-term organization
Position the heaviest or most frequently used items at the most accessible height:
Ergonomic arrangement:
- Items placed too high or too low require more effort to access, discouraging consistent use
- Reserve the most convenient, eye-level to waist-level zone for daily-use tools
- Less frequently needed items can be positioned higher or lower, where slightly more effort is an acceptable trade-off
- This arrangement consideration meaningfully affects how efficiently the whole system actually functions day to day
3. The Task-Specific Layered Lighting
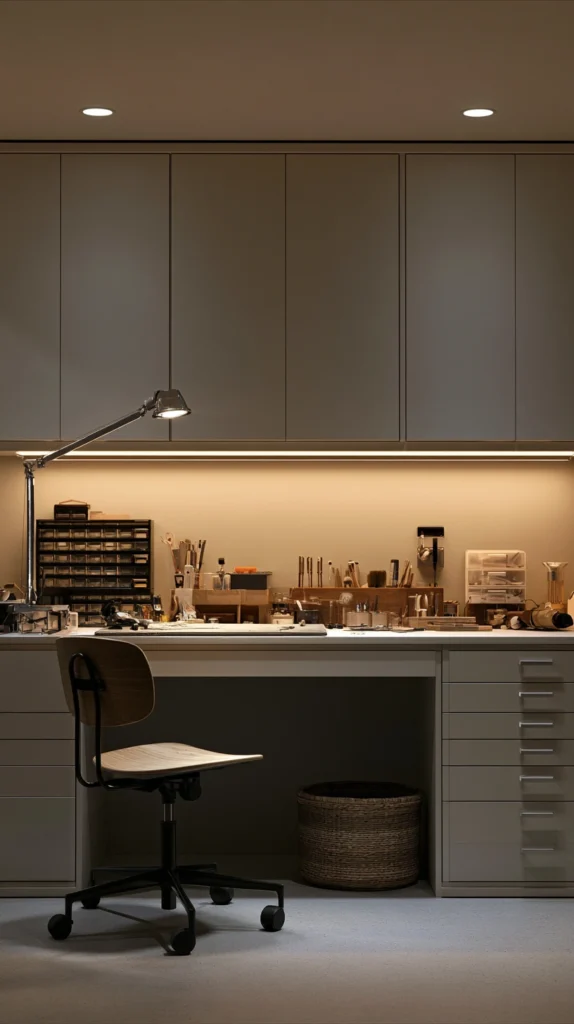
Multiple light sources, combining ambient overhead lighting with focused task lighting, specifically suited to the hobby’s actual visual demands.
My inadequate single-fixture lighting:
What was limiting the room’s usability:
- A single overhead fixture providing general room light but inadequate illumination for detailed work
- Squinting or leaning close to see fine detail, especially during evening sessions
- A missed opportunity to design lighting specifically around the hobby’s actual visual requirements
The layered lighting solution:
Why task-specific lighting matters more in a hobby room than almost any other room:
- Many hobbies, from sewing to painting to model building, require significantly more focused light than general room lighting provides
- Poor lighting directly affects both the quality of the work and the physical comfort of working for extended periods
- A layered approach, combining ambient and task lighting, addresses both general room function and specific work needs
- One of the most overlooked but genuinely functional upgrades available for any dedicated hobby space
Building the lighting layers:
Combining sources effectively:
- Ambient overhead lighting for general room illumination and safe movement
- A dedicated task lamp, positioned directly over the primary work surface
- Under-shelf or under-cabinet lighting for illuminating storage areas without shadow interference
- Color-accurate bulbs, particularly important for any hobby involving color matching or painting
Choosing the right light temperature:
Getting the color right for the specific hobby:
- Daylight-balanced bulbs (5000K-6500K) for color-critical work like painting or fabric matching
- Warmer bulbs (2700K-3000K) for general ambient lighting, creating a more comfortable overall room feel
- Adjustable or dimmable task lighting for flexibility across different types of work
Cost:
- Quality task lamp: $30-100
- Under-shelf LED lighting: $20-60
- Daylight-balanced bulbs: $8-15 each
My layered hobby room lighting: Adding a dedicated daylight-balanced task lamp directly over the painting table eliminated the color-matching frustration that had plagued every project under the room’s previous single overhead fixture, and evening work sessions are finally as comfortable as daytime ones.
Task Lighting Tips
Choose daylight-balanced bulbs specifically for any color-critical hobby work:
Color accuracy priority:
- Standard warm bulbs distort how colors actually appear, a significant problem for painting, sewing, or any color-matching work
- Daylight-balanced bulbs, typically rated 5000K-6500K, render colors much closer to how they will appear in natural light
- This distinction matters significantly for hobbies where accurate color perception affects the finished result
- Confirm the specific bulb’s color temperature rating before purchasing, since not all “bright” bulbs are genuinely daylight-balanced
Position task lighting to minimize shadows cast by the working hand:
Practical placement:
- A light source positioned directly behind or above a right-handed worker’s dominant hand can cast a shadow directly onto the work
- Position task lighting slightly to the side, typically opposite the dominant hand, to minimize this interference
- This detail matters more than the light’s brightness alone for genuinely comfortable, effective task lighting
- Test the lighting setup during actual work to confirm shadows are not interfering with visibility
4. The Clear Bin Labeling System
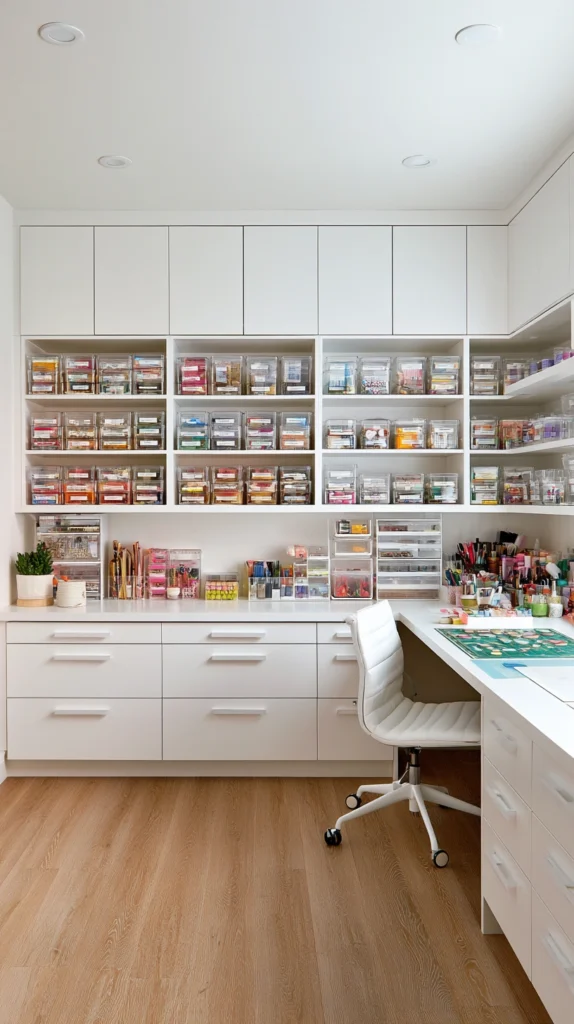
Every supply stored in clear, labeled bins, allowing contents to be identified at a glance without opening or searching.
My mystery bin problem:
What was slowing down every project:
- Opaque bins requiring opening and searching to identify contents
- Similar supplies scattered across multiple unlabeled containers
- Time wasted before every project simply locating the needed materials
The clear bin labeling solution:
Why visibility and labeling matter so much for hobby supply storage:
- Clear bins allow instant visual confirmation of contents without any search time
- Labels provide a second layer of confirmation and support consistent, correct returns after use
- Significantly reduces the friction of locating specific supplies before or during a project
- A relatively simple, low-cost organizational system delivering substantial ongoing time savings
Building the labeling system:
Implementation approach:
- Clear plastic bins or containers, sized appropriately to the specific supply category
- A consistent labeling method, whether a label maker, chalkboard labels, or simple printed tags
- Categorization by project type, material type, or frequency of use, whichever matches actual workflow best
- Consistent bin sizing where possible, supporting more efficient shelving and stacking
Organizing categories:
Common approaches to sorting:
- By material type: fabric, paint, paper, hardware, each in dedicated bins
- By project stage: raw materials, works in progress, finished pieces
- By frequency of use: daily essentials at the most accessible height, occasional items further away
Cost:
- Clear plastic bins (per bin): $5-15
- Label maker or printed label supplies: $20-40
My clear bin labeling system: Transferring every supply category into clear, labeled bins eliminated the search-and-open routine that used to precede nearly every project, and even household members unfamiliar with the hobby can now find and correctly return specific supplies.
Bin Labeling Tips
Choose a labeling system durable enough to withstand regular handling:
Label durability:
- Paper labels attached with basic tape often peel or fade with regular handling
- A label maker with laminated tape, or durable printed labels with clear packing tape overlay, holds up significantly better
- This durability consideration matters given how frequently hobby supply bins are handled and moved
- A slightly higher-quality labeling method prevents the need for frequent relabeling over time
Categorize by actual workflow rather than by a generic organizational template:
Workflow-based organization:
- A categorization system that does not match how the hobby actually unfolds creates ongoing friction
- Consider the natural sequence of a typical project and organize bins to support that actual sequence
- This consideration is more important than following any standard or generic organizational advice
- Adjust the categorization system after a few weeks of actual use if the initial approach is not proving intuitive
5. The Fold-Down or Murphy-Style Work Table
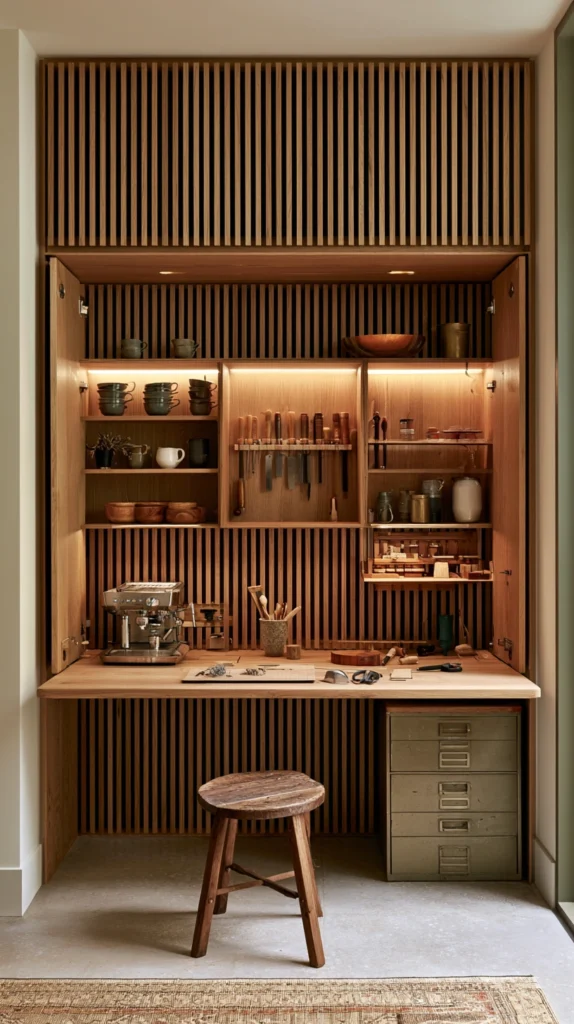
A work surface that folds flat against the wall when not in use, ideal for a hobby room sharing space with another function.
My multi-purpose room space conflict:
What was creating tension:
- A hobby room doubling as a guest room or home office, with the work table constantly competing for floor space
- The permanent work surface either taking up too much room or requiring removal for the space’s other function
- A missed opportunity for a solution genuinely suited to a multi-purpose room
The fold-down table solution:
Why this specific solution suits shared-purpose rooms so well:
- Provides a full-size work surface only when actually needed
- Folds completely flat against the wall for the room’s other function, whether guest sleeping or general office use
- Removes the floor space competition inherent in trying to fit a permanent table into a multi-purpose room
- A genuinely practical compromise for anyone without a fully dedicated hobby space available
Choosing the right fold-down system:
Style and mounting options:
- A simple wall-mounted drop-leaf table, hinged directly to the wall
- A Murphy-style table combined with fold-down shelving above for supply storage
- Built-in folding tables integrated into an existing cabinetry or shelving unit
Making it functional when open:
Completing the workspace:
- A small wall-mounted shelf above the table for supplies, keeping the folding surface itself clear
- A folding or stackable stool stored nearby when the table is not in use
- Adequate support legs or brackets confirming stability once the table is unfolded and in use
Cost:
- Basic wall-mounted folding table: $80-200
- Higher-quality built-in folding system with storage: $250-700
My fold-down hobby table: Installing a wall-mounted folding table in the guest room meant the space could genuinely serve both purposes, guest sleeping when needed and a real hobby workspace the rest of the time, without either function permanently compromising the other.
Fold-Down Table Tips
Mount into wall studs for a fully weight-bearing, stable table:
Installation safety:
- A folding table supporting genuine hobby work needs secure, stud-mounted installation
- Drywall anchors alone are typically insufficient for this application, particularly for hobbies involving any tool use
- Locate studs with a stud finder before finalizing mounting hardware
- This step ensures the table remains stable and safe through regular, active use
Add wall-mounted storage directly above the folding table for supplies:
Maximizing the footprint:
- A fold-down table alone still requires supply storage somewhere in the room
- Wall-mounted shelving or a cabinet directly above the table keeps supplies close at hand without consuming additional floor space
- This pairing maximizes the functional value of the wall space the table itself already occupies
- Confirm the storage does not interfere with the table’s folding mechanism before finalizing placement
6. The Rolling Storage Cart System
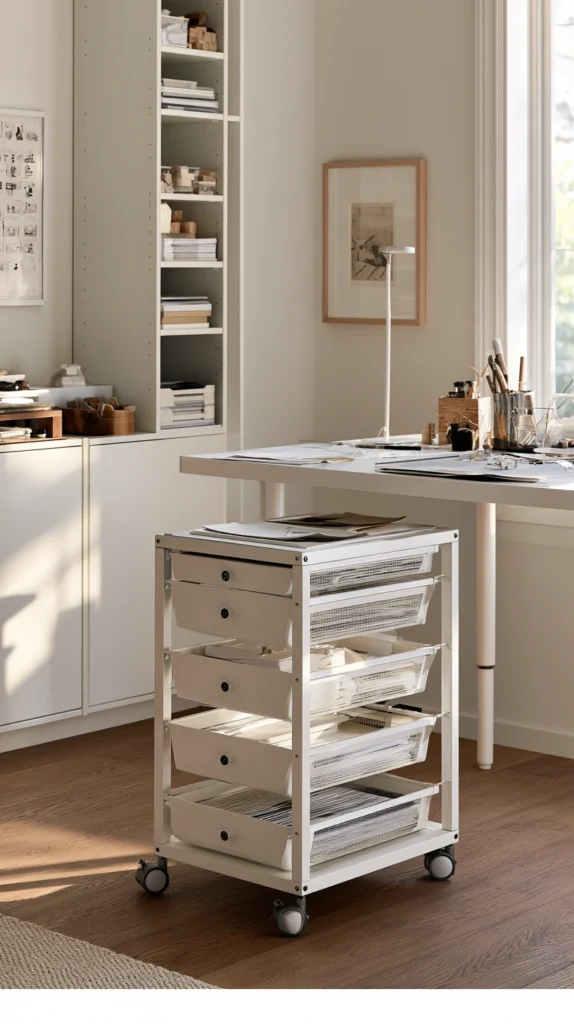
Mobile storage carts, holding project-specific supplies, that can be rolled to the work surface and put away when not needed.
My fixed storage location frustration:
What was creating inefficiency:
- Supplies stored in one fixed location, requiring trips back and forth during active work
- No easy way to keep an in-progress project’s specific supplies together and accessible
- A missed opportunity for the flexibility mobile storage specifically provides
The rolling cart solution:
Why mobility adds genuine functional value to hobby storage:
- A cart can be rolled directly to the work surface, keeping supplies within arm’s reach during active work
- Different carts can be dedicated to different projects or supply categories, then rolled in and out as needed
- Particularly valuable in smaller rooms, where a cart can be tucked away between uses rather than permanently occupying floor space
- Combines genuine storage capacity with the flexibility a fixed shelf cannot offer
Choosing the right cart:
What to look for:
- A slim profile that fits through doorways and moves easily around the room’s layout
- Multiple tiers or drawers, allowing supplies to be organized by type or project stage
- Locking wheels for stability once positioned at the work surface
- Sizing appropriate to the specific hobby’s typical supply volume
Organizing cart contents:
Making the most of mobile storage:
- Dedicate one cart specifically to an active, ongoing project’s supplies
- Use a second cart for daily-use tools and materials, rolled to the work surface at the start of each session
- Reserve fixed shelving for less frequently accessed, bulkier storage
Cost:
- Rolling storage cart (per cart): $40-150
My rolling storage cart: Dedicating one rolling cart specifically to my current quilting project, holding exactly the fabric and tools needed for that piece, means I can roll the entire project to the table and back without ever losing track of where things stand between sessions.
Rolling Cart Tips
Measure doorways and pathways before purchasing a cart:
Fit verification:
- A cart too wide for the room’s doorway or layout defeats its mobile purpose entirely
- Measure the narrowest point the cart will need to pass through before buying
- This check is especially important in smaller homes or rooms with limited clearance
- A cart that cannot actually move where needed loses its primary functional advantage
Assign each cart a clear, specific purpose rather than general mixed storage:
Organizational clarity:
- A cart used for miscellaneous, mixed storage loses much of the clarity mobile storage is meant to provide
- Dedicating each cart to a specific project or supply category keeps the system genuinely useful
- This clarity also makes it immediately obvious which cart to roll out for a given work session
- Revisit and reassign cart purposes as projects change, rather than letting them accumulate unrelated items over time
7. The Inspiration and Reference Wall
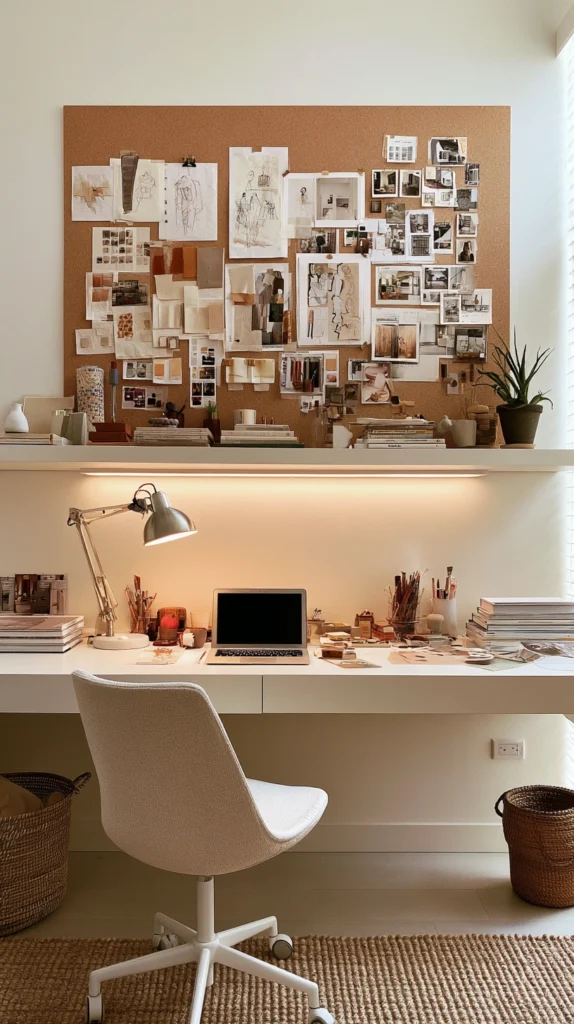
A dedicated wall space for pinning reference images, color swatches, project sketches, and inspiration material directly in view of the work area.
My scattered inspiration sources:
What was disconnected from the actual work:
- Inspiration images and reference material saved on a phone or computer, disconnected from the physical work happening in the room
- No dedicated space to keep current project references visible while actually working
- A missed opportunity for the kind of ambient creative support a visible inspiration wall provides
The inspiration wall solution:
Why a physical, visible reference space matters for creative hobby work:
- Keeps current project references and inspiration directly in the sightline while working
- Physical proximity to reference material supports more fluid, less interrupted creative flow than checking a phone
- Creates an evolving visual record of the room’s creative direction over time
- A relatively simple addition that meaningfully supports the actual creative process, not just the room’s appearance
Building the inspiration wall:
Setup options:
- A cork board or fabric-covered pin board, sized to the available wall space
- A simple grid of washi tape or small clips, allowing images to be added and removed easily
- A magnetic board paired with small magnets for a cleaner, more flexible display option
Curating the wall’s content:
What to include:
- Current project reference images and color swatches
- Sketches or plans for upcoming projects
- General inspiration images supporting the room’s broader creative direction
- A rotating system, removing completed project references to keep the wall current and relevant
Cost:
- Cork or fabric pin board: $20-60
- Washi tape, clips, or magnets: $10-25
My inspiration wall: A simple cork board directly above the work table, holding current project sketches and color references, keeps everything I need to reference in direct sightline while working, and it has become a genuine visual record of how my creative direction has evolved over the past year.
Inspiration Wall Tips
Position the wall within direct sightline of the primary work surface:
Placement for actual use:
- An inspiration wall positioned elsewhere in the room, out of the natural sightline while working, gets consulted far less often
- Position the board directly above or beside the work surface for genuine, frictionless reference during active work
- This placement consideration matters more than the board’s size or specific style
- Confirm the intended placement genuinely stays visible from the actual seated or standing work position
Rotate and refresh the wall’s content regularly to keep it genuinely relevant:
Ongoing curation:
- A static wall, unchanged for months, gradually becomes background noise rather than active support
- Periodically removing completed project references and adding current, relevant material keeps the wall functionally useful
- This habit also creates a natural record of creative progression that can be genuinely interesting to look back on
- Set a simple, low-effort routine, such as updating the wall at the start of each new project, to maintain this relevance
8. The Sound-Dampening Treatment
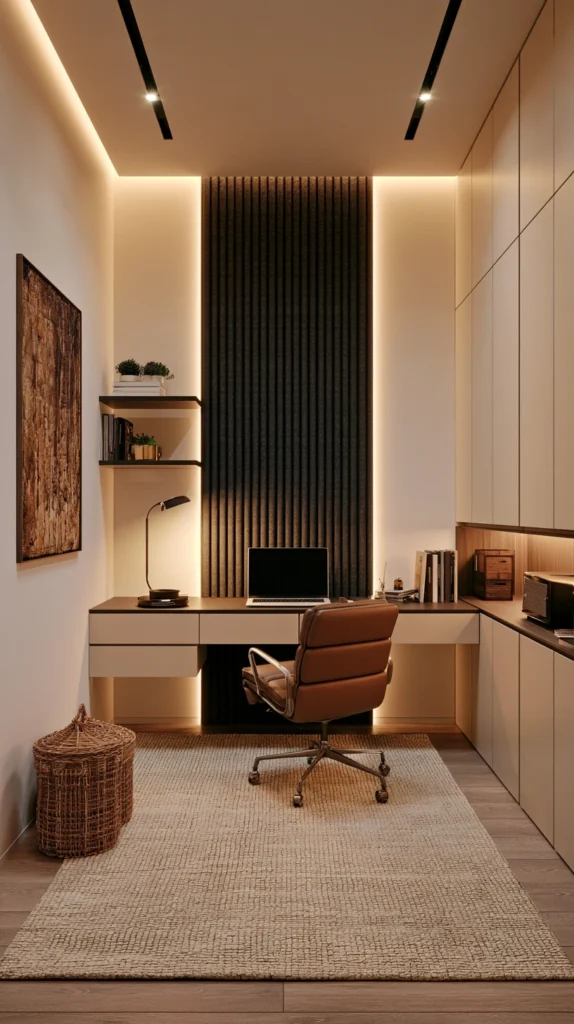
Acoustic panels, rugs, or soft furnishings added specifically to manage noise, whether reducing echo or containing sound from a louder hobby.
My noise problem, in either direction:
What was creating friction:
- A hobby involving power tools, music practice, or other genuinely loud activity, disruptive to the rest of the household
- Alternatively, a hard-surfaced room with distracting echo, making focused work genuinely uncomfortable
- A missed opportunity to address the room’s acoustic reality directly, rather than working around it
The sound-dampening solution:
Why acoustic treatment matters more than most people initially consider:
- Reduces friction with other household members for genuinely loud hobbies, supporting more regular, guilt-free use
- Improves the room’s actual comfort for hobbies requiring focus, since excessive echo can be surprisingly distracting
- A relatively affordable addition delivering meaningful improvement to daily usability
- Particularly valuable for hobby rooms located near shared living spaces or bedrooms
Choosing the right acoustic treatment:
Options by need and budget:
- Acoustic foam panels, mounted on walls, for genuine sound absorption in music or louder hobby spaces
- A substantial area rug, adding meaningful sound dampening to a hard-floored room at relatively low cost
- Heavy curtains or fabric wall hangings, contributing both acoustic benefit and visual softness
- Door seals or weatherstripping, specifically addressing sound leaking beneath or around the door
Where to prioritize treatment:
Targeting the most impactful areas:
- Walls shared with bedrooms or common living areas, for genuinely loud hobbies
- The floor, particularly in a room with hard flooring and significant echo
- The door itself, often the primary path for sound leaking in or out of the room
Cost:
- Acoustic foam panels (per pack): $30-80
- Substantial area rug: $80-250
- Door seal weatherstripping: $10-25
My sound-dampened hobby room: Adding acoustic panels to the wall shared with the living room, combined with a large area rug, meant practicing drums no longer generated the household tension it used to, and sessions happen far more regularly now that the noise concern has genuinely been addressed.
Sound Dampening Tips
Prioritize treating the wall shared with the most noise-sensitive adjacent space:
Strategic targeting:
- Full-room acoustic treatment can be costly and is often unnecessary if the actual concern is one specific adjacent space
- Identify which wall borders a bedroom, living room, or other particularly noise-sensitive area and prioritize treatment there
- This targeted approach delivers meaningful noise reduction at a fraction of full-room treatment cost
- Expand treatment to additional walls only if the initial targeted approach proves insufficient
Address the door and any gaps as part of the overall sound strategy:
Comprehensive approach:
- Sound frequently escapes through gaps beneath and around doors, undermining wall treatment alone
- Simple weatherstripping or a door sweep addresses this often-overlooked sound leakage point
- This relatively inexpensive addition meaningfully improves the overall effectiveness of any wall-based acoustic treatment
- Consider this detail as part of a complete sound strategy, not an optional afterthought
9. The Vertical Storage Wall for Maximum Capacity
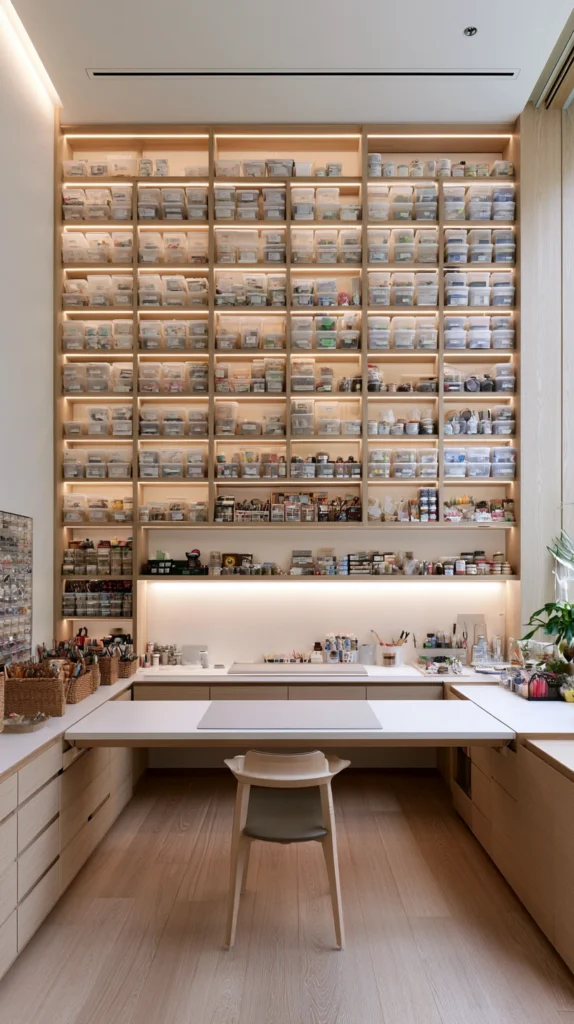
Floor-to-ceiling shelving, using the room’s full height rather than just the standard shelf-height zone, to maximize storage capacity.
My underused ceiling height:
What was going unused:
- Storage furniture stopping at a standard shoulder or head height
- Significant unused wall space above every shelf or cabinet in the room
- A missed opportunity to genuinely maximize a hobby room’s often-limited square footage
The vertical storage solution:
Why going all the way up matters specifically in a hobby room:
- Hobby supplies frequently accumulate significantly over time, quickly outgrowing standard-height storage
- Ceiling height is almost always underused, representing genuinely free additional capacity
- Floor-to-ceiling shelving adds substantial storage without expanding the room’s actual footprint
- The single most effective way to add capacity in a room where floor space is often already constrained by the work surface itself
Building the vertical storage wall:
Approach options:
- Freestanding floor-to-ceiling bookshelf or cube storage units
- Wall-mounted shelving brackets extending the full available height
- A closed cabinet system on the lower half with open shelving above for less frequently accessed items
Organizing by access frequency:
Making full-height storage genuinely functional:
- Daily-use supplies at the most easily reached height, typically waist to shoulder level
- Occasional-use items on higher or lower shelves, where slightly more effort to access is an acceptable trade-off
- The most infrequently needed bulk supplies reserved for the highest shelves, accessed with a step stool when genuinely needed
Cost:
- Freestanding floor-to-ceiling shelving unit: $150-500
- Wall-mounted shelving system, full height: $100-400
My vertical storage wall: Installing floor-to-ceiling shelving along one wall of the hobby room roughly doubled the usable storage capacity without taking up a single additional inch of floor space, finally accommodating a supply collection that had outgrown every previous storage attempt.
Vertical Storage Tips
Anchor tall freestanding units to the wall for safety:
Safety consideration:
- Tall, floor-to-ceiling furniture carries genuine tip-over risk, particularly in a room with regular activity
- Anti-tip straps or brackets are inexpensive and simple to install
- This step is essential regardless of whether the unit is freestanding or built-in
- Most furniture retailers include anti-tip hardware with tall shelving units, but confirm this before installation
Keep a small step stool in the room for genuine top-shelf access:
Practical accessibility:
- Storage above easy reach becomes underused if accessing it is genuinely inconvenient
- A compact, foldable step stool, stored discreetly within the room, keeps top shelves functionally accessible
- This small addition ensures the full height of the storage wall actually gets used rather than becoming forgotten space
- Without this convenience, upper shelves often become a place items are stored but rarely retrieved
10. The Comfortable Seating Beyond the Work Chair
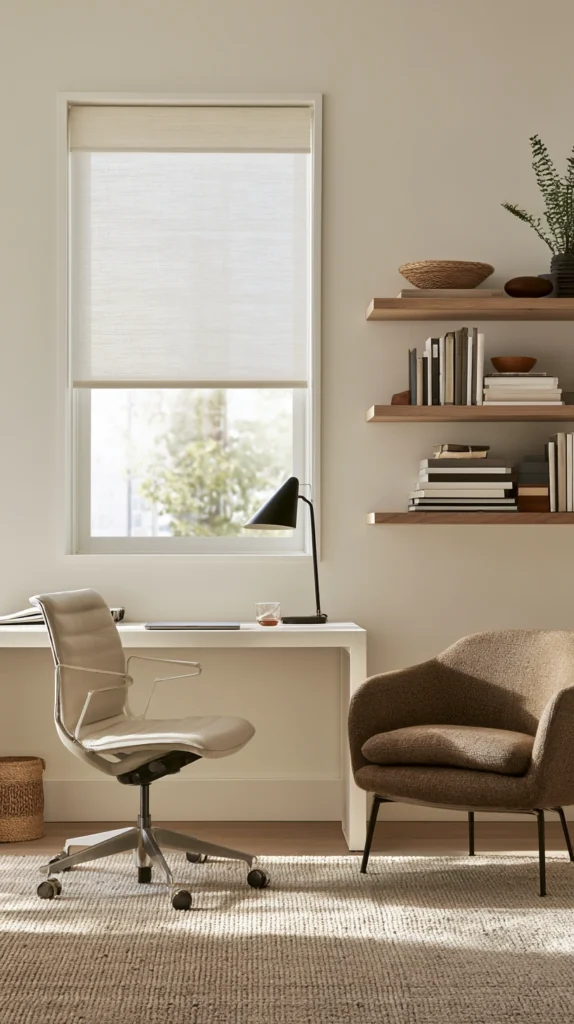
A secondary, more relaxed seating option within the hobby room, supporting activities like planning, reading reference material, or simply resting between work sessions.
My all-work-no-rest room layout:
What was missing:
- A room entirely organized around the active work surface, with nowhere to sit and simply think or plan
- Every moment in the room oriented toward active production
- A missed opportunity for the value a genuinely comfortable, secondary seating spot provides
The comfortable seating solution:
Why a second, more relaxed seat adds genuine value:
- Supports planning, reading, or reviewing reference material away from the active work posture
- Provides a spot to simply rest during longer work sessions without leaving the room entirely
- Distinguishes between active production time and the equally important thinking and planning phase of most hobbies
- A relatively simple addition that meaningfully rounds out the room’s overall function
Choosing the right seating:
Options by space and room style:
- A small accent chair, positioned in whatever corner the room can accommodate
- A floor cushion or pouf for rooms with limited space for full furniture
- A small loveseat if the room’s size genuinely allows for more substantial seating
Positioning the seat within the room:
Getting the placement right:
- Near the inspiration wall, supporting quiet reference review
- Within reach of a small side table for a drink or reference materials
- Positioned to take advantage of any natural light the room offers
Cost:
- Small accent chair: $80-300
- Floor cushion or pouf: $30-100
My secondary seating spot: Adding a simple accent chair in the corner of the hobby room, positioned near the inspiration wall, gave me somewhere to actually sit and plan a project before diving into active work, a step that used to happen standing at the table or not at all.
Comfortable Seating Tips
Choose seating scaled appropriately to the room’s actual available space:
Proportion consideration:
- Oversized seating in a small hobby room can consume space better dedicated to work surfaces and storage
- A modest accent chair or floor cushion typically fits more successfully than full-sized furniture in a constrained room
- Measure the available space honestly before selecting seating, prioritizing the room’s core function
- This restraint ensures the secondary seating enhances rather than competes with the room’s primary purpose
Position the seat to support a genuinely different activity than the main work surface:
Functional distinction:
- Seating positioned identically to the work posture does not add meaningfully different value
- A seat oriented toward reading, viewing the inspiration wall, or simply resting serves a genuinely distinct function
- This distinction is what separates a valuable addition from simply more furniture in the room
- Consider what specific activity the seating is meant to support before finalizing its placement and orientation
11. The Project-in-Progress Display Shelf
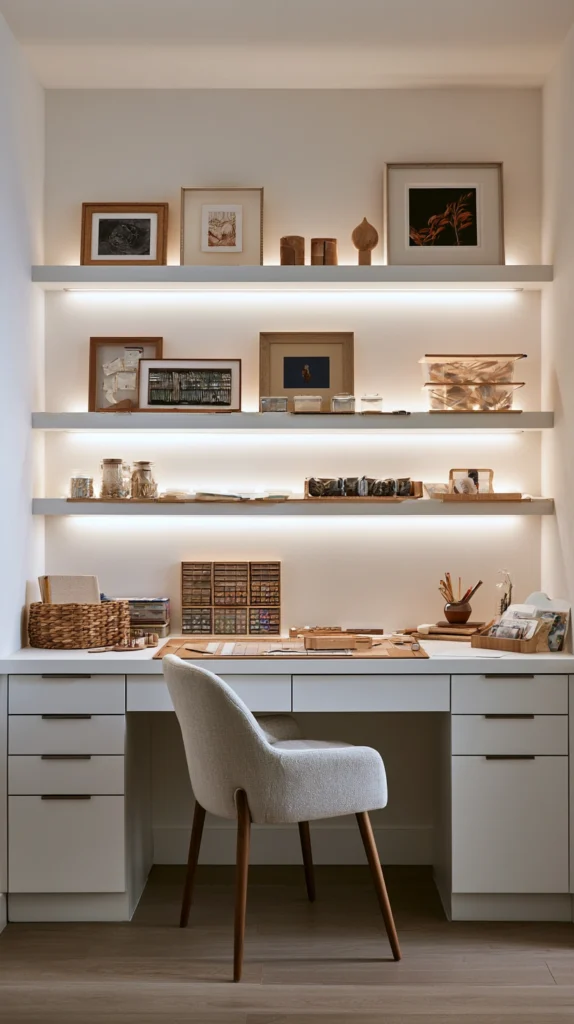
A dedicated shelf or small display area specifically for showcasing current or completed projects, separate from working storage.
My hidden finished work:
What felt like a missed opportunity:
- Completed projects immediately packed away or given away, with nowhere in the room to actually see and appreciate them
- A missed opportunity for the motivation and satisfaction a visible project history provides
- A room entirely focused on production, with no space acknowledging the results
The display shelf solution:
Why showcasing finished or in-progress work adds genuine value:
- Provides visible evidence of progress and accomplishment, supporting motivation for continued work
- Creates a genuine sense of the hobby’s history and development within the room itself
- Distinguishes clearly between active working storage and the separate function of display and appreciation
- A relatively simple addition that meaningfully changes the room’s emotional relationship to the work being done
Building the display shelf:
Setup options:
- A simple floating shelf, positioned separately from working storage areas
- A small glass-front cabinet for more delicate or precious finished pieces
- A rotating display, changing periodically to feature current work in progress
Curating the display:
What to include and how often to update it:
- A rotating selection rather than attempting to display every piece ever completed
- Current in-progress work, allowing visible tracking of a project’s development over time
- Occasional standout pieces, kept as a more permanent reference point within the display
Cost:
- Simple floating display shelf: $20-60
- Small glass-front display cabinet: $80-250
My project display shelf: A simple floating shelf near the door, holding a rotating selection of finished pieces, gives the room a visible sense of accomplishment that the previous pack-it-all-away approach never provided, and it has become genuinely motivating to see the collection grow.
Display Shelf Tips
Rotate the display periodically rather than letting it become static:
Ongoing curation:
- A display shelf filled once and never updated eventually becomes background rather than genuinely noticed
- Periodically swapping in different pieces, whether new completions or previously stored older work, maintains genuine visual interest
- This rotation also allows different pieces to have their moment of visibility rather than only ever the most recent work
- A simple habit, updating the display at natural project milestones, keeps this element functioning as intended
Keep the display genuinely separate from working storage areas:
Functional distinction:
- Mixing display pieces into working storage undermines the display’s distinct purpose
- A clearly separate shelf or area, physically distinct from where active supplies are stored, maintains this important boundary
- This separation reinforces the room’s dual function: active production and genuine appreciation of results
- Resist the temptation to use the display shelf as overflow storage for supplies when space runs short elsewhere
12. The Ventilation and Air Quality Consideration
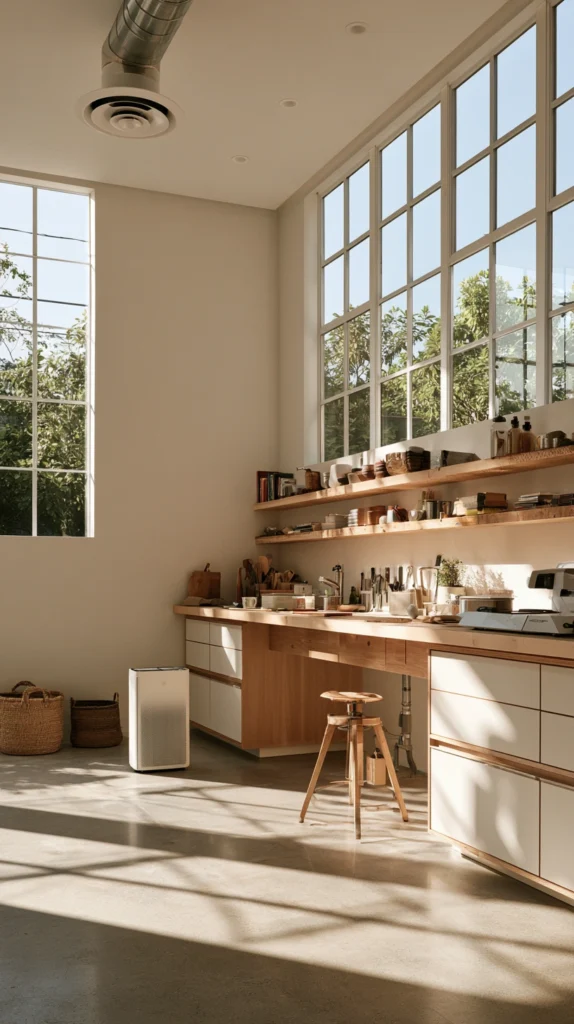
Adequate ventilation, whether through windows, fans, or air purification, specifically addressing any fumes, dust, or particulates the hobby generates.
My overlooked air quality issue:
What was going unaddressed:
- A hobby involving paint fumes, dust, or other airborne particulates, with no specific ventilation plan in place
- A room that became genuinely uncomfortable or concerning to work in for extended periods
- A missed opportunity to address a genuinely important functional requirement, not just an aesthetic one
The ventilation solution:
Why air quality deserves genuine design consideration:
- Many hobbies, from painting to woodworking to certain crafting techniques, generate fumes or particulates requiring proper ventilation
- Poor air quality directly affects both comfort and genuine health during extended work sessions
- A room lacking adequate ventilation is used less often and for shorter sessions, regardless of how well everything else is designed
- One of the most important, if least visually exciting, functional considerations for certain hobby types specifically
Addressing ventilation needs:
Approach options by hobby type:
- Operable windows, providing genuine fresh air exchange during and after fume-generating work
- A dedicated exhaust fan, particularly important for hobbies involving paint, solvents, or significant dust
- A quality air purifier with a HEPA filter, addressing fine particulates that ventilation alone may not fully clear
- Simple box fans positioned to draw air out of the room during particularly fume-heavy work sessions
Matching ventilation to specific hobby demands:
Assessing actual needs:
- Painting and solvent-based crafts typically require the most active ventilation consideration
- Dust-generating hobbies, like sanding or certain fiber crafts, benefit significantly from air purification
- Lower-particulate hobbies may need only standard room ventilation, without significant additional investment
Cost:
- Basic exhaust fan: $30-100
- Quality HEPA air purifier: $80-250
My ventilation solution: Adding a small exhaust fan and keeping the window cracked during any painting sessions eliminated the lingering fume concern that used to genuinely limit how long I could comfortably work, and sessions are noticeably more pleasant as a result.
Ventilation Tips
Assess the specific hobby’s actual air quality demands honestly before finalizing a solution:
Needs-based planning:
- Not every hobby requires the same level of ventilation investment
- Research the specific fumes, dust, or particulates the particular hobby genuinely generates before over- or under-investing in ventilation
- This honest assessment ensures the ventilation solution genuinely matches the actual need
- Consult specific hobby safety guidance, since some materials require more rigorous ventilation than general assumption might suggest
Combine multiple ventilation approaches for hobbies with more significant air quality demands:
Layered solution for higher-need hobbies:
- A single ventilation method may prove insufficient for hobbies generating significant fumes or fine dust
- Combining active exhaust, fresh air exchange, and air purification addresses air quality more comprehensively
- This layered approach matters especially for hobbies involving solvents, certain paints, or significant sanding and dust generation
- Prioritize this more comprehensive approach specifically for any hobby where genuine health considerations are involved
13. The Color Palette Suited to Focus and Creativity
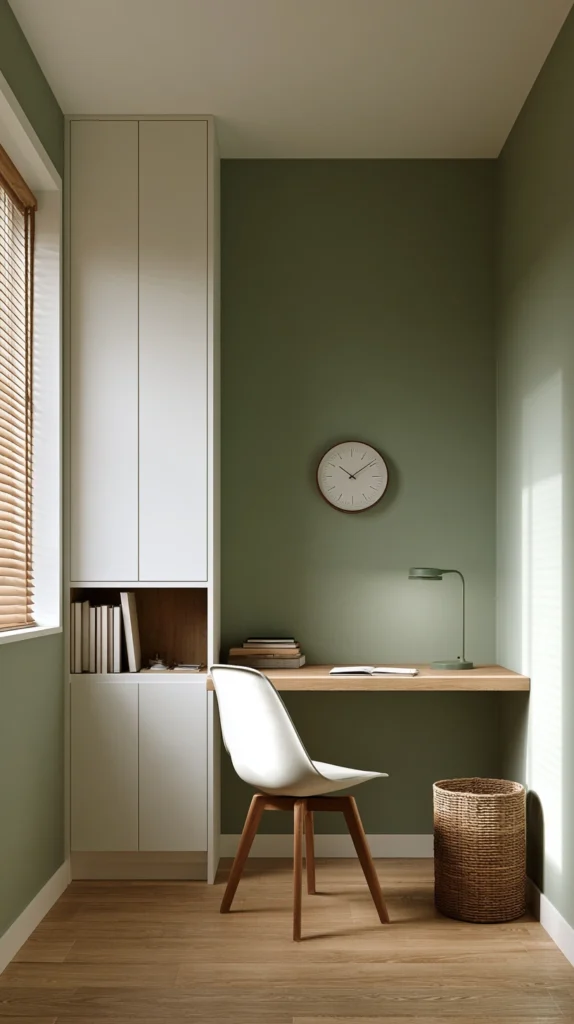
A wall color and overall palette chosen specifically to support the room’s intended function, whether energizing creativity or supporting calm focus.
My generic, unconsidered wall color:
What felt like a missed opportunity:
- Wall color inherited from the room’s previous function, with no specific consideration of the hobby room’s actual needs
- A color that did not particularly support either focus or creative energy
- A missed opportunity to use color intentionally, the way it is used deliberately in other functional rooms throughout the home
The intentional color solution:
Why color choice matters specifically in a hobby room’s design:
- Different colors are genuinely associated with different psychological effects, from calm focus to energetic creativity
- A color chosen intentionally for the room’s specific function can meaningfully support the actual work happening there
- This consideration is often applied thoughtfully to bedrooms and offices but overlooked in hobby spaces
- A relatively low-cost change delivering potentially significant impact on the room’s actual daily experience
Choosing a color direction:
Options by intended effect:
- Soft blues and greens for hobbies requiring sustained calm focus, such as detailed handwork
- Warmer, more energetic tones like soft yellow or coral for hobbies benefiting from creative stimulation
- Neutral, muted tones as a genuinely versatile backdrop, letting colorful supplies and finished work provide the room’s visual energy
- Deep, rich tones for a more dramatic, immersive creative atmosphere, particularly in rooms with adequate natural light
Practical color application:
Getting the paint choice right:
- Test paint samples directly in the room, viewed under the room’s actual lighting conditions
- Consider how the wall color will interact with fabric, paint, or other colorful supplies regularly present in the room
- A more neutral wall color often provides the most flexible backdrop for hobbies involving significant color variation in the materials themselves
Cost:
- Interior paint (per gallon): $30-60
- Average small room (1-2 gallons): $30-120
My intentional hobby room color: Repainting the previously stark white walls a soft, muted sage gave the space a calmer, more considered feel specifically suited to the detailed, focus-heavy embroidery work I do there, and the color choice has genuinely made longer work sessions feel more comfortable.
Color Palette Tips
Consider how the wall color interacts with the hobby’s actual supply colors:
Practical color coordination:
- A wall color clashing with frequently used supply colors, fabric, paint, or paper, can create visual tension during work
- A more neutral or coordinating wall color provides a calmer backdrop that lets the actual project materials stand out appropriately
- This consideration matters more in hobby rooms than in most other functional spaces, given how much colorful material is typically present
- Test the intended wall color alongside a sample of frequently used project materials before finalizing the choice
Test paint samples under the room’s actual lighting conditions, not just daylight:
Lighting-specific verification:
- A color that looks appealing under bright daylight can read very differently under the room’s actual task and ambient lighting
- View large paint samples specifically during the time of day and under the lighting typically used for hobby work
- This verification prevents choosing a color that ultimately does not suit the room’s real, everyday lighting conditions
- A relatively small additional testing step that prevents a potentially disappointing full-room repaint
14. The Digital and Charging Station Integration
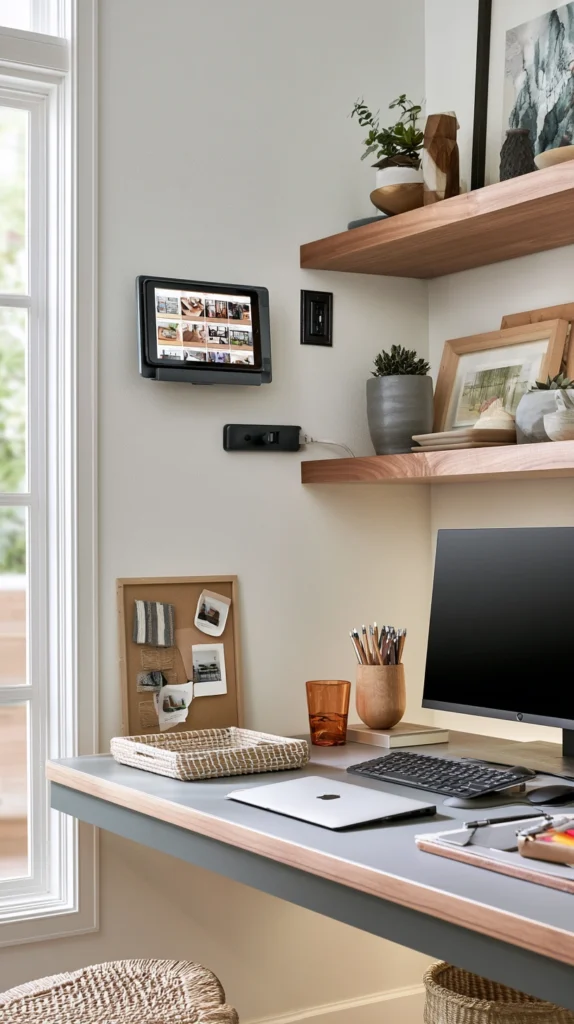
A dedicated spot for charging devices, storing digital reference tools, or supporting any technology the hobby specifically relies on.
My scattered device charging problem:
What was creating friction:
- Phones, tablets, or other devices used for reference or pattern-following, with no dedicated charging spot in the room
- Devices constantly running low on battery mid-project, requiring a trip elsewhere to charge
- A missed opportunity to integrate genuinely necessary technology into the room’s overall design
The charging station solution:
Why dedicated technology integration matters for many modern hobbies:
- Many hobbies now rely on digital patterns, video tutorials, or reference apps accessed via phone or tablet
- A dedicated charging spot keeps these devices genuinely ready and available during work sessions
- Prevents the friction of a mid-project device running low on battery, interrupting work to charge elsewhere
- A relatively simple addition addressing a genuinely modern hobby room requirement
Building the charging station:
Setup options:
- A small dedicated shelf or drawer with a built-in charging outlet or power strip
- A wall-mounted tablet holder, positioned within view of the work surface for hands-free pattern or tutorial viewing
- A simple charging cable management system, keeping cords organized and untangled
Positioning for actual use:
Getting the placement right:
- Within reach of the primary work surface, supporting genuine hands-free reference use during work
- Near an existing outlet, or with a plan for adding one if the room’s current outlet placement is inadequate
- Positioned to avoid cord clutter across the primary work area
Cost:
- Small charging station or power strip with USB ports: $20-50
- Wall-mounted tablet holder: $15-40
My charging station integration: Adding a small wall-mounted tablet holder with a nearby charging outlet, positioned directly above the work table, means pattern videos and reference material stay visible and charged throughout every work session, without ever interrupting the actual project to go find a charger elsewhere.
Charging Station Tips
Position the charging station within genuine reach of the primary work surface:
Practical placement:
- A charging station positioned across the room still requires interrupting work to retrieve or check a device
- Position charging capability directly within reach of where actual work happens
- This placement consideration is what determines whether the addition genuinely reduces friction or simply relocates it
- Confirm the specific placement supports hands-free or minimal-interruption device use during actual project work
Plan cord management to avoid clutter across the primary work surface:
Cable organization:
- Loose charging cords across a work surface create both visual clutter and genuine physical obstruction
- Simple cord clips or a small cable management box keep charging cords contained and out of the way
- This detail matters more in a hobby room than many other spaces, given how much the work surface itself needs to remain clear
- A relatively small additional consideration that meaningfully improves the room’s everyday functional tidiness
15. The Personal Touches That Make It Genuinely Yours
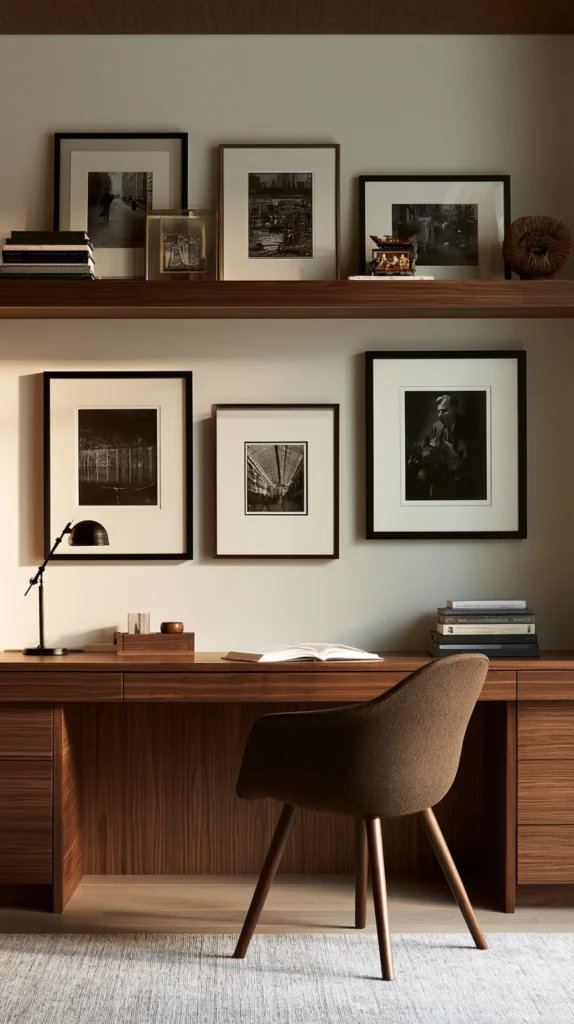
Small, personal decorative elements, photos, meaningful objects, or sentimental items, integrated into an otherwise functional space.
My purely functional, impersonal room:
What felt missing:
- A hobby room organized entirely around function, storage, and workflow, with no genuine personal warmth
- A space that worked well but did not feel like it belonged specifically to the person using it
- A missed opportunity to balance genuine functionality with the personal connection that makes a space worth spending time in
The personal touches solution:
Why personal elements matter even in a highly functional space:
- A room designed purely around efficiency can start to feel sterile or impersonal over time
- Small personal touches create genuine emotional connection to the space, supporting more consistent, enjoyable use
- Balances the room’s necessary functional demands with the warmth that makes any space genuinely enjoyable to spend time in
- A relatively low-cost, highly individual addition that meaningfully affects how the room actually feels to use
Adding personal touches:
Ideas for genuine personalization:
- Photos of finished projects, or of people who inspired or taught the hobby
- A meaningful object, perhaps a tool inherited from a family member or a first-ever finished project
- A small plant or two, adding life to an otherwise purely functional space
- A favorite piece of art or a meaningful quote, positioned somewhere visible during work
Balancing personal touches with functional demands:
Keeping the room genuinely usable:
- Personal items should enhance, not compete with, the room’s core functional layout
- Reserve genuinely personal display for areas not needed for active storage or work surface space
- A few well-chosen personal items typically add more warmth than an abundance of smaller decorative objects
Cost:
- Varies significantly based on specific items chosen; often achievable through existing meaningful objects rather than new purchases
My personal hobby room touches: A small photo of my grandmother, who taught me to sew, positioned near the inspiration wall, and her original sewing shears displayed on a small shelf, gave the room a genuine emotional warmth that all the careful functional planning alone had not quite achieved.
Personal Touch Tips
Choose personal items with genuine meaning rather than purely decorative filler:
Intentional selection:
- Generic decorative objects added purely to fill space do not deliver the same emotional value as genuinely meaningful items
- Prioritize objects, photos, or elements with real personal significance to the hobby or the people involved in learning it
- This intentionality is what distinguishes genuine personalization from simple decoration
- Take time selecting these elements specifically, rather than defaulting to whatever decorative items happen to be readily available
Keep personal touches from interfering with the room’s core functional layout:
Balance consideration:
- Personal items competing for space with essential storage or work surface area undermine the room’s primary purpose
- Position personal touches in genuinely secondary spaces, a small shelf, a wall corner, rather than prime functional real estate
- This balance ensures the room remains genuinely functional while still feeling personally connected
- Revisit this balance periodically if personal items begin to encroach on space needed for the room’s essential function
Choosing Your Hobby Room Elements
By Priority
Foundational function first:
- Dedicated work surface that stays set up (idea 1)
- Task-specific layered lighting (idea 3)
- Clear bin labeling system (idea 4)
Storage and organization:
- Pegboard tool wall (idea 2)
- Vertical storage wall for maximum capacity (idea 9)
- Rolling storage cart system (idea 6)
Comfort and atmosphere:
- Comfortable seating beyond the work chair (idea 10)
- Color palette suited to focus and creativity (idea 13)
- Sound-dampening treatment (idea 8)
By Effort Level
Lowest effort:
- Clear bin labeling system (idea 4)
- Inspiration and reference wall (idea 7)
- Personal touches that make it genuinely yours (idea 15)
Medium effort:
- Pegboard tool wall (idea 2)
- Task-specific layered lighting (idea 3)
- Digital and charging station integration (idea 14)
- Project-in-progress display shelf (idea 11)
Higher commitment:
- Dedicated work surface that stays set up (idea 1)
- Vertical storage wall for maximum capacity (idea 9)
- Fold-down or Murphy-style work table (idea 5)
- Sound-dampening treatment (idea 8)
- Ventilation and air quality consideration (idea 12)
By Budget
Under $150:
- Clear bin labeling system (idea 4)
- Inspiration and reference wall (idea 7)
- Digital and charging station integration (idea 14)
- Project-in-progress display shelf (idea 11)
$150-400:
- Pegboard tool wall (idea 2)
- Task-specific layered lighting (idea 3)
- Comfortable seating beyond the work chair (idea 10)
- Ventilation and air quality consideration (idea 12)
$400-800:
- Dedicated work surface that stays set up (idea 1)
- Vertical storage wall for maximum capacity (idea 9)
- Fold-down or Murphy-style work table (idea 5)
- Sound-dampening treatment (idea 8)
$800+:
- Full room combination of multiple higher-commitment elements
Maintenance Through the Years
Weekly:
- Return tools to their designated pegboard or bin locations after use
- Clear and reset the dedicated work surface between projects
Monthly:
- Reassess bin organization and relabel as supply categories shift
- Rotate the project display shelf with current work
Seasonally:
- Deep clean storage areas and reorganize based on actual recent usage patterns
- Update the inspiration wall with current project direction
Annually:
- Reassess the room’s overall layout against how the hobby itself may have evolved
- Consider whether storage capacity still matches the current supply collection’s actual size
My Complete Hobby Room Journey
What I built across two years:
Year one ($480):
- Dedicated work surface and pegboard tool wall
- Clear bin labeling system for all fabric and supplies
- Learned that removing setup friction mattered more than any other single change
Year two ($610):
- Task-specific lighting and a full vertical storage wall
- Inspiration wall and a small comfortable accent chair
- Learned that supporting the planning and thinking phase, not just active work, meaningfully changed how the room actually got used
Total investment: $1,090 across two years Most important lesson: Reducing the friction between wanting to work and actually starting mattered more than any aesthetic decision Single highest-impact change across both years: The dedicated, always-ready work surface, for fundamentally changing how often the hobby actually got practiced
Getting Started This Weekend
Start with friction, not furniture.
This weekend:
Step 1 — Identify the single biggest source of friction in the current setup:
- Note whether it is setup time, disorganized supplies, poor lighting, or something else entirely
- This honest assessment determines where the first improvement will deliver the most genuine benefit
Step 2 — Address that specific friction point first, before any other addition:
- A dedicated work surface, a basic labeling system, or a simple task lamp
- Solving the most significant existing problem delivers more value than any secondary addition
Step 3 — Add one storage improvement supporting actual workflow:
- Pegboard, clear bins, or vertical shelving, chosen based on the hobby’s specific supply needs
- This addition should reduce search and setup time, not just improve visual tidiness
Step 4 — Consider one comfort or personalization element:
- A secondary seat, an inspiration wall, or a few genuinely meaningful personal touches
- These additions round out the room’s function with the warmth that supports long-term, genuine enjoyment
My recommendation:
Start with a dedicated work surface and basic supply organization:
- Both directly address the friction that most commonly prevents a hobby room from actually getting used
- Both provide a foundation that every other addition on this list builds upon naturally
- This starting point delivers the clearest, most immediate change in how often the room actually gets used
Sit down to work in the newly organized space and notice how much faster you actually start before planning what comes next.
Now go build the hobby room that finally gets used as often as you actually intended.
Quick Summary
The 15 hobby room design ideas:
Foundational function:
- Dedicated work surface that stays set up (idea 1): the single highest-impact change for actual use
- Task-specific layered lighting (idea 3): lighting matched to the hobby’s real demands
- Fold-down or Murphy-style work table (idea 5): a full surface for shared-purpose rooms
Storage and organization:
- Pegboard tool wall (idea 2): instant visual access to tools and supplies
- Clear bin labeling system (idea 4): eliminating search time before every project
- Rolling storage cart system (idea 6): mobile supplies exactly where and when needed
- Vertical storage wall for maximum capacity (idea 9): maximizing an often-limited footprint
Creative and functional support:
- Inspiration and reference wall (idea 7): visual support directly in the work sightline
- Sound-dampening treatment (idea 8): reducing friction for louder hobbies
- Ventilation and air quality consideration (idea 12): a genuinely important, often overlooked need
- Digital and charging station integration (idea 14): supporting modern, tech-reliant hobbies
Comfort and personality:
- Comfortable seating beyond the work chair (idea 10): supporting planning and rest
- Project-in-progress display shelf (idea 11): visible motivation and accomplishment
- Color palette suited to focus and creativity (idea 13): intentional atmosphere
- Personal touches that make it genuinely yours (idea 15): warmth within a functional space
The universal hobby room rules:
Always:
- Prioritize reducing the friction between deciding to work and actually starting
- Organize storage around actual workflow, not just visual tidiness
- Choose lighting specifically suited to the hobby’s real visual demands
- Balance genuine function with enough personal warmth to make the space worth spending time in
Never:
- Assume a hobby room only needs storage, without a genuinely dedicated work surface
- Rely on a single overhead light for detailed or color-critical work
- Ignore ventilation needs for hobbies generating fumes, dust, or particulates
- Let a room’s function become so purely utilitarian that it loses any personal connection
Common mistakes:
- Requiring full setup and teardown for every single work session
- Organizing supplies for visual appearance rather than actual workflow efficiency
- Treating lighting as a fixed, unchangeable feature rather than a functional design decision
- Overlooking air quality and noise considerations specific to the actual hobby involved
- Building a purely functional space with no genuine personal connection or warmth
Remember: the biggest factor in whether a hobby room actually gets used is how much friction exists between wanting to work and starting, storage should be organized around real workflow rather than generic tidiness, lighting and ventilation are functional requirements, not optional upgrades, personal touches matter even in a highly functional space, and the best hobby room is the one that gets used constantly, not the one that merely looks impressive.