14 Brilliant Basement Ceiling Ideas
Basement ceilings come with challenges most other rooms don’t have — low clearance, exposed pipes and ductwork, and moisture concerns all factor into what actually works overhead. The good news is there are plenty of finishes that work around those constraints rather than fighting them, often for less than a full drywall renovation.
Below are 14 ways to finish or upgrade a basement ceiling, from full drywall installs to exposed-and-painted treatments, with real numbers on clearance, material cost, and budget so the project fits both your ceiling height and your budget.

Basement Ceiling Considerations
Low clearance (under 7.5 feet):
- Painted exposed ceiling saves the most height
- Avoid drop ceilings, which lose 3-6 inches
- Recessed lighting over surface-mounted fixtures
- Every inch matters for a comfortable feel
Access needs (plumbing, electrical, HVAC):
- Drop ceilings offer the easiest ongoing access
- Painted exposed ceilings need no access panels
- Drywall requires cut-in access panels at shutoffs
- Factor in future repairs, not just current looks
Moisture-prone basements:
- Avoid fabric or paper-based materials
- Choose mold-resistant drywall if enclosing
- Metal and vinyl tiles resist moisture well
- Address any leaks before finishing the ceiling
1. Paint the Exposed Ceiling for an Industrial Look
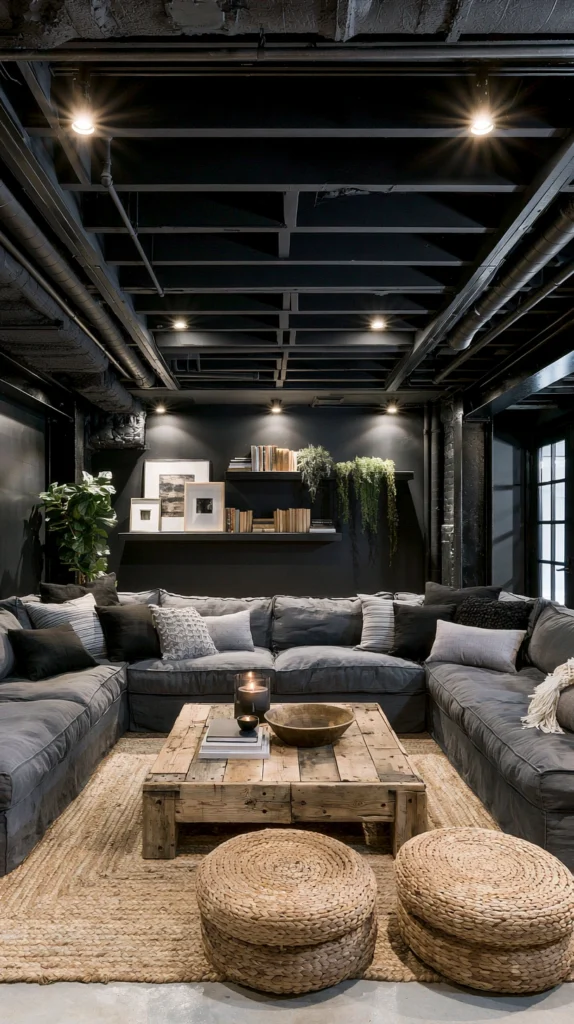
Painting the joists, subfloor, ductwork, and pipes all one uniform color is one of the cheapest and most popular basement ceiling treatments, since it preserves every inch of ceiling height. A typical 500 sq ft basement needs about 2-3 gallons of ceiling paint.
Budget: $80-150 for paint and supplies, plus a few days of labor if doing it yourself. Matte black is the most common choice since it visually recedes and makes uneven surfaces and mismatched materials far less noticeable.
Painting everything the same flat, dark color — joists, ducts, pipes, and wiring alike — is what makes this look read as intentional rather than unfinished. Skipping any one element (leaving a duct unpainted, for example) draws the eye and undercuts the effect.
Plan for a paint sprayer rather than a roller if possible, since it reaches into tight joist bays and around pipes far more evenly and quickly than manual rolling.
2. Install a Drop Ceiling with Wood-Look Tiles
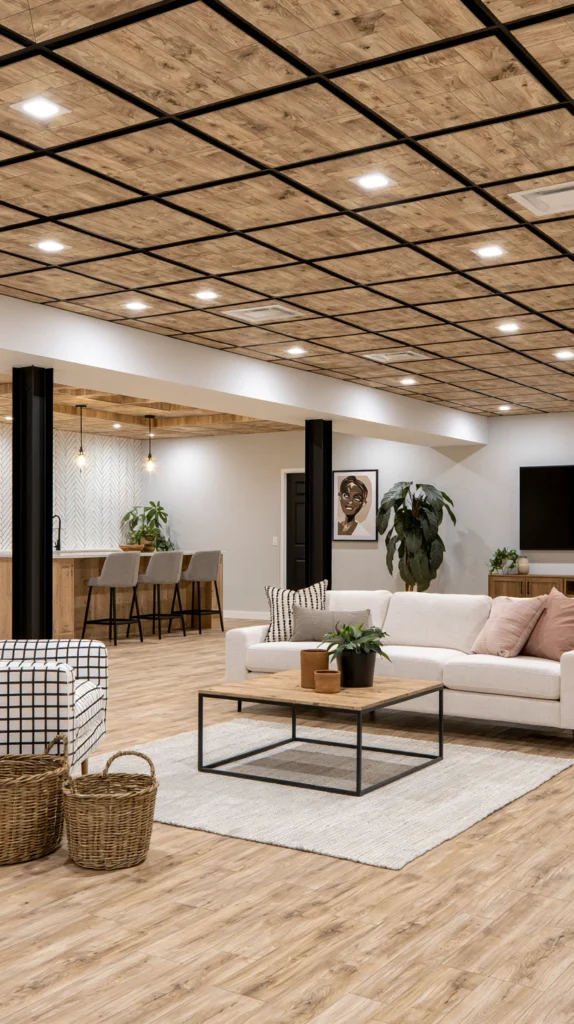
A suspended drop ceiling remains one of the most practical basement options because it offers full access to plumbing, wiring, and ductwork above. Standard drop ceiling tiles run 2×2 or 2×4 feet, and a 500 sq ft basement needs roughly 60-125 tiles depending on size.
Budget: $500-1,200 for a full grid and wood-look tile install in a 500 sq ft basement. Wood-look and textured tiles have come a long way from the plain white acoustic tiles most people associate with drop ceilings.
Drop ceilings do reduce clearance by 3-6 inches, so measure your existing ceiling height carefully before choosing this option if the basement already feels low. In basements with 8-foot ceilings or taller, this trade-off is rarely noticeable in daily use.
The main advantage over drywall is that any tile can be lifted out individually for repairs, which matters a lot in a space with active plumbing or electrical work happening above.
3. Add Drywall for a Fully Finished Look
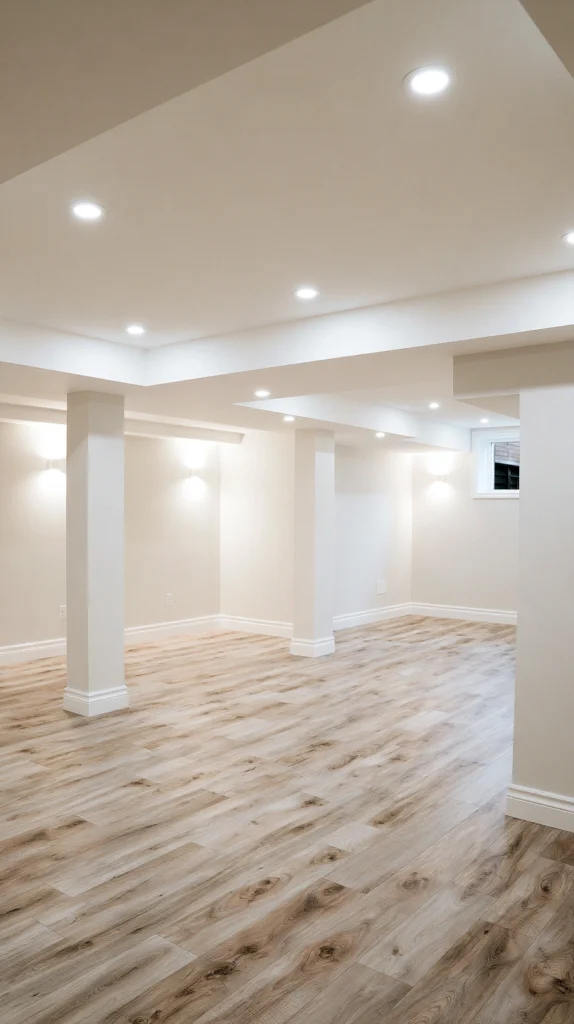
Drywall remains the standard choice for anyone wanting a basement ceiling that looks identical to the rest of the house. A 500 sq ft basement typically needs about 15-20 sheets of standard 4×8 drywall.
Budget: $600-1,200 for materials and installation in a 500 sq ft basement, more if hiring a professional for the full job. Choose moisture-resistant drywall specifically for basement use, even in areas that seem dry, as a simple safeguard against future humidity issues.
Access panels should be planned and installed at every shutoff valve, junction box, or cleanout before the drywall goes up, since cutting into finished drywall later for a repair is far more disruptive and costly. A local building code check is also worth doing before finishing a basement ceiling, since some areas require an accessible panel by law.
This is the most expensive option on this list, but it also delivers the most seamless, house-matching finish of any treatment here.
4. Use a Wood Slat Ceiling for a Modern Basement
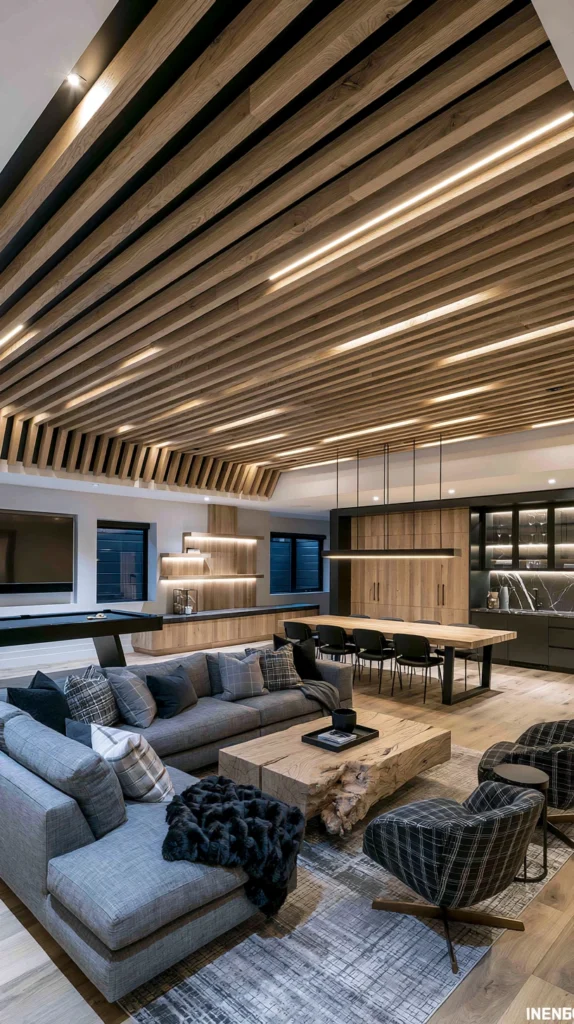
Wood slats spaced with small gaps between them bring warmth to a basement without covering the ceiling edge to edge, which also uses less material than a full wood ceiling. Standard slats run 1-3 inches wide with 1-2 inch gaps, and a 500 sq ft basement needs roughly 400-450 linear feet of slat material.
Budget: $1,000-2,000 for slat material and mounting hardware for a 500 sq ft basement. Pre-finished slat panel systems simplify installation significantly compared to cutting and spacing individual boards by hand.
This treatment can also be used to conceal recessed lighting, speakers, or even ductwork behind the slats if the gaps and mounting depth are planned out before installation begins. A basement with slightly uneven ceiling height benefits from this approach, since the linear slats visually smooth out small variations better than a flat drywall surface would.
Wood slats read as a distinctly modern choice, making this a strong option for a basement being finished as a media room or home office rather than a traditional rec room.
5. Add Tin or Metal Tile Ceiling Panels
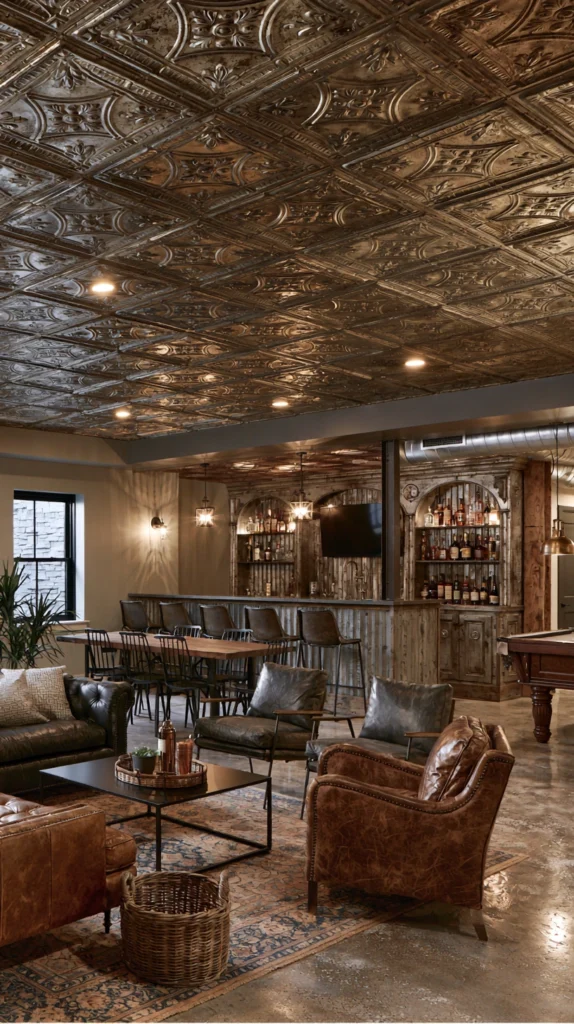
Pressed tin and metal-look tiles bring an ornate, vintage detail to a basement ceiling and are naturally resistant to moisture, which matters in a below-grade space. Standard tin tiles run 2×2 or 2×4 feet, similar to drop ceiling tile sizing.
Budget: $400-900 for a full tin tile install in a 500 sq ft basement, depending on pattern complexity. Lightweight PVC tin-look tiles cost significantly less than real pressed metal while delivering a similar visual effect.
These tiles typically install into an existing drop ceiling grid, which means they combine the access benefits of a suspended ceiling with a far more decorative finished look than standard acoustic tiles. Metal’s natural moisture resistance also makes this one of the more forgiving choices for a basement with occasional humidity concerns.
Choosing a metallic or antiqued bronze finish rather than bright silver tends to read as more intentional and less like an unfinished industrial space.
6. Create a Tray Ceiling for Architectural Detail
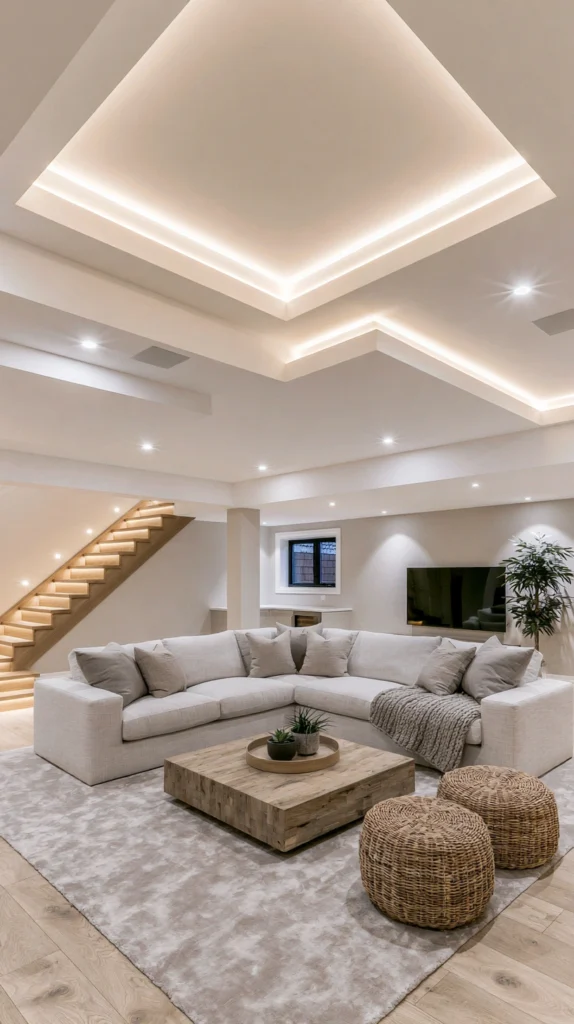
A tray ceiling adds a recessed center section, creating depth and visual interest in a basement that might otherwise feel flat and low. This works best in basements with at least 8 feet of clearance, since the technique still requires some height to create the stepped effect.
Budget: $600-1,500 depending on size and whether framing is built out or achieved with trim alone. A simpler version using crown molding and paint color contrast costs far less than a fully framed tray.
The painted version of this technique — using a slightly darker or lighter paint color on the recessed section compared to the surrounding ceiling — is the most budget-friendly way to fake the tray effect without any additional framing or construction. This is worth trying first before committing to a fully built-out tray.
A tray ceiling works especially well centered over a basement’s main seating area, drawing the eye upward and making the room’s layout feel more intentional.
7. Add Beadboard for a Cozy, Finished Feel
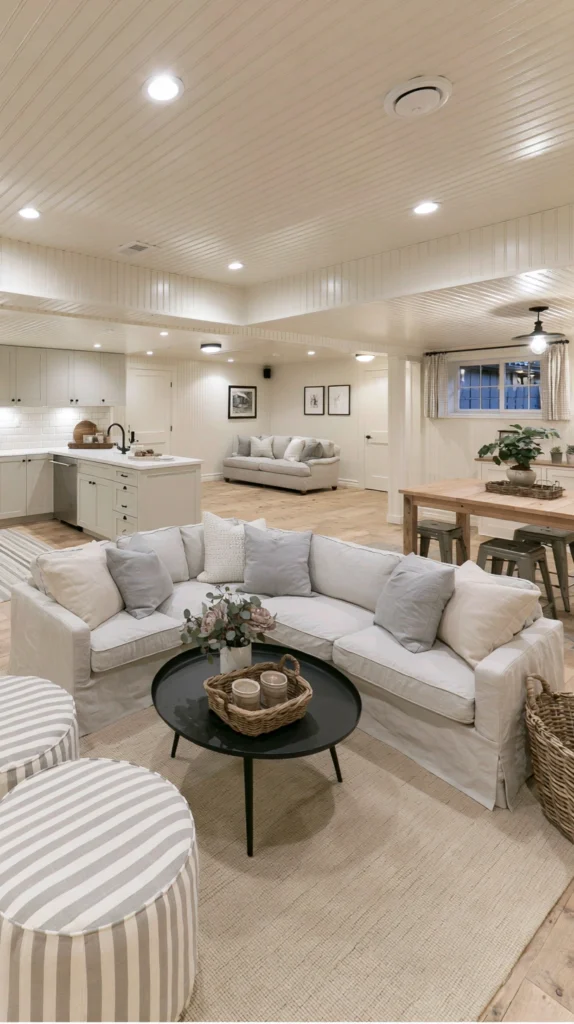
Beadboard’s narrow grooved panels bring texture to a basement ceiling while remaining one of the more affordable full-coverage options available. Standard beadboard sheets run 4×8 feet, and a 500 sq ft basement needs about 16 sheets.
Budget: $500-1,200 for beadboard panels and installation in a 500 sq ft basement. This costs somewhat more than a basic drop ceiling but delivers a warmer, more finished look than acoustic tile.
Beadboard should be primed thoroughly before painting, since the grooves can trap and unevenly absorb paint if this step is skipped, leading to a patchy finish overhead where lighting makes any inconsistency more visible. Painting it a soft white or cream keeps a basement feeling bright despite the lack of natural light most below-grade rooms have.
This is a strong choice for a basement being finished as a playroom, home gym, or guest space where a cozier, cottage-style feel fits better than an industrial or modern aesthetic.
8. Paint the Concrete Ceiling Directly
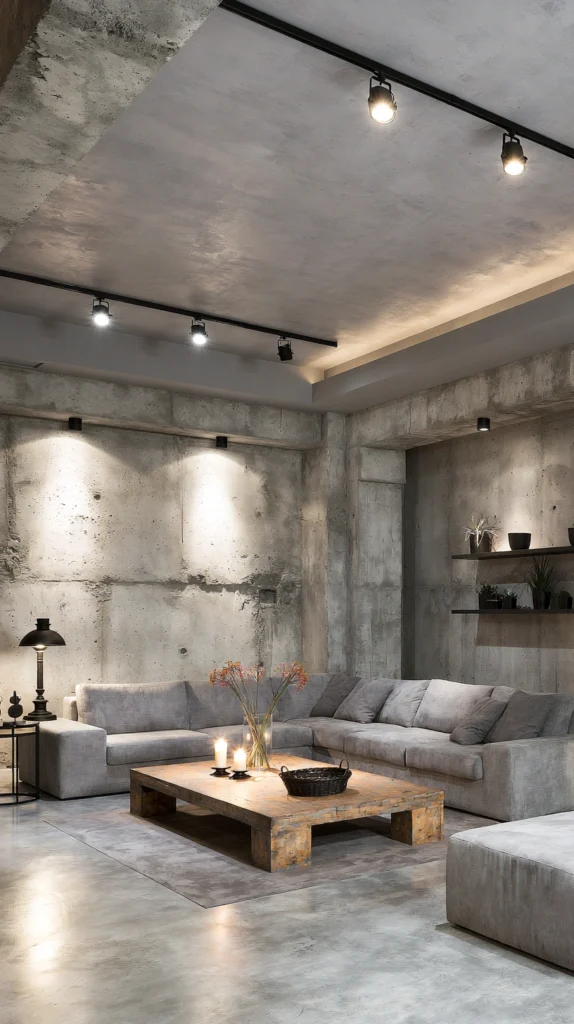
In basements without finished framing above, painting the bare concrete or subfloor directly is sometimes the simplest and cheapest option available. This works only in basements where the underside of the floor above is concrete or a similarly paintable surface rather than exposed joists needing separate treatment.
Budget: $100-200 for concrete-appropriate ceiling paint and a primer coat for a 500 sq ft basement. Use a paint specifically rated for masonry or concrete surfaces, since standard ceiling paint won’t adhere as well or last as long.
A concrete ceiling holds paint differently than drywall or wood, so a masonry primer coat first is worth the extra step and cost, since skipping it typically leads to peeling within the first year. This option offers essentially no loss of ceiling height, which matters most in a basement that’s already on the shorter side.
This is one of the lowest-cost basement ceiling treatments on the list, provided the surface underneath is already suitable for direct painting.
9. Use a Fabric Ceiling Treatment for Softness
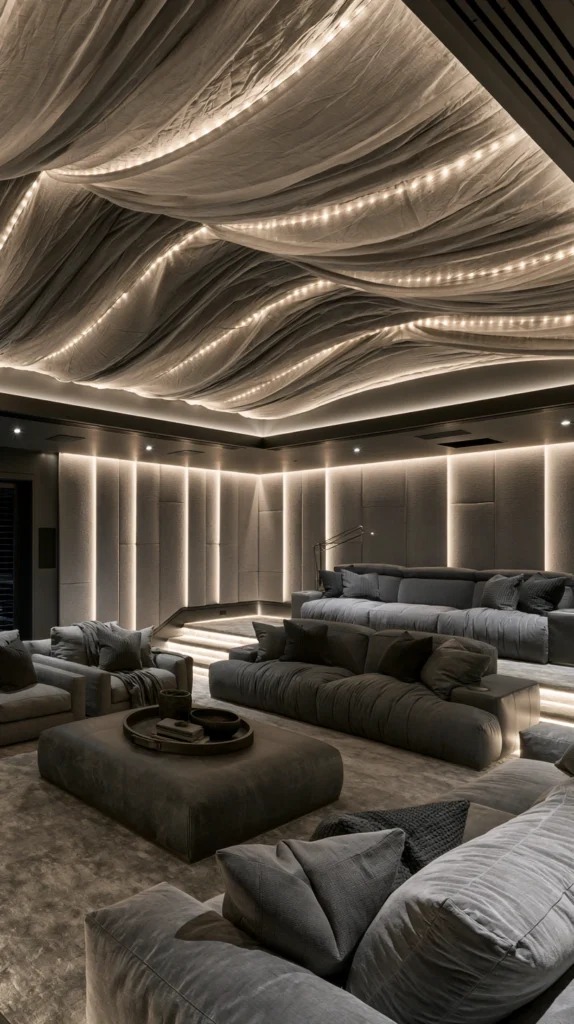
Stretched fabric ceiling systems, often installed on a track similar to a drop ceiling grid, create a soft, sound-dampening surface overhead. This is a less common choice for basements specifically because of moisture sensitivity, so it works best in basements with no history of dampness or flooding.
Budget: $800-1,800 for a full fabric ceiling system in a 500 sq ft basement, including the track and fabric panels. This sits at the higher end of the budget options on this list.
Because fabric is more moisture-sensitive than tile, tin, or painted finishes, this option should only be considered after confirming the basement has a reliable vapor barrier and no ongoing humidity issues. A dehumidifier running consistently in the space is also worth budgeting for alongside the ceiling itself.
The main benefit of this approach is sound dampening, which makes it a good fit for a basement being finished as a home theater or music room.
10. Build in a Recessed Lighting Grid
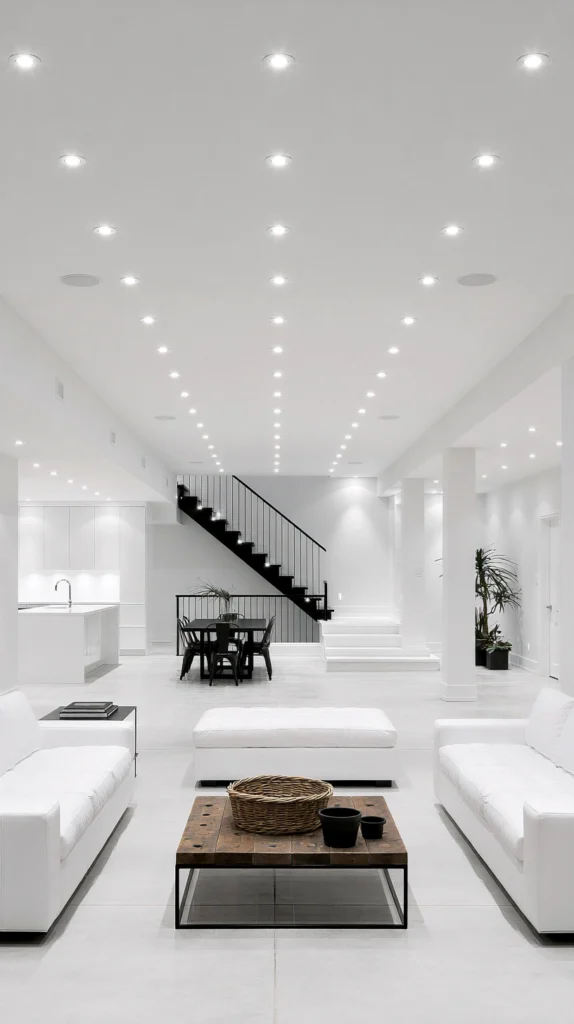
Recessed lighting isn’t a ceiling material on its own, but planning a full grid of recessed cans changes how any of the other finishes on this list actually feel in the room. A typical 500 sq ft basement benefits from 8-12 recessed lights spaced evenly across the space.
Budget: $50-100 per fixture including the light kit, or roughly $500-1,200 for a full 500 sq ft basement. This cost is in addition to whichever ceiling material you choose to install around the fixtures.
Recessed lighting is one of the few basement ceiling upgrades that meaningfully improves how bright and usable the room feels day to day, since basements typically lack natural light entirely. Spacing lights every 4-6 feet in a grid pattern, rather than clustering them in one area, distributes light most evenly across the room.
This upgrade pairs well with almost any of the other finishes on this list, from a painted exposed ceiling to full drywall.
11. Add Faux Wood Beams for Character
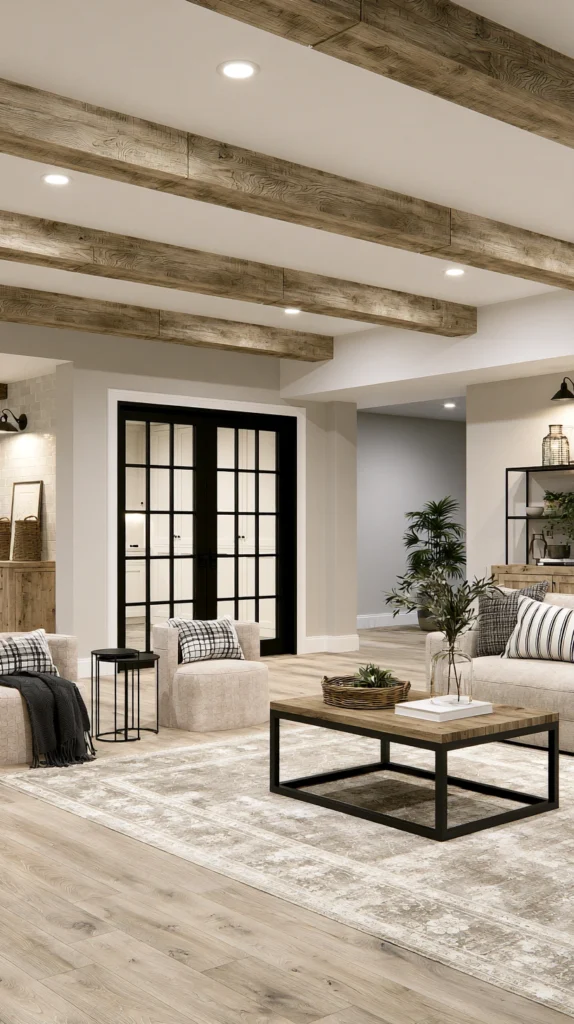
Faux beams made from lightweight polyurethane recreate the look of structural timber overhead without adding real weight to a basement ceiling that may already have limited clearance. Standard faux beams run 6-10 inches wide in lengths matching common room widths.
Budget: $300-800 for a basement with 3-4 beams spanning 10-12 feet each. This is significantly cheaper than sourcing and installing real structural timber.
Faux beams are usually simply glued and screwed into ceiling joists without needing additional structural support, which makes this one of the more approachable DIY projects on this list even for a basement ceiling. Spacing beams every 24-36 inches across the room creates the most balanced, intentional-looking result.
This treatment pairs especially well with a painted drywall ceiling, adding architectural interest without a full tray or coffered design.
12. Install a Shiplap Ceiling for Farmhouse Style
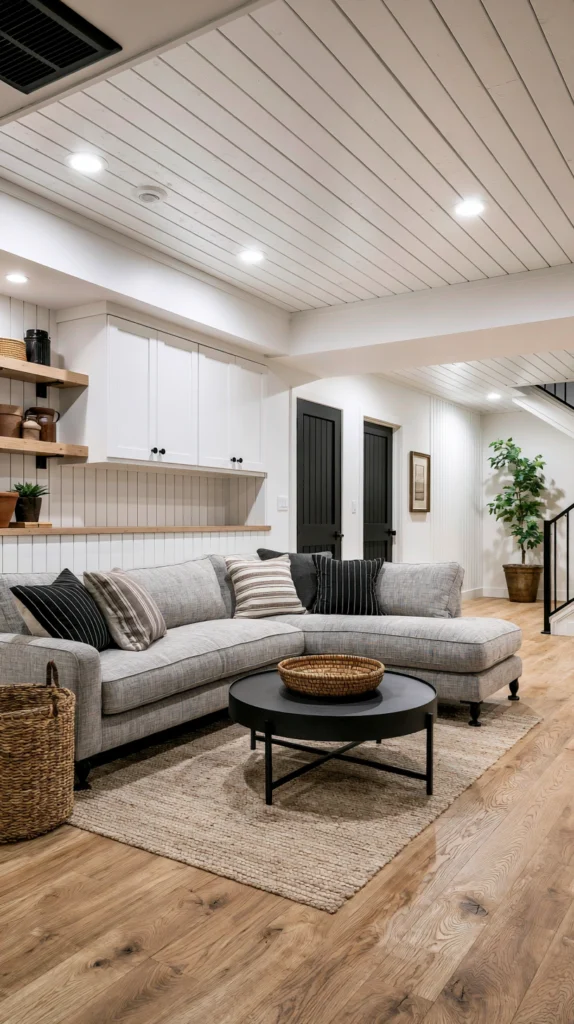
Shiplap’s overlapping horizontal boards bring the same popular farmhouse look to a basement ceiling that it delivers on walls. Standard shiplap boards run 5.5-7.25 inches wide, and a 500 sq ft basement needs roughly 550-600 sq ft of material accounting for waste.
Budget: $750-1,750 for a full 500 sq ft shiplap ceiling install. MDF-based shiplap costs less than real wood and paints just as well for this application.
Use spacers to keep a consistent shadow gap between each board as you install, since this small gap is what gives shiplap its characteristic texture rather than looking like a flat, seamless surface. Painting the finished shiplap white or a soft cream is the most common approach and helps counteract a basement’s naturally lower light levels.
This is a heavier material commitment than a drop ceiling but delivers a distinctly warmer, more textured look for a basement being finished as a primary living space.
13. Use Acoustic Tiles for Noise Reduction
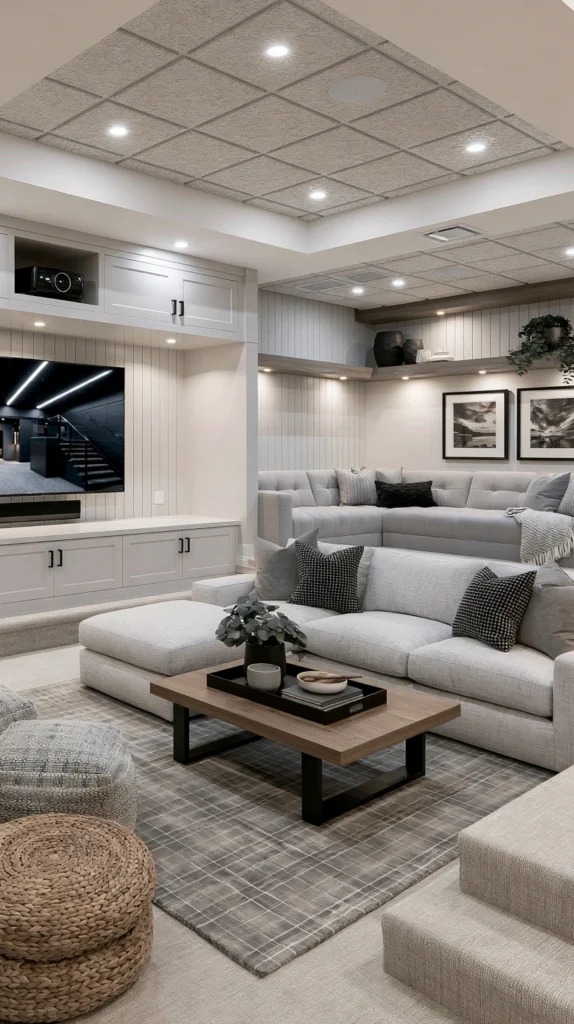
Specialty acoustic tiles, whether in a drop grid or mounted directly, reduce sound transfer between the basement and the floor above far more effectively than standard drywall or paint. Standard acoustic tiles run 2×2 or 2×4 feet, similar to typical drop ceiling sizing.
Budget: $500-1,200 for a full acoustic tile install in a 500 sq ft basement, depending on tile thickness and sound rating. Higher sound-dampening ratings do cost more, so match the tile choice to how much noise reduction the space actually needs.
This is the best option on the list specifically for a basement being finished as a home theater, music practice space, or a bedroom where noise from above (footsteps, conversation, appliances) is a real concern. Combining acoustic tiles with insulation added between the joists above further improves the sound dampening effect.
Textured or patterned acoustic tiles have improved significantly in appearance over older plain white options, so this no longer means sacrificing style for function.
14. Try a Two-Tone Painted Ceiling to Highlight Pipes
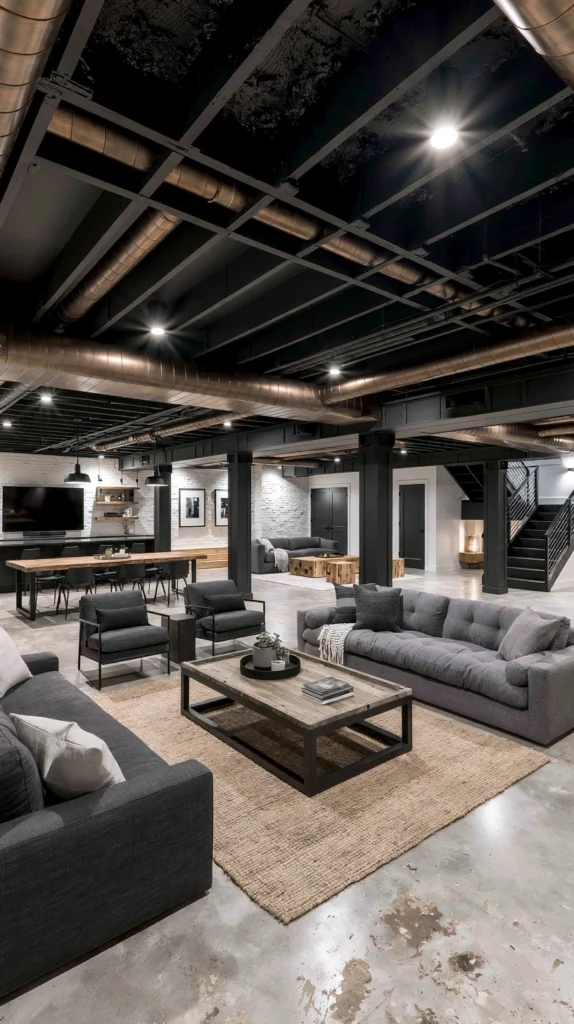
Rather than hiding every pipe and duct, a two-tone approach paints the structural joists and surrounding ceiling one color while leaving select pipes or ductwork in a contrasting metallic or bold accent color. This works in basements where at least some of the overhead elements are in decent condition and worth showing off rather than concealing.
Budget: $100-200 for paint and supplies in a 500 sq ft basement, similar in cost to a standard single-color exposed ceiling. This uses the same core technique as painting everything one color, just with an added layer of contrast paint on selected elements.
Choosing just one or two elements to highlight — a single run of ductwork, for example — rather than multiple different pipes and beams in different colors keeps this look feeling curated instead of chaotic. A metallic copper or brass paint on ductwork against a matte black backdrop is one of the more popular combinations for this approach.
This is a good middle-ground option for anyone who likes the industrial exposed-ceiling look but wants a bit more visual interest than a single flat color provides.
Quick Start Tool List
Before starting any basement ceiling project:
- Stud finder to locate joists above drywall or slats
- Ladder rated for indoor ceiling height
- Paint sprayer for exposed-ceiling projects
- Moisture meter to check for hidden dampness
- Shop vacuum for dust and debris cleanup
Budget-Friendly Version
Lowest-cost options overall:
- Painted exposed ceiling (joists, pipes, ductwork)
- Painted concrete ceiling where applicable
- Basic drop ceiling with standard tiles
- Two-tone paint highlighting existing pipework
Success Indicators
- Ceiling height still feels comfortable for the room’s use
- Access to plumbing and electrical remains possible where needed
- No signs of moisture or staining appear after the first season
- The finish matches the room’s intended use (media room, gym, bedroom)
- The basement no longer feels like an unfinished afterthought
Remember
Measure actual ceiling height before choosing a treatment, since a drop ceiling or beam system can meaningfully affect a room that already feels low, address any moisture or leak issues before finishing the ceiling regardless of material chosen, plan access panels or removable tiles at every shutoff valve and junction box in advance, prioritize recessed lighting early since basements typically lack natural light, and treat the ceiling as one of the highest-impact updates available when finishing a basement on a budget.