14 Striped Ceiling Ideas That Add Drama Without Renovation
Striped ceiling designs represent the ultimate dramatic transformation, where intentional pattern application establishes the kind of distinctive overhead features celebrating visual sophistication and refined design confidence.
These thoughtfully executed installations prove that dramatic architectural impact need not require expensive renovation, instead establishing spaces where quality paint, careful planning, and intentional styling create the kind of genuinely impressive overhead treatments becoming genuine focal points, transforming entire rooms.
Strategic striped ceiling design incorporating careful stripe width selection, ensuring appropriate proportion, color coordination supporting overall aesthetic, and meticulous execution preventing amateurish appearance, establishes the kind of distinctive overhead features that genuinely elevate interior spaces while remaining genuinely accessible for homeowners.

Understanding which stripe widths suit specific room dimensions, how to coordinate colors to prevent an overwhelming effect, and what constitutes professional execution ensuring lasting visual impact, ensures ceiling investments deliver substantial, dramatic satisfaction and genuine design sophistication.
These fourteen striped ceiling ideas demonstrate practical approaches from foundational stripe selection through comprehensive styling integration, each proving that thoughtfully designed striped ceilings create the kind of distinctive, dramatic character worth substantial creative effort.
1. Vertical Stripe Pattern Creating Height Illusion
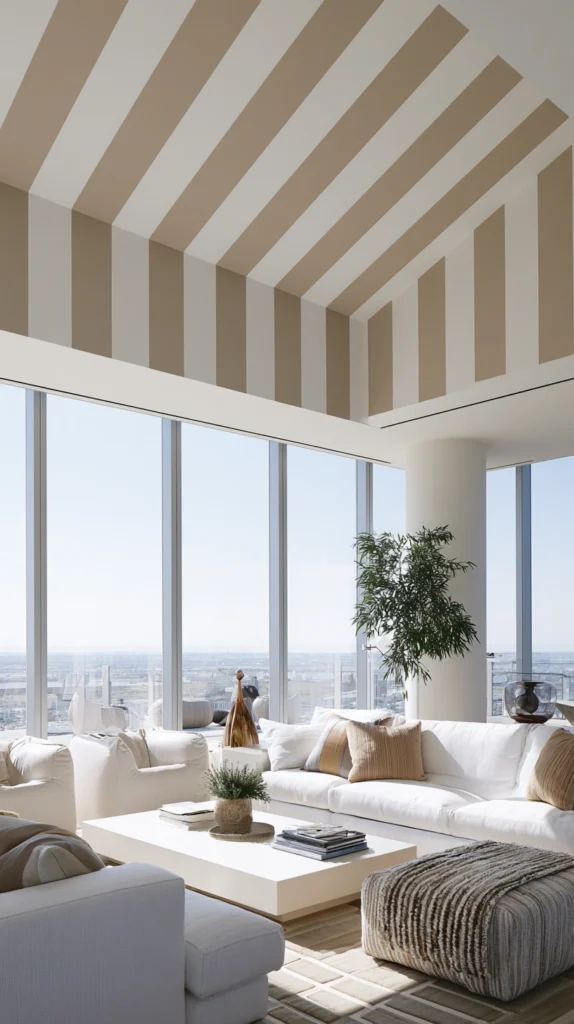
Establish immediate visual drama through sophisticated stripe orientation. Paint vertical stripes in coordinating colors spaced 4 to 8 inches apart, creating an optical illusion of increased ceiling height, and appreciate how directional stripes prevent a flat overhead appearance.
The vertical stripes create drama. The height illusion prevents a compressed feeling. The coordinated colors maintain harmony. The optical effect transforms perception.
For color, choose two tones within the same paint family — a flat white alternating with satin white, or warm cream paired with soft greige — so the effect reads as architectural rather than purely decorative.
How to get clean results:
- Paint the entire ceiling in your lighter base color first and allow 24 hours to cure before taping
- Use a chalk snap line to mark consistent stripe widths from the center of the ceiling outward
- Start from the center so any partial stripes fall at the less-visible edges of the room
- Apply FrogTape and press the edges firmly with a putty knife to prevent bleed
Budget roughly $40 to $80 for paint on a standard 12×12 ceiling, plus $10 to $15 for quality edge tape.
2. Narrow Stripe Variation Creating Sophisticated Subtlety
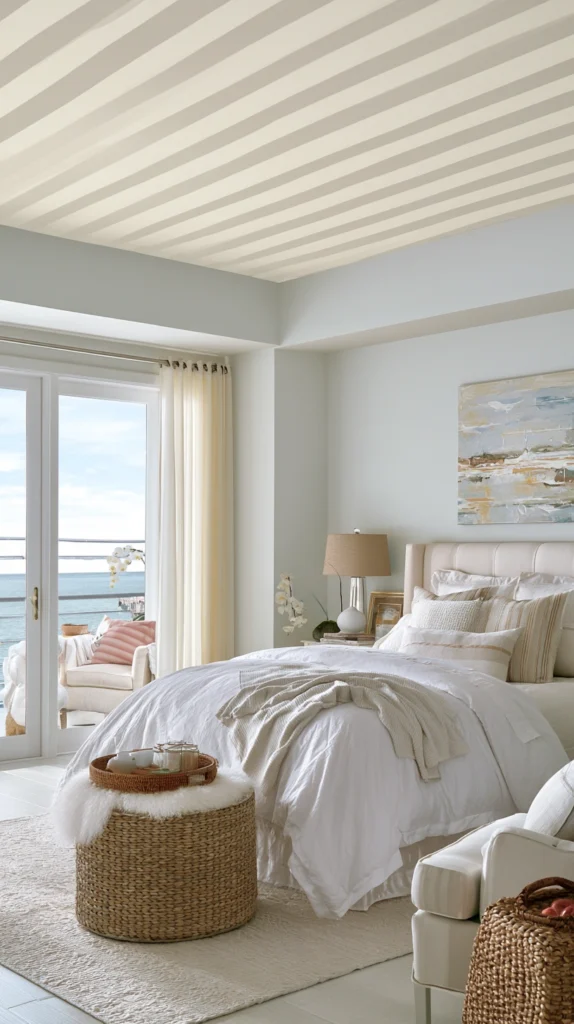
Introduce refined elegance through delicate stripe selection. Paint narrow alternating stripes of 2 to 3 inches in soft coordinating tones, maintain sophisticated restraint preventing overwhelming boldness, and create destinations where refined subtlety communicates design knowledge.
The narrow stripes add sophistication. The soft colors prevent harshness. The refined approach prevents gaucheness. The subtle effect elevates spaces.
Tone-on-tone combinations work especially well here — two shades from the same color family such as pale sage and deeper eucalyptus, or warm ivory and soft linen, deliver the pattern without visual tension. This approach suits bedrooms and dining rooms where texture is welcome but bold contrast would feel disruptive.
Tips for narrow stripe execution:
Pre-cut striping stencils are a reliable alternative if freehand painting feels risky
Rent a laser level for around $20 per day — maintaining consistent narrow lines by eye alone across a full ceiling is genuinely difficult
Use a specialty striping brush rather than a roller for cleaner edge control at this width
3. Bold Wide Stripe Creating Architectural Drama
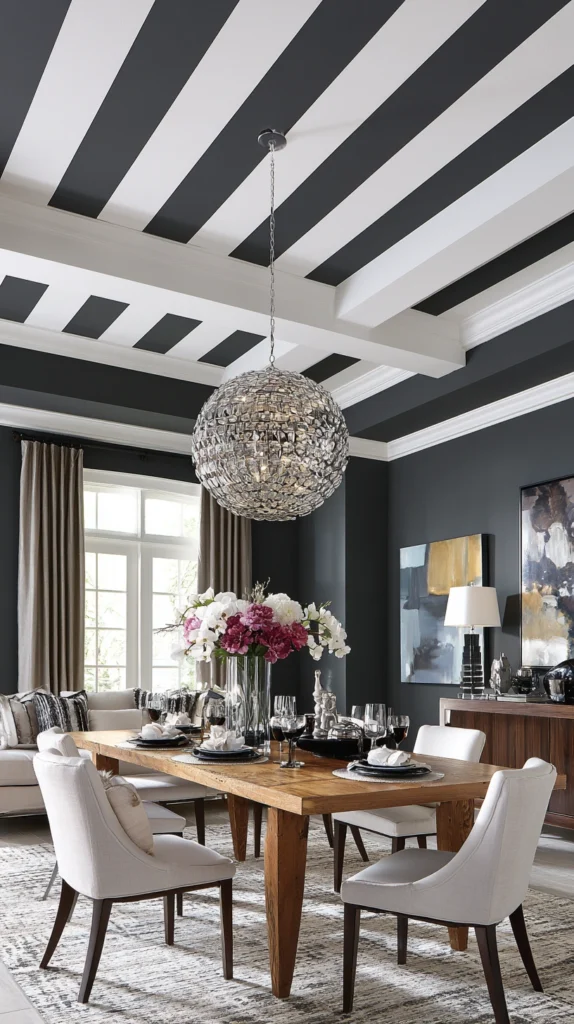
Develop impressive visual impact through substantial stripe width. Paint generously proportioned stripes of 10 to 18 inches in contrasting colors, position prominently where the dramatic overhead becomes a clear focal point, and appreciate how bold stripes command immediate attention.
The bold stripes create drama. The substantial width prevents subtlety. The contrasting colors enhance effect. The impressive treatment transforms spaces.
Wide stripes are the most forgiving to execute — minor variations in line straightness are far less visible at this scale, making them an excellent choice for first-time stripe projects.
Proportion guide by room size:
- Small rooms under 120 sq ft — 8 to 10 inch stripes work best
- Medium rooms 120 to 200 sq ft — 12 to 14 inch stripes maintain good rhythm
- Large rooms over 200 sq ft — 16 to 20 inch stripes prevent the pattern feeling lost
Effective color pairings include navy and white, deep forest green and soft ivory, or charcoal and warm cream. Use satin or eggshell finish rather than flat paint so color transitions read cleanly. Budget $60 to $120 for paint depending on room size.
4. Diagonal Stripe Pattern Creating Dynamic Movement
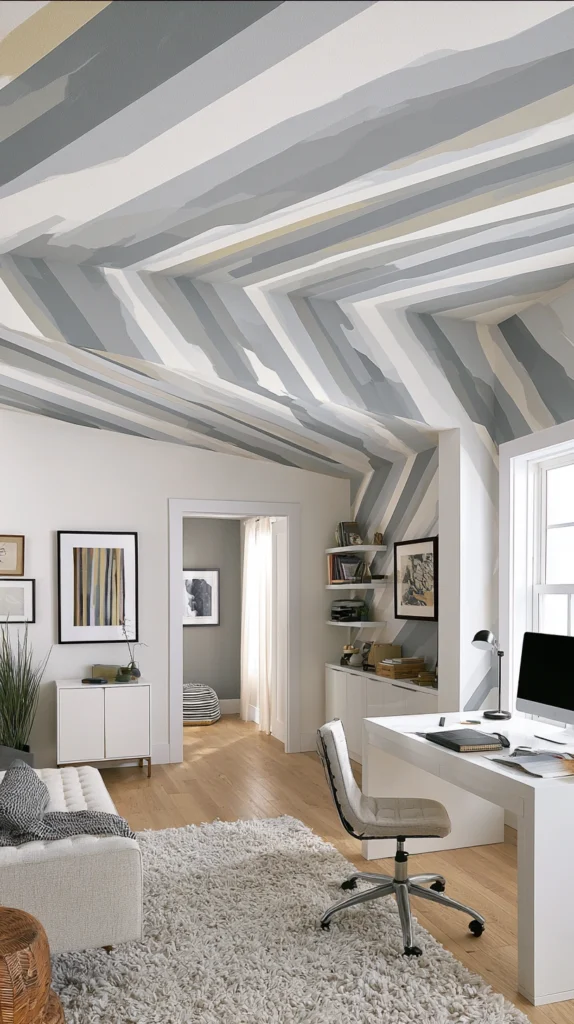
Introduce sophisticated visual interest through angled stripe application. Paint diagonally oriented stripes at a precise 45-degree angle creating directional movement, execute carefully maintaining consistent angles throughout, and appreciate how dynamic pattern prevents static overhead coldness.
The diagonal stripes create movement. The directional pattern prevents flatness. The sophisticated approach prevents standard coldness. The dynamic effect elevates spaces.
Keep color contrast moderate — a 20 to 30 percent value difference between stripe colors is ideal. Pale gold and warm white, dusty lavender and soft grey, or muted sage and cream all work well.
Mapping out diagonal stripes:
- Find the exact center point of the ceiling and mark it with a pencil dot
- Draw a single reference diagonal at exactly 45 degrees through the center using a long straightedge
- Measure all subsequent stripes perpendicularly from this reference line, not from the walls
- Use a chalk snap line to extend marks accurately across the full ceiling span
- Always work tape from the center outward — errors compound quickly when starting from an edge
If the room has crown molding or recessed lighting, consider hiring a decorative painter just for the layout and taping phase, typically $150 to $300, while doing the painting yourself.
5. Ombre Stripe Gradient Creating Color Progression
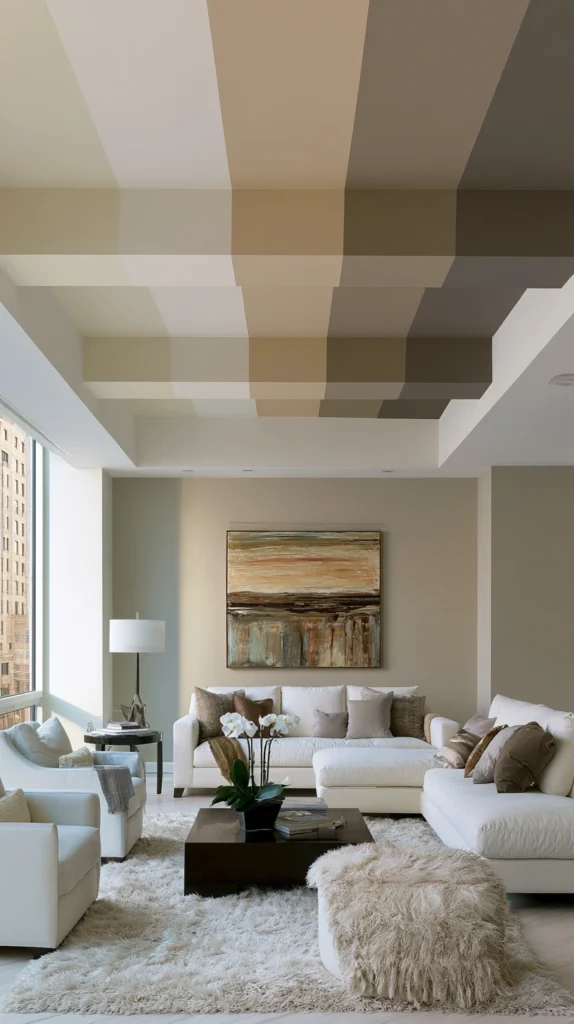
Develop artistic sophistication through color gradation. Paint stripes in progressively shifting colors creating gradual transitions — typically five to seven steps moving from deep to light across the ceiling — and create destinations where artistic execution prevents purely decorative coldness.
The ombre effect creates artistry. The progressive gradient adds dimension. The intentional colors demonstrate knowledge. The artistic approach elevates spaces.
Work from the darkest tone at one end of the ceiling to the lightest at the other, rather than placing deep color at the center which can feel visually heavy.
Practical mixing advice:
This technique works best in rooms with consistent natural light so the gradient reads evenly throughout the day
Purchase a single paint color in multiple pre-tinted strengths, or mix your own gradations by adding increasing amounts of white to a base color between each stripe
Label each paint container clearly before starting
Mix enough of each tone to complete that full stripe in a single session — color-matching midway through is extremely difficult
6. Two-Tone Stripe Creating Classic Elegance
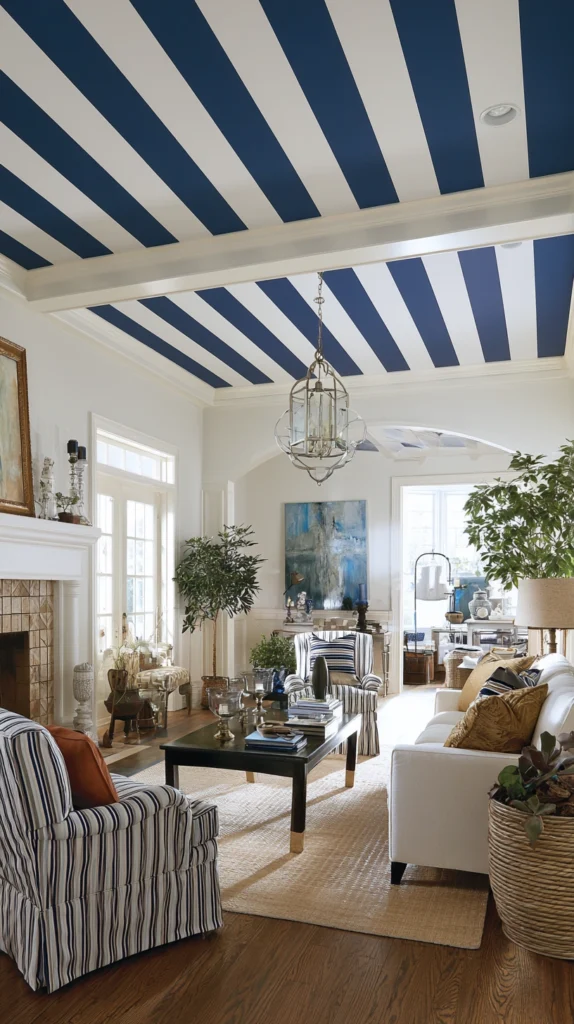
Establish refined foundations through traditional pattern application. Paint alternating stripes in two complementary coordinating colors, space them equally creating visual balance, and appreciate how this classic pattern prevents trendy coldness while remaining adaptable to virtually any interior style.
The two-tone stripe creates elegance. The complementary colors maintain harmony. The classic approach prevents dated appearance. The timeless effect enables longevity.
The two-tone approach is the most versatile of all stripe techniques and suits traditional, transitional, and contemporary rooms equally well with only the color selection changing.
Color selection guide:
- Choose colors separated by 30 to 40 percent value contrast — enough to read clearly but close enough in temperature to feel harmonious
- Both colors should share the same undertone, either both warm or both cool
- Stripe widths between 6 and 12 inches suit most standard rooms
Apply FrogTape rather than standard painter’s tape and press edges firmly with a putty knife to prevent bleed, which is the most common failure point in two-tone stripe projects.
7. Metallic Stripe Accent Creating Luxurious Details
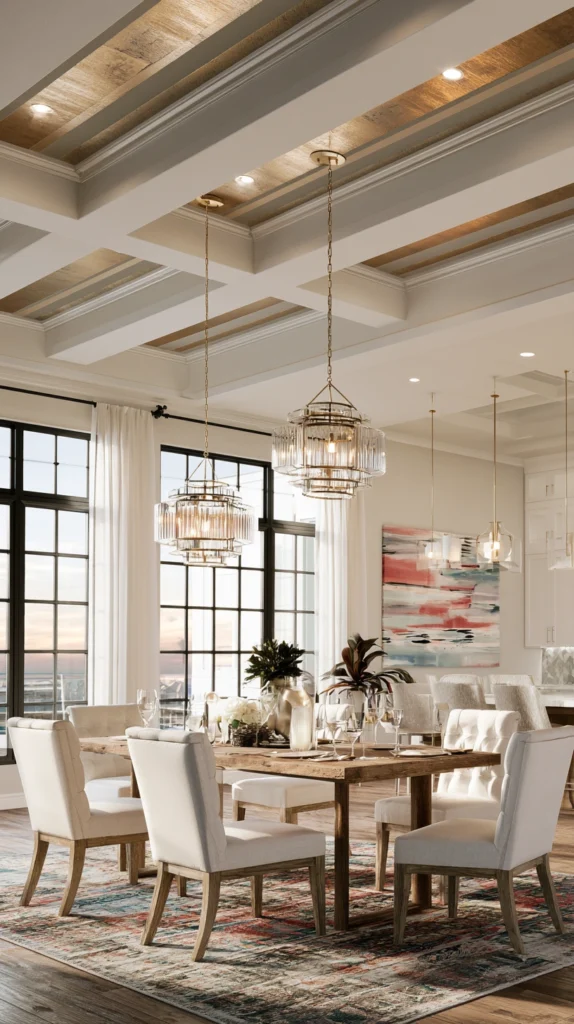
Incorporate sophisticated luxury through specialty paint selections. Feature metallic striping in gold, silver, copper, or bronze coordinating with existing hardware and fixtures, position strategically where natural or artificial light will interact with the reflective surface, and appreciate how luminous accents prevent utilitarian coldness.
The metallic stripe adds luxury. The light-reactive quality creates dimension. The coordinated approach maintains unity. The refined detail elevates spaces.
Use metallics as accent stripes within a larger pattern rather than as one of two equal stripe colors — a white ceiling with narrow 2-inch gold stripes every 8 inches reads as intentionally luxurious, while an equal alternation of matte and metallic can look unfinished.
Application tips for metallic paint:
Allow a full 48-hour cure time before removing tape to prevent tearing the reflective surface
Modern Masters and Rust-Oleum both offer quality metallic ceiling paint between $20 and $35 per quart
Apply in two thin coats — thin coats outperform one heavy application for both coverage and sheen consistency
8. Neon Stripe Accent Creating Contemporary Edge
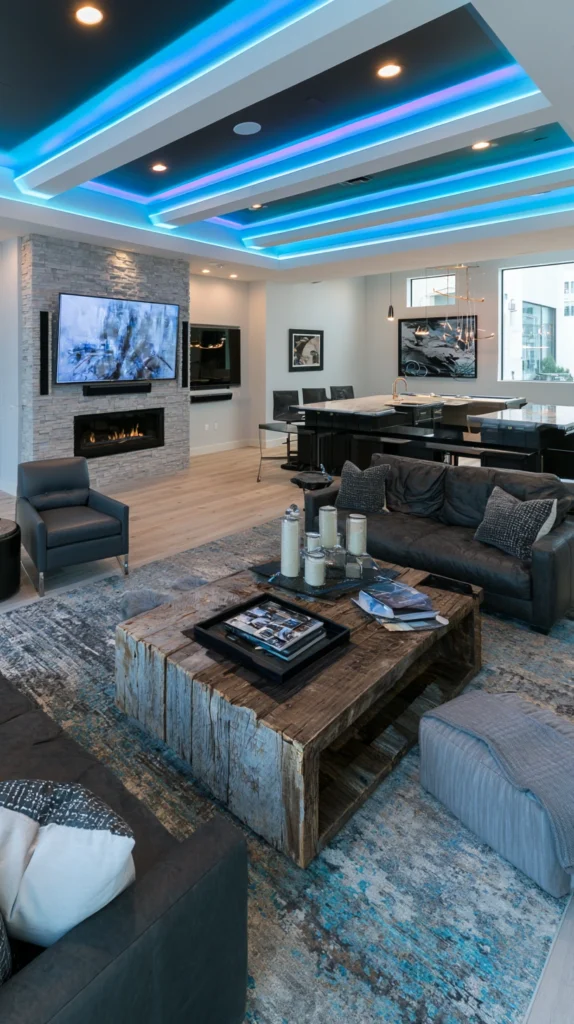
Introduce modern sophistication through bold color selections. Feature neon or vibrant stripe accents — electric blue, acid yellow, vivid coral — preventing a traditional appearance, position thoughtfully as narrow accent bands within a neutral field, and create destinations where contemporary boldness communicates design confidence.
The neon stripe adds interest. The modern color prevents dated coldness. The confident approach prevents timidity. The contemporary detail elevates spaces.
Neon ceiling stripes work most effectively in creative spaces: home studios, children’s rooms, entertainment areas, or any room where energy and personality take priority over quiet sophistication.
Getting the most from neon paint:
Apply in three thin coats rather than two for maximum saturation
Keep neon stripes narrow, between 1 and 3 inches, and space them generously within a white or neutral field
Fluorescent and neon paints require a white primer base for accurate color payoff — without it the pigments read muddy rather than vivid
9. Wallpaper Stripe Application Creating Professional Finish
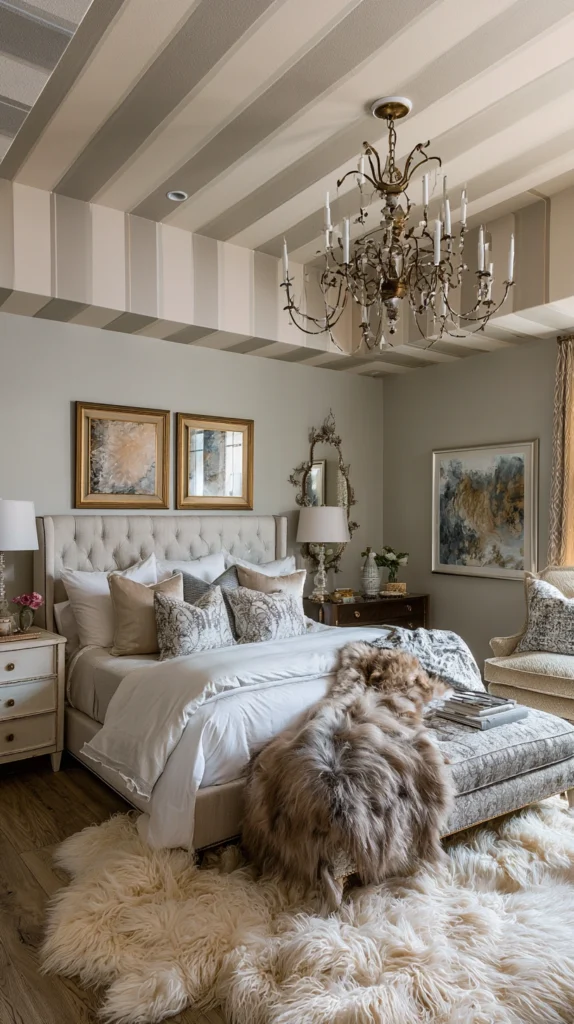
Develop impressive visual quality through specialty materials. Install quality striped wallpaper on the ceiling creating seamless pattern application without the complexity of taping and painting, coordinate pattern scale with the overall room design maintaining intentionality, and appreciate how a professional finish prevents the imperfections common to DIY paint stripe projects.
The wallpaper stripe ensures consistency. The seamless application prevents tape lines. The professional quality communicates investment. The polished result elevates spaces.
Ceiling wallpaper installation differs from wall application primarily in the physical demands — work with a partner and use a wallpaper table or scaffold rather than attempting to manage full-length drops from a stepladder.
What to know before buying:
Score seams lightly with a seam roller while paste is still active for the flattest possible finish
Choose a wallpaper with a straight match rather than a drop match — straight-match patterns are significantly easier to align across a ceiling
Pre-pasted wallpapers simplify application considerably; for unpasted options use a heavy-duty ceiling adhesive rated for overhead use
Quality striped wallpaper typically costs $40 to $120 per roll and a standard bedroom ceiling requires 4 to 6 rolls
10. Color-Block Stripe Creating Geometric Interest
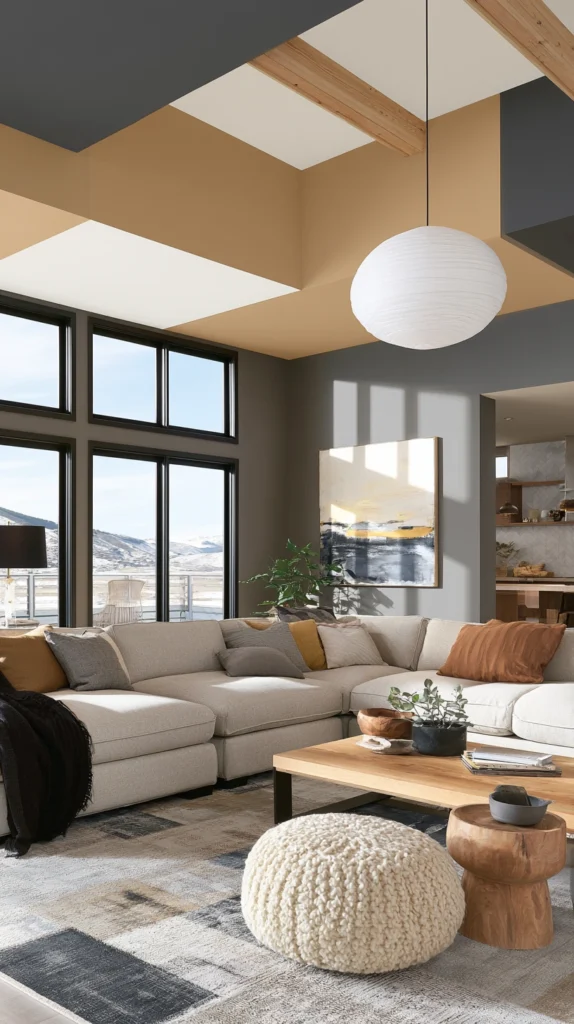
Introduce architectural sophistication through bold geometric pattern. Paint substantial color blocks of 18 to 24 inches creating a striped effect with visual weight and presence, position strategically where geometric form becomes a clear visual focal point, and create destinations that prevent the standard stripe pattern from feeling expected.
The color blocks create geometric interest. The bold form prevents subtlety. The architectural approach commands attention. The distinctive pattern elevates spaces.
Color-block stripes read less as surface decoration and more as architectural banding, making them particularly effective in rooms with minimal molding or detail where the ceiling treatment provides the structure the space lacks.
Color and finish guidance:
Use a satin finish to give the color blocks definition and depth
Limit color-block stripes to two or three colors maximum — more colors at this scale fragment the ceiling rather than organizing it
Deep jewel tones respond especially well: cobalt and ivory, burgundy and cream, or forest green and warm white
11. Thin Pinstripe Creating Refined Sophistication
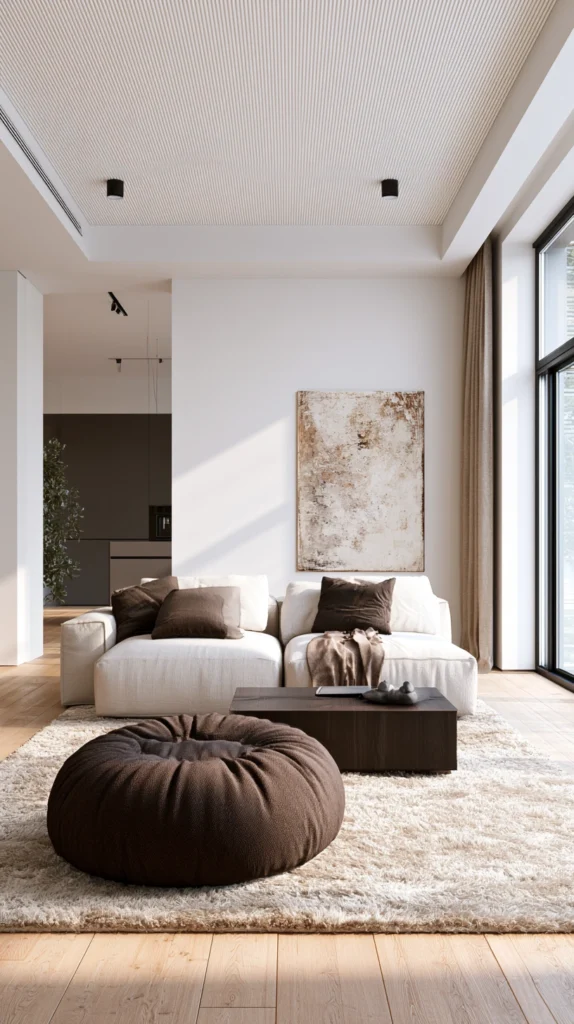
Develop elegant minimalism through delicate stripe selection. Paint very narrow stripes of 0.5 to 1 inch in subtle coordinating colors, maintain sophisticated restraint preventing an overwhelming effect, and create destinations where refined subtlety communicates genuine design knowledge.
The pinstripe adds elegance. The delicate execution demonstrates skill. The refined approach prevents boldness. The subtle effect elevates spaces.
Pinstripes at this scale are among the most technically demanding ceiling treatments — precision is everything, and even small deviations from straight lines are immediately visible against a clean field.
Tools that make this achievable:
Space pinstripes 4 to 6 inches apart for a balanced rhythm — closer spacing reads as texture rather than pattern at this width
A laser level is essential rather than optional at this scale
A dedicated pinstriping brush with long flexible bristles gives far better line control than any roller
Pre-cut pinstripe stencils from brands like Royal Design Studio offer a reliable alternative for those who want the effect without freehand risk
12. Striped Stencil Pattern Creating Artistic Detail
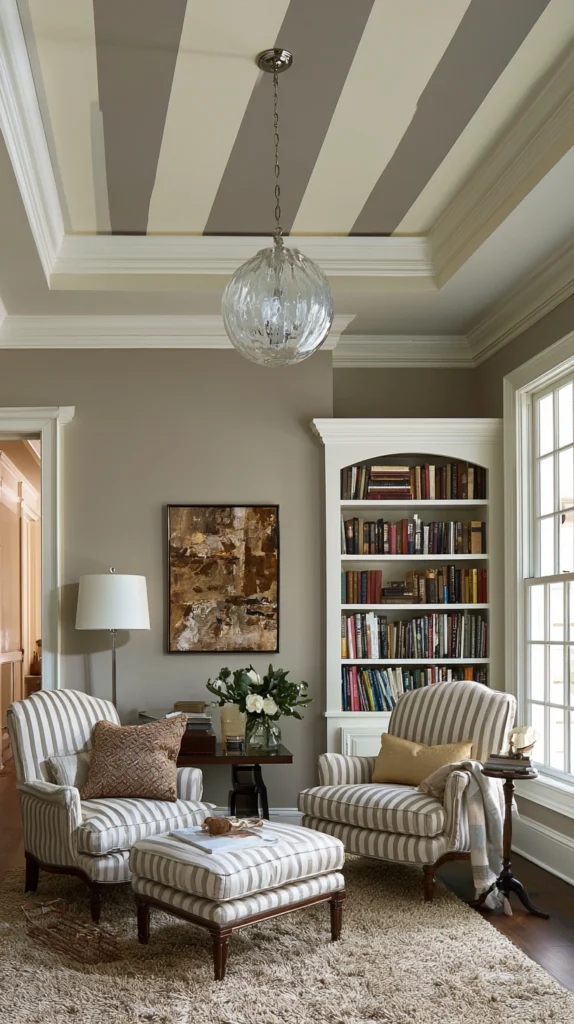
Introduce creative sophistication through specialty pattern application. Use quality Mylar stencils to create precise stripe patterns with repeating motifs, coordinate colors with the overall room design, and appreciate how artistic execution elevates a simple overhead surface into a genuine design feature.
The stenciled pattern creates artistry. The precise execution demonstrates skill. The artistic approach prevents utilitarian coldness. The creative detail elevates spaces.
Stenciling removes the most difficult aspect of painted stripes — maintaining perfectly straight lines — while allowing for pattern complexity that freehand painting cannot reliably achieve.
Stenciling technique:
Royal Design Studio, Cutting Edge Stencils, and Modello Designs all offer quality ceiling-appropriate stencil patterns at $25 to $75 per set
Secure stencils to the ceiling with low-tack repositionable spray adhesive rather than tape alone so the stencil lies completely flat
Use a dense foam roller or stencil brush with minimal paint, blotting excess on paper towels before applying
13. Room-Coordinate Stripe Creating Visual Continuity
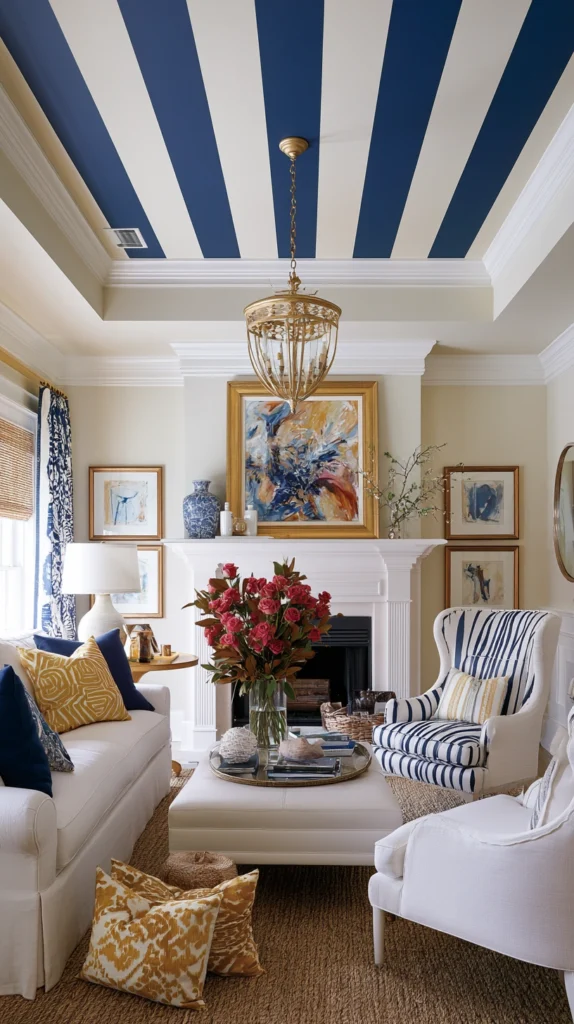
Establish design cohesion through coordinated color selections. Paint ceiling stripes in colors drawn directly from the wall color, upholstery, or accent pieces already present in the room, maintain intentional coordination throughout, and create a comprehensive aesthetic where the ceiling becomes an active design element rather than an overlooked white surface.
The coordinated stripe maintains unity. The intentional selection demonstrates knowledge. The complete coordination prevents a disconnected appearance. The cohesive approach elevates entire rooms.
This approach requires selecting stripe colors before finalizing any other room elements, or working backward from an established palette to identify the most suitable ceiling tones.
How to coordinate effectively:
Always test coordinated colors on actual ceiling samples — colors look noticeably different on horizontal versus vertical surfaces under the same lighting
Use the wall color as one stripe and a lighter or deeper variation of that same color as the second stripe — this creates continuity without the ceiling competing with the walls
Alternatively, pull an accent color from textiles or artwork and use it as a narrow stripe against a white ceiling field, carrying that accent upward and completing the room’s color circulation
14. Complete Striped Ceiling Creating Comprehensive Drama
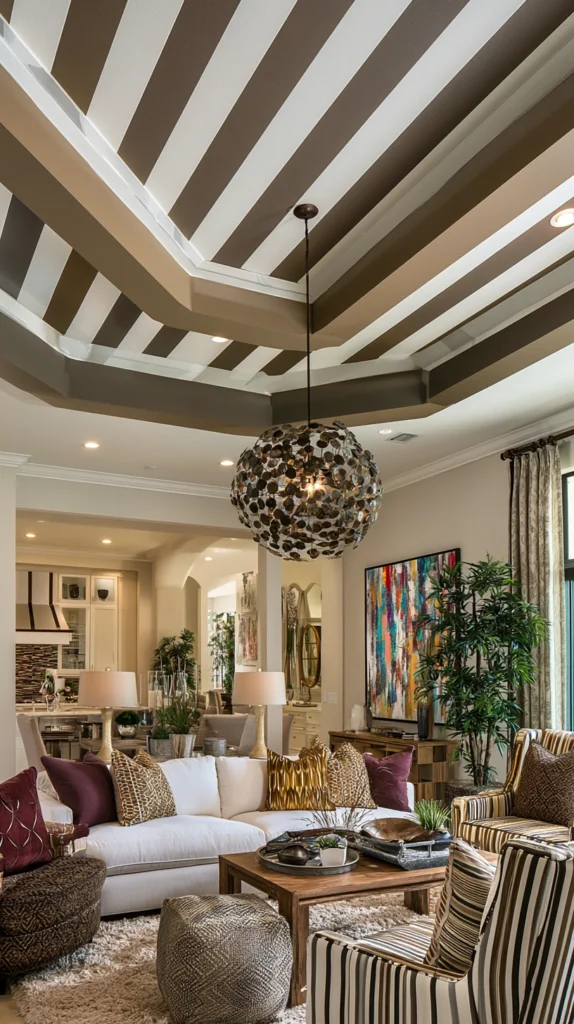
Design an ultimate dramatic transformation through intentional comprehensive execution. Paint quality striped patterns with careful color selection, precise application, and full coverage from wall to wall, coordinate the complete overhead treatment with the overall room design, and appreciate how a well-executed full ceiling stripe transforms the entire spatial experience of a room.
The complete striping creates an impression. The intentional execution demonstrates knowledge. The comprehensive approach elevates spaces. The dramatic effect transforms properties.
A complete striped ceiling is a commitment — it becomes the defining feature of the space — so approach color selection and stripe width with particular care before beginning.
Executing a full ceiling treatment:
- Work in manageable sections rather than taping the entire ceiling at once — tape adhesion weakens over time, especially in humid conditions
- Roll paint in sections of four to five stripes before moving the ladder, keeping a wet edge throughout to prevent lap marks
- A pole roller makes ceiling work significantly less physically demanding and produces more consistent coverage than reaching overhead with short strokes
- Complete the entire project within a single weekend if possible — stopping midway and resuming can introduce subtle color variation between sessions as paint from different batches rarely matches perfectly
Successfully creating striped ceilings requires careful stripe width selection ensuring appropriate proportion, thoughtful color coordination maintaining visual harmony, and meticulous execution preventing an amateurish appearance. Choose appropriate stripe widths matching room dimensions. Select coordinating colors to prevent an overwhelming effect. Measure carefully ensuring consistent spacing. Execute with precision preventing wavering lines.
Coordinate with the overall design maintaining aesthetic unity. Most importantly, recognize that genuine striped ceilings succeed through intentional, careful execution where appropriate stripe selection, thoughtful color coordination, and precise application combine to create the kind of distinctive overhead features that genuinely transform spaces.
Proving that dramatic ceiling impact deserves serious design effort, thoughtfully designed striped ceilings create the kind of dramatic character that transcends basic ceiling treatment — demonstrating that when executed with careful planning, coordinated colors, and precise application, striped ceilings become a transformative design feature establishing distinctive character that genuinely elevates entire rooms, creating beautiful, sophisticated treatments that become cherished focal points worthy of substantial creative investment.