16 Minimalist Nail Designs: Simple Elegance for Modern Style
In a beauty world obsessed with over-the-top nail art, there’s something refreshingly sophisticated about minimalist designs.
I’ve put together 16 minimalist nail ideas that prove sometimes less really is more—perfect for those who want nails that whisper rather than shout but still get noticed.
Cut-Corner Nails

Cut-Corner nails bring architectural inspiration to your fingertips with intentional negative space. This design leaves certain corners or sections of the nail bare, creating geometric cutouts that feel deliberate rather than unfinished.
The bare sections become a design element themselves, transforming emptiness into purpose. Try asymmetrical cutouts that shift slightly on each finger for a cohesive yet varied look across your hand.
This works best with neutral backgrounds like nude or soft white, where the clean lines and precise edges make your hands look instantly more refined. Pro tip: start with a full color application, then use a cleanup brush with remover to create those perfect cutouts.
Side-Fade Nails
While traditional ombré transitions from tip to base, Side-Fade Nails flip the script by building color from the edges inward. The sides of your nails get full pigment concentration while the center remains translucent or clear.
This creates a frame effect that’s subtly unexpected. The gradient hugs your nail edges rather than following the expected horizontal path, requiring just a makeup sponge and patience to build the color gradually.
What’s cool about this design is how it adapts to different nail shapes—elongating almond nails while emphasizing the structural lines of square ones. Soft pastels show the gradient effect beautifully while keeping that minimalist vibe.
Hidden Pattern Nails
There’s something deliciously secretive about Hidden Pattern Nails. This technique uses matte and glossy finishes in the same color to create patterns that reveal themselves only when light hits them right.
After applying a solid base color and matte top coat, use clear glossy top coat to paint subtle patterns that appear and disappear as you move. It’s like wearing a secret only the observant will notice.
This works surprisingly well in corporate environments—from a distance, your nails look solid and professional. Only up close does the artistic element become apparent. Dark colors like navy and burgundy show this effect most dramatically.
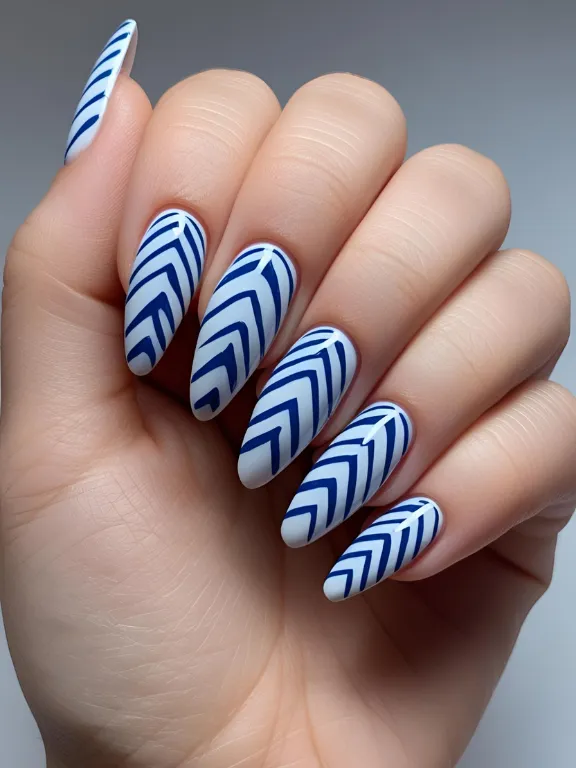
Broken Line Nails
Broken Line Nails play with connectivity in a way that’s both clever and visually striking. Thin lines appear broken on individual nails but connect across multiple fingers when your hand is at rest.
The magic happens with movement. When fingers are together, the lines create a cohesive pattern. As you spread your fingers, the design fractures intentionally, creating what’s essentially kinetic art on your fingertips.
Keep the lines extremely thin—more like pen strokes than traditional nail art—to maintain sophistication. A contrasting color against a neutral base works well, or for true minimalist vibes, try a glossy line on a matte base of the same color.
Cuticle Rim Nails
Cuticle Rim Nails flip traditional nail art focus by decorating only the base edge. Delicate colored arcs follow your cuticle’s curve, framing your nail while leaving most of it beautifully bare.
These crescents act like architectural framing, emphasizing your natural nail shape with just enough color to feel intentional. The technique requires a steady hand to create that perfect curve about 1-2 mm from your cuticle.
This design particularly flatters shorter nails by creating the illusion of more defined nail beds. For an elevated look, try metallic polish for the crescents against a bare, buffed nail—like subtle jewelry for your fingertips.
Floating Shadow Nails
The Floating Shadow technique creates an optical illusion that adds dimension without heavy decoration. A thin horizontal line in a darker shade is placed slightly below where your free edge ends, creating the impression of your nail casting a subtle shadow.
This trompe l’oeil effect plays with perception in a sophisticated way. For maximum impact, use a light neutral base with the shadow line in a slightly darker version of the same color.
What’s fascinating is how this simple line can visually change your nail shape—making tips appear longer and more defined even on shorter nails. It’s particularly effective on squoval or oval shapes where the curved edge gets emphasized by the shadow placement.
Corner Dot Nails
Sometimes the most striking designs come from perfect placement rather than complexity. Corner Dot Nails feature small squares or dots of color precisely positioned at nail corners—either diagonal corners or all four.
What elevates this from simple to sophisticated is mathematical precision. These aren’t random dots but deliberately placed color blocks creating balance across your hand. The dots should be perfectly geometric, maintaining clean lines that echo your nail shape.
Try using related but different colors for the dots on each nail for a cohesive palette across your hand, or vary the placement pattern while keeping the color consistent. The minimal coverage lets you experiment with bolder colors while maintaining restraint.
Ridge Pattern Nails
Ridge Pattern Nails take minimalism into the third dimension with subtle tactile designs. Clear gel creates raised patterns across an otherwise simple nail surface, engaging touch as much as sight.
In some lighting, these nails appear almost plain. But as light shifts, the raised patterns create shadow play revealing the design. It’s like hidden architecture for your fingertips.
These textures can follow geometric patterns or organic lines like topographic maps. The transparent nature makes this appropriate for even conservative environments while still offering artistic expression.
Split Color Nails
The Split Color technique divides the nail into two sections using colors that complement rather than contrast each other. Unlike harsh color blocking, this design uses colors that live side by side on the color wheel—sage green with pale blue, or dusty rose with soft coral.
The division should be clean and precise—a straight line down the middle or diagonal split. What makes this sophisticated is the color relationship: hues similar enough in value that they harmonize while remaining distinguishable.
This creates visual interest without patterns or embellishments. Try varying the split direction across different fingers for subtle rhythm while keeping the restraint in color choice firmly minimalist.
Curved Line Nails
Curved Line Nails celebrate organic flow with minimalist precision. This design features thin lines echoing your nail’s natural curve but positioned unexpectedly—perhaps off-center or creating asymmetrical divisions.
Unlike geometric lines, these curves feel natural and flowing, almost calligraphic. The lines must be extremely thin and precise, creating maximum impact with minimal intervention.
What makes this effective is how it enhances rather than covers your natural nail shape. The curves can visually elongate or widen your nail bed through clever placement. For a cohesive look, the curves should follow a similar flow across all fingers.
Texture Spot Nails
Texture Spot Nails create contrast through tactile differences rather than color changes. A small, precisely positioned area of textured polish—matte, sugar effect, or velvet finish—stands out against an otherwise smooth surface.
The textured area should be intentionally placed—perhaps a half-moon at the base or small shape off to one side. Keeping this area small maintains minimalist integrity despite the textural interest.
This works beautifully with monochromatic schemes where finish, not color, creates the contrast. The subtle shift from smooth to textured rewards close inspection without being obvious from a distance—sophisticated minimalism at its best.
Precise Metal Nails
Metallic accents take a calculated approach with Precise Metal Nails. Small metallic elements in clean geometric shapes are positioned according to specific principles like the golden ratio or rule of thirds.
The background should be clean and neutral, allowing the metallic elements center stage. What distinguishes this from typical accent nails is the intentionality of placement—carefully positioned elements creating visual harmony.
Gold against nude or silver against pale gray creates a sophisticated combination that catches light as your hands move. The result feels luxurious despite minimal coverage—like perfectly placed jewelry for your nails.
Layer Overlap Nails
Layer Overlap Nails explore depth through translucency using semi-sheer polishes that create new colors where they intersect. Two or more translucent layers applied in geometric sections create areas where colors blend to form new hues.
The effect is subtle but fascinating—like looking through colored glass. The overlapping sections create dimension without obvious patterns. Stick to related colors within the same family for a truly minimalist approach.
From a distance, these might appear as simple gradients, but closer inspection reveals the intentional overlapping sections. Sheer pastels or tinted top coats work particularly well, allowing light to play through multiple layers.
Finish Mix Nails
Finish Mix Nails use the same color throughout but create interest through contrasting finishes. A single color gets different top coats—matte, satin, high-gloss—in specific sections, creating segments distinguished only by light reflection.
The segmentation should be geometric and precise—diagonal divisions or asymmetrical blocks. The unified color keeps everything cohesive while finish variations add subtle complexity that changes with lighting conditions.
This works best with darker colors where matte-glossy contrast is most pronounced. Navy, charcoal, and burgundy show dramatic differences between finishes while maintaining minimalist color unity.
Tip Space Nails
Tip Space Nails invert French manicure expectations by applying color to most of the nail but leaving small half-moons of negative space at the tips. This unexpected placement creates interest while maintaining clean lines.
The bare tips should perfectly echo your natural nail shape, creating harmonious lines that feel intentional rather than unfinished. The contrast draws attention to your nail architecture in a flattering way.
This design grows out gracefully—as nails extend, the bare tip simply becomes slightly larger. It works particularly well on oval or almond shapes where the curved tip gets emphasized by the negative space.
Floating Speck Nails
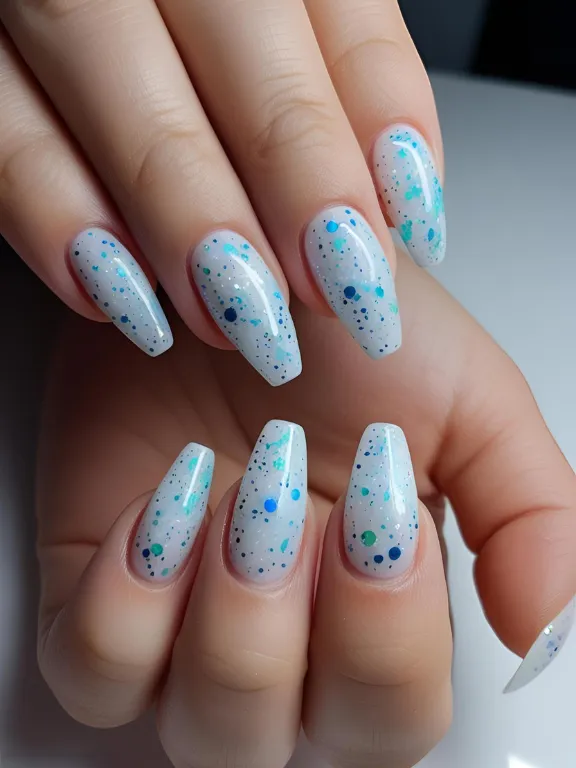
Floating Speck Nails create dimension through suspension rather than surface decoration. Clear gel encloses tiny colored particles—micro glitter or chrome flakes—that appear to float within the nail rather than sitting on top.
What makes this minimalist is strategic placement. Rather than random distribution, the specks concentrate in specific zones—clustered at one side or arranged in a thin horizontal band.
The three-dimensional aspect creates depth that changes as viewing angles shift. Light catches the suspended elements differently as your hands move, creating subtle sparkle without overwhelming glitter effects. Limit floating elements to a small percentage of nail area for true minimalist restraint.
These minimalist designs prove that restraint often creates the most powerful statements. They work across occasions and settings—appropriate for both boardrooms and creative events. The key to their success lies in execution—clean lines, precise application, and attention to detail elevate these simple concepts