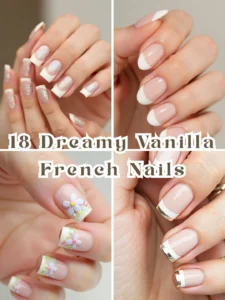
Easy Mother’s Day Nail Designs
Hey there! Mother’s Day is around the corner, and I’ve got a collection of nail ideas that won’t have you struggling with complicated techniques. Let’s dive into these designs that still look amazing!
Pink Hearts
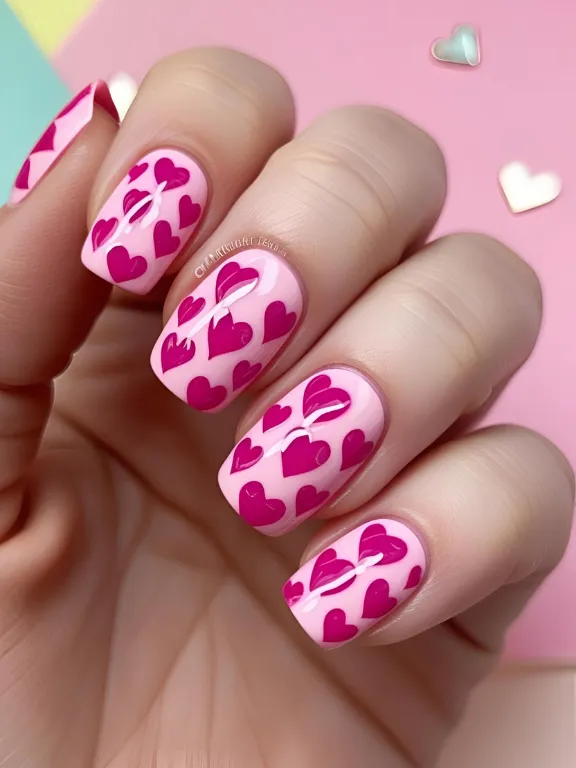
Grab your favorite pink polish and coat all your nails. Once dry, take a red polish and a toothpick to add tiny hearts on your ring finger or thumb. This classic combo screams Mother’s Day without saying a word.
The hearts don’t need to be perfect – slightly uneven ones actually look more charming and handmade. For extra pop, outline the hearts with a thin white line using a detail brush.
If you’re feeling extra, add a sprinkle of fine glitter over the hearts to make them shimmer when you move your hands – perfect for catching mom’s eye when you hand over her gift!
Pastel Flowers
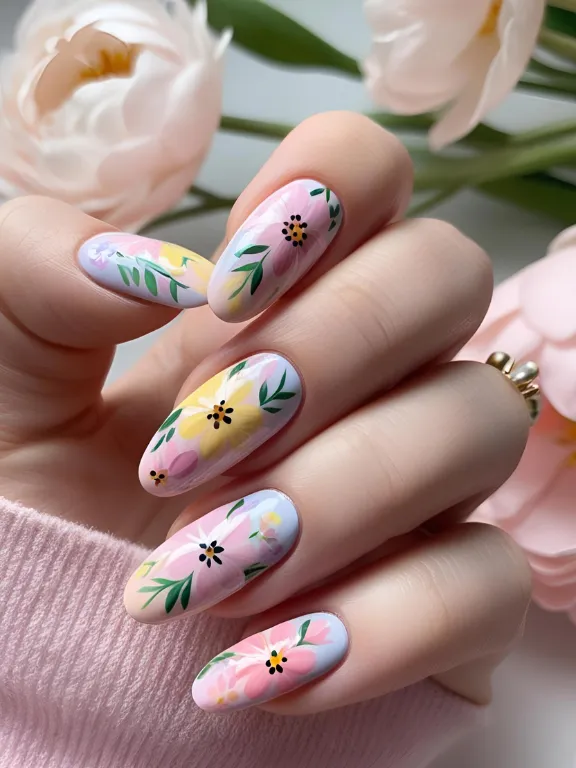
Start with a base of soft colors like lavender, mint, or baby blue. Use the end of a bobby pin to make small dots in groups of five to create tiny flowers all over your nails.
Mix up the flower colors for a garden effect – try white flowers on blue, pink flowers on mint, or go multicolored on a neutral background. The simple dot technique makes even the shakiest hands successful.
For dimension, add a tinier dot of white in the center of each flower to create a highlight, making your amateur nail art look surprisingly professional with minimal effort.
“Mom” Letters
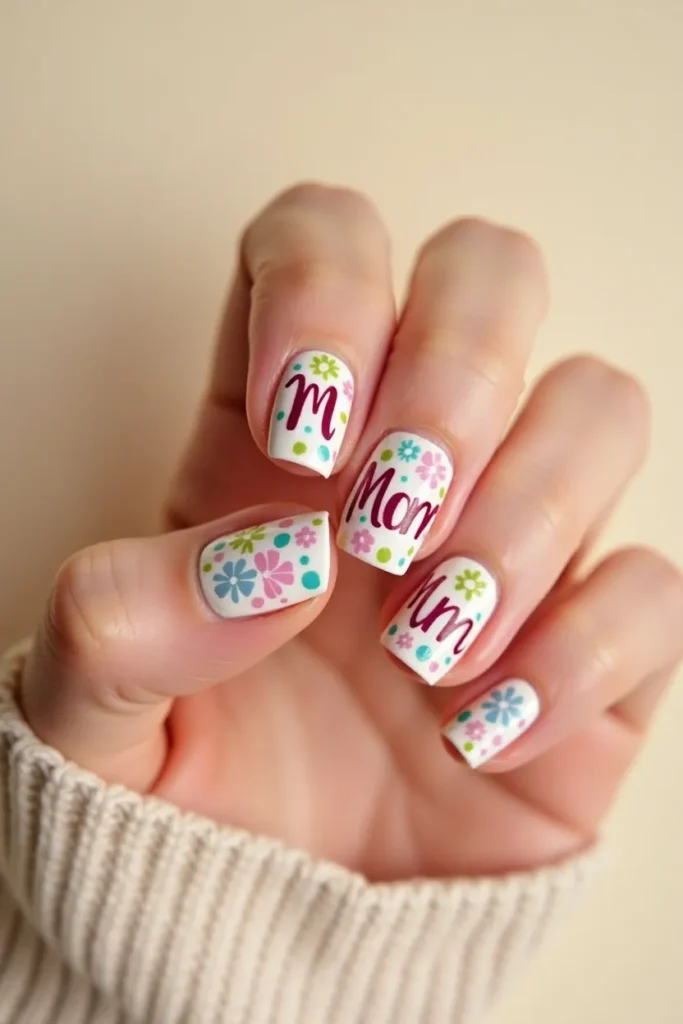
Paint your nails in a neutral shade first. Then pick three fingers and write one letter on each—”M,” “O,” “M”—using a thin brush or nail pen for a personalized touch.
You can make this even more special by doing the letters in mom’s favorite color or using a metallic polish that catches the light. Keep the font simple – block letters are easiest to create.
For added detail, draw a tiny heart dot above or below each letter, or surround the letters with miniature dots to create a frame effect that makes the message stand out.
Simple Roses
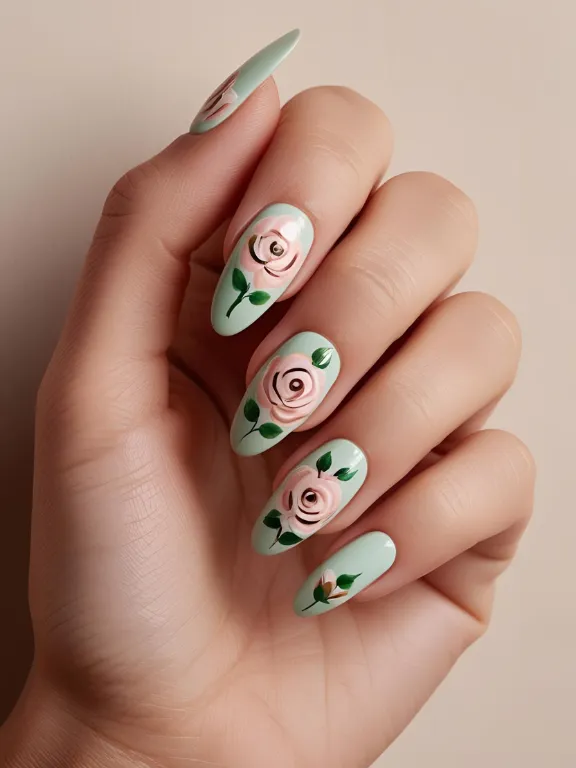
Paint your nails a soft pink or cream color. On your accent nail, make a swirl pattern with a darker pink or red to create a rose shape that looks impressive but is actually super simple.
Start with a tight spiral in the center and gradually make looser curves as you work outward. It doesn’t need to be perfect – roses in nature have unique shapes too!
Add two small green leaves with a thin brush to finish the look. This design looks especially pretty on a thumb or ring finger while keeping other nails in complementary solid colors.
Tulips
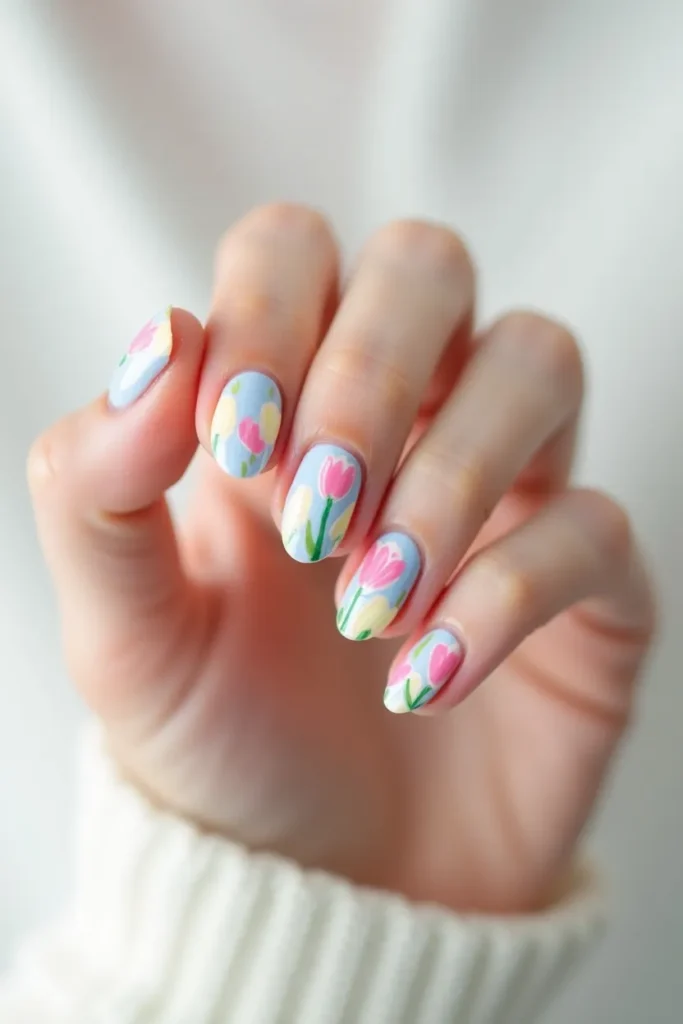
Use a bright background like yellow or sky blue. Make three quick brush strokes in red or pink that come together at the bottom to form a tulip shape on one or two nails.
The beauty of tulips is their simple shape – they’re basically upside-down U’s with slightly pointed tops. Even nail art beginners can master this with a little practice.
Add tiny green stems and maybe a leaf or two. This spring design is perfect for Mother’s Day and shows you put in effort without needing professional skills.
Daisy Nails
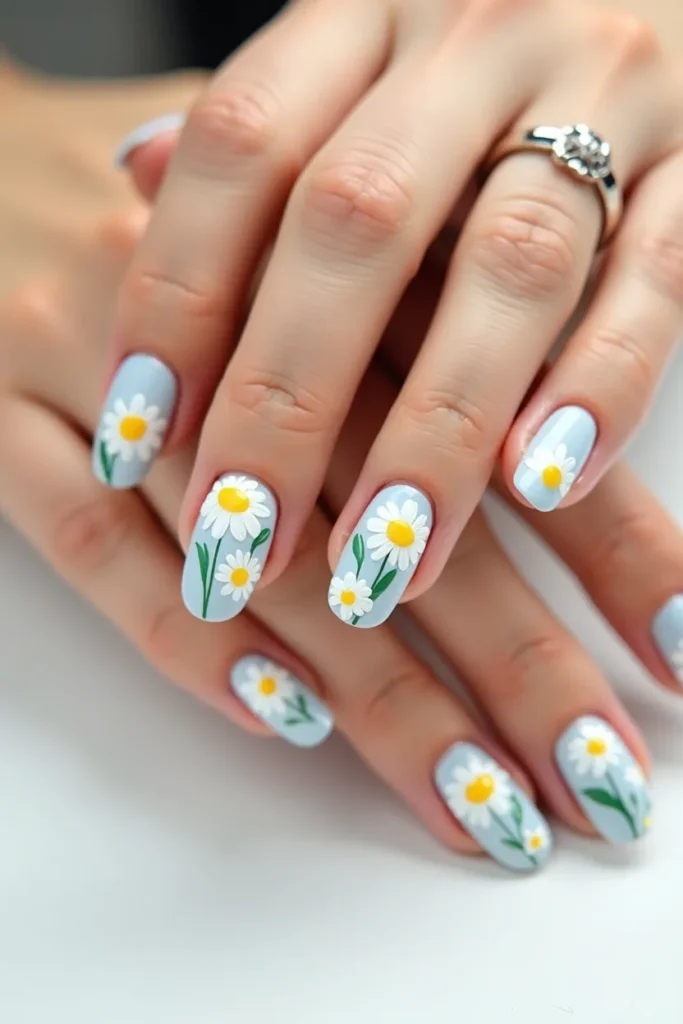
Paint your nails white or a soft green shade. Use a dotting tool to make yellow circles, then add white petals around them with a toothpick for instant cheer.
Try different sizes of daisies – a large one on your thumb and smaller ones on other fingers creates a cute garden effect. You can even overlap them slightly for a lush look.
For a twist, try different colored centers – orange, pink, or even light blue can make your daisy design unique while still keeping that springtime Mother’s Day feel.
Ombre Nails
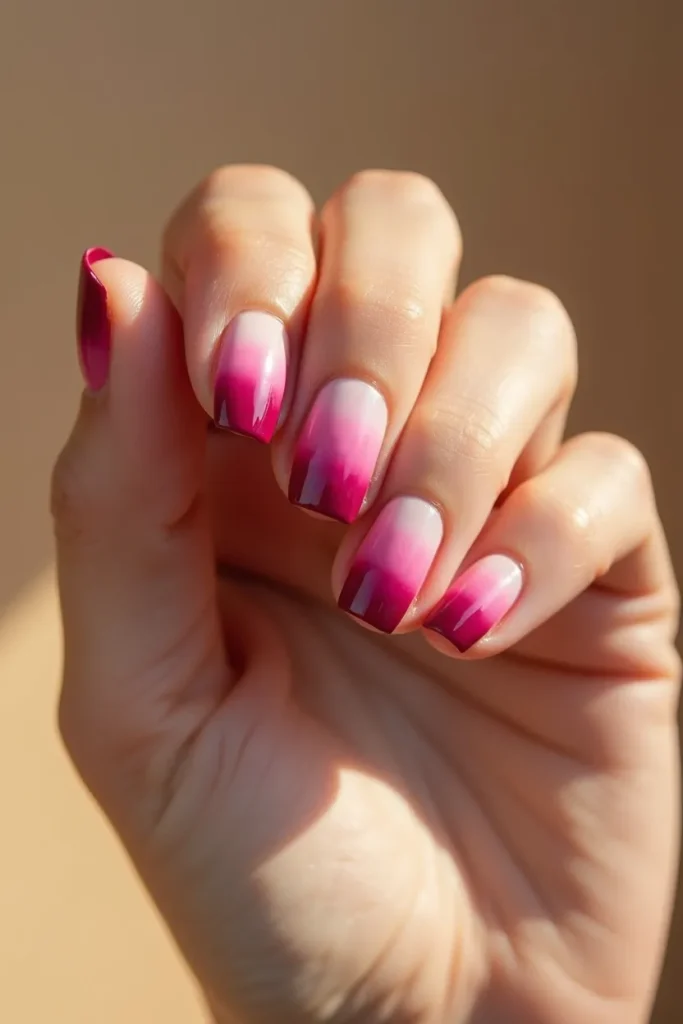
Pick two colors that blend well—like pink and white or coral and yellow. Paint the lighter color as your base, then dab the darker color onto a makeup sponge and blot it onto the tips.
The sponge creates that perfect gradient effect without special tools. Try blending from cuticle to tip instead of side to side for a different look that’s still easy to achieve.
This technique works with any colors – try a pastel ombre for a soft look, or go bold with bright spring colors that Mom will notice right away.
French Tips with a Twist

Instead of the classic white tip, go for pink, lavender, or even gold! Paint your base a neutral shade, then add these colorful tips for an updated take on a classic.
Try making the tips slightly curved or V-shaped instead of straight across for a modern look. You can even do different colored tips on each finger for a rainbow effect.
For extra flash, add a thin line of glitter between the base color and the tip color – this catches the light and cleverly hides any unevenness in your line work.
Stripes
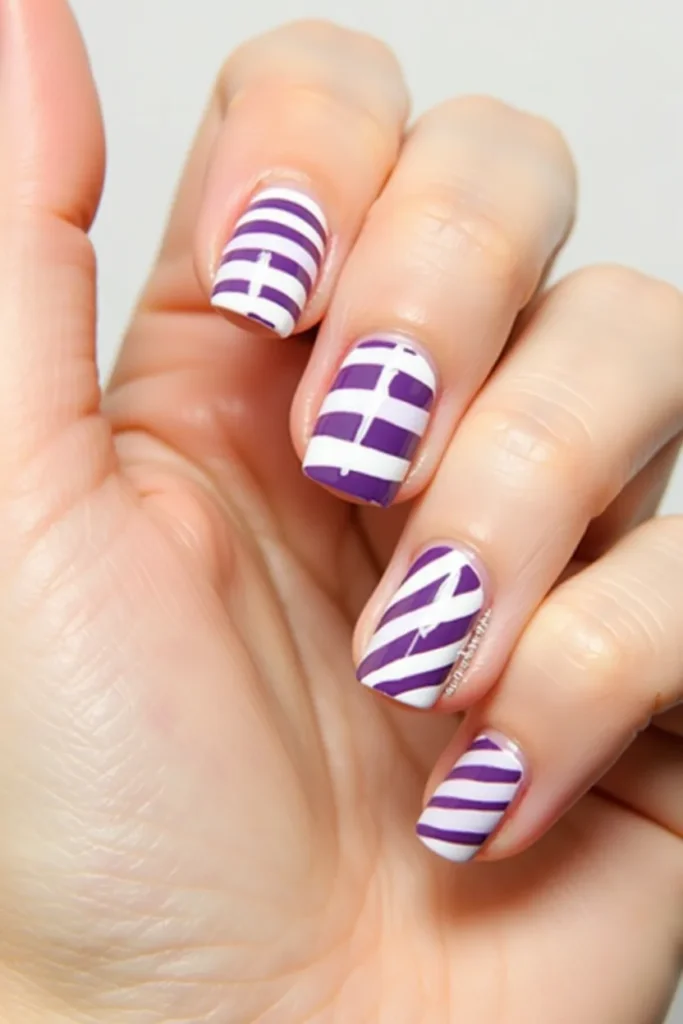
Lay down strips of tape across your nails after applying a base color. Paint over them with a contrasting shade, then quickly remove the tape while the polish is still wet for crisp lines.
Play with direction – vertical stripes elongate short nails, while horizontal or diagonal stripes create interesting visual effects. Vary the thickness for a more dynamic look.
Try a stripe in the middle of your nail with your base color on either side, or multiple thin stripes for a more detailed look. The tape ensures even amateur nail artists get professional results.
Single Accent Nail
Paint most of your nails one solid color—think spring tones like coral or mint. Then go all out on just your ring finger with a pattern, glitter, or small decoration.
This approach lets you show off your creativity without the pressure of decorating every nail. The contrast between simple and decorated nails actually makes the design stand out more.
Match your accent nail to Mom’s favorite color or something that represents her – like her birthstone color or a tiny flower that reminds you of her garden.
Nude with Sparkle

Choose a sheer nude or pink that matches your skin tone. Apply two coats for coverage, then add a layer of fine glitter just at the tips or base of the nail.
This subtle look is perfect for moms who appreciate elegance over flashiness. The sparkle catches light when you move your hands but still looks appropriate for any Mother’s Day activity.
Try an ombre effect with the glitter, making it dense at the tip and gradually fading as it moves toward the middle of the nail for a sophisticated, grown-up sparkle.
Tiny Gems
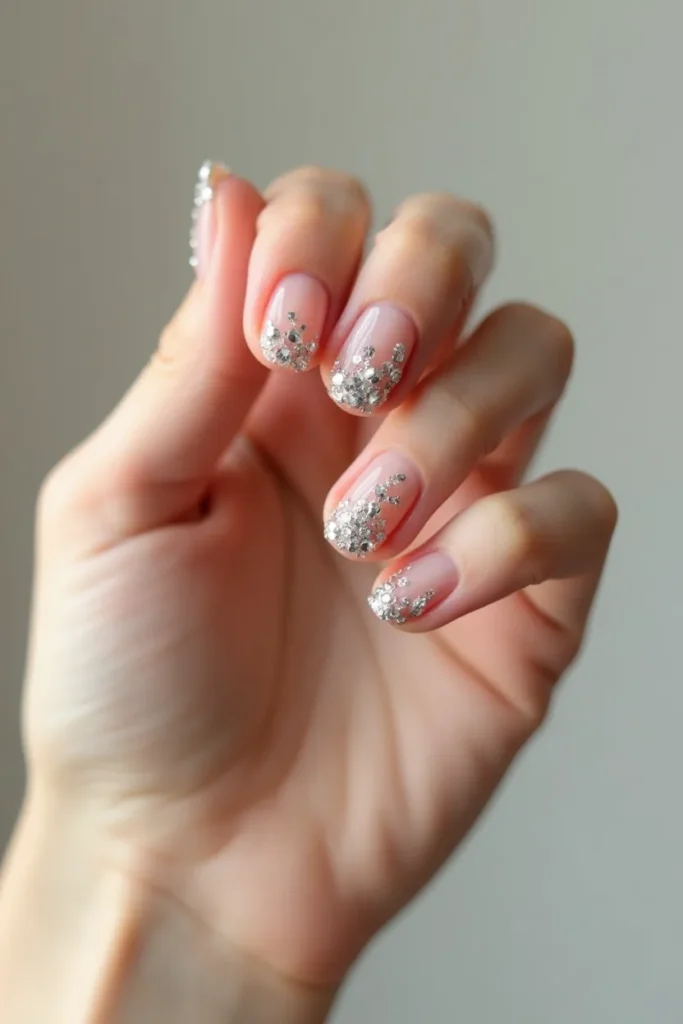
After painting your nails a solid color, place one small rhinestone or pearl near the base of each nail. Press it gently into slightly wet polish or use a top coat as glue.
Position gems in different spots on each nail – center of one nail, corner of another – for a scattered star-like effect. Odd numbers of gems usually look more balanced than even numbers.
Clear or pearl gems work with any color polish, but trying colored gems that complement your base color can create a more coordinated, thoughtful look for Mother’s Day.
Polka Dots
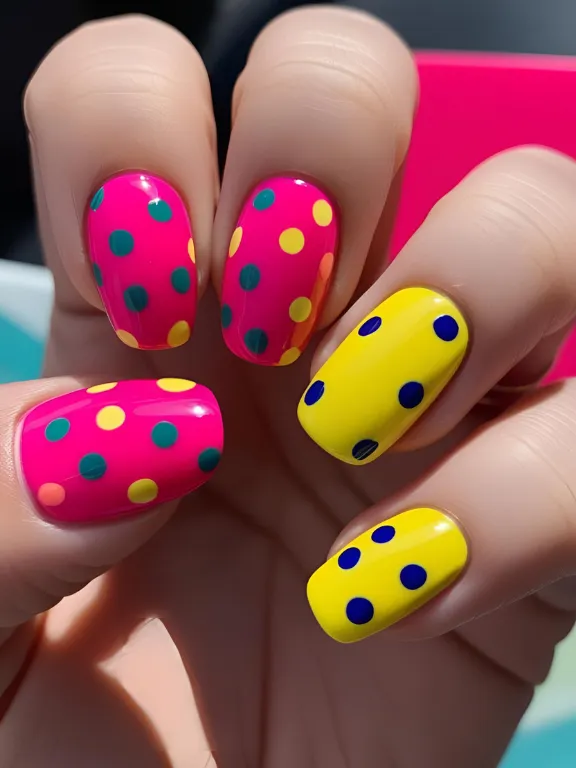
Use a base color like white, pink, or mint, then add evenly spaced dots in a contrasting color. A dotting tool works best, but a bobby pin or toothpick works in a pinch!
Mix up the dot sizes for visual interest – large dots on some nails, tiny dots on others. You can even create patterns like flowers or hearts using strategically placed dots.
For a modern take, concentrate dots at just one area of the nail – clustered at the tip or fading from dense to sparse across the nail for an artistic effect.
Metallic Accents
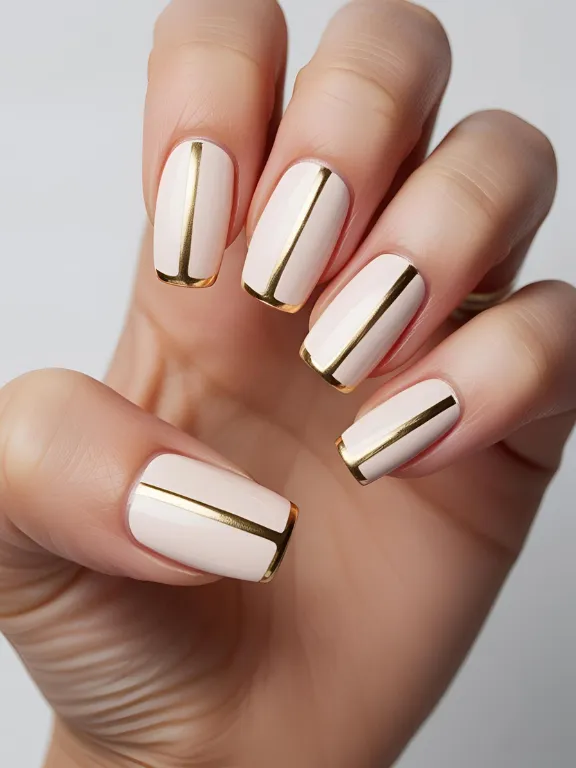
Start with a cream or pale pink base, then use gold or silver polish to add thin lines, small shapes, or edges to your nails for instant elegance.
Try a single thin metallic line across the middle of each nail, or outline just the tip for a modern take on French nails. The metallic finish elevates even the simplest design.
These accents catch the light beautifully and look more expensive than they are – perfect for making Mom feel special without breaking your budget on a salon visit.
Watercolor Effect

Apply a white base coat, then use a small brush to dab diluted polish in soft colors onto your nails. The colors will blend and spread into a beautiful watercolor-like pattern.
Blue, green, and purple create a cool-toned floral feel, while pinks, yellows, and oranges give a warm sunset vibe. Let the colors naturally blend at the edges.
This technique is actually perfect for beginners because imperfection is part of the charm – no precise lines needed! Finish with a glossy top coat to enhance the watercolor effect.
Heart Cutouts
Paint your nails a bold color like red or pink, then use a small brush dipped in nude polish to create heart shapes that appear to be cut out of the bright color.
The contrast between the bright color and the nude “cutout” creates a striking effect that looks complicated but is actually achievable with a steady hand and patience.
Try different sizes of hearts on different nails, or place them in different positions for variety. This design shows thoughtfulness and skill without requiring salon-level expertise.
Floral Border
Paint nails in a soft color, then use a thin brush to create a frame of tiny flowers and leaves around the edge of each nail – like a garden border.
Keep the center of the nail clean and simple to make the floral frame pop. This works especially well on longer nails where you have more space to work with.
Mix flower types and colors for a wild garden look, or stick to one flower type in varying shades of the same color for a more coordinated, elegant feel.
Confetti Nails
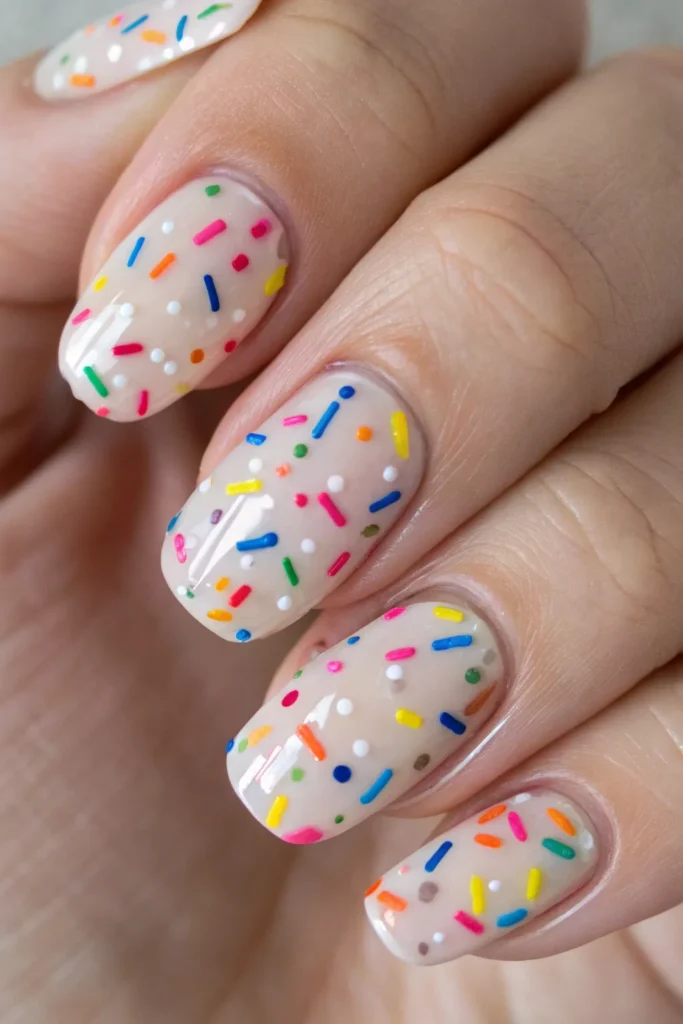
Apply a clear or nude base, then use a small brush to add randomly placed dots, lines, and tiny shapes in bright colors that look like confetti on your nails.
The scattered placement makes this design forgiving for beginners – there’s no pattern to follow, just joyful chaos! Add different shapes and sizes for the most realistic confetti look.
This design literally brings the celebration to your fingertips – perfect for showing Mom you’re ready to party in her honor on Mother’s Day!
Abstract Brushstrokes

Start with a neutral base, then use a thin brush to add two or three deliberate brushstrokes in contrasting colors across each nail for an artistic, minimalist look.
The beauty of abstract designs is that they’re meant to be imperfect – quick, confident strokes actually look better than careful, hesitant ones. Try metallic polishes for extra impact.
This modern approach feels sophisticated and artistic without requiring any drawing skills – perfect for giving Mom a trendy Mother’s Day surprise.
Gradient Dots
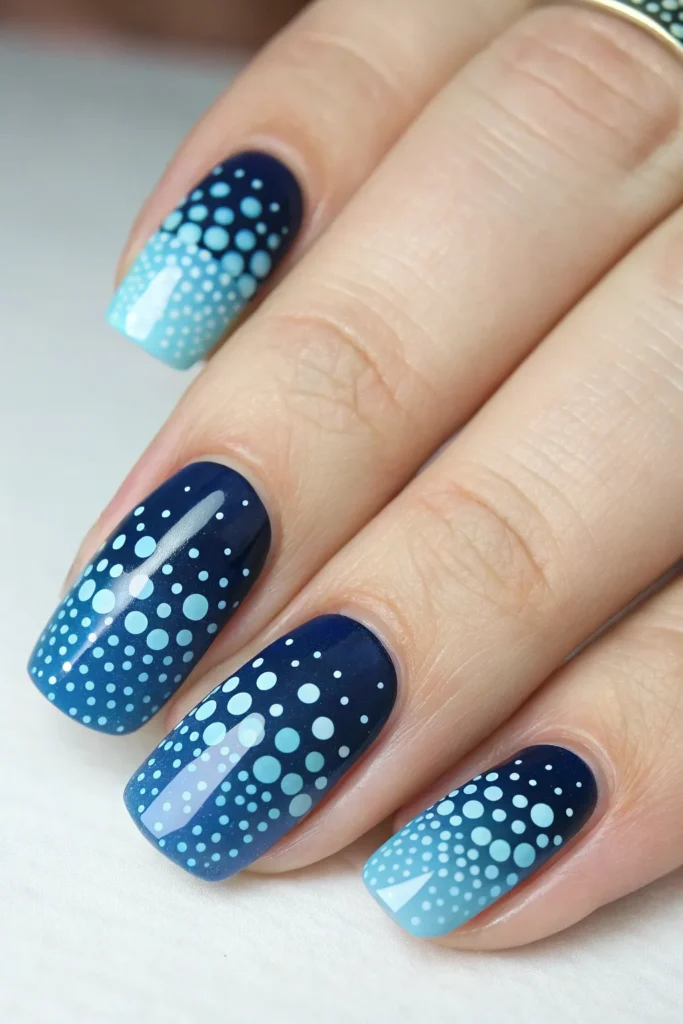
Create a gradient effect by placing dots that start dense at the cuticle and gradually space out toward the tip of the nail, using colors that flow from dark to light.
This design works in any color family – try blues from navy to sky, pinks from magenta to baby pink, or even a rainbow gradient across all your nails.
The orderly pattern is satisfying to look at but also forgiving to create – minor inconsistencies in spacing won’t be noticeable in the overall effect.
Lace Details
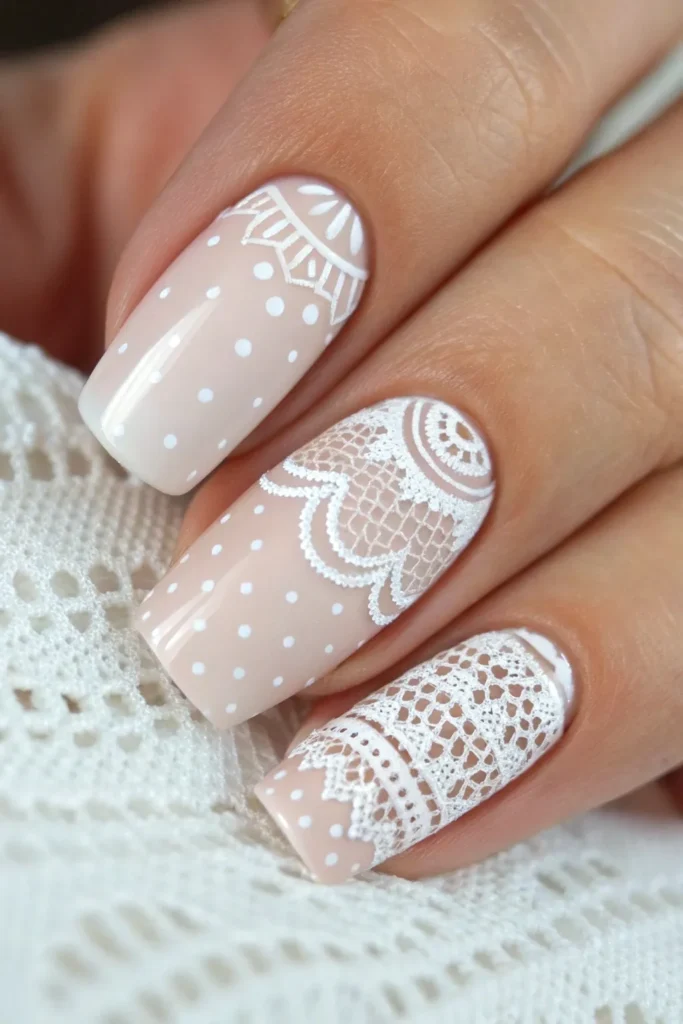
Paint nails with a solid base color, then use white polish and a very thin brush to create delicate lace-like patterns on one or two accent nails.
Focus on creating small scallops, dots, and lines that mimic the look of vintage lace. The white-on-color contrast gives a feminine, romantic feel perfect for Mother’s Day.
Even simplified lace patterns make a big impact – try just doing the edge of the nail with a scalloped lace design if a full-nail pattern seems too challenging.