20 Acrylic Nail Styles to Elevate Your Manicure Game
Acrylic nails have revolutionized the world of nail art, offering durability, versatility, and endless creative possibilities.
This comprehensive guide explores 20 stunning acrylic nail styles that can transform your manicure from ordinary to extraordinary.
Each style comes with practical tips on how to achieve the look and why it might become your new favorite.
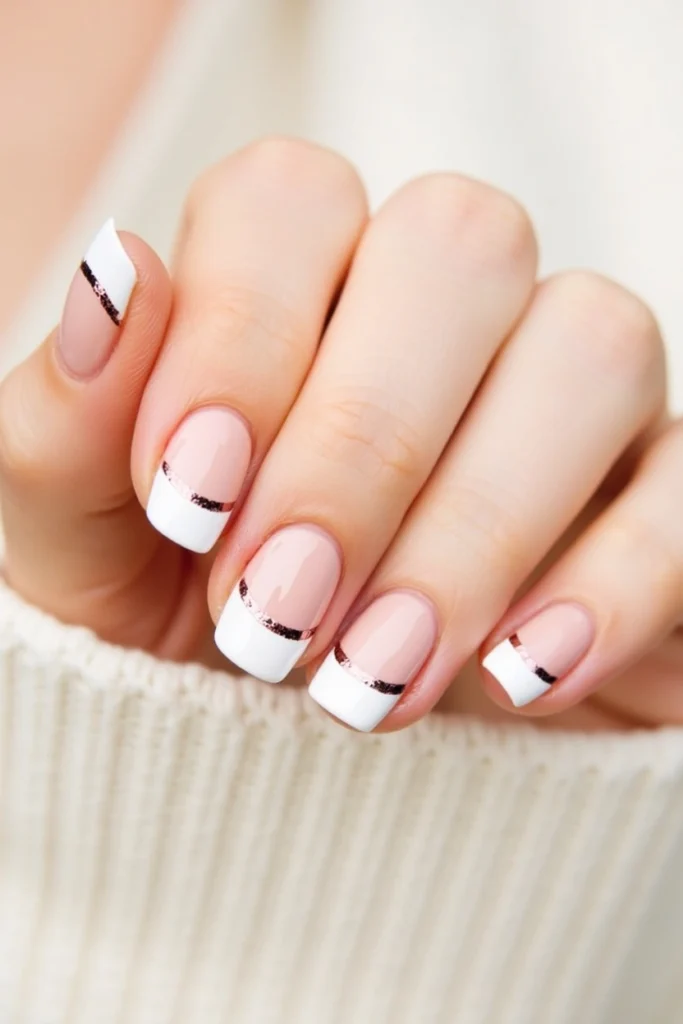
Classic French Tips

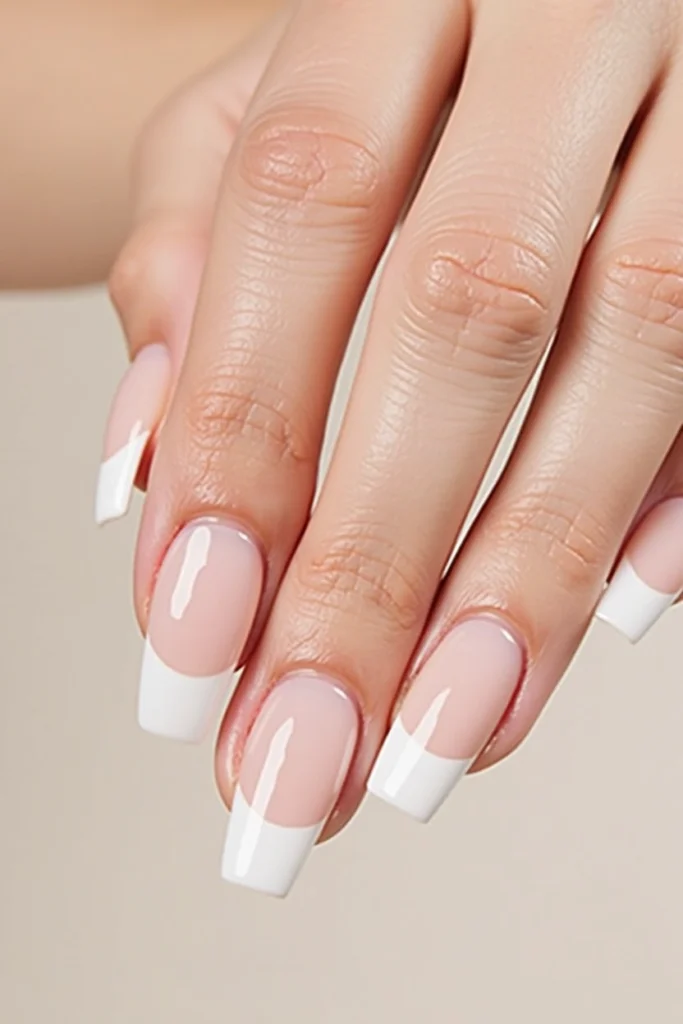
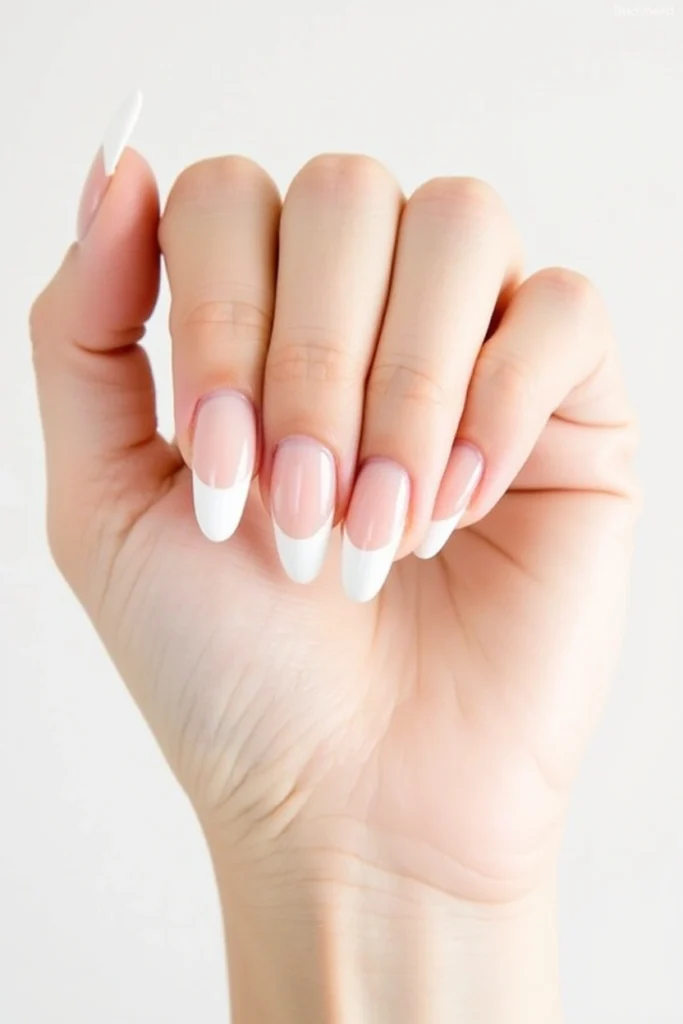
The timeless elegance of French tips features a nude or pink base with crisp white tips, creating a clean and sophisticated look perfect for any occasion. This style has remained popular for decades due to its versatility and professional appearance.
Why you’ll love it: French tips offer versatility that few other styles can match. They’re appropriate for both formal events and everyday wear, providing a chic, polished look that never goes out of style.
How to create it: Begin with a sheer pink or nude base coat on the entire nail. Once dry, apply white acrylic to the tips using a small brush. For precise lines, use French tip guides or stickers.
Seal your design with a clear top coat for lasting shine. For a more natural look, opt for a slightly rounded white tip rather than a stark straight line.
Reverse French Tips
This modern twist on the classic French manicure features a contrasting color at the cuticle area instead of the tip.
Also known as half-moon manicures, reverse French tips create a stylish and eye-catching effect that draws attention in a subtle way.
Why you’ll love it: Reverse French tips offer sophistication with a unique edge. They’re perfect for those who appreciate classic styles but want something with a bit more personality.
How to create it: Start by applying a base color to the entire nail. Once dry, use semicircle stickers or a precision brush to create a half-moon shape at the base of your nail.
Apply a contrasting color to this area, carefully remove any guides, and finish with a top coat. For added dimension, try using metallic shades for the half-moon.
Ombre Acrylics

Ombre acrylics feature a beautiful gradient effect where two or more colors blend seamlessly into each other. This trendy look can be subtle with nude-to-white transitions or bold with vibrant color combinations.
Why you’ll love it: Ombre designs offer endless color possibilities while maintaining a soft, elegant appearance. The gradient effect adds depth and dimension to your nails.
How to create it: Apply the lighter shade as your base color. While still wet, use a sponge to dab the second color onto the tip of the nail, gradually building up the intensity.
For a smoother transition, slightly overlap the colors where they meet. Alternatively, your nail technician can blend acrylic powders while they’re still wet for a seamless gradient. Finish with a clear top coat to blend and seal the design.
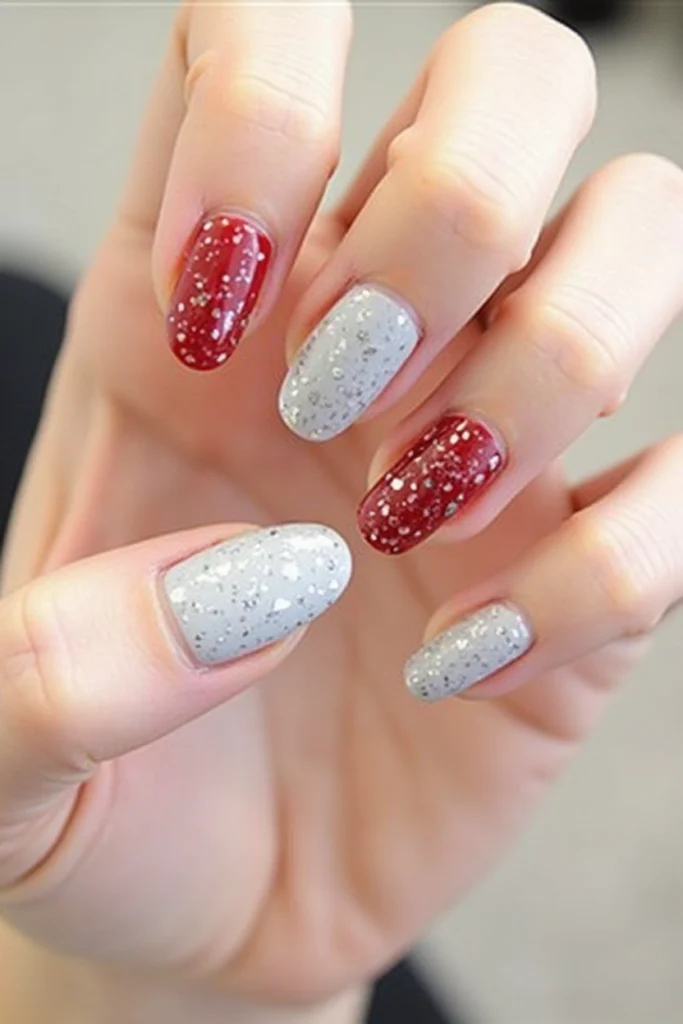
Glitter Acrylics
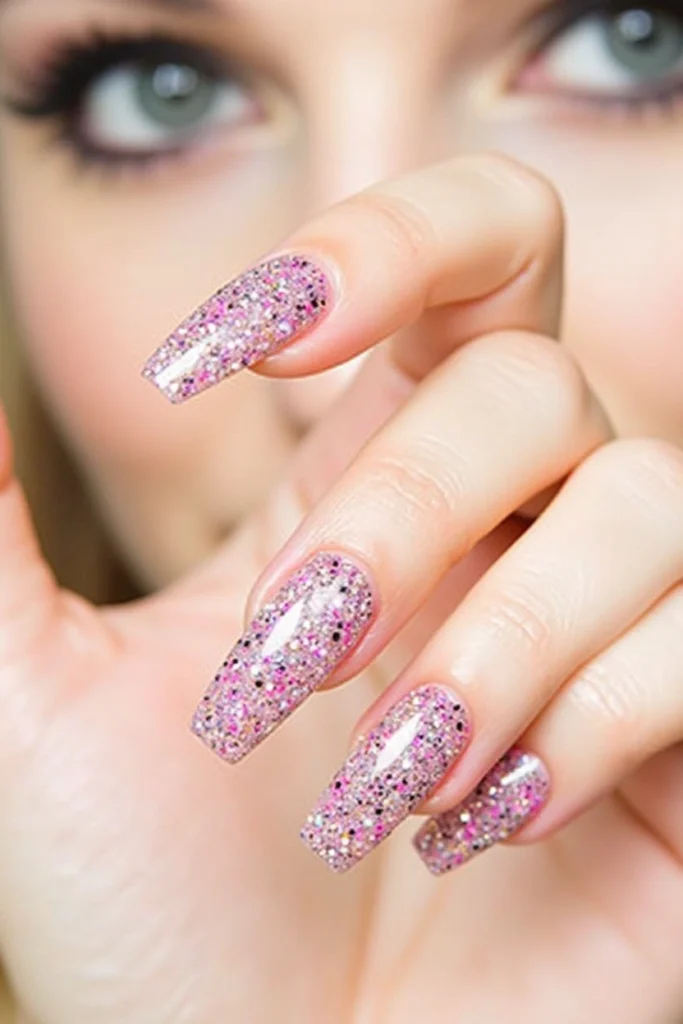
Glitter acrylics add sparkle and glamour to any nail design. Options include all-over glitter, glitter tips, or strategic glitter accents that catch the light with every movement of your hands.
Why you’ll love it: Glitter nails instantly elevate any look and add a festive touch. They’re particularly perfect for celebrations and nights out when you want your nails to make a statement.
How to create it: For full glitter coverage, mix fine glitter into clear acrylic powder before application. For glitter tips or accents, apply a base color first, then use a small brush to place glitter-infused acrylic where desired.
For a smoother finish, apply several layers of top coat, allowing each to dry completely. This prevents the rough texture that can sometimes occur with glitter.
Matte Acrylics
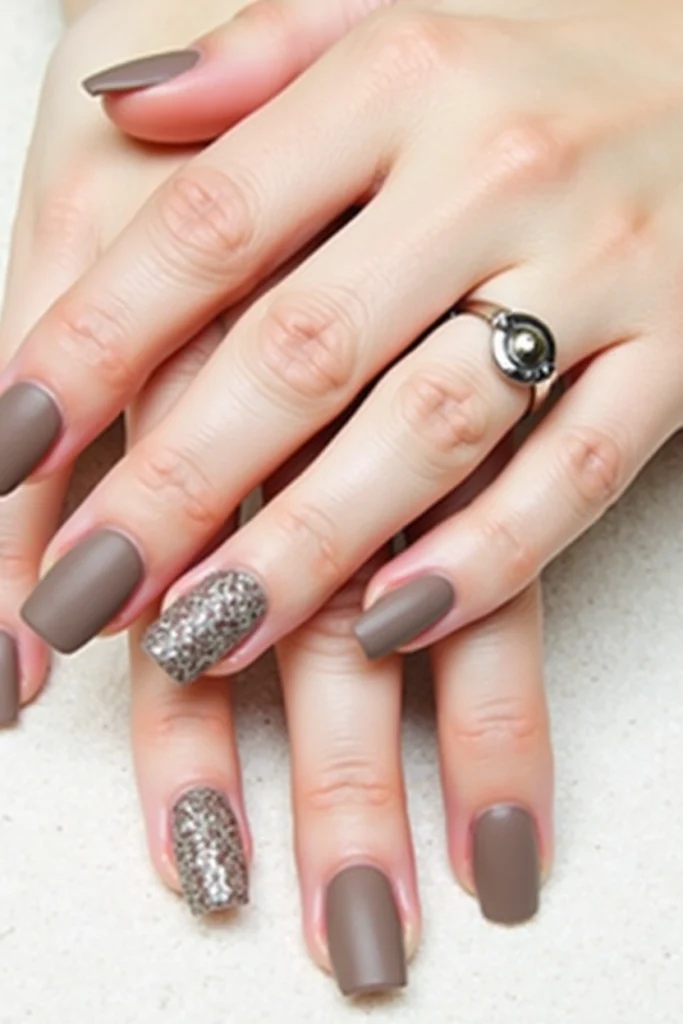
Matte acrylics offer a sophisticated and modern vibe with their non-shiny finish. This unique texture adds understated elegance to any nail color or design, creating a velvety appearance.
Why you’ll love it: Matte finishes provide a chic, trendy look that stands out precisely because it doesn’t shine. The velvety texture adds an unexpected element to classic colors.
How to create it: Apply your chosen color as normal, then finish with a specialized matte top coat instead of a glossy one. For an interesting contrast, consider leaving certain elements glossy (like french tips or patterns) while making the rest matte. This creates visual interest through texture difference rather than just color.
Marble Acrylics
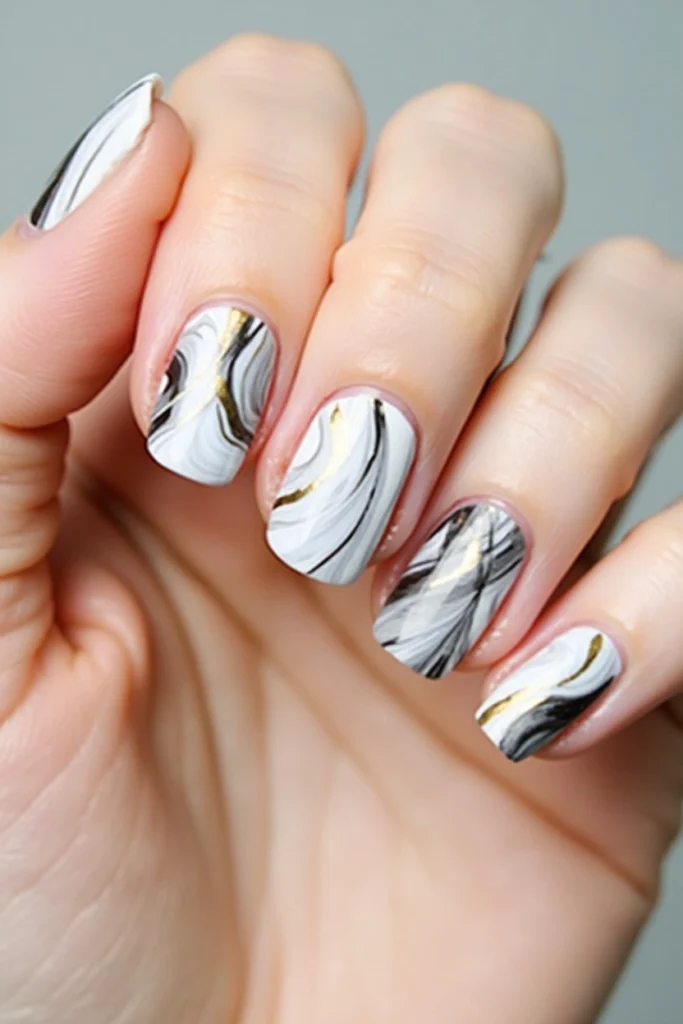
Marble acrylics mimic the luxurious patterns of natural marble stone by swirling different colors together. This artistic technique creates unique designs where no two nails are exactly alike.
Why you’ll love it: Marble patterns exude elegance and sophistication. The organic swirls create a high-end look that’s both artistic and trendy.
How to create it: Start with a white or light-colored base. While still wet, use a thin brush to add drops of a contrasting color (typically gray, black, or gold for classic marble).
Use a toothpick or nail art tool to gently drag through the colors, creating swirling patterns. Don’t overwork the design—the beauty comes from subtle, organic-looking veins. Seal with a glossy top coat to enhance the stone-like appearance.
Floral Acrylics
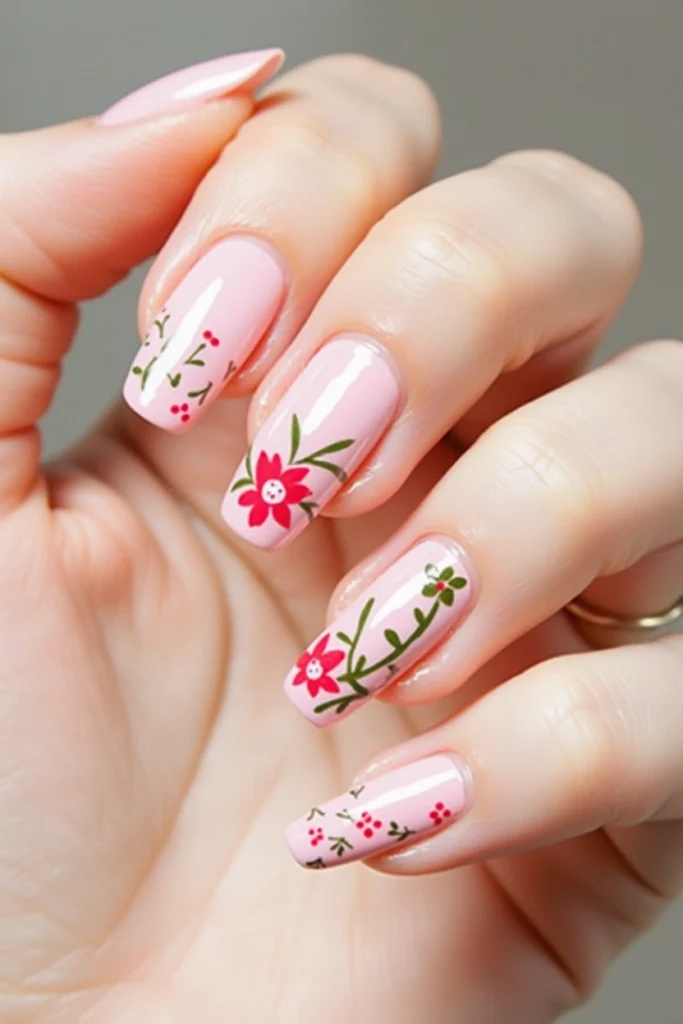
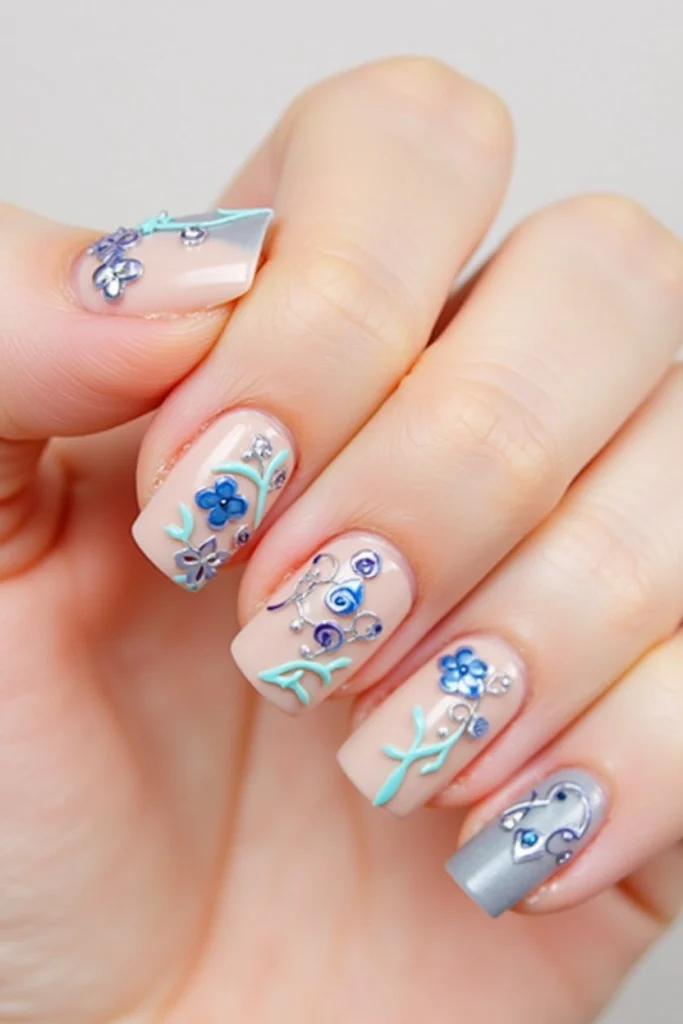
Floral acrylics celebrate the beauty of nature with delicate hand-painted flowers or 3D floral embellishments. These charming designs range from subtle single blooms to elaborate garden scenes.
Why you’ll love it: Floral designs add femininity and a romantic touch to your manicure. They’re especially popular during spring and summer but can be adapted for any season with appropriate color choices.
How to create it: For painted flowers, use a base coat of your choice, then add flowers using a thin brush and acrylic paints. Begin with simple dots or teardrops for petals, adding details as your skill improves.
For 3D flowers, mold small amounts of colored acrylic into petal shapes, allowing them to partially set before positioning them on the nail. Secure with clear acrylic and finish with a top coat.
For beginners, floral nail stickers can provide a similar effect with less skill required.
Geometric Acrylics

Geometric acrylics feature sharp lines, triangles, squares, and other shapes to create modern and edgy designs. This contemporary style makes a bold statement with its precision and architectural quality.
Why you’ll love it: Geometric patterns offer a bold, contemporary look that’s visually striking. The clean lines and shapes create an artistic manicure with modern flair.
How to create it: Start with a solid base color. Use thin striping tape to mark off geometric sections on the nail.
Apply different colors to the exposed areas, removing the tape while the polish is still slightly wet. For perfect lines, use a fine detail brush and steady hand.
Experiment with color blocking, negative space, and metallic accents to enhance the geometric effect. Always finish with a top coat to seal the design and prevent the lines from bleeding.
Animal Print Acrylics
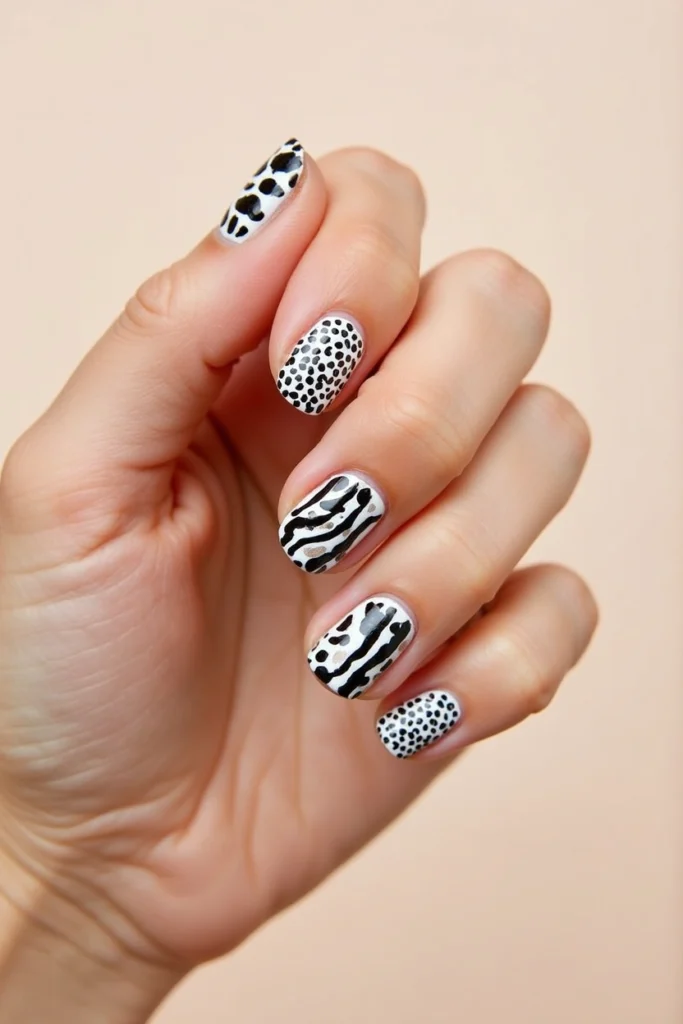
Animal print acrylics let you unleash your wild side with patterns inspired by leopard, zebra, snake, and other exotic animal markings. These fierce designs make a bold fashion statement.
Why you’ll love it: Animal prints add personality and daring flair to your manicure. They’re trendy yet timeless, always making a comeback in fashion.
How to create it: For leopard print, start with a neutral base (beige or tan works well). Using a thin brush, create irregular spots with black acrylic paint.
Once dry, outline the spots partially with a lighter color to create dimension. For zebra print, apply a white base and add black stripes using a thin brush. Snake print can be achieved by creating a textured base with plastic wrap pressed into wet polish, then adding scales with a contrasting color.
Seal with top coat. If hand-painting seems daunting, nail stencils offer a simpler alternative.
Negative Space Acrylics
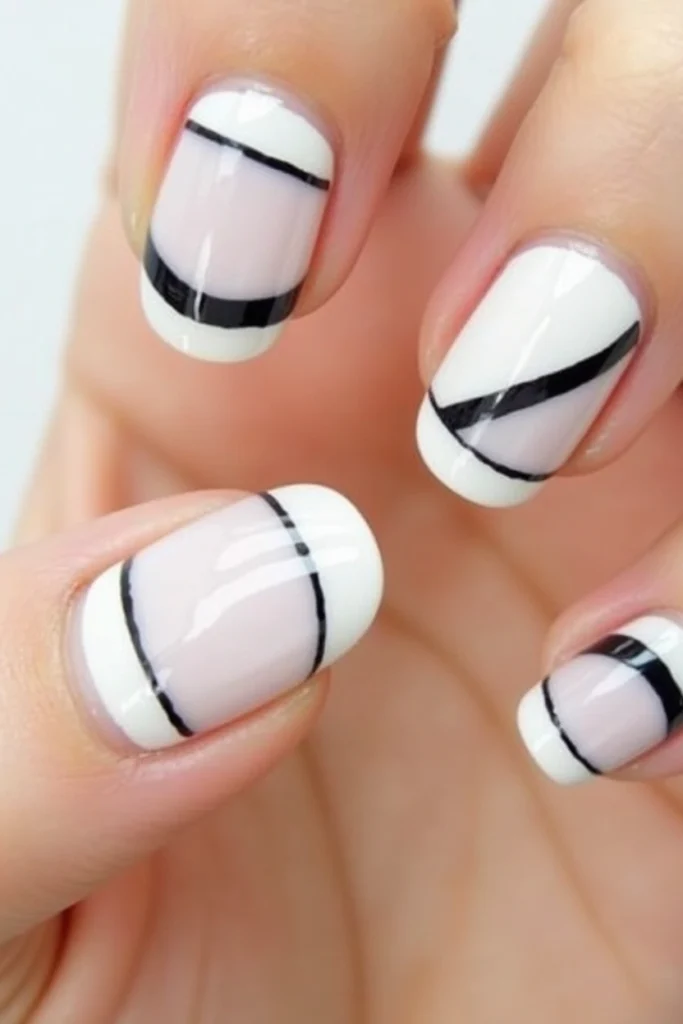
Negative space designs incorporate the natural nail as part of the overall aesthetic. By strategically leaving portions of the nail exposed, this technique creates intriguing modern looks with unique contrasts.
Why you’ll love it: Negative space nails offer a minimalist, artistic approach that’s effortlessly cool. They’re perfect for those who appreciate contemporary design and subtle sophistication.
How to create it: Begin by deciding which portions of the nail will remain exposed.
Use striping tape, vinyl stencils, or a steady hand to create clean lines. Apply your chosen color(s) to the designated areas, being careful not to flood the negative spaces.
Remove any guides while the acrylic is still slightly wet for the cleanest lines. Consider using a clear base coat on the negative spaces for added protection without losing the effect. Seal the entire nail with a top coat for a cohesive finish.
Stiletto Acrylics
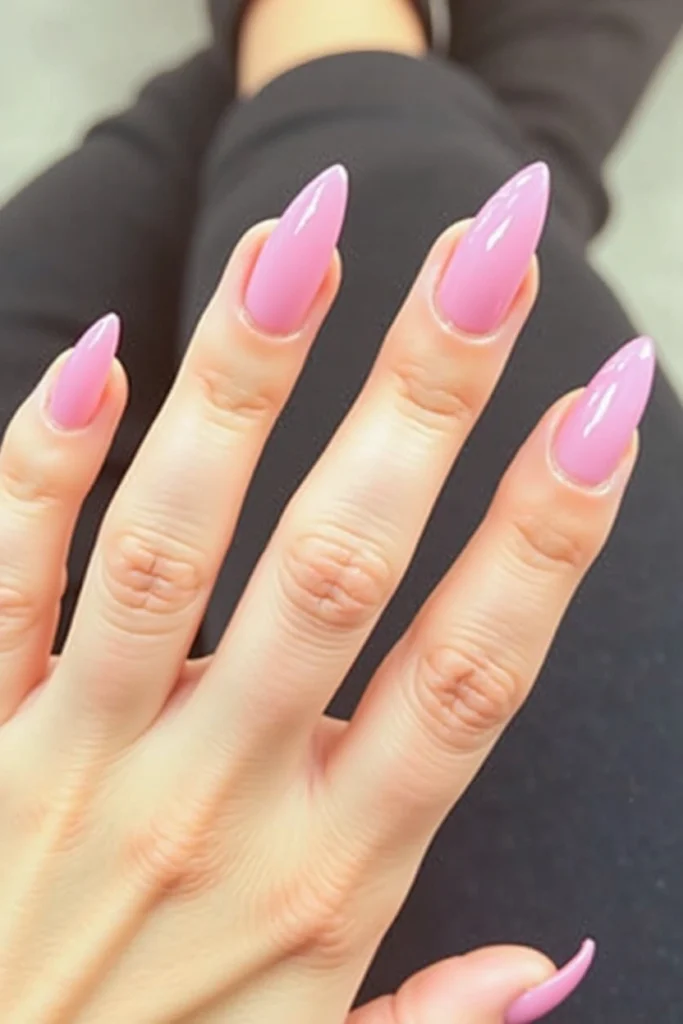
Stiletto nails feature dramatically pointed tips that taper to a sharp end. This bold shape creates an edgy, high-fashion look that makes a statement.
Why you’ll love it: Stiletto nails instantly add drama and boldness to any manicure. They elongate the fingers and provide an excellent canvas for creative designs.
How to create it: Building stiletto nails requires experience, so it’s best done by a professional. The nail technician will apply an acrylic extension, carefully shaping it into a dramatic point as it dries.
The sharp tip can be slightly rounded for practicality while maintaining the stiletto effect.
Due to their shape, stiletto nails may be more prone to breaking, so a slightly thicker application may be necessary for durability. Consider starting with shorter stilettos if you’re new to this shape.
Coffin/Ballerina Acrylics
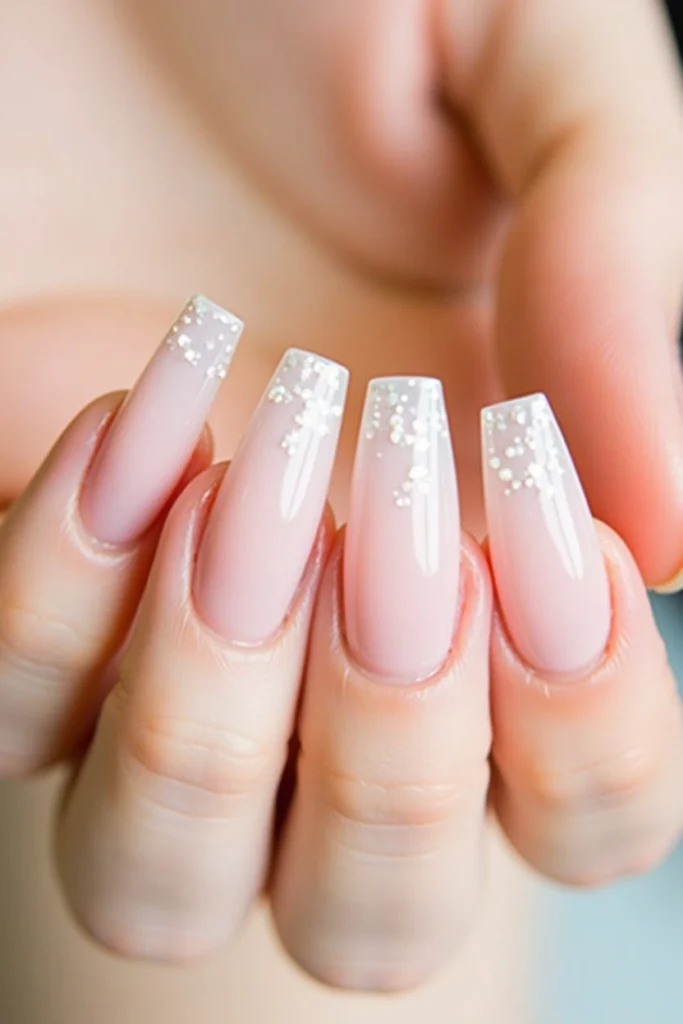
Coffin (or ballerina) shaped acrylics are long, tapered nails with a flat tip, resembling either a coffin or a ballerina’s slipper. This trendy shape offers the drama of long nails with a more practical squared-off end.
Why you’ll love it: Coffin nails provide an elegant, modern take on long nails. They’re trendy yet sophisticated and offer a large surface area for nail art.
How to create it: A nail technician will extend your natural nail with acrylic, tapering the sides like a stiletto shape, but instead of a point, the tip is squared off flat.
The width of the flat edge can be customized based on your preference. This shape works best on longer nails, so expect to add significant length to your natural nails. For added stability, the corners of the flat edge are often slightly rounded to prevent catching and breaking.
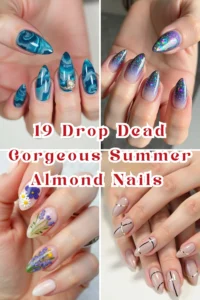
Almond Acrylics
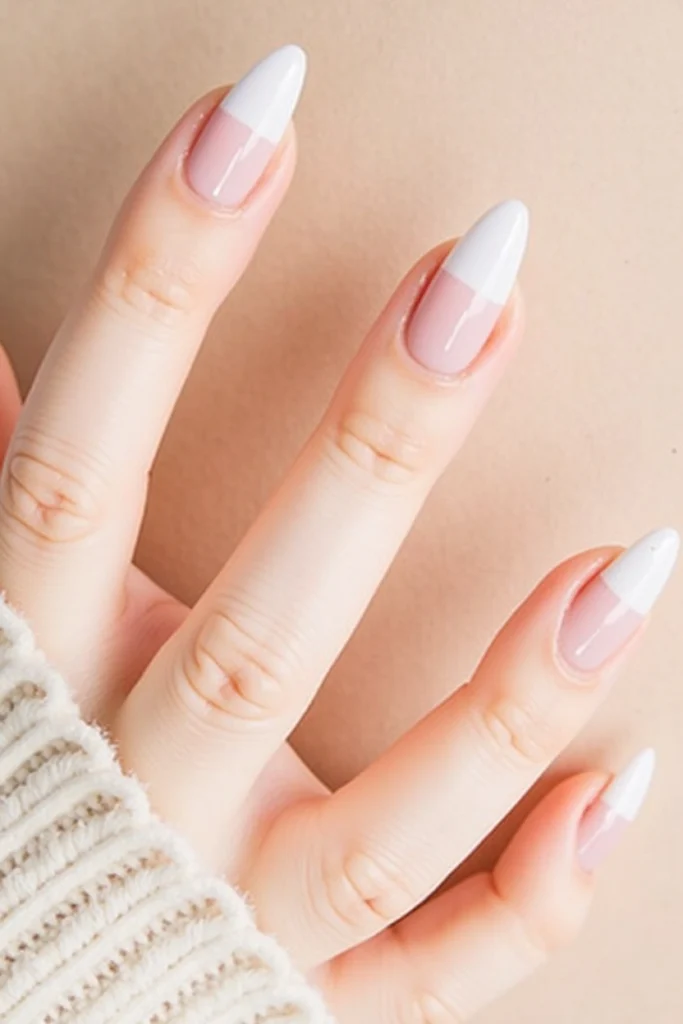
Almond shaped acrylics taper to a rounded point, resembling their namesake nut. This universally flattering shape offers a balance between elegance and practicality.
Why you’ll love it: Almond nails create a feminine, elongating effect for the fingers. They’re versatile enough for various nail art designs while being more practical for everyday wear than sharper shapes.
How to create it: Your nail technician will extend the nail with acrylic, gradually tapering the sides toward the center to create a soft point. Unlike stiletto nails, the point is rounded for a gentler appearance and greater durability.
This shape works well on most hand types but is particularly flattering for those with shorter fingers as it creates the illusion of length. For a more natural look, opt for a shorter almond shape.
Square Acrylics
Square acrylics feature straight sides and a flat, blunt tip. This classic shape offers clean lines and a strong, defined look that’s stood the test of time.
Why you’ll love it: Square nails provide durability and a wide canvas for nail art. Their clean, geometric appearance works well for both bold designs and subtle manicures.
How to create it: After applying acrylic to extend the nail, file the sides perfectly straight and parallel to each other. The free edge is filed straight across, creating a 90-degree angle at the corners.
For a slightly softer look, the corners can be very slightly rounded while maintaining the overall square appearance. This shape works particularly well on nails with wider nail beds, as it maintains proportion.
Oval Acrylics
Oval acrylics feature rounded edges that taper slightly toward the tip, creating a natural and elegant appearance. This classic shape follows the natural contour of the fingertip.
Why you’ll love it: Oval nails offer a comfortable, natural-looking shape that complements most hand types. They’re elegant without being overly dramatic and are less likely to catch or break.
How to create it: Begin with a squared acrylic extension, then file the sides with a curved motion to create a soft oval shape. The nail should be widest at the stress point (where the free edge begins) and taper gently toward the tip. The end should be rounded rather than pointed.
This shape works particularly well for those with long, slender fingers or narrow nail beds, but its classic appearance suits virtually everyone.
Jewel-Encrusted Acrylics
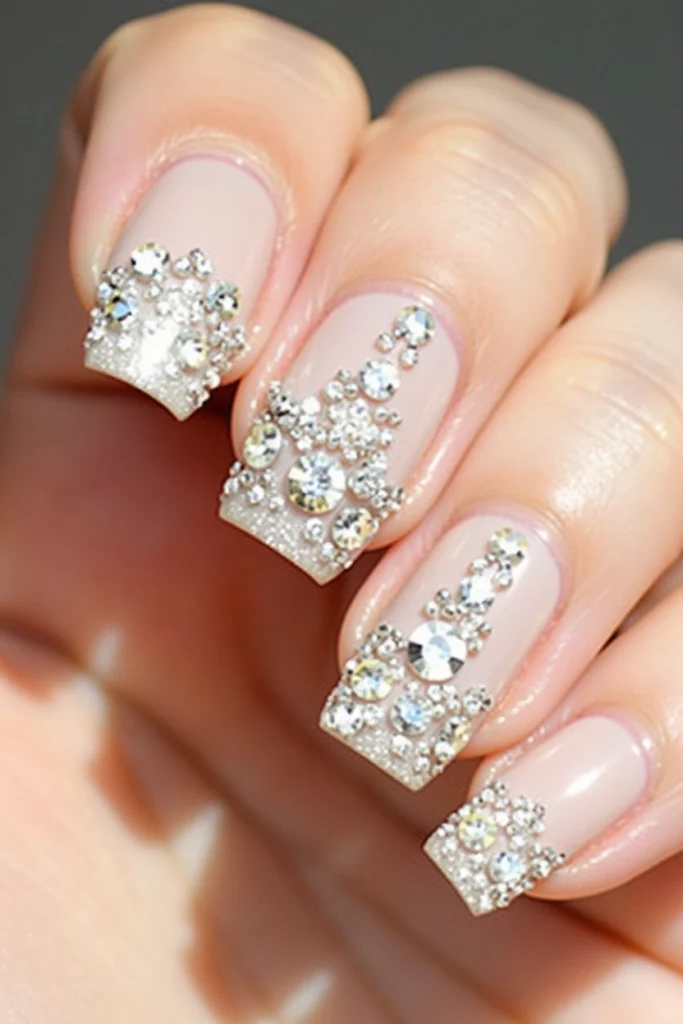
Jewel-encrusted acrylics feature sparkling rhinestones, pearls, gems, and other embellishments carefully placed to create dazzling designs. These luxurious manicures range from subtle accents to full-coverage bling.
Why you’ll love it: Jeweled nails bring glamour and luxury to any occasion. They’re perfect for special events when you want your manicure to double as an accessory.
How to create it: Start with a base color that complements your chosen embellishments. While the acrylic is still slightly tacky, use tweezers to place rhinestones, pearls, or other gems in your desired pattern.
Secure larger pieces with a small amount of nail glue. For maximum hold, encapsulate the base of the embellishments in clear acrylic or gel.
Finish with a careful application of top coat, avoiding covering the jewels completely as this can dull their sparkle. For longevity, avoid placing gems too close to the edge where they may catch on things.
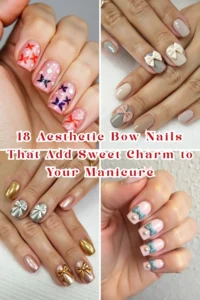
3D Acrylic Nail Art
3D acrylic nail art takes designs to the next dimension with sculpted elements that rise from the nail surface. These tactile creations include flowers, bows, chains, and other intricate shapes formed from acrylic powder.
Why you’ll love it: 3D designs add unique texture and visual interest to your manicure. They’re artistic, conversation-starting, and unlike anything possible with traditional flat nail art.
How to create it: This advanced technique typically requires professional skill. After applying a base color, small amounts of acrylic are sculpted directly on the nail while still pliable.
The nail artist builds the design layer by layer, using different colored acrylics and specialized tools to shape elements like petals, leaves, or geometric forms.
For durability, designs should be proportional to the nail size and not too tall, which could cause them to break off. A careful application of top coat helps secure the design without flattening the 3D effect.
Watercolor Acrylics
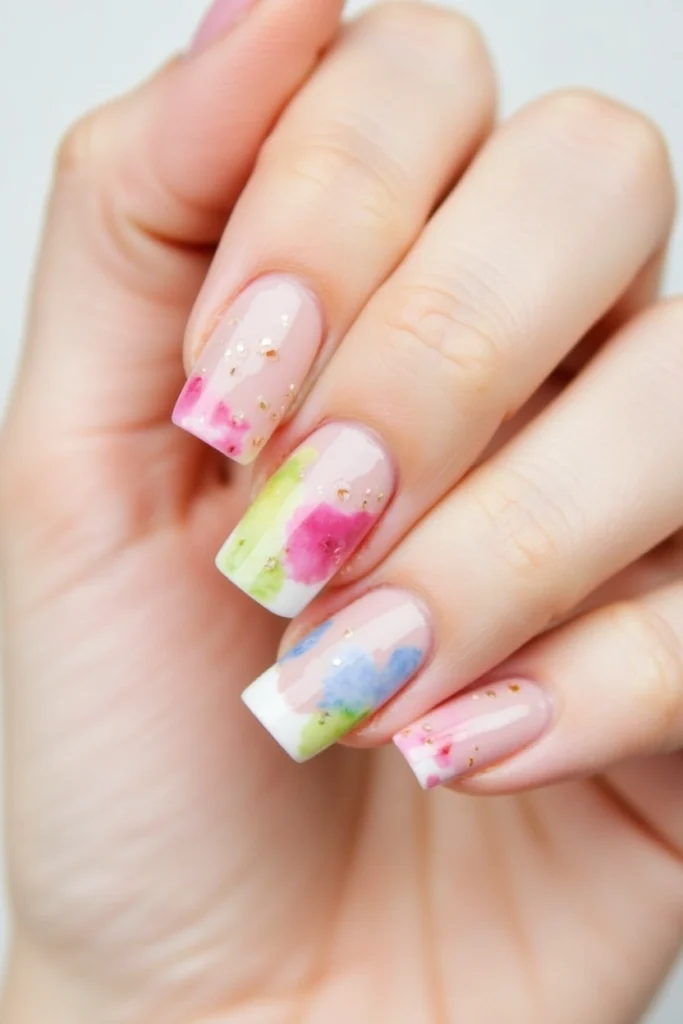
Watercolor acrylics create a soft, dreamy effect reminiscent of watercolor paintings. Diluted acrylic paints are blended to create delicate, flowing designs with a transparent quality.
Why you’ll love it: Watercolor nails offer an ethereal, artistic appearance that’s both subtle and striking. The soft color transitions create depth and movement.
How to create it: Begin with a white or very light base to allow the watercolor effect to show. Dilute acrylic paints or use special watercolor nail polish, then apply small drops to the nail.
While still wet, use a clean brush slightly dampened with alcohol or nail polish remover to gently blend the edges of each color, allowing them to flow into each other.
For more definition, add a few darker accents after the initial layer dries. Seal with multiple layers of top coat to smooth the surface and enhance the watercolor transparency.
Glow-in-the-Dark Acrylics
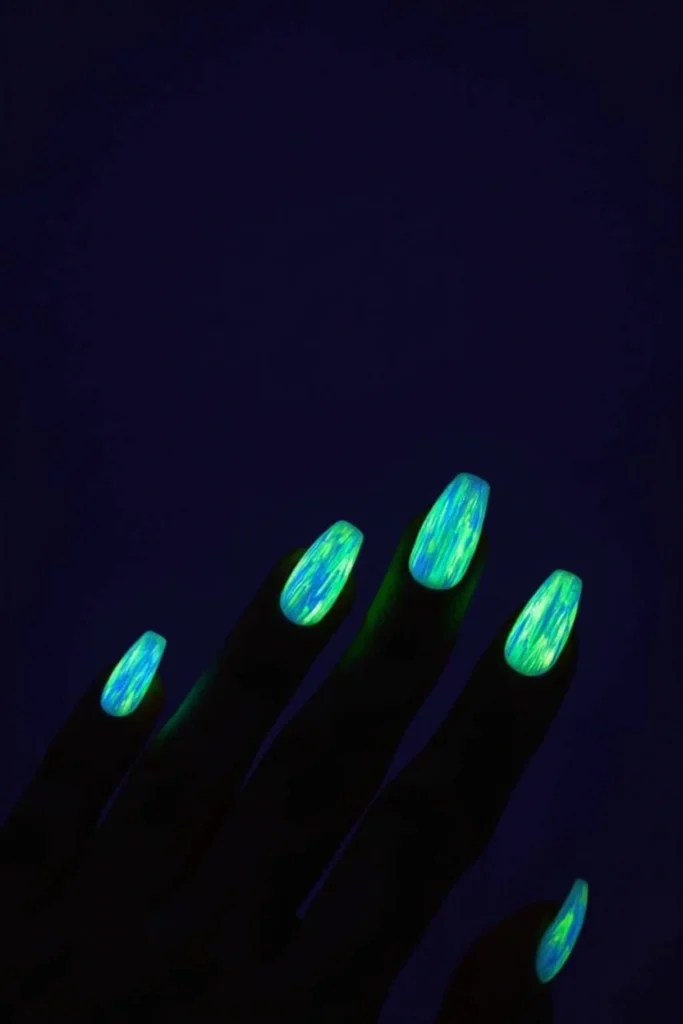
Glow-in-the-dark acrylics contain special phosphorescent powders that absorb light and emit a vibrant glow in dark conditions. This playful style adds an unexpected element of surprise to your manicure.
Why you’ll love it: Glow nails bring fun and uniqueness to your manicure. They’re perfect for parties, nighttime events, or anytime you want to add an element of surprise.
How to create it: Mix glow-in-the-dark powder into clear acrylic or use pre-mixed glow powder. This can be applied as a full coverage color or as accents over a base color.
For maximum glow effect, apply white polish underneath as it reflects light and enhances the glow. “Charge” the nails under bright light for several minutes before entering dark areas for the best effect.
The glow typically lasts 4-6 hours before needing recharging. Seal with a clear top coat, but be aware that multiple layers may slightly dim the glow effect.
Textured Acrylics
Textured acrylics add dimension and tactile interest through various techniques that create raised patterns, rough surfaces, or other touchable effects. These designs engage both visual and tactile senses.
Why you’ll love it: Textured nails add innovative, eye-catching elements to your manicure. They create interest through physical dimension rather than just color or pattern.
How to create it: There are many ways to create texture, depending on the desired effect. For sugar or sand texture, sprinkle fine glitter or textured powder over wet polish. For raised patterns, use a dotting tool to create small mounds of acrylic in deliberate patterns.
Textured nail polishes with special formulations (like velvet, leather, or concrete effects can also be used over acrylic. Another technique involves dabbing a small sponge onto wet polish to create a stippled effect. Some textures may wear more quickly than smooth finishes, so an extra layer of top coat can help preserve the design longer.