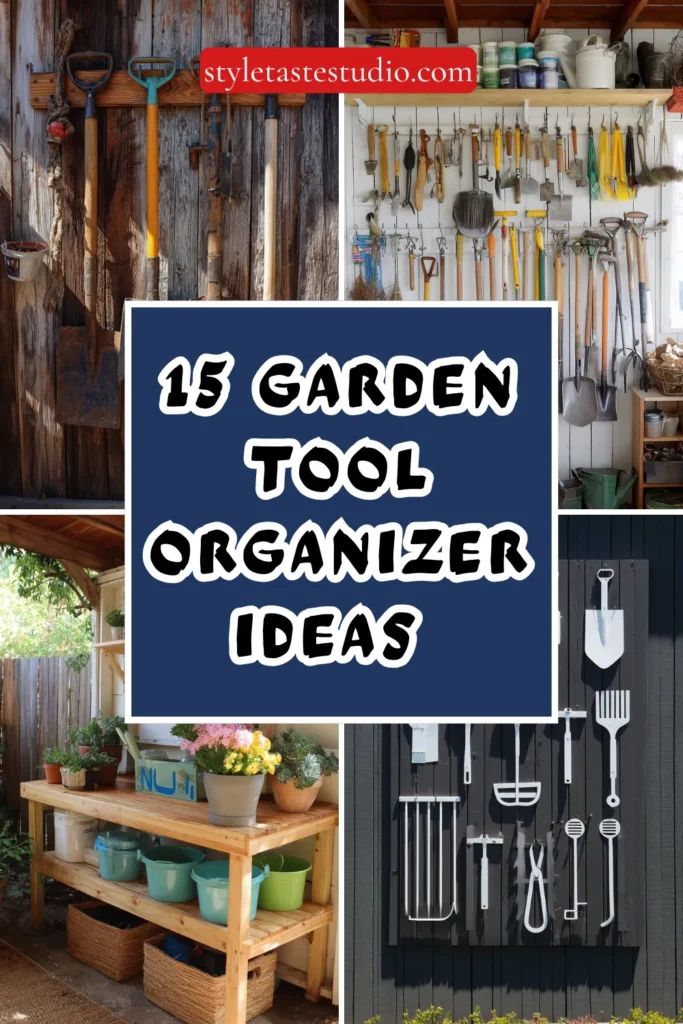
15 Garden Tool Organizer Ideas for a Tidy and Functional Shed
A disorganized garden tool collection is one of those low-level daily frustrations that accumulates quietly until the simple act of finding a trowel takes five minutes of archaeological excavation through tangled rakes and misplaced gloves.
The tools are all there. Finding them is the problem. And the solution — a properly organized garden tool storage system — takes a single afternoon to install and delivers years of daily satisfaction in return.
The best garden tool organizers make putting tools away as easy and as natural as taking them out. When every tool has a clearly defined home that is easy to reach, the garden shed stops being a place of chaos and becomes a genuinely functional working space that makes every gardening session start well.
Here are 15 garden tool organizer ideas that transform any shed or outdoor storage space into a satisfying, functional working environment.
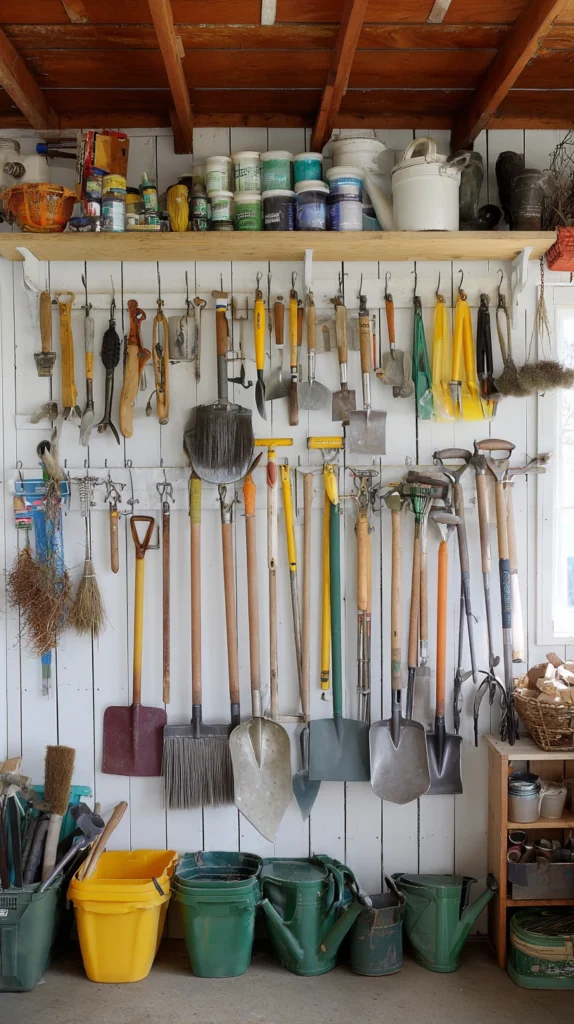
1. Pegboard Tool Wall
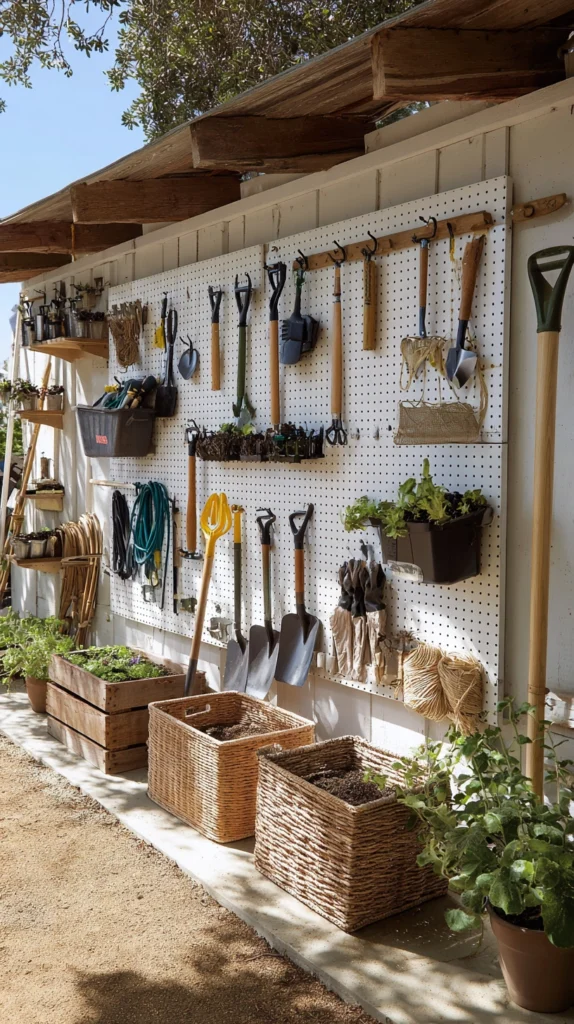
A pegboard tool wall — a sheet of perforated hardboard fixed to the shed wall with an assortment of hooks, holders, and brackets — is the most flexible and most widely used garden tool storage system available.
Every tool has its own hook positioned exactly where needed, the open surface makes every stored item immediately visible, and hook positions reconfigure instantly as the collection grows. Cover the full width of at least one shed wall for a surface generous enough to accommodate a complete tool collection.
Pro Tip: Paint the pegboard surface in a light color — white or pale grey — before fixing to the wall. A light-colored surface makes every stored tool visible at a glance and allows permanent marker tool outlines to read clearly against the background. A dark or unpainted pegboard makes the storage system significantly harder to use quickly and efficiently in daily practice.
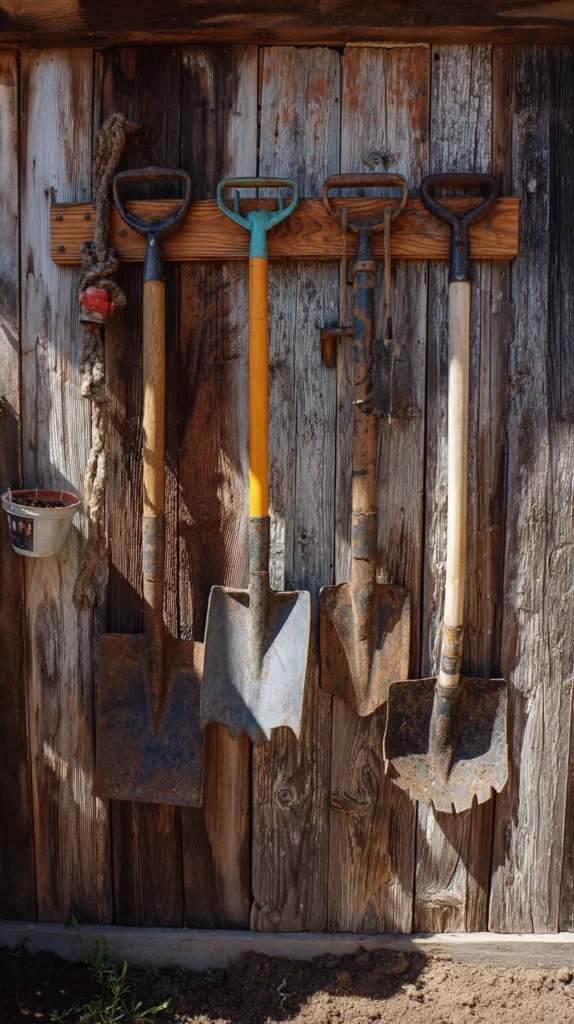
2. Wall-Mounted Timber Dowel Rack
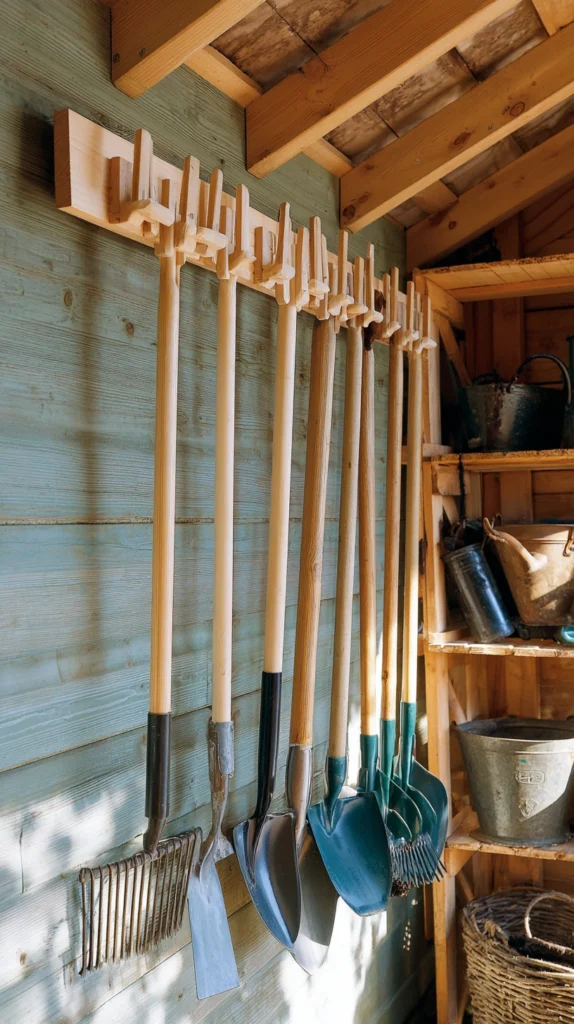
A length of 100mm x 50mm timber fixed horizontally to the shed wall with timber dowel pegs projecting from its face creates a sturdy, beautiful, and inexpensive long-handled tool storage system.
Cut 25mm diameter dowel pegs to approximately 15cm length and fix into pre-drilled angled holes at 15cm intervals. The slight upward angle prevents handles from sliding off and keeps every tool hanging securely even when neighbouring tools are removed.
Pro Tip: Space dowel pegs at consistent 15 centimetre intervals rather than varying spacing to accommodate specific tool handles. Consistent spacing creates a rack that accommodates any tool in any position — allowing free reorganization as the collection changes. Varied spacing sized to specific tools creates a rack that only works for the exact collection it was built for and becomes inflexible when tools are added or replaced.
3. PVC Pipe Tool Holder
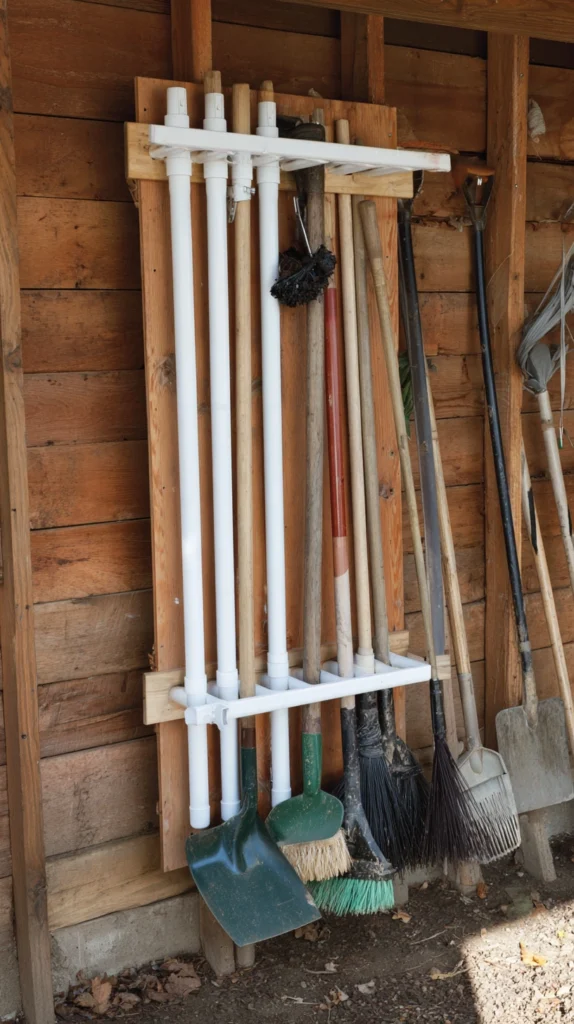
Short sections of 50mm diameter PVC waste pipe — each approximately 20 centimetres long — fixed vertically to a timber backing board create individual handle holders that grip each tool securely and keep it standing upright.
The enclosed pipe section holds the handle firmly from all sides — significantly more secure than a simple peg that allows tools to swing and fall when disturbed. The internal diameter accommodates all standard garden tool handles including spades, forks, rakes, and hoes.
Pro Tip: Drill a small drainage hole through the base of each pipe section before mounting. Tool handles inserted into sealed pipes carry moisture into the tube — particularly after outdoor use in rain — and trapped moisture creates rot at the base of wooden handles over time. A drainage hole allows moisture to escape freely and significantly extends the life of the wooden handles stored within.
4. Magnetic Tool Strip
A strong neodymium magnet bar fixed to the shed wall holds metal-headed hand tools securely through magnetic attraction without any individual hooks or holders. Trowels, hand forks, pruners, and secateurs attach and detach with a single effortless movement — the most frictionless storage system available for small hand tools. Fix the strip at shoulder height and it accommodates tools of any width or shape without modification.
Pro Tip: Keep the magnetic strip away from electronic devices, battery-powered garden equipment, and chargers stored in the same shed.
Strong neodymium magnets can affect electronic components and battery cells at close range — a practical consideration in a shed housing battery-powered tools and electronic timers. A dedicated wall zone for the magnetic strip away from electronic equipment prevents any interference issues.
5. Repurposed Wooden Pallet Organizer
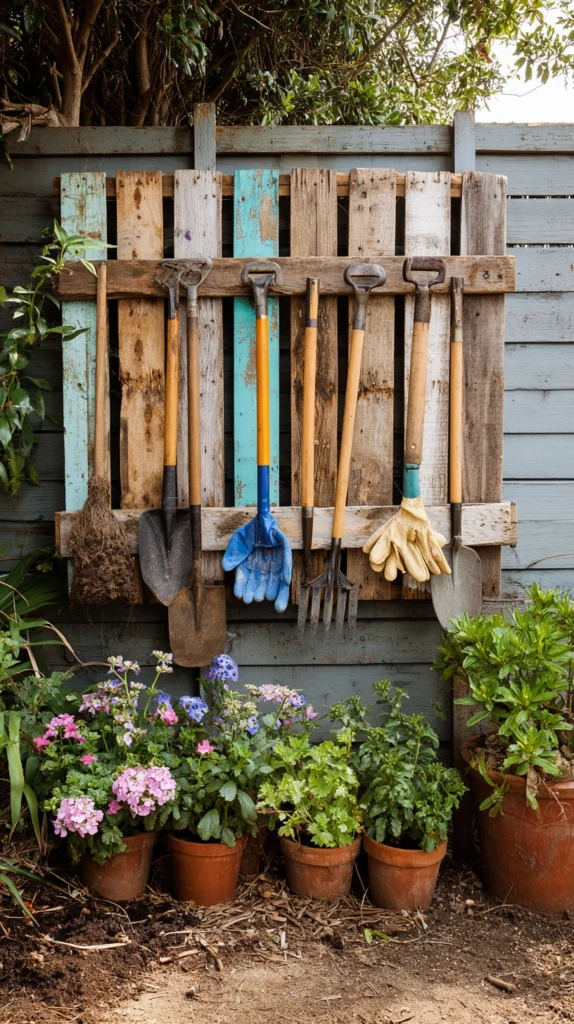
A wooden pallet fixed vertically to the shed wall creates a ready-made multi-level tool storage system of considerable capacity at completely free material cost.
The gaps between pallet slats serve as natural tool holders for long-handled tools, the frame provides fixing points for additional hooks and brackets, and the open structure allows tools to be inserted and removed easily. Paint the pallet in a complementary color to the shed interior for a finished, considered appearance.
Pro Tip: Check pallet markings before use. Pallets marked HT have been heat-treated for pest control and are completely safe for indoor use. Pallets marked MB have been treated with methyl bromide — a toxic chemical making them entirely unsuitable for any application where people or plants may come into contact. Always verify the treatment code before bringing any pallet indoors.
6. Ceiling-Mounted Tool Storage
Ceiling-mounted hooks, rails, and hanging brackets fixed to the shed ceiling joists use the one surface in most sheds that is almost completely ignored as a storage resource.
Ceiling mounting is ideal for long awkward items — ladders, long-handled tools stored horizontally, large rolls of netting and fleece, coils of hose — that consume significant floor or wall space when stored conventionally. The freed wall and floor space can then accommodate items that genuinely benefit from eye-level or ground-level access.
Pro Tip: Fix ceiling hooks and rails exclusively into the structural ceiling joists rather than into the ceiling boards between joists. Ceiling boards have minimal load-bearing capacity and will fail under the weight of garden tools. Use a stud finder or tap along the ceiling to locate joists before drilling and drive all fixings directly into the structural timber for a genuinely safe and reliable ceiling storage system.
7. Galvanised Bucket Tool Station

A collection of large galvanised metal buckets — each dedicated to a different tool category — grouped on a shed shelf or directly on the floor creates a storage system of considerable visual charm and genuine practical effectiveness. One bucket for long-handled tools stood upright, one for hand tools, one for stakes and canes, one for twine and labels. Label each bucket with its category using a paint marker or chalkboard label.
Pro Tip: Place a layer of coarse gravel in the base of each galvanised bucket. The gravel absorbs moisture that drips from tools inserted while still wet, prevents tools from sitting in standing water that causes rust and handles rot, and adds weight to the base preventing tipping when tall tools are inserted and removed from one side only.
8. Broom and Rake Clip Rail
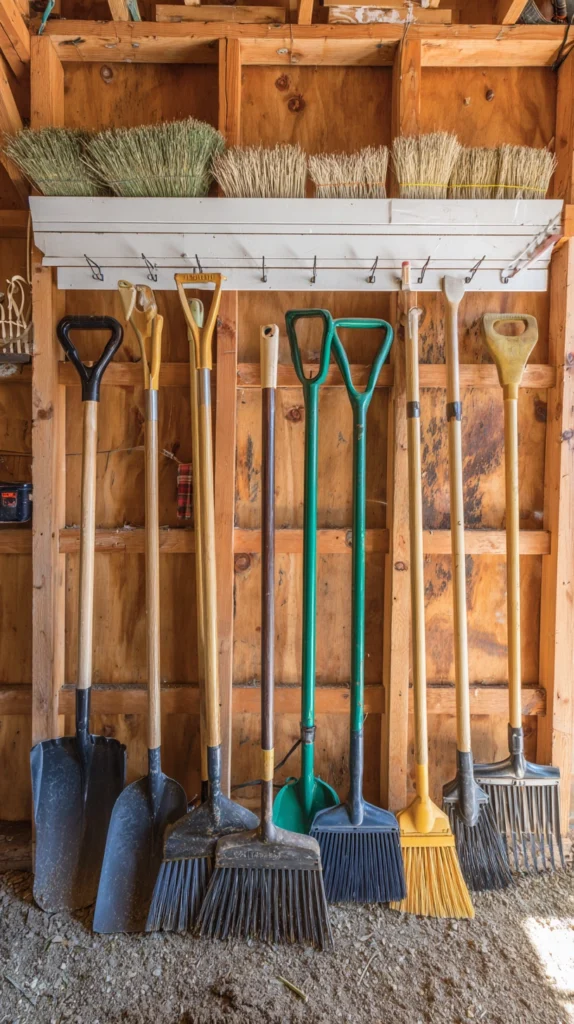
Purpose-made spring-loaded clip holders fixed to a timber mounting rail grip each tool handle securely and hold it flat against the wall in a space-efficient position. Fix the mounting rail horizontally at shoulder height and space clip holders at 15 centimetre intervals for a neat organized row of long-handled tools all stored at the same height. The spring clip mechanism holds tools securely enough to prevent falling but releases with a single squeeze for effortless removal.
Pro Tip: Group long-handled tools on the clip rail by frequency of use — the most frequently used tools at the most easily accessed central positions and occasionally used tools toward the ends. A storage arrangement organized around actual use frequency significantly reduces daily friction and makes the system genuinely efficient rather than simply visually organized.
9. Repurposed Wine Crate Small Tool Storage
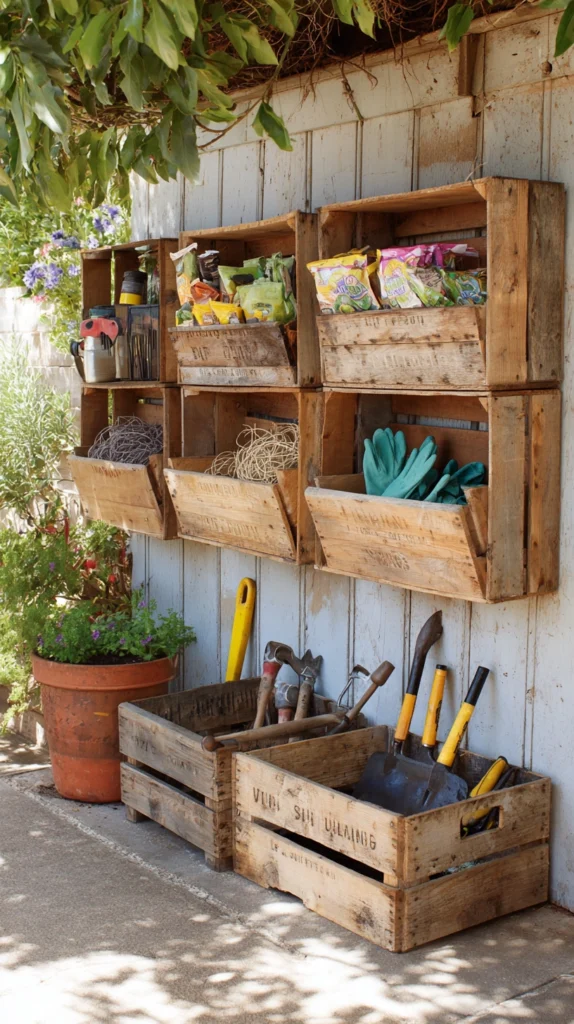
Wooden wine crates fixed to the shed wall or stacked on a shelf create a small tool and accessory storage system of extraordinary natural character and complete practicality. Each crate provides a defined compartment for a specific category — seed packets in one, plant labels in another, hand tools in a third, gloves and ties in a fourth. The open-fronted design makes every stored item immediately visible from the front.
Pro Tip: Line the interior base of each wine crate with a cut piece of outdoor carpet or rubber matting. The lining protects the crate base from scratching by metal tool heads, prevents small items from falling through gaps between the base boards, and provides a slightly cushioned surface protecting delicate items like seed packets and ceramic pots from the hard timber base of an unlined crate.
10. Tool Silhouette Wall Board
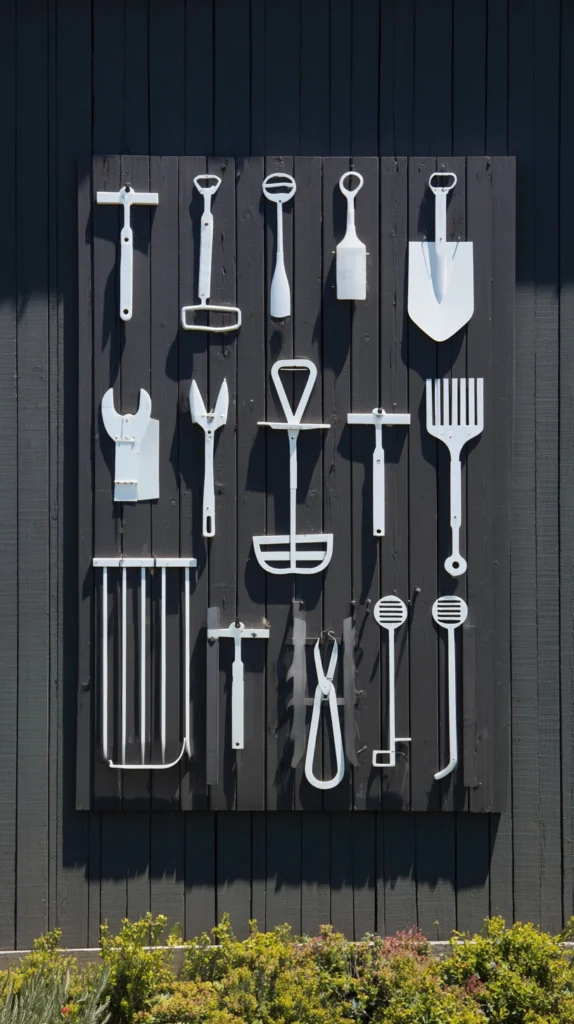
A sheet of exterior plywood painted in a contrasting color with each tool’s silhouette painted onto the surface and a hook installed at each silhouette position creates a storage system that makes missing tools immediately obvious at a glance.
Every tool out of the shed leaves a visible colored silhouette clearly indicating what is missing and where it belongs when returned. Paint the board in dark charcoal with silhouettes in white or bright yellow for maximum visual clarity.
Pro Tip: Update the silhouette board whenever a new tool joins the collection — adding the new silhouette and hook position immediately rather than waiting. A silhouette board accurately representing the current tool collection is an effective daily management tool. A board with missing silhouettes for tools added without updating loses its accountability function and becomes an inaccurate and unhelpful reference.
11. DIY Timber Shelving Unit
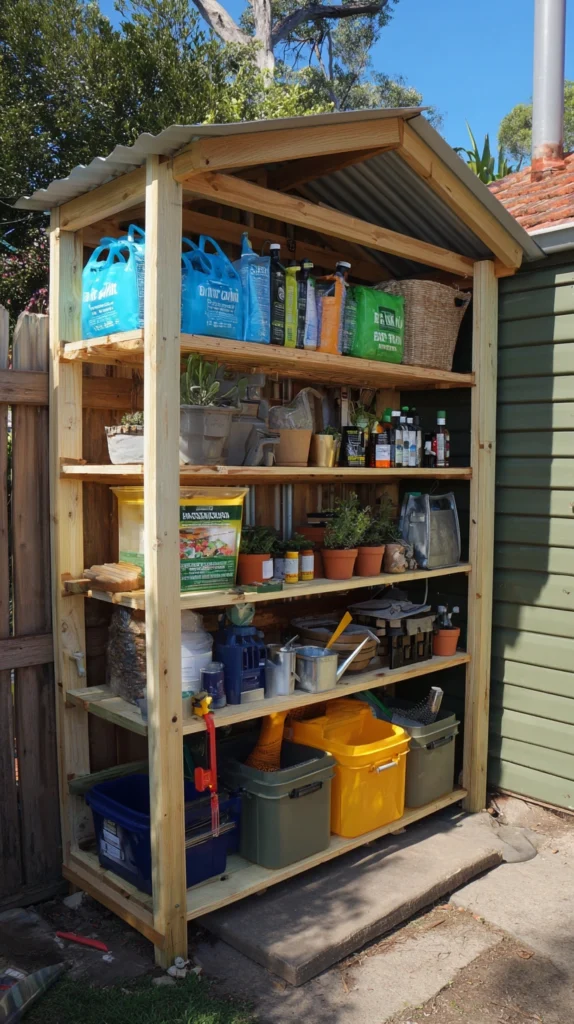
A simple freestanding timber shelving unit — built from pressure-treated timber and plywood shelves on a basic batten frame — creates the most versatile and most generous storage system available. Multiple shelf levels accommodate tools of different heights and categories and the open-fronted shelves keep every item visible and accessible.
Size the unit to fill the full width of one shed wall from floor to ceiling and fix to the wall through the back frame for stability.
Pro Tip: Make the bottom shelf at least 15 centimetres above floor level rather than flush with the floor. A raised bottom shelf allows a brush to be passed beneath for floor cleaning, prevents moisture from floor splashing being absorbed into stored items, and allows air circulation beneath the unit that reduces condensation and keeps the shed floor dry.
12. Garden Hose Wall Reel
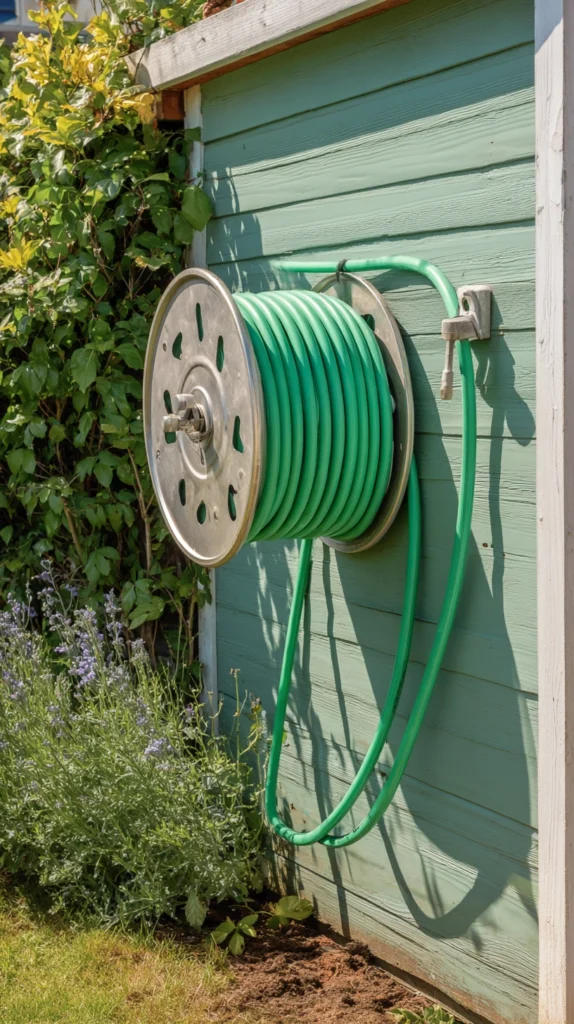
A wall-mounted garden hose reel fixed to the shed exterior wall or a fence post keeps the garden hose organized, protected from UV degradation, and immediately accessible.
A simple hand-crank mechanism winds the full hose length neatly onto the reel in a single two-minute operation after every use — eliminating the tangled heap on the ground that an unorganized hose inevitably becomes. Fix at waist height for convenient working access.
Pro Tip: Drain the hose completely before winding onto the wall reel for winter storage. Water left inside a hose stored on an outdoor reel freezes in cold weather — expanding as it freezes and cracking the hose wall at multiple points.
A completely drained hose stored on a wall reel survives multiple winters without deterioration. A water-filled hose stored through a single hard frost is frequently damaged beyond practical use by spring.
13. Labelled Storage Bins for Small Accessories
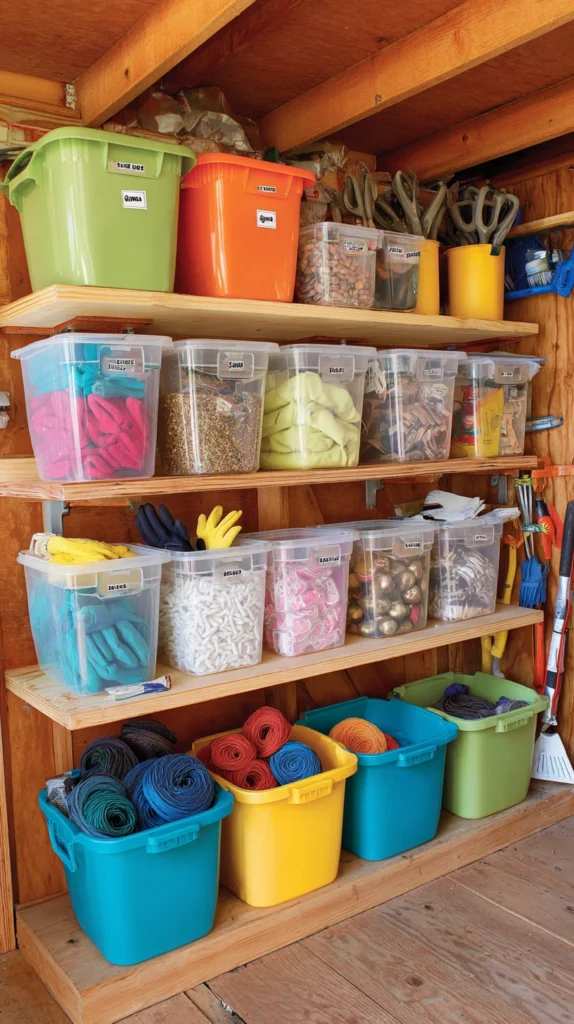
A row of matching storage bins on a dedicated shelf — each clearly labeled with its specific contents — creates a small accessory storage system of complete visual order.
Seed packets, plant labels, twist ties, slug pellets, fertiliser sachets, and small garden chemicals all have their own dedicated labeled container. Choose bins of a consistent size and color for a visually cohesive shelf that is pleasant to use and easy to maintain in order.
Pro Tip: Include a clear-fronted bin for the most frequently accessed category — typically seed packets or plant labels. A clear-fronted bin allows the specific item needed to be identified and retrieved without removing the entire bin from the shelf. For frequently accessed items this single upgrade reduces daily friction significantly and makes the organized shed genuinely faster to work within.
14. Over-Door Shoe Organiser for Hand Tools
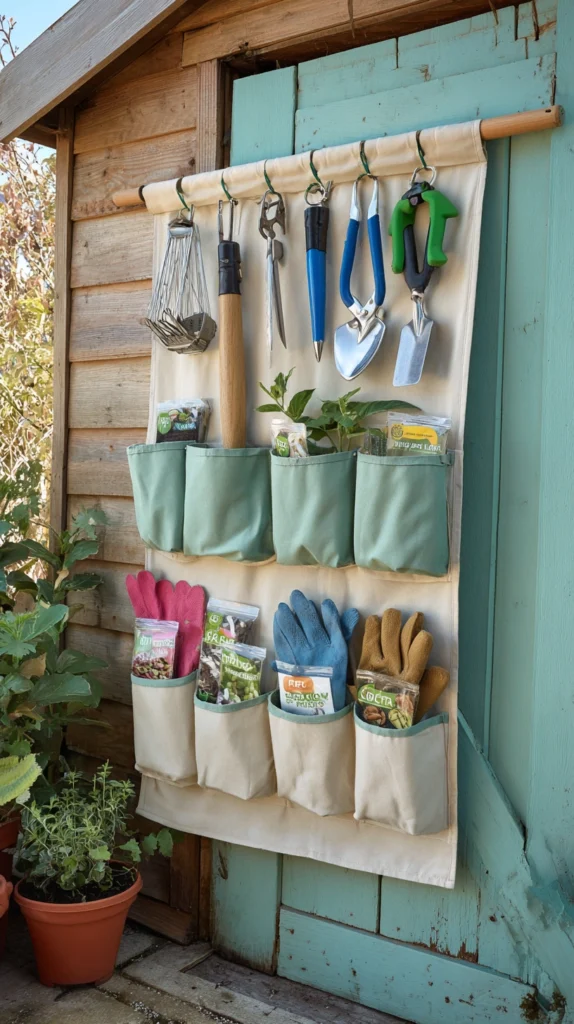
A fabric over-door shoe organiser hung on the inside of the shed door creates an immediate, zero-installation hand tool storage system of considerable capacity at minimal cost.
Each pocket accommodates a different hand tool or small accessory — trowels, hand forks, pruners, gloves, labels, and seed packets all sit neatly in individual pockets. The over-door position uses a surface that is otherwise completely wasted and the organiser is immediately visible every time the shed door opens.
Pro Tip: Choose a shoe organiser made from breathable fabric rather than sealed plastic for garden shed use. Breathable fabric allows moisture from damp tools to evaporate naturally from the pockets — preventing the trapped moisture that causes rust and handles rot in sealed plastic pocket organisers. A breathable organiser keeps tools dry between uses without requiring thorough drying before storage after every single outdoor use.
15. Dedicated Potting Bench with Integrated Storage
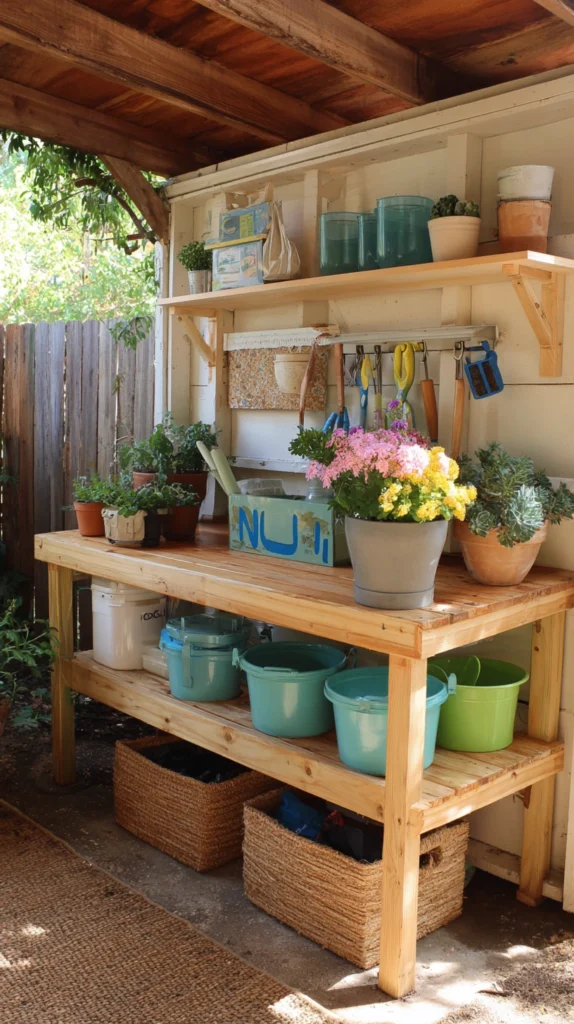
A potting bench with integrated tool storage — a generous timber work surface at standing height, a lower shelf for large items beneath, wall-mounted tool storage above the bench surface, and small bins for hand tools and accessories built into the bench structure — creates a complete, self-contained garden working station where every tool needed for potting and planting is organized and immediately to hand.
Pro Tip: Fit the potting bench work surface with a lipped front edge — a 5 centimetre timber lip running along the front edge.
Seed trays, small pots, labels, and hand tools slide toward the front of the bench during potting work and a lipped edge catches everything before it falls to the floor. This simple addition prevents the daily frustration of retrieving rolled items and keeps the bench surface genuinely usable during active potting sessions.
A Tidy Shed Changes Everything
An organized garden shed makes every gardening session start better, progress more smoothly, and finish more satisfyingly. When every tool has a home and every home is clearly visible and easily reached, the shed becomes a genuine working pleasure rather than a daily obstacle.
Choose the organizer ideas that suit your shed, your collection, and your budget. Install them on a single free afternoon. And discover how much more enjoyable gardening becomes when the tools are always exactly where they should be.