15 Custom-Look Wall Storage Ideas You Can DIY
Wall storage is one of the domestic interior’s most consistently underutilized resources. The average home has hundreds of square meters of vertical wall surface that contribute nothing to the organizational capacity of the space — painted, hung with occasional art, and otherwise left as a passive backdrop while the floor below them fills with the furniture, objects, and accumulation of a lived-in life.
The translation of wall surface into storage capacity is one of the most significant quality-of-life improvements available to any household, delivering the combined benefit of reduced floor clutter, increased organizational clarity, and — when the storage is designed and executed with genuine aesthetic intention — a visual richness and architectural depth that a plain painted wall cannot provide.

The barrier to wall storage for most people is the assumption that genuinely good-looking wall storage requires either a professional installation team, a significant budget, or both. Neither is true.
The most beautiful and most functionally effective wall storage systems available in contemporary interior design are, in the overwhelming majority of cases, achievable by a competent DIY practitioner with basic tools, a willingness to learn a small number of techniques, and the patience to execute carefully rather than quickly. Here are fifteen custom-look wall storage ideas that demonstrate this principle across every room in the home.
1. Floor-to-Ceiling Floating Shelf System

The floor-to-ceiling floating shelf system — a series of shelves mounted on invisible brackets that appear to emerge from the wall without visible support, running from the baseboard to the ceiling cornice in a continuous vertical composition — is the wall storage idea with the highest impact-to-difficulty ratio available in any home improvement project.
The floating shelf effect is achieved with keyhole brackets or French cleat systems that conceal all fixings within the wall and within the back edge of the shelf, leaving the shelf’s underside clean and the illusion of a wall-born horizontal surface perfectly maintained.
The critical requirements for a convincing floating shelf installation are quality materials — solid timber or high-density MDF of sufficient thickness that the shelf does not flex under load — and precise level installation, because a shelf that is not perfectly horizontal is immediately and distractingly obvious against the room’s vertical and horizontal architectural lines.
Install solid wall anchors into studs or masonry for any shelf that will bear significant weight, and use a spirit level for every shelf in the system rather than assuming that each subsequent shelf is level because the previous one was.
2. A Pegboard Command Center
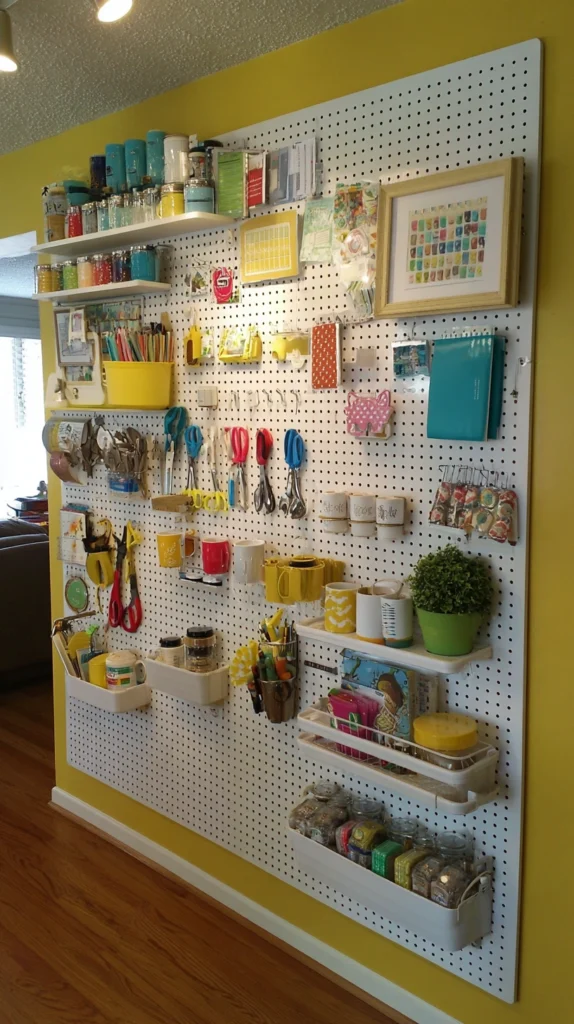
The pegboard wall — a sheet of perforated hardboard or MDF mounted to the wall with spacer blocks that create a gap between the board and the wall surface through which pegboard hooks and accessories can be inserted — is the most configurably flexible wall storage system available at any price point, because every hook, shelf, bin, and accessory can be repositioned in seconds without tools, allowing the storage system to be reorganized as frequently as the household’s needs change.
A well-designed pegboard command center — a large panel, ideally one to two meters wide and one to one and a half meters high, positioned in a kitchen, home office, hallway, or utility room — becomes the organizational hub of the space it occupies, holding everything from tools to keys to office supplies to cooking equipment in a visible, accessible, and completely reconfigurable arrangement.
Paint the pegboard before installation in a color that suits the room’s palette — the contrast between the panel’s color and the objects displayed on it creates a visual composition of considerable interest — and choose quality metal pegboard accessories rather than the plastic alternatives that break under even moderate use.
3. A Shaker Peg Rail with Shelf Above
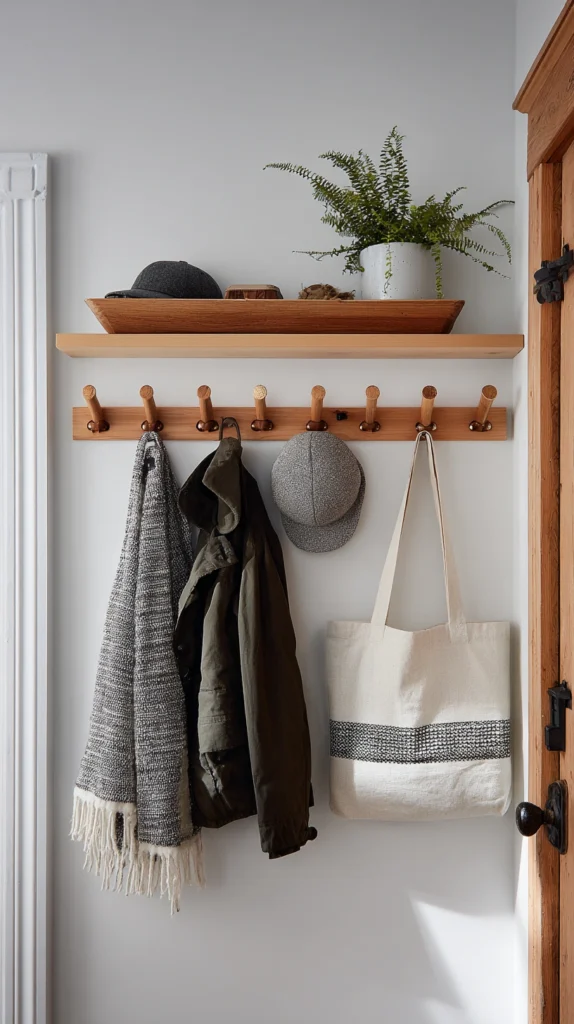
The Shaker peg rail — a timber board mounted horizontally at shoulder height with a series of wooden pegs at regular intervals, used for hanging coats, bags, hats, and daily-use items — is one of the simplest and most beautiful wall storage solutions available for hallways, bedrooms, mudrooms, and utility spaces, and its combination of functional capacity and visual warmth makes it a universally applicable addition to almost any room in the home.
A peg rail with a shelf mounted directly above it — the shelf extending slightly beyond the rail’s width on each side, providing a surface for keys, mail, and small objects above the hanging zone — creates a complete entry storage system in a wall footprint of perhaps two meters width and thirty centimeters depth.
The Shaker peg rail is among the most straightforward DIY installations available: a length of square-edged timber, a set of Shaker-style turned pegs available from woodworking suppliers, a shelf bracket, and wall fixings. Paint or oil the timber in a color that relates to the room’s palette, and the result is a storage feature of considerable professional quality.
4. A French Cleat Wall System for the Workshop or Garage
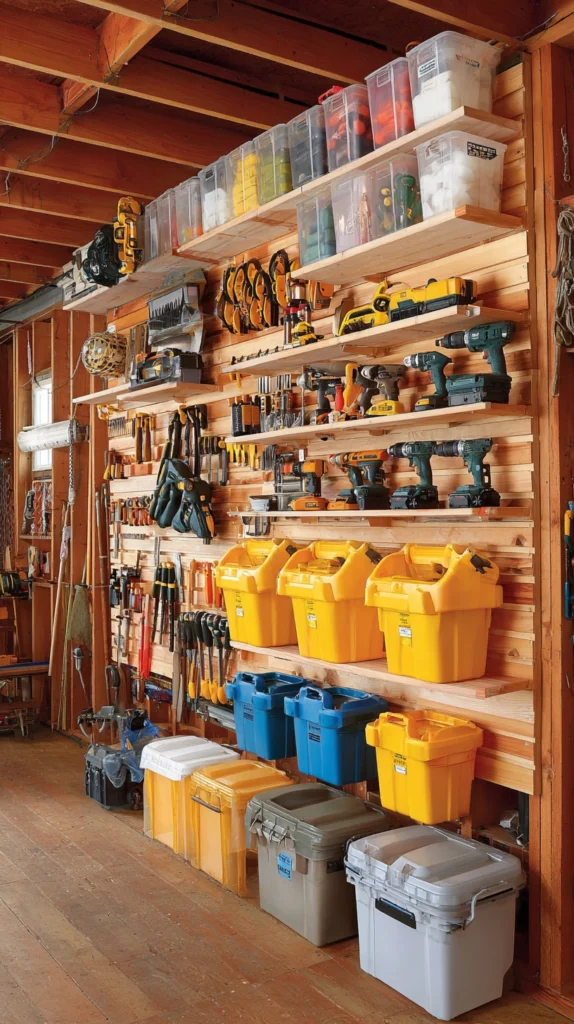
The French cleat — a simple system of interlocking angled timber strips that allows tools, shelves, bins, and storage accessories to be hung from a wall-mounted cleat and repositioned freely without drilling new holes — is the most powerful and most practically intelligent wall storage system available for workshops, garages, and utility spaces, and its adaptability makes it one of the most enduringly useful DIY projects a homeowner can undertake.
A French cleat wall is installed by mounting horizontal strips of timber — each with a forty-five-degree angled top edge — across the full width of the wall at regular vertical intervals, typically every twenty centimeters.
Accessories and storage units are then hung from these cleats using matching angled brackets that hook over the cleat’s angle. The system can hold an extraordinary variety of accessories — tool holders, shelf units, bin rails, magnetic strips, power outlet strips — all of which can be moved to any position on the wall in seconds.
The French cleat wall can be covered with a sheet of plywood or pegboard for a cleaner aesthetic if the bare cleat system’s visual character is too utilitarian for the space.
5. Recessed Alcove Shelving Between Studs
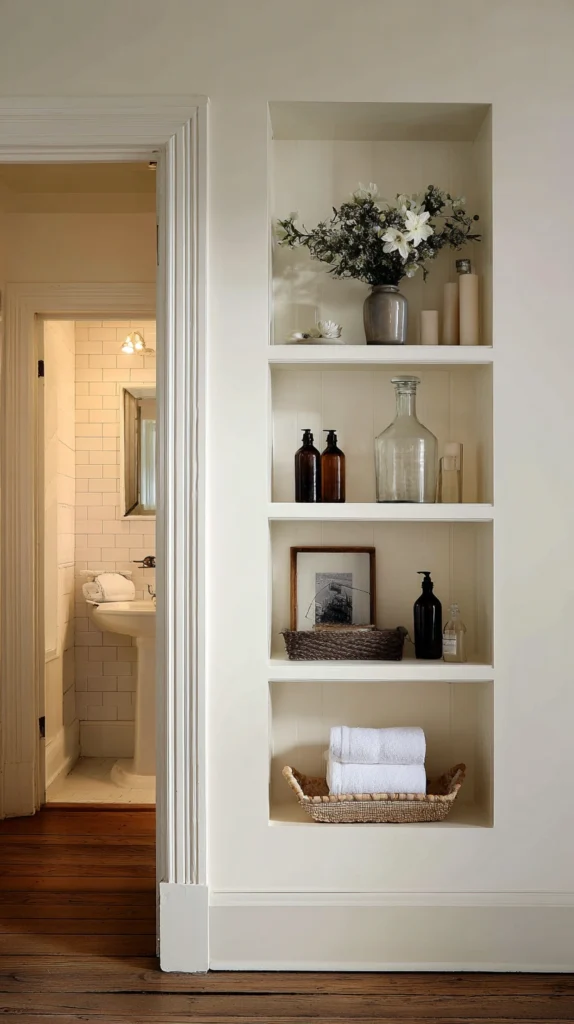
The recessed shelf — a shelf built into the wall cavity between stud framing, creating a storage surface that is flush with the wall face rather than projecting into the room — is the wall storage idea with the smallest room footprint of any structural approach, and in spaces where every centimeter of floor area and wall projection matters — bathroom walls, hallway walls, bedroom walls adjacent to doorways — it creates storage capacity where no conventional shelving could be placed.
Finding the studs and identifying the cavity space is the first step, followed by cutting the drywall opening, framing the recess with timber, and finishing the interior with drywall or timber panels.
The recessed shelf is most commonly used in bathrooms — where a shallow niche in the shower wall holds shampoo and soap, or where a recessed cabinet provides medicine storage — but it is equally effective in hallways, bedrooms, and any room where a standard projecting shelf would create a clearance problem.
A recessed shelf with a painted timber interior in a complementary or contrasting color to the surrounding wall creates a visual focal point of considerable refinement.
6. A DIY Built-In Bookcase Using IKEA or Flat-Pack Units
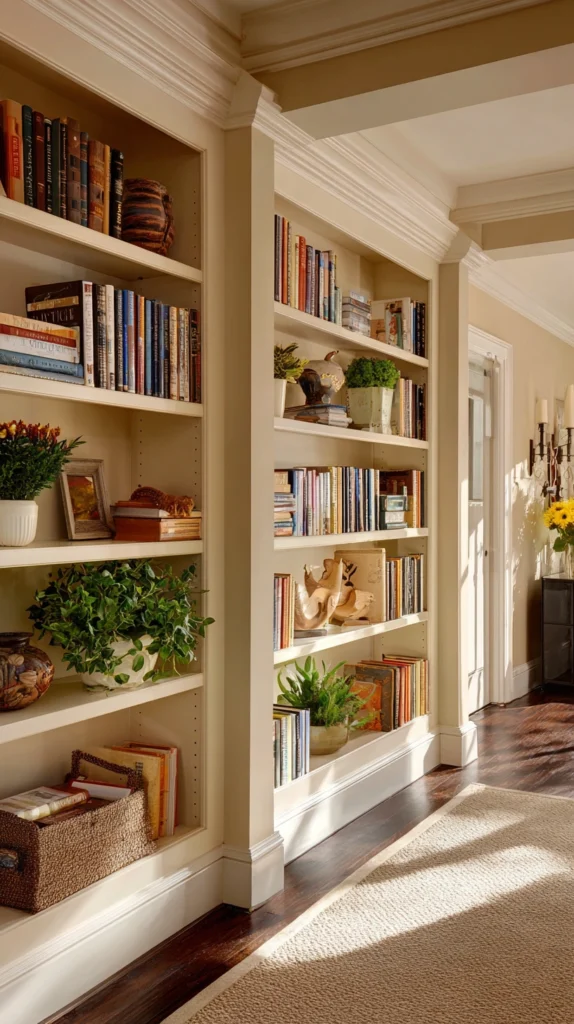
The built-in bookcase that appears to have been custom-designed for the specific wall it occupies but is actually assembled from standard flat-pack units — the approach that has generated more satisfying DIY home improvement projects than almost any other single technique — creates the custom-look wall storage at a fraction of the cost of genuine bespoke joinery.
The technique involves selecting flat-pack bookcase units of appropriate dimensions, installing them side by side against the chosen wall, and adding the architectural details — a continuous cornice molding along the top, plinth molding at the base, side panel infills between the units and the adjacent walls and ceiling — that disguise the individual unit origins and create the impression of a single, designed built-in installation.
The cornice and plinth moldings, available from timber merchants and building suppliers in appropriate profiles, are the key transformative elements: without them, the flat-pack units are obviously flat-pack; with them, even a careful observer struggles to identify the assembly as anything other than a custom installation.
Paint the entire composition — units, moldings, and wall behind — in a single consistent color, and the built-in quality of the result is complete.
7. A Magnetic Wall Panel for Kitchen Organization
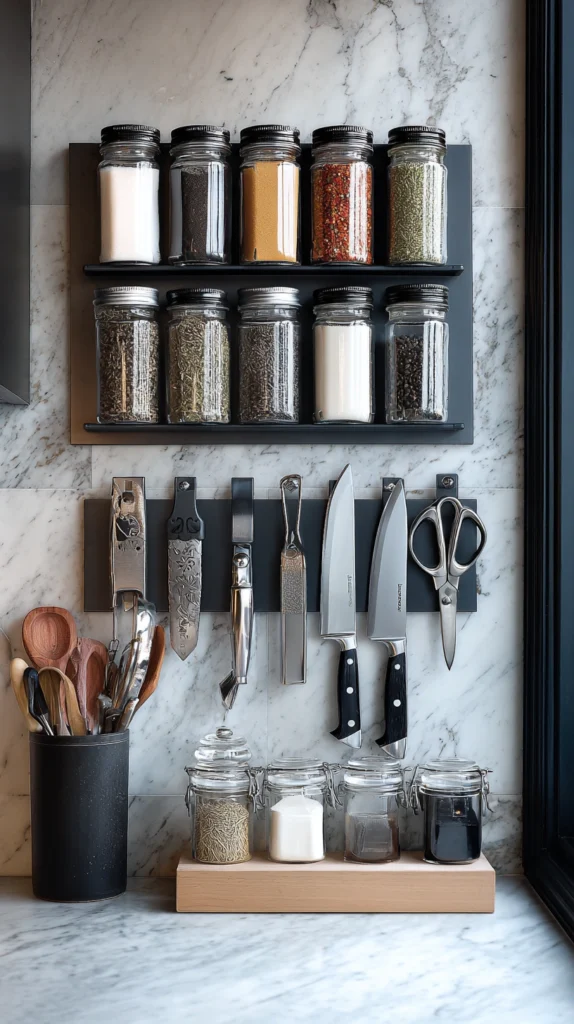
A magnetic wall panel — a sheet of steel or a purpose-made magnetic surface mounted to the kitchen wall, to which magnetic knife holders, spice containers, tool hooks, and note-holding magnets attach without any additional fixings — creates a kitchen wall storage system of remarkable versatility and considerable visual interest.
The steel panel can be powder-coated in any color, allowing it to be designed as a specific visual element within the kitchen rather than a purely functional installation, and the magnetic accessories that attach to it can be repositioned instantly as the kitchen’s organizational needs change.
A magnetic panel of one meter by sixty centimeters, installed on the kitchen’s most accessible wall, provides sufficient surface area for a knife collection, a set of spice containers, a notes and recipe display system, and the miscellaneous small items — scissors, bottle openers, small tools — that accumulate around a working kitchen without adequate storage provision. The DIY installation requires only a stud finder, appropriate wall fixings, and a drill.
8. A Ladder Shelf Leaned Against the Wall

The leaning ladder shelf — a timber ladder form with horizontal rungs that serve as shelves, leaned at a slight angle against the wall rather than fixed to it — is the wall storage idea that requires no drilling, no wall fixings, and no installation skill whatsoever, and that delivers a storage and display surface of considerable charm and visual warmth in any room where a vertical storage element is needed without the commitment of a permanent installation.
The leaning ladder shelf suits living rooms, bedrooms, bathrooms, and home offices with equal aptitude, and its non-permanent nature means it can be moved, repositioned, or replaced without any wall repair.
The DIY version — constructed from two lengths of rough-sawn timber for the side rails and a series of dowel or batten rungs fixed between them — is a morning project for any competent DIY practitioner, and the materials cost is minimal. Sand the timber smooth, apply an oil or wax finish, and the result is a display ladder of quality and warmth that suits a wide range of interior styles.
9. A Vertical Garden Wall for Living Storage
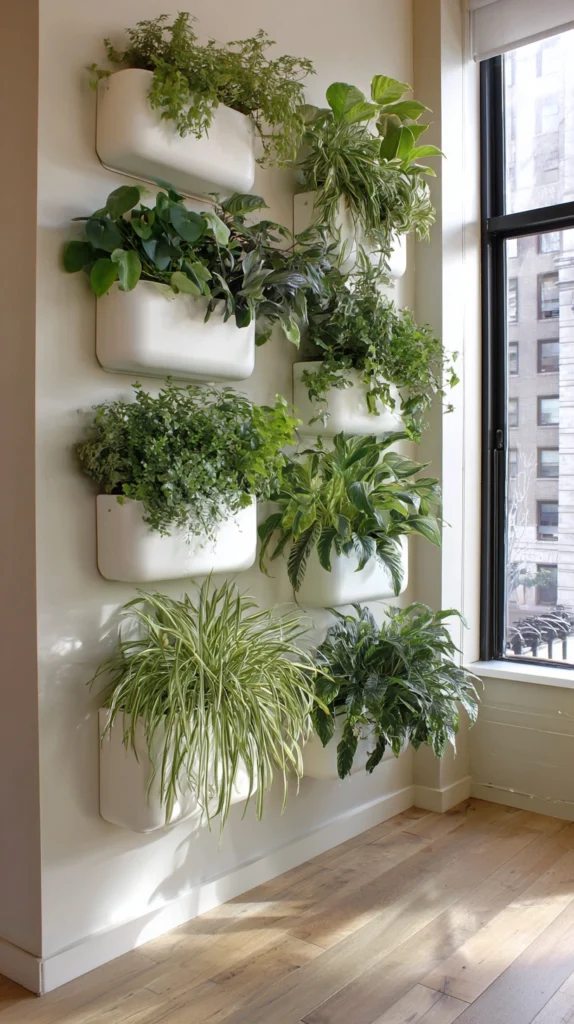
A vertical garden wall — a system of wall-mounted planters, pockets, or modular growing units that create a living planted surface — is the wall storage idea that interprets storage as something broader than the accommodation of objects, extending it to include the housing of living plants that improve the room’s air quality, biophilic quality, and sensory richness simultaneously.
The DIY vertical garden can be constructed from a variety of approaches: a timber framework supporting individual terracotta pots on angled shelf brackets; a pallet mounted to the wall with landscape fabric stapled into the pallet compartments as planting pockets; a series of wall-mounted metal buckets or ceramic pots on individual hooks; or a purpose-built modular system of interlocking planter units.
The key practical requirement for an interior vertical garden is waterproofing — the wall behind and below the planters must be protected from water damage through a combination of drip trays, waterproof backing, and careful watering practice.
10. A Timber Batten Wall with Integrated Shelves
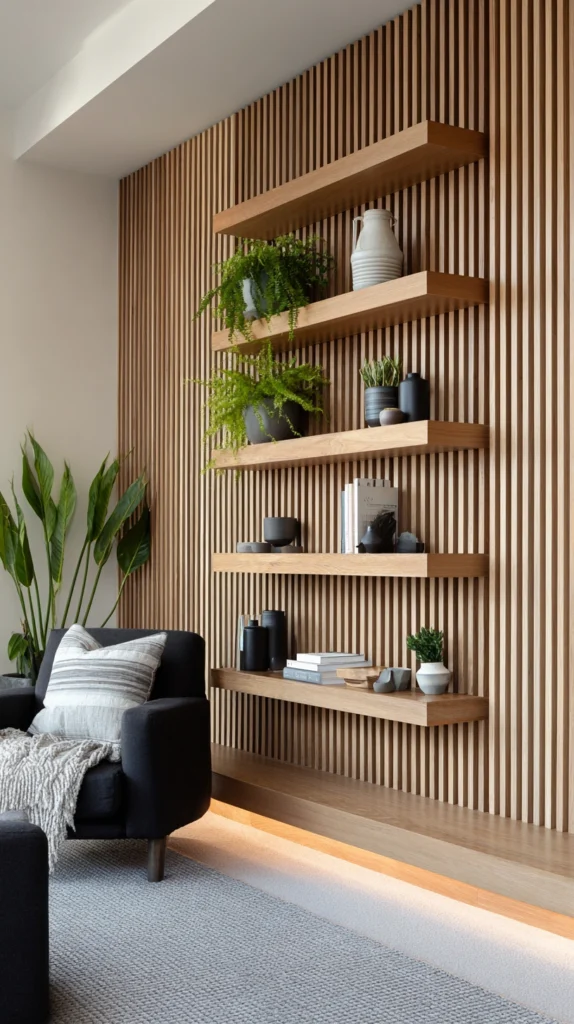
The timber batten wall — a series of evenly spaced vertical or horizontal timber battens mounted to the wall surface, creating a textured paneled wall that is simultaneously a decorative feature and a structural system for mounting shelves, hooks, and accessories — is one of contemporary interior design’s most versatile wall treatments, and its DIY execution is within the reach of any practitioner with a miter saw, a drill, and basic carpentry skills.
The battens create a wall surface of considerable visual interest — the regular rhythm of the timber members casting fine shadows and creating the texture that a plain painted wall lacks — and the gaps between the battens allow shelf brackets, picture hooks, and other wall-mounted accessories to be fixed at any point along the wall rather than being constrained to stud locations.
Paint the wall behind the battens in a contrasting or complementary color to the battens themselves — the color visible between the timber members creates the layered visual effect that makes the batten wall so photographically appealing.
11. A DIY Command Station for Family Organization

The family command station — a wall-mounted organizational system that centralizes the household’s calendaring, communication, and daily logistics in a single, clearly designed wall area — is the wall storage idea with the highest daily quality-of-life return for households with children, multiple schedules, and the organizational complexity of a busy family life.
A DIY command station combines several organizational elements on a single wall section: a large-format calendar or chalkboard for schedule management, a cork or magnetic board for notes and reminders, individual labeled mail and document slots for each family member, a key hook system, and a small shelf for the items that need to be at the door every morning — a charging station, a sunscreen basket, a spare umbrella.
The command station’s visual coherence depends on designing all its components as a single composition rather than assembling them independently — a consistent frame material, a consistent color palette, and a consistent spacing between elements creates a wall feature of professional quality from what could otherwise be a chaotic collection of organizational tools.
12. A Herringbone Timber Feature Wall with Built-In Niches
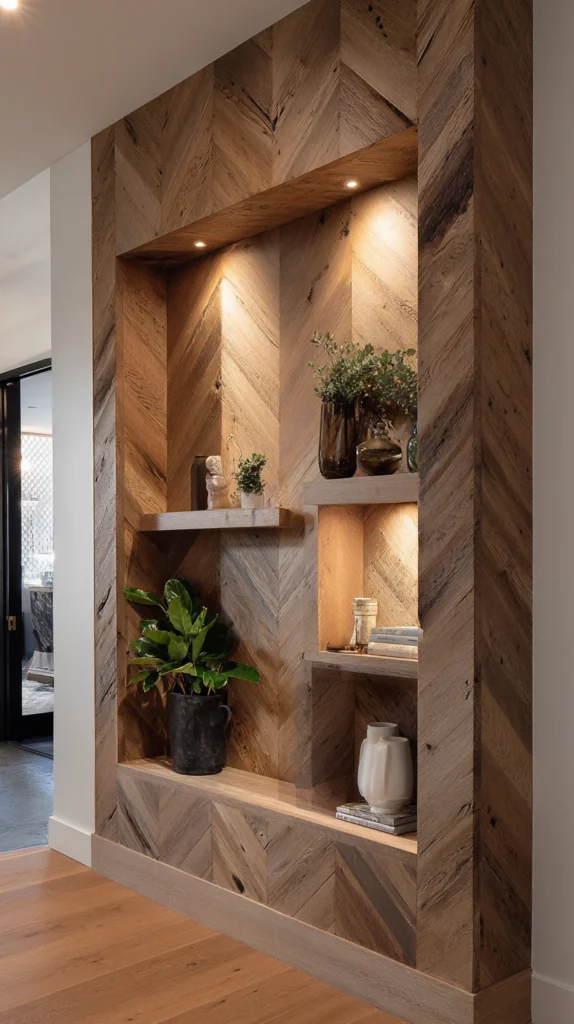
A feature wall constructed from timber boards arranged in a herringbone pattern — the angled, interlocking arrangement that transforms flat timber boards into a sophisticated geometric surface — with small display niches cut through the boards at strategic points creates a wall of considerable decorative ambition and functional value simultaneously.
The herringbone installation requires more precision than parallel board installations and the miter cutting of each board end at forty-five degrees demands a miter saw of adequate quality and a careful, methodical approach to sequencing.
The result justifies the effort: a herringbone timber wall has a visual energy and geometric sophistication that makes it one of the most impressive DIY wall treatments available, and the integrated niches — framed by the surrounding timber boards and finished with a painted or tiled interior — create display recesses of genuine decorative quality that suit sculptures, plants, candles, and the beautiful objects that every home accumulates.
13. A Wire Grid Panel for Versatile Display
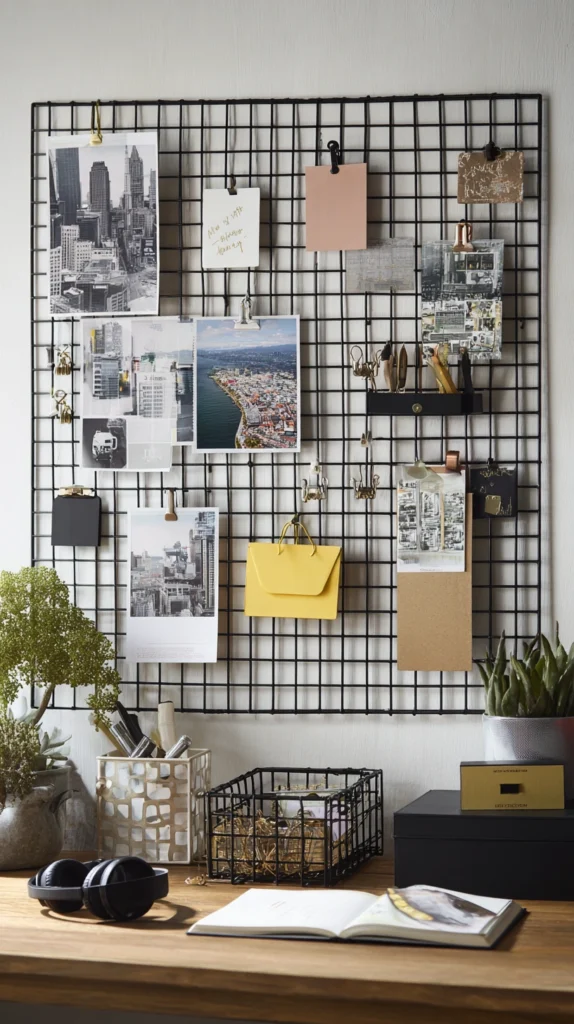
The wire grid panel — a square or rectangular grid of welded wire, typically in a thirty-centimeter square grid pattern, mounted to the wall and hung with S-hooks, clip rails, and small baskets — is the most visually lightweight and most organizationally versatile wall storage system available for home offices, bedrooms, kitchens, and craft rooms.
The grid’s open structure means that it barely registers visually when empty — it is the accessories and objects hung from it that create the visual interest — and the S-hook hanging system allows every element to be repositioned in seconds without tools. A wire grid panel in a home office holds notes, inspiration images, cables, headphones, and desktop tools in a visible, accessible arrangement above the desk.
In a craft room, it holds thread, tools, and small supply containers in a similarly organized format. In a kitchen, it provides the same magnetic panel function with the addition of the grid’s three-dimensional accessory system. Choose a quality welded grid in a powder-coated black or brass finish rather than the lightweight alternatives, which flex under load and create an unstable hanging system.
14. A Floating Corner Shelf System
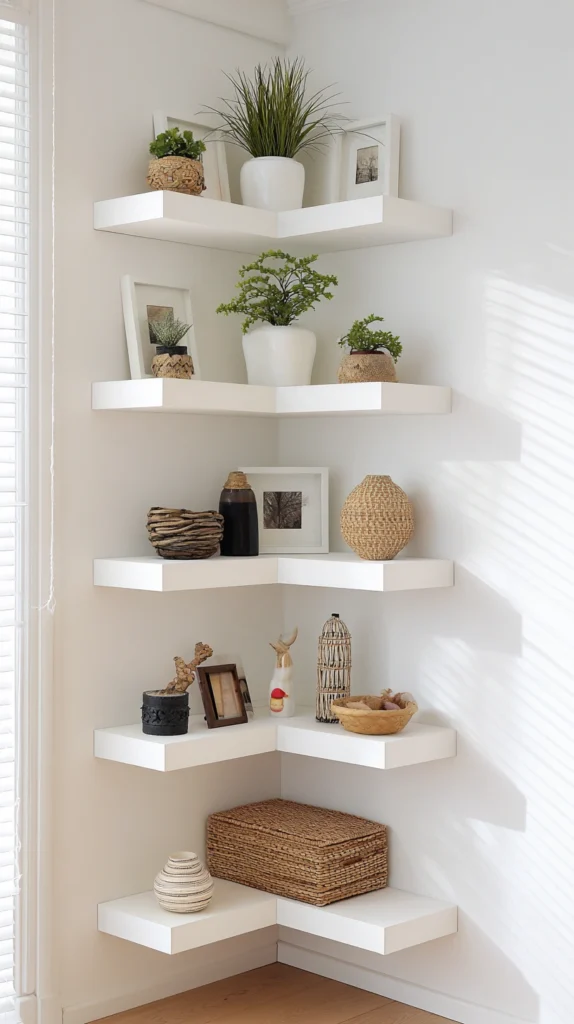
The corner shelf — a triangular or L-shaped floating shelf that fits precisely into the ninety-degree angle where two walls meet, using both wall surfaces as support and providing a shelf footprint in the dead corner space that straight shelves cannot occupy — is the wall storage addition with the smallest visual footprint and the highest utilization of previously unused wall space.
A DIY corner shelf system uses the same French cleat or keyhole bracket approach as standard floating shelves, with the additional requirement of precise measurement and cutting for the mitered corners where the shelf meets both walls simultaneously.
A tower of corner shelves — five or six shelves stacked from floor to ceiling height in a corner that would otherwise contribute nothing to the room’s storage or display capacity — creates a storage column of considerable capacity in a footprint of perhaps thirty by thirty centimeters at floor level, and the vertical composition of multiple shelves creates a display tower of visual interest that the room’s other walls cannot provide.
15. A Full-Wall Plywood Storage System
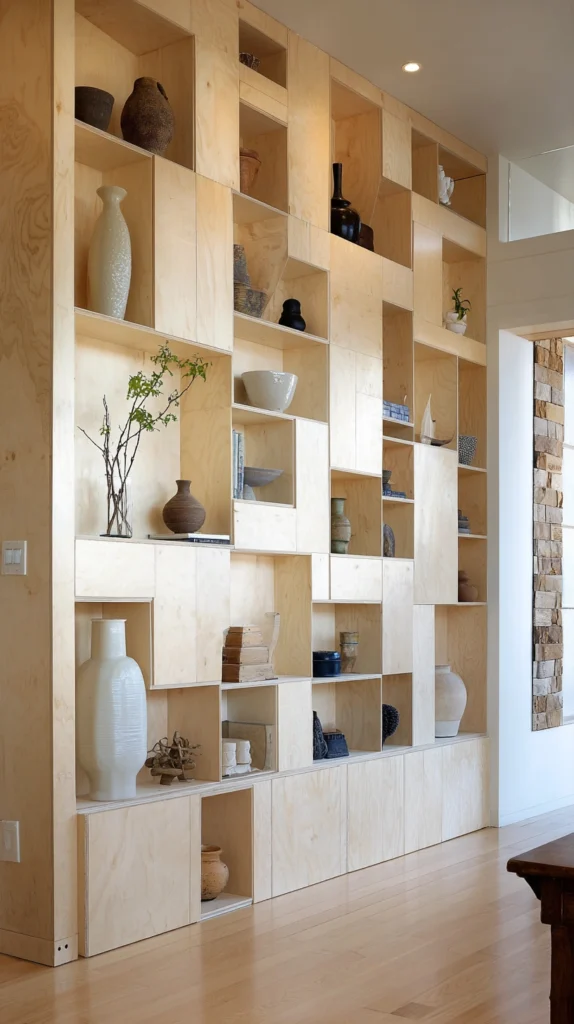
The full-wall plywood storage system — a complete wall of plywood panels, shelves, and storage compartments designed and built as a single architectural composition that covers one wall of a room from floor to ceiling and wall to wall — is the most ambitious and most transformative of all DIY wall storage projects, and the one whose result most completely fulfills the promise of custom-look storage at DIY cost.
Plywood is the ideal material for this project: it is available in large sheets that minimize jointing, it is strong and stable for shelf construction, it takes paint beautifully when properly prepared, and its material cost is a fraction of solid timber while its structural performance is equivalent for shelving applications. Design the wall system before cutting any timber — draw it to scale, determine the arrangement of open shelves, closed cabinets, and display niches, and calculate the material quantities precisely.
Build in sections that can be assembled on the floor and then lifted into position, and finish the entire assembly — including all visible edges — with iron-on edge banding or timber edge strips before painting. The completed full-wall plywood system, painted in a sophisticated color and dressed with books and objects, is indistinguishable from a professional joinery installation at a fraction of its cost.