15 Pink Christmas Nail Trends To Try This Year
Christmas doesn’t always have to be about traditional reds and greens. This year, pink is having a major moment in holiday nail art, and honestly, it’s about time! Whether you’re someone who loves soft pastels or bold magentas, there’s a pink Christmas nail look that’ll make your holiday season extra special.

Rose Gold Glitter Fade
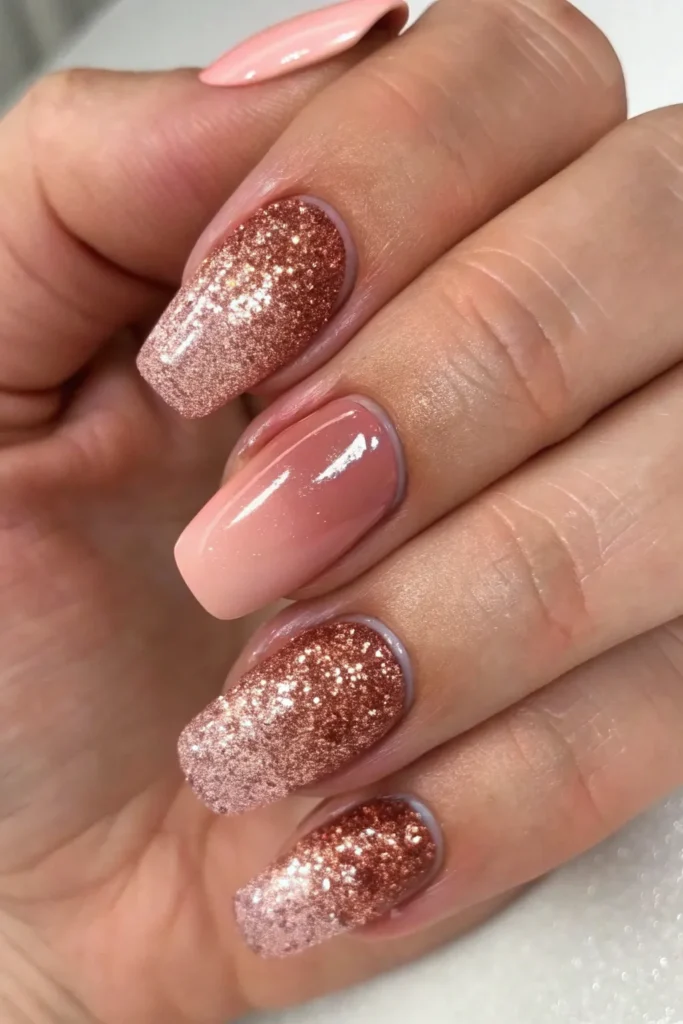
This trend combines the warmth of rose gold with subtle pink undertones for a sophisticated holiday look. Start with a nude pink base and gradually blend rose gold glitter from the tips toward the middle of your nails.
The key to nailing this look is using a makeup sponge to dab the glitter polish rather than brushing it on. This creates that seamless fade effect that looks professionally done. Make sure to seal everything with a high-quality top coat to prevent the glitter from chipping during all those holiday parties.
Pink and White Candy Cane Stripes
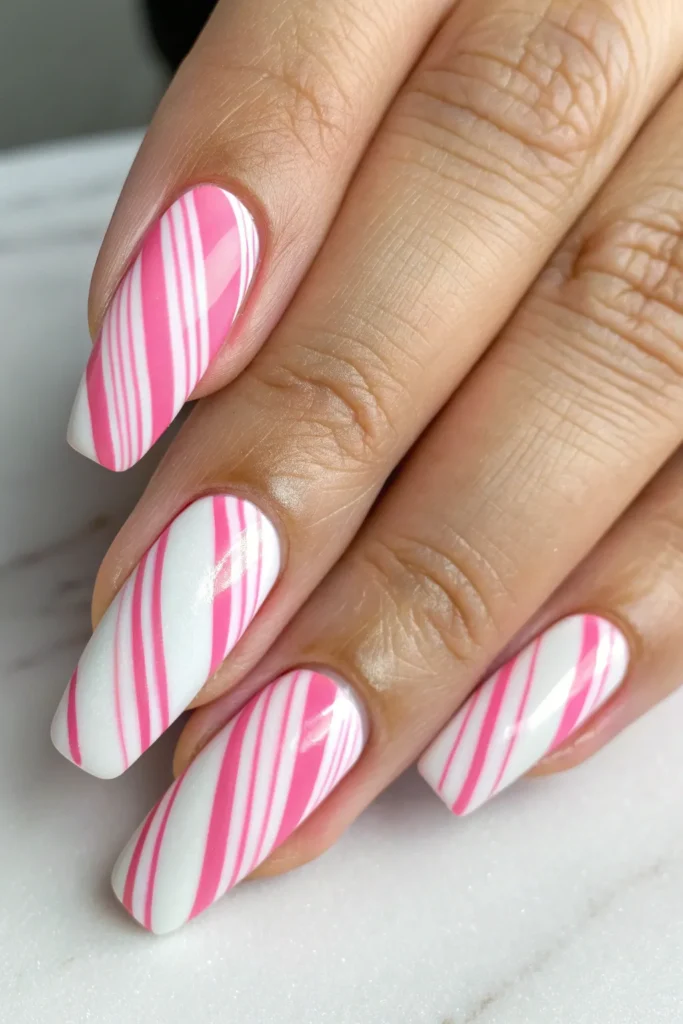
Who says candy canes have to be red? Pink and white stripes give this classic Christmas design a fresh, playful twist that’s perfect for anyone who wants something festive but different.
Use thin nail art brushes or striping tape to create clean, even lines. Start with a white base coat and add thin pink stripes at an angle. If you’re not confident with freehand painting, nail vinyl strips are your best friend – they’ll give you those crisp lines every time. This design works especially well on longer nails where you have more space to show off the pattern.
Dusty Rose with Gold Snowflakes
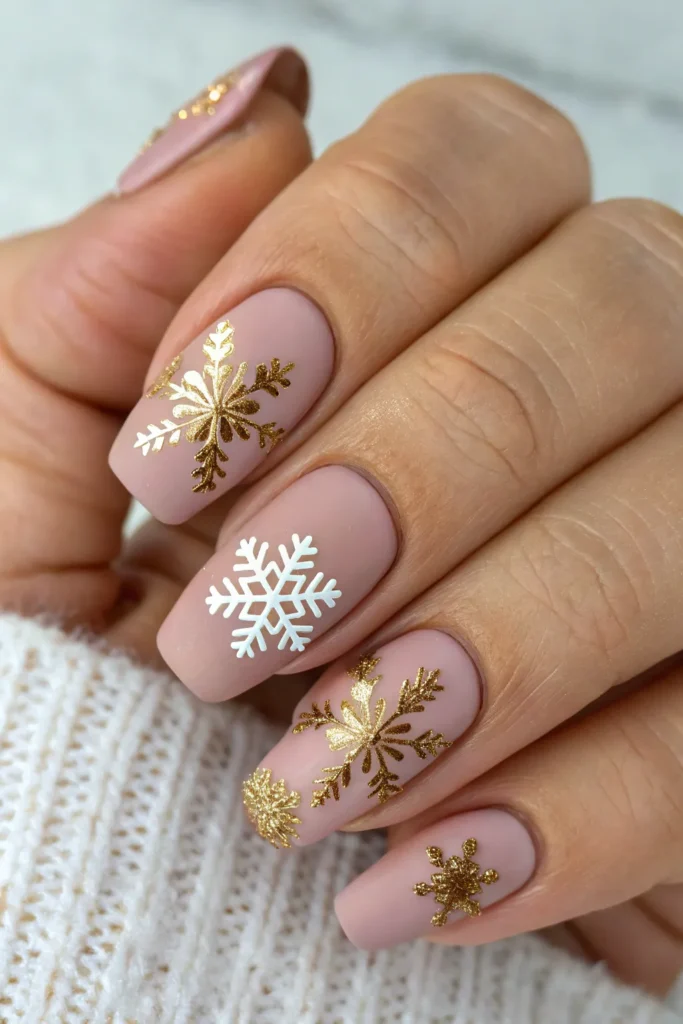
Dusty rose is having a huge moment right now, and when you add delicate gold snowflakes, it becomes the perfect winter wonderland manicure. This muted pink shade is sophisticated enough for work but festive enough for holiday gatherings.
You can create the snowflakes using a fine detail brush and white or gold nail polish, or save time with snowflake nail decals. The trick is to vary the sizes and placement of your snowflakes – some large, some small, and don’t make them too perfect. Real snowflakes are unique, and your nail art should be too.
Hot Pink French Tips
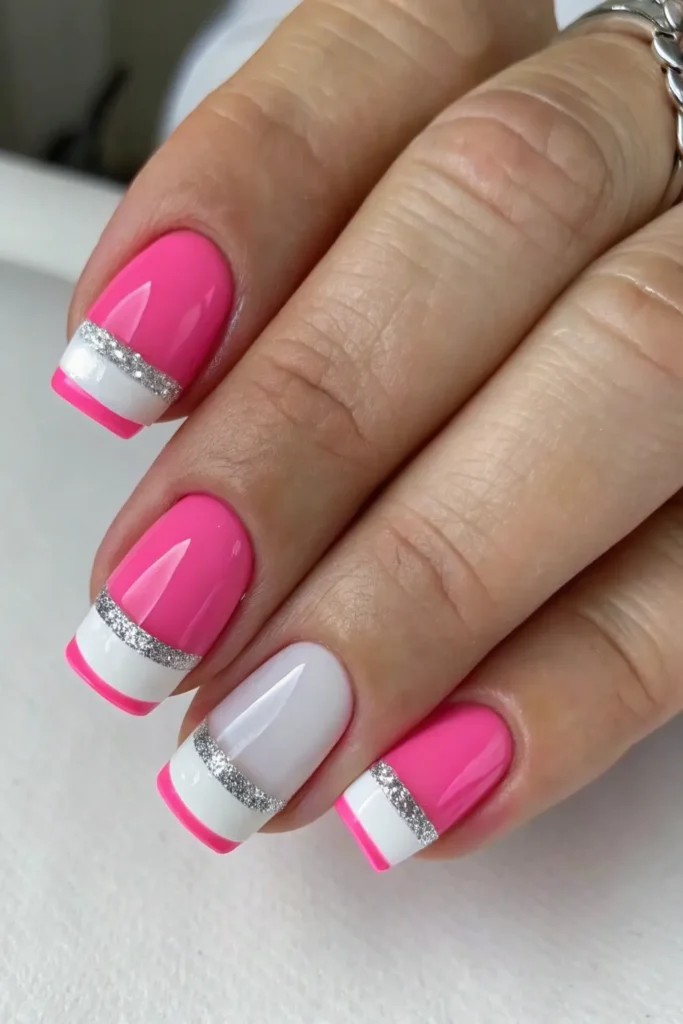
Give the classic French manicure a bold holiday makeover with hot pink tips instead of white. This look is modern, eye-catching, and surprisingly versatile with different holiday outfits.
For the cleanest application, use French tip guides or tape to section off the tip area. Apply your hot pink polish in thin layers rather than trying to get full coverage in one coat. This prevents bubbling and gives you a smoother finish. Consider adding a thin line of silver glitter right at the edge where the pink meets your natural nail for extra sparkle.
Pink Chrome with Holographic Accents
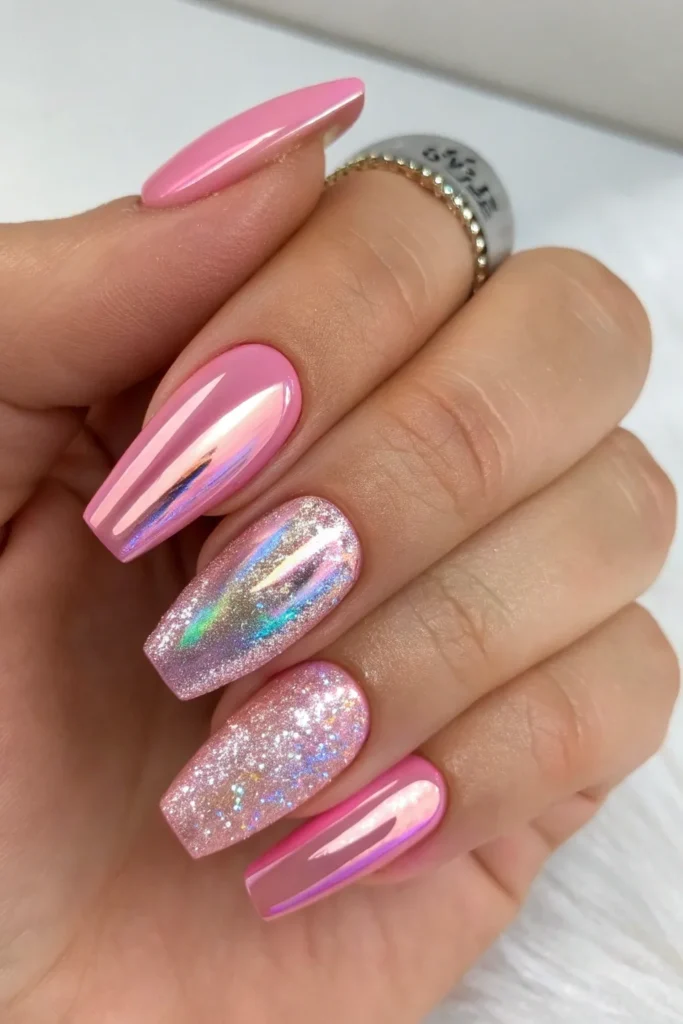
Chrome nails are still trending strong, and pink chrome gives you that futuristic metallic finish with a feminine twist. Add some holographic powder or polish to one or two accent nails for extra dimension.
To achieve the chrome effect, you’ll need a special chrome powder applied over a black or dark base coat, then buffed to a high shine. The holographic accents work best when applied with a sponge in a dabbing motion. This creates texture and catches light beautifully, making your nails look like they’re covered in fairy dust.
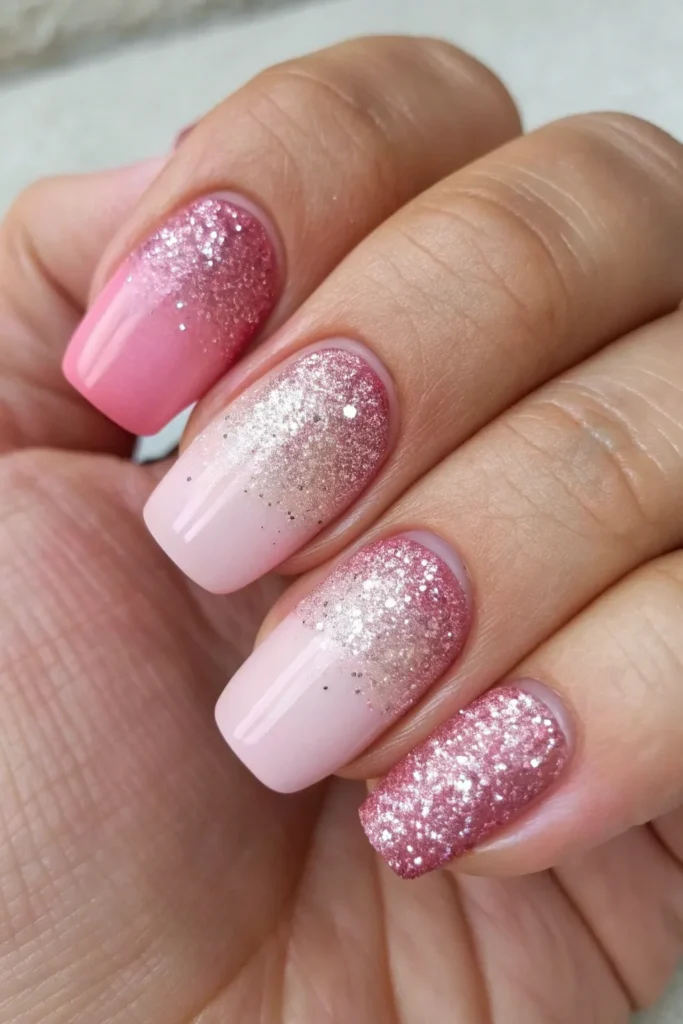
Soft Pink with Silver Glitter Ombre
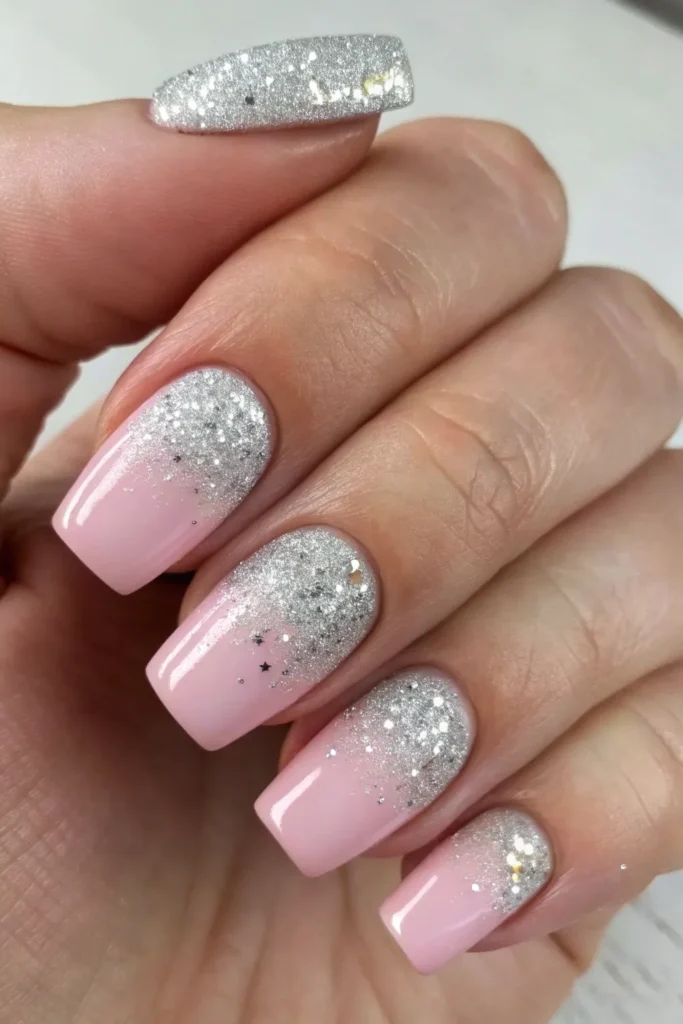
This elegant design starts with a barely-there pink base and gradually builds up silver glitter toward the tips. It’s subtle enough for conservative workplaces but still gives you that holiday sparkle.
Use a cosmetic sponge to blend the glitter, starting light at the base and building up density toward the tips. Work quickly while the base coat is still slightly tacky for the best adherence. This technique also works beautifully with different pink shades – try it with coral pink or even a deeper mauve.
Pink Plaid Holiday Pattern
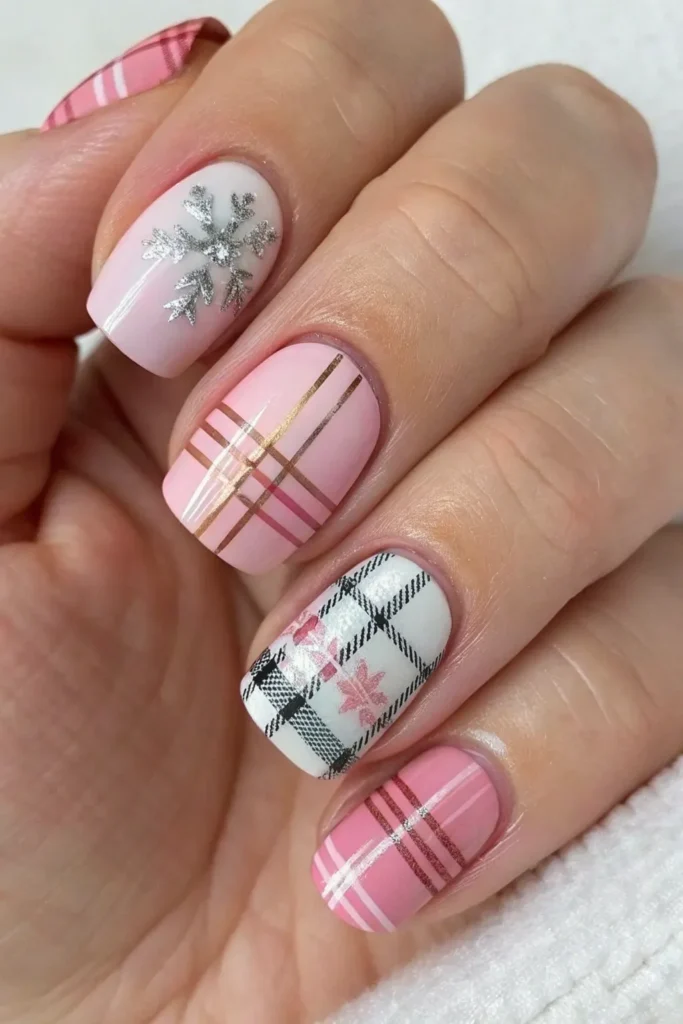
Bring cozy winter vibes to your nails with a pink plaid design that mimics your favorite flannel shirt. Use different shades of pink along with white and a touch of silver or gold for the intersecting lines.
Start with your lightest pink as the base color. Use a thin brush to create the grid pattern with your darker colors, then add the intersecting lines. Plaid might look complicated, but it’s really just overlapping stripes. Practice the pattern on paper first if you’re nervous – once you get the hang of it, it’s actually quite relaxing to paint.
Millennial Pink with White Dots
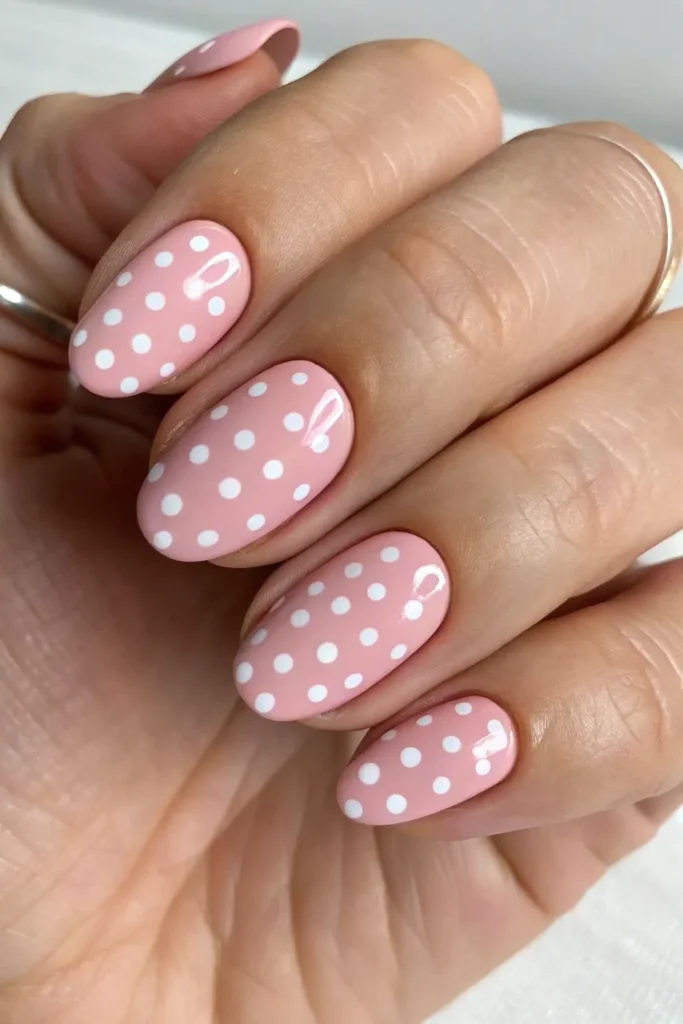
Millennial pink – that perfect dusty rose shade – paired with crisp white polka dots creates a retro-inspired look that’s both nostalgic and totally current. It’s like Christmas morning in the 1950s, but make it modern.
For perfectly round dots, use a dotting tool or even the end of a bobby pin dipped in white polish. Start with larger dots and fill in with smaller ones for visual interest. The key is to not overthink the placement – random spacing actually looks more natural and charming than a perfectly uniform pattern.
Pink Ombré Christmas Trees
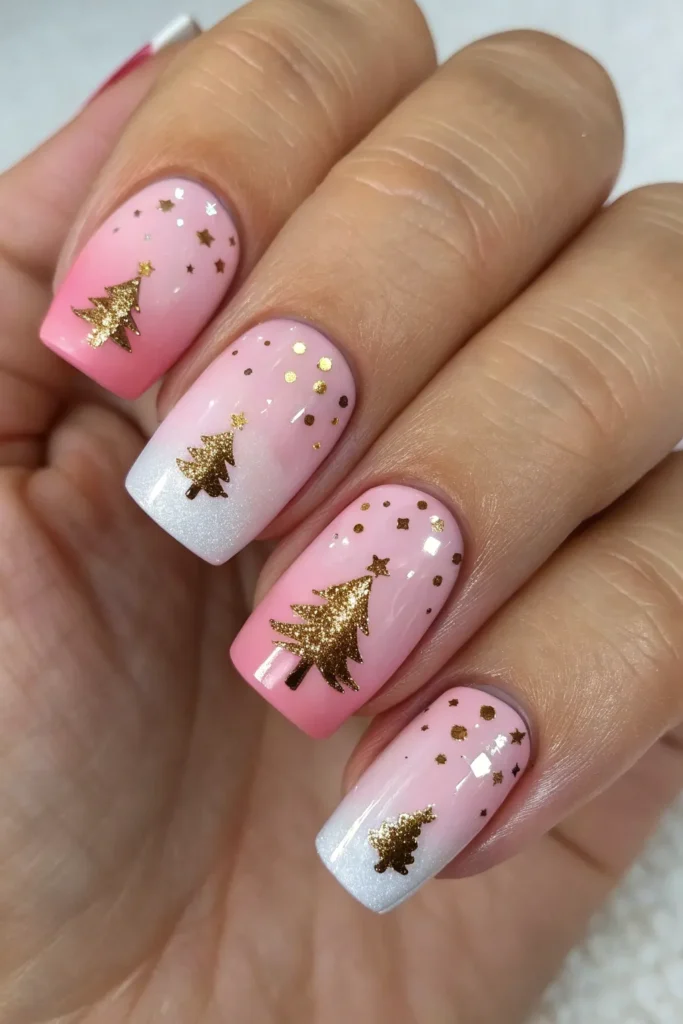
Create tiny Christmas trees using different shades of pink in an ombré effect. Start with the lightest pink at the top of each tree and gradually get darker toward the base.
Use a small detail brush to paint triangular tree shapes, then blend the colors while they’re still wet using a clean brush. Add tiny gold or silver dots as ornaments and a small brown rectangle for the trunk. This design works best on longer nails where you have room to create the gradient effect within each tree.
Blush Pink with Rose Gold Foil
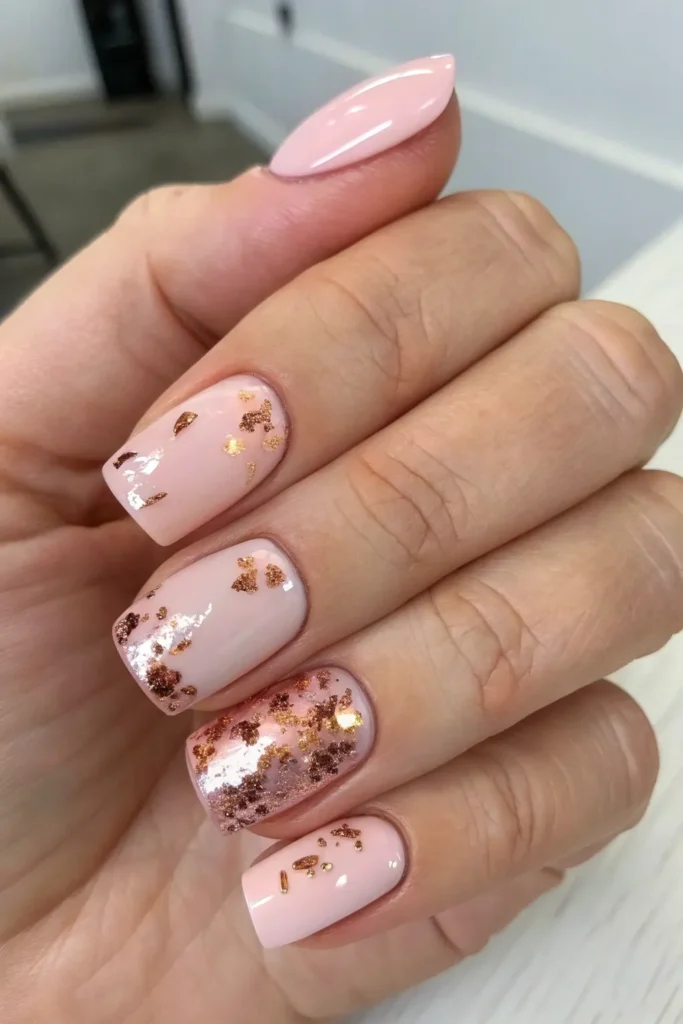
Delicate blush pink nails get an instant upgrade with strategically placed rose gold foil pieces. This combination is romantic, elegant, and catches light beautifully during those candlelit holiday dinners.
Apply the foil while your base coat is still slightly tacky for the best adhesion. Don’t cover the entire nail – instead, place small pieces randomly across each nail for a more organic, expensive-looking finish. Seal everything with a glossy top coat to smooth out the edges and add extra shine.
Pink and Gold Geometric Patterns
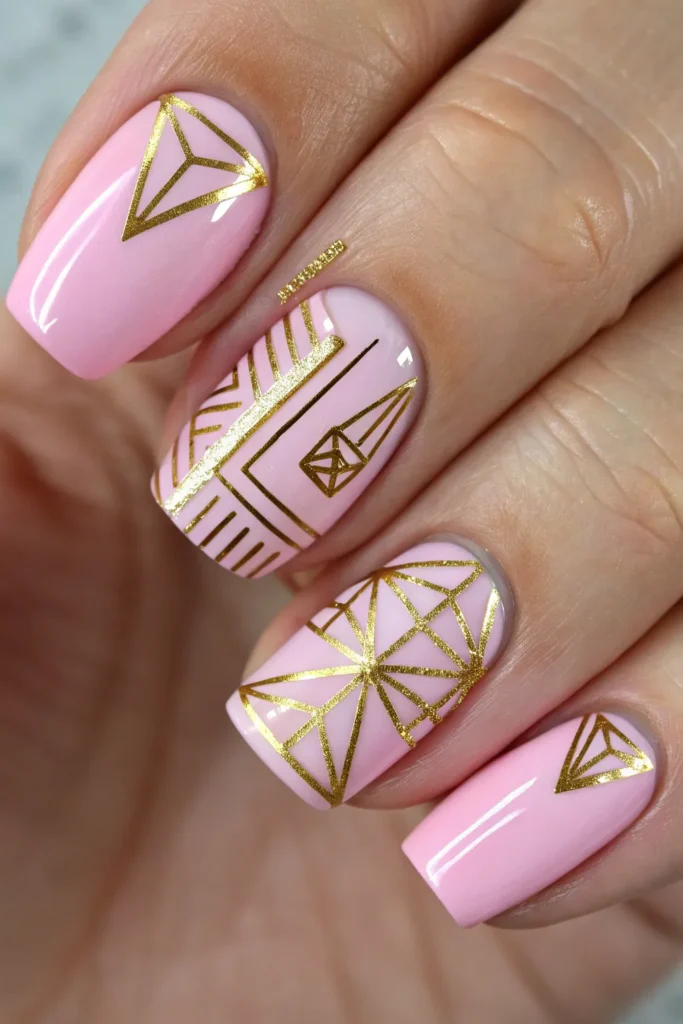
Sharp geometric shapes in pink and gold create a modern, artistic approach to holiday nails. Think triangles, diamonds, and abstract shapes that look like they belong in a contemporary art gallery.
Use nail tape to create clean lines and sharp angles. Apply your pink base first, then use the tape to section off areas for gold accents. Remove the tape while the polish is still slightly wet to prevent peeling. This trend works especially well if you vary the patterns on each nail rather than making them all identical.
Coral Pink with Green Holly Accents
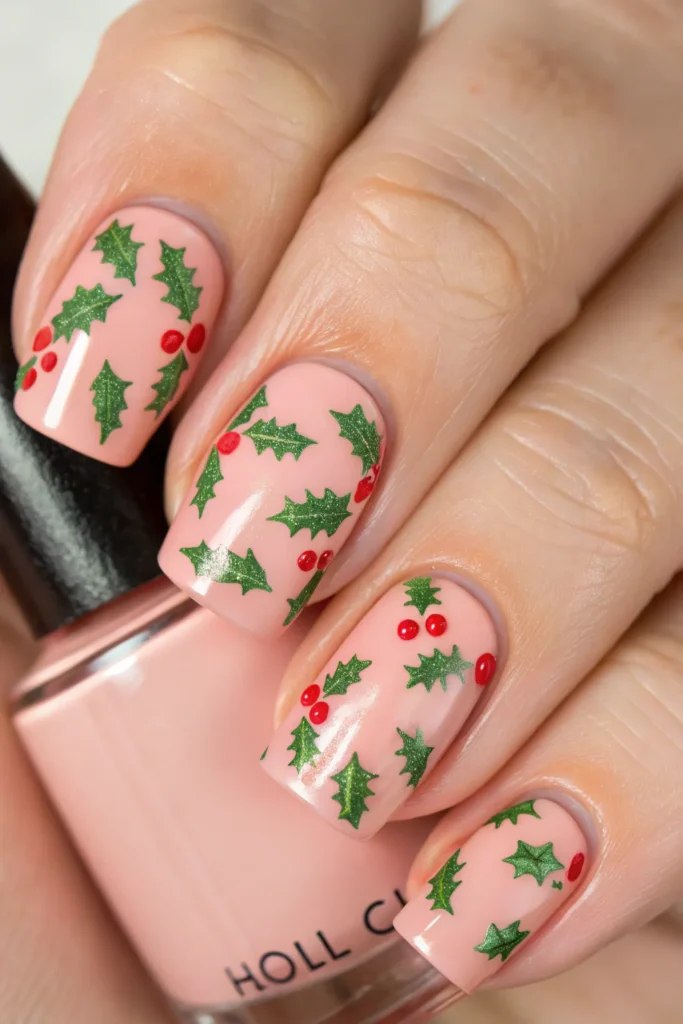
Add a subtle nod to traditional Christmas colors by pairing coral pink with tiny green holly leaves and red berries. It’s festive without being overwhelming, and the coral adds warmth to your overall look.
Paint small holly leaves using a thin brush and forest green polish, then add tiny red dots for berries using a dotting tool. The trick is to keep the holly designs small and delicate so they complement rather than compete with the beautiful coral base. Position them near the cuticle area or off to one side for the most natural look.
Mauve Pink with Silver Snowflake Stamping
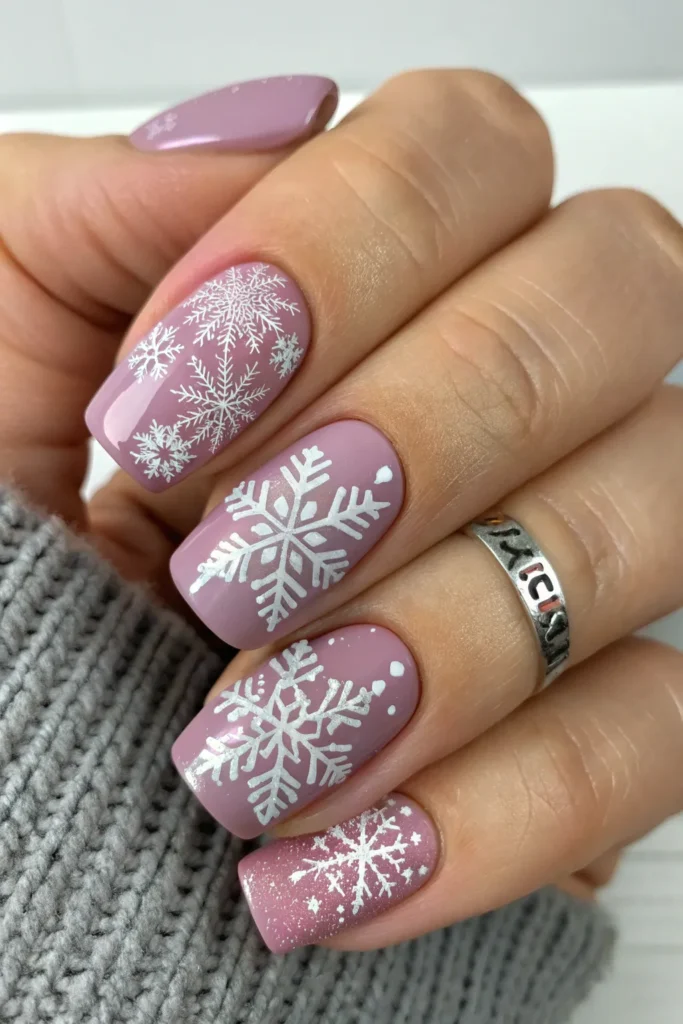
Mauve pink provides the perfect backdrop for intricate silver snowflake designs created with nail stamping plates. This technique lets you achieve detailed, professional-looking patterns without needing steady hands for freehand art.
Invest in a good stamping kit with clear, detailed snowflake patterns. The key to successful stamping is working quickly and using polish that’s not too thick or too thin. Practice on a piece of paper first to get your technique down. Each snowflake will come out slightly different, which actually adds to the natural, winter wonderland effect.
Pink Glitter Gradient with Matte Top Coat
Start with any shade of pink and create a glitter gradient from tips to mid-nail, then finish with a matte top coat for an unexpected texture combination. The matte finish makes the glitter look more sophisticated and less “little girl.”
Build up your glitter gradually using a makeup sponge, concentrating the most sparkle at the tips. Once everything is completely dry, apply your matte top coat carefully – if you go over the same area twice, you might accidentally create glossy streaks. This contrast between sparkle and matte creates visual interest that photographs beautifully.
Baby Pink with Iridescent Flakes
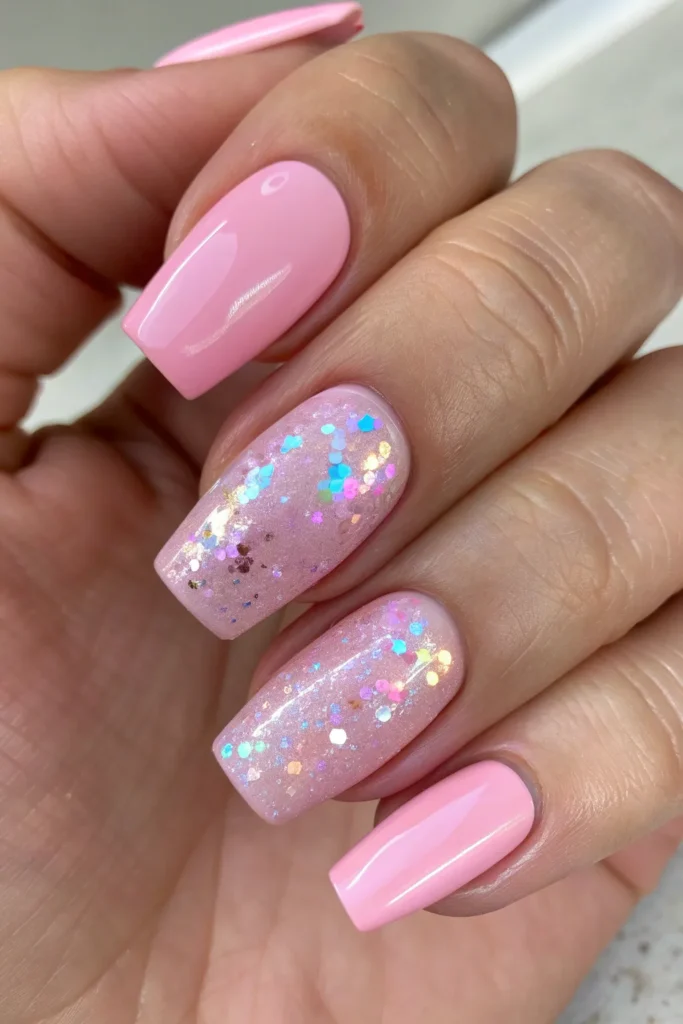
Finish strong with the softest baby pink base topped with iridescent flakes that shift color in different lighting. It’s like having tiny pieces of rainbow trapped in your manicure, and it’s absolutely magical for the holiday season.
Apply the iridescent flakes while your base color is still tacky, then gently press them into the polish with a silicone tool or your finger. Don’t try to cover every inch – leaving some areas of solid pink creates a more elegant, intentional look. Finish with a glossy top coat to lock everything in place and enhance the color-shifting effect.
Pink Christmas nails prove that holiday manicures don’t have to stick to the traditional color palette to be festive and beautiful. Whether you go for soft and romantic or bold and modern, these pink nail trends will keep your fingertips looking fabulous all season long. The best part? Most of these designs are totally doable at home with a little patience and practice. So grab your favorite pink polish and get ready to sleigh the holiday nail game!