Easy Easter Nail Art Designs For Beginners
Hop into the season with the cutest nails around! Whether you’re planning an Easter brunch, a spring picnic, or just want something fresh and festive, these beginner-friendly Easter nail designs are perfect for adding a pop of pastel and playfulness to your look.

From simple polka dots to pastel rainbows, you don’t need fancy tools or salon skills — just a few pretty polishes and a little creativity. Let’s dive into 19 easy Easter nail art ideas that anyone can try at home!
Photo credit can be found via the Instagram link beneath each image.
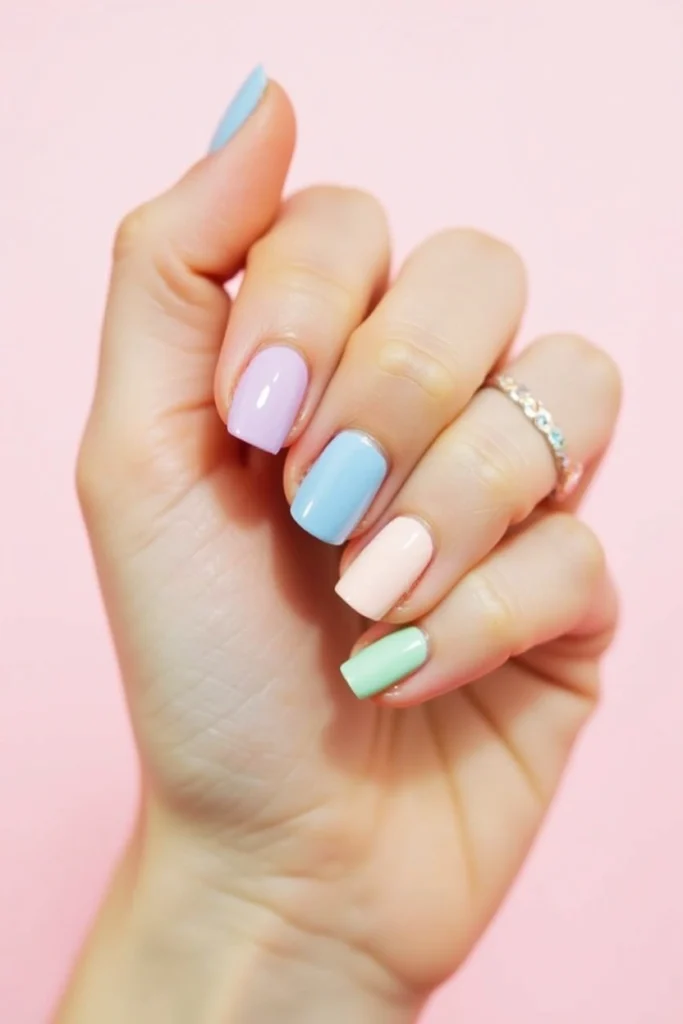
Simple Pastel Nails
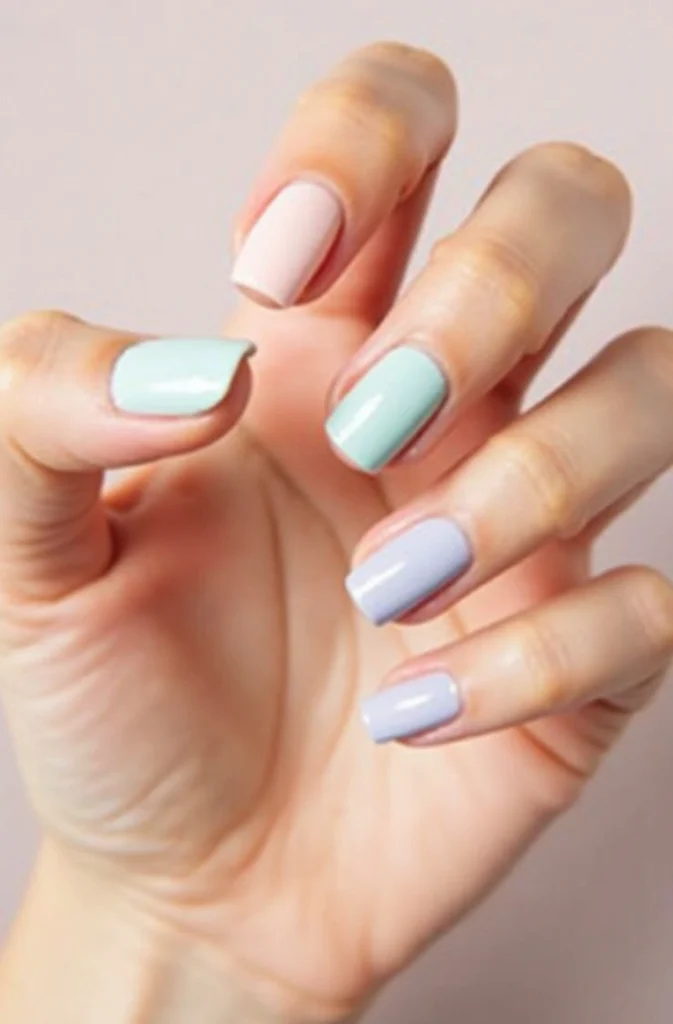
The easiest place to start? Just painting your nails in soft, pretty pastel shades. Think light pink, baby blue, mint green, soft yellow, and lavender — all the classic Easter colors.
You don’t need any design or detail here. Just file your nails, apply a base coat, then do two coats of your favorite pastel polish. Top it off with a clear glossy top coat, and you’re good to go. It’s clean, cute, and totally in the Easter spirit.
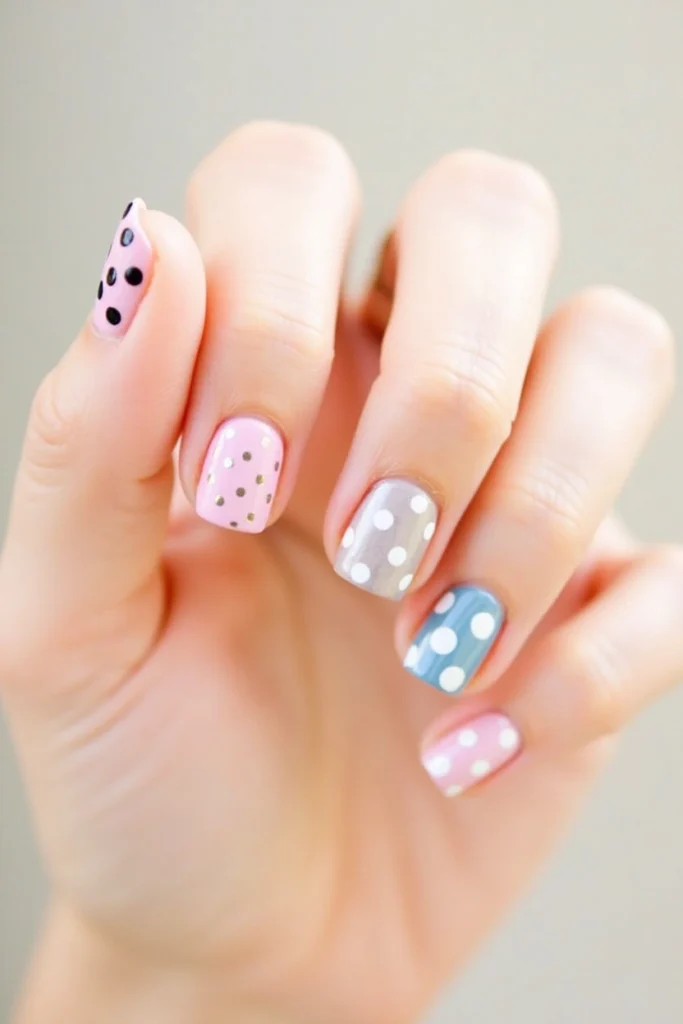
Polka Dot Nails with a Toothpick
You don’t need a dotting tool to create cute polka dots. Just use a toothpick or the tip of a bobby pin.
Start by painting your nails with a solid pastel base — any shade you love. Once it’s dry, dip the tip of the toothpick in white polish and gently dab dots across your nails. You can go random or neat rows, and use different pastel colors if you want to switch it up. Let it dry, then seal it with a top coat.
Two-Tone Split Nails
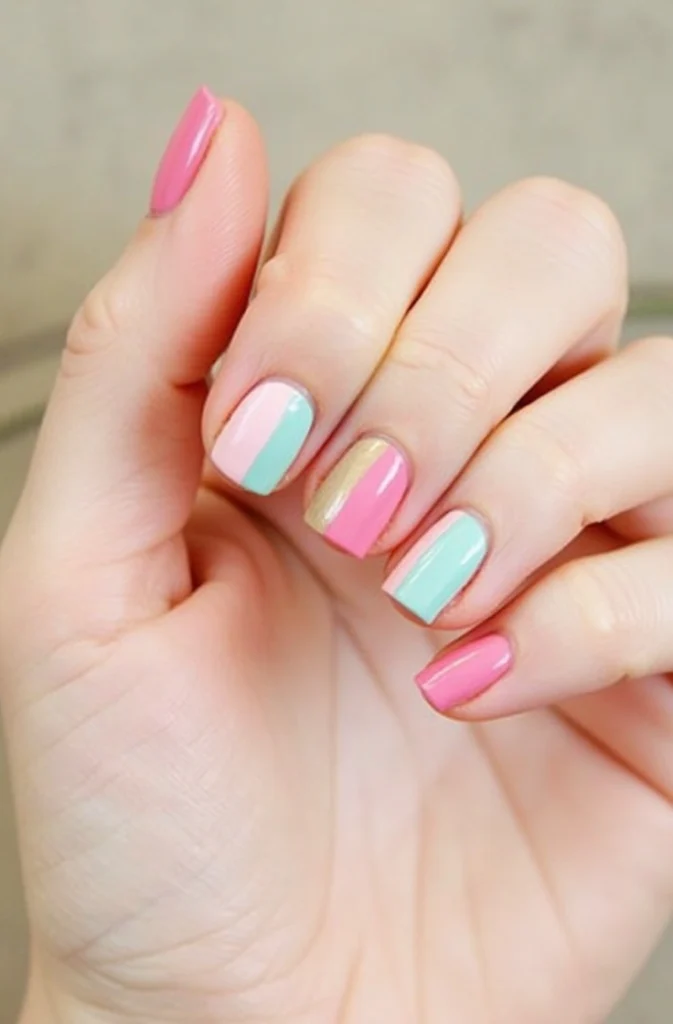
This one looks fun but takes zero effort. You’re just using two colors on each nail — half and half.
Paint your entire nail one pastel color, let it dry, then use another shade to paint the top half or bottom half. You don’t need straight lines — it looks cute even if it’s slightly uneven. If you want a cleaner line, a piece of tape helps. Use a top coat to blend everything together.
Easy Flower Dots
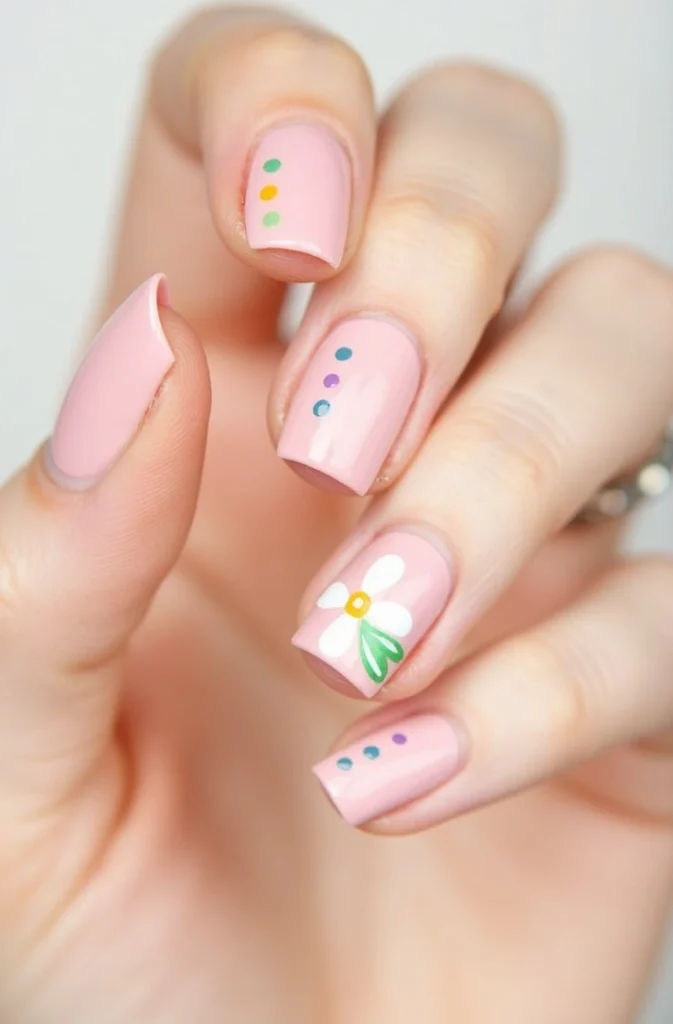
Tiny flowers with dots are beginner-friendly and adorable.
Paint your nails with a light base color — white or baby pink works great. Then, using a toothpick or bobby pin, make five little dots in a circle (any pastel shade) and add a different-colored dot in the center. You don’t even need to make one on every nail — just a few as accents looks lovely too.
Skittle Pastel Nails
No design at all — just paint each nail a different pastel shade. That’s it!
Pick five Eastery colors (like soft green, pale blue, lilac, light pink, and soft peach). Paint one shade per nail. It’s cute, cheerful, and takes just a few minutes. You don’t need any tools, just your favorite colors and a little top coat at the end.
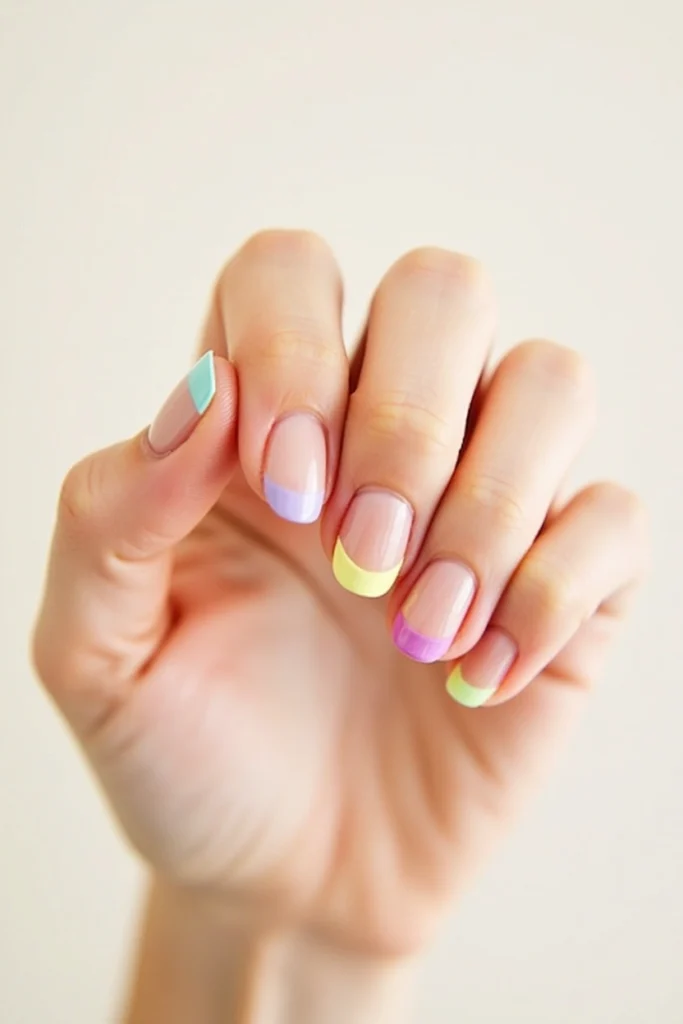
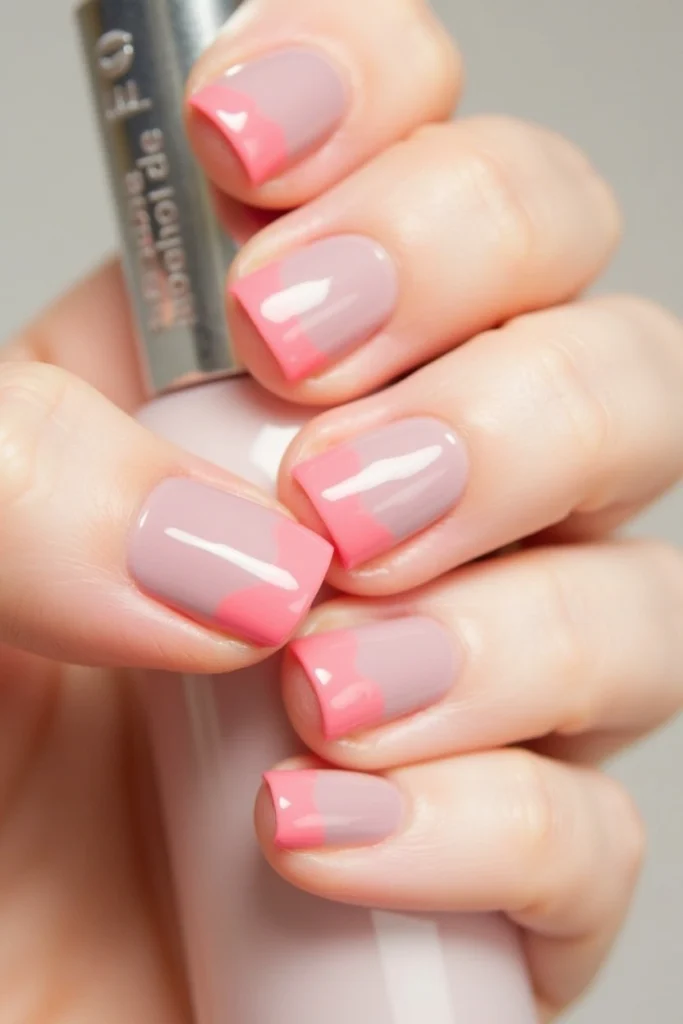
French Tips with a Twist
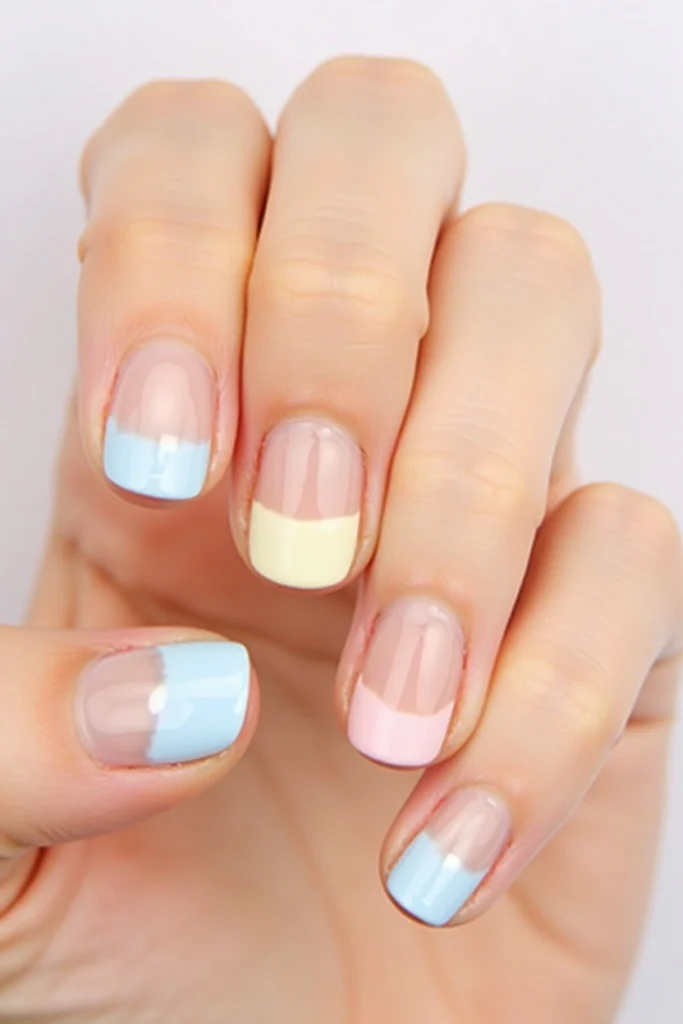
Instead of doing white tips like the classic French manicure, try using pastel colors for the tips.
Start with a nude or clear base, and then swipe just the tip of your nail with a pastel polish — like yellow, pink, or blue. Don’t worry if the tip isn’t perfect — it still looks pretty and fun. A little practice makes it easier each time.
Little Heart Dots
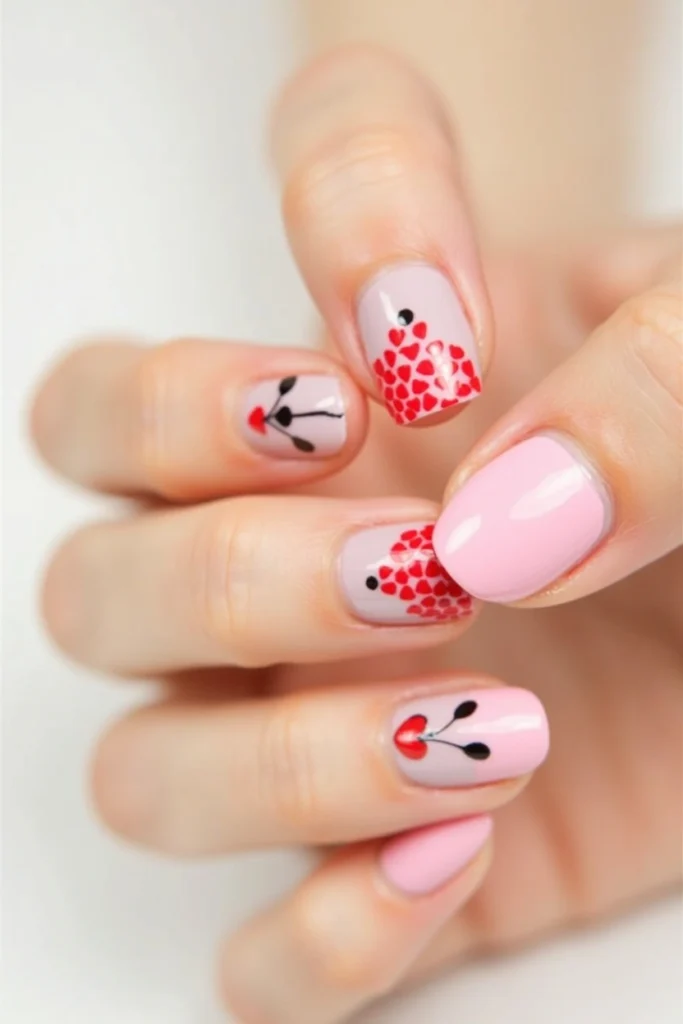
This is a super cute one that only needs a dotting tool or toothpick.
Paint your nails a solid pastel shade. Then, using a bobby pin or toothpick, add two dots close together and gently drag the polish downward into a point to make a little heart. Do one per nail, or just on your ring finger as a subtle accent.
Dot Accent Nail
If doing full dotted nails feels like too much, just do one dotted accent nail.
Paint all your nails in a solid pastel shade. Then on one nail (usually the ring finger), add white dots using a bobby pin or the head of a pin. It’s a simple detail that makes your mani look like you spent more time on it than you actually did.
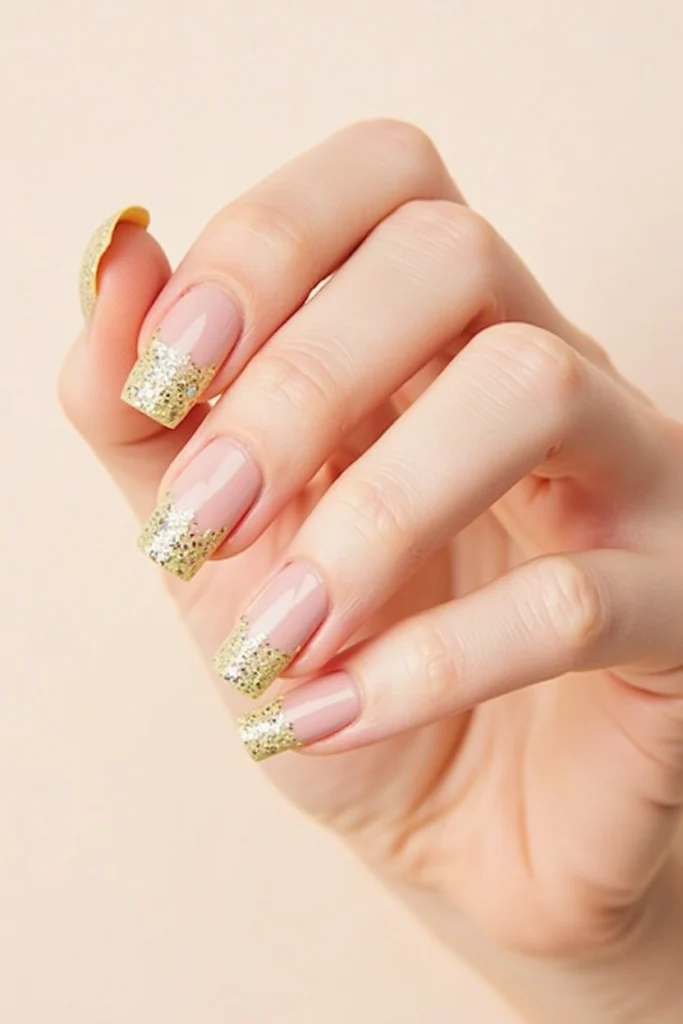
Glitter Over Pastel
Add a little sparkle without doing any real design work.
Once your pastel base is dry, apply a thin coat of clear glitter polish over it. You can go for chunky glitter, fine shimmer, or just glitter on the tips. It’s a fun and easy way to make your nails feel a little more festive for Easter, especially if you’re going to brunch or a spring get-together.
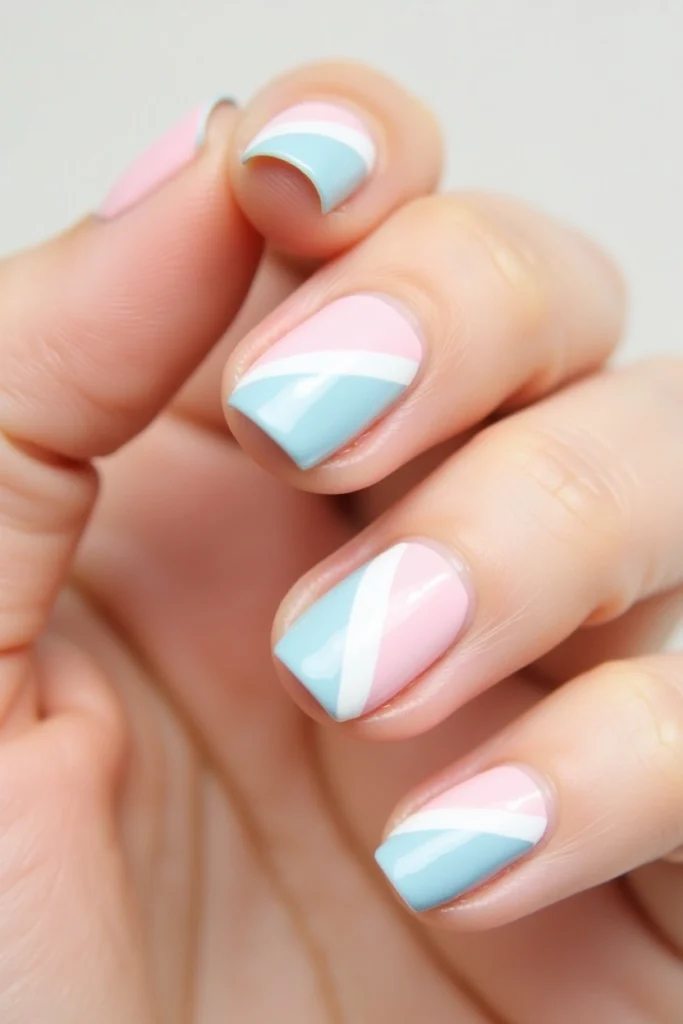
Diagonal Two-Color Nails
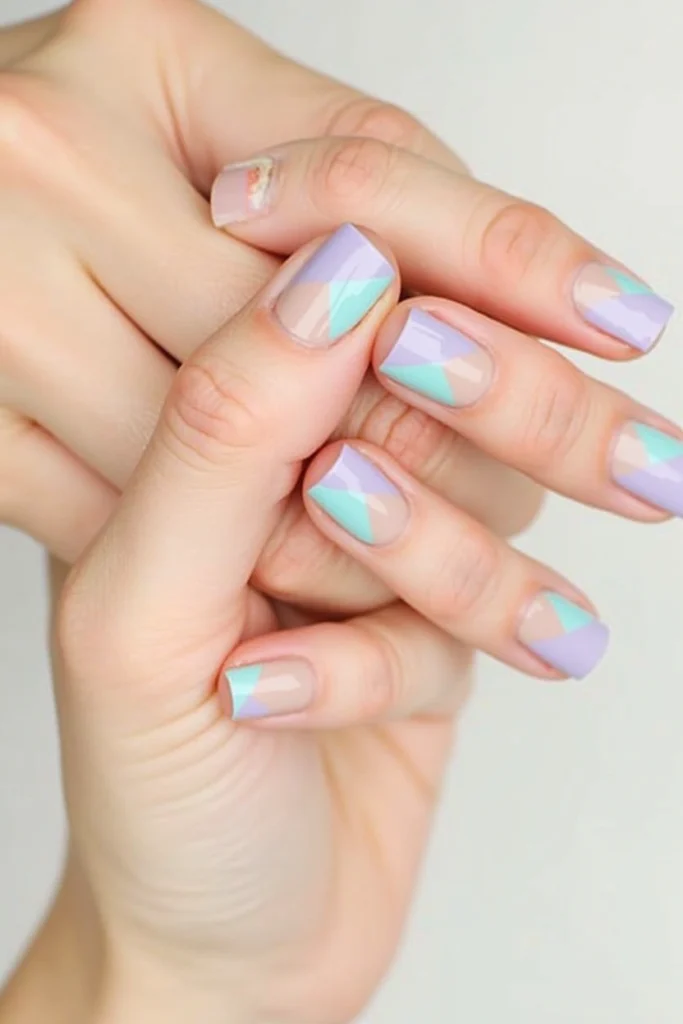
Instead of painting straight across, try dividing your nail diagonally between two colors.
Start with your base shade (maybe lavender). Once dry, take another pastel color (like mint green) and paint across the nail on a diagonal. You can use tape for a clean line, or just freehand it — it honestly looks cute either way. It’s a fun look and super easy once you try it on one nail first.
Pastel Rainbow Tips
Instead of a full pastel manicure, paint just the tips of your nails in a rainbow of Easter shades — think mint, baby pink, lilac, and soft yellow.
To keep it neat, use a piece of tape across each nail to block off the bottom half. Paint the top in your color of choice, wait for it to dry, then peel off the tape. This French-tip-style look is super easy but still festive and playful.
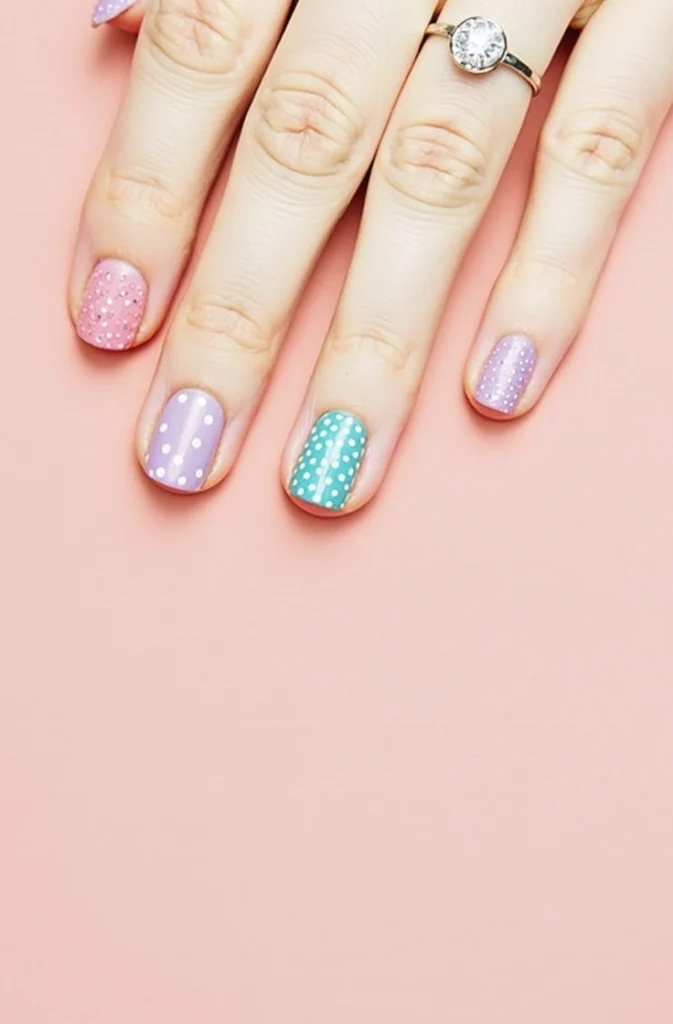
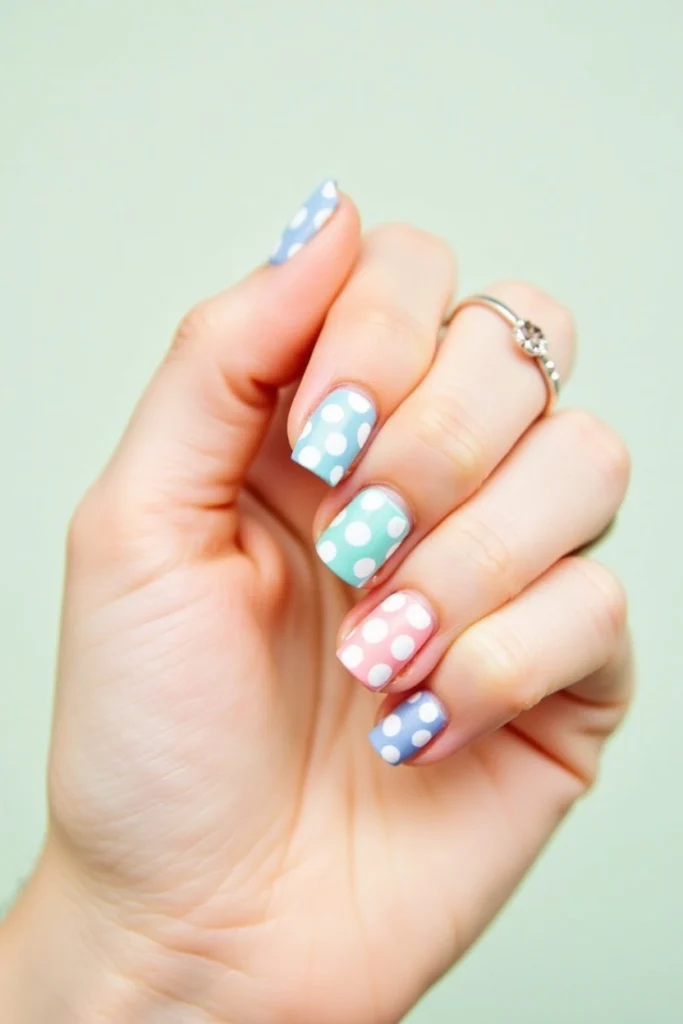
Dotty Pastel Nails
No nail art tools? No problem.
Paint your nails a solid pastel color (like lavender). Once dry, dip a toothpick, dotting tool, or the end of a bobby pin into a contrasting pastel shade and make evenly spaced dots across each nail. It’s a fun, confetti-like pattern that takes no real skill — but looks super cute.
Soft Color Fade
Pick two pastel shades — say, pink and peach — and apply them side by side on a makeup sponge. Gently dab the sponge onto your nail to blend the colors in a soft, gradient effect.
The blending doesn’t have to be perfect — that’s what makes it great for beginners. Add a glossy top coat to smooth out the texture and finish the look.
Matte Pastels

If you want something classy and effortless, go for simple matte pastels.
Paint each nail a different pastel shade, let them dry, and top with a matte top coat. It completely changes the vibe — soft, velvety, and perfect for Easter without needing any designs at all.
Two-Tone Diagonal
Use two complementary Easter colors on each nail in a diagonal split.
First, paint your whole nail in one pastel shade and let it dry. Then, use tape or freehand a diagonal swipe of a second pastel polish over the top. It’s a super sleek look with minimal effort — just make sure the first layer is completely dry before adding the second color.
Polka Dot Accent Nail
Stick to solid color nails and just add polka dots on one or two fingers.
After applying your base pastel color, use a toothpick or the back of a makeup brush to make polka dots in a lighter or contrasting shade. It’s the easiest way to create a cute accent without needing a steady hand or advanced tools.
Negative Space Stripes
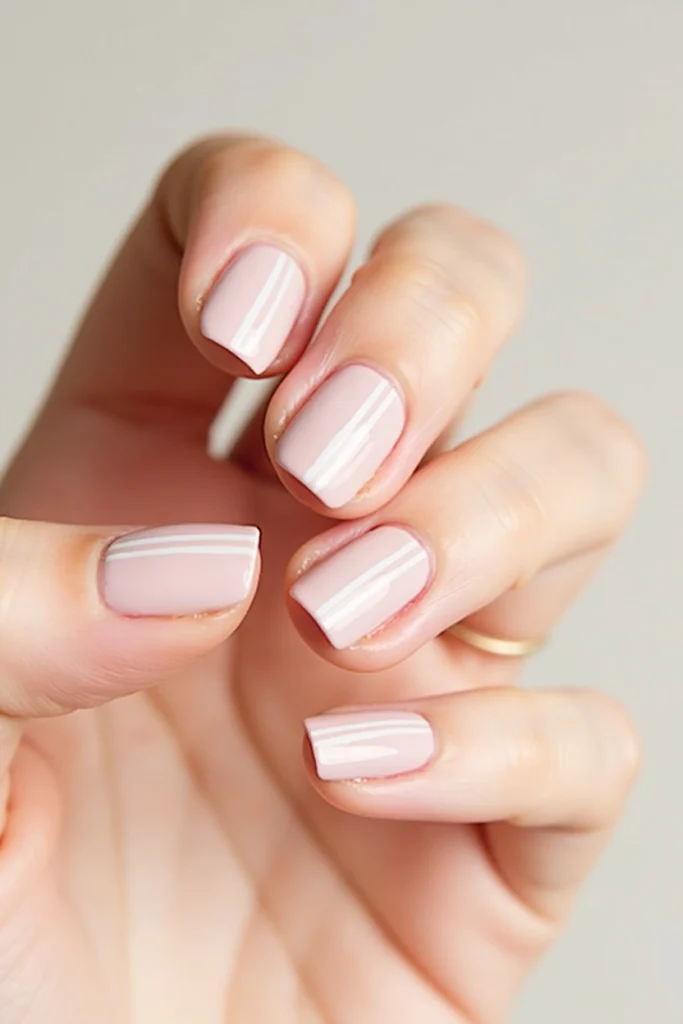
Instead of painting the whole nail, leave a little clear space for a modern effect.
Use striping tape or regular tape to mask off thin lines before painting your pastel polish. Once dry, peel off the tape and seal with top coat. You’ll get clean, minimalist lines that look salon-level but are beginner-friendly with just tape.
Glitter Tip Fade
Paint your nails with a soft base color like pale yellow or pink.
Then apply a small amount of glitter polish starting at the tip of your nail, and gently dab it down toward the center to create a subtle fade. No precision needed — the sparkle hides imperfections and gives it a fun, festive feel for Easter.
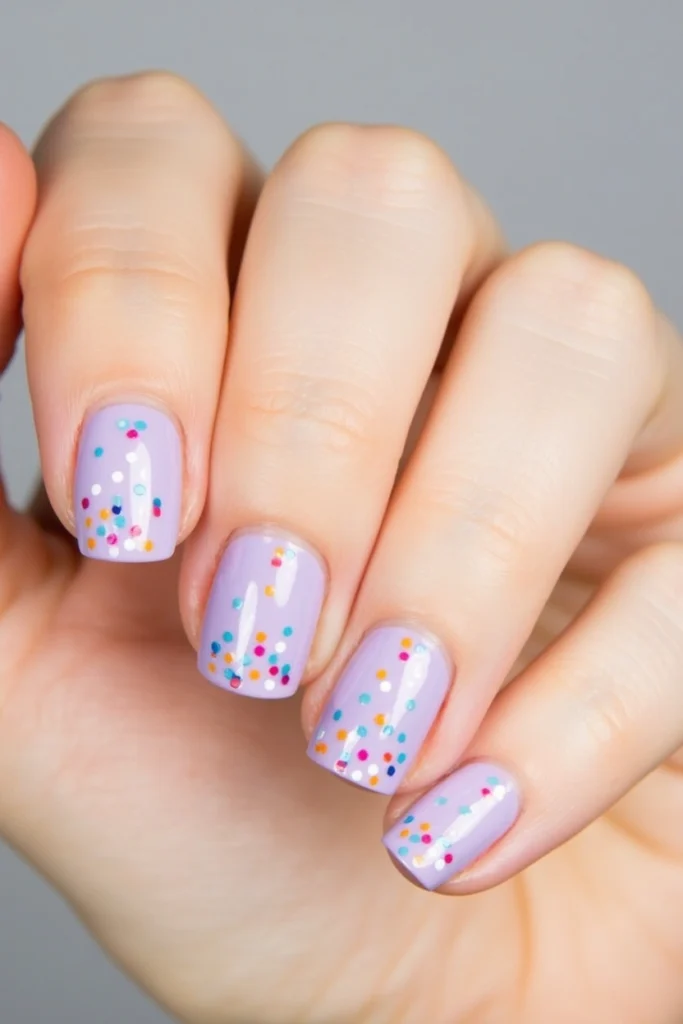
White Base with Colorful Dots
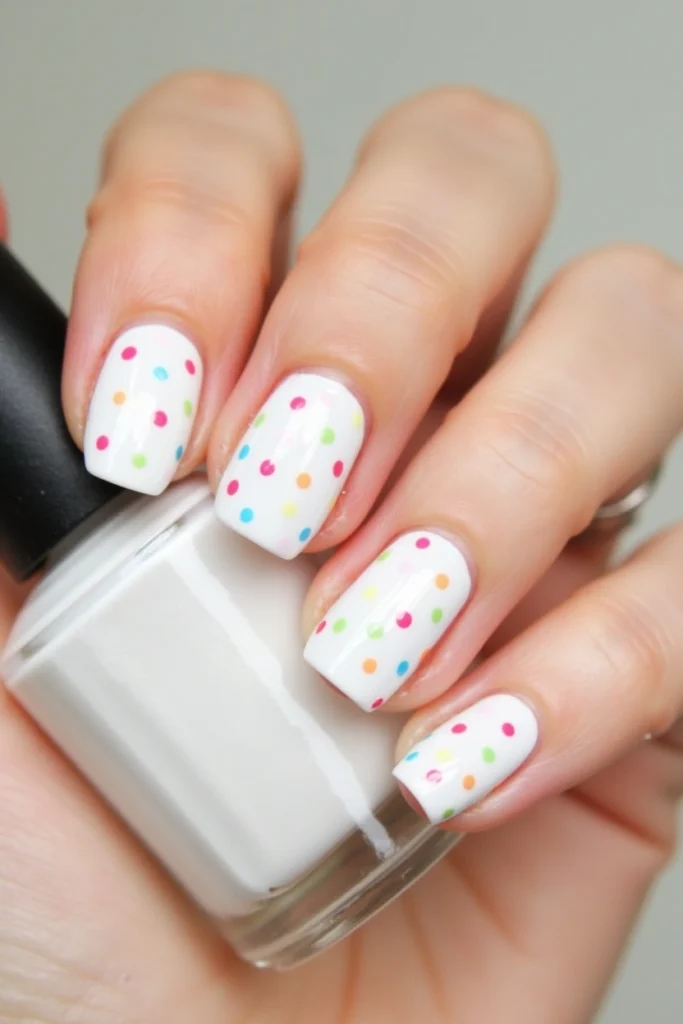
Start with a clean white polish base. Then grab a few pastel polishes and use a dotting tool (or toothpick) to make tiny dots randomly scattered across your nails.
It gives a “sprinkle” or “confetti egg” vibe and is perfect for Easter without being difficult at all. You don’t need perfect placement — the randomness adds to the charm.
Easter nails don’t need to be complicated to be cute. All of these styles can be done at home with a few basic tools and your favorite pastel polishes. Whether you’re into soft gradients, polka dots, or playful color combos, you can totally pull these off — no nail art experience required. So grab your favorite spring colors and get creative — your Easter nails are about to be the cutest accessory this season.