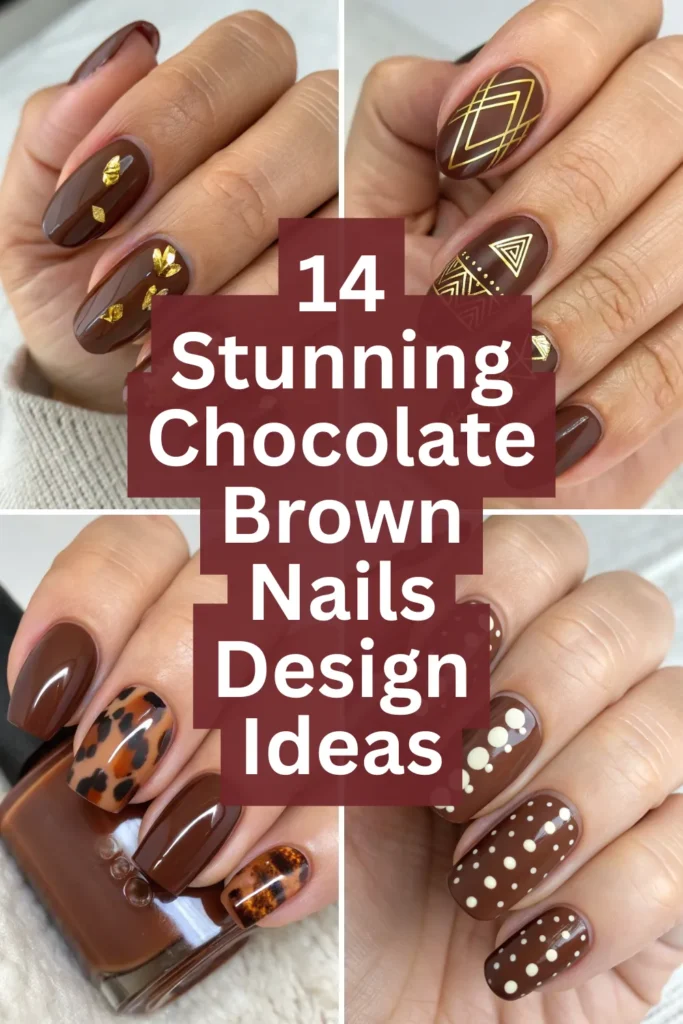
14 Stunning Chocolate Brown Nails Design Ideas
Chocolate brown nails are having such a major moment right now, and honestly, it’s about time! This rich, warm shade is incredibly sophisticated and works beautifully year-round.
Whether you’re going for cozy autumn vibes or chic winter elegance, chocolate brown is that perfect neutral that somehow manages to feel both understated and luxurious at the same time.
Rich Chocolate Brown with Gold Foil Accents
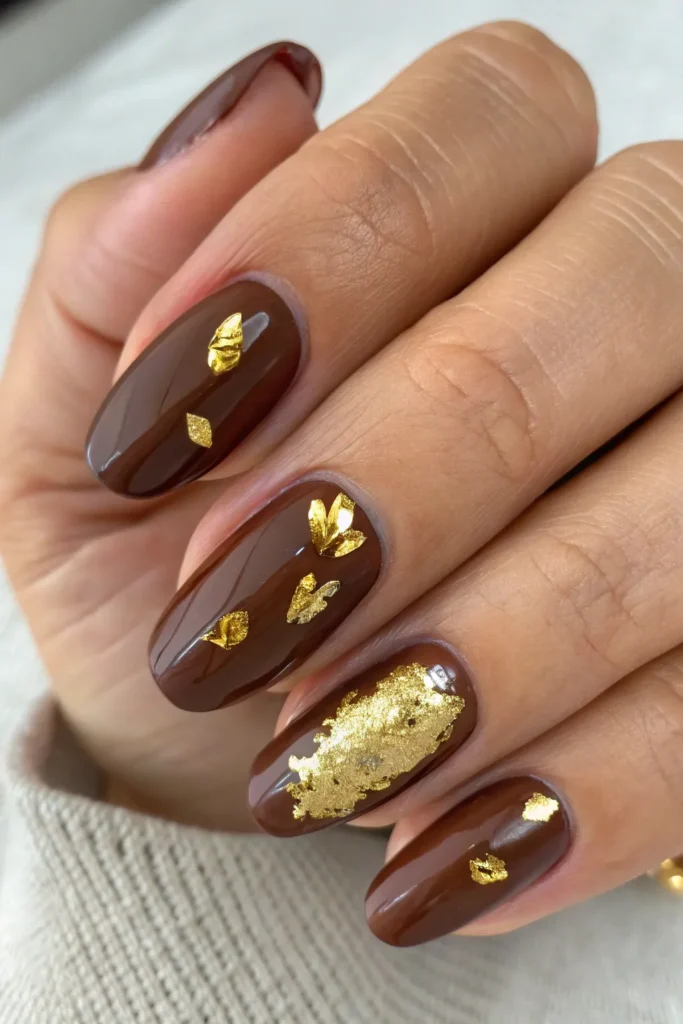
Pure chocolate brown paired with delicate gold foil creates an incredibly luxurious look that’s perfect for special occasions. The warm gold complements the brown beautifully and adds just the right amount of glamour without being overwhelming.
Apply your chocolate brown base in thin, even coats for the smoothest finish. Once completely dry, use nail glue or a tacky base coat to adhere small pieces of gold foil randomly across each nail. Don’t try to cover the entire surface – strategic placement looks more expensive and intentional.
The key to working with gold foil is handling it gently since it’s quite delicate. Use tweezers or a small brush to position the pieces, and always seal everything with a high-quality top coat to prevent the foil from lifting. This combination photographs beautifully and catches light throughout the day, making your nails look like they cost way more than they actually did.
Chocolate Brown French Tips with Nude Base
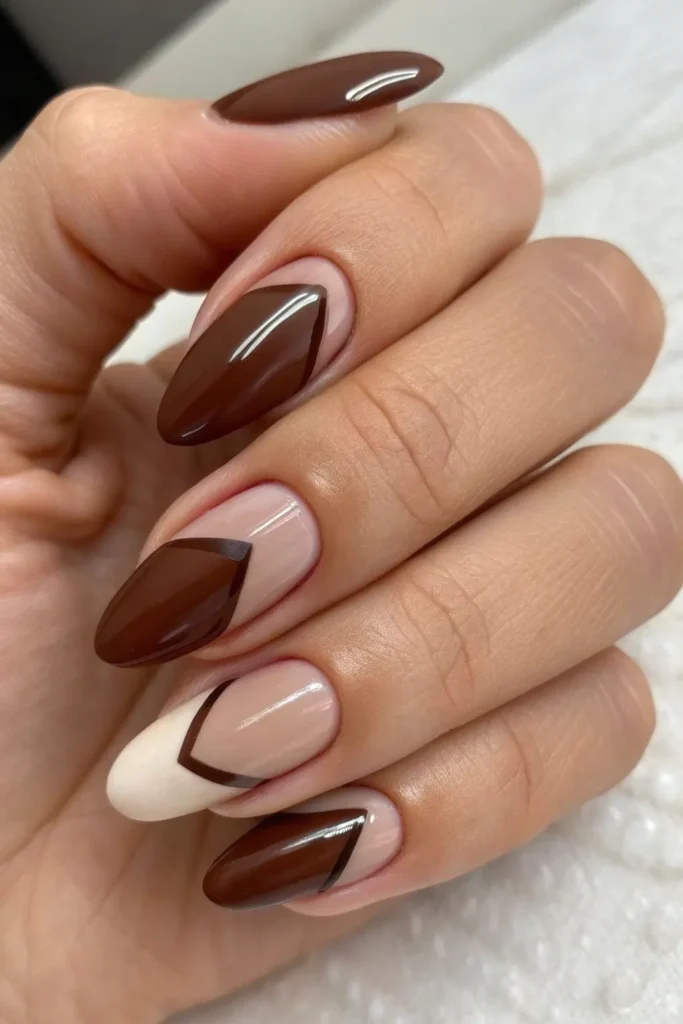
Give the classic French manicure a modern twist by using chocolate brown for the tips instead of white. This unexpected color combination is sophisticated and works beautifully for both professional settings and casual occasions.
Use French tip guides or nail tape to create clean, curved lines at your nail tips. Apply the chocolate brown in thin layers rather than trying to get full coverage in one coat – this prevents bubbling and gives you that smooth, professional finish you’re after.
This design is incredibly versatile and flatters all skin tones. The chocolate brown tips add warmth and depth while the nude base keeps everything looking polished and elegant. It’s perfect for anyone who wants to try something different but still maintain a professional appearance.
Chocolate Brown Ombre to Cream
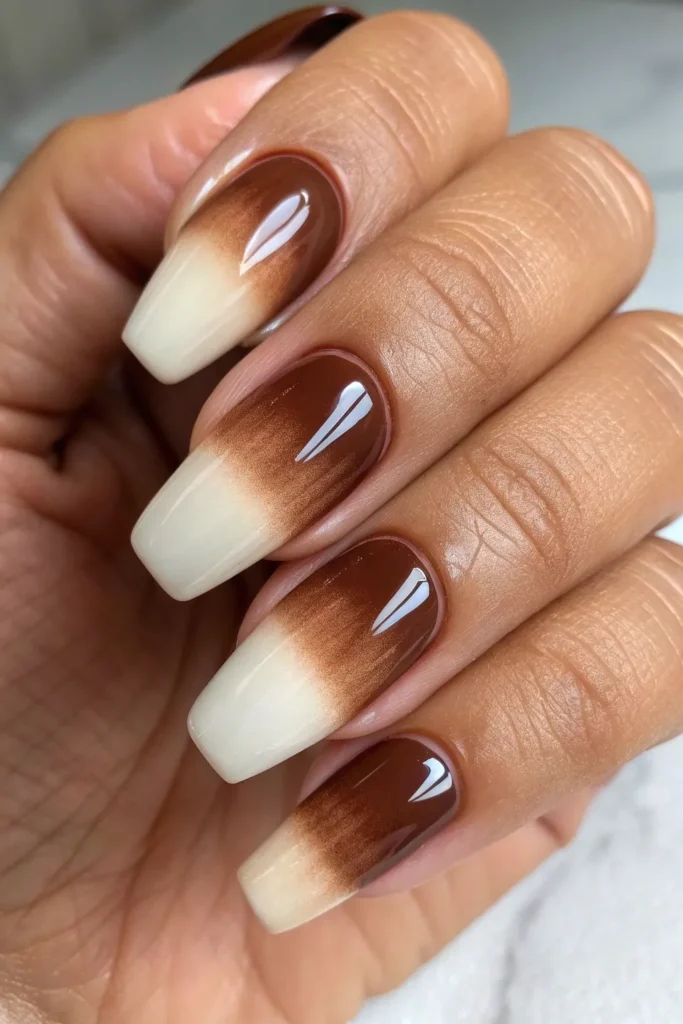
A subtle gradient from rich chocolate brown at the base fading to creamy white or beige at the tips creates a stunning ombre effect that’s both modern and timeless. This technique adds depth and visual interest to your manicure.
Use a makeup sponge to blend the colors while they’re still wet, working from the cuticle toward the tip. Start with your chocolate brown base, then add cream color to one end of the sponge and blend upward. Work quickly while the polishes are still workable for the smoothest transition.
The key to a perfect ombre is patience – build up the gradient in thin layers rather than trying to achieve the full effect in one application. This technique can take some practice, but the results are absolutely worth it. The subtle color transition looks incredibly sophisticated and works with any outfit.
Matte Chocolate Brown with Glossy Accent Nail
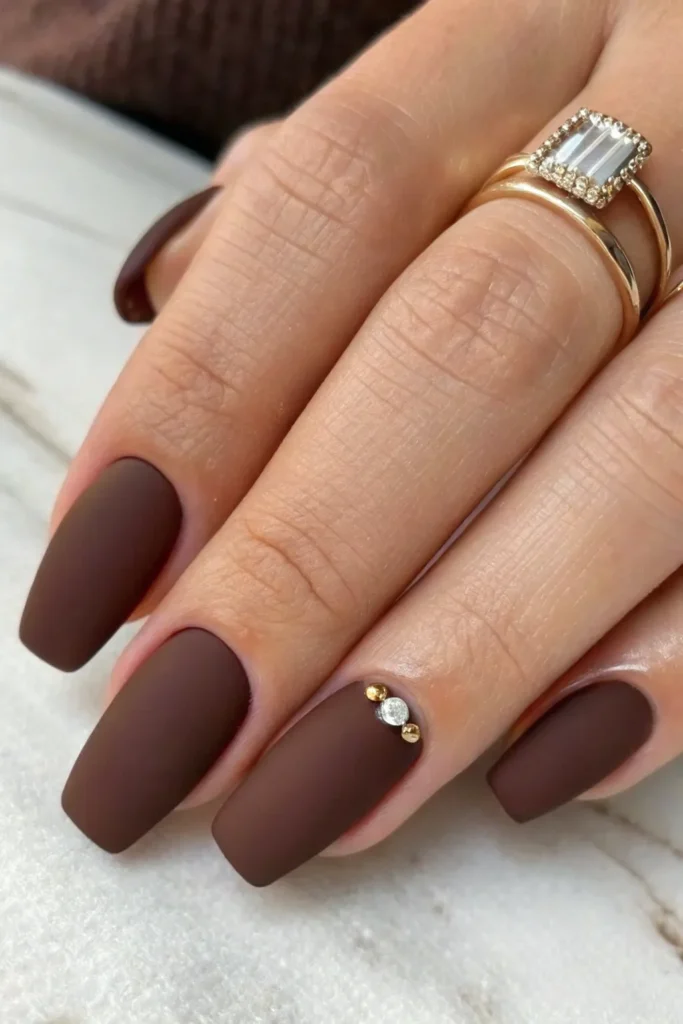
Combine matte and glossy finishes for a modern, textural approach to chocolate brown nails. Keep most nails in a beautiful matte finish and make your ring finger glossy for a subtle but impactful contrast.
Apply your chocolate brown base in thin, even coats and let everything dry completely before adding your matte top coat. For the glossy accent nail, skip the matte finish and use a high-shine top coat instead. The contrast between textures creates visual interest without needing additional colors.
Matte finishes require a bit more care during application since they show imperfections more readily than glossy polishes. Make sure each coat is completely smooth and even. The matte texture gives chocolate brown a more contemporary, expensive look that’s perfect for fall and winter styling.
Chocolate Brown with Rose Gold Glitter Gradient
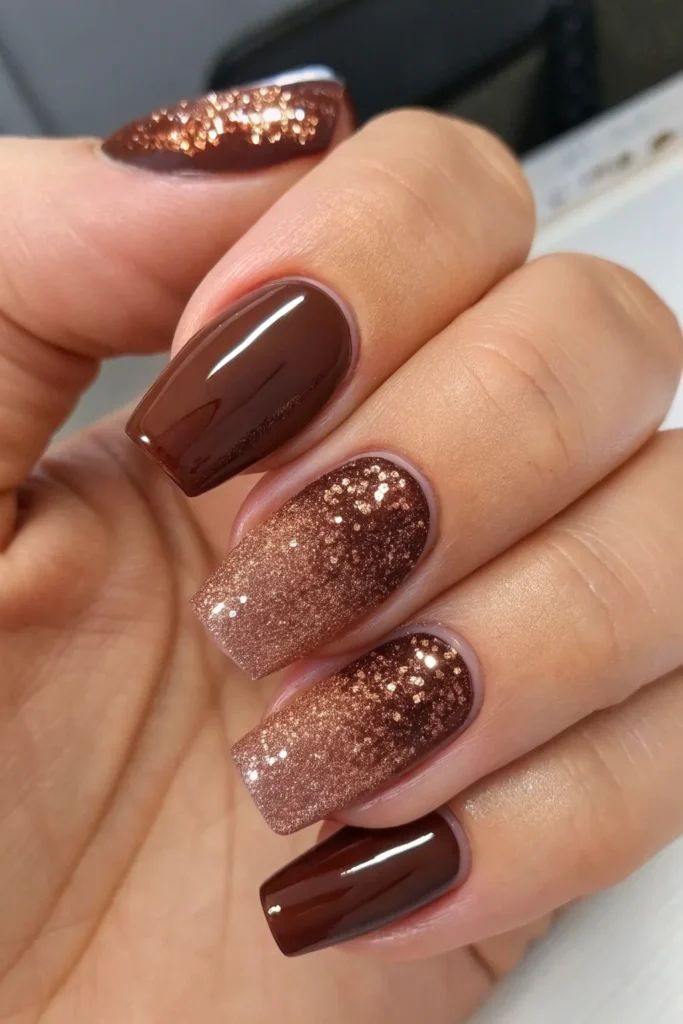
Add some sparkle to your chocolate brown base with a rose gold glitter gradient that concentrates at the tips. This combination is warm, luxurious, and perfect for evening events or when you want to feel a little extra glamorous.
Use a small makeup sponge to dab rose gold glitter from the tips toward the middle of each nail, building up the intensity gradually. Work in light layers to avoid a bumpy texture, and make sure to blend while the base coat is still slightly tacky.
The rose gold adds warmth that complements the chocolate brown beautifully without competing with it. This color combination is incredibly flattering on warm skin tones and photographs beautifully in both natural and artificial lighting. The gradient technique also makes your nails appear longer and more elegant.
Minimalist Chocolate Brown with Single Gold Line
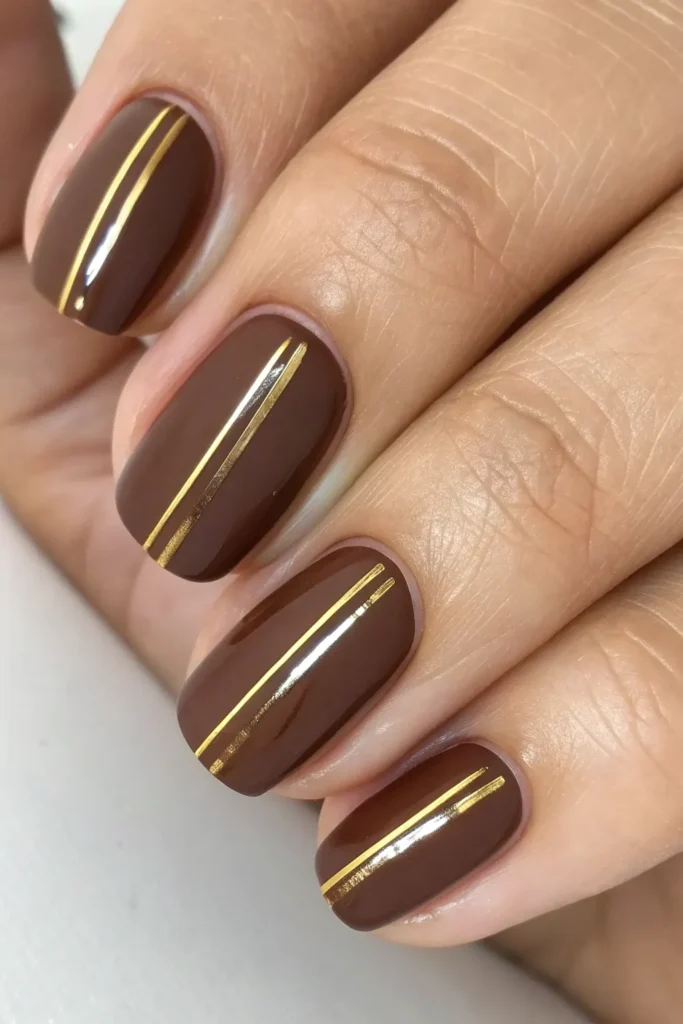
Sometimes the most impactful designs are the simplest ones. A thin gold line running vertically down the center of each chocolate brown nail creates instant elegance with minimal effort but maximum sophistication.
Use a striping brush or nail art pen for the cleanest application. If your hand isn’t super steady, you can use striping tape as a guide – just remove it while the polish is still slightly wet to prevent peeling and ensure crisp edges.
This design works beautifully on any nail length and is perfect for professional settings where you want something stylish but not too flashy. The single gold line creates the illusion of longer nails while adding just enough detail to make your manicure feel special and intentional.
Chocolate Brown with Cream Polka Dots
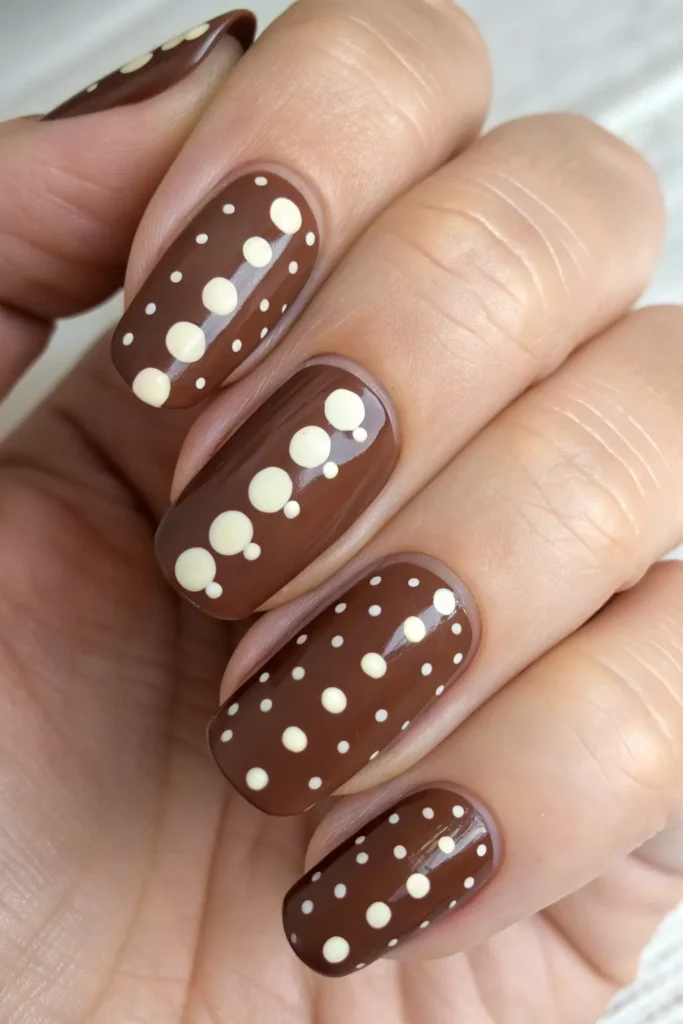
Delicate cream or white polka dots scattered across a chocolate brown base create a playful yet sophisticated look that’s reminiscent of vintage fashion and classic design. This combination never goes out of style.
Use a dotting tool or the tip of a bobby pin to create perfectly round dots in various sizes. Don’t worry about making them completely uniform – slightly irregular spacing actually looks more organic and charming than a rigid pattern.
The key to making polka dots work is restraint. Too many dots can make your nails look busy and cluttered, especially on shorter lengths. Aim for about 5-7 dots per nail, varying the sizes and placement for the most natural, effortless look.
Chocolate Brown Base with Copper Metallic Stripes
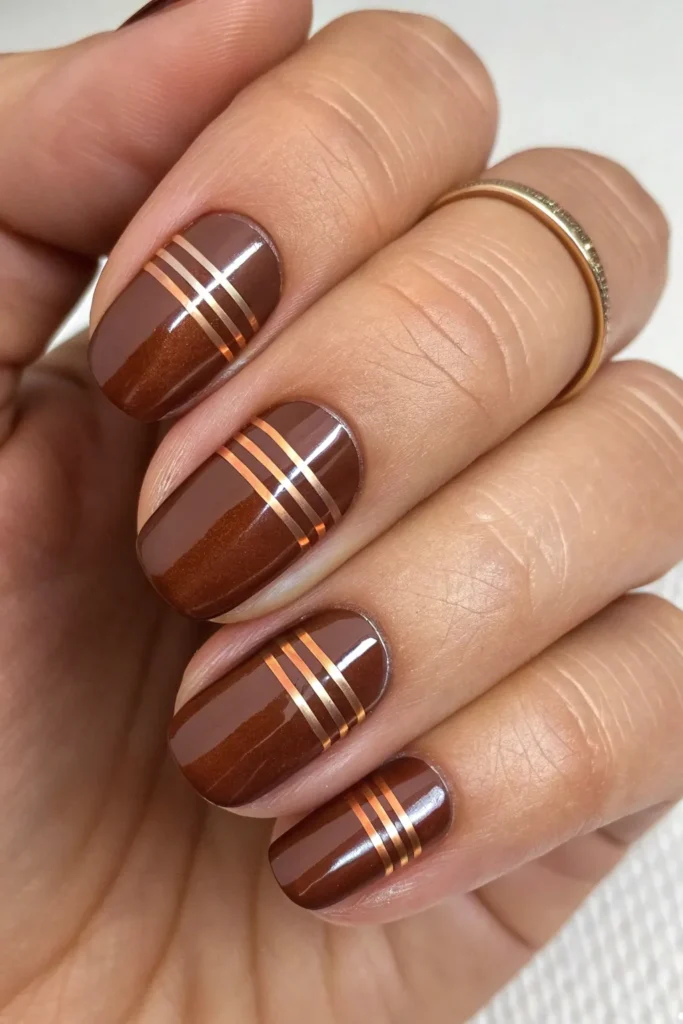
Thin copper metallic stripes against a chocolate brown background create a rich, autumnal look that’s perfect for the season. The warm metallics complement the brown beautifully and add visual interest without being overwhelming.
Use striping tape to create clean, even lines, or try your hand at freehand stripes with a thin brush if you’re feeling confident. Apply the copper in thin layers to prevent streaking, and remove any tape while the polish is still slightly wet for the crispest lines.
You can vary the stripe placement – try diagonal lines, vertical stripes, or even a geometric pattern. The copper adds warmth and catches light beautifully, making this design perfect for fall gatherings and cozy evening events.
Chocolate Brown with Nude Half-Moon Design

Create a reverse French manicure using chocolate brown with nude half-moon shapes at the cuticle. This modern take on classic nail art is sophisticated and incredibly flattering on all nail shapes and lengths.
Use half-moon stencils or carefully applied tape to create the perfect curve at your cuticle line. Apply the nude polish first, then remove the stencil while the polish is still wet for the cleanest lines. This technique takes some practice, so don’t get discouraged if it’s not perfect immediately.
This design elongates your nails by drawing the eye toward the cuticle area and creates a beautiful contrast between the rich chocolate and soft nude tones. It’s professional enough for any work environment while still feeling special and intentional.
Chocolate Brown with Silver Glitter Accent Nails
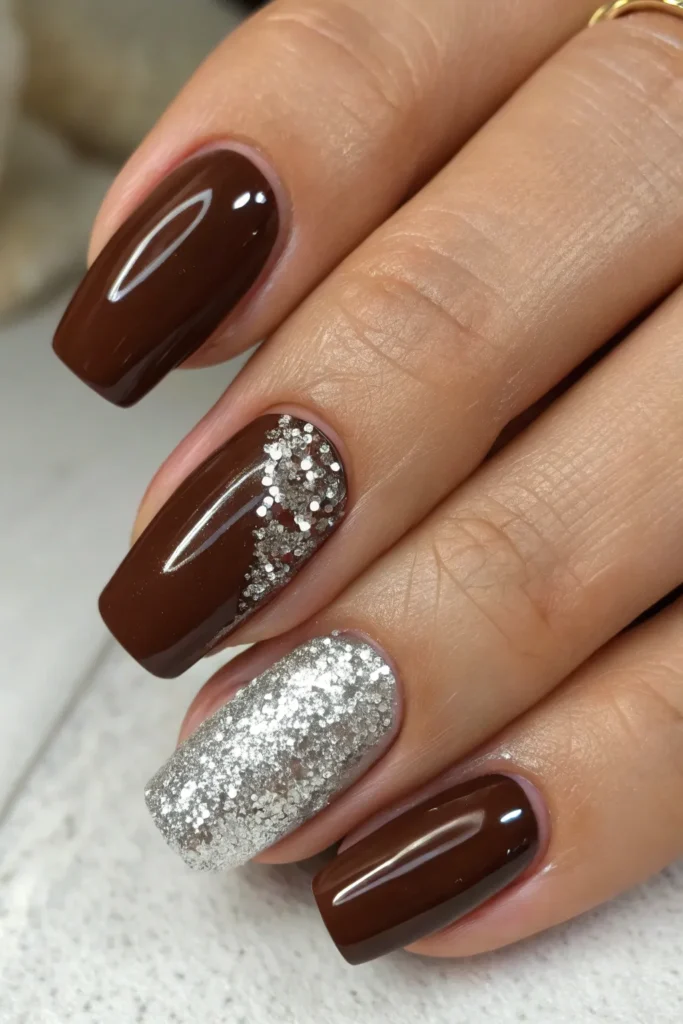
Keep most nails in gorgeous chocolate brown and make two accent nails sparkle with silver glitter. This combination is unexpected but absolutely stunning – the cool silver against warm brown creates beautiful contrast.
Choose fine glitter rather than chunky pieces for the most sophisticated look. Apply it in thin, even coats over your chocolate brown base, or use it as a full coverage color on your accent nails for maximum impact.
The silver adds a modern edge to the warm chocolate brown and works beautifully for both daytime and evening looks. This design is perfect for anyone who wants some sparkle without going completely over the top with glitter on every nail.
Textured Chocolate Brown with Matte Finish
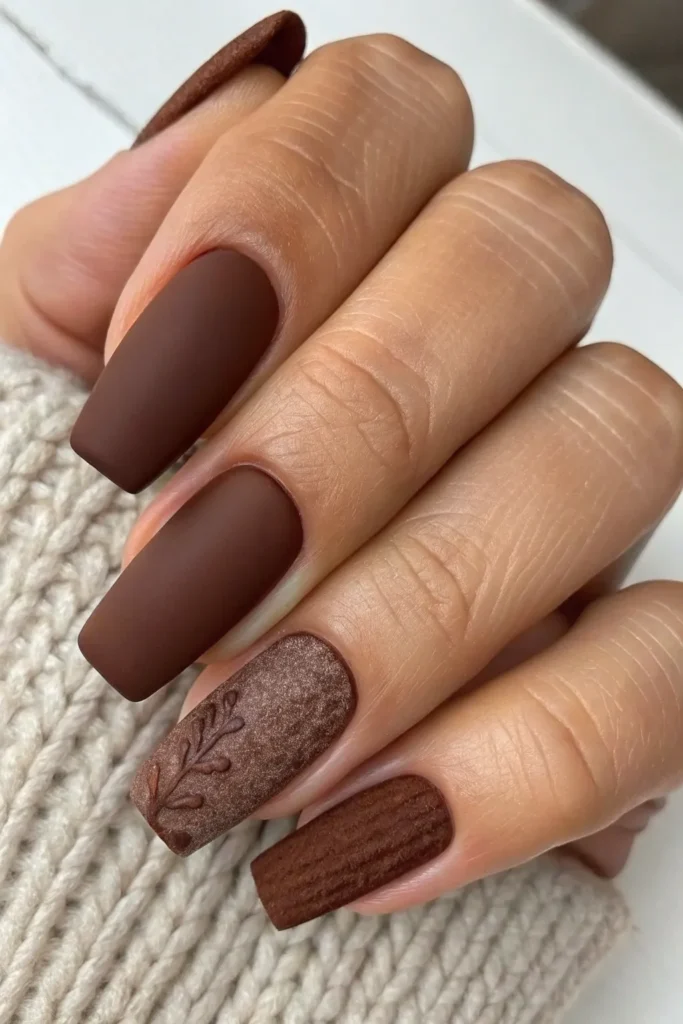
Sometimes the most beautiful nail art comes from texture rather than color. A rich chocolate brown in a matte finish with subtle texture created through application technique gives you depth and visual interest.
Try using a slightly drier brush to create subtle texture in your matte chocolate brown, or experiment with a sea sponge for a more pronounced textured effect. The matte finish enhances any texture you create and gives the color incredible depth.
This monochromatic approach is incredibly sophisticated and modern. The texture catches light subtly throughout the day, creating visual interest without needing additional colors or embellishments. It’s perfect for anyone who appreciates understated elegance.
Chocolate Brown with White Marble Veining
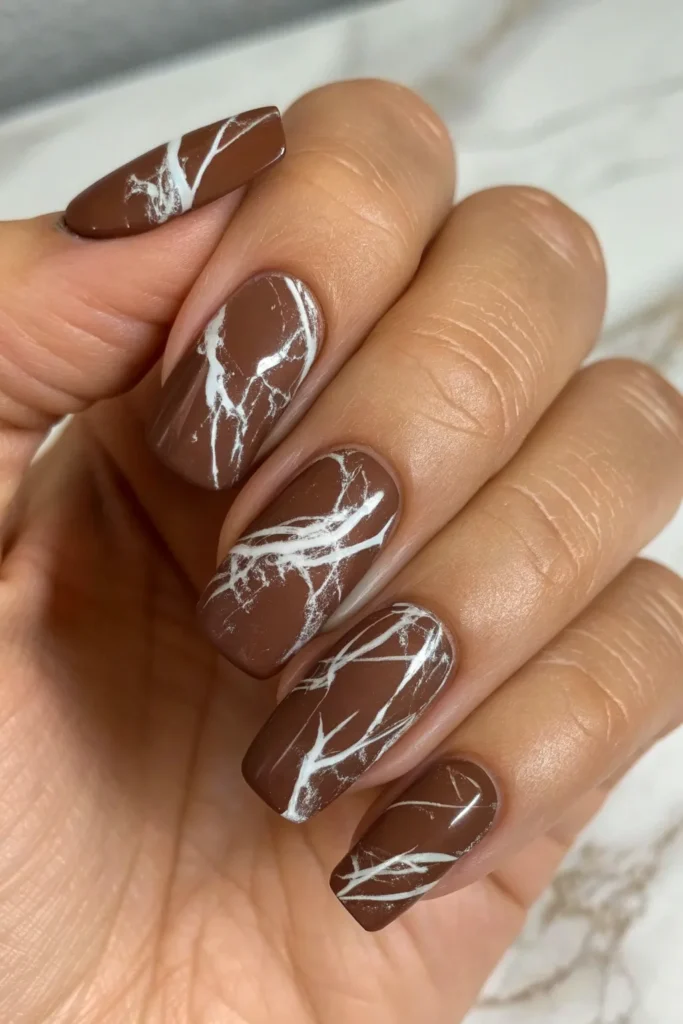
Combine chocolate brown with delicate white marble veining for a look that’s both organic and elegant. This design mimics expensive marble stone and adds an architectural element to your manicure.
Use a thin brush or even a feather to create realistic marble veining over your chocolate brown base. Work quickly while the base color is still slightly wet, and don’t make the veins too uniform – real marble has organic, flowing patterns that look natural and random.
The contrast between the rich brown and crisp white veining is absolutely stunning. This design works beautifully on longer nails where you have more space to create the flowing marble pattern, and it photographs incredibly well in both natural and artificial lighting.
Chocolate Brown with Tortoiseshell Accent
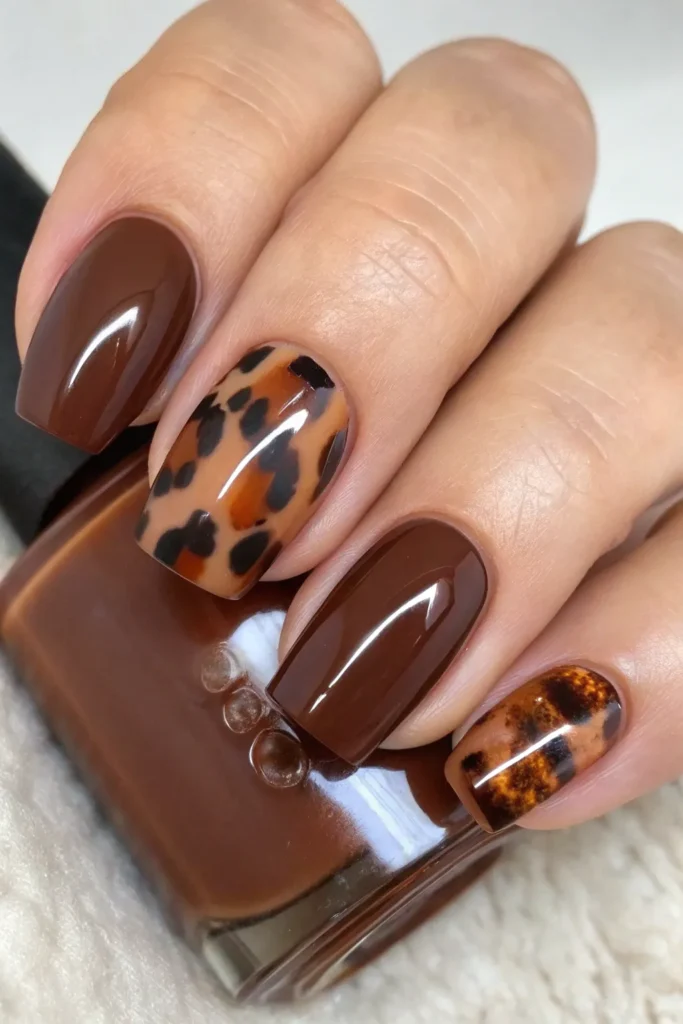
Create a sophisticated tortoiseshell pattern on one or two accent nails while keeping the rest in solid chocolate brown. This classic pattern never goes out of style and adds incredible richness to your overall look.
Layer different shades of brown, amber, and black in organic, irregular patterns to mimic real tortoiseshell. Use a small brush to dab and blend the colors while they’re still wet, creating that characteristic mottled appearance.
The tortoiseshell pattern works best when it looks natural and random rather than too structured or geometric. This design is perfect for fall and winter and pairs beautifully with neutral and earth-toned outfits.
Chocolate Brown with Gold Geometric Patterns
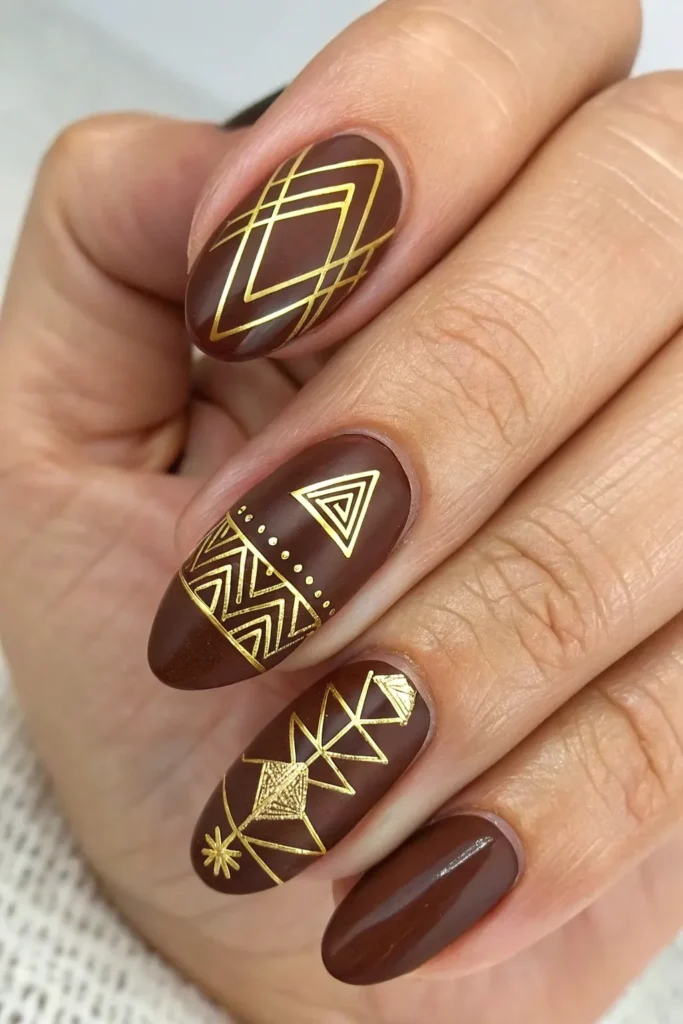
Finish with modern geometric shapes in gold against your chocolate brown base. Think triangles, diamonds, and abstract patterns that feel contemporary and artistic rather than traditional or cutesy.
Use nail tape to create clean lines and sharp angles for the most professional-looking geometric designs. Apply your chocolate brown base first, then use tape to section off areas for gold accents. Remove the tape while the polish is still slightly wet to prevent peeling.
This design works especially well when you vary the patterns on each nail rather than making them all identical. The geometric shapes feel modern and fresh while the chocolate brown and gold color combination remains timeless and sophisticated.
Chocolate brown nails are proof that neutral doesn’t have to mean boring. This rich, versatile color works beautifully as a base for so many different design techniques, from simple elegance to dramatic glamour. Whether you prefer minimalist sophistication or bold artistic statements, there’s a chocolate brown nail design here that’ll make you fall in love with this gorgeous, underrated shade. The best part is how wearable these designs are – they work with everything in your wardrobe while still making your nails look absolutely stunning.