15 Bathroom Tile Layout Ideas That Instantly Upgrade the Space
The difference between a basic bathroom and one that feels thoughtfully designed often comes down to a single decision: how you lay your tile. While most people focus on choosing the perfect color or finish, the layout pattern you select can completely transform the look and feel of your space.
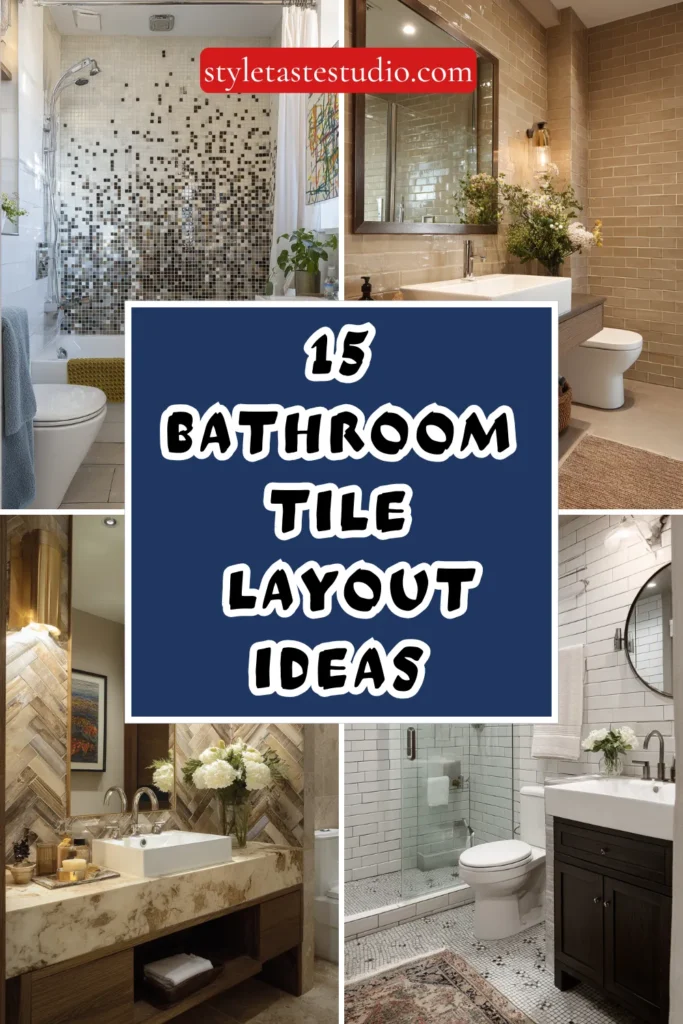
A strategic tile layout adds visual interest, creates the illusion of more space, establishes a specific mood, and elevates even budget-friendly tiles into something that looks custom and high-end.
Whether you’re renovating a cramped powder room or designing a luxurious master bath, these 15 tile layout ideas will help you create a bathroom that feels polished, intentional, and uniquely yours.
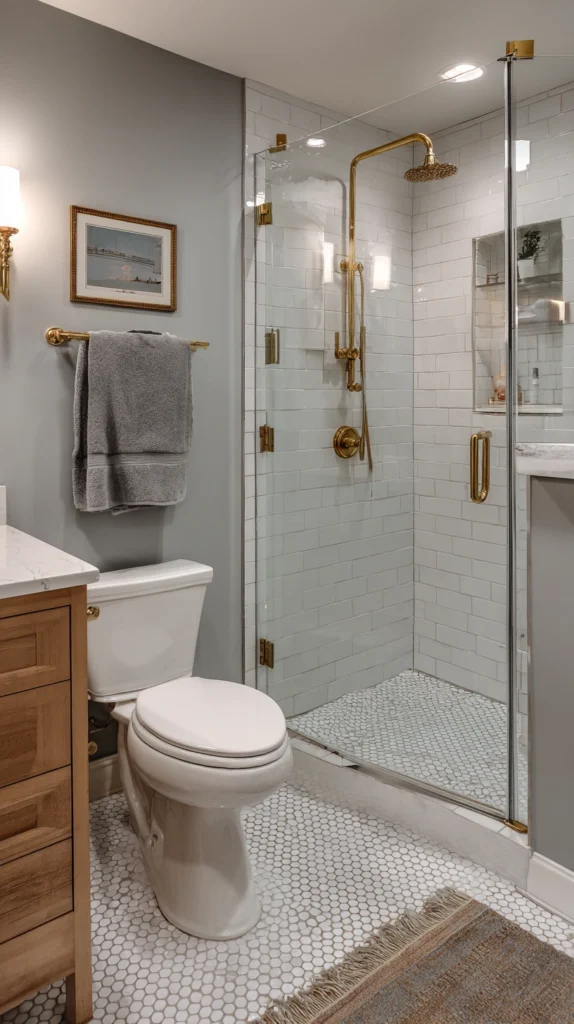
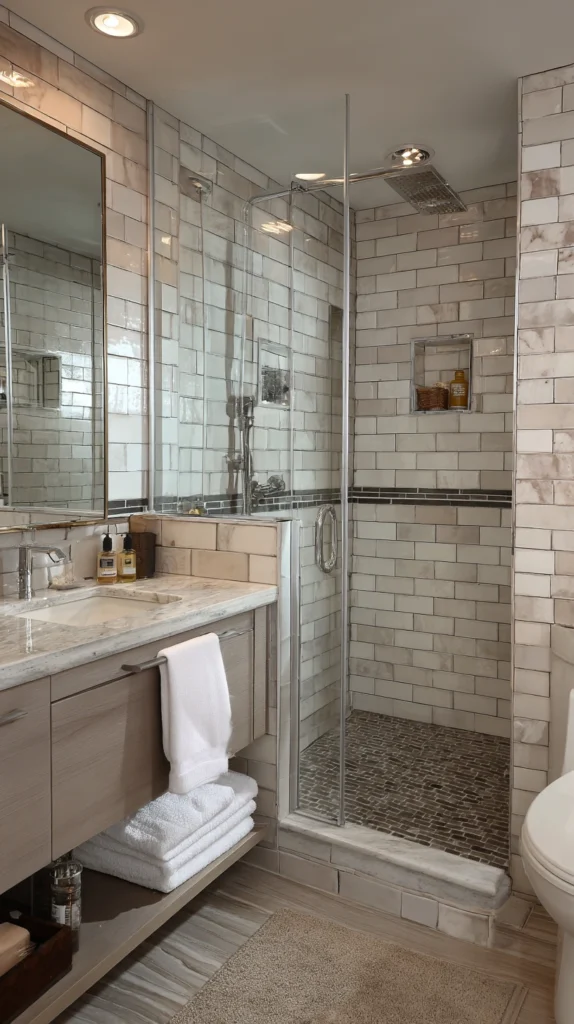
1. Classic Horizontal Subway: Timeless Appeal
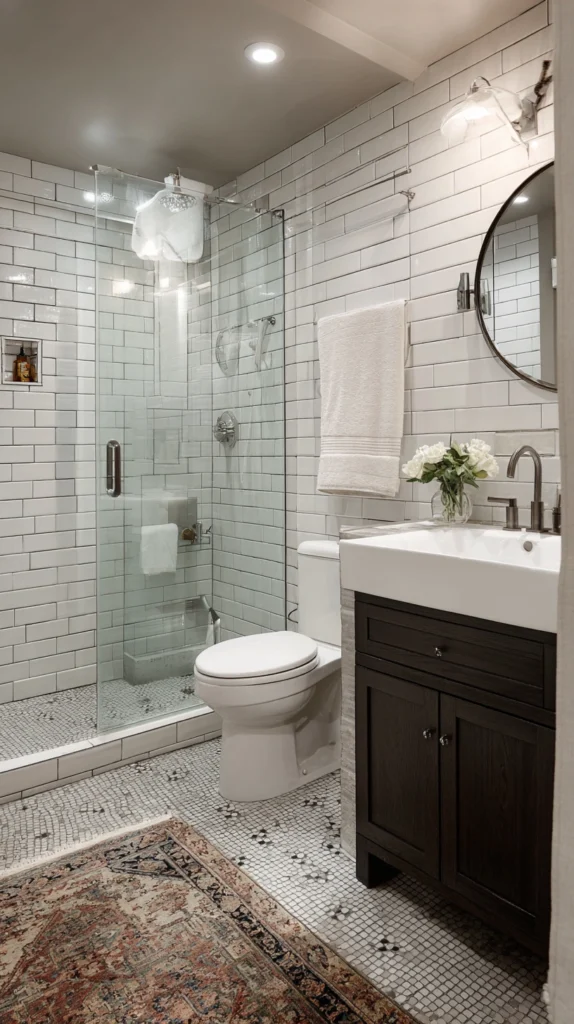
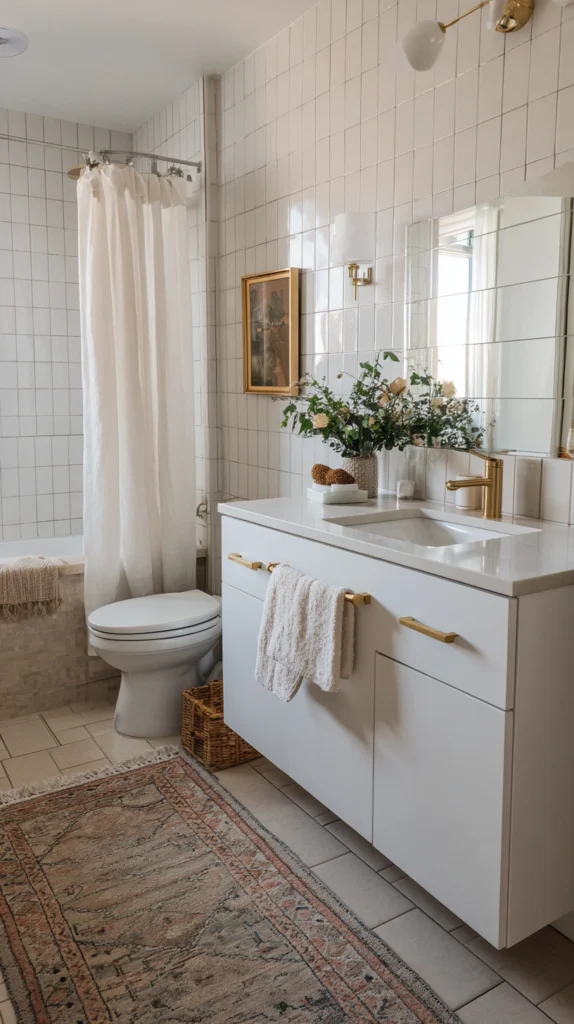
The traditional horizontal subway tile layout remains popular for good reason—it’s clean, classic, and incredibly versatile. In this layout, rectangular tiles are installed in a brick pattern with each tile offset by half its width. This creates gentle horizontal movement across your walls that feels familiar and comfortable.
The pattern works beautifully in both vintage-inspired and contemporary bathrooms, making it a safe choice that never goes out of style. The horizontal orientation subtly widens narrow bathrooms, making them feel more expansive. Pair white subway tiles with contrasting dark grout for a graphic, modern look, or use matching grout for a seamless, subtle effect.
2. Vertical Subway: Height-Enhancing Drama
Flip those subway tiles on their side and watch your bathroom walls soar. Vertical subway tile installation draws the eye upward, creating the illusion of taller ceilings and more vertical space.
This layout works particularly well in bathrooms with standard eight-foot ceilings or in shower enclosures where you want to emphasize height. The vertical orientation feels fresh and contemporary while still honoring the classic subway tile aesthetic.
This pattern is especially effective behind vanities or as a full wall treatment in walk-in showers. The upward movement creates energy and dynamism that makes even small bathrooms feel more spacious and elevated.
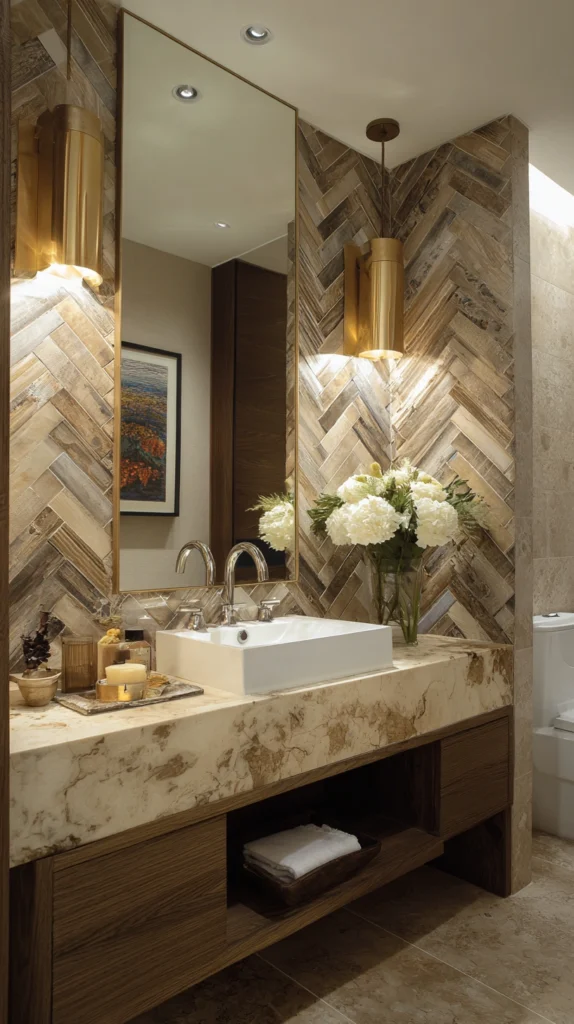
3. Herringbone: Sophisticated Movement
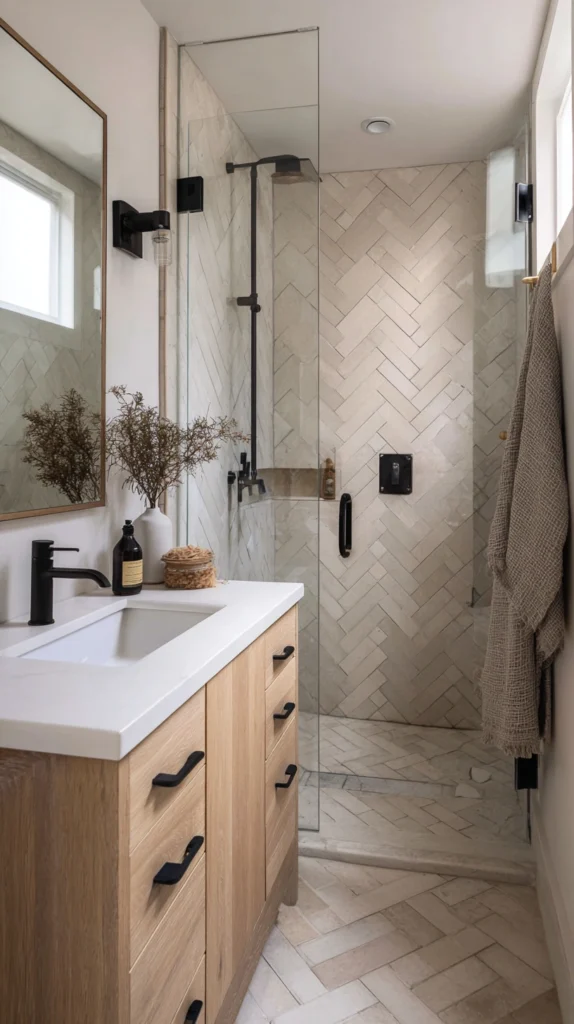
The herringbone pattern takes rectangular tiles and arranges them in a distinctive V-shaped zigzag that creates sophisticated visual texture.
This layout demands attention and adds instant elegance to any bathroom. Herringbone works beautifully on floors, where it creates a sense of movement that guides you through the space, or on accent walls where it becomes a stunning focal point. The interwoven appearance adds depth and complexity without requiring patterned tiles—even simple subway tiles become extraordinary in this layout. Use horizontal herringbone to make narrow bathrooms feel wider, or vertical herringbone to add perceived height. This pattern does require more precise installation and additional cutting, but the results are absolutely worth the extra effort.
4. Large Format Tiles: Minimalist Luxury
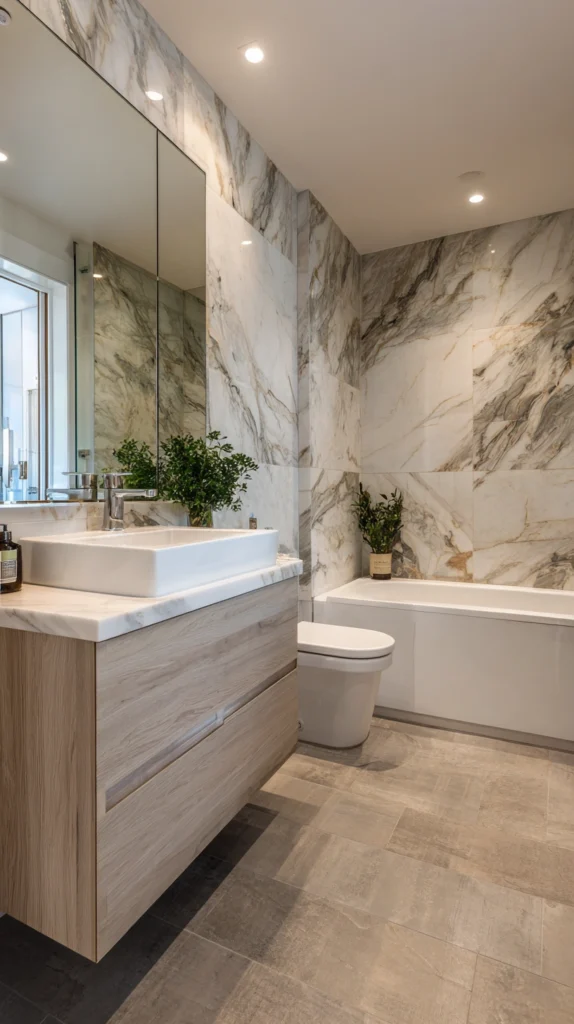
Oversized tiles—typically 12×24 inches or larger—create a sleek, modern aesthetic that makes bathrooms feel more expansive. By minimizing grout lines, large format tiles create visual continuity that tricks the eye into perceiving more space than actually exists. This layout works exceptionally well on both walls and floors, creating a seamless, almost slab-like appearance that feels luxurious.
The simplified grid pattern lets beautiful stone-look or marble-look porcelain truly shine without busy grout lines interrupting the natural veining and movement. Large format tiles also mean easier maintenance since there’s less grout to clean. Install them in a simple stacked grid pattern for maximum impact and contemporary sophistication.
5. Running Bond (Brick Pattern): Structured Elegance
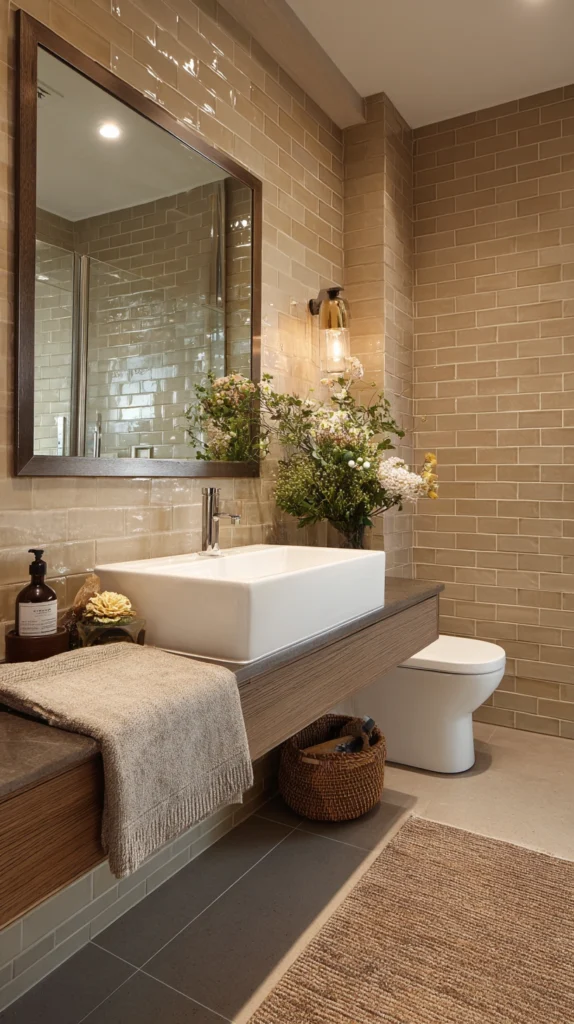
The running bond or brick pattern layout creates a structured, rhythmic effect that brings order and balance to bathroom walls and floors. This classic pattern staggers each row by offsetting tiles halfway, mimicking traditional brickwork. The layout works with square tiles for a contemporary compressed look or rectangular tiles for a more traditional feel.
Running bond creates gentle horizontal movement that makes bathrooms feel wider while maintaining a clean, organized appearance. This versatile pattern suits both casual and formal bathroom designs and works beautifully with contrasting grout colors that emphasize the pattern’s geometry.
6. Stacked Grid: Clean Modern Lines
The stacked or straight-lay grid pattern is wonderfully simple—tiles align perfectly in straight vertical and horizontal lines, creating a clean, uniform appearance. This minimalist layout feels crisp and modern, allowing beautiful tile materials and colors to take center stage without pattern competition.
Stacked grids work particularly well with textured tiles where you want the surface variation to be the star, or with bold colored tiles where the pattern might create visual chaos. The orderly precision of this layout brings calm and clarity to bathroom spaces. Use it with rectangular tiles installed vertically for contemporary flair or horizontally for a more traditional sensibility.
7. Diagonal Layout: Dynamic Energy
Installing square or rectangular tiles at a 45-degree angle creates instant visual drama and makes rooms appear larger. The diagonal orientation creates a dynamic sense of movement and energy that draws the eye across the space rather than straight across. This layout is particularly effective on bathroom floors, where it makes small spaces feel more expansive by creating longer sight lines from corner to corner. The diamond-shaped pattern adds sophistication and visual interest without requiring patterned tiles. Keep in mind that diagonal layouts do create more waste due to edge cuts, but the dramatic effect often justifies the extra material cost.
8. Basketweave: Vintage Charm
The basketweave pattern creates a woven appearance using rectangular tiles arranged in alternating directions. Pairs of horizontal tiles alternate with pairs of vertical tiles, creating a textured, interlocking effect that adds dimension and character.
This classic pattern brings vintage charm and works beautifully in traditional or cottage-style bathrooms. Basketweave is particularly effective in smaller areas like powder room floors or shower floors where its intricate pattern creates a focal point. The pattern works best with two contrasting tile colors or finishes that emphasize the woven effect, though monochromatic versions create subtle sophistication.
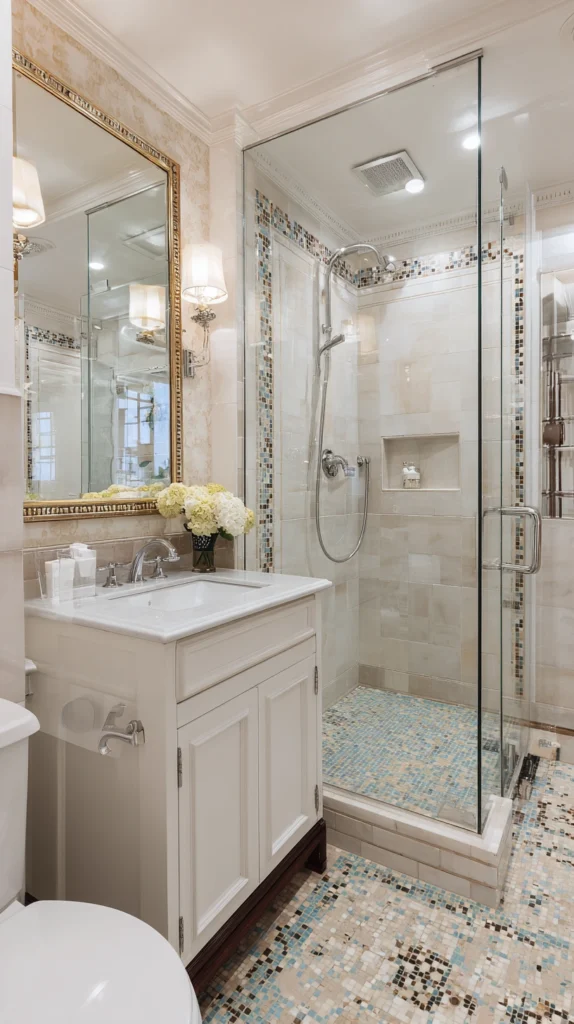
9. Hexagon Mosaic: Geometric Interest
Hexagonal tiles bring contemporary, geometric energy to bathroom floors and accent walls. These six-sided tiles create a honeycomb pattern that feels both modern and slightly organic. Small hexagon mosaics add vintage charm and work beautifully on shower floors where they provide excellent traction.
Larger hexagon tiles create bold, graphic statements on bathroom floors or feature walls. The versatile shape allows for creative color combinations—alternate colors for a playful checkerboard effect, or create custom patterns and gradients. Hexagons pair particularly well with simple rectangular tiles, creating visual interest through shape contrast while maintaining cohesion through coordinated colors.
10. Penny Round: Retro Sophistication
Penny round tiles—small circular tiles typically one to two inches in diameter—create a distinctively vintage look with timeless appeal. These circular tiles are usually mounted on mesh sheets for easier installation and create a soft, organic pattern that contrasts beautifully with the hard edges of typical bathroom fixtures.
Penny rounds work wonderfully on shower floors where their curved edges provide natural slip resistance, or as accent walls where they add textural interest. The pattern feels nostalgic and charming in classic white but can be modernized with bold colors like navy, black, or emerald green. The multitude of grout lines means more maintenance, but the distinctive look is worth the effort.
11. Chevron: Bold and Graphic
Chevron creates a striking V-shaped pattern similar to herringbone but with a key difference—tiles are cut at angles to create perfect points where they meet. This creates a sharper, more continuous zigzag pattern that feels bolder and more graphic than herringbone. Chevron makes a powerful statement on bathroom floors or as a full wall treatment in showers. The strong directional pattern creates dynamic movement that energizes spaces.
Use chevron sparingly as an accent to avoid overwhelming small bathrooms, or embrace it fully for a maximalist, design-forward look. This pattern requires precise cutting and installation, making it more labor-intensive, but the dramatic results create a truly custom appearance.
12. Mixed Layout Accents: Layered Interest
One of the most effective ways to upgrade your bathroom is incorporating multiple tile layouts in a single space. For example, install horizontal subway tiles across most walls but introduce a vertical stripe or section for visual contrast. This technique adds unexpected detail and creates focal points that guide the eye.
You might use standard brick pattern for primary walls but switch to herringbone for a shower niche or behind the vanity. The combination of different layouts using the same tile maintains cohesion while adding sophisticated complexity. This approach works particularly well when you mix matte and glossy finishes of the same tile—the changing light reflection creates additional visual depth.
13. Border and Frame Details: Defined Elegance
Adding decorative borders or frames using different tile layouts elevates your bathroom from basic to custom. Install a border of small mosaic tiles at chair rail height to break up large expanses of wall tile.
Create a decorative frame around mirrors using tiles laid in a different pattern than the surrounding walls. Use contrasting layouts to define specific zones—perhaps basketweave on the floor with a herringbone border, or subway tile walls with a running bond accent stripe. These framing details add architectural interest and create visual organization that makes spaces feel more thoughtfully designed and finished.
14. Floor-to-Ceiling Continuity: Seamless Flow
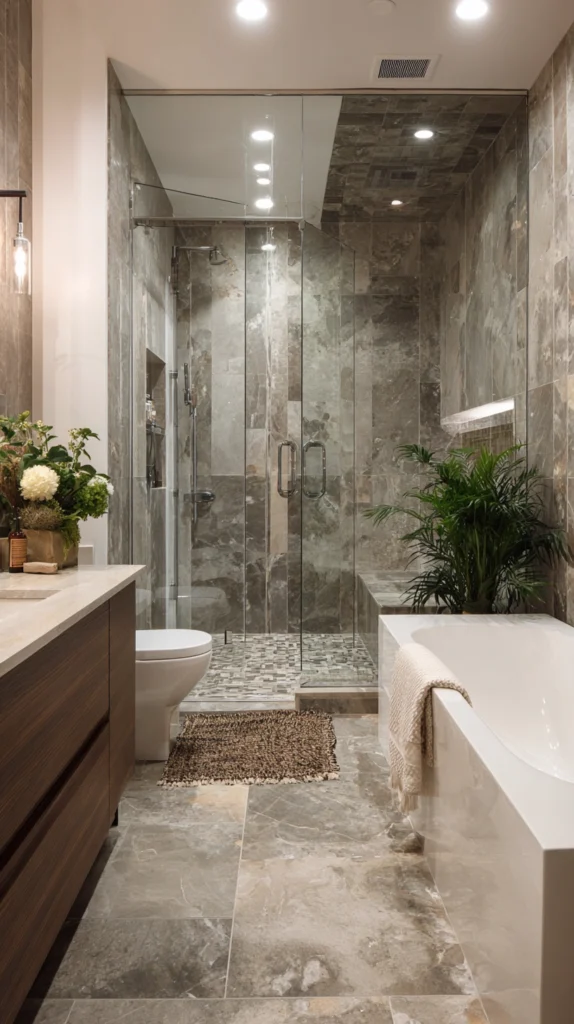
Installing the same tile in the same layout from floor to ceiling creates dramatic continuity that makes bathrooms feel larger and more luxurious. This approach works particularly well in walk-in showers where continuing floor tile up the walls creates a waterproof envelope that feels seamless and spa-like.
The uninterrupted flow eliminates visual breaks that can make small bathrooms feel choppy. This technique is especially effective with large format tiles or subtle patterns that create calm rather than overwhelm. The cohesive look feels intentional and polished while making your bathroom appear more spacious through visual simplicity.
15. Gradient Ombre Effect: Artistic Transition
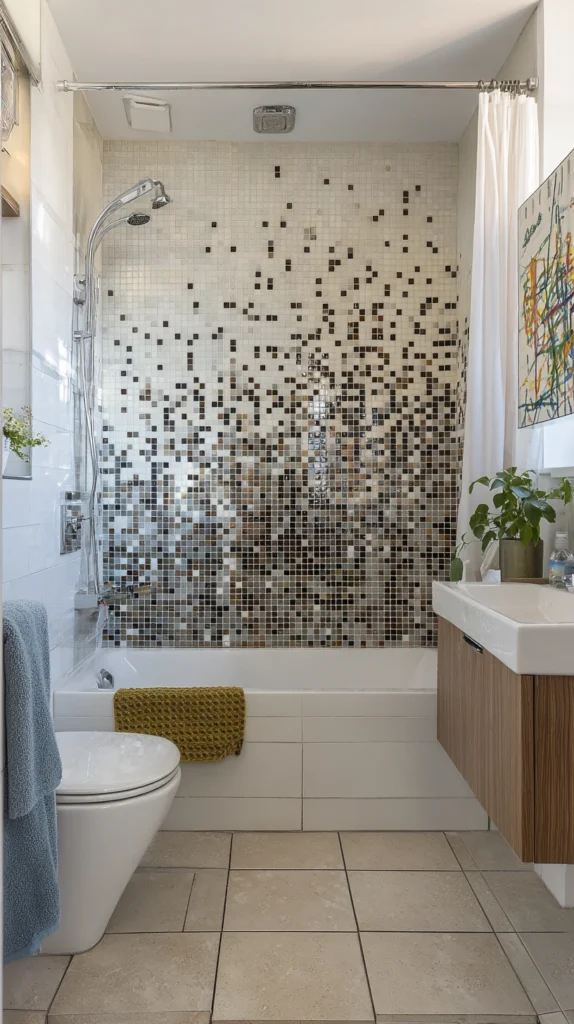
Create artistic sophistication by gradually transitioning from one tile layout to another, or from one size to another. You might start with large format tiles at the floor and gradually transition to smaller mosaics near the ceiling, creating an ombre effect that draws the eye upward. Alternatively, shift from a structured pattern like stacked grid at the bottom to a more dynamic herringbone toward the top. This gradient approach adds visual movement and artistic flair while creating the perception of height. The technique requires careful planning to ensure smooth transitions, but the results feel custom and gallery-worthy. This works beautifully in powder rooms or shower enclosures where you want to create a statement.
Maximizing Your Tile Layout Success
Beyond choosing the perfect pattern, consider these essential factors to ensure your bathroom tile layout achieves its full potential:
Plan for Your Space: Consider your bathroom’s proportions when selecting layouts. Horizontal patterns widen narrow spaces. Vertical patterns add height to rooms with low ceilings. Diagonal patterns expand small square rooms. Match your layout strategy to your specific spatial challenges.
Consider Grout Carefully: Grout color dramatically affects how your layout reads. Contrasting grout emphasizes pattern and creates graphic impact. Matching grout creates subtle sophistication and makes spaces feel larger. High-contrast grout requires more maintenance but creates bolder design statements.
Mix Scales Thoughtfully: Combining different tile sizes adds visual interest, but requires careful planning. Use larger tiles for primary surfaces and smaller mosaics for accents, borders, or shower floors. Avoid combining too many different sizes, which can create visual chaos rather than sophisticated layering.
Account for Installation Complexity: Some patterns require significantly more cutting, waste, and installation time than others. Diagonal, chevron, and herringbone patterns cost more to install than simple stacked grids or running bonds. Factor installation costs into your budget when selecting complex patterns.
Test Your Layout First: Before installation begins, lay out your tiles in the chosen pattern on the floor to visualize the final effect. This helps you catch potential issues, see how colors and patterns interact, and make adjustments before tiles are permanently set.
Consider Long-Term Maintenance: Complex patterns with many grout lines require more cleaning and maintenance. Textured tiles show soap scum and water spots more readily than smooth tiles. Choose patterns and finishes that align with your willingness to maintain them.
Think About Focal Points: Every bathroom needs focal points that draw the eye. Use special layouts or patterns strategically in key locations—shower niches, behind vanities, or on feature walls. Avoid competing focal points that fragment attention and create visual confusion.
Respect Architectural Details: Work with your bathroom’s existing architecture rather than against it. Align tile layouts with windows, doors, and built-in features. Center patterns on focal points like freestanding tubs or statement vanities for balanced, intentional design.
Bringing Your Vision to Life
Tile layout is where practical function meets creative expression. The pattern you choose sets the tone for your entire bathroom, influencing everything from perceived space to daily mood.
Whether you opt for classic subway tiles arranged in fresh new ways, sophisticated herringbone that adds movement and luxury, bold geometric patterns that create statement moments, or clean large format grids that feel modern and serene, your layout choice transforms ordinary tile into extraordinary design.
The beauty of tile is its permanence—once installed, your layout becomes a lasting part of your home’s character. This makes the selection process important but also means you can create something truly special that brings daily joy.
Don’t be afraid to push beyond standard horizontal subway tiles into more creative territory. The right layout can make affordable tiles look expensive, small bathrooms feel spacious, and ordinary spaces feel uniquely yours.
With thoughtful planning, attention to proportion, and a clear vision of the atmosphere you want to create, your bathroom tile layout becomes more than a practical surface—it becomes a defining design element that elevates your entire space. Whether you’re drawn to timeless classics or contemporary patterns, there’s a layout strategy that will transform your bathroom into a space that feels polished, intentional, and beautifully designed.